How to Zoom In on a Video
While almost all image locations allow you to zoom in to take a closer look, it can be very difficult to zoom in on a video. In this article, I’m going to show you how to zoom in on any part of any video using Kapwing.

Suppose that you want to zoom in on one section of a video. That is, you want the frame to cut out the extraneous action happening around it and instead focus on the important part. Perhaps you want to publish a video on social media with a focus on the zoomed in part, or you want to inspect part of a video more closely to understand what's going on.
Internet videos can be hard to interact with. Some viewers, like Instagram, allow publishers and viewers to pinch and zoom in on one part of the video. But other make it hard to take a closer look, and pinching & zooming while the video is playing can be hard on a small screen.
In this article, I’m going to show you how to zoom in on any part of any video for free and online. I recommend using Kapwing, for several reasons:
• It's free to use nearly all of its products
• It's easy to learn
• It doesn't require you to download any apps
• It works on computers, phones, and tablets
• You can upload videos from any source
To zoom in on videos using Kapwing, you'll need to know just four simple steps:
- Find your video
- Upload it to the Kapwing Studio
- Crop & Resize
- Publish & Download!
Step 1: Find Your Video
First, you’ll need to know where you can access your video. If you want to use a video you found online, just copy its URL. You can use videos from Facebook, Instagram, YouTube, Twitter, and pretty much any major video sharing platform on the internet. Either right click on the URL at the top of the page or right-click on the video while it’s playing and select “Copy Link.” Now you’re ready to upload your video.
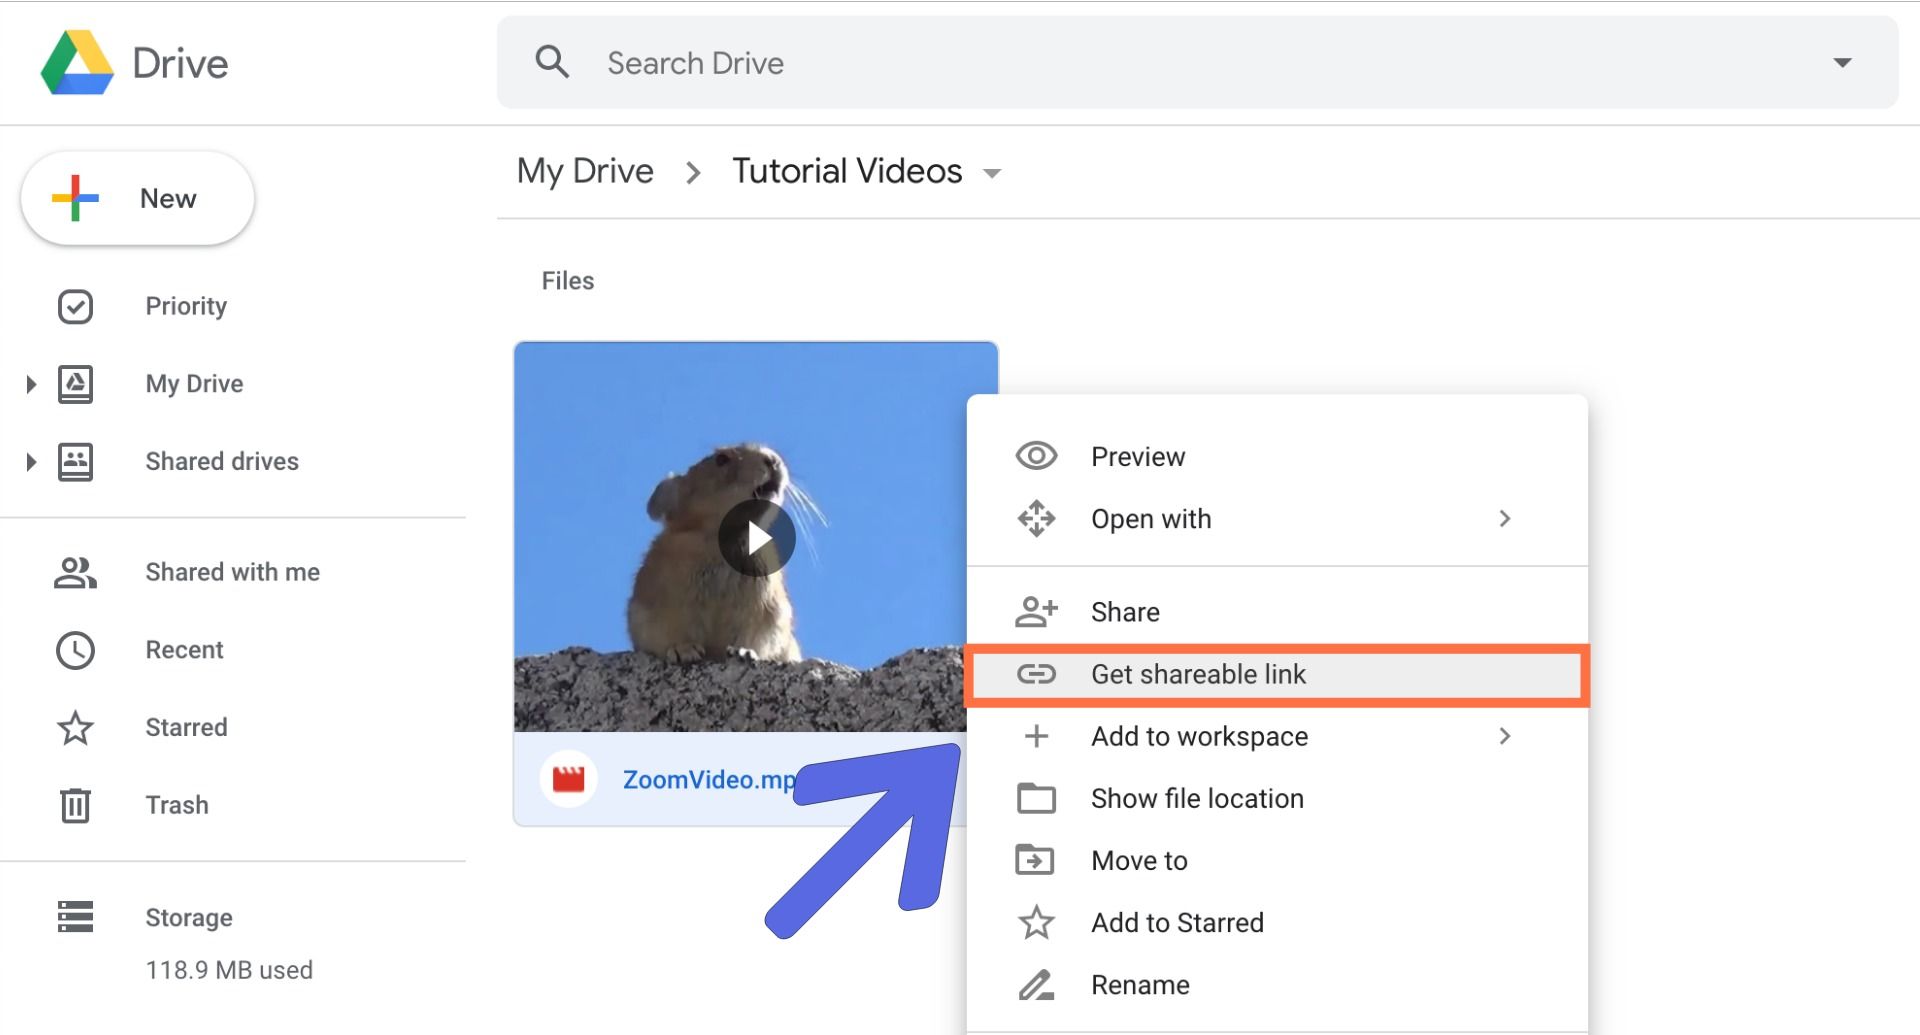
And if you want to use a video you recorded yourself, or one that you have downloaded onto your device, make sure you can find it in your file browserIt’s a good idea to rename your video file to something that you can search for, or simply keep a file browser window open.
Step 2: Upload It to the Kapwing Studio
Uploading your video to Kapwing is just as easy! First, go to Kapwing.com and click “Get Started.” Or, if you're already signed in, click "New Project," then "Start with Studio." This will take you to the Kapwing Studio, where you can zoom in on your video and use all of Kapwing’s photo and video editing tools in one convenient place.
To upload a video from your computer, phone, or tablet, you can select the button that says “Click to upload” and find the file you want to edit in your file browser. You can also find the video in your file browser or Photos app and simply drag & drop it into the Studio window.
And if you want to zoom in on a video you found online, click on the field that says “Paste an image or video URL.” Now, right click (or just tap one more time if you're editing on your phone or tablet) on the field and select “Paste.” Kapwing will work its magic and upload your video to the Studio.
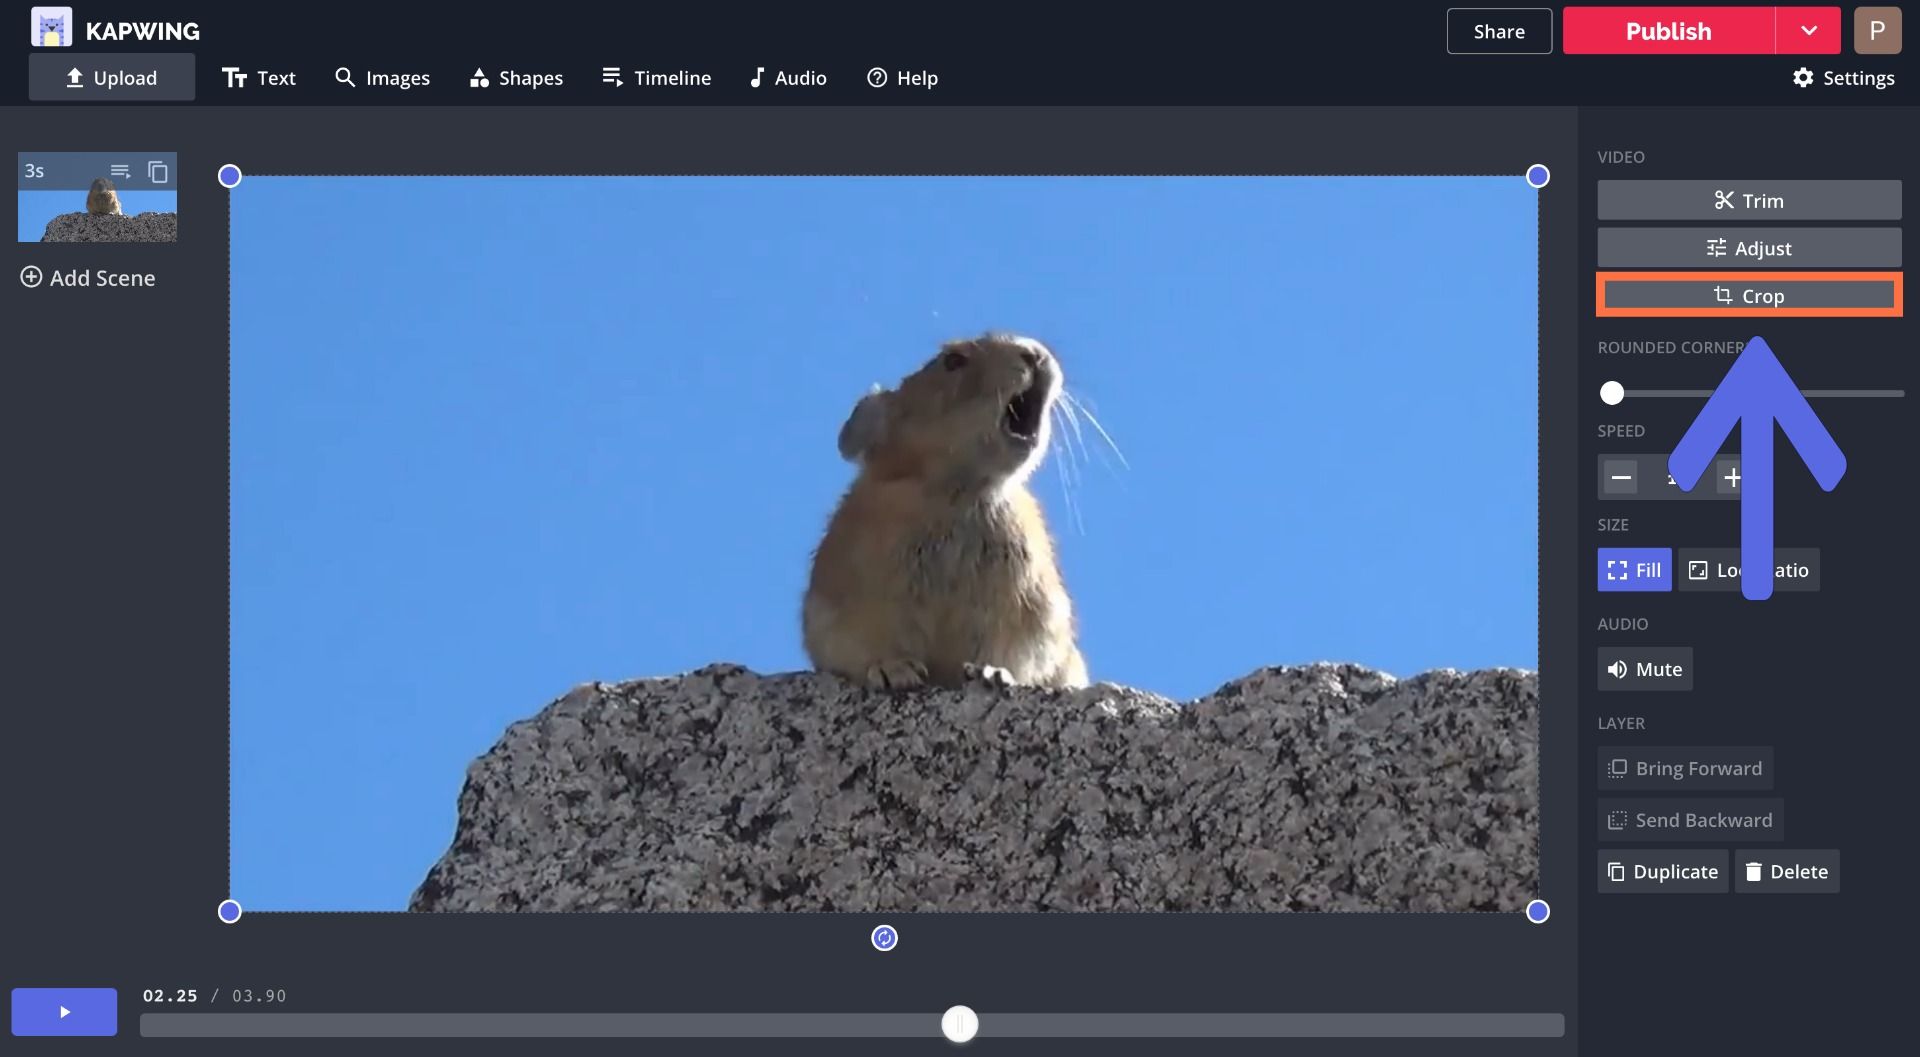
Step 3: Crop & Resize
Now that your video has been uploaded to the Studio, you can zoom in on any part that you want. To simply zoom in, select the video layer and click "Crop" from the right-hand menu. Here, you can click & drag any corner or edge to change your video's frame, and you can drag the cropped box to reframe your project. You can also choose preset dimensions rom the menu on the right.
When you leave the cropping window, you'll need to remove the extra white space around your video. Simply deselect all layers and click "Remove Padding" from the right-hand menu. Kapwing will automatically zoom in on the cropped video, resizing wider videos to a width of 990 pixels and taller videos to a height of 600 pixels.
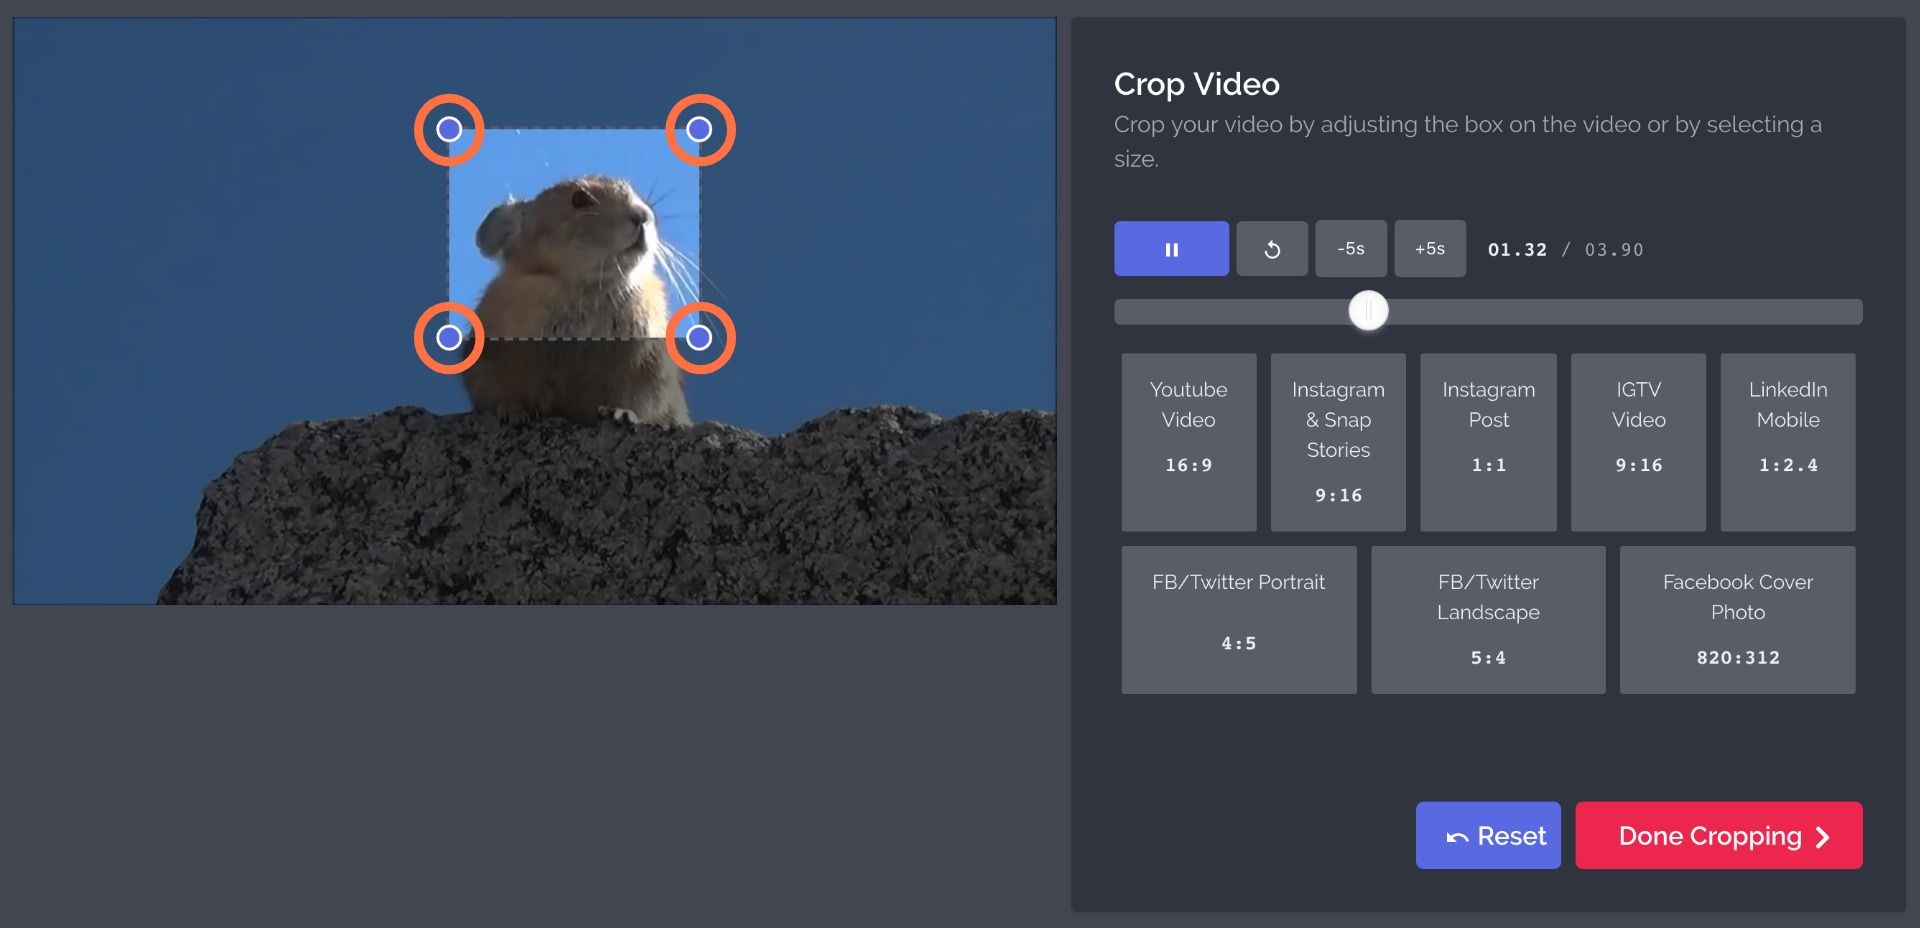
If you'd like your zoomed video to be an exact size, select "Custom Size" from the right-hand menu and enter the width and height that you would like. You can click "Lock Aspect Ratio" to resize your video while maintaining its aspect ratio, or you can enter both dimensions manually.
Alternatively, there is a zoom slider in the right-hand menu. Use this slider to zoom in on the center of the video.

You can zoom in or out on mobile or on desktop.


After you've zoomed in on your video, you can make any other edits that your video needs. For example, you can add & edit text, insert other pictures, GIFs, videos, overlays, & audio, animate the video layer, and crop, filter, or trim inline.
Step 4: Export & Download!
Once you've zoomed in and edited your video to perfection, click "Export" in the upper right-hand corner. Kapwing will automatically work its magic and your video will be ready to download in no time.
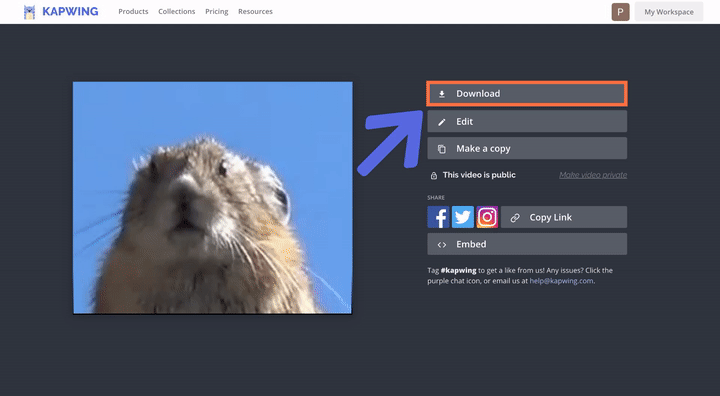
When your video is finished processing, click “Download” from the right side of the screen. On an iPhone, you may need to find the video in your downloads folder to save it to your camera roll.
Remember to tag us @KapwingApp whenever you share your videos on social media– we love to see what our creators are passionate about! And be sure to subscribe to the Kapwing Resources page – we’re constantly writing new tutorial and features to help you make the most out of Kapwing.
Related Articles:
• How to Edit Videos Using Kapwing
• How to Crop a GIF
• The Best Photo and Video Sizes for Social Media
• How to Make Videos Smaller