How to Add a Jump Scare to Your Video
Create your own frightening surprise from scratch

If you've mustered up the courage to watch scary movies, then you're familiar with jump scares. This horror technique intends to shock viewers with terrifying visuals that appear out of the blue.
The startling interruption typically results in jumps, screams, and attempts to flee to the nearest exit. Not to mention, the shrieking music alone will have you running for the hills. Whether you're kicking off spooky season or stirring up a prank on an unsuspecting friend, you can make jump scare videos for the occasion.
In this tutorial, we'll show you how to make jump scare videos with all the bells and whistles needed to give your friends and colleagues a fright.
Table of Contents:
- Step One: Find a Spooky Image or Video
- Step Two: Arrange and Edit Jump Scare Video
- Step Three: Export and Download
Step One: Find a Spooky Video or Image
A ten-minute brainstorming session is a good idea when devising a successful jump scare video.
Try to think of an ordinary setting for the beginning of your video, say a recording of a meeting or a presentation, followed by a scary jump scare idea for the shock factor at the end. If you don't have a video to hand, you can use a series of images to generate a jump scare GIF instead.
Upload your image
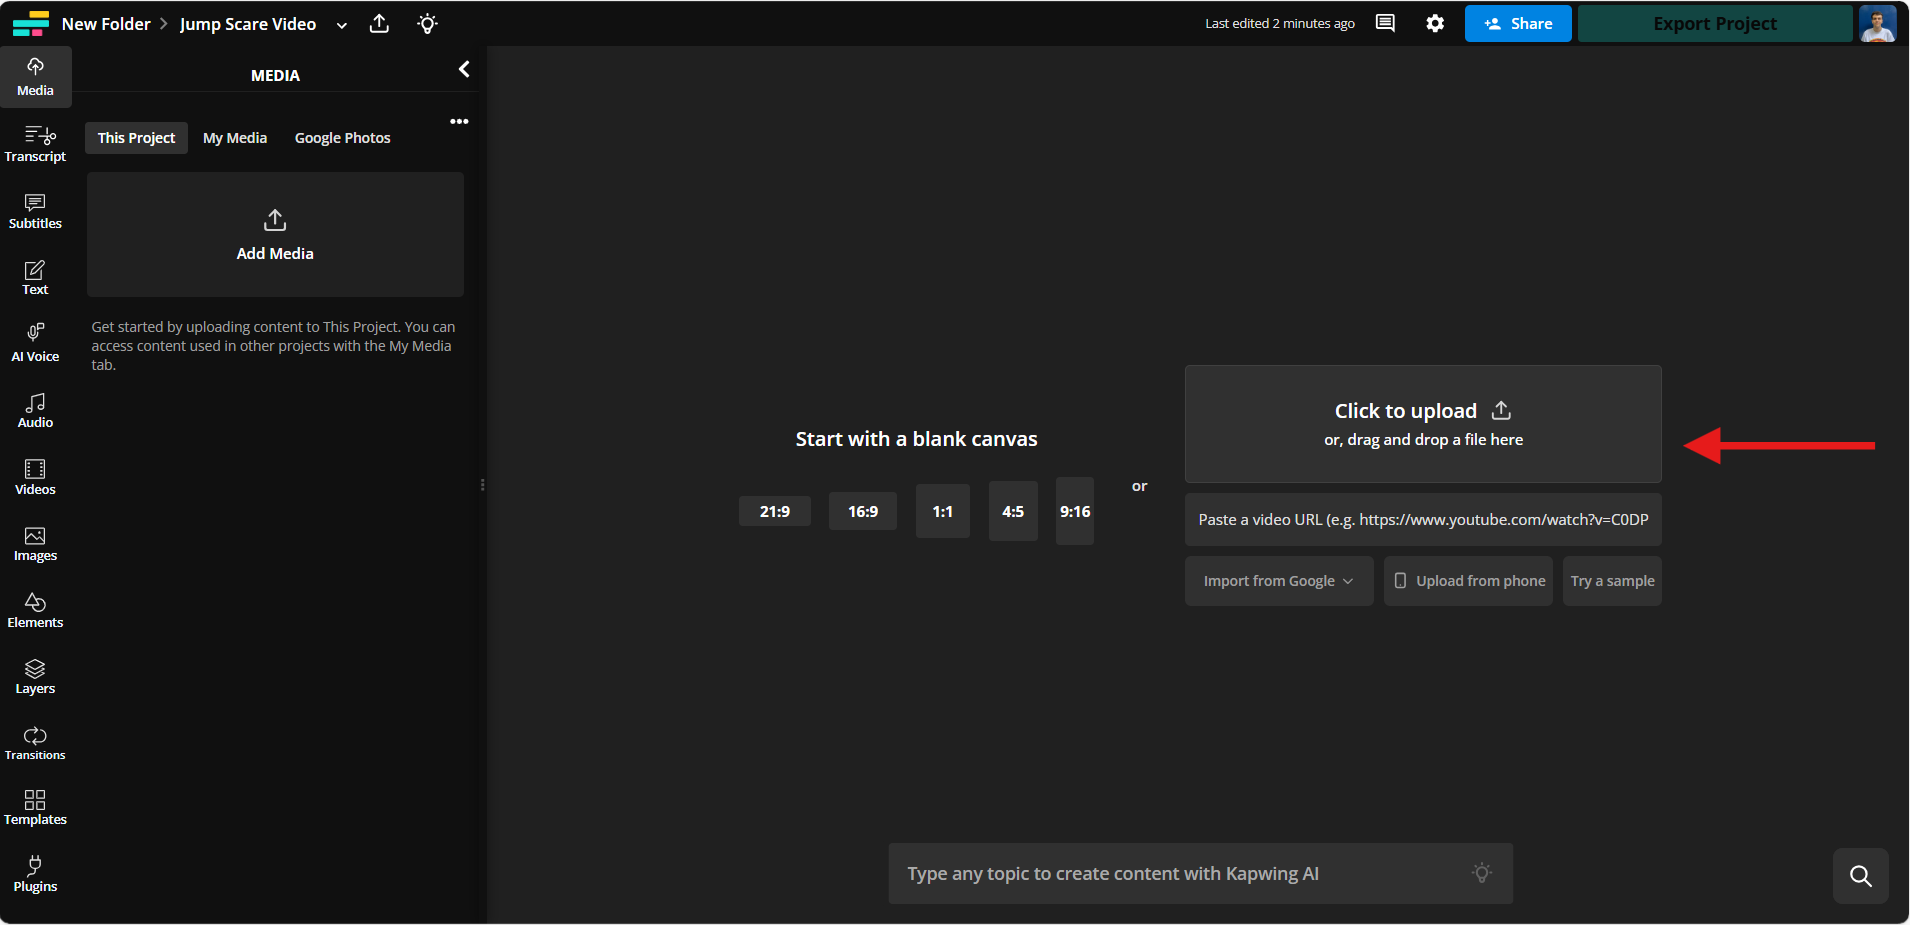
If you have an image or video in mind that you know will frighten your friends and family to their core, you can upload it straight to Kapwing's editing studio.
After entering the studio select Click to Upload, then drag and drop your files or paste a link to import your images and/or videos. You can also sign into Google Drive and Google Photos to import files from your account. Once they load, you'll see your assets on the timeline at the bottom of the Studio.
Generate an Image With AI
For those who don't have a specific image in mind, use your imagination to devise the scariest jump scare moment you can, then use an AI Image Generator or AI Video Generator to bring your jump scare vision to life.
Simply select whether you would like to generate a video or an image, type out your idea and then hit generate to create the perfect ending to your jump scare content.

Find a Royalty-Free Image
Kapwing also offers a royalty-free image library, meaning you can insert a pre-existing photo into your project.
Just navigate to the Images tab on the left and use the search function before adding your preferred image to your editing studio.

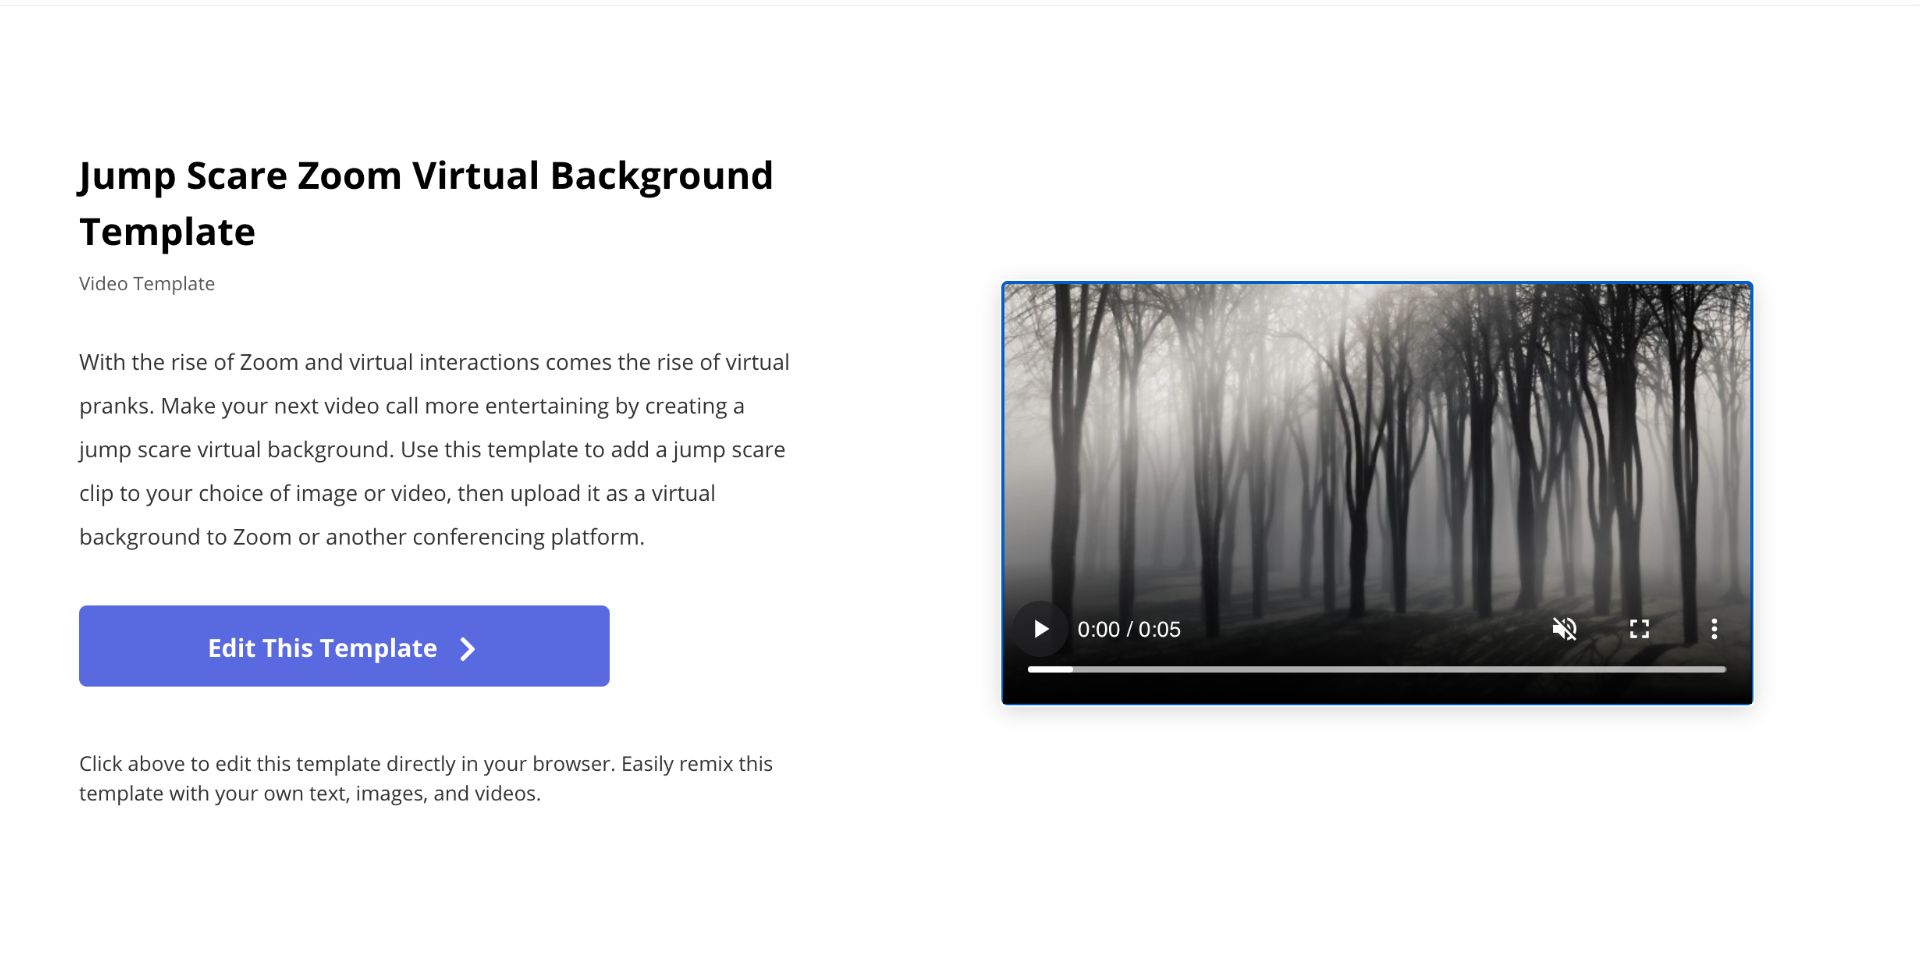
Alternatively, you can use our premade jump scare template which includes a pre-selected freaky video set in a landscape ratio, perfect for a Zoom background or uploading to a landscape-friendly platform such as YouTube or X (Twitter).
Step Two: Arrange and Edit Your Jump Scare Video
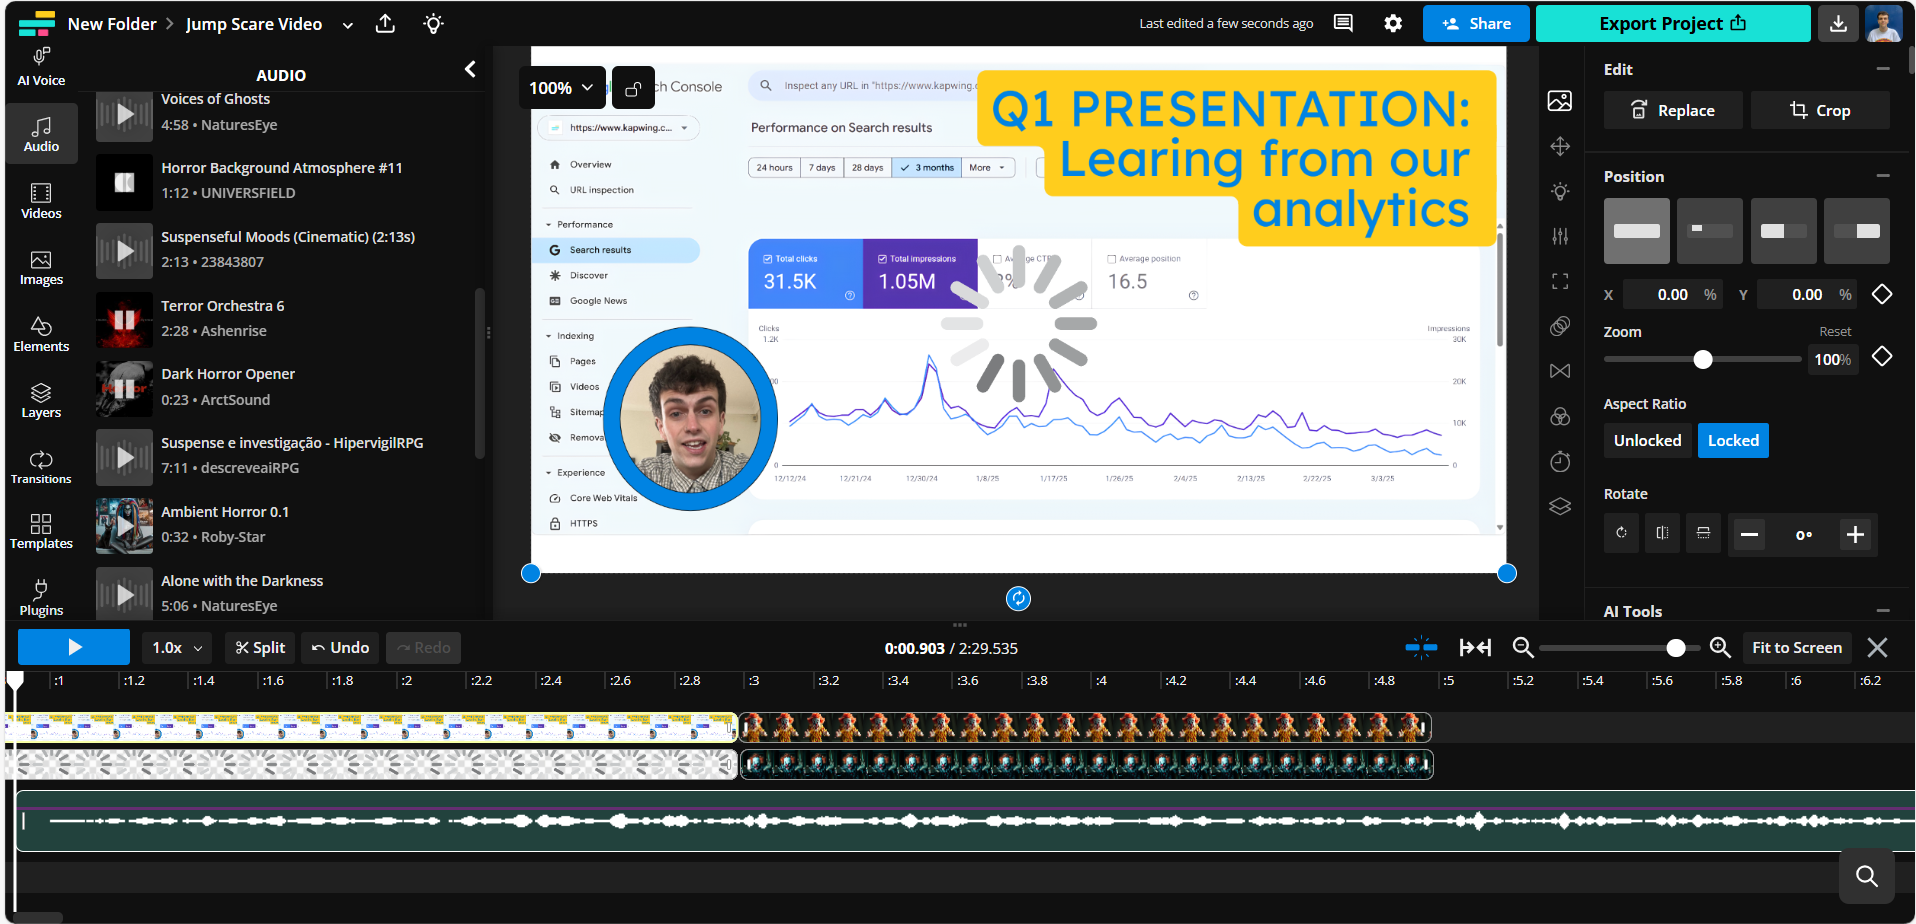
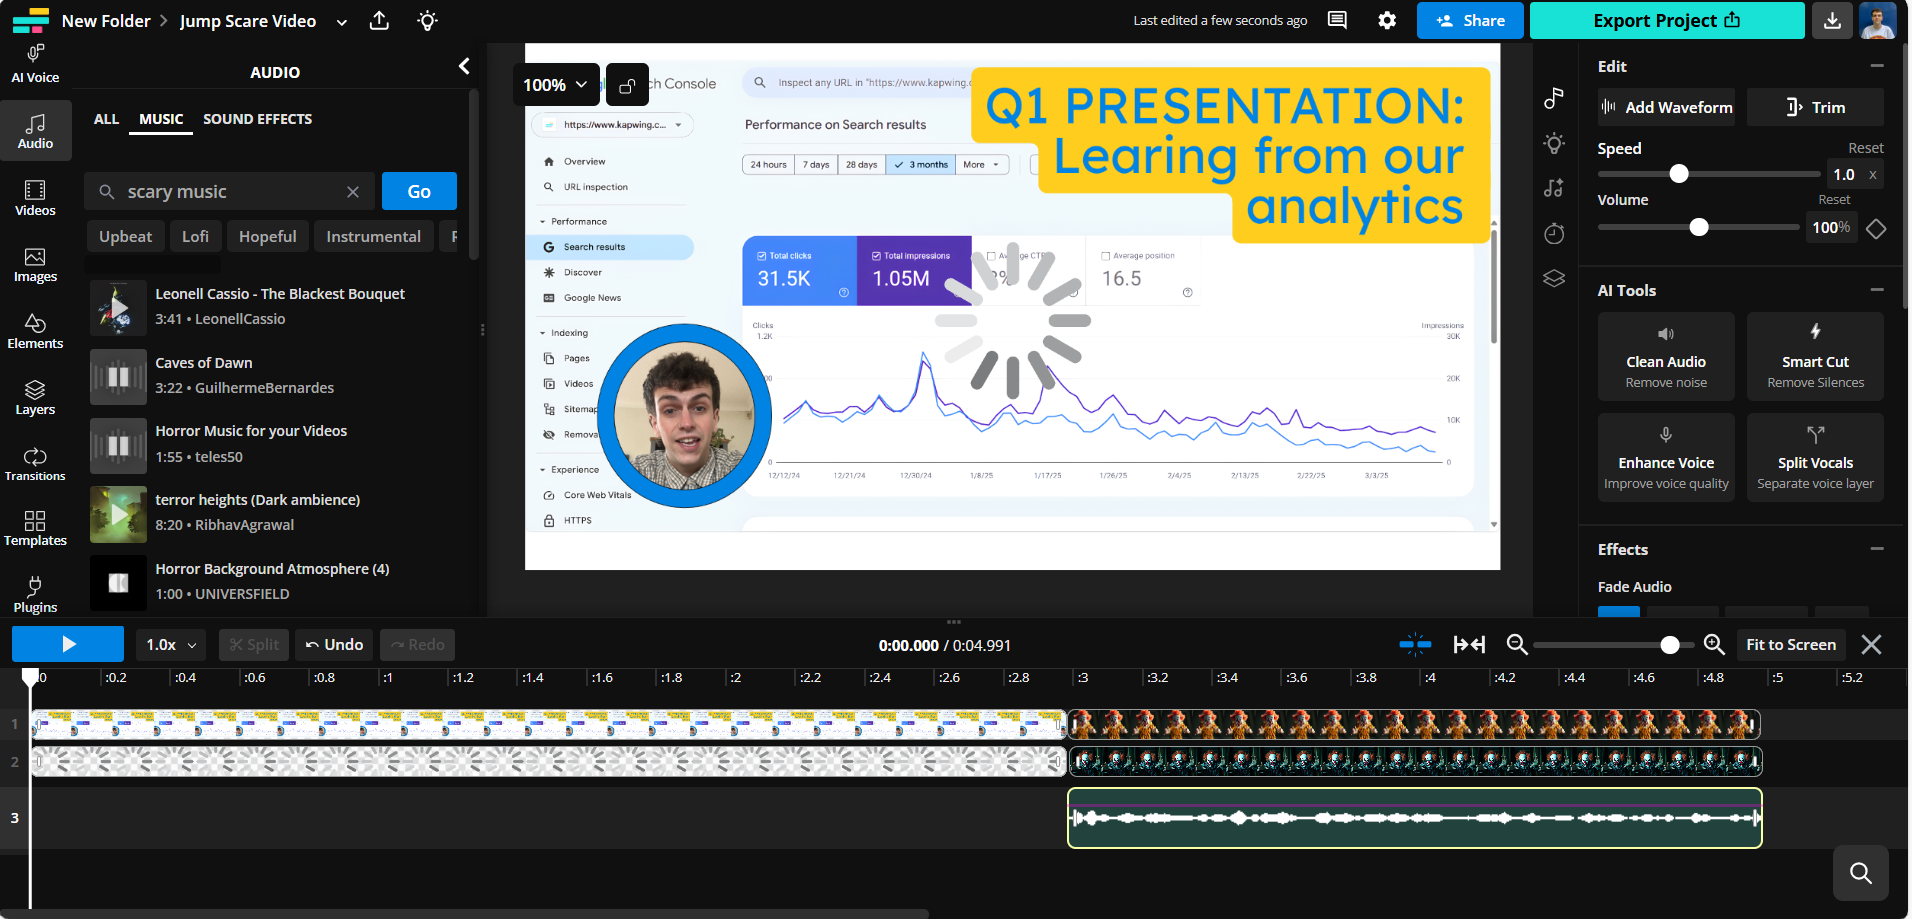
Once you have selected the content you need to put your video together, you need to rearrange your assets onto the timeline so the spooky clip or image is at the very end.
This example shows a frozen screen prank, with the initial screenshot at the start, and the scary clip on the far right side of the timeline.
You can also use unsuspecting clips like funny compilations, puzzle videos, and games.
Keep the first clip long enough to engage your viewer but short enough to maintain interest. Drag the ends of a video layer to trim it, press "S" to split and remove footage, and adjust the timeline view for a more comfortable editing experience.
Use the (+) or (-) magnifying glasses to zoom in and out of the timeline, or click Fit to Screen to view the full duration of each layer. Enable Ripple Mode to automatically remove gaps after splitting or deleting clips, and keep layers aligned by activating Snap to Timeline.
When it comes to editing, there are countless ways to enhance your video or GIF. For example, you can remove the background, add transitions to videos, try out eye-catching filters and more.
Let's say you don't like the current audio in a clip and want a new creepy sound for your jump scare video. You can use Kapwing's sound library to add audio to your video. Just navigate to the Audio tab on the left and describe the type of sound you are looking for.
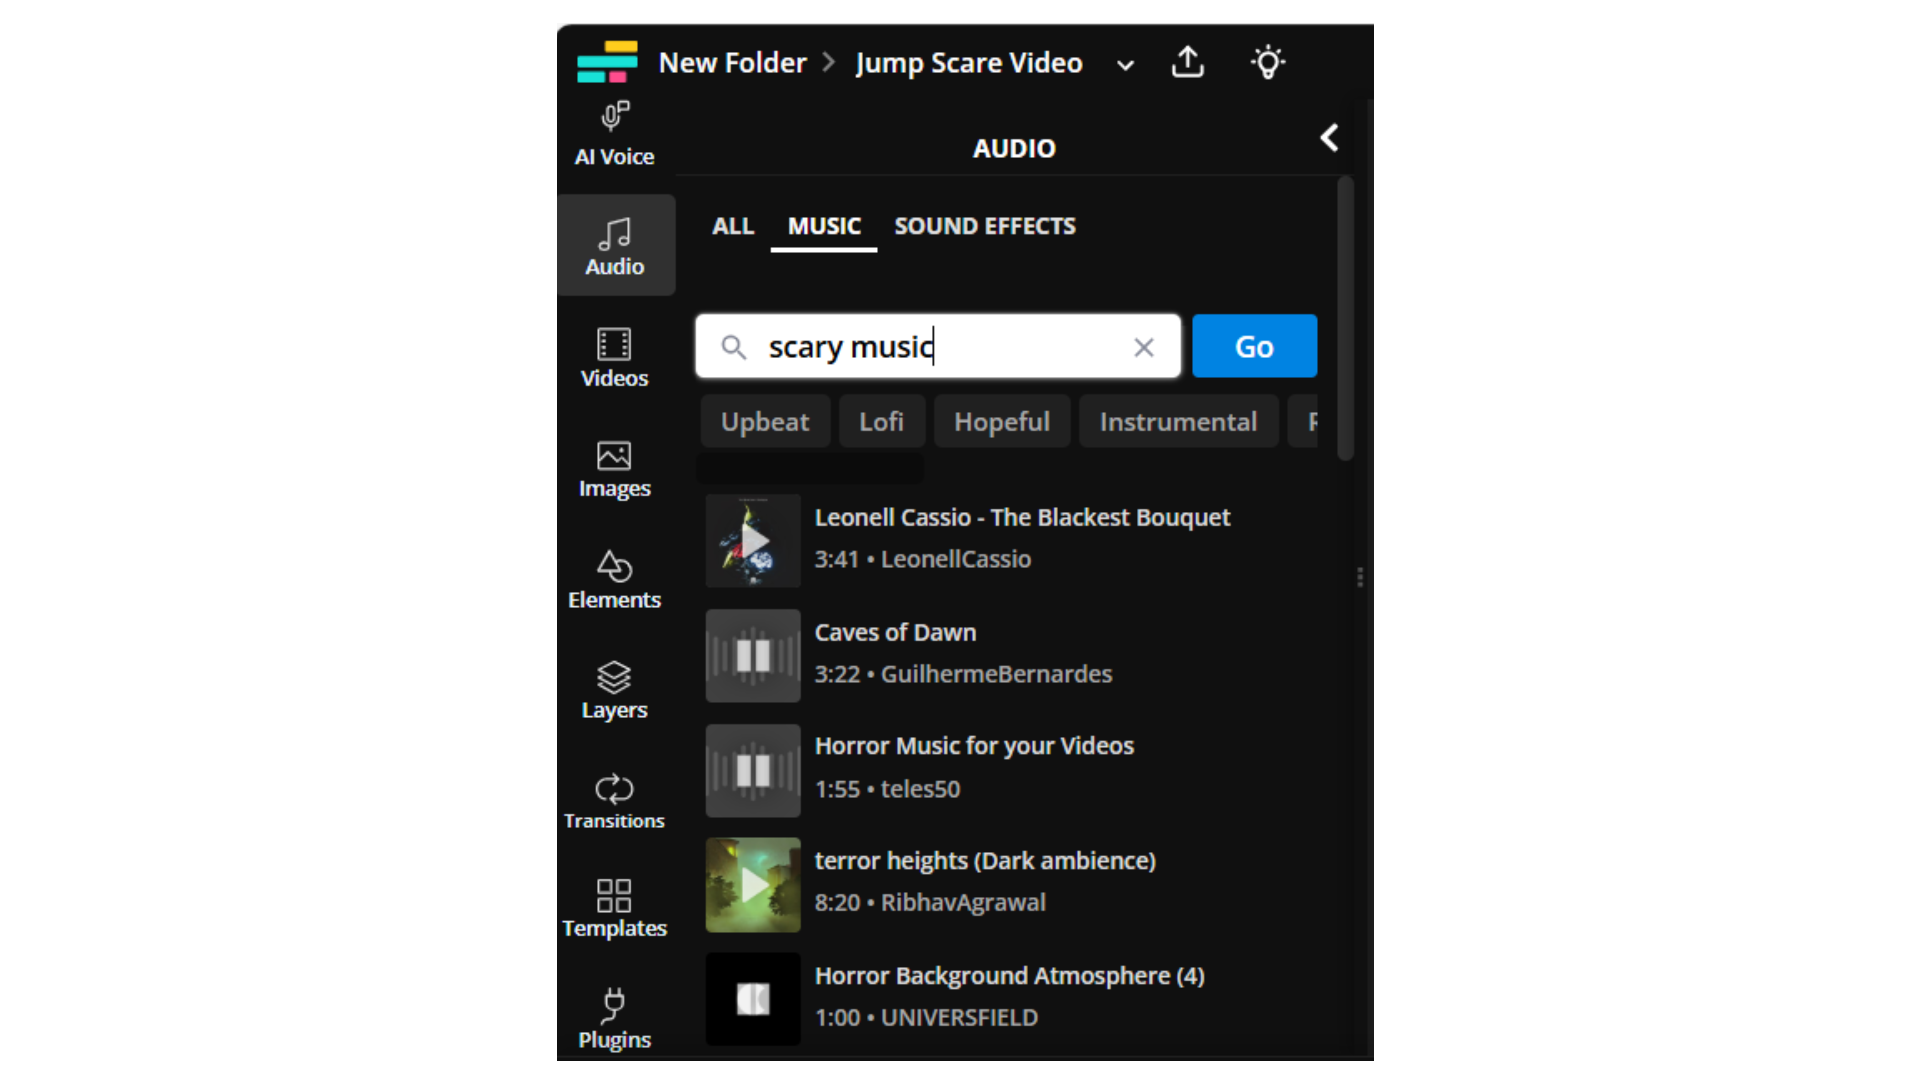
From here, drag and drop an MP3 into the Studio or click Audio and paste a link if you have your own music – increase the volume if you wish to intensify the sound experience.
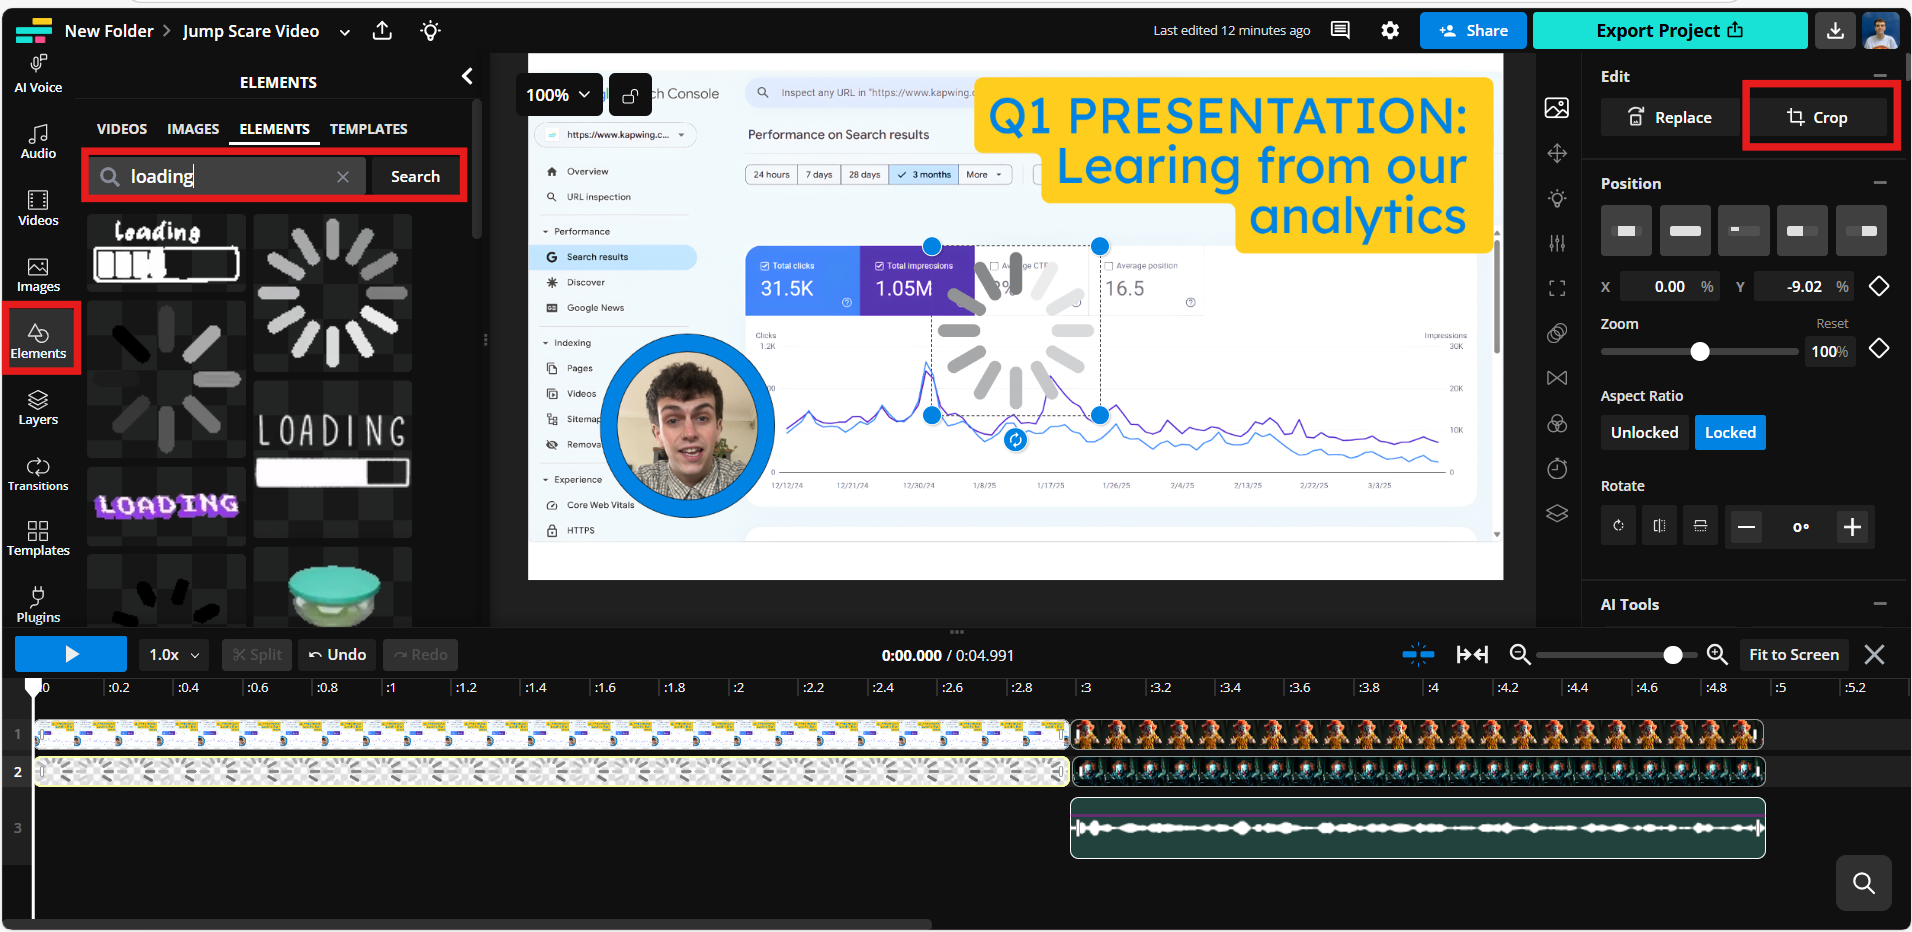
To create the frozen screen effect in the example below, a GIF has been selected from the Elements tab on the left-hand side of the screen.
You can click and drag elements to change the start and end time and adjust the size by dragging the corners. Use the crop tool to zoom in on an area and remove the remaining sections.
If you're using still images for a jump scare, add movement under the Animations header in the Edit panel on the right.
Options like Vibrate or Moving Zoom can bring your images to life. To create a darker, eerie effect, lower the brightness and saturation or apply filters like Maxwell or Grayscale for a quick black and white effect.
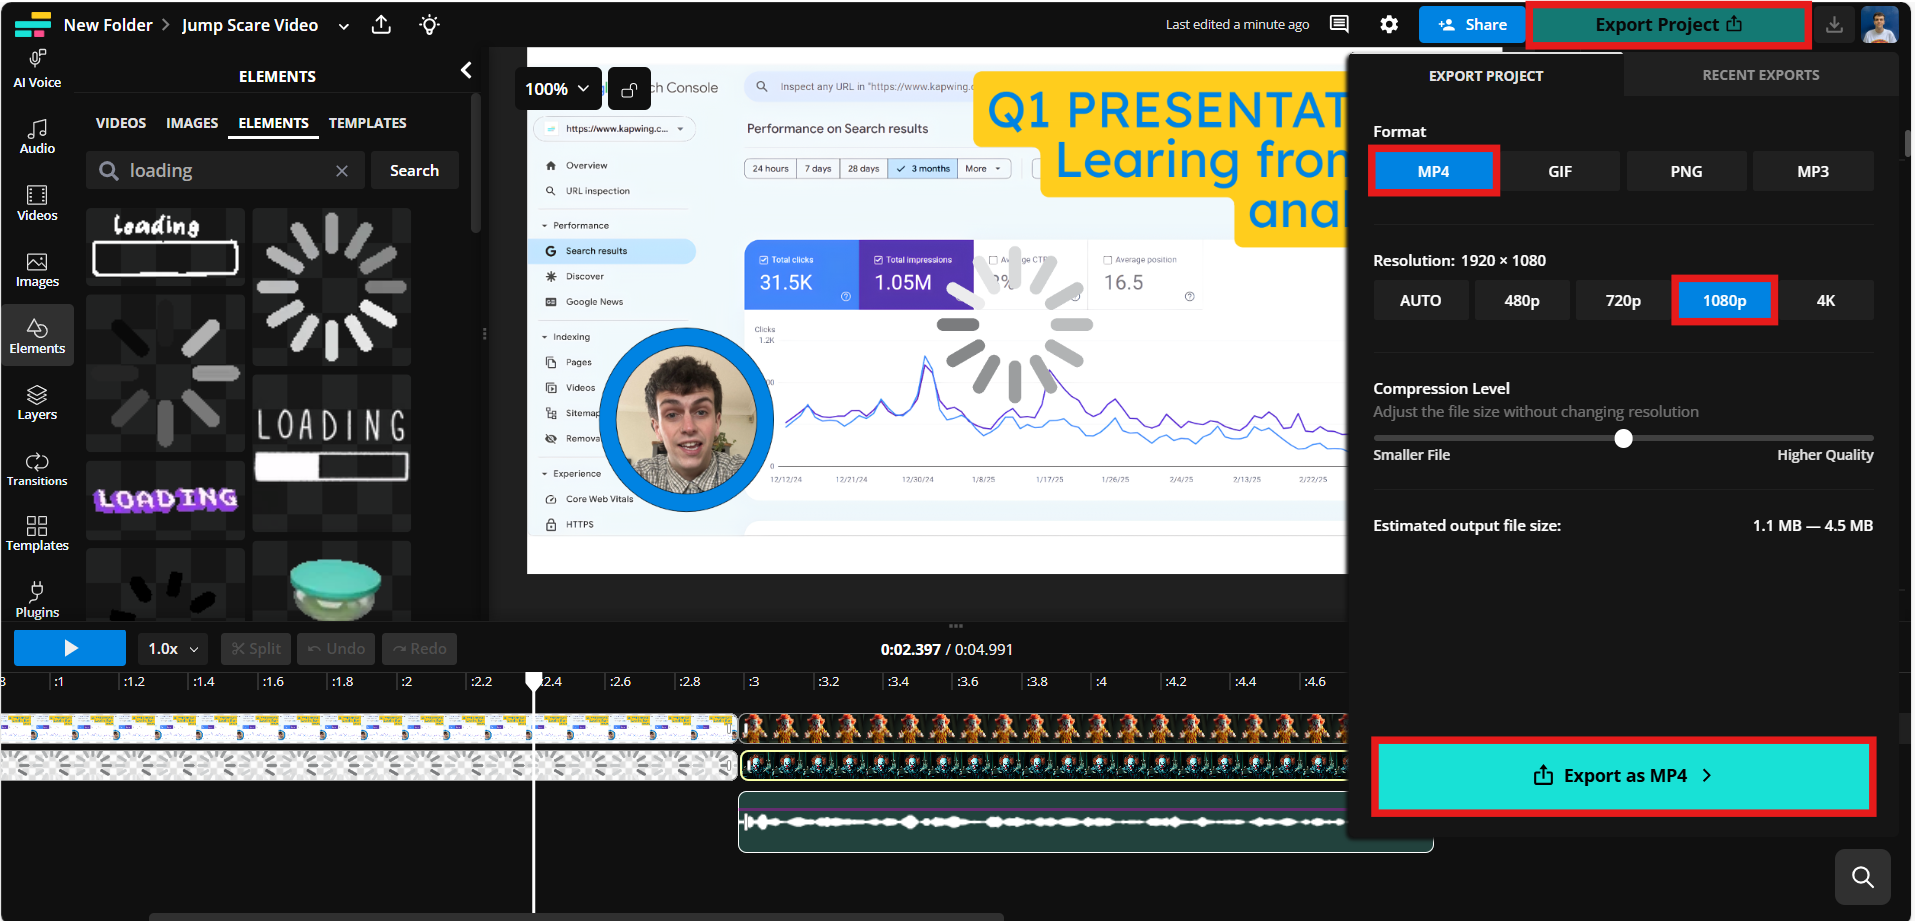
Step Three: Export and Download
When you're happy with the jump scare video, click Export Video at the top, select your desired resolution, and then click Download to save it to your device.