
YouTube Thumbnail Sizes 2026: Aspect Ratios, Sizes, and Fonts
90% of top-performing YouTube videos have custom thumbnails
Ensuring your YouTube thumbnail is clear, eye-catching, and correctly sized with the right aspect ratios and resolutions is a crucial step in maximizing your content’s reach.
While long-form video content is on the rise across various social media platforms, YouTube remains the undisputed video giant — home to over 14 billion videos and 2.7 billion users as of 2026. Yet with an overwhelming amount of free-to-watch content competing for attention, it’s more important than ever to make your videos stand out.
And what is the first thing a viewer sees? Your thumbnail.
YouTube confirmed that of all its top-performing videos, 90% of them have custom thumbnails - so it's important to get yours right. From aspect ratio and resolution to font selection and composition, multiple design elements can determine whether a thumbnail captures attention or gets overlooked.
This guide will walk you through the best practices for framing your thumbnails effectively across all YouTube formats, including YouTube Shorts, channel banner art, and profile pictures.
Table of Contents
YouTube Thumbnail Aspect Ratios and Resolutions (Updated for 2026)
YouTube supports multiple thumbnail sizes across its platform, but adhering to the recommended guidelines for each video format ensures your content is optimized for greater visibility and impact.
The following sections outline the best aspect ratios and pixel dimensions to enhance clarity and engagement, helping you present key information effectively to potential viewers.
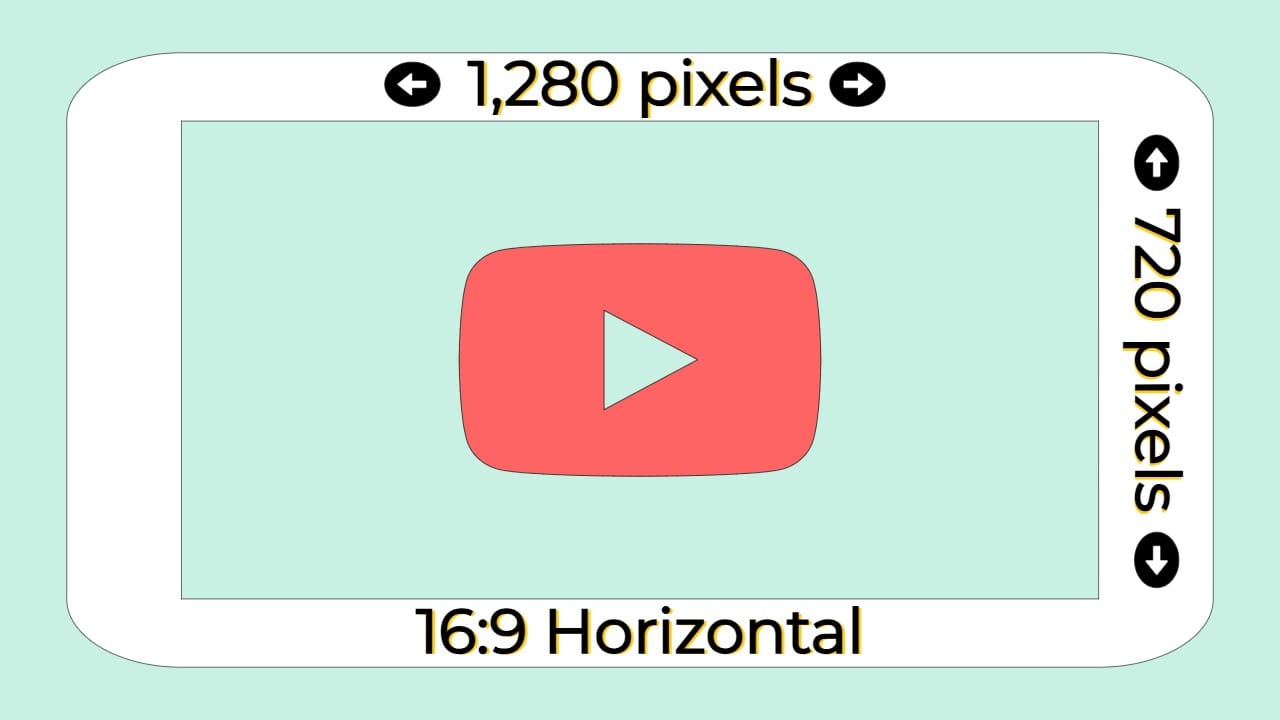
YouTube Video Thumbnails (Updated 2026 Specs)
For standard YouTube videos, the recommended thumbnail size remains 1280 × 720 pixels with a 16:9 aspect ratio, ensuring sharp display across phones, desktops, and TVs. YouTube also accepts thumbnails with a minimum width of 640 pixels, but using the recommended size gives the best visual quality.
Updated file guidelines:
• File size: Keep the thumbnail under 2 MB to avoid upload issues and excessive compression.
• Formats: JPG, PNG, and GIF (static) are supported and work reliably for custom thumbnails.
Creating thumbnails at these specs ensures YouTube accepts and displays your image crisply without unnecessary cropping or degradation.
Additional Best Practices:
- Ensure the image is high resolution to prevent pixelation on larger screens
- Use contrasting colors and bold text for better readability
- Avoid excessive clutter — keep the aesthetic clear and visually engaging
- Thumbnails should be relevant to the video content to maintain trust and engagement
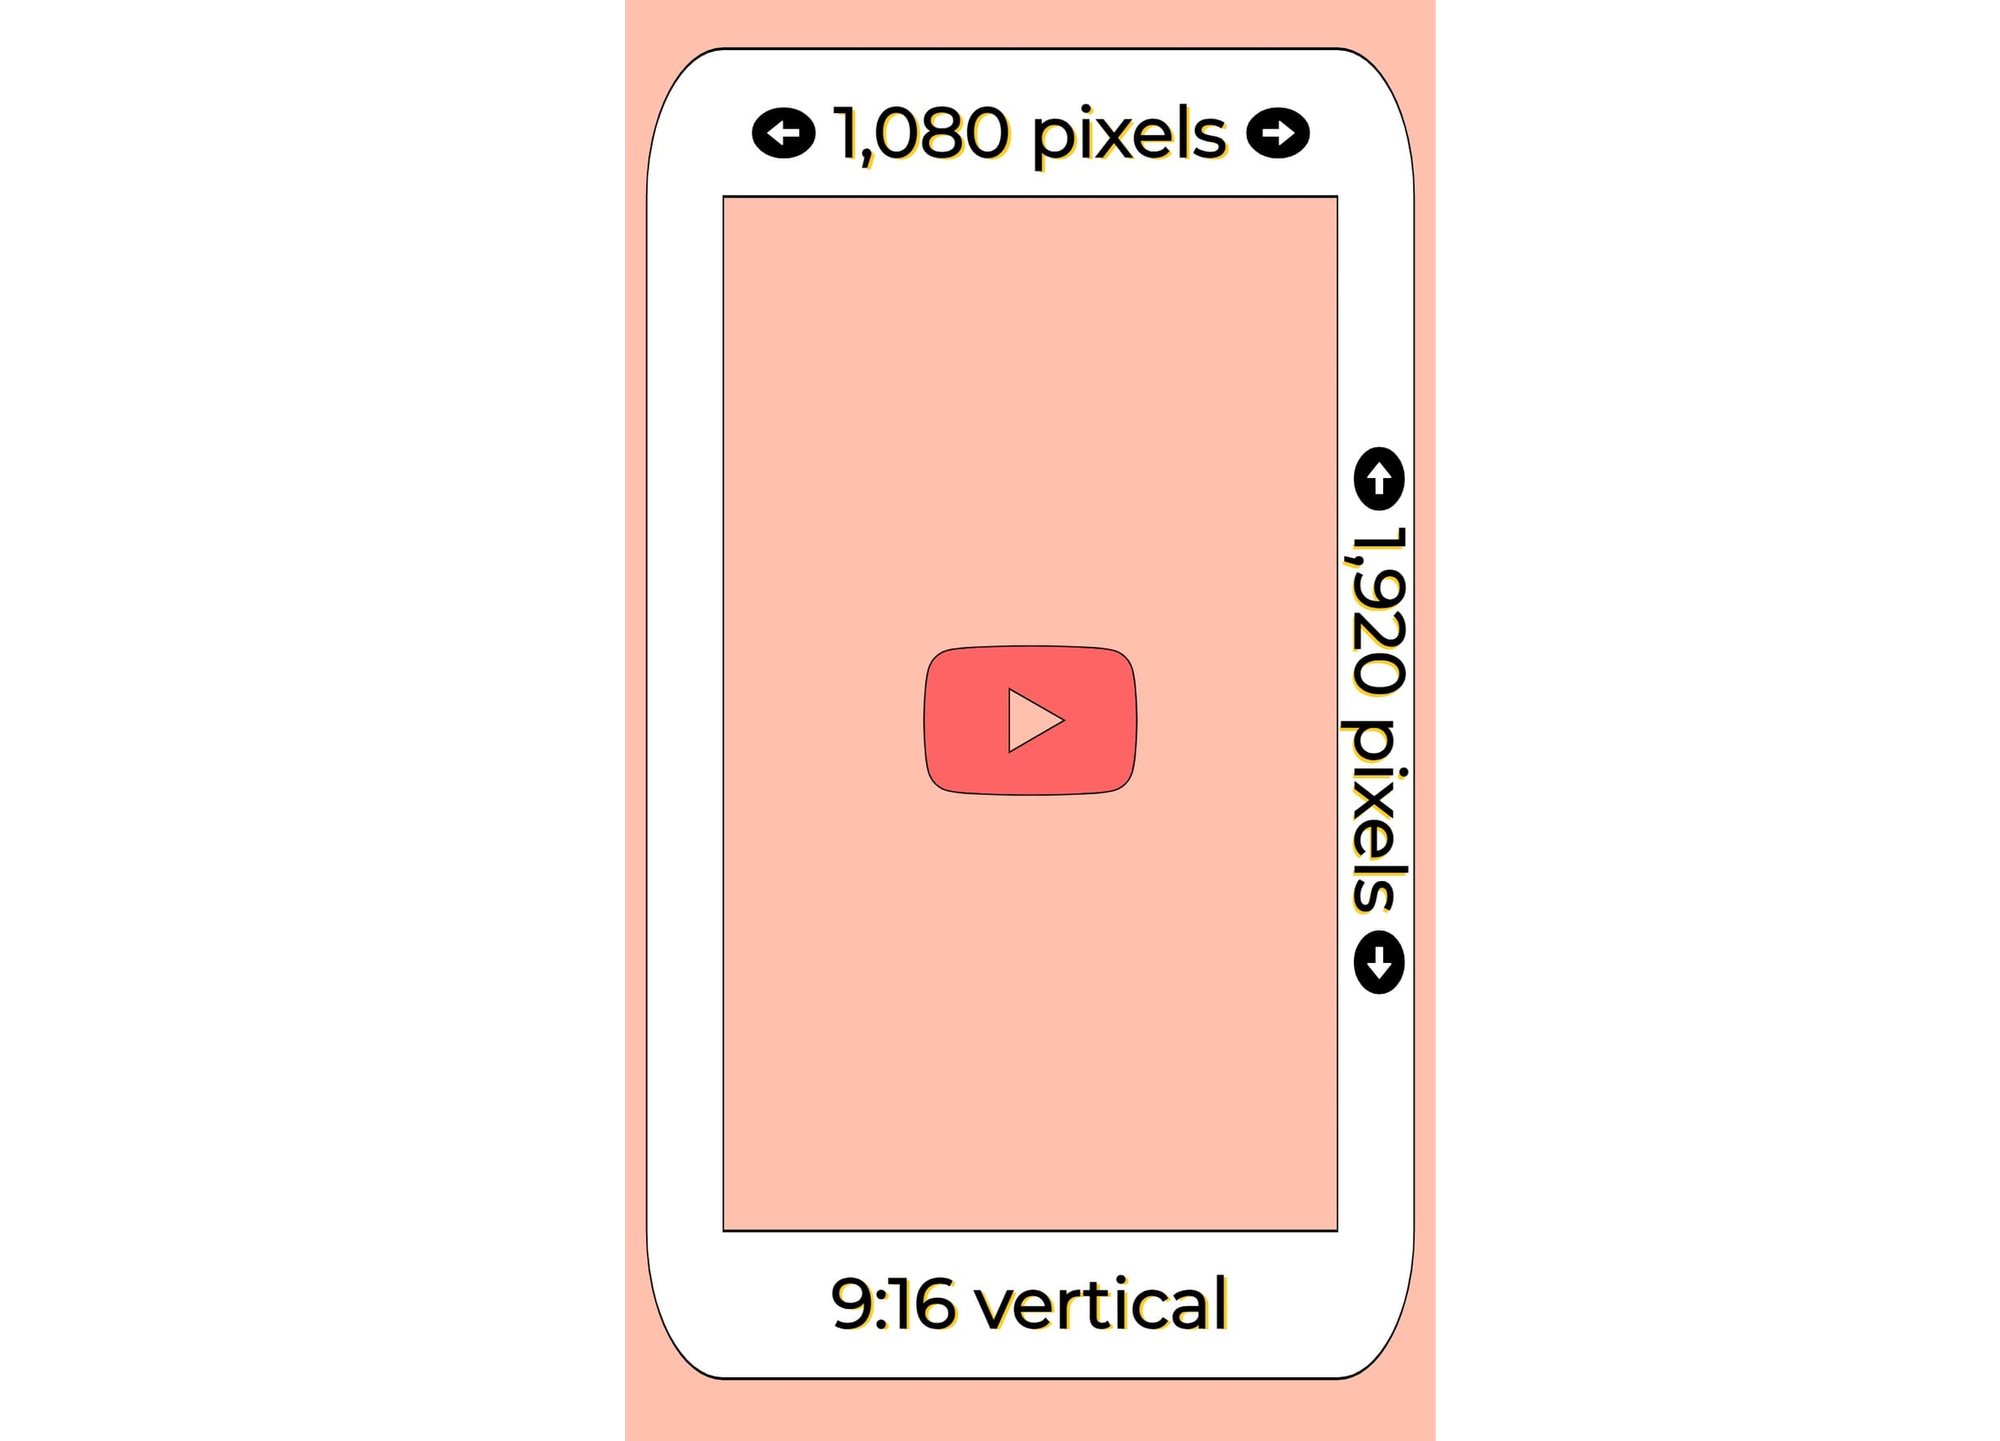
YouTube Shorts Custom Thumbnails
YouTube now supports custom thumbnails for (9:16) format in the Shorts feed. If you upload a standard 16:9 thumbnail, YouTube may crop or resize it to fit vertical display.
Updated file guidelines:
• File size: Keep the thumbnail under 2 MB to avoid upload issues.
• Formats: JPG, PNG, and GIF (static) are supported.
Designing vertical thumbnails that match the natural display of Shorts delivers a better viewer experience and avoids automatic cropping.
Additional Best Practices:
- Use high-resolution images to prevent pixelation when viewed on mobile devices
- Ensure the thumbnail is visually engaging and easy to read, as Shorts are often viewed in a scrolling feed
- Avoid placing key text near the edges, as cropping may occur when displayed in different screen sizes
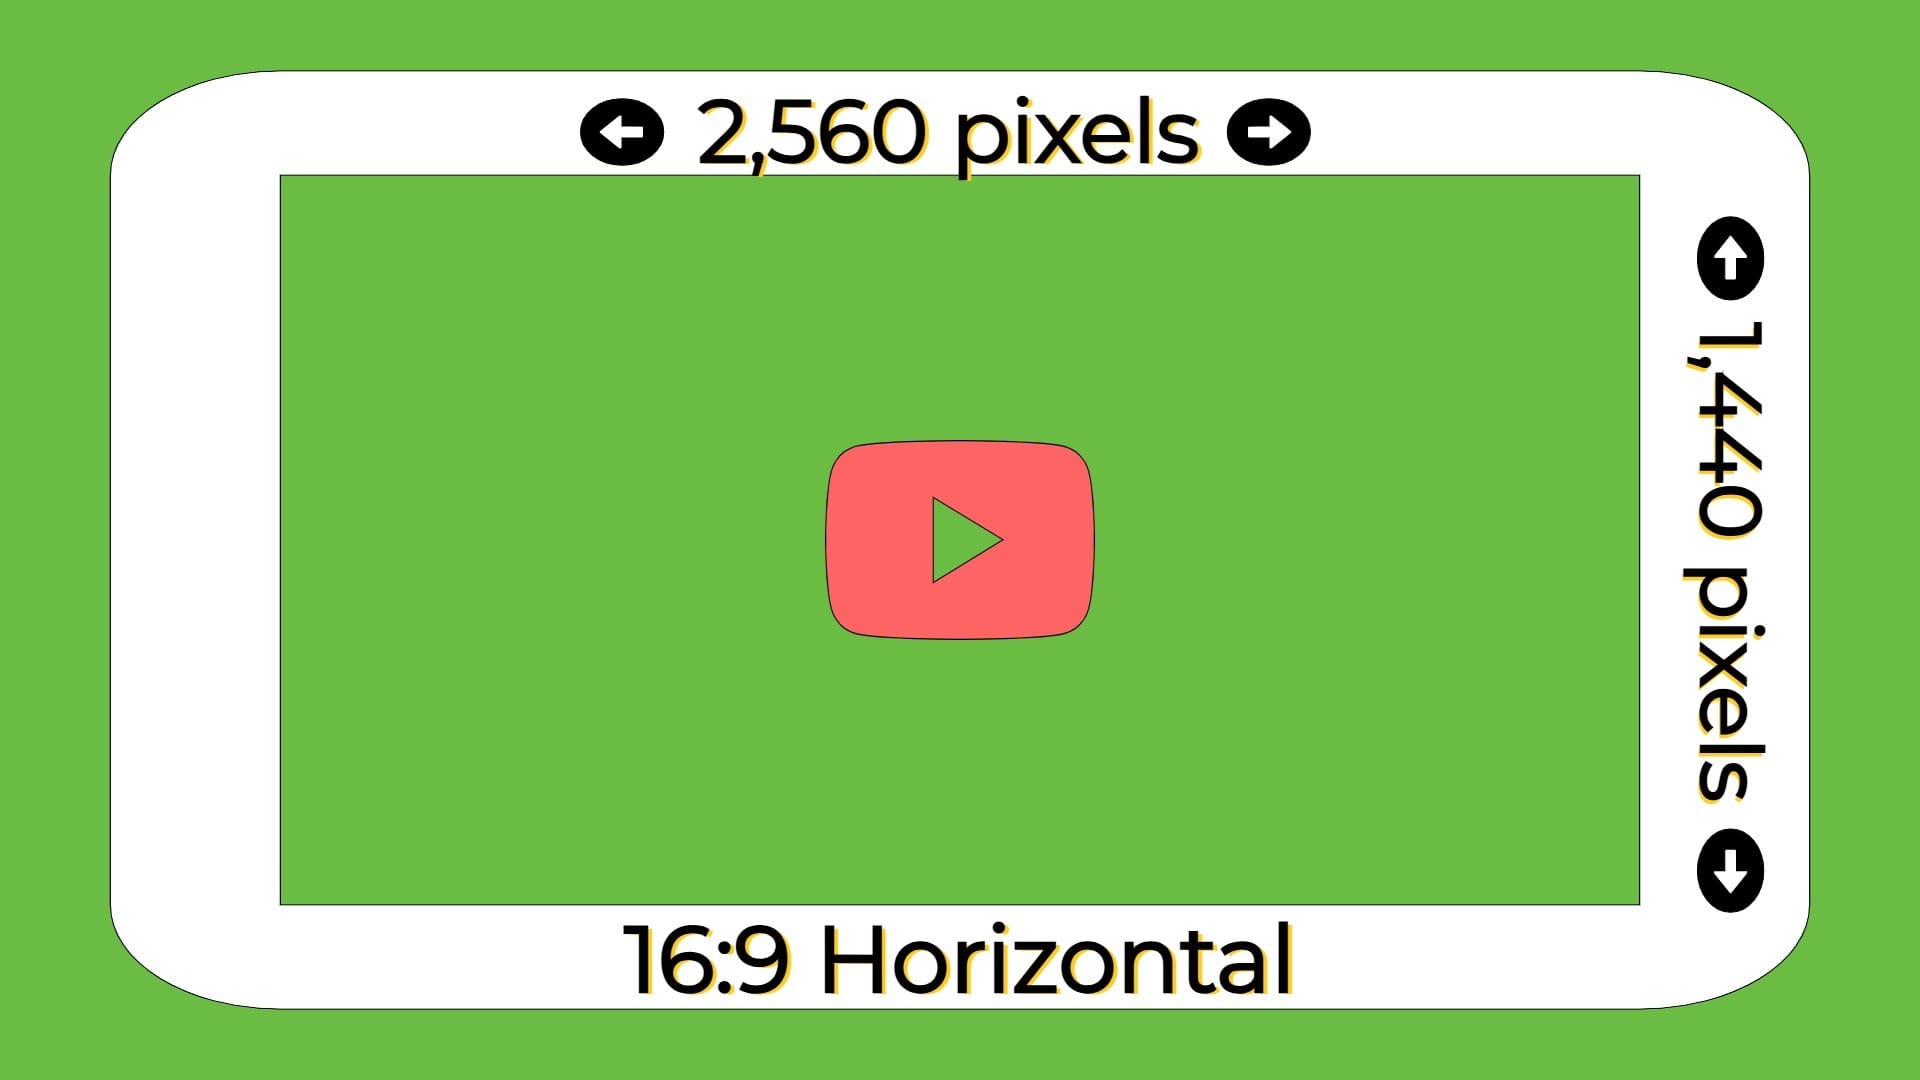
Banner Images
For YouTube channel banners, the recommended resolution is:
- 2560 × 1440 pixels (Recommended)
- 2048 x 1152 pixels (Minimum)
Remember to keep important text and visuals within 1235 × 338 pixels (the central area) to ensure visibility on all screen sizes and use a 16:9 aspect ratio.
Ensure your banner image displays correctly across all devices and maintains optimal quality by adhering to:
- A maximum file size of 6 MB
- Using JPG, PNG, GIF (non-animated), or BMP formats
How do I make a YouTube banner?
To make a custom YouTube banner, you’ll first need to choose a basic image editing software or a specialized tool like Kapwing’s template editor. Kapwing offers different banner templates for you to begin with and expand on using text, images, elements, and layers. Create your perfect banner with these three steps:
- Experiment with the features within the template editor, trying out different fonts, uploading your own images, playing with filters, and testing out layers.
- Customize your banner to embody your aesthetic with a specific color palette, thoughtful design that’s not overly elaborate, and relevant photos or graphics.
- Publish your banner on your channel, see how it looks to visitors, and make adjustments as needed.
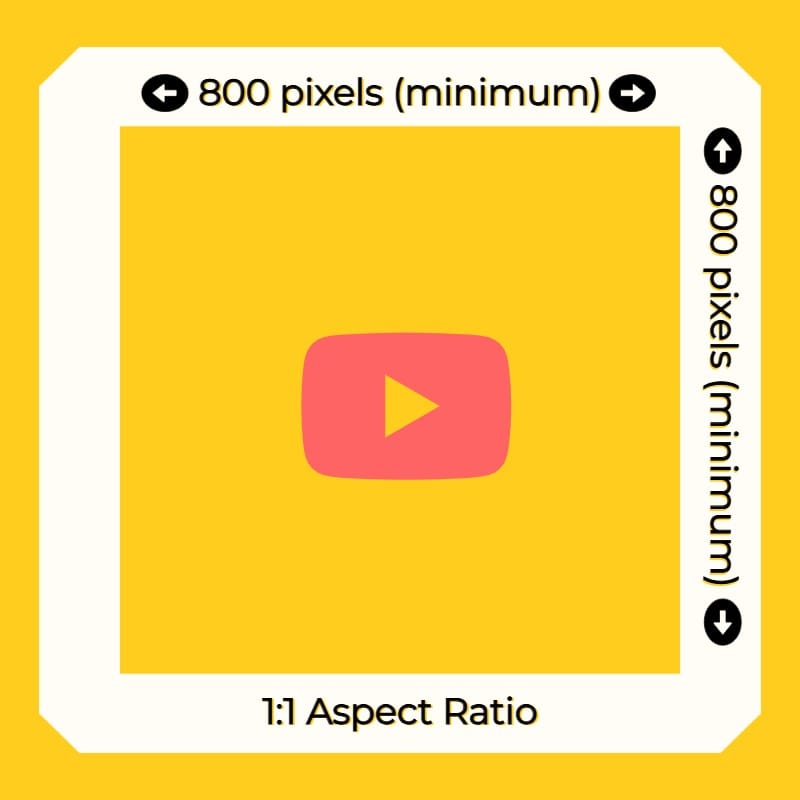
Profile Pictures
When uploading a profile picture, the ideal resolution is:
- 800 × 800 pixels (Recommended)
- 98 x 98 pixels (Minimum)
Although profile pictures are uploaded as a square using a 1:1 aspect ratio, they are displayed as a circle on YouTube, so avoid placing important elements near the edges.
You can use Kapwing's convenient YouTube Profile Picture Template to make your own perfectly sized display picture by simply adding your image to the ready-made 1:1, 800 x 800 frame.
To ensure your profile picture appears correctly on all devices and retains high quality, follow these guidelines:
- A maximum file size of 2MB
- Using JPG, PNG, or GIF (non-animated), BMP as accepted formats
Best Practices for Banner and Profile Images:
- Use high-quality, high-resolution images to prevent pixelation on larger screens
- Ensure important text and visuals are centered, as banners may be cropped differently on various devices
- Consistent branding across your banner, profile picture, and thumbnails helps establish a strong channel identity
YouTube Thumbnail Fonts
From YouTube's official guidance, content creators are advised to keep their thumbnails simple and to the point. You should always choose a font that is bold enough to grab attention yet clear enough for easy readability.
Creators who post regularly and have built an audience have likely gauged what works for their thumbnails and what doesn’t. However, for those still establishing a channel identity, we’ve selected three popular YouTube fonts — all available in Kapwing’s font library — that can help your content stand out and develop a unique visual style.
1. Impact
Impact is arguably the most popular YouTube font, and it does exactly what its name suggests — makes an impact.
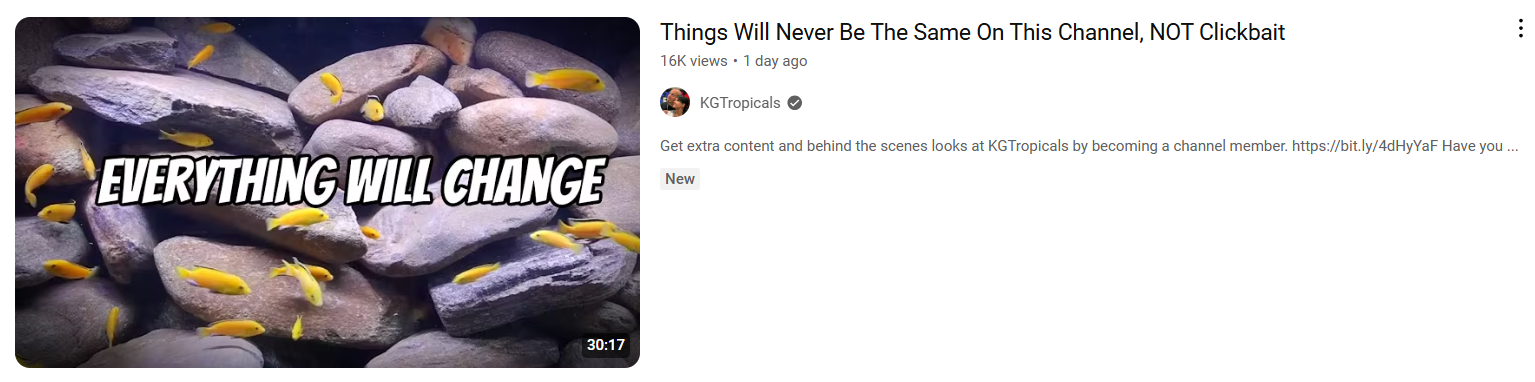
Content creators like PewDiePie have long been associated with this bold and reliable font, which remains highly readable against any background. Its thick white lettering with a black outline ensures clarity and visibility, no matter the design.
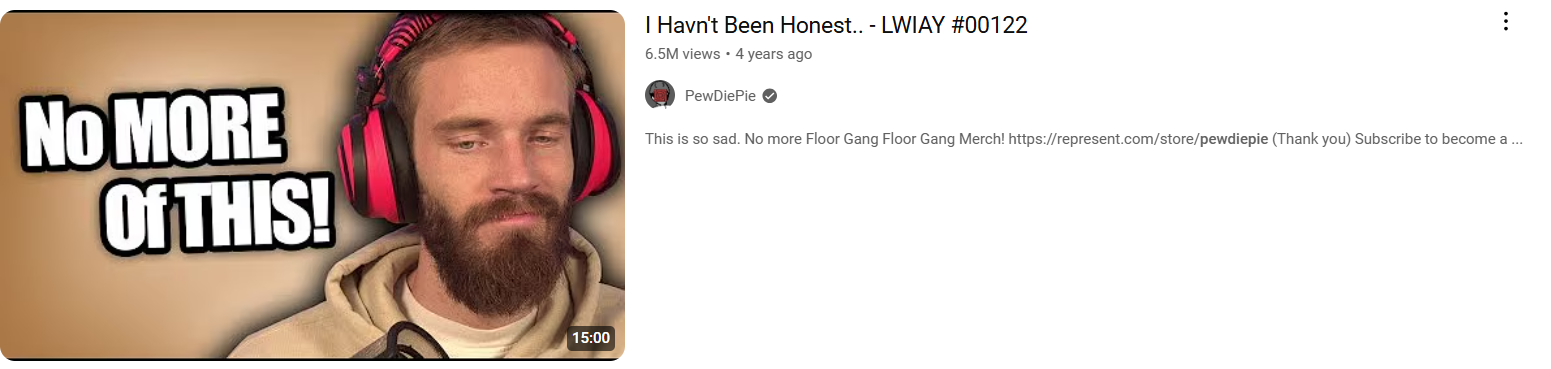
Impact is one of many popular fonts available and can be added to all custom thumbnails created on the site.
2. Amatic SC
Many travel, beauty, and lifestyle creators use rustic-looking fonts to enhance the aesthetic of their channel, such as the one featured in the thumbnail example below.
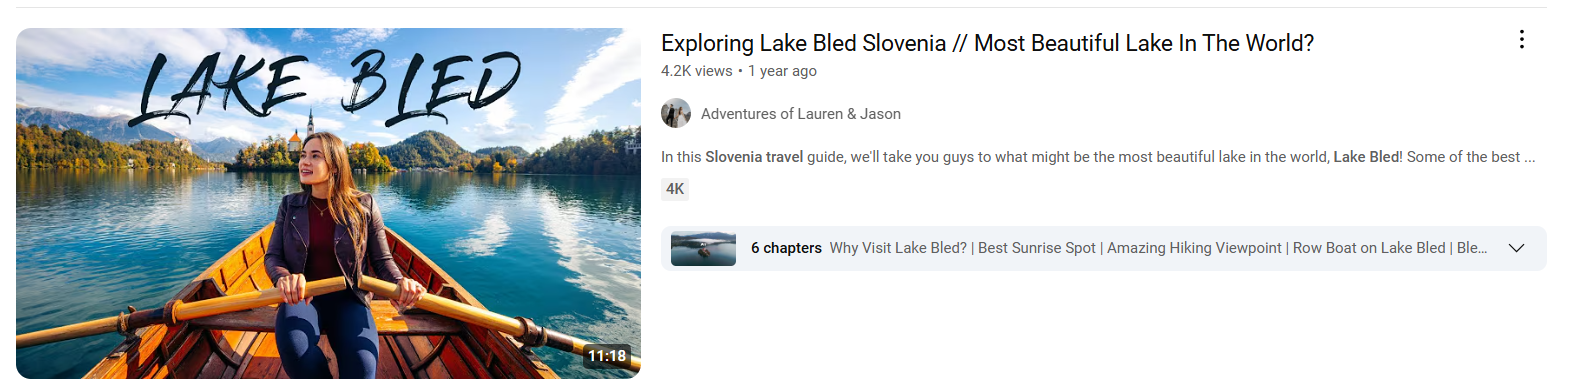
For those looking to achieve a similar vibe, the Amatic SC font offers a stylish yet approachable look, drawing attention to your video without being overly bold or distracting.

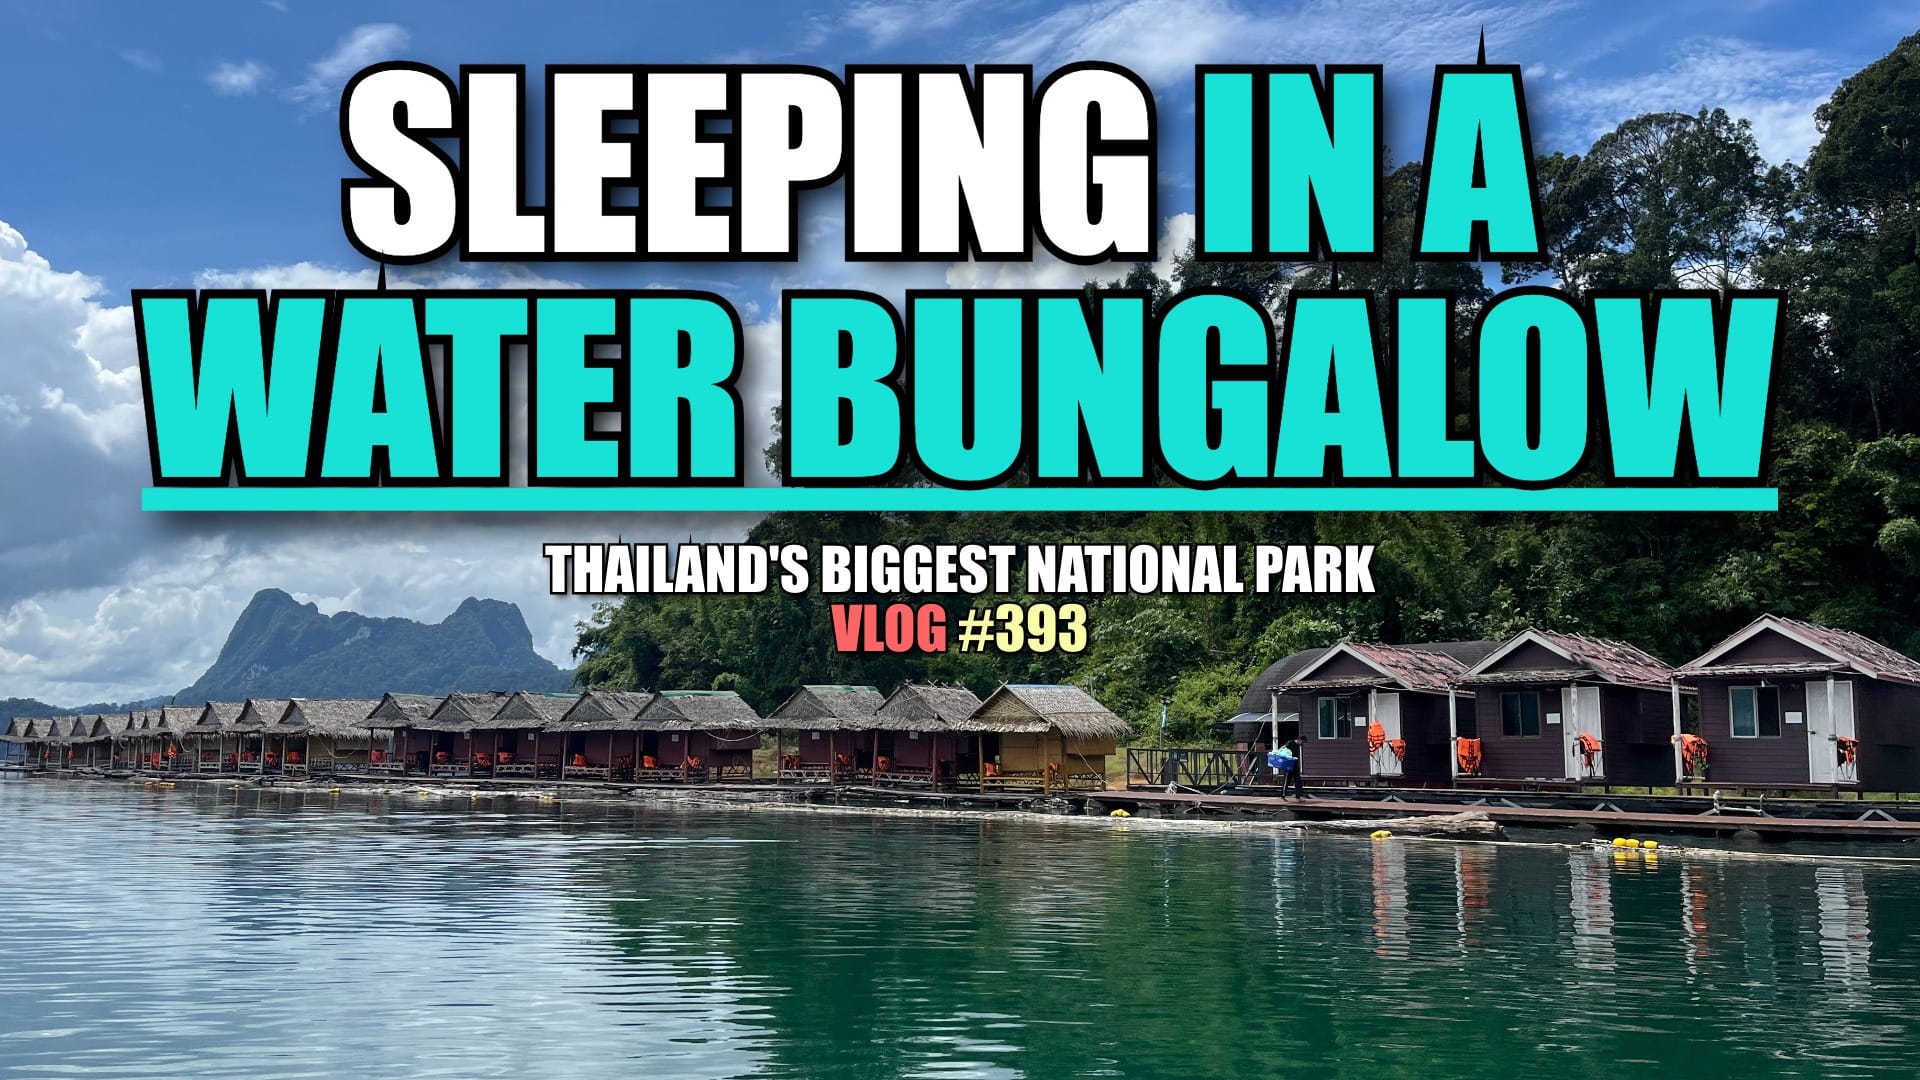
3. Bangers
Another popular font commonly used in YouTube thumbnails is Bangers. A more playful take on classics like Impact, Bangers exudes a cartoon-style feel, as it is a variation of the often criticized— yet undeniably influential — Comic Sans.
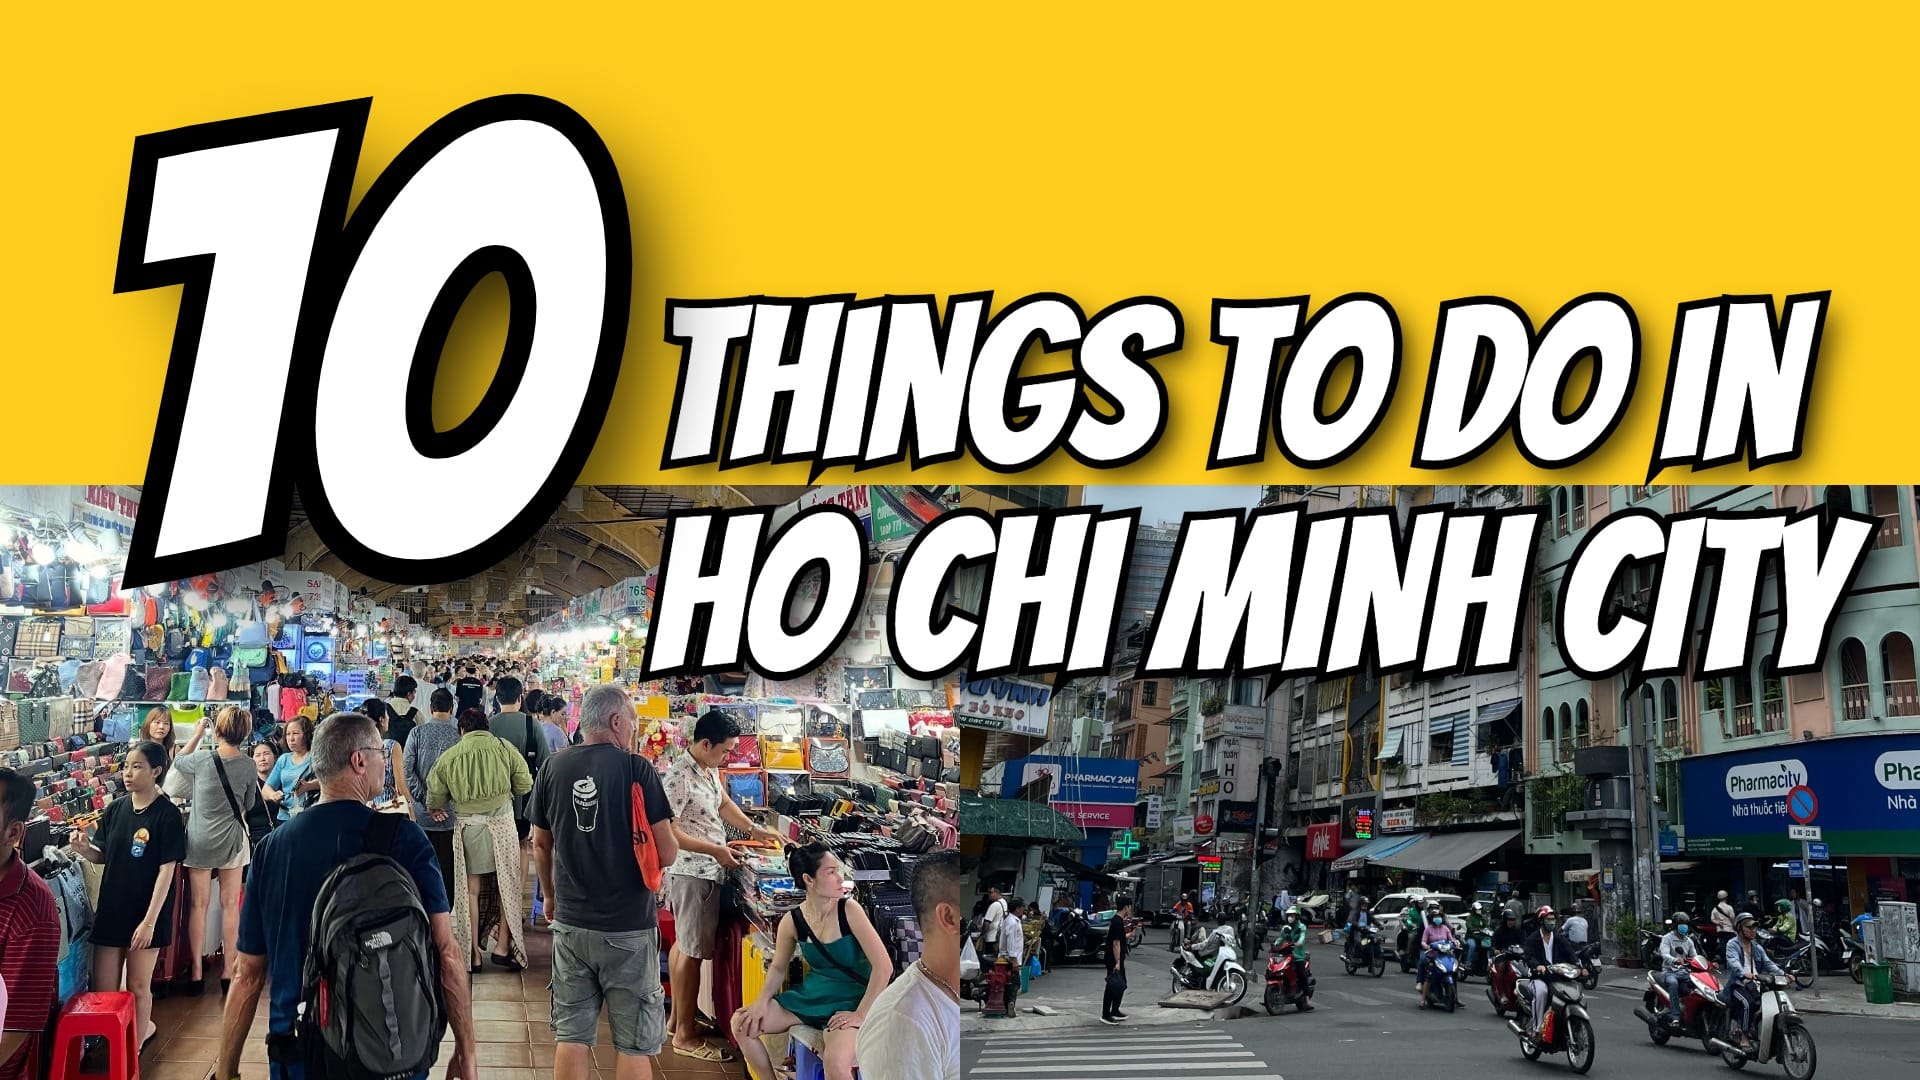
We used the Bangers font to create an eye-catching travel vlog thumbnail, designed to grab attention and make potential viewers stop scrolling.
If you have a custom font that you would like to use as a thumbnail next, you could always upload your own font directly into the editor.
Alternatively, we have well-researched guides on the most popular fonts for TikTok and the most used meme fonts.
How to Create a YouTube Thumbnail
Thanks to Kapwing’s YouTube Thumbnail Maker, creating a unique, attention-grabbing thumbnail is effortless and ready for upload in minutes.
While YouTube allows users to upload custom thumbnails, it doesn’t provide in-platform tools for editing them. That’s why using a third-party editor makes sense — letting you add text, images, and effects to ensure your thumbnail stands out before uploading.
You can either design a thumbnail from scratch, incorporating visual elements and a base image (such as an upload or an AI-generated image), or use a freeze frame from your YouTube video as a starting point.
In the example below, we use a freeze frame to demonstrate how to enhance your thumbnail.
1. Upload Video and Select a Freeze Frame
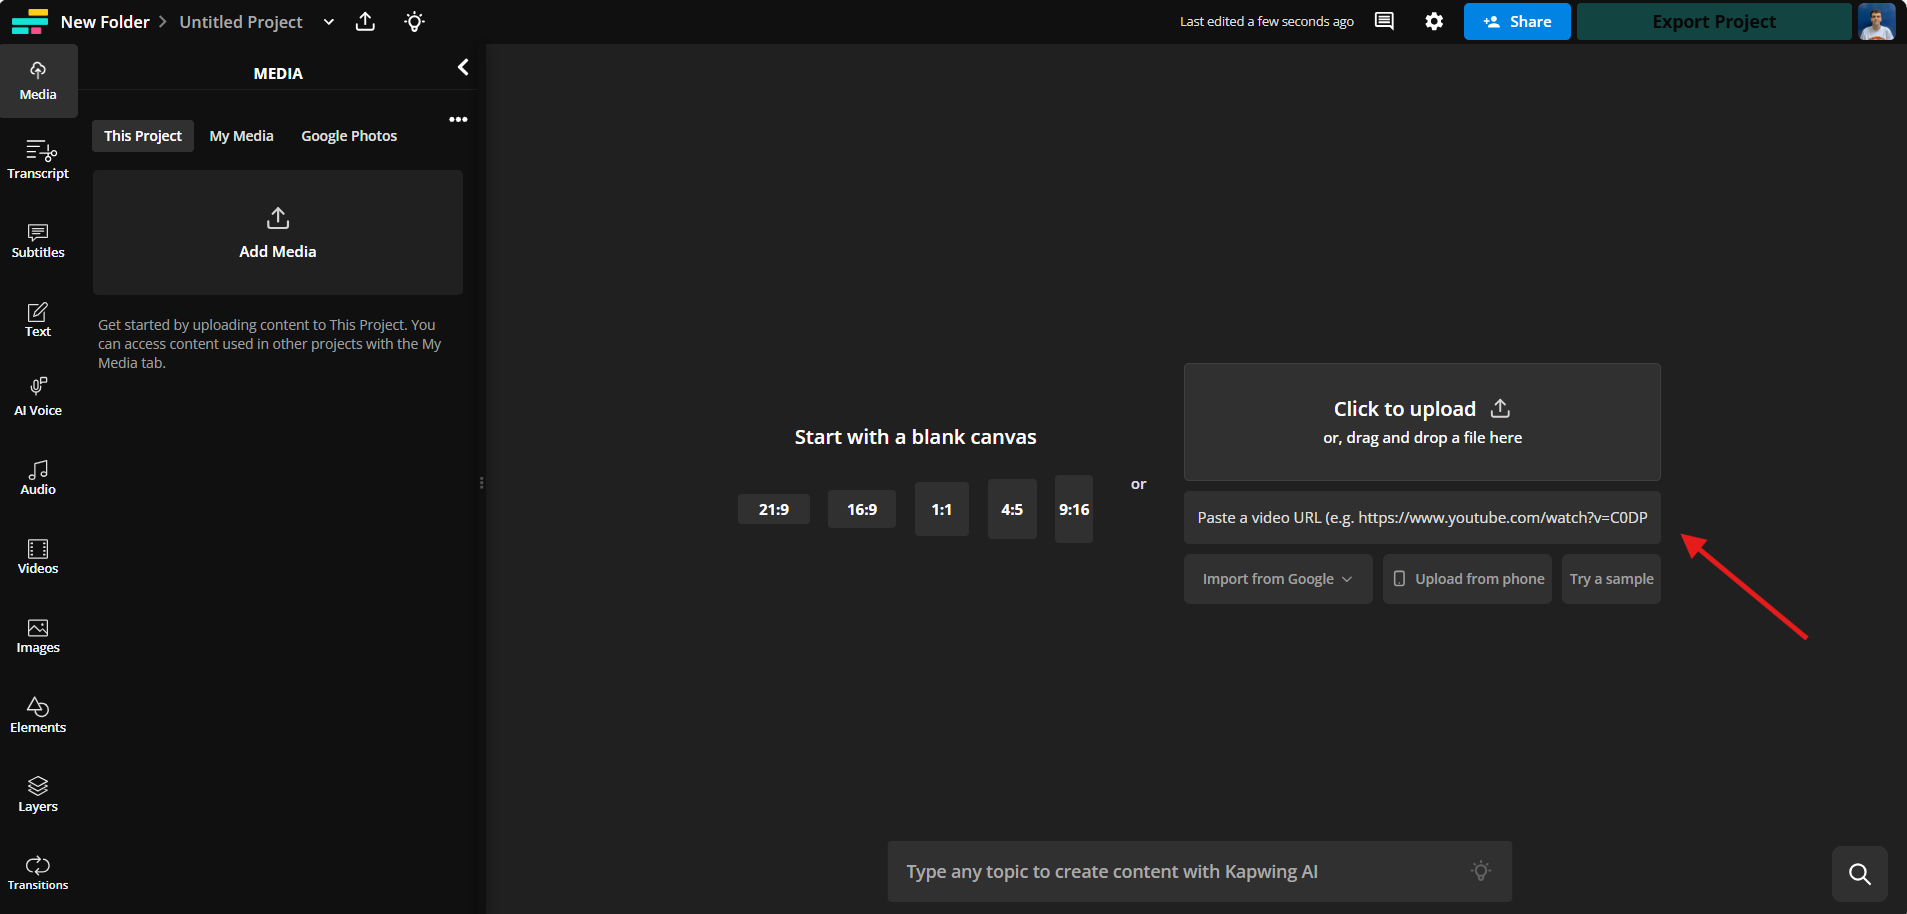
Start by uploading your YouTube video to the online editor.
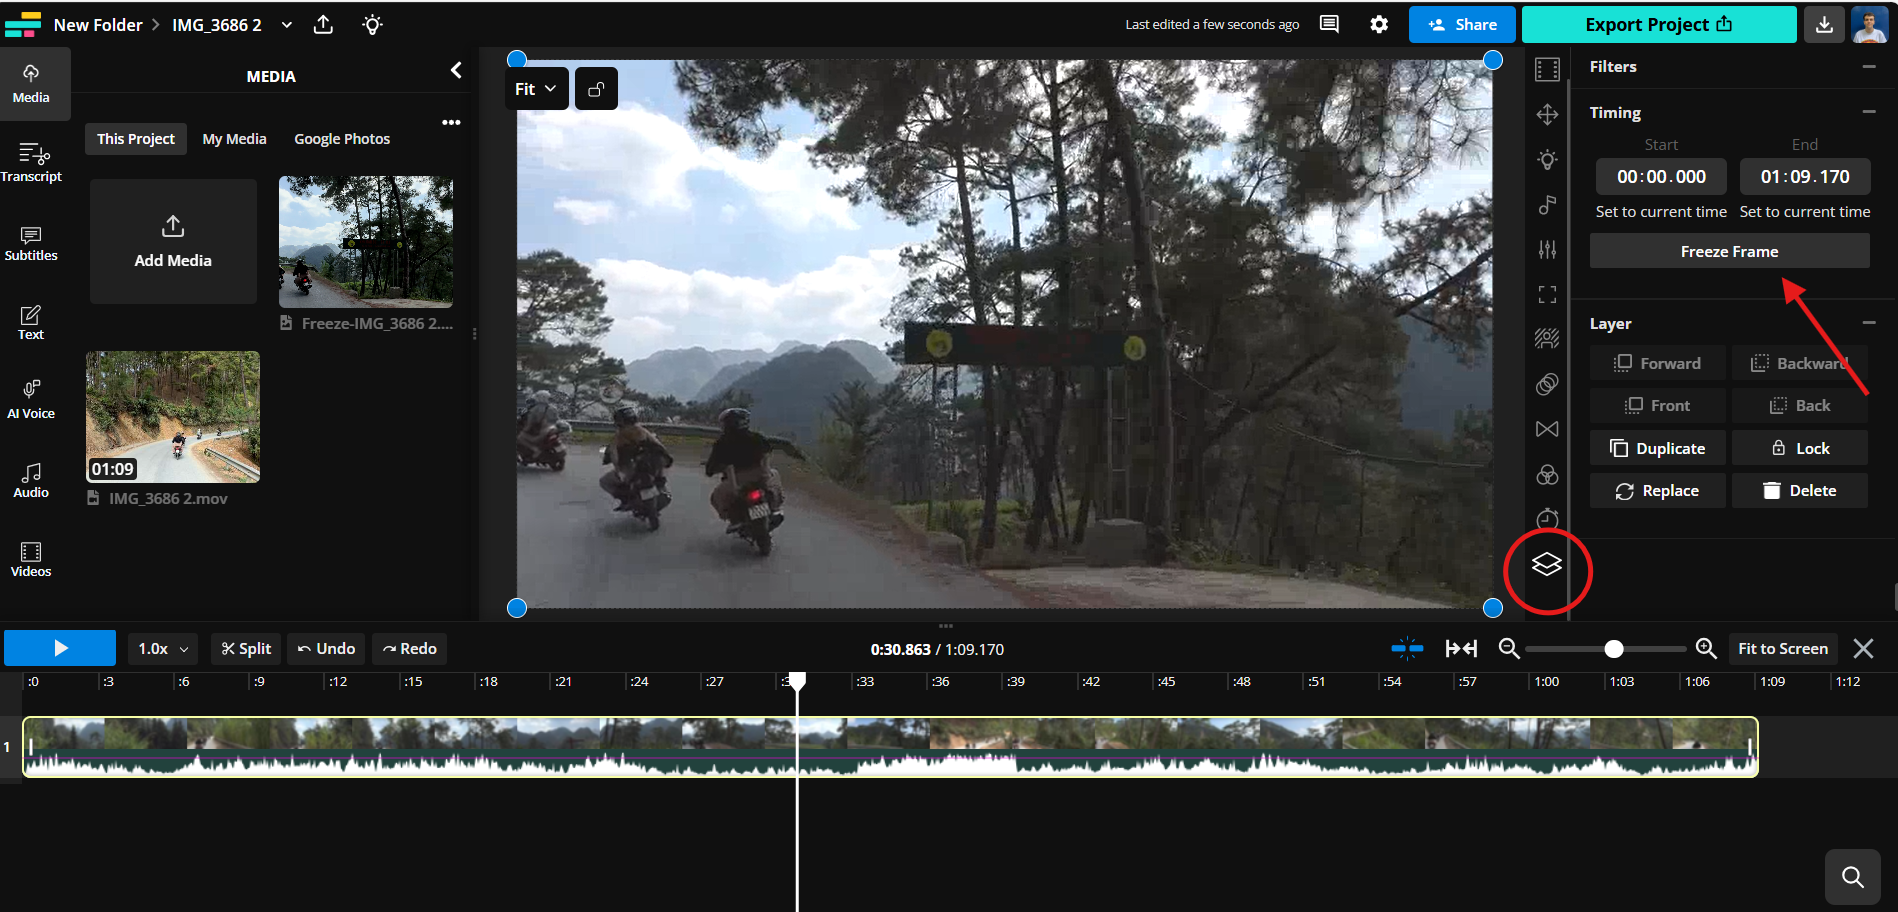
Then, move the playhead along your video timeline until you find the perfect frame for your thumbnail. Once selected, click the Freeze Frame button under the Timing tab on the right-hand side to capture a still image. Alternatively, you can upload an image or select one from the built-in royalty-free image library.
2. Edit Your Thumbnail Image
Once you've selected your thumbnail image, you can use Kapwing’s editing tools to customize it to your liking.
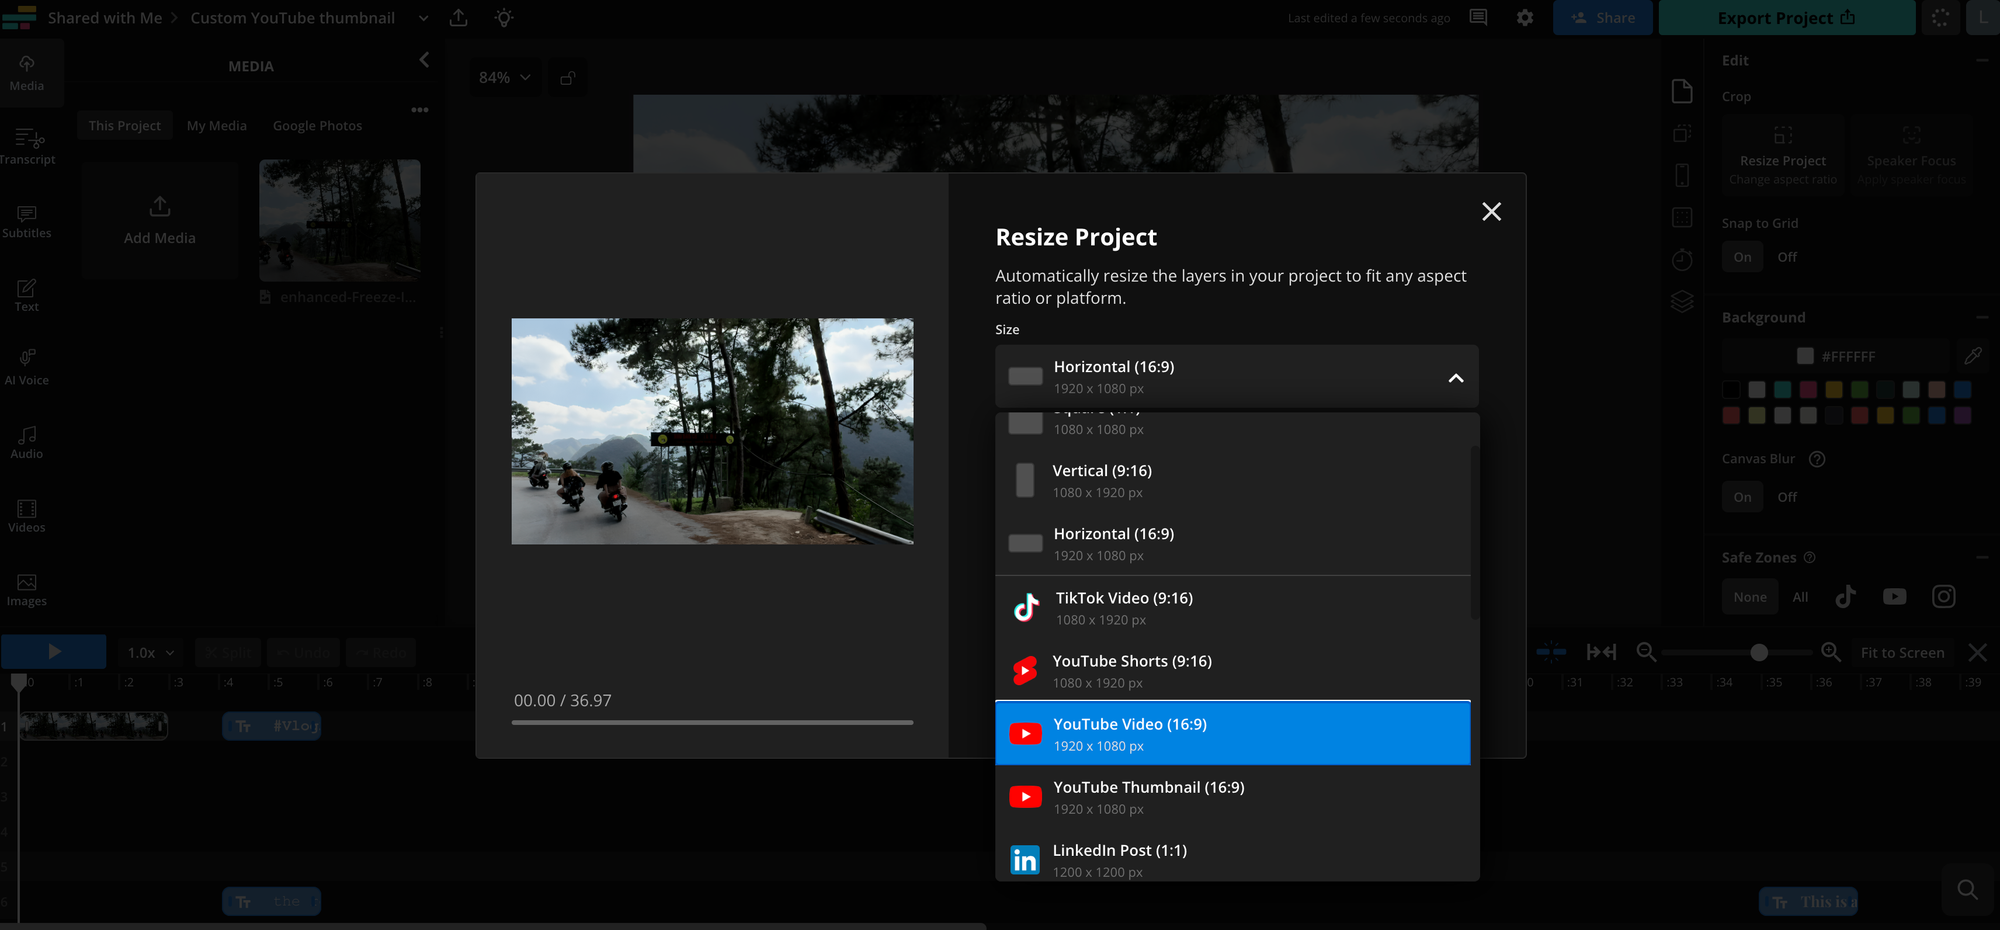
To start, make sure your thumbnail meets YouTube’s requirements. Click the ‘Resize Project’ button under the Editing tab on the right-hand side. The ideal aspect ratio for a standard YouTube video thumbnail is 1,280 × 720 pixels, although each preset aspect ratio is given a helpful title.
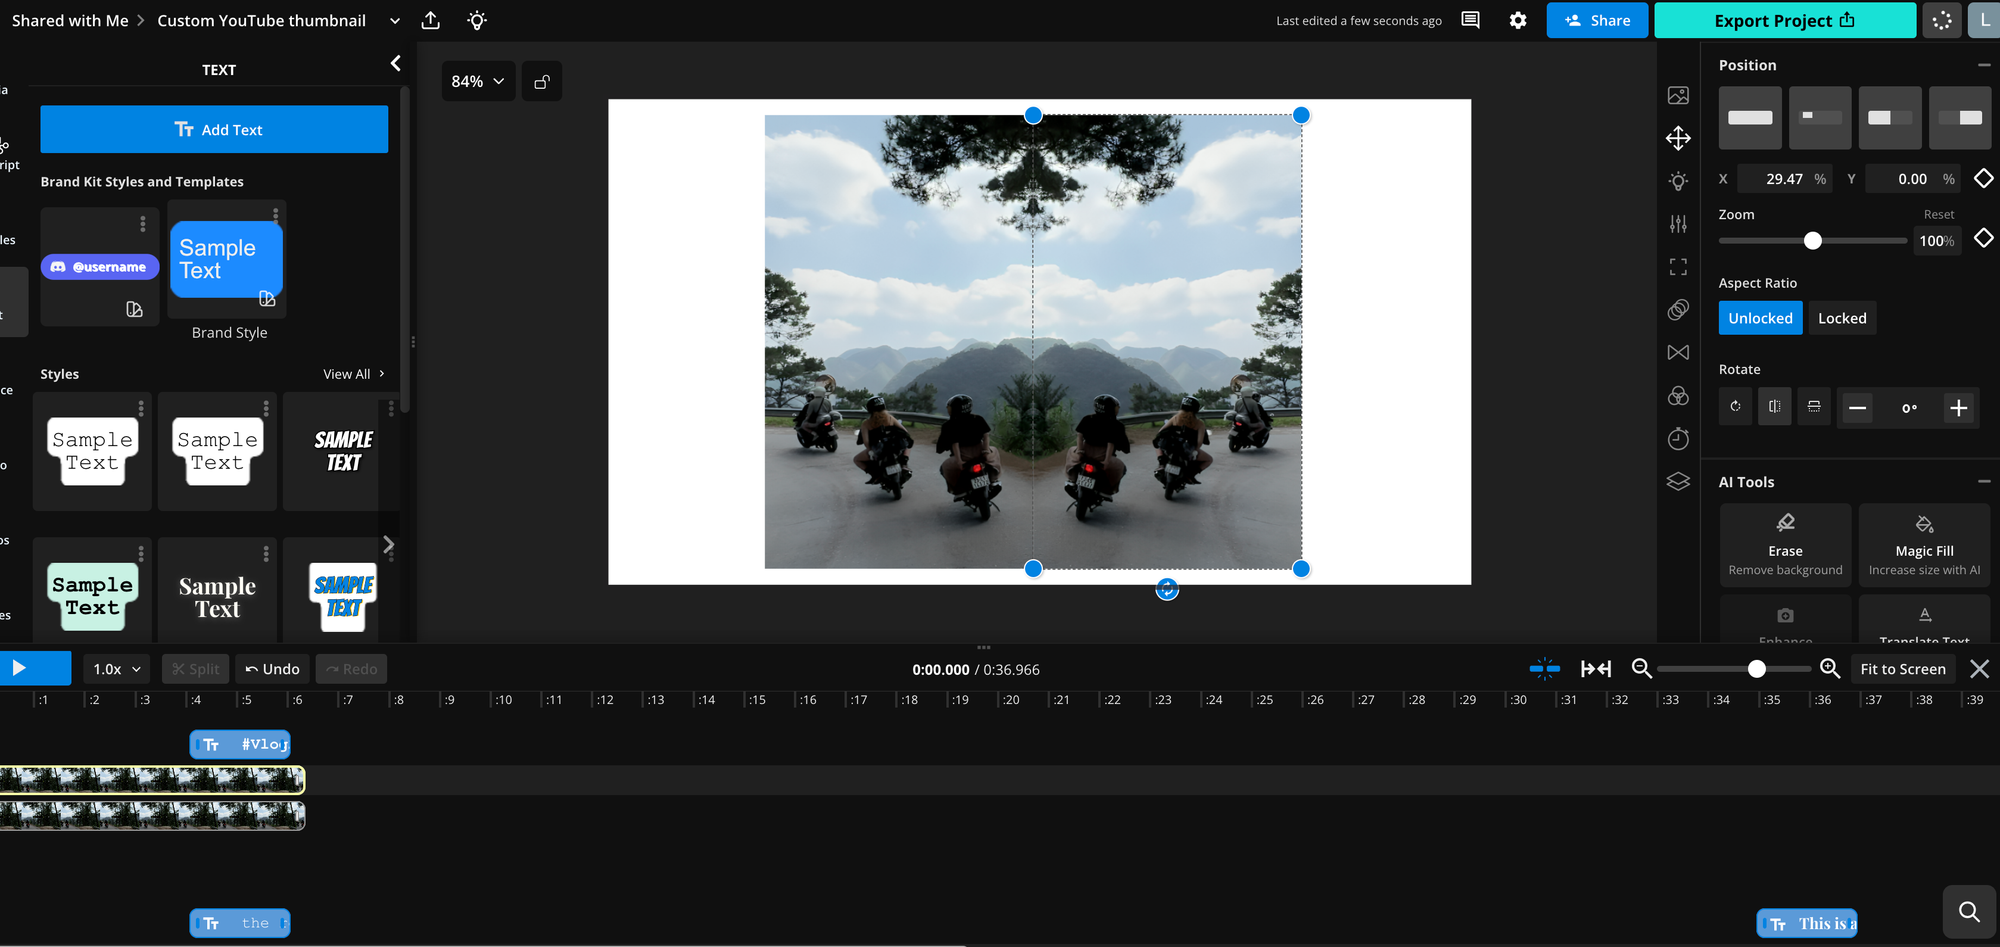
For this thumbnail design below, I started by cropping the image to highlight the key "action area"— the three motorcyclists in the bottom left corner. Next, I duplicated the image and used the Rotate tool under the "Position" section in the right-hand toolbar to create an artistic mirrored effect, placing the two images side by side.
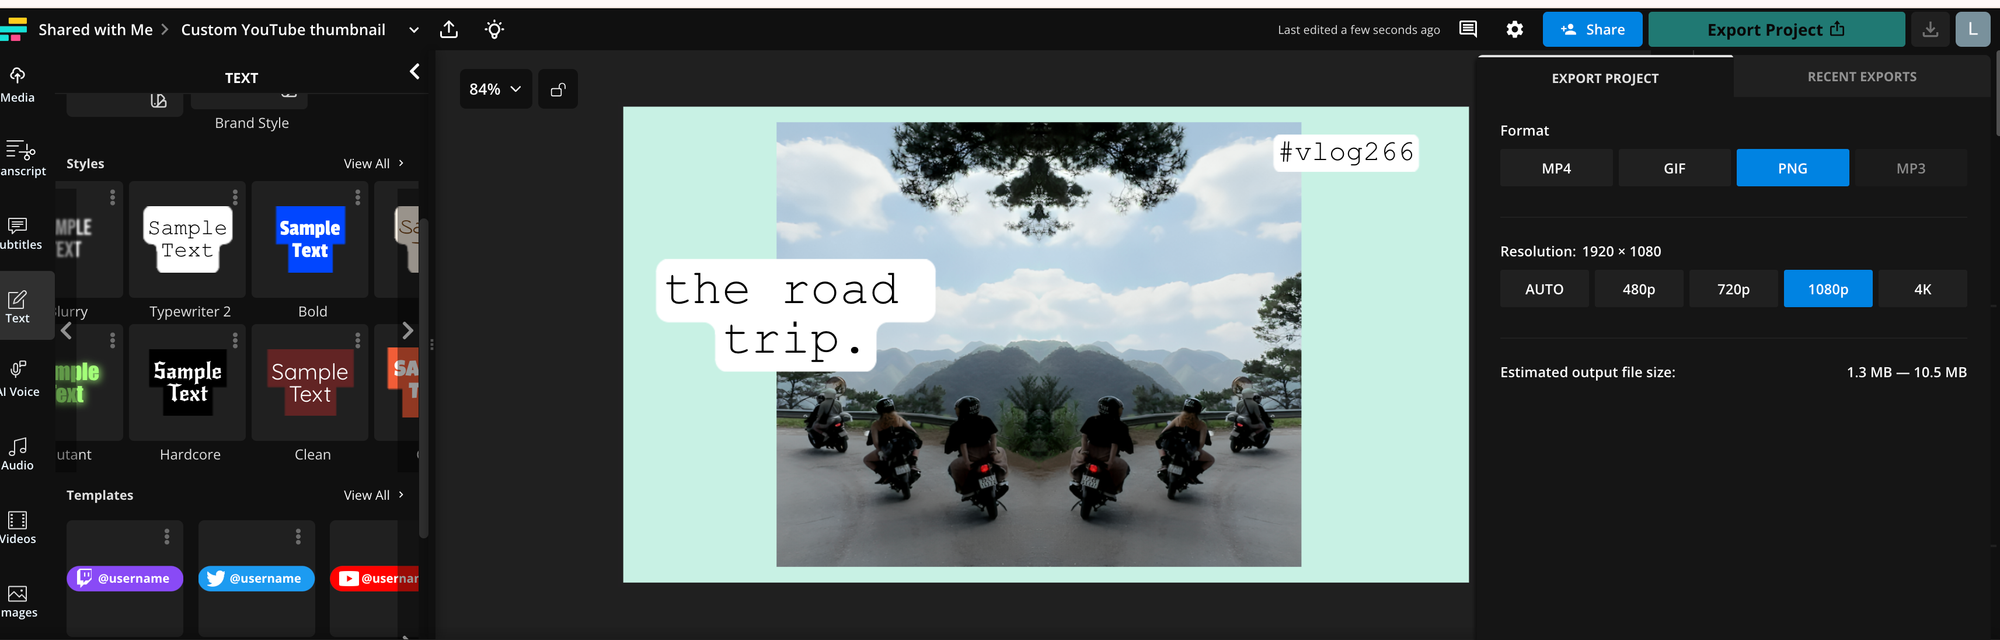
Finally, I added a background color and selected a minimalistic font (Courier New) from the font templates in the left-hand toolbar to complete the design.
You can also try adding text, images, and filters, or use the AI Enhancer to sharpen your thumbnail for a more polished look. You can also utilize the Automatic Background Remover to ensure viewers focus on a specific element of your design.
3. Export and Upload to YouTube
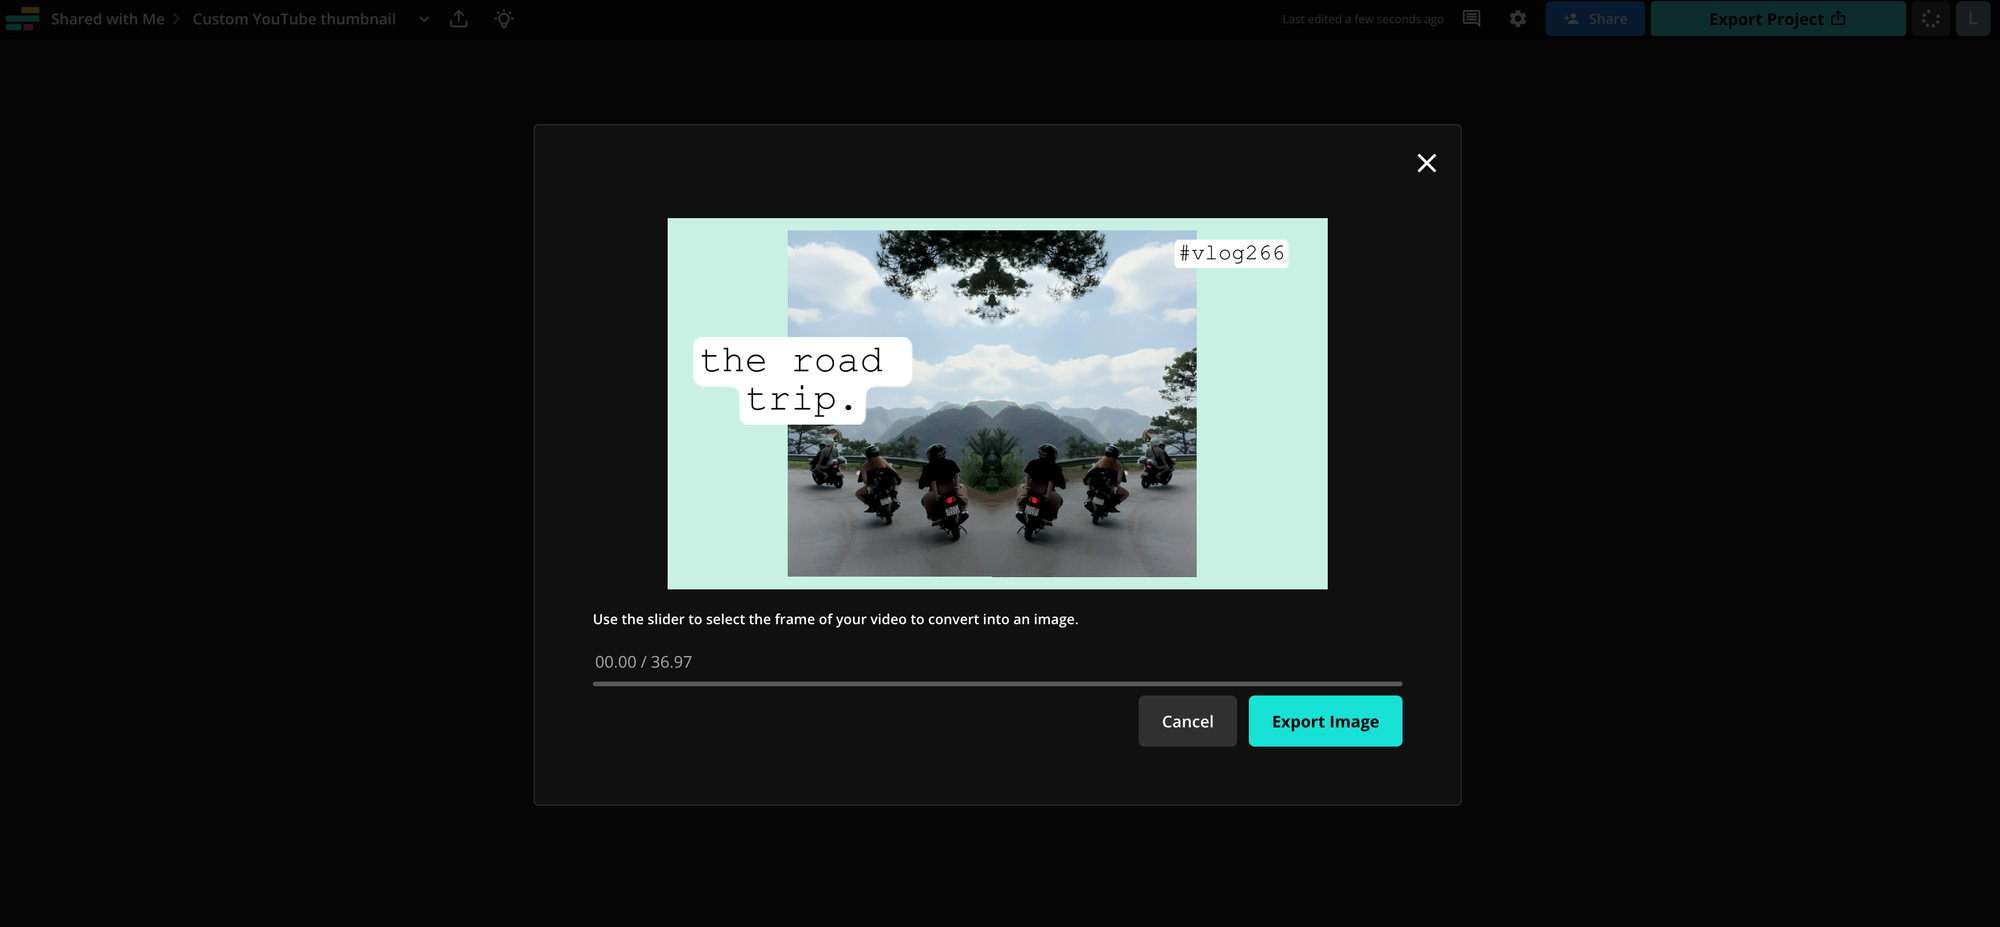
Once you've finished editing your image, click the "Export Project" button in the top right-hand corner. Under the Format heading, select PNG, then choose the correct resolution before exporting your project.
Once the export is complete, you can download your thumbnail and upload it to YouTube by following these steps:
- Navigating to YouTube Studio
- Visit the Content section and select the video you wish to add the thumbnail to
- Select the Upload File option under the Thumbnail header
For more helpful YouTube advice, read our blog explaining how we grew a faceless YouTube video account to 1,000 followers.


