
How to Make YouTube Channel Art Online (2560x1440 pixels)
YouTube's restrictions make it pretty difficult to create custom channel art. In this article, I'll show you how to design custom YouTube channel art with the right specs.
If you're trying to get your YouTube channel off the ground, you want to make it look as appealing and high-quality as possible. The biggest part of this (literally!) is your YouTube "channel art," sometimes referred to as a banner photo.
For channel art, YouTube recommends an image that is 2560 x 1440 pixels in size, and it has to be at least 2048x1152. That's a large image. In this article, I'll show you how to make YouTube channel art from scratch, edit a photo you took yourself, or repurpose a picture you found on the web for your YouTube banner art.
To make YouTube channel art, you need to follow these 4 steps:
- Choose a picture to start with
- Resize & edit in the Kapwing Studio
- Process & download
- Upload to your YouTube channel
TL;DR: Use this free YouTube channel art template to resize an existing image to the correct dimensions or get started with a blank canvas.
Step 1: Choose a Picture to Start With
Before you start editing your YouTube banner, you'll need to find a starting point. You should choose something fairly large, like a photo you would use for your computer's desktop photo. It should also have a horizontal aspect ratio, since it will only be visible with a 16:9 aspect ratio or wider. Below are a few background ideas I pulled from the Pixabay plugin in Kapwing Studio.
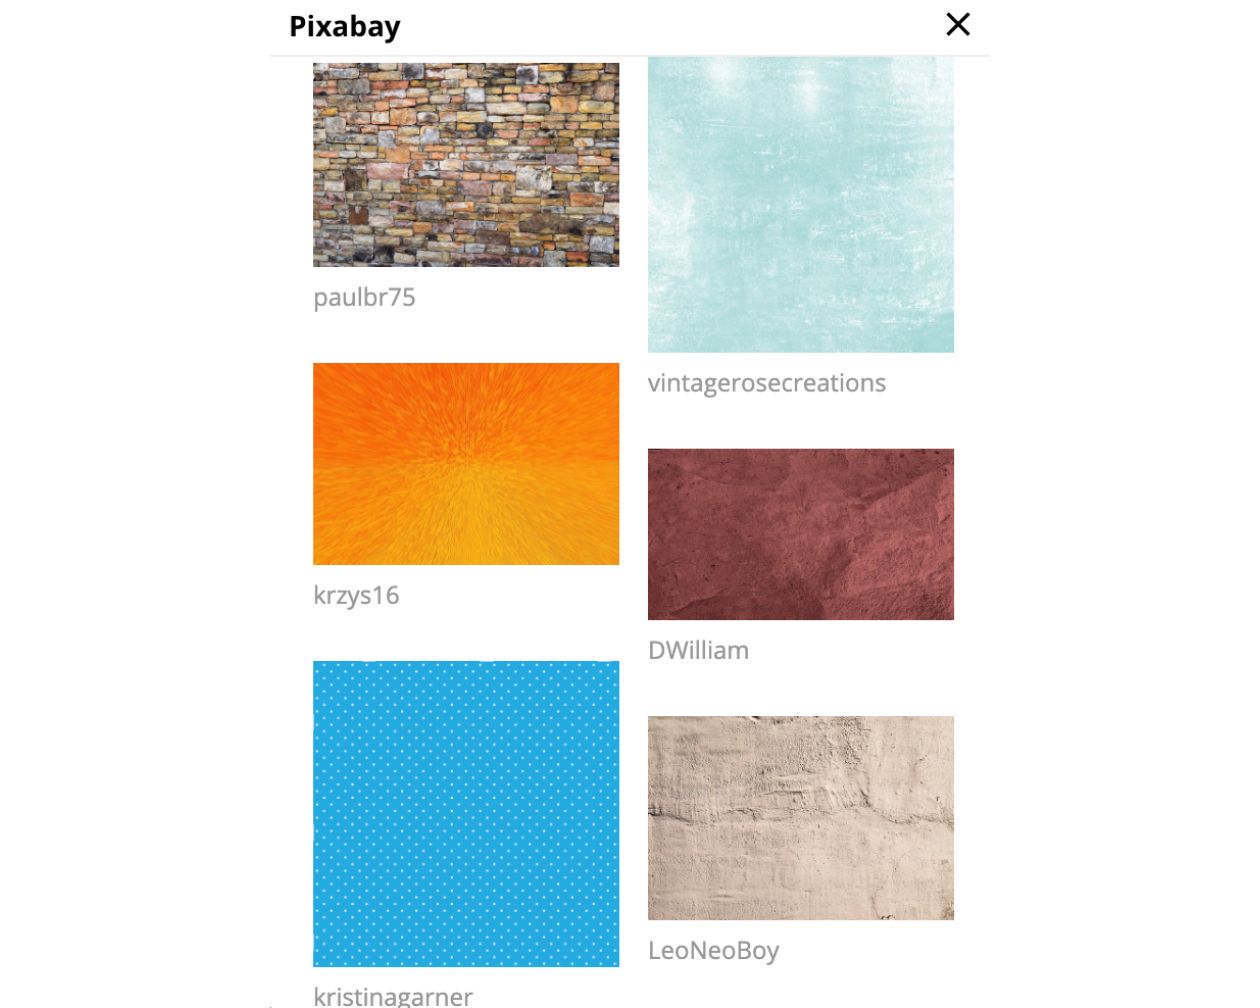
You can find your photos anywhere on the Internet (Facebook, Instagram, Twitter, etc.) since Kapwing lets you easily import pictures from most sites. All you need is its link. If you're uploading photos from a computer, it's a good idea to have your file browser open, so you can click & drag your content into the Kapwing Studio.
Try these new YouTube tools:
- Free Online YouTube Video Editor
- Repurpose Instagram Videos to YouTube
- Online YouTube Thumbnail Maker
- Free YouTube Banner Creator
- Video Intro Maker for YouTube
Step 2: Resize & Edit in the Kapwing Studio
YouTube provides a fairly detailed guide on creating and editing your channel art at this page, but its support for the most necessary step in the process is pretty vague. YouTube's support page indicates that you can use Preview or Microsoft Photos to resize your image, but neither of these tools can perform more than the most basic resize functions – not nearly enough for a well-formatted channel art banner.
To resize your YouTube channel art so it looks just right on any device, head over to Kapwing.com and click "Start Editing" to go to the Studio. To upload your photo, you can either use the "Click to Upload" button to find a photo that you've saved to your computer, or paste the link to the photo you found online.
Once your picture is uploaded to the Studio, you can start making any edits you want. For example, I wanted to give the Kapwing channel art a wintry update for the holidays, so I started by making my picture smaller and positioning it in the middle of the canvas. Then, I clicked "Images," searched for Snowflake PNGs for the background, and added a Santa hat png to complete the picture. For high quality illustrations, I recommend clicking "Plugins," then "Pixabay." Each illustration is free to use and is a quick way to dress up your banner. Successful YouTube Channels generally include large, readable, text with a call-to-action to subscribe and the channel name.
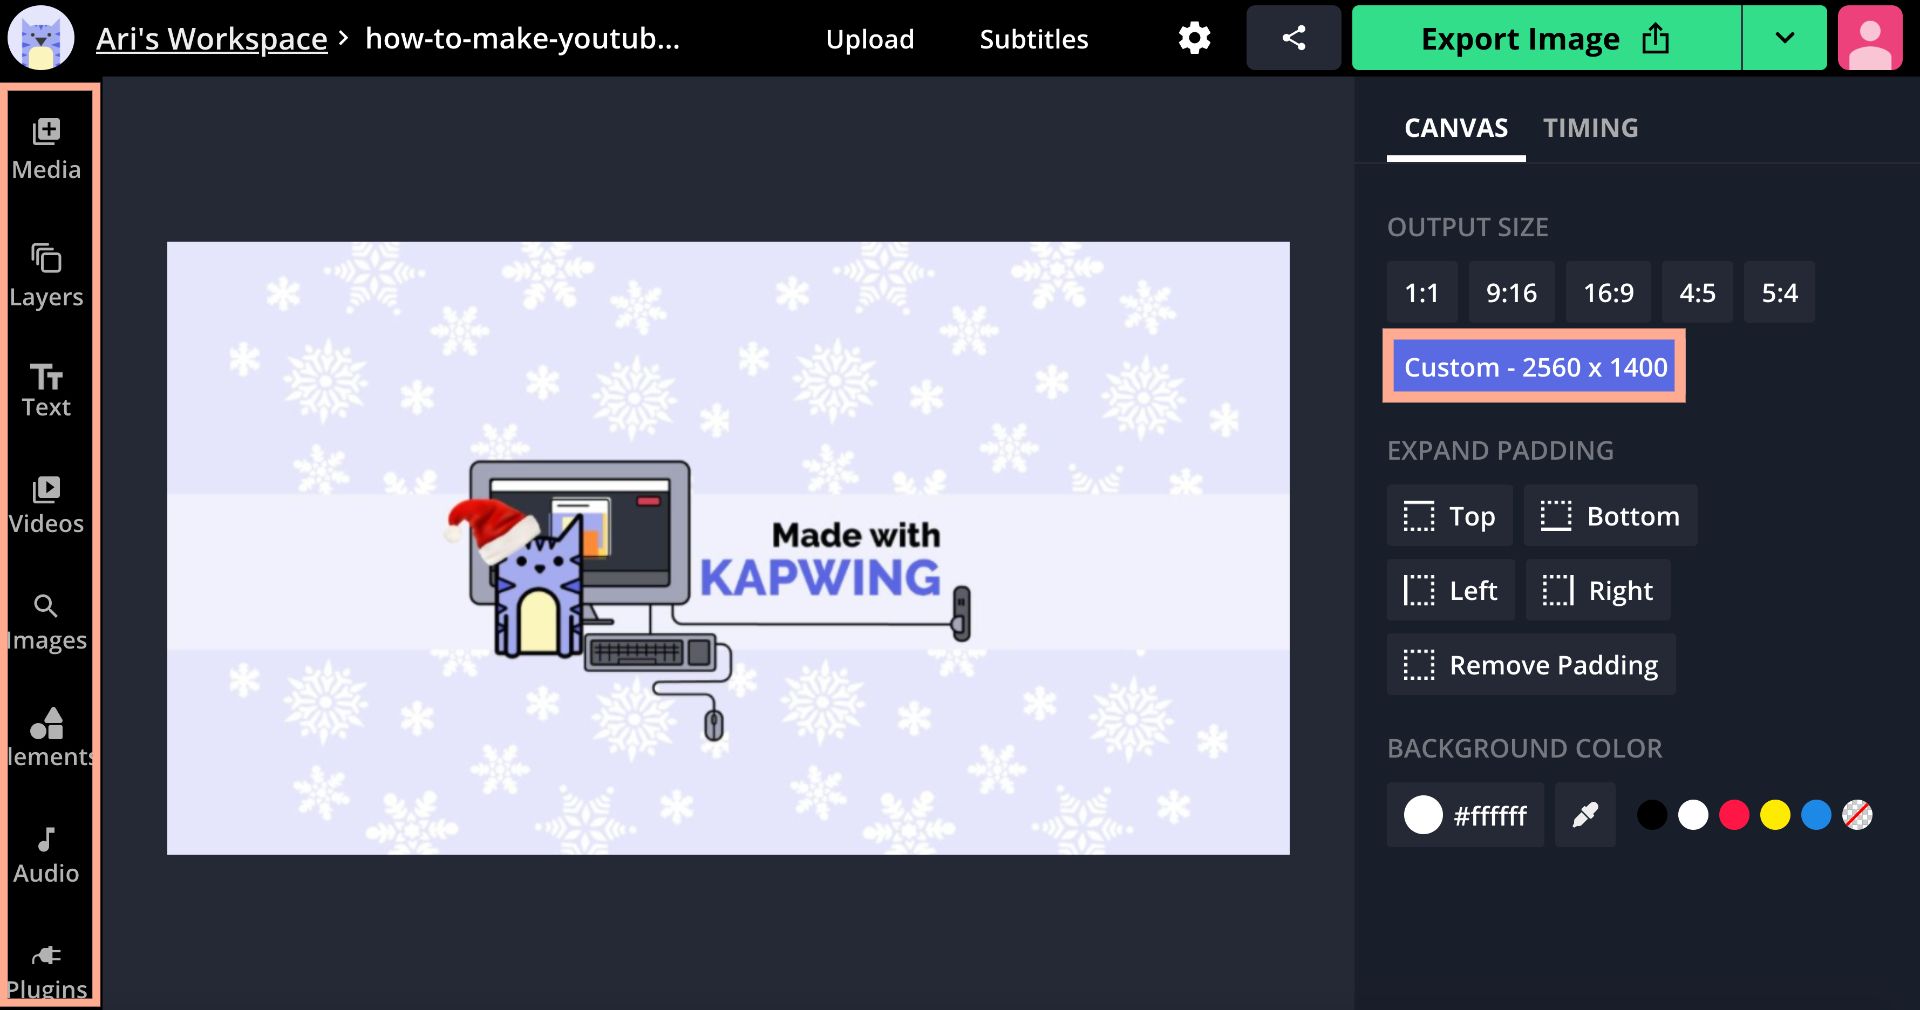
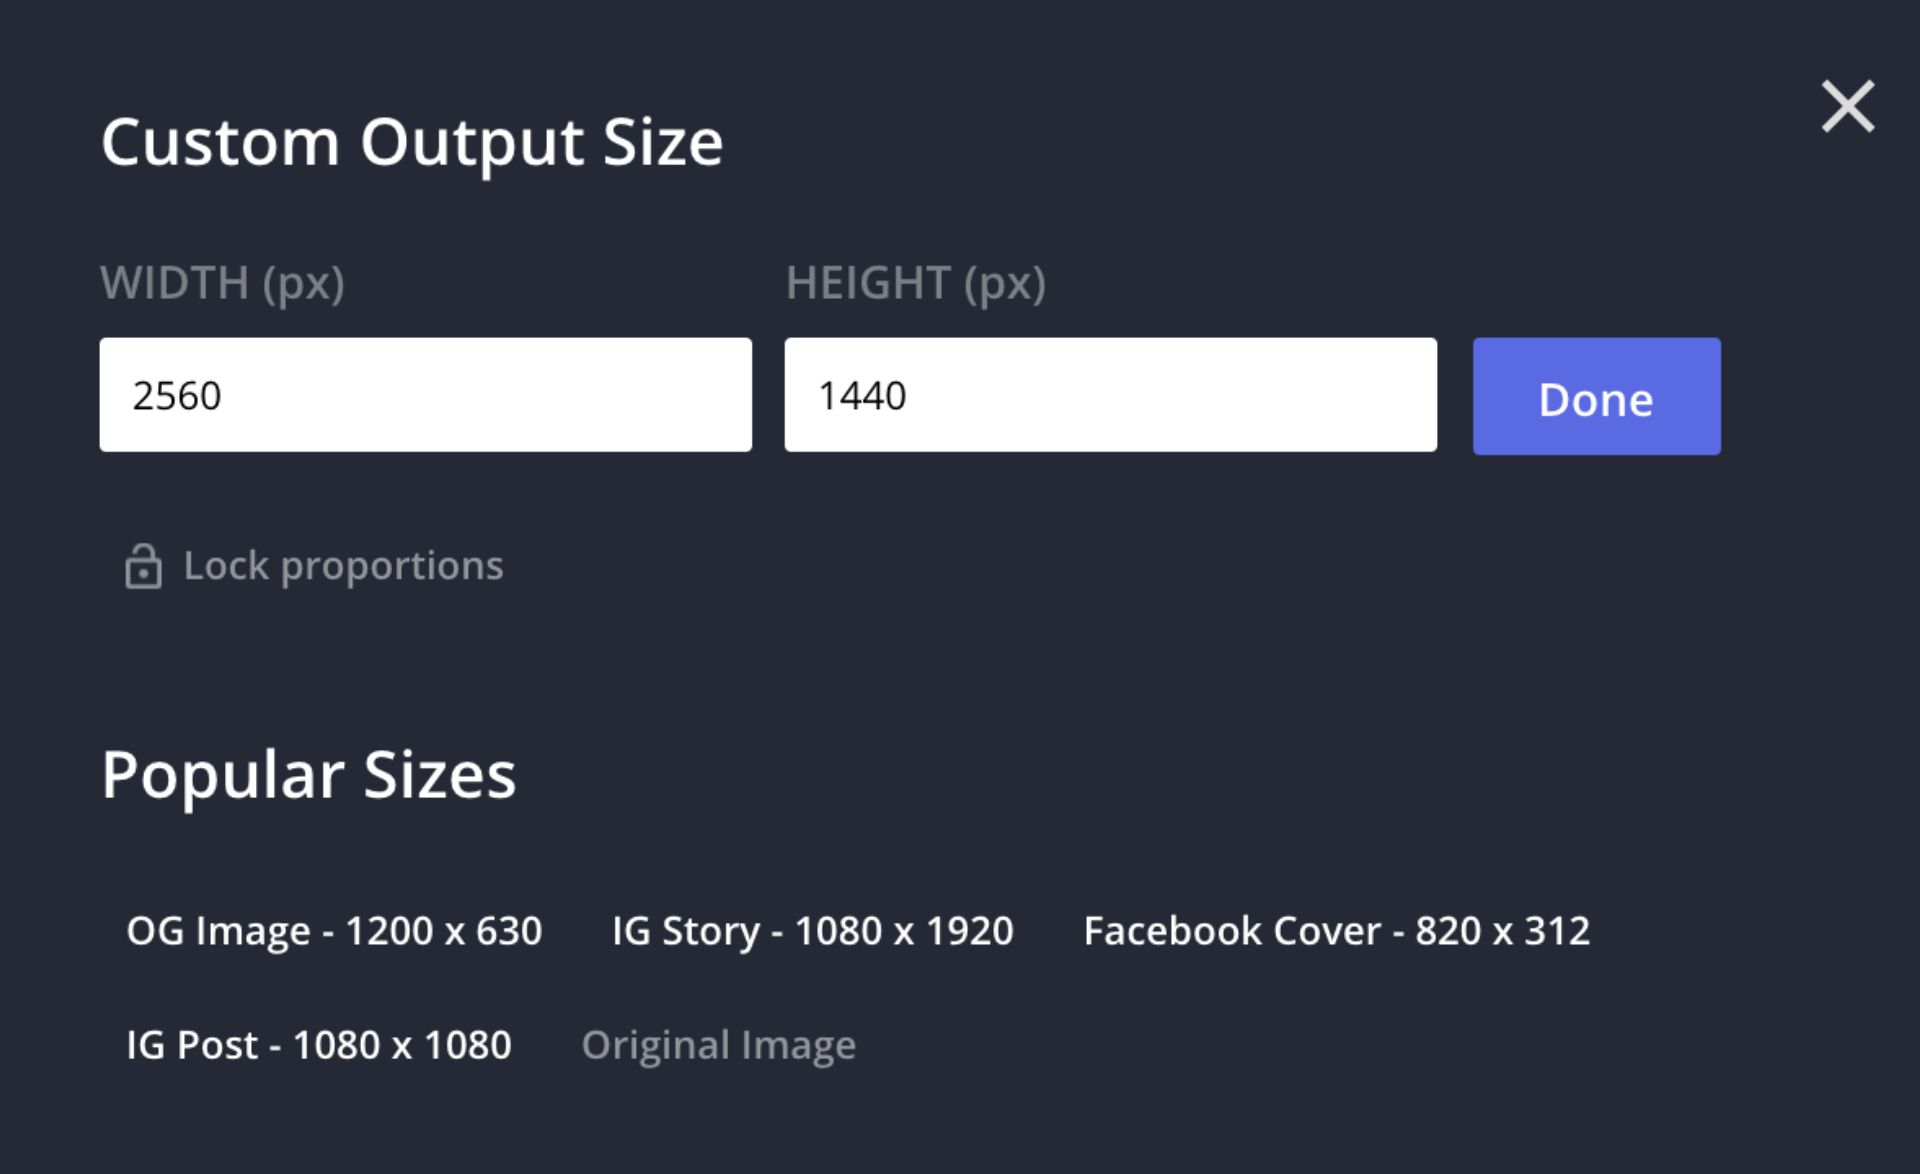
One thing you'll need to do is resize your image to fit YouTube's particular specifications for channel art. The most difficult requirement is the minimum size: YouTube's recommended size for your channel art is 2560 x 1440. To resize your picture using Kapwing, click on "Custom Size" under your resizing options on the right-hand side of the Studio window. Enter 2560 in the "Width" field and 1440 for "Height."
The aspect ratio is 16:9, which is the widescreen standard. Your YouTube channel art can't be any taller than 16:9; otherwise, it will be cutoff on smaller screens. The full height only displays on TVs.
The other vital thing to consider when editing and resizing your image is the area that will be visible on most platforms. YouTube requires that your image is viewable on TVs, but most users are using their computers or phones to look at your channel. This means that the large majority of your channel art will be cropped for nearly all users.
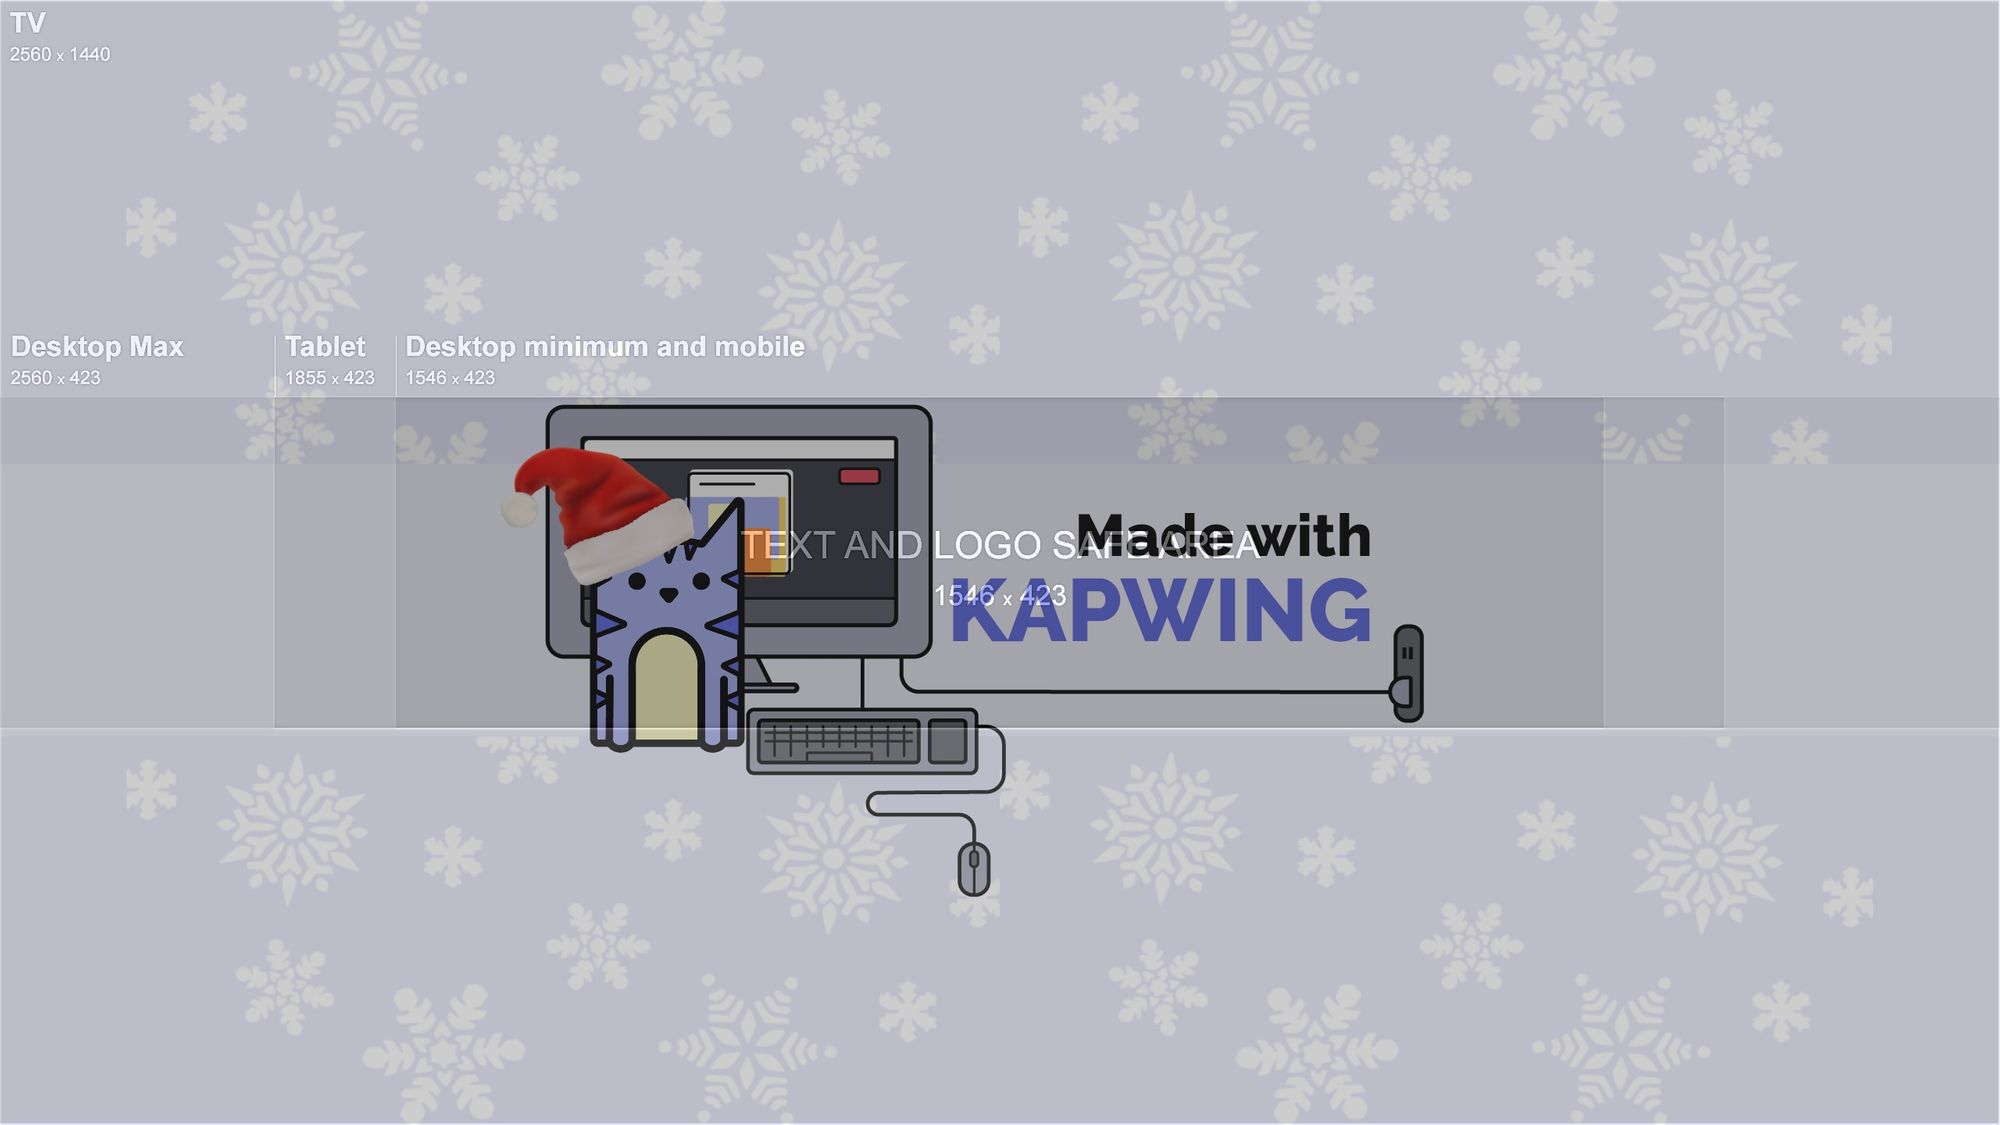
Thankfully, Google has published a guideline for what areas of the channel art are always visible. The center area - at 1546 x 432 - will always display in view, regardless of the viewer's screen size. Keep your most important words and images directly in the center of your design, or use this YouTube channel art template to make sure your photo is in bounds.
Step 3: Publish & Download
Once you've edited your picture to perfection and resized it to fit YouTube's specifications, click "Export Video" in the upper right-hand corner. Kapwing will automatically begin processing your YouTube channel art, and it will be ready to download in under a second.
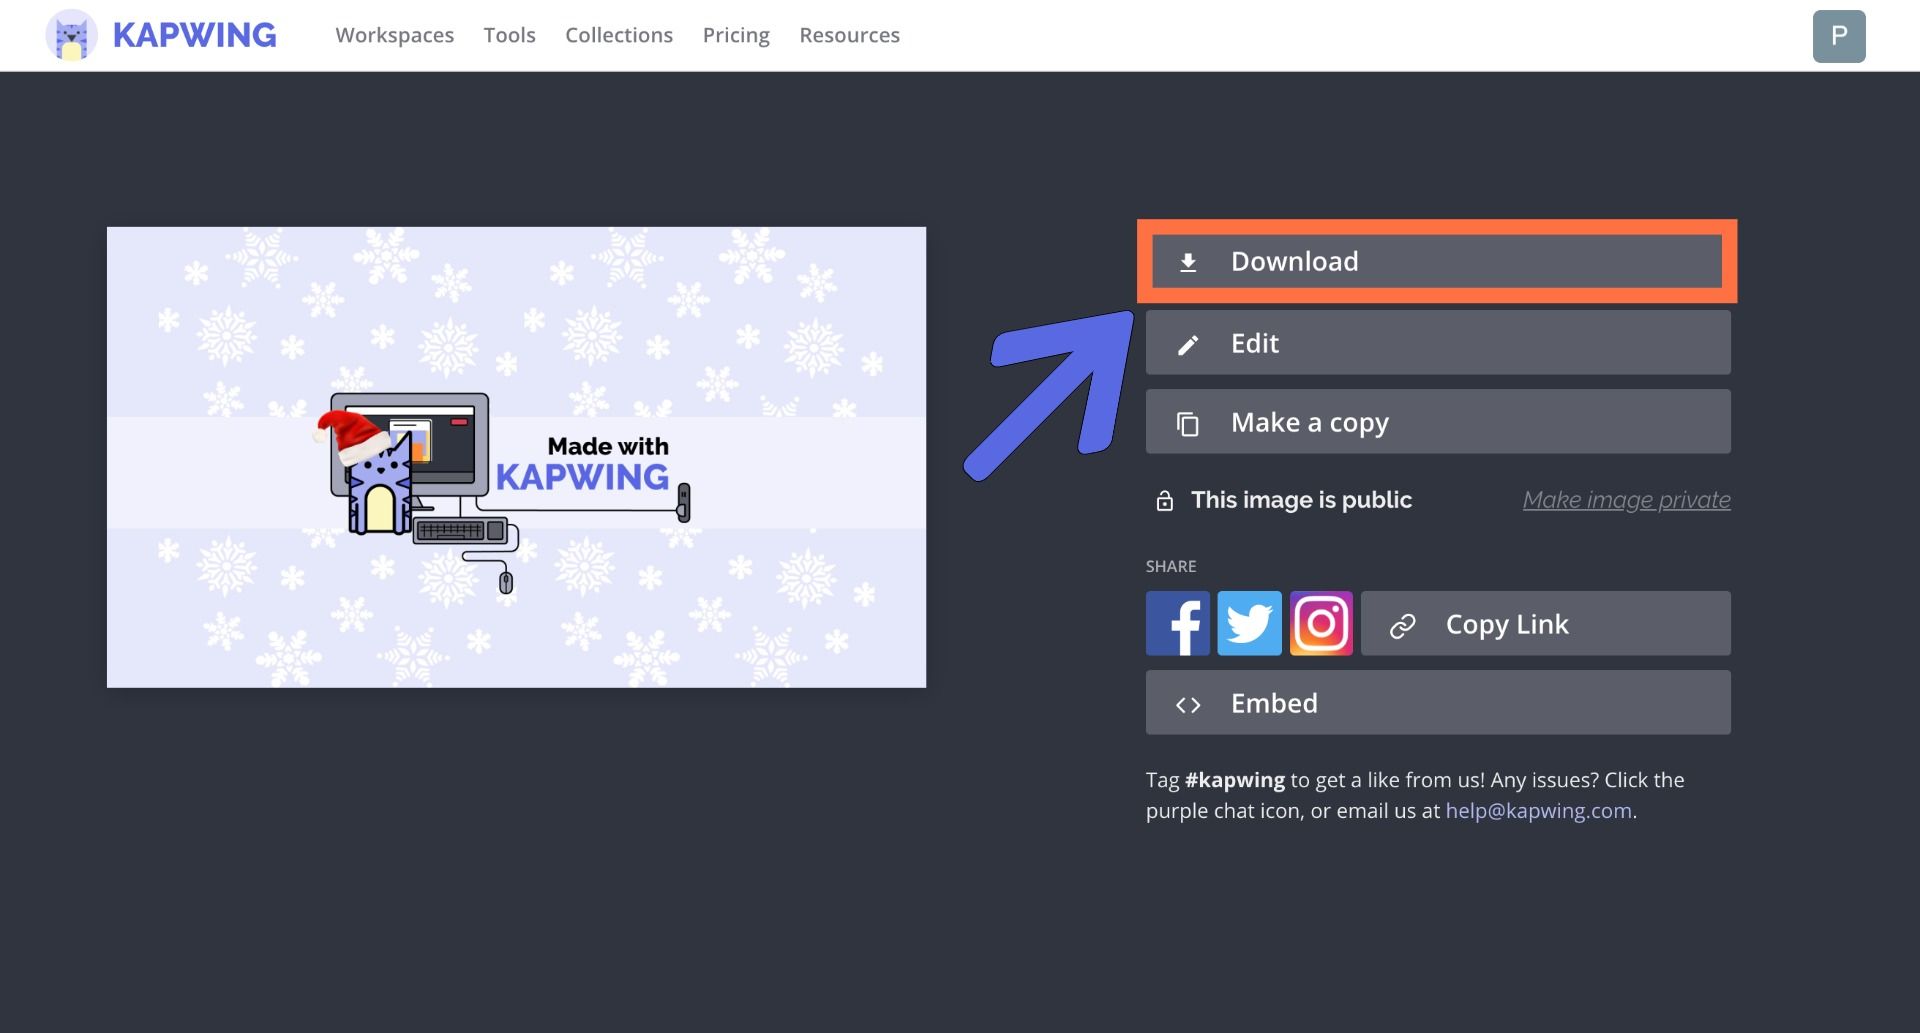
When your picture is finished processing, click “Download” from the right side of the screen. If you're not signed into a Kapwing account, sign in or sign up using your Google or Facebook account – once you've signed into a Kapwing account, the watermark in the lower right corner will be removed from your final image.
Step 4: Upload to Your YouTube Channel
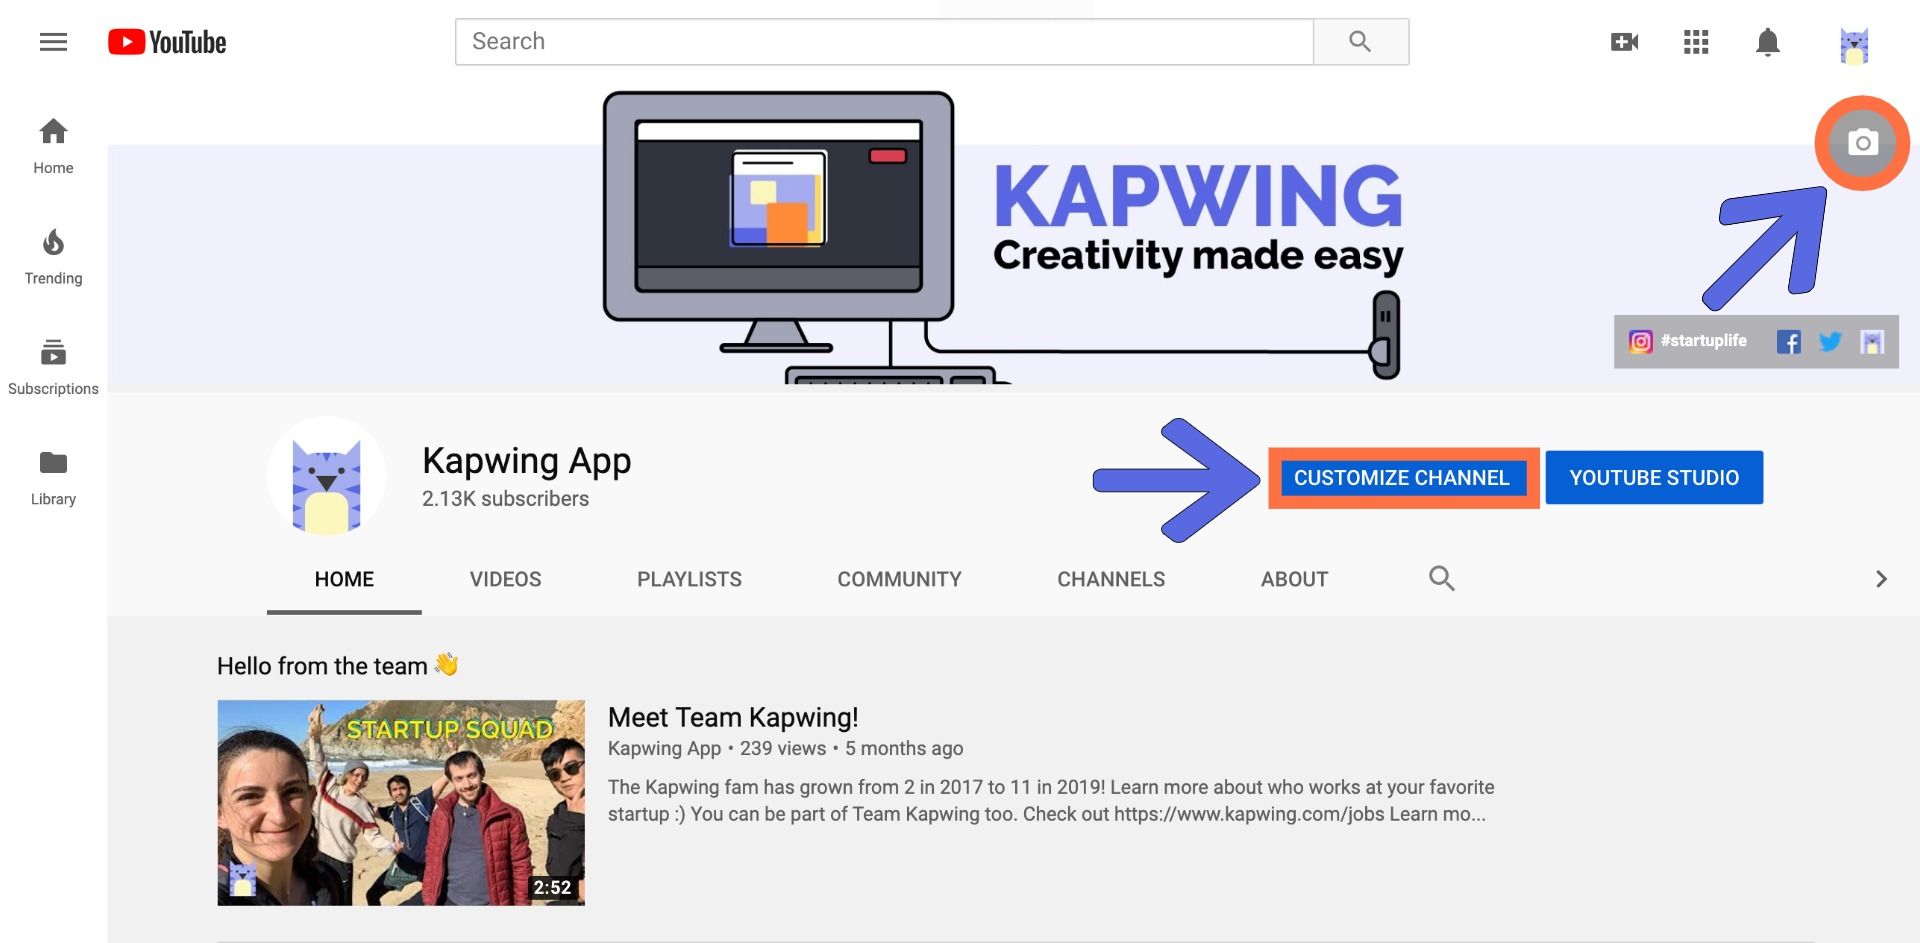
Now that you downloaded your photo, your channel art is ready to upload to YouTube. Just go to YouTube in your browser and click your profile icon in the upper right corner of the window. From the drop-down list, choose Your Channel. If you only want to change your channel art, click on the camera icon in the upper right corner of the channel art banner. If you're adding channel art for the first time, or would like to add social media or website links to your header, you'll need to click Customize Channel, then the pencil icon in the upper right corner of your channel art banner.
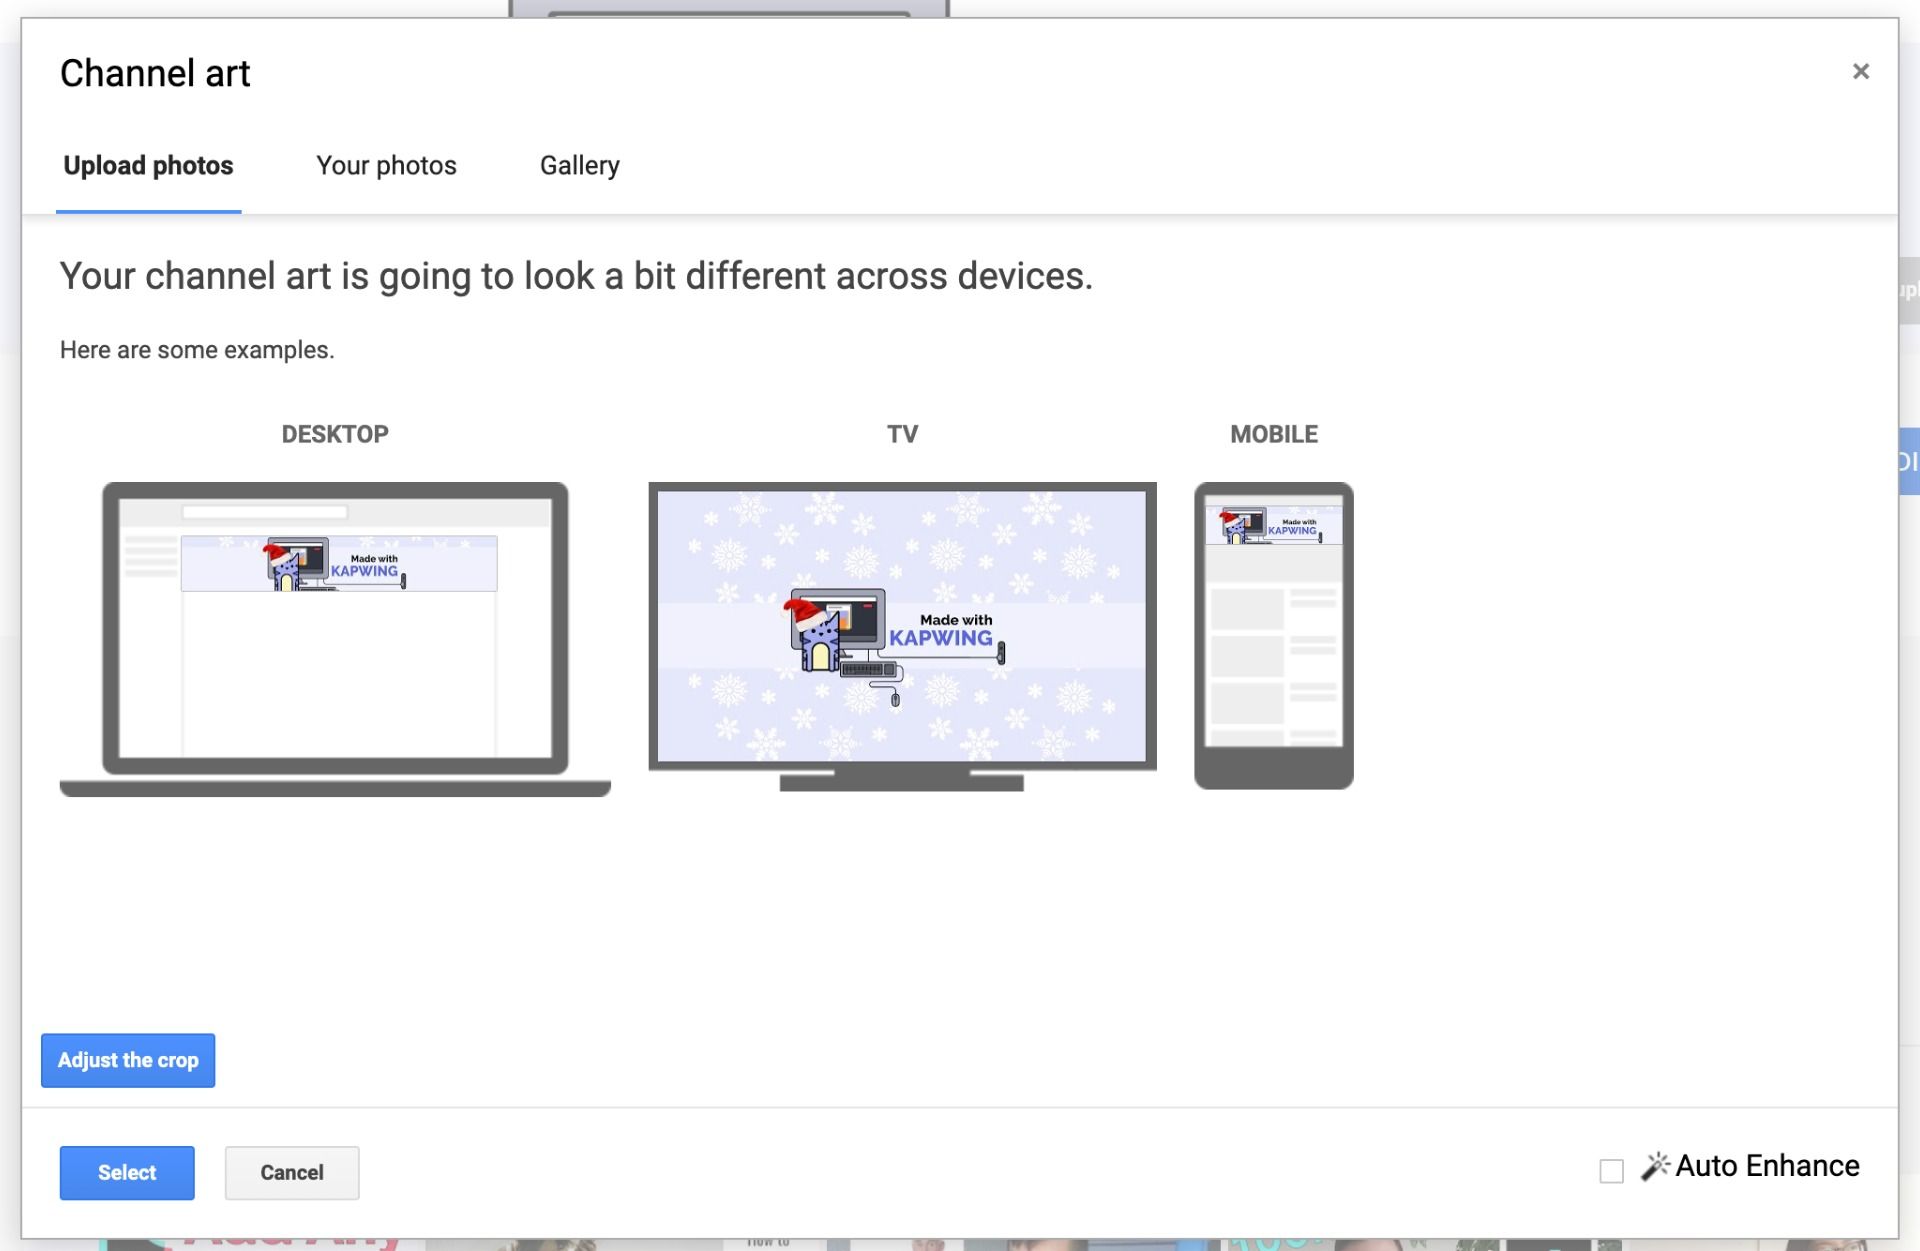
In the channel art uploader, click the button that says Select a photo from your computer and find the photo you downloaded from Kapwing in your file browser. YouTube will show you 3 different ways your channel art will look on different devices: click Select, and your YouTube channel art is all ready to go!
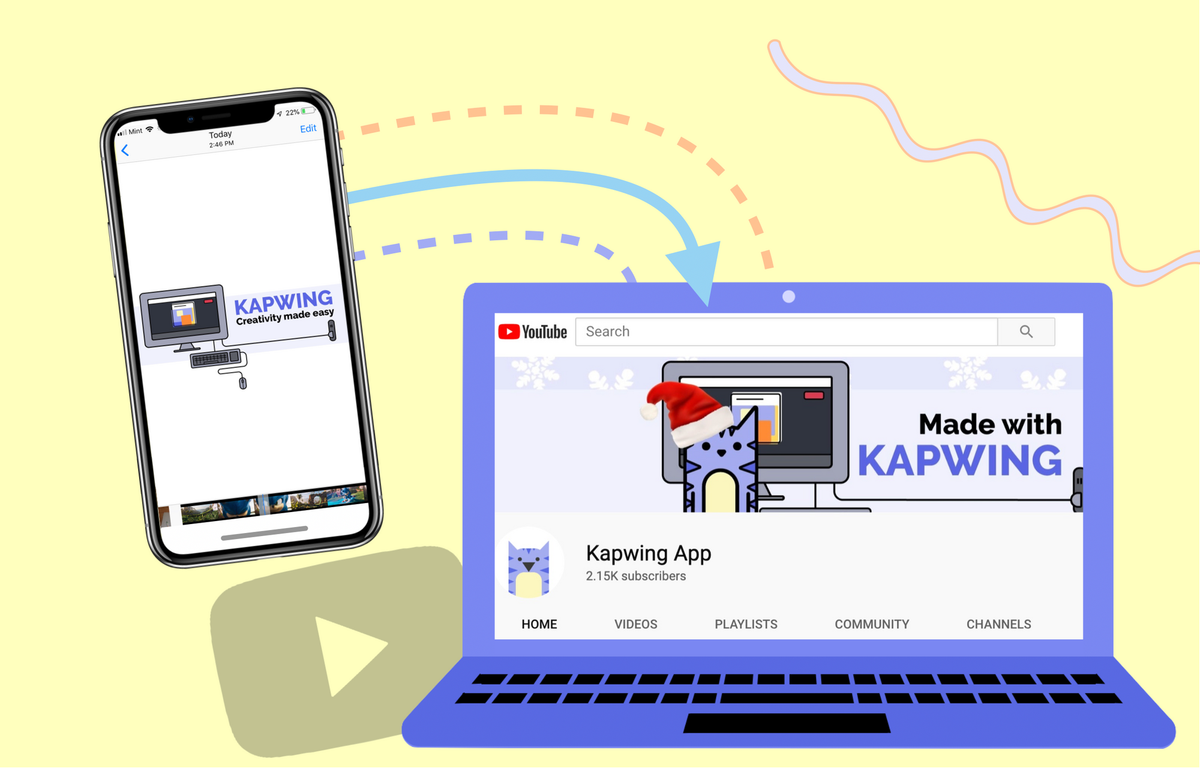
Thanks for reading! We hope that this article and resource makes it easier for creators to design on-brand, compelling YouTube background art. If you're interested in more tips and tutorials on digital content in 2021, check out our YouTube channel Kapwing App. In the meantime, look through some of our related articles on creating content for YouTube:
📚 Learn more:


