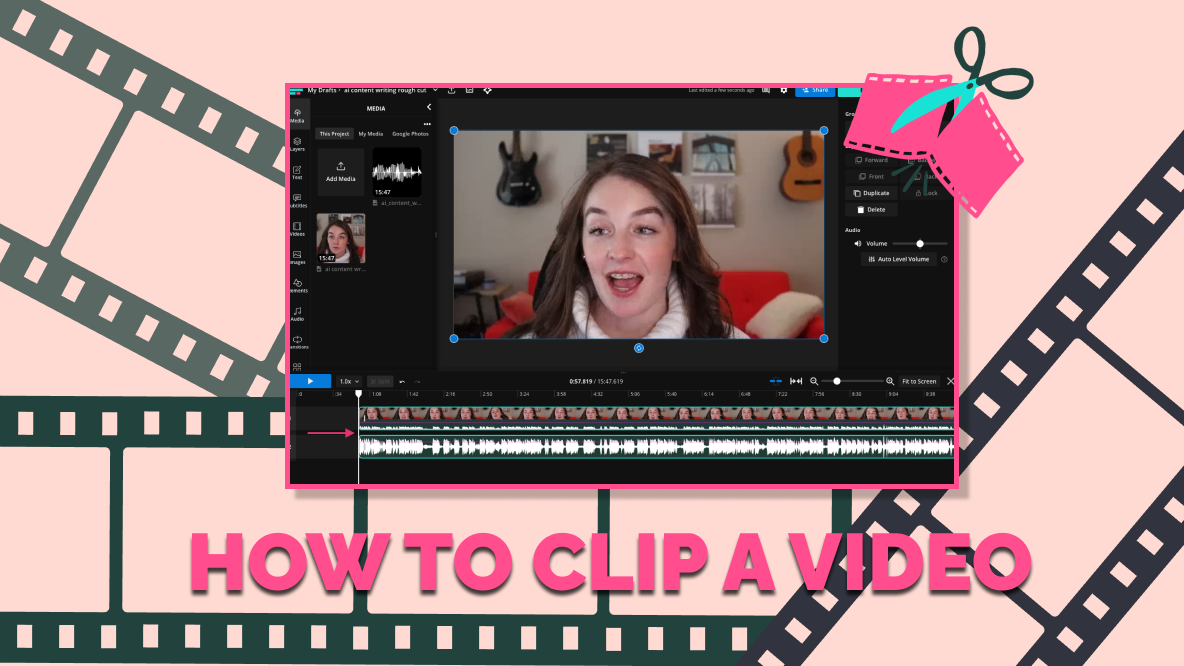
How to Clip a Video Online: Trim, Split, & Cut
Creating clips, splitting, and trimming your videos lets you use them on any social media platform. In this article, we'll show you how to clip any video.
Short video clips have become incredibly popular on social media over the last few years. Just take a look at the rise of TikTok, Reels, and YouTube Shorts.
Clipping is now an essential skill for editing videos; a must-learn technique for creators who make short-form content. Even creators who make longer content are trimming videos as part of their editing process so that they can repurpose their content across more channels.
This simple yet powerful process extracts emotional, funny, and riveting sections from videos to capture the best moments. With a range of online video editors available, you don’t need to download professional software to make this happen. In this article, we'll explain how to use Kapwing, an online video editor, to trim your video.
The example featured in the tutorial below is the result after trimming a timelapse video filmed from a phone with Kapwing. The original video was over one minute in length and is now a short 5-second nugget displaying the best section from the timelapse video. To achieve similar results with your videos, follow the four steps listed in the next section.
How to clip a video online:
- Open Kapwing's free video trimmer.
- Upload the video you want to clip.
- Trim, cut, or split your video.
- Save the video to your device and share.
There are a variety of tools you can use to trim videos. We recommend an online video trimmer like Kapwing, because there's no need to download any new software. You can use the tool right from your browser on any device when you need to quickly clip a section of a single video.
Here's how.
Step One: Open Kapwing's Trim Video Tool
Head to over to the Kapwing Video Trimmer tool. You can use this tool on any device with a browser — iPhone, Android, laptop, even a Chromebook.
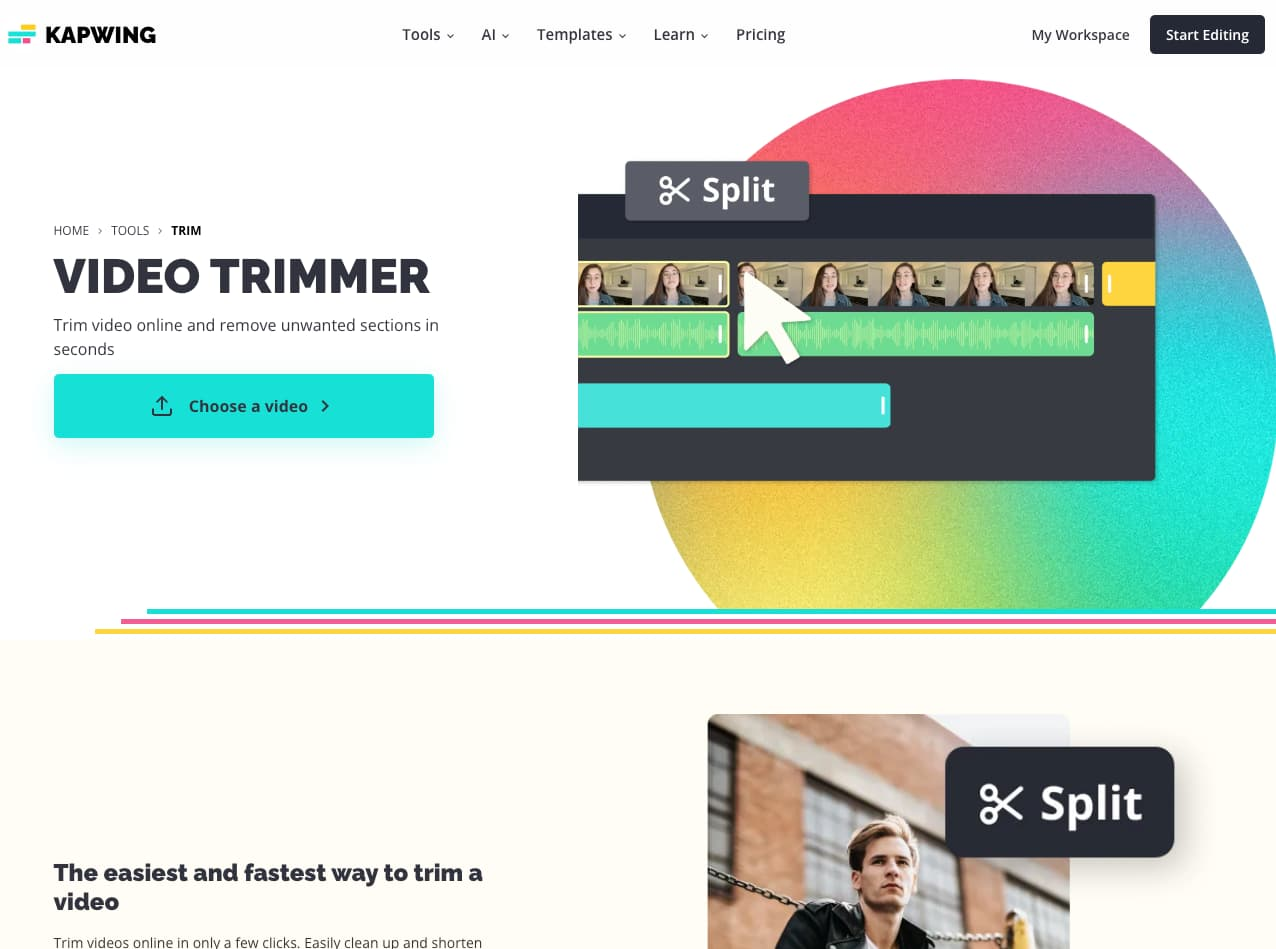
Click "Choose a video" to get started. This will take you into the video editor where you can upload the video file you want to trim.
Step Two: Upload Video
There are several upload options for importing your video to Kapwing.
You can upload videos from your device directly or import from a URL. Pasting a link is useful for clipping a section out of a YouTube video or importing a video from TikTok, Imgur, Vimeo, Instagram, or another website.
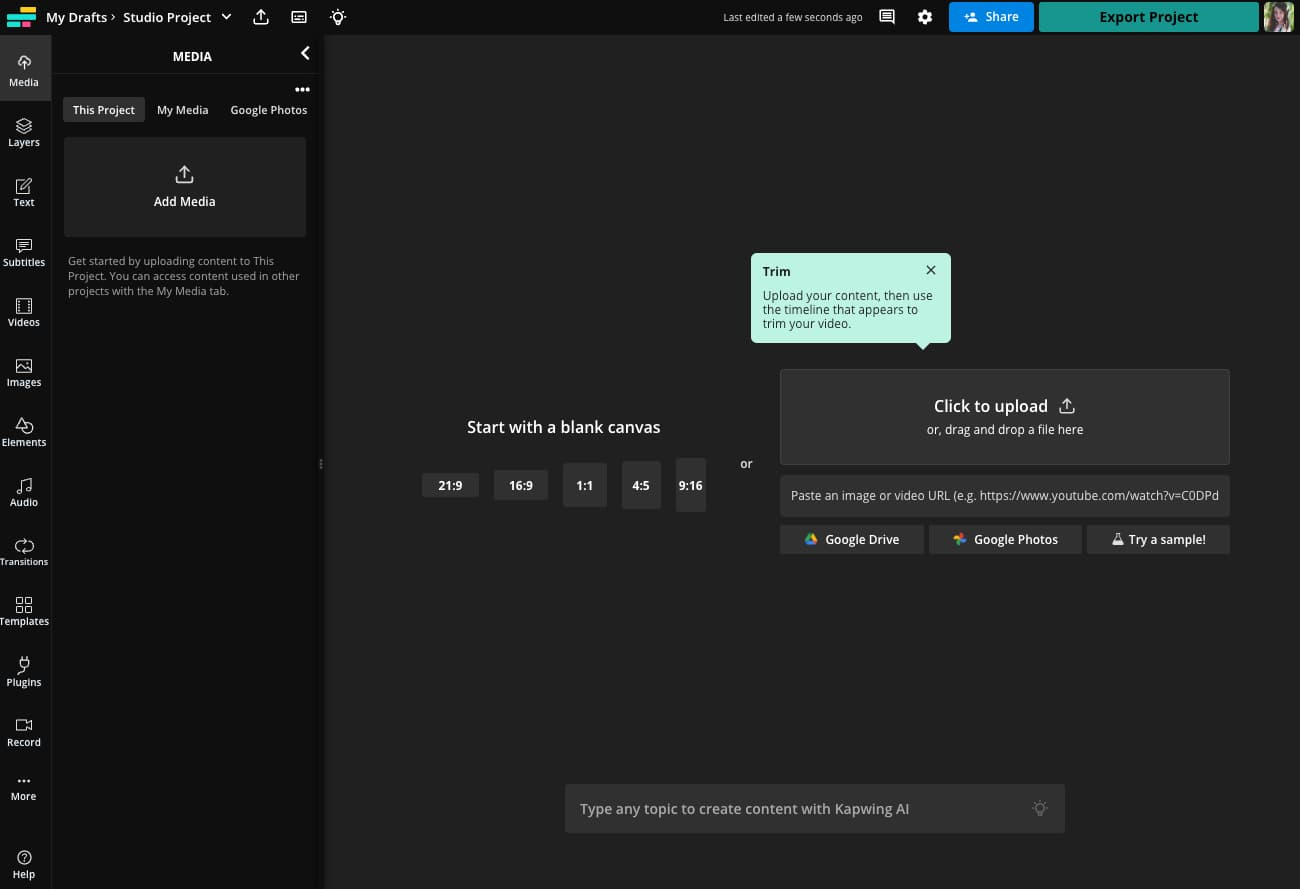
Kapwing also integrates directly with Google Photos and Google Drive, so you can import videos that you've taken on your phone and saved to the Cloud.
Once you upload your video, it will appear in the Media tab to the left as well as in the video timeline editor below.
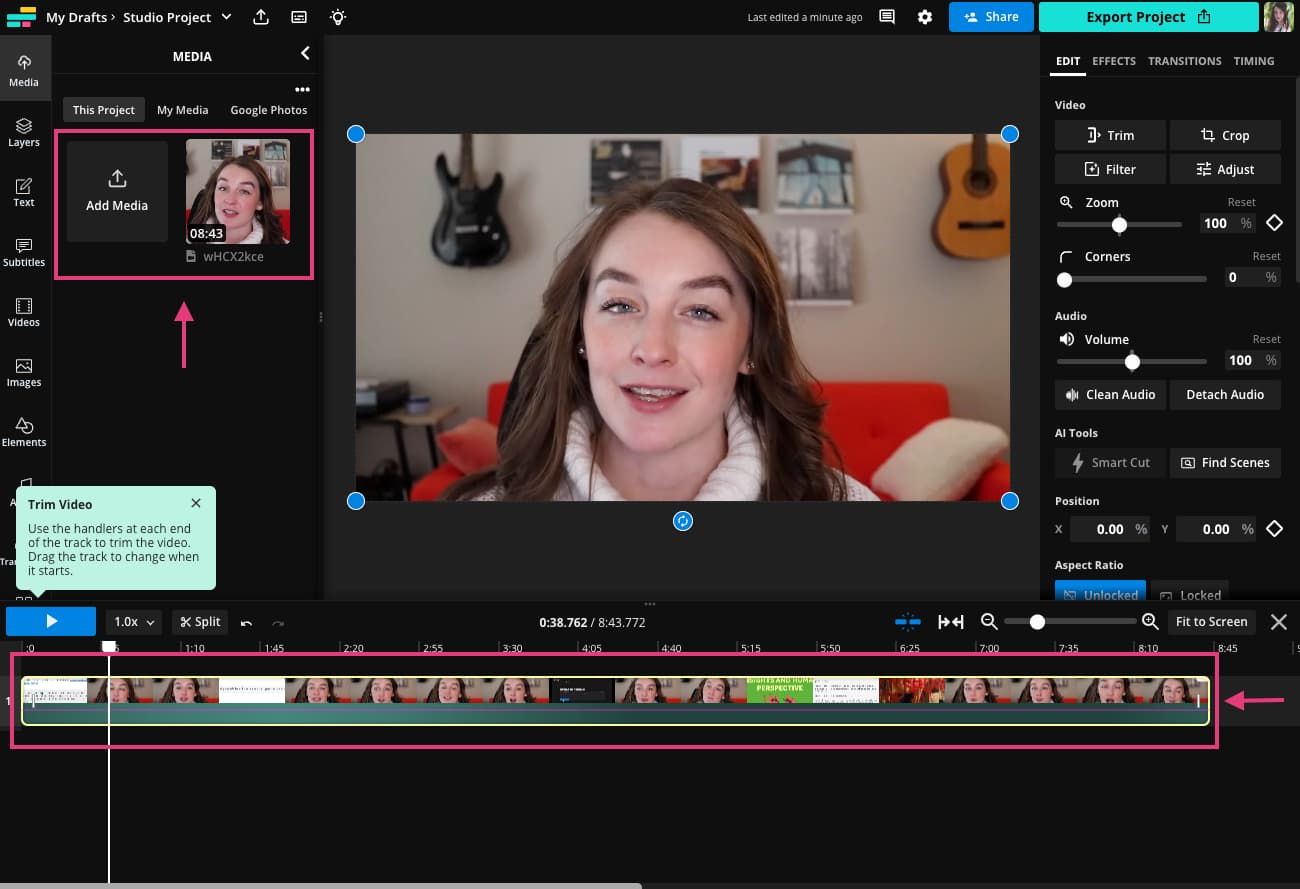
Step Three: Trim, Cut, or Split Your Video
Time to trim your video.
There are various tools on to help you edit. You can click the play button to preview your video. Clicking "Fit to Screen" will zoom out until you can see the all of the layers on the screen, start to finish. Additionally, you can zoom in and out to make precise edits using the plus and minus buttons or the view slider.
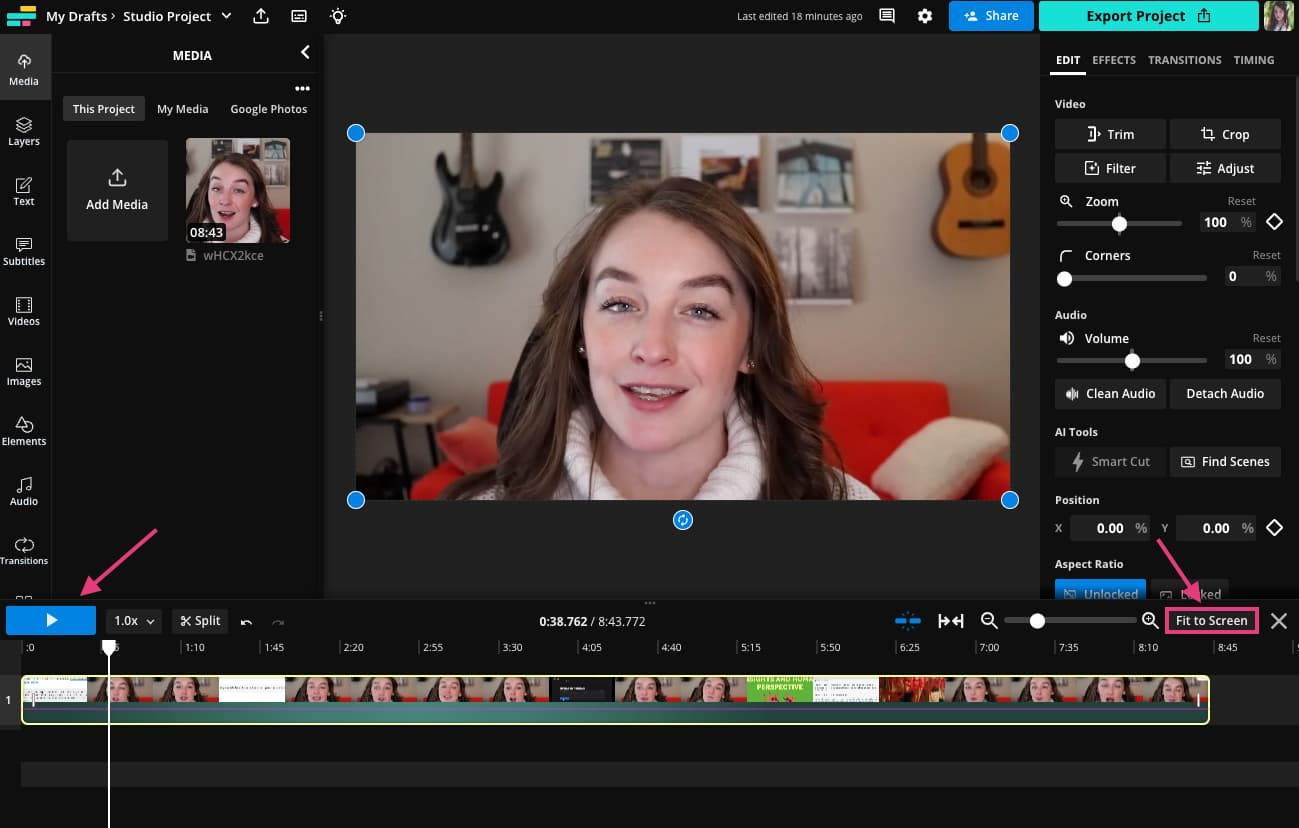
To trim just the beginning or end of your video, grab the ends of the video layer in the timeline below and drag left or right to adjust the start and end time of the video.
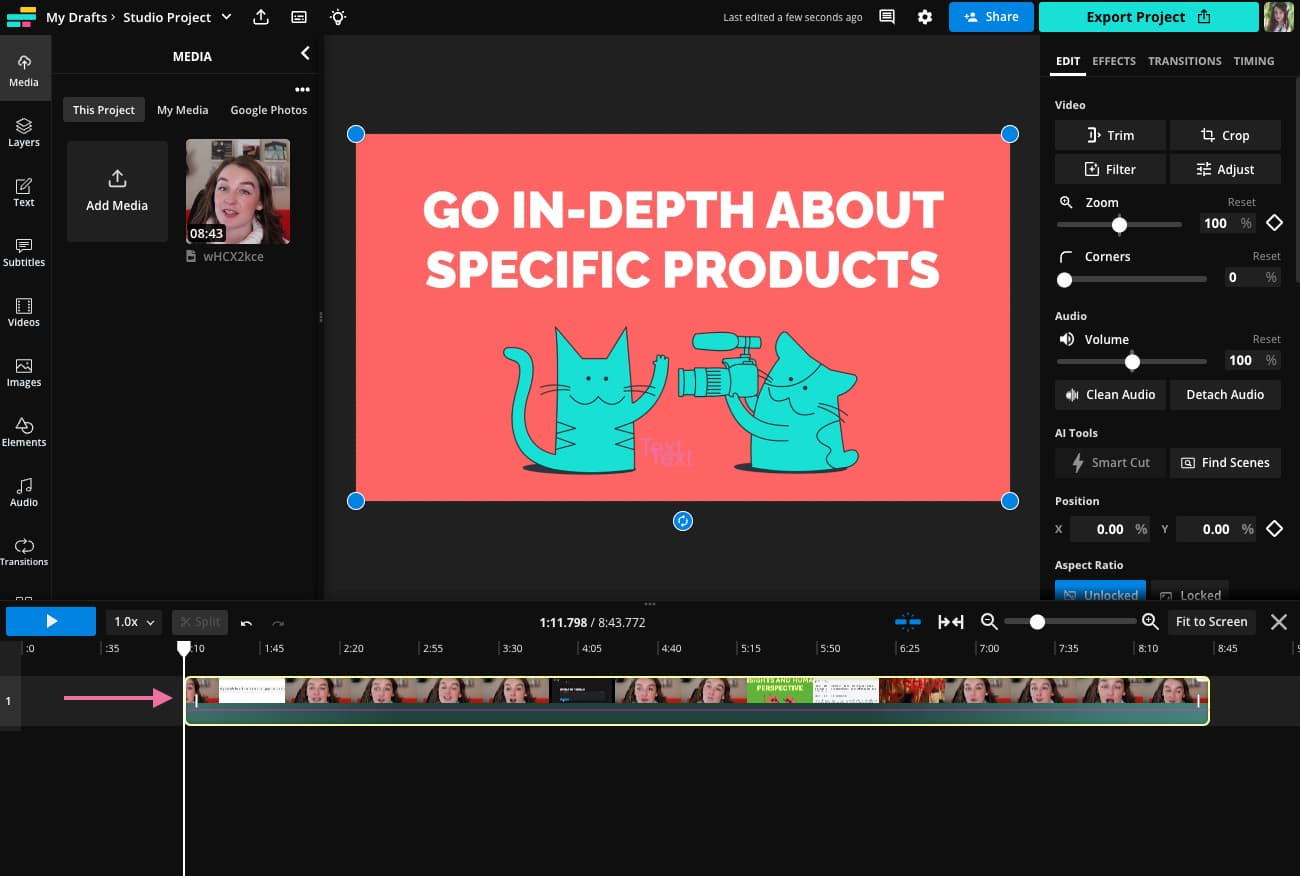
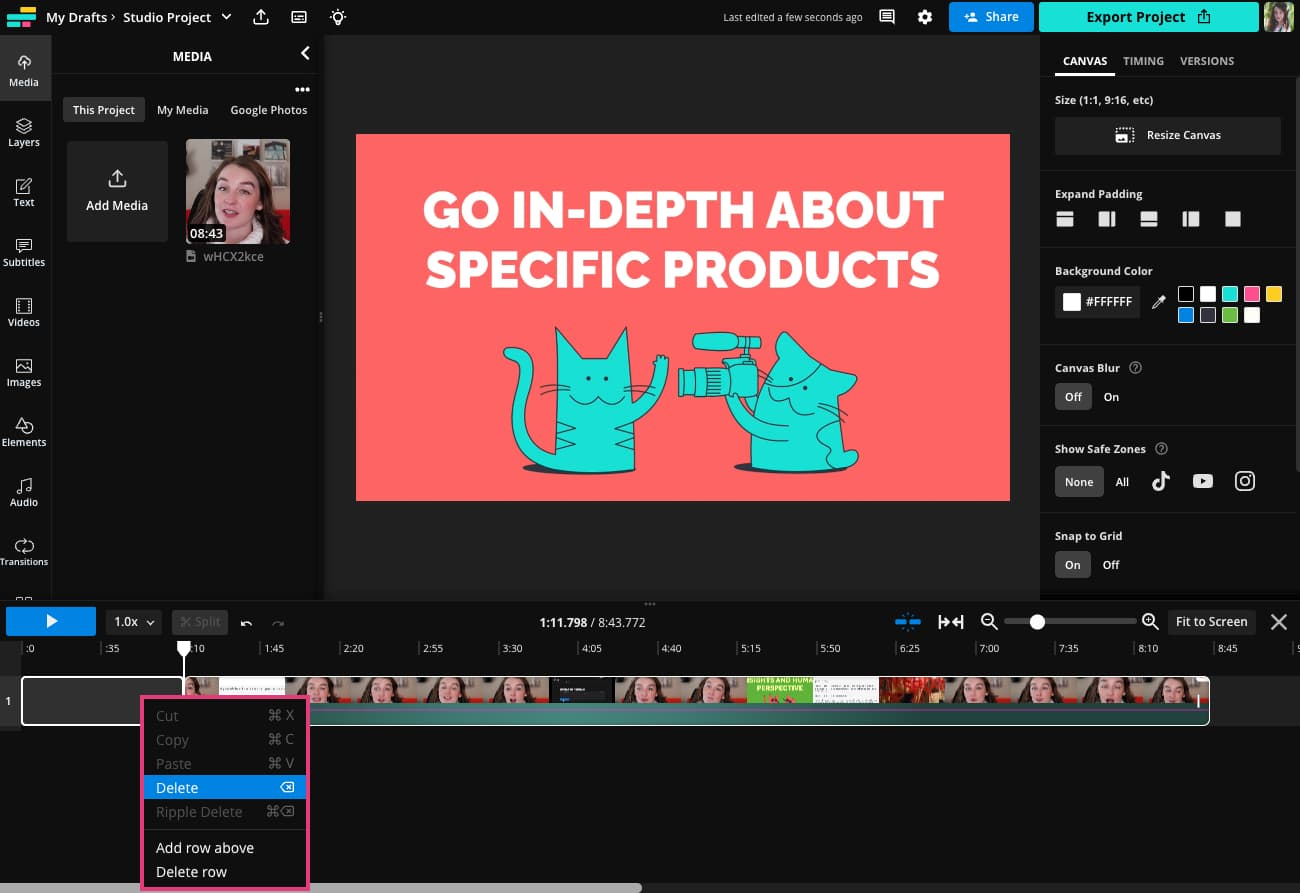
If you want to shorten the video to a middle section, drag the end time to the desired end point and the start time to the starting point. Then, right click the blank gap at the beginning of the timeline and delete it. This will shift the rest of the video layer over to start at the beginning of the timeline.
If you know the timestamps of where you want your clip to begin and end, use the Trim button instead. To do so, select the video layer and choose the Trim button from the edit menu on the right side of the editor.
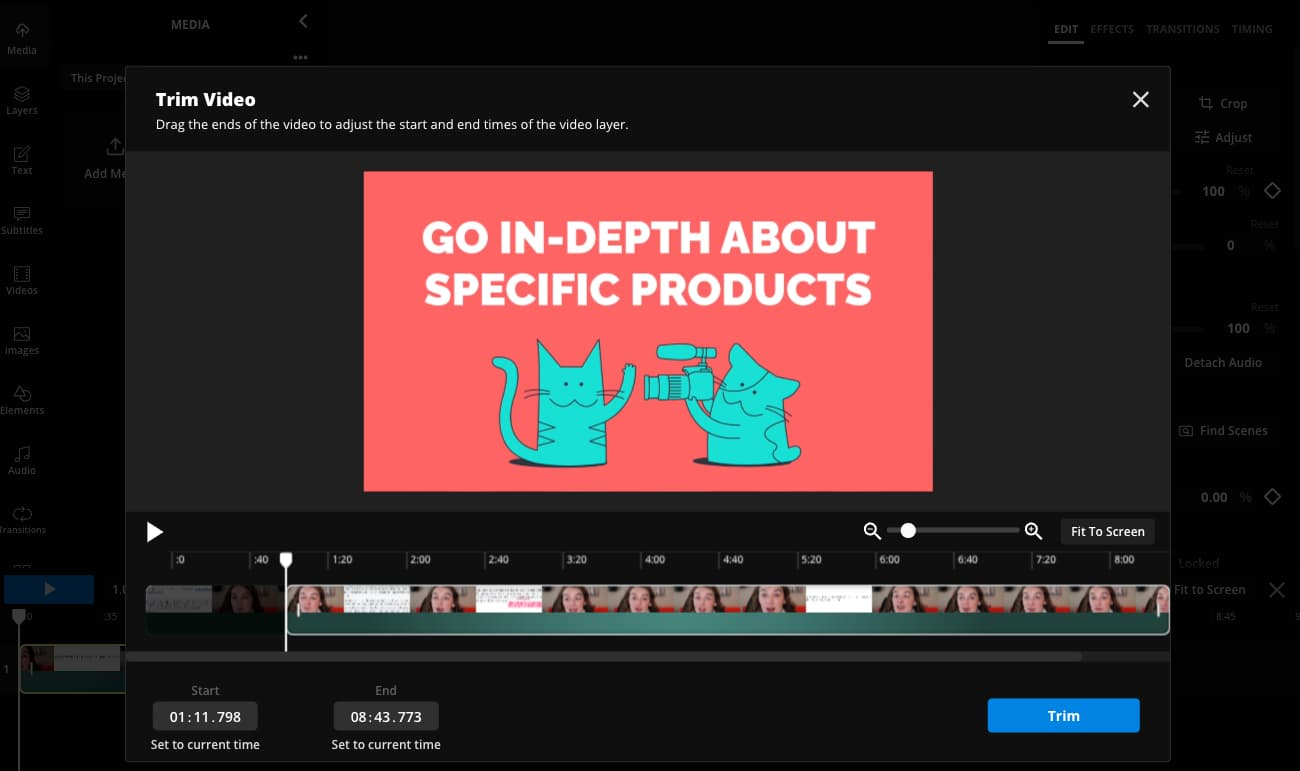
If your video has audio (talking or background audio), you'll be able to see the waveforms in the Trim modal and use them as a guide for where to cut.
Another way to create a shorter video from the original video file is to clip out the unwanted parts using the Split tool.
Move the play header to the part of the video you want to cut, then click the Split button. You can also right click, then select the video splitter or use the S-key shortcut to make a split wherever the play header is.
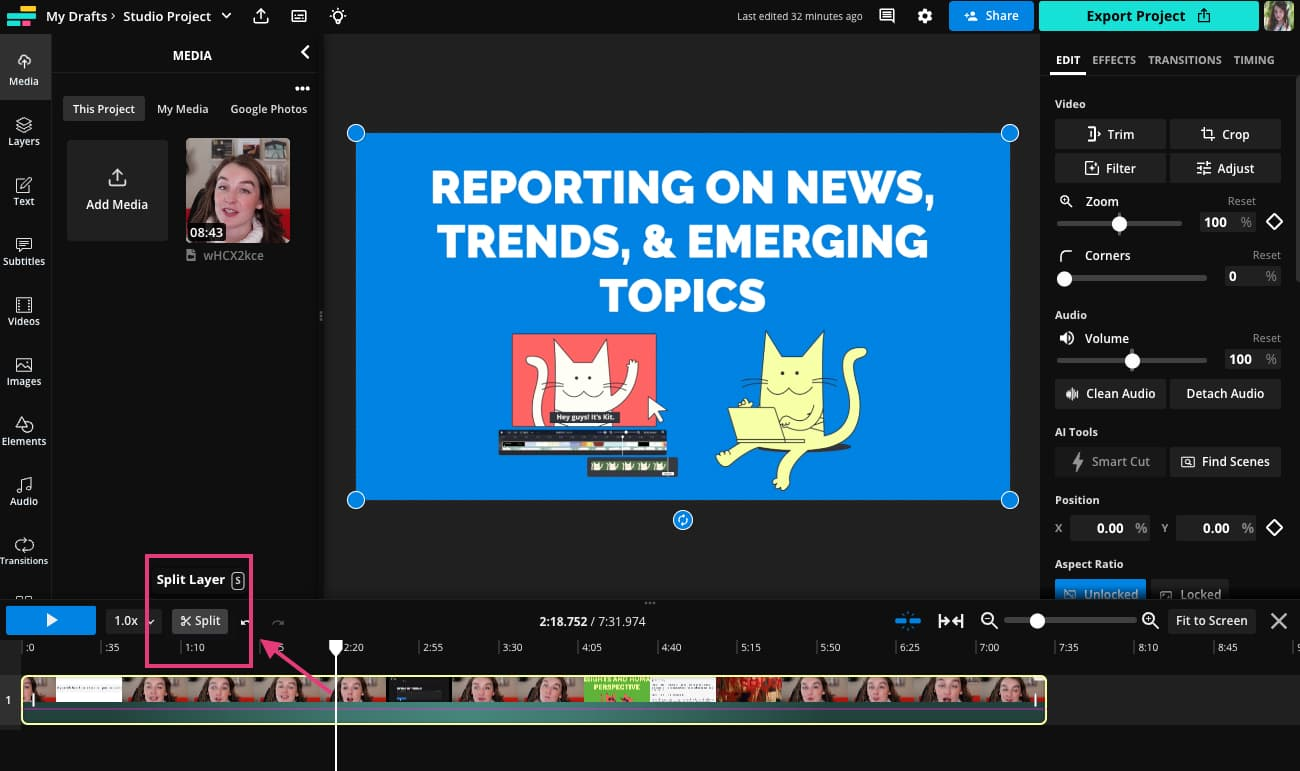
Making another split at a different part of the video will create an isolated clip that you can delete or move and trim as desired. To move this clip to the beginning of the video and delete whatever comes before it, right click the section you want to remove then select "Ripple delete."
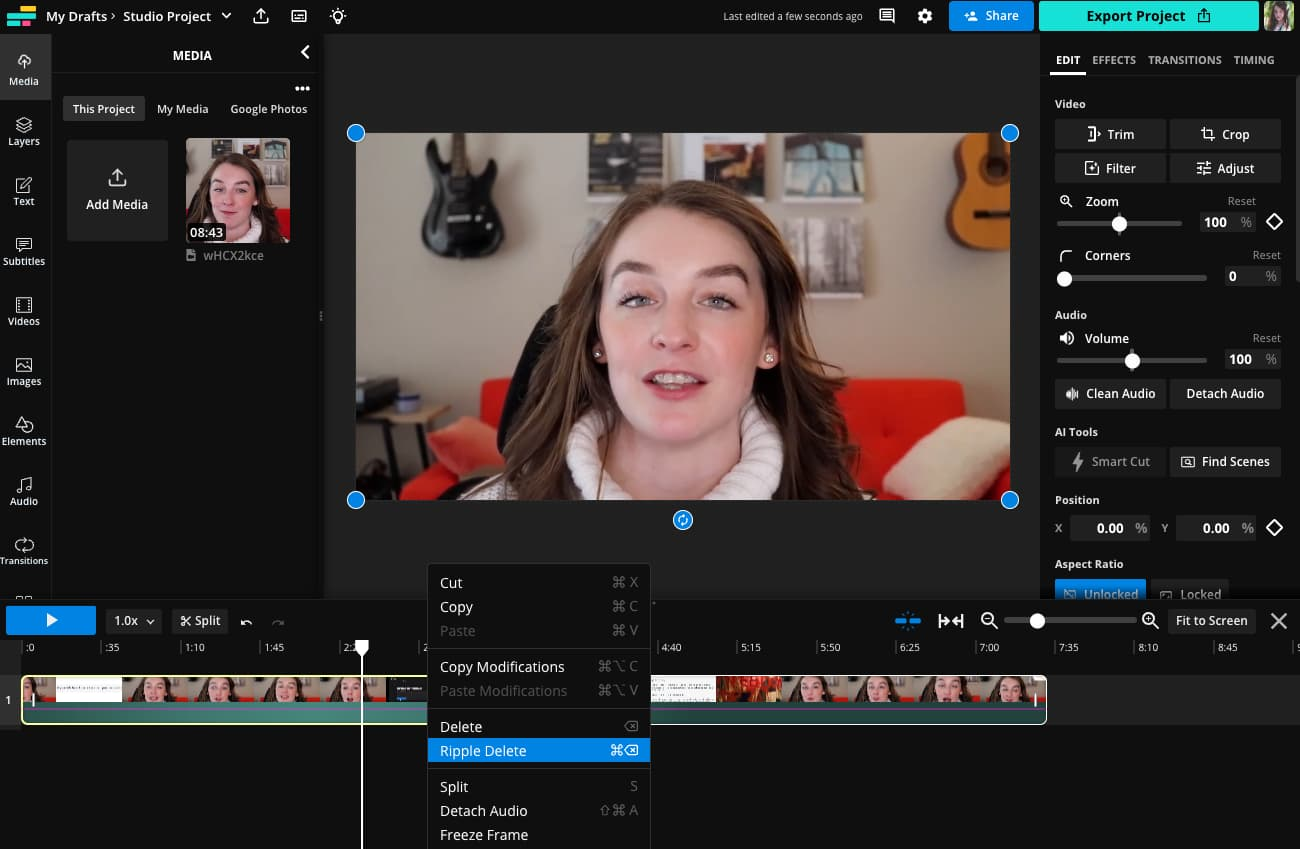
This will delete that clip and move everything over to the left. Cmd/Ctrl + Del will also perform the ripple delete function, just make sure you have the right clip selected.
Kapwing's editor also gives you AI-powered smart tools to assist in clipping your video. The Find Scenes tool will identify wherever there's a scene change in the video and make cuts. This is helpful when repurposing an existing video for social media, since it can cut one video up into multiple clips that can be saved as one shorter video or multiple short videos.
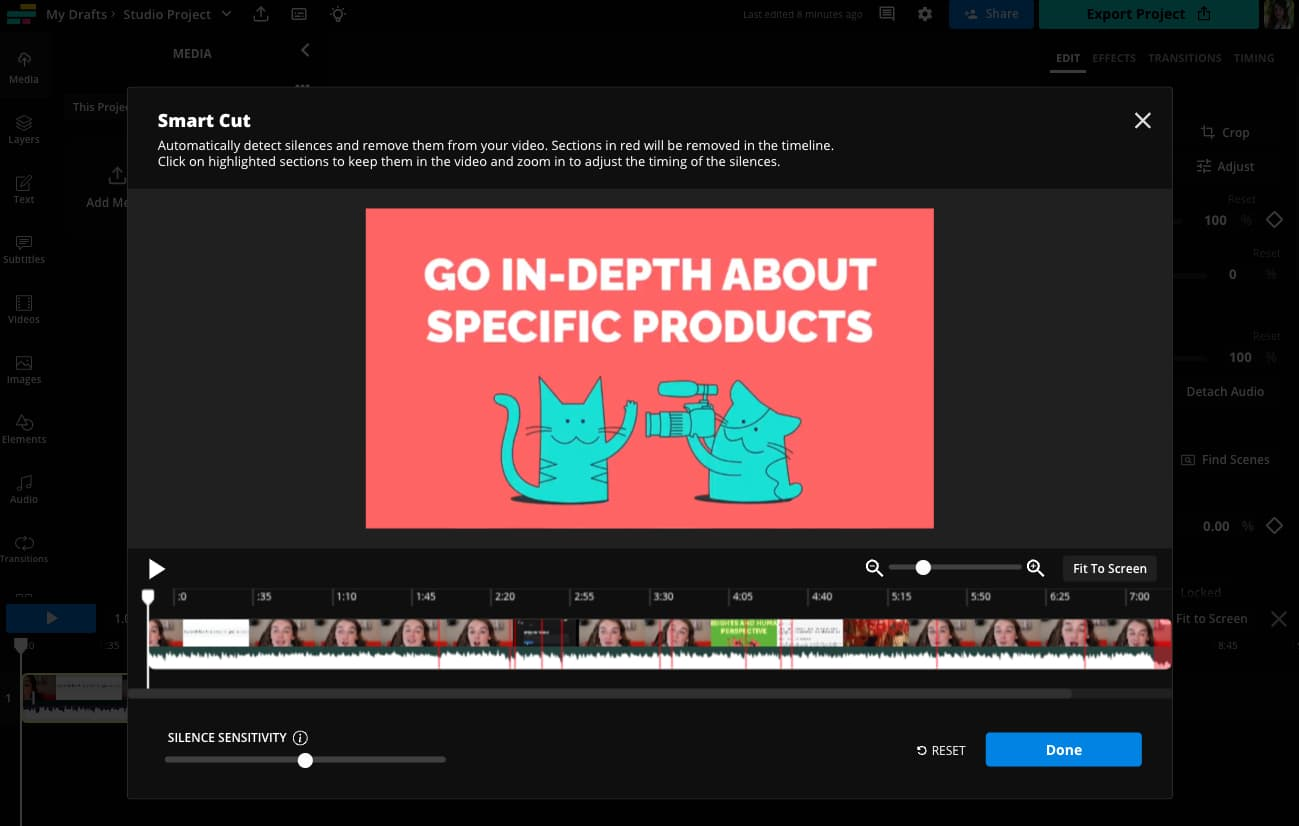
Another smart tool for clipping video is Smart Cut. Smart Cut automatically identifies and removes any silences that appear in the video, making cuts that increase the tempo and engage viewers. It also makes your video look more professional and polished. Win-win.
Kapwing's AI clip maker is also useful when you want to find the best moments in a long-form video fast. This feature transcribes your video, dynamically chooses the most important parts, then automatically creates multiple clips for you to save or continue editing.
Step Four: Save Video and Share
When you're happy with your new video, click the Export button in the top right corner. Select your file format and resolution settings and wait for the video clip to export.
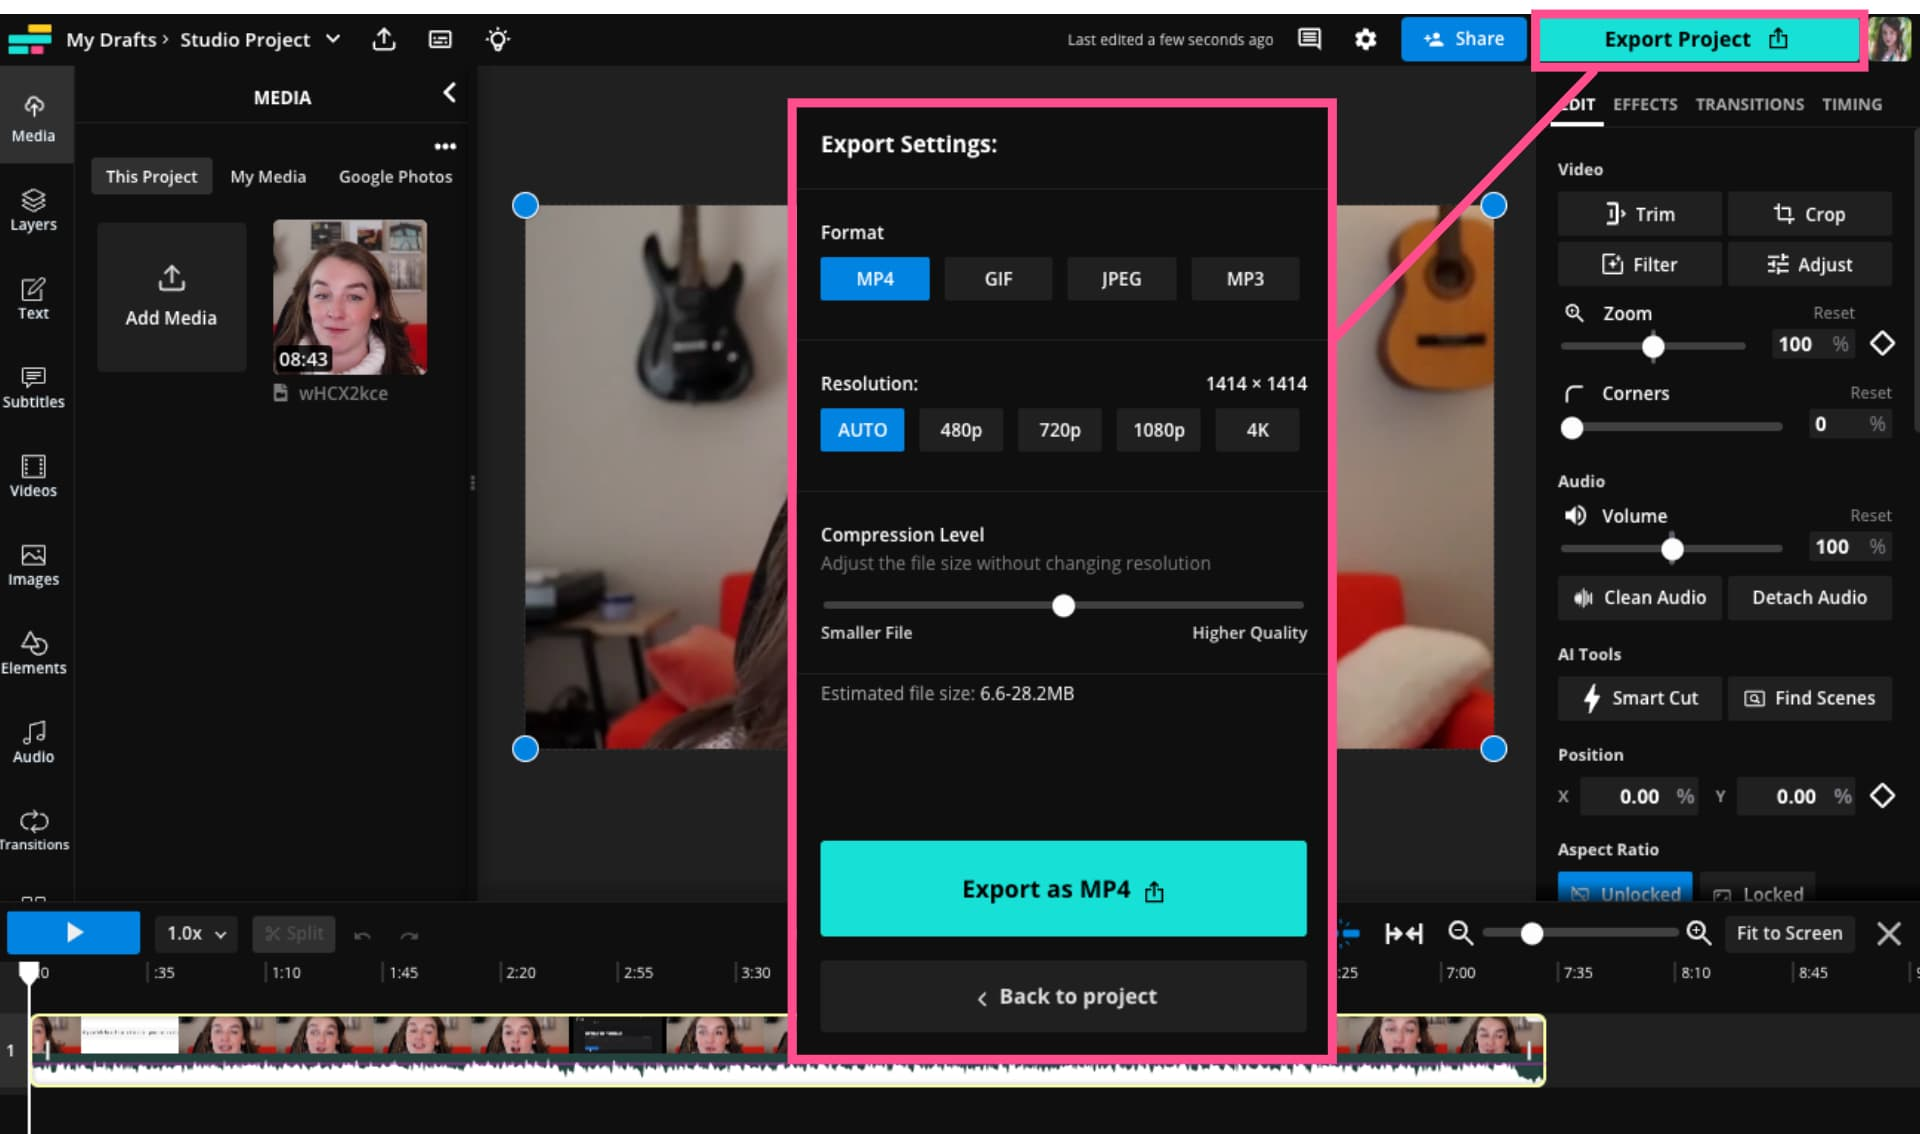
After the video is done processing, you can share your video. Copy the URL to share a link to the video or download the video clip to save it to your device and share elsewhere. Now that you've made the video shorter, you can share it on social media platforms like YouTube Shorts, Instagram Reels, and TikTok, some of which require a video's length to be a minute or less.
For more video editing technique tips and tutorials, visit our YouTube channel to watch the best video editing tutorials for creators.
How to Clip a Video FAQs
1. What is clipping a video?
Clipping a video is a simple editing technique that involves selecting a short “clip” from a longer video and saving it as its own video. Video clipping is often used to create clips for social media, like YouTube Shorts, TikTok, and Instagram Reels. It’s a great way to repurpose existing videos for new channels and get more mileage out of your content.
2. What is the easiest way to clip a video?
The easiest way to clip a video is to use an online video editor, like Kapwing. By using a browser-based editor, you don’t need to download any bulky software or worry about computer compatibility. The splitting and trimming tools in Kapwing are also intuitive and easy to use. Simply split the video at the beginning and end of the clip you want to save to separate it from the rest of the video. Then delete the extra footage you won’t be using and download your new video to your device.
3. How do you clip a video on your phone?
You can clip a video on your phone easily using Kapwing. Because Kapwing is a browser-based editor, you can access it through the Safari or Chrome mobile browsers. No need to download a new app and it works for clipping video on iPhone or Android.
4. How do you clip a video on your computer?
To clip a video on your computer, you’ll need to use a video editing tool. There are plenty of editing softwares available, but we recommend using a browser-based editor, so you don’t have to download anything new to your computer. Kapwing works on all computers, even Chromebooks, as long as you have internet access.