How to Automatically Add Captions to YouTube Shorts
YouTube Shorts need captions, but Shorts doesn't have an auto-captioning feature yet. In this article, I'll show you a great work around for auto-captioning YouTube Shorts.

Captioning short-form content is no longer just important—it’s mandatory. Subtitles make videos more accessible and keep viewers engaged whether they have the sound on or off. Auto-captions make this process quick and easy but some platforms’ auto-captioning functions leave much to be desired.
Like YouTube Shorts.
In this article, we’ll share how to add auto-captions to Shorts on YouTube as well as an alternative auto-captioning tool you can use that allows you to customize your captions, correct errors, and add your own branding and styling.
How to add captions to YouTube Shorts in YouTube Studio
There are a few different ways to add captions to your YouTube Shorts in YouTube Studio. You can manually type them out (not recommended), upload an .SRT or .SBV file, or sync an existing video transcript. You can also wait for YouTube to add automatic captions once you’ve published your Short. This takes anywhere from a few hours to a few days, depending on the length of the video.
Currently, there is no way to add automatic captions to YouTube Shorts in YouTube Studio before publishing.
How to edit automatic YouTube Shorts captions
While you can just leave the automatic captions as is, if you want to edit them for accuracy, you can do so in YouTube Studio. In fact, the YouTube Help Center recommends that you “always review automatic captions and edit any parts that haven't been properly transcribed.”
So, how do you edit automatic YouTube Shorts captions?
Here’s how to add automatic captions to YouTube Shorts with YouTube’s subtitler:
- Navigate to the YouTube Studio.
- Open the “Content” tab and view “Shorts.”
- Find the Short you want to caption.
- Click on the “Details” button to edit.
- Open the “Subtitles” tool on the right side menu.
- Manually edit the automatic subtitles and save your changes.
Why YouTube’s auto-caption feature isn’t the best for Shorts
This process is pretty straightforward, but there are some things we don’t love about YouTube’s auto-captions.
First, you can’t add auto-captions before you post, meaning your Shorts won’t have subtitles for a few hours to a few days after you post, which isn’t the best viewer experience for anyone who finds your video during that intervening time. We know that social media users massively prefer subtitled content, so this puts your Shorts at a disadvantage.
Second, the captions require a pretty decent amount of editing. YouTube’s automatic captions are notorious for spelling and grammar errors. In this example, you can see how badly “ChatGPT” has been transcribed.
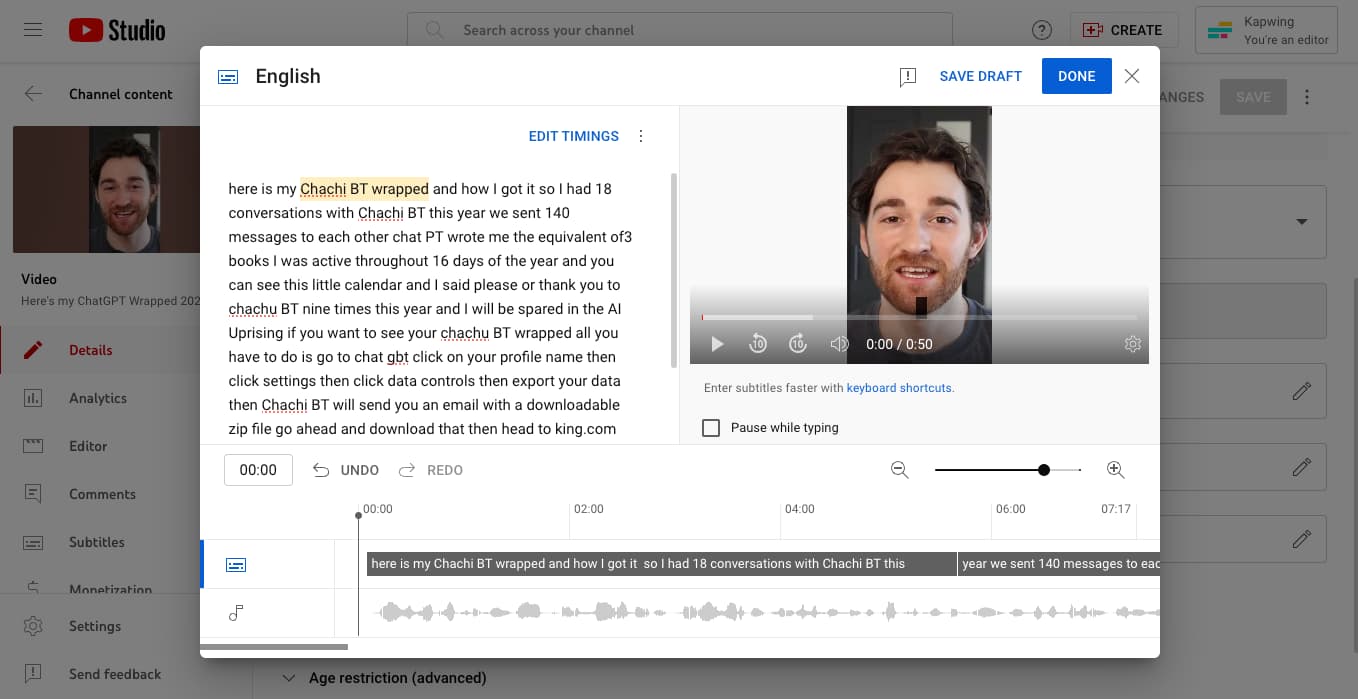
There’s also almost no capitalization or punctuation. It’s a mess.
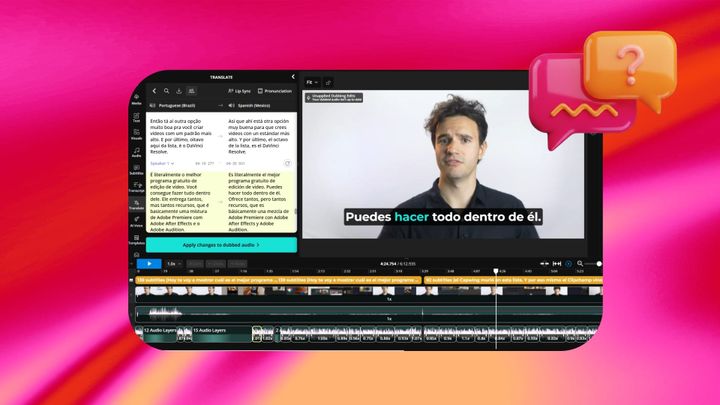
While cleaning up YouTube’s automatic captions is faster than manually transcribing the video yourself, it’s still a lot of extra work that you shouldn’t have to do—and don’t have to do if you use a different tool. More on that in a moment.
Finally, you can’t customize the formatting and style of YouTube’s automatic captions. Because Shorts function more like TikToks and Reels than traditional YouTube videos, the look and feel of the final video is pretty important. If branding and style is important to you, YouTube’s automatic captions might be a bit lacking for your Shorts editing flow.
Let’s take a look at an alternative automatic captioning tool to use for adding subtitles to Shorts.
How to add customizable auto-captions to YouTube Shorts
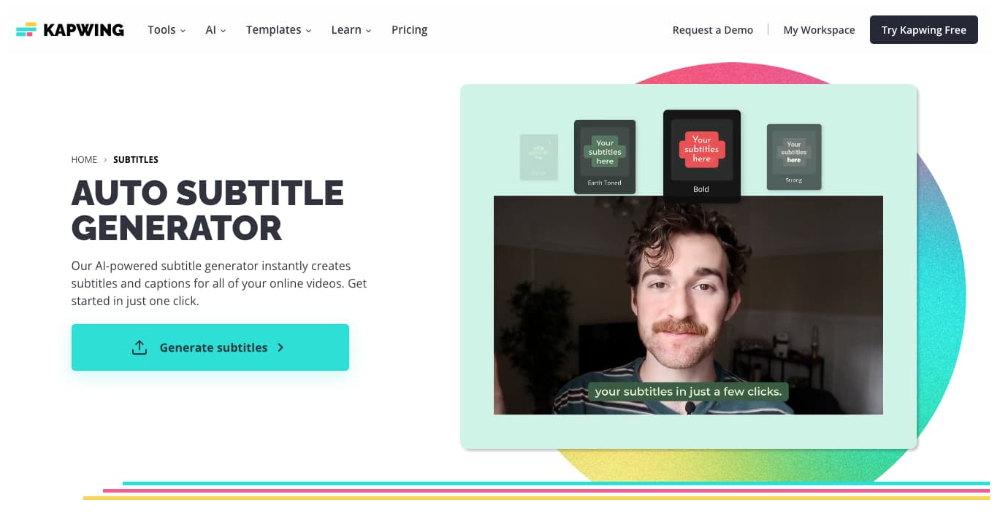
For this example, we’ll show you how to add captions to YouTube Shorts using Kapwing, an online video editor. Kapwing is browser-based, meaning you can access it from your mobile or desktop devices anywhere that you have internet access.
Step 1) Upload your video to Kapwing
Head over to Kapwing’s automatic subtitle generator to get started.
You'll be prompted to sign into your account if you're not already logged in and from there will be able to create a new project. When you open your new project, you'll see the upload options.
You can either upload your video from your device with drag and drop, upload from Google Drive or Photos, or paste a link to a TikTok video or other short-form video online.
TIP: If you have a long YouTube video and want to get clips out of it, try our AI YouTube Shorts Generator.
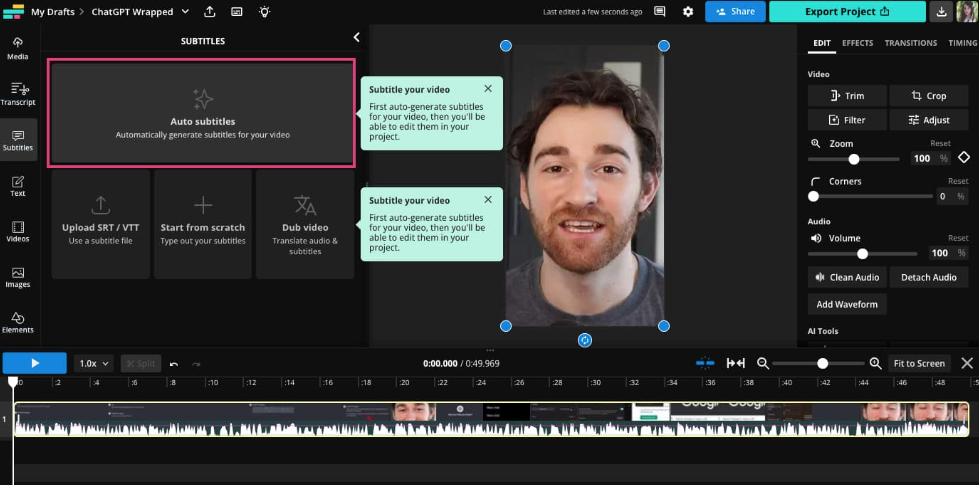
Step 2) Generate Auto-Captions for Your Video
Once your video is uploaded, head to the Subtitles tab on the left sidebar. There are a few ways to add subtitles here, including the options to upload .SRT/VTT files, manually type out your captions, or dub your video into a new language.
Select “Auto subtitles” right at the top, which will automatically add subtitles to your video that are synced with the exact timing of your speech.
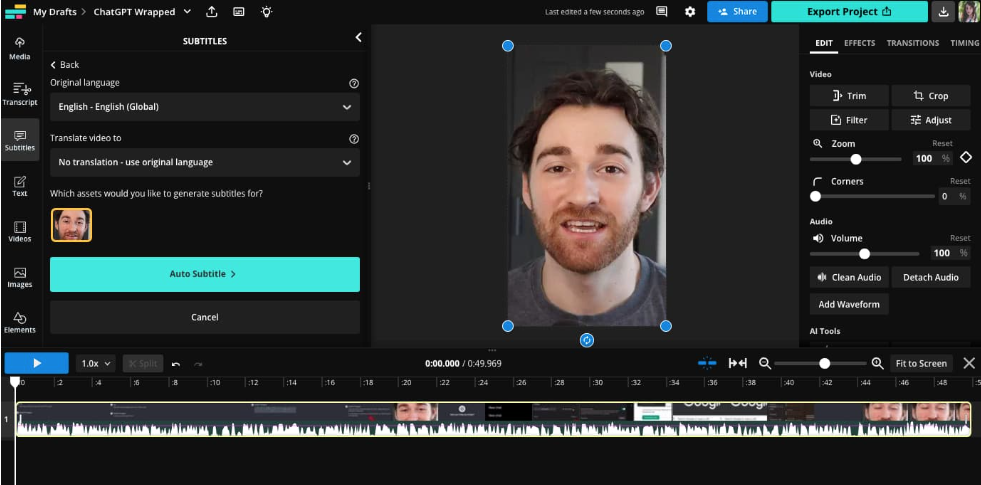
Next, set your caption language settings (you can even translate your captions if you want), hit “Auto Subtitle,” then wait for the subtitler to do its thing. The process time varies depending on the length of your video, but for short-form videos you typically only need to wait a few moments.
For this example, it took about three minutes to generate auto-captions.
Step 3) Customize Your Auto-Captions
When the captions are ready, you'll see them appear on your video if you press play on the preview. You'll also see a full overview of the captions, including timestamps of where they appear in the video, in the Subtitles window to the left.
Take a moment to read through them and make sure they're correct. If you find something you do need to change, like a homophone that's been transcribed incorrectly or a brand name that's been misspelled, it's easy to correct.
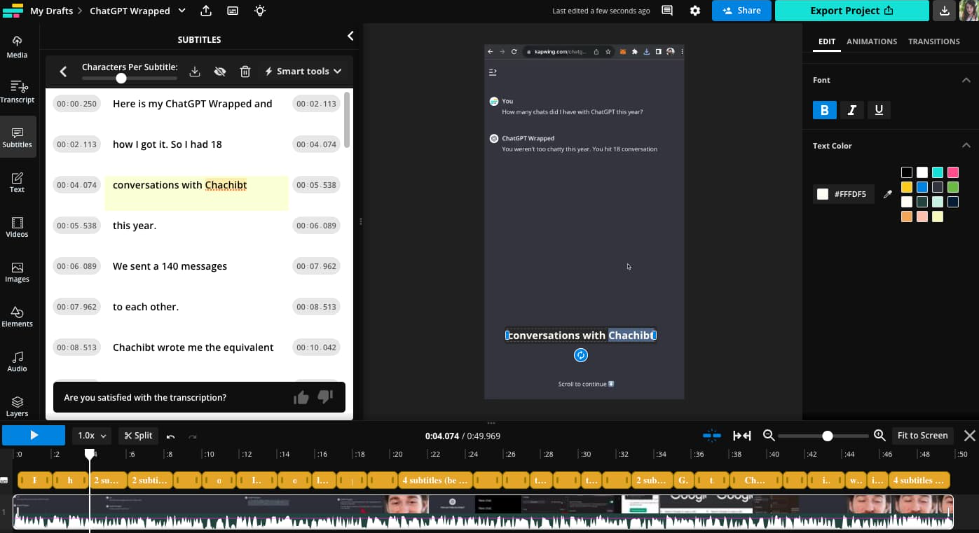
Just click on the mistake in the transcription and edit it like a Word document.
There are a few different things you can do to change how your YouTube Shorts auto-captions look, as well.
1) Adjust the Characters Per Subtitle
To change how many words are in each subtitle, simply move the Character Per Subtitle slider.
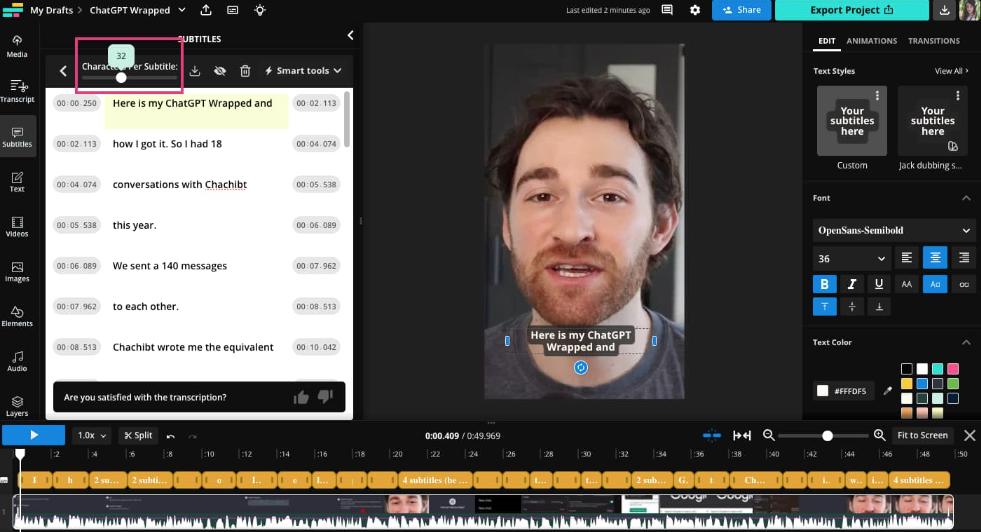
For a short-form video, I'd recommend only having a few words on the screen at a time. Otherwise, it could become cluttered and difficult to read, which is the opposite of accessible and engaging.
2) Change the Font, Color, and Size
Click on the subtitle text box to see the Edit menu on the right side. Within this menu, you have the option to customize your subtitles font, font color, font size, background color, and background styling.
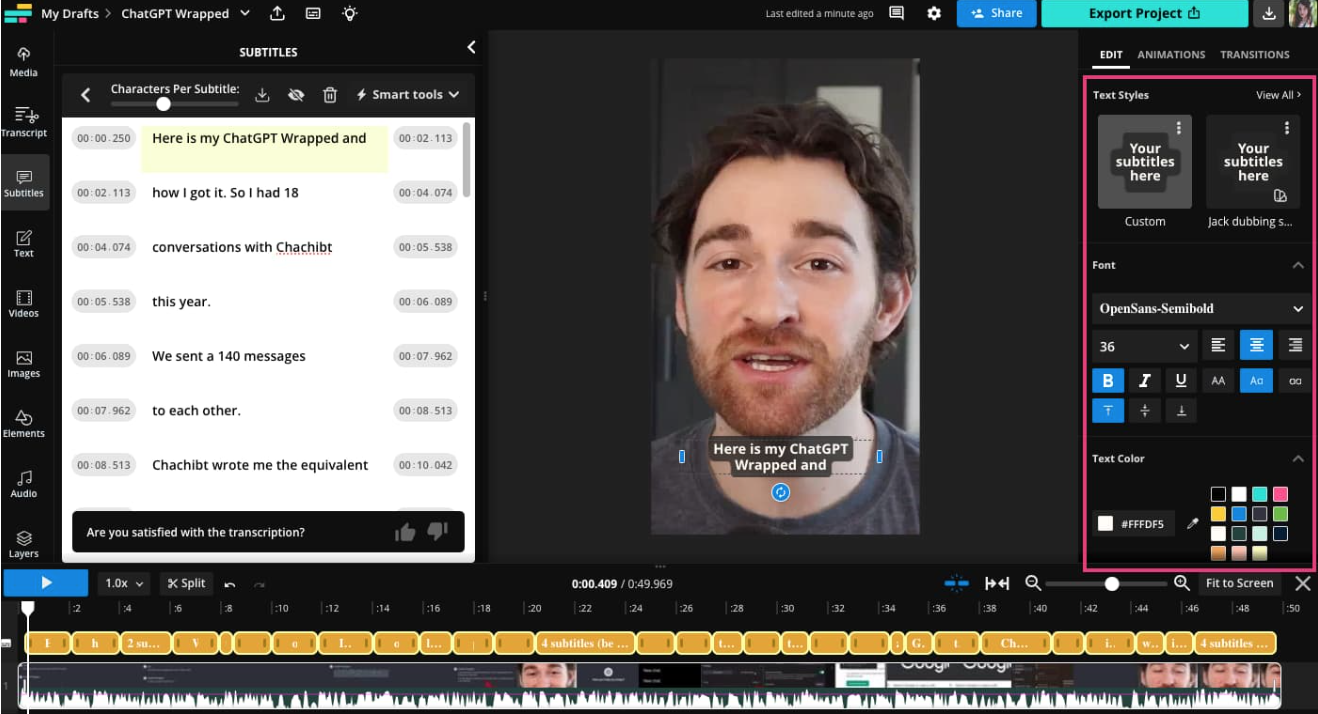
You can keep things simple, curate a branded look, or just be colorful and fun.
The important thing to keep in mind is that your auto-captions should still be nice and legible. That means high contrast for color choices (no white font on a beige background) and easy-to-read fonts with a heavier line weight and without a ton of serifs or curly-cues.
3) Add an Animation to Your Subtitles
Click on the Animations tab on the right to choose from seven different subtitle animation styles.
Most of these are karaoke-style animations that highlight or reveal the word actively being spoken as you speak it. They add an extra bit of color and movement to your video that will help keep viewers engaged.
Click on a style to see a preview of how it would look with your captions and customize the different color and style options available.
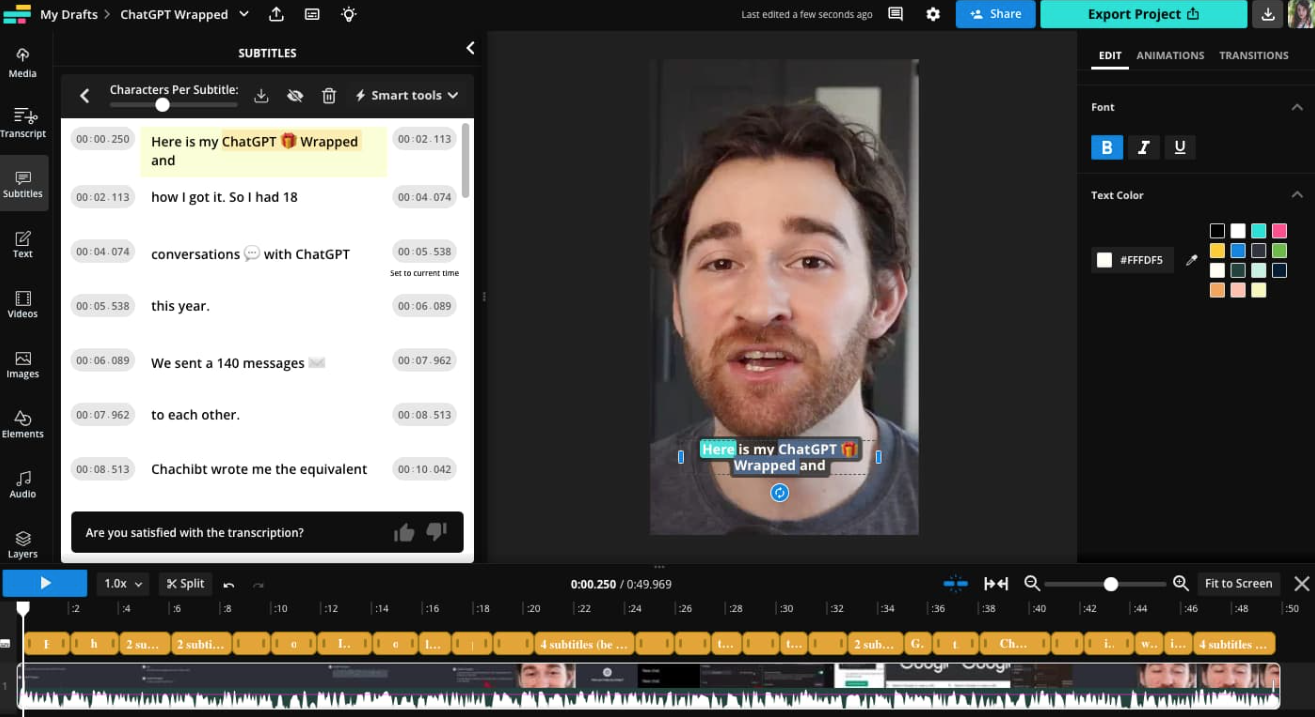
4) Automatically add emojis to your subtitles
Another way to add interest and visual impact to your subtitles is with emojis. Open the “Smart tools” dropdown menu from the Subtitles window and select “Auto Emojis.”
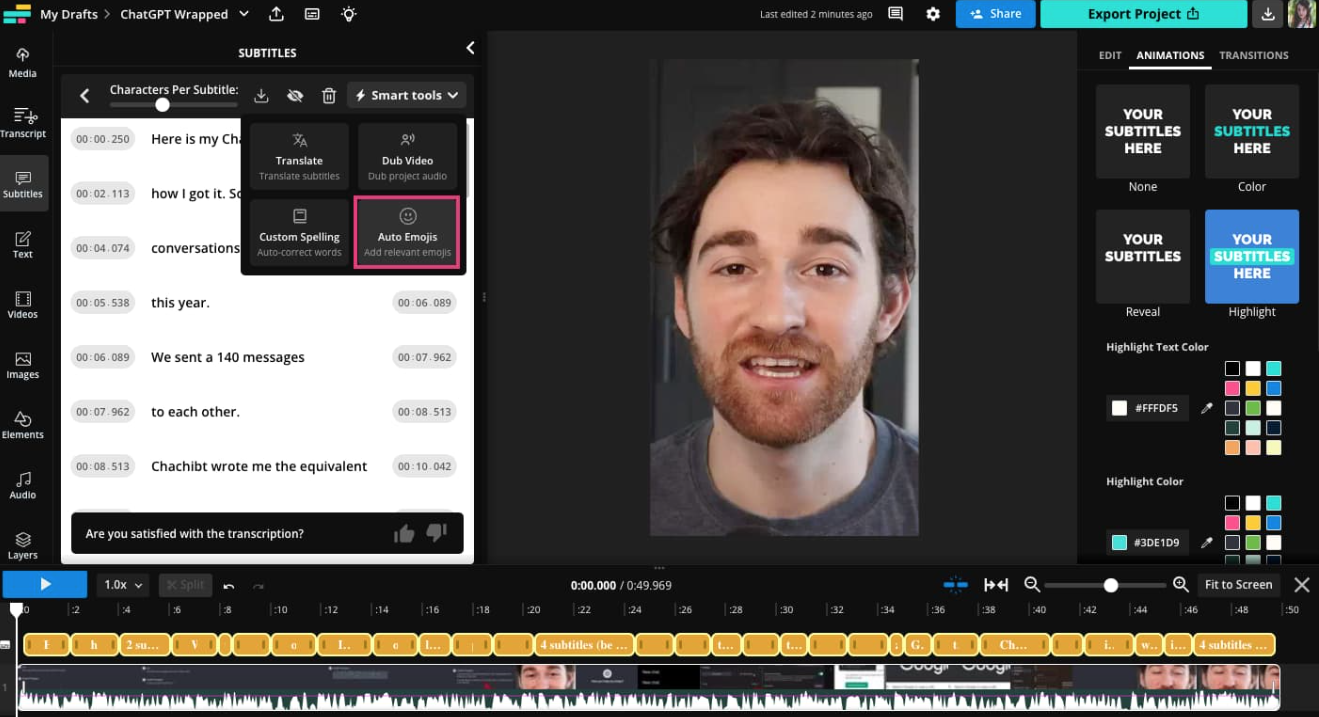
Kapwing will analyze your video’s transcript and automatically add relevant emojis to the subtitles based on context. You can edit these the same way you edit the text of the transcript, removing or replacing any emojis you don’t want in the final video.
Step 4) Use Safe Zones to Keep Captions Visible
Once you've finished customizing and editing your auto-captions, click on the canvas. The canvas is just the dark background behind your video preview. In the Canvas menu on the right, you'll see an option to "Show Safe Zones."

Using Safe Zones lets you check if your content will be visible once you publish it to TikTok, Instagram Reels, or YouTube Shorts by placing a transparent overlay onto your video while you edit it.
Since we're making a YouTube Short, choose the option to show Safe Zones for YouTube Shorts.
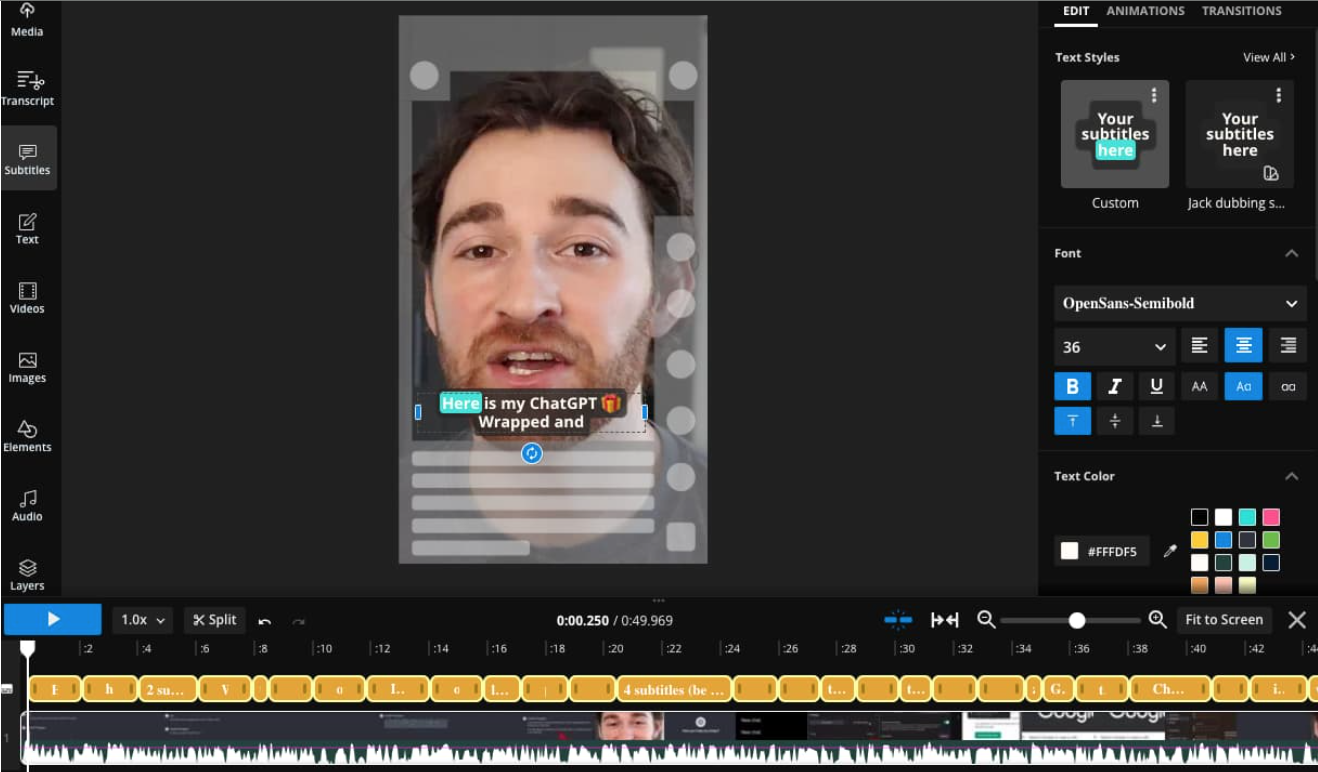
My subtitles are safely inside the clear area in the middle where they won't be covered by a video description, the like, share, and comment buttons, or any other features.
Step 5) Export and Share to YouTube Shorts
When everything is exactly how you want it, hit the Export button and choose your file format and sizing preferences.
Download your video then upload it to YouTube Shorts and publish as usual—except now it has auto-captions! The best part is that with these captions baked into your video, you can publish it anywhere, not just YouTube Shorts, and it will be accessible and engaging for all viewers.
YouTube Shorts Auto-Captions FAQs
1. Can you put captions on YouTube Shorts?
Yes, you can add captions to YouTube Shorts and, in fact, you should. There are a few different ways to do it. You can use YouTube’s subtitling tool to upload an SRT file, sync a transcript, or manually type out the captions yourself. You can rely on YouTube’s automatic CC feature, which will be generated after you publish the video. Or you can use an automatic subtitle generator to create and permanently add your subtitles to your video.
2. How do you get captions on YouTube if there is no CC button?
If there’s no CC button on a YouTube video, it’s possible that YouTube hasn’t finished generating the automatic captions yet. You can add subtitles yourself if it’s your video by uploading an SRT file or transcript in YouTube Studio.
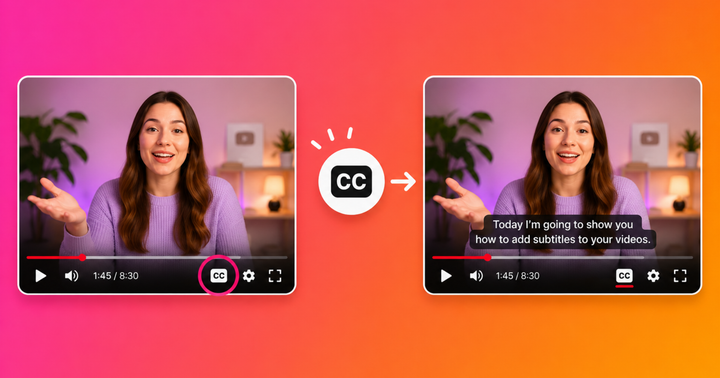
3. Where can you find CC on YouTube?
If you’re watching a video on YouTube and want to turn on CC, you can access them in the video’s settings. For a YouTube Short, click on the three dot menu then click on “Captions.” For a regular YouTube video, the CC button should show up at the bottom of the video player. Click on it to turn the captions on or off. To change the language of the automatic captions, click on the settings wheel icon next to the CC button.
Related Articles: