How to Make Professional-Sounding Voice Overs (Even While Recording at Home)
Voice overs are a critical part of making great video content. Here's how to plan and record pro-quality voice overs—even in a home studio.

What a viewer sees and hears in a video determines what they learn, how they feel, and, ultimately, what impression they're left with. If you want to make great video content, voice overs are an essential part of the recipe.
Most advice on how to do voice overs is focused on the traditional film industry. However, off-camera narration for marketing and brand content is a valuable and increasingly prevalent skill that video creators need to master. There's plenty to learn from documentaries and Pixar's vault, but making a voice over for brand-building purposes requires a decidedly different approach—and often a much scrappier mindset.
So today, we're going to cover how to do voice overs in a marketing and brand context, including prep and post-production work, gear recommendations, and tips for recording your lines. Let's jump in.
What is a voice over?
A voice over is a post-production technique that overlays an active or unseen speaker's voice in order to give more context about what's being shown in the footage.
And although most voice overs are read from a prepared video script, they can also be recorded ad-hoc or live, especially for videos on social media. There is no right or wrong way to use a voice over, but they're generally used to explain and add context while keeping a video moving at a brisk pace since separate footage can be shown alongside the speaker.
How to create a voice over: 6 simple steps
1. Set up your recording space
No studio? No problem. There are a number of steps you can take to ensure your recording space is well-suited for recording high-quality audio—even if you're creating voice overs from home.
- Listen for ambient noise. The noise outside of your home is impossible to control, but in-room noise such as fans, vents, or even electronic devices humming in the background are all sounds you can temporarily silence to create a clean, quiet space to record. If you don't have control over any of these noises, we suggest using an audio background noise removal tool, which we'll explore later.
- Favor soft surfaces and small rooms. An empty room with hard surfaces will result in the most echo when recording someone's voice—their voice will feel hollow with a slight reverb rather than warm and full. Carpets, blinds (for windows), couches, and yes, foam panels, can go a long way in fixing this issue for any room. And the smaller the space, the easier it is to fill.
- Watch out for windows. Windows are the most likely source of sound you have no control over. Taking steps to minimize outdoor noises can go a long way; I've hung up a blanket or two in my day just to keep a room quiet. And as we'll cover in the next section, there's some gear that can help with this, too.
2. Choose the right gear
Voice over equipment doesn't have to be expensive or overly complicated. To start, cardioid microphones with an XLR connection are the right choice for most voice over work; these mics capture sound from the front and reduce ambient noise which results in a richer, fuller sound for recordings.
Pair a quality cardioid microphone with a preamp like the Mackie 402-VLZ4 or a Zoom P4 Podtrak and you're off to the races. For even higher-fidelity sound, use a microphone/isolation shield, which is a portable foam chamber that's especially helpful for blocking out sound coming in from your windows, all without buying special blinds or filling your room with soundproof wall panels.
Note: Standalone USB microphones are inexpensive and fine for simple video content or in a pinch, but if you want to create high-quality voice overs it's best to invest in gear that's similar to the above.
3. Write your script or outline
While you may not need a full-fledged script for a casual TikTok voice over, most voice over work sounds much better when the speaker is composed and speaking in a direct, concise fashion. To accomplish that, you'll want a script or at least a well-structured outline.
When writing your script, keep these points in mind:
Script to the video's goal
Every decision you make for a video should support the intended goal of the video, and that includes your script. What is this video trying to achieve? What audience will it reach? What will it say, explain, or demonstrate to that audience? What does the viewer already know coming into this video? How should they feel when the metaphorical credits roll?
All of the above will help you draw a line around what's useful to include in your video, and what isn't. Making cuts becomes far easier when you know what outcome your video is trying to achieve.
Keep your tone consistent
There's lots of scriptwriting advice that tells video creators to "keep it casual," but that's not always the right tone to take. Your company's voice was chosen with important context in mind. The tone check you should apply isn't, "Can we make this more casual?", but instead checking to see if the tone you've taken fits your brand's voice overall in the given context.
For example, even a trendy brand may want voice overs for their help center videos to be clear and direct—as customers are there to solve a problem—while still maintaining a style that feels uniquely on-brand.
Revise for brevity
One revision you will want to make for nearly any script is an edit that shortens and distills your first draft. "As short as possible, and no shorter" is usually the ideal length of any video.
The information density of a script is very important. If a script it's too dense, it will be hard for the viewer or listener to follow; if it's too long, they'll grow bored and click away to something else. In our experience, most scripts are biased toward being overly long.
4. Record your voice over
With a script or general idea of what you want to say now prepped, it's time to record your voice over. Depending on the type of media you're creating, there are two approaches to consider: recording over the timeline within an editing tool, or recording the audio while recording your screen.
Record over the timeline
1. Open the Kapwing editor. Select the "Audio" option in the Kapwing editor and then click on "Record" once you're ready to record voice over—we'll do that in one second.
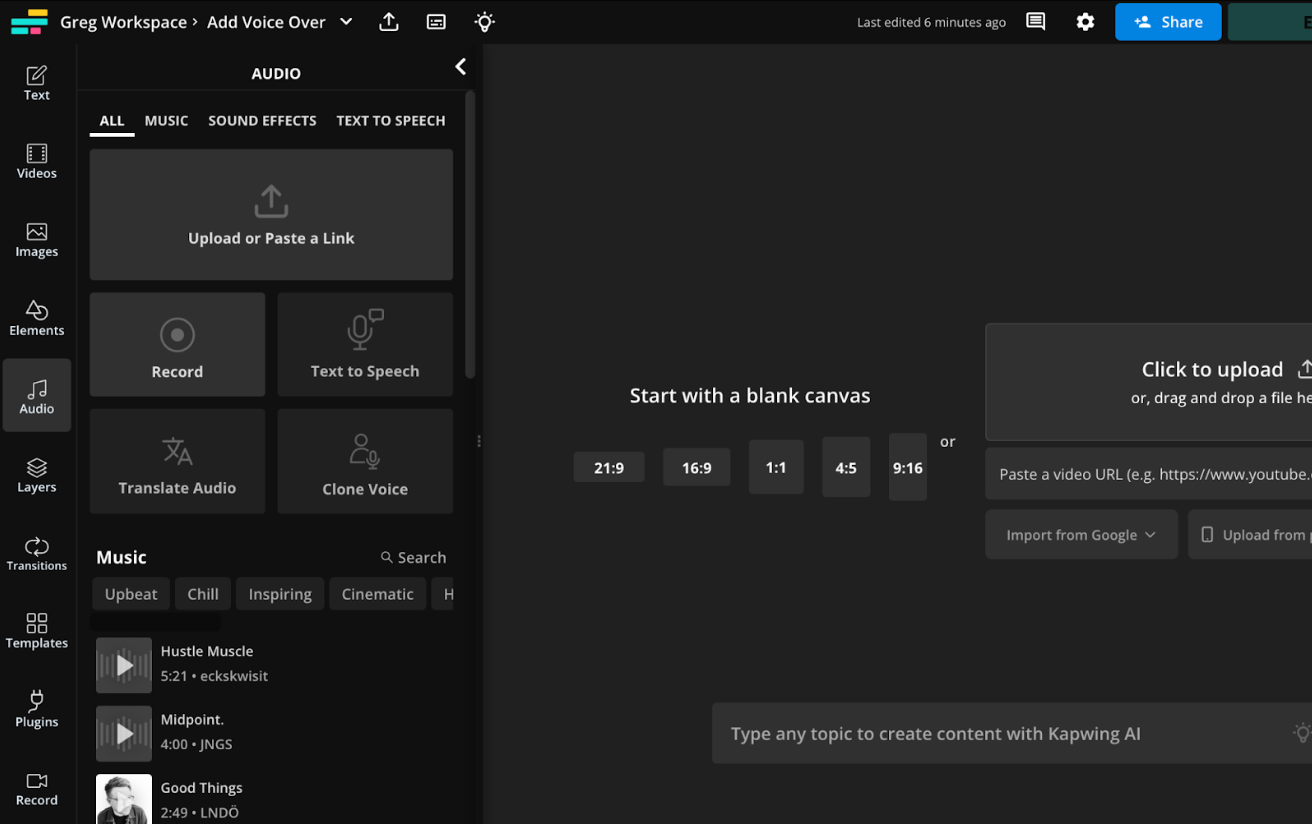
2. Pull up (or generate) your script. If you have a script already written, you can either open the document where it's located or add your script to Kapwing's teleprompter tool so it will scroll as you begin recording. If you're in need of a script, try our Video Script Generator to help you get started.
3. Start recording your voice over. Now that you're ready, select the "Record" button from the Audio section and then choose the microphone you'll be using. In the example below, I've chosen my Shure MV7 mic. Then hit the red button and start your voice over recording.
Record along with your screen
If you're creating a screen recording, it's often simpler to just record your voice over along with the action on your screen. Access Kapwing's Screen Recorder by selecting the "Record" button in the editor.
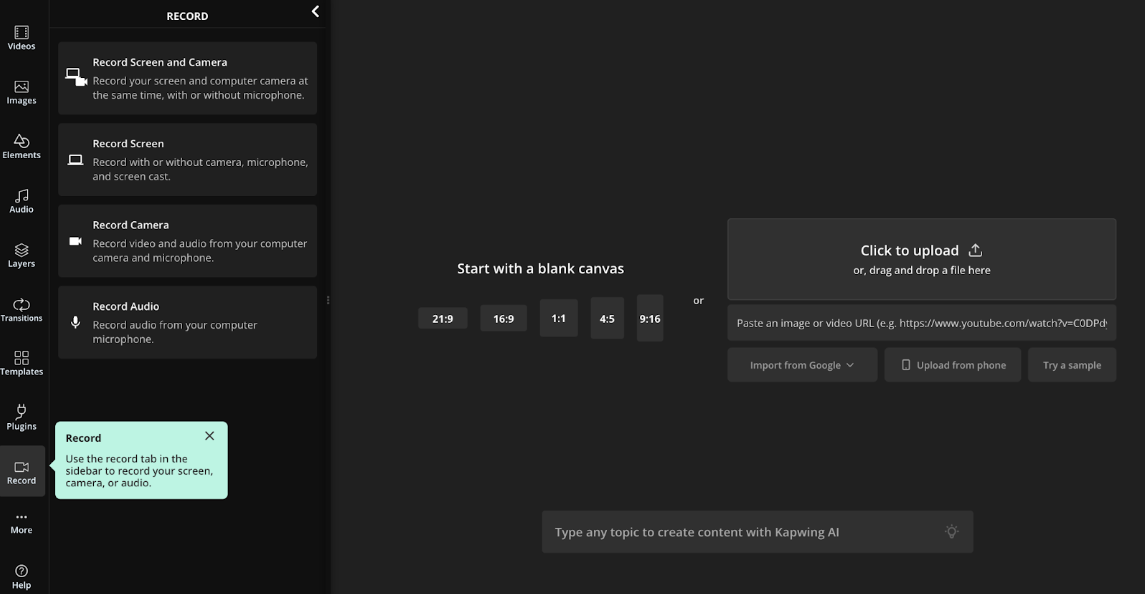
If you're creating a long screen recording or an explainer video with multiple segments, it may make sense to record your screen, edit the footage, and then record your voice over separately over your final edit.
5. Edit your voice over
Editing is where the real creative magic happens—and that applies to voice overs, too. You won't record most voice overs perfectly in a single take, and there are a lot of post-production effects you can add via editing software that will go a long way in making your voice overs feel polished.
The first is rough cutting and trimming the voice recording itself. Trim with Transcript, which allows you to transcribe your voice over and then edit the audio just like you'd edit a text doc. This is a great option if you're not so familiar with traditional editing interfaces, or just want to edit your voice over quickly.
Once you've tightened up your voice over with direct edits, you'll also want to clean up your audio removing any background noise and editing out any filler words (ums, uhs) that slow down the pace of the content. Kapwing features AI-powered editing tools that make this fast and easy.
6. Add the voice over to your video
If you're editing your audio and footage in Kapwing, you may not need to take this step. But if you're uploading a voice over you've already edited, you'll need to add it to the timeline and sync your audio and video.
Inside the Kapwing editor, click on "Audio" and then upload your voice over or paste a link to wherever it's hosted. You'll then be able to add the voice over to your video as a separate layer in the editor.
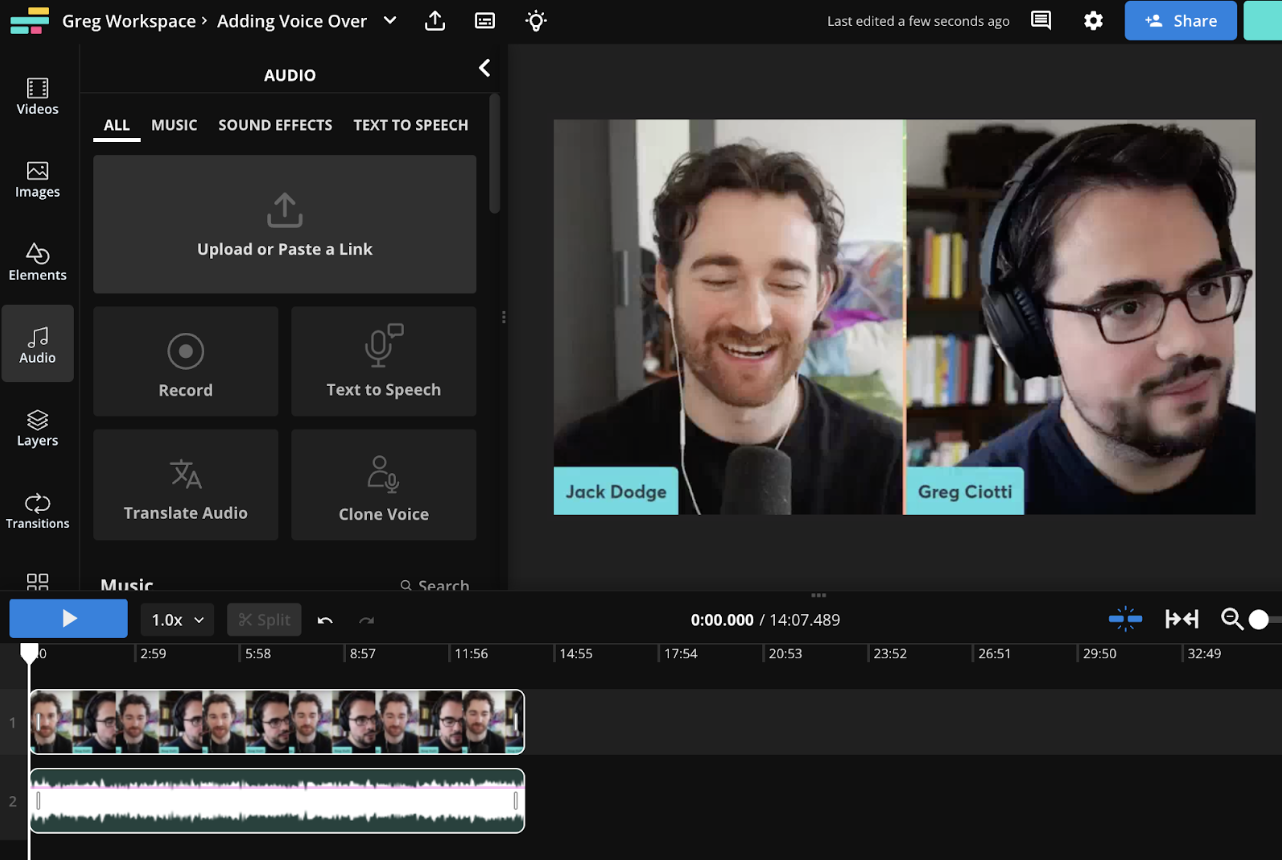
If your video has existing audio in a section where you'd like to use your voice over audio instead, you can simply use Kapwing to extract or mute the audio and replace it with your voice over.
How to create a voice over with AI
A new way to add voice overs that's quickly becoming popular is to use natural-sounding AI voices. If you're unable to record your own voice or simply want to try this cutting-edge approach, follow the steps below.
1. Select your AI voice
The reason this is the first step is that there's two unique paths forward from here: you can either choose a natural-sounding AI-generated voice, or you can record a sample of yourself talking in order to clone your voice with AI and apply that to your voice over. If you want to translate your voice, we recommend trying our Lip Sync AI feature to match lip movements with the translated audio.
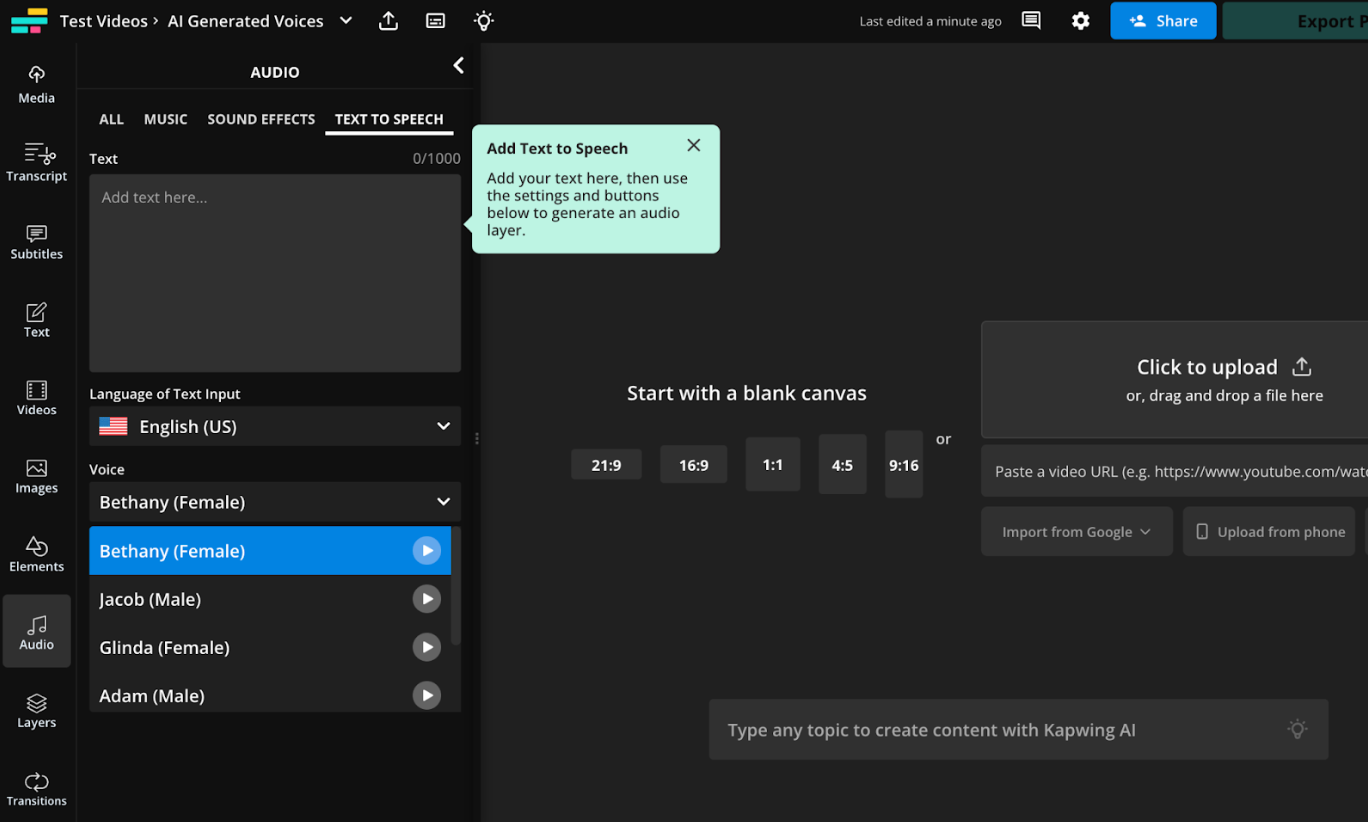
Choosing an AI-generated voice: If it's been a while since you've tried text-to-speech software, you'll be surprised at how natural and lifelike modern AI voices sound. We partnered with ElevenLabs to feature a wide variety of voices in dozens of languages in Kapwing—all you have to do is input your text (or script) and select the voice that feels most appropriate for your video.
Note: You can use also use Kapwing to create voice overs in other languages to reach international audiences.
Cloning a voice with AI: What if you, or a colleague, are the "voice" of your content and you want to keep that consistency? Cloning a voice takes AI-generated voice overs a step further, but it doesn't require that much additional effort. Just upload a long enough audio sample—making sure you have full permission to use the voice in question—and Kapwing's Voice Cloning tool will add your distinct voice as another option when using text-to-speech. See the video below for instructions.
2. Write your script
With your AI-generated voice created or selected, there's no additional voice recording work to do. That means it's time to move on to writing your script for the AI voice to read back.
The advice here is largely the same as when you're recording the audio yourself. Just remember that the AI voice you've chosen may enunciate words a bit differently, and some voices don't handle contractions or jargon as well as others.
3. Edit your voice over (or script)
If you're using text-to-speech, you can also use Trim with Transcript to edit the script and voice over itself directly after your audio converts to text. Remove sections that slow down your voice over or trim out any words or sections that sound awkward with the AI voice you've chosen.
Tips for making a professional-sounding voice over
Take one line at a time
Reminder: You're free to record single lines in your voice over as often as you like until they're correct. Focus on the line you're speaking now and don't be afraid of re-doing lines until you've nailed them; it's easy to clean up bad takes and practice lines in post-production.
Speak clearly and deliberately
While you don't have to recite your voice over like a speech, your voice and speech patterns should not draw a viewer's attention away from the video. Achieve that by speaking at the right volume, clearly and deliberately, and without stumbling over or poorly enunciating your words.
Position the mic correctly
Many new video creators record voice overs with the microphone far too close to their mouths. With a decent cardioid pattern microphone, you want to start about eight to twelve inches away from the mic; specifically, that's how far away your mouth should be when speaking. If the audio sounds too distant at that length, try moving an inch or two closer.
Practice your inflection
Your inflection is how you deliver the words on the page, from the emotion you express to the emphasis you place on individual words. Inflection has a very significant effect on how a voice over ultimately turns out, including how it matches the tone and context of the footage it's supporting. This is one dimension of your voice over that's worth practicing and even recording a few takes to get right.
Warm up your voice
Yes, even if you're not planning on being in the studio all day, even amateur voice over makers benefit from vocal warm-ups. The reason professionals do them is to improve their vocal range, work out any scratchiness in their voice, and avoid straining their voice by going from not speaking to speaking with emphasis for hours on end. Maybe most useful of all is how vocal warm-ups just help make you more comfortable talking at a microphone in an empty room before you begin recording.
Take a breather
Recording voice overs for a long period of time, or re-doing the same take multiple times, can cause you to tense up which affects your speaking patterns. If you feel yourself getting flustered or if you've just been recording for a long consecutive period, take a step back, breathe, feel your shoulders relax, and then try the lines again—you may be surprised how different the recording sounds when you're relaxed.