How to Make Discord Reactive Images
Reactive images let people's avatars light up when they're talking on stream. You don't have to be a VTuber to make your own – I'll show you how.
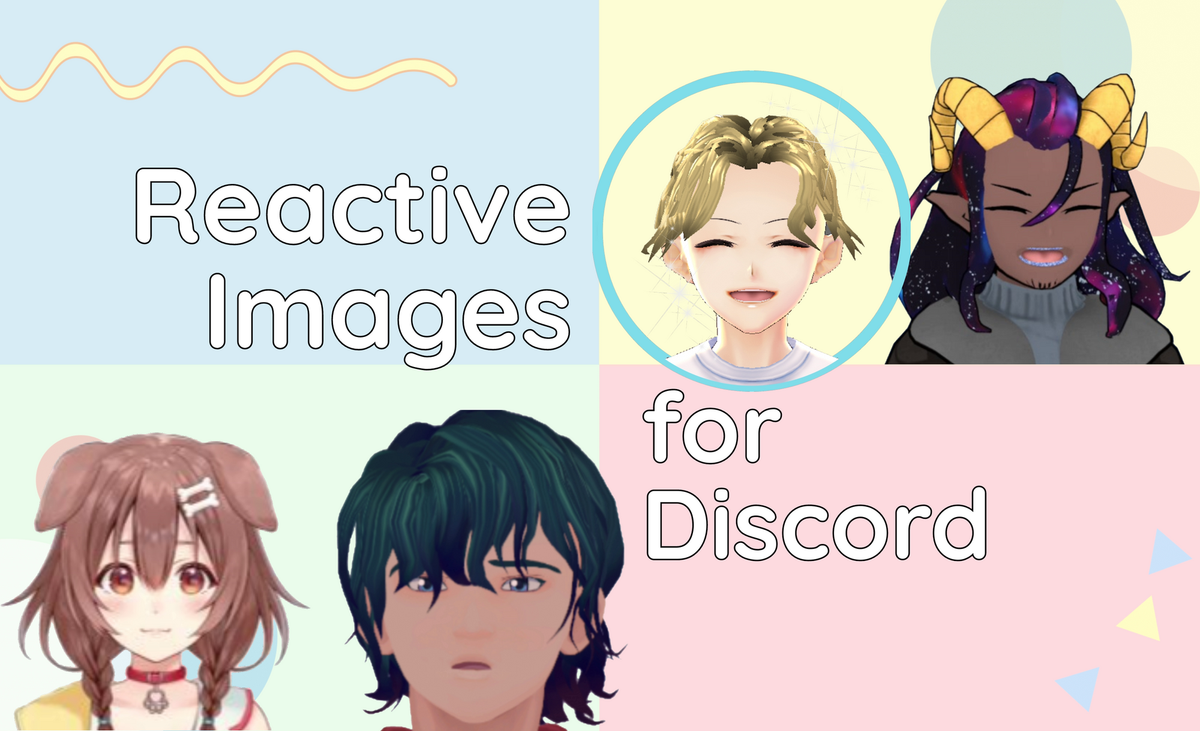
If you watch streamers chat in groups on Twitch or other platforms, they’re probably using a Discord call. With the right know-how, you can use simple Discord voice or video to show people’s avatars when they speak, or even use VTuber-style characters to make the call more lively.
When speakers’ icons light up, change, or move while they speak, streamers are using a feature called “reactive images," and you don't need to be a real VTuber to use them yourself. I’ll show you how to set up Discord Reactive Images in just a few minutes using Discord, OBS, and a free online image editor called Kapwing.
How to Make Discord Reactive Images:
- Create 1 or 2 PNG images
- Add images to the Discord Reactive Images tool
- Create a browser input in OBS
- Chat & stream!
Step 1: Create 1 or 2 PNG Images
By default, you can use your circular Discord PFP as your Reactive Image avatar, but these tend to have very low resolution (128x128 pixels, usually), are solid circles, and will only light up when you speak. Instead, I recommend using an avatar maker and Kapwing to create 1 or 2 new PNG images to create your reactive image.
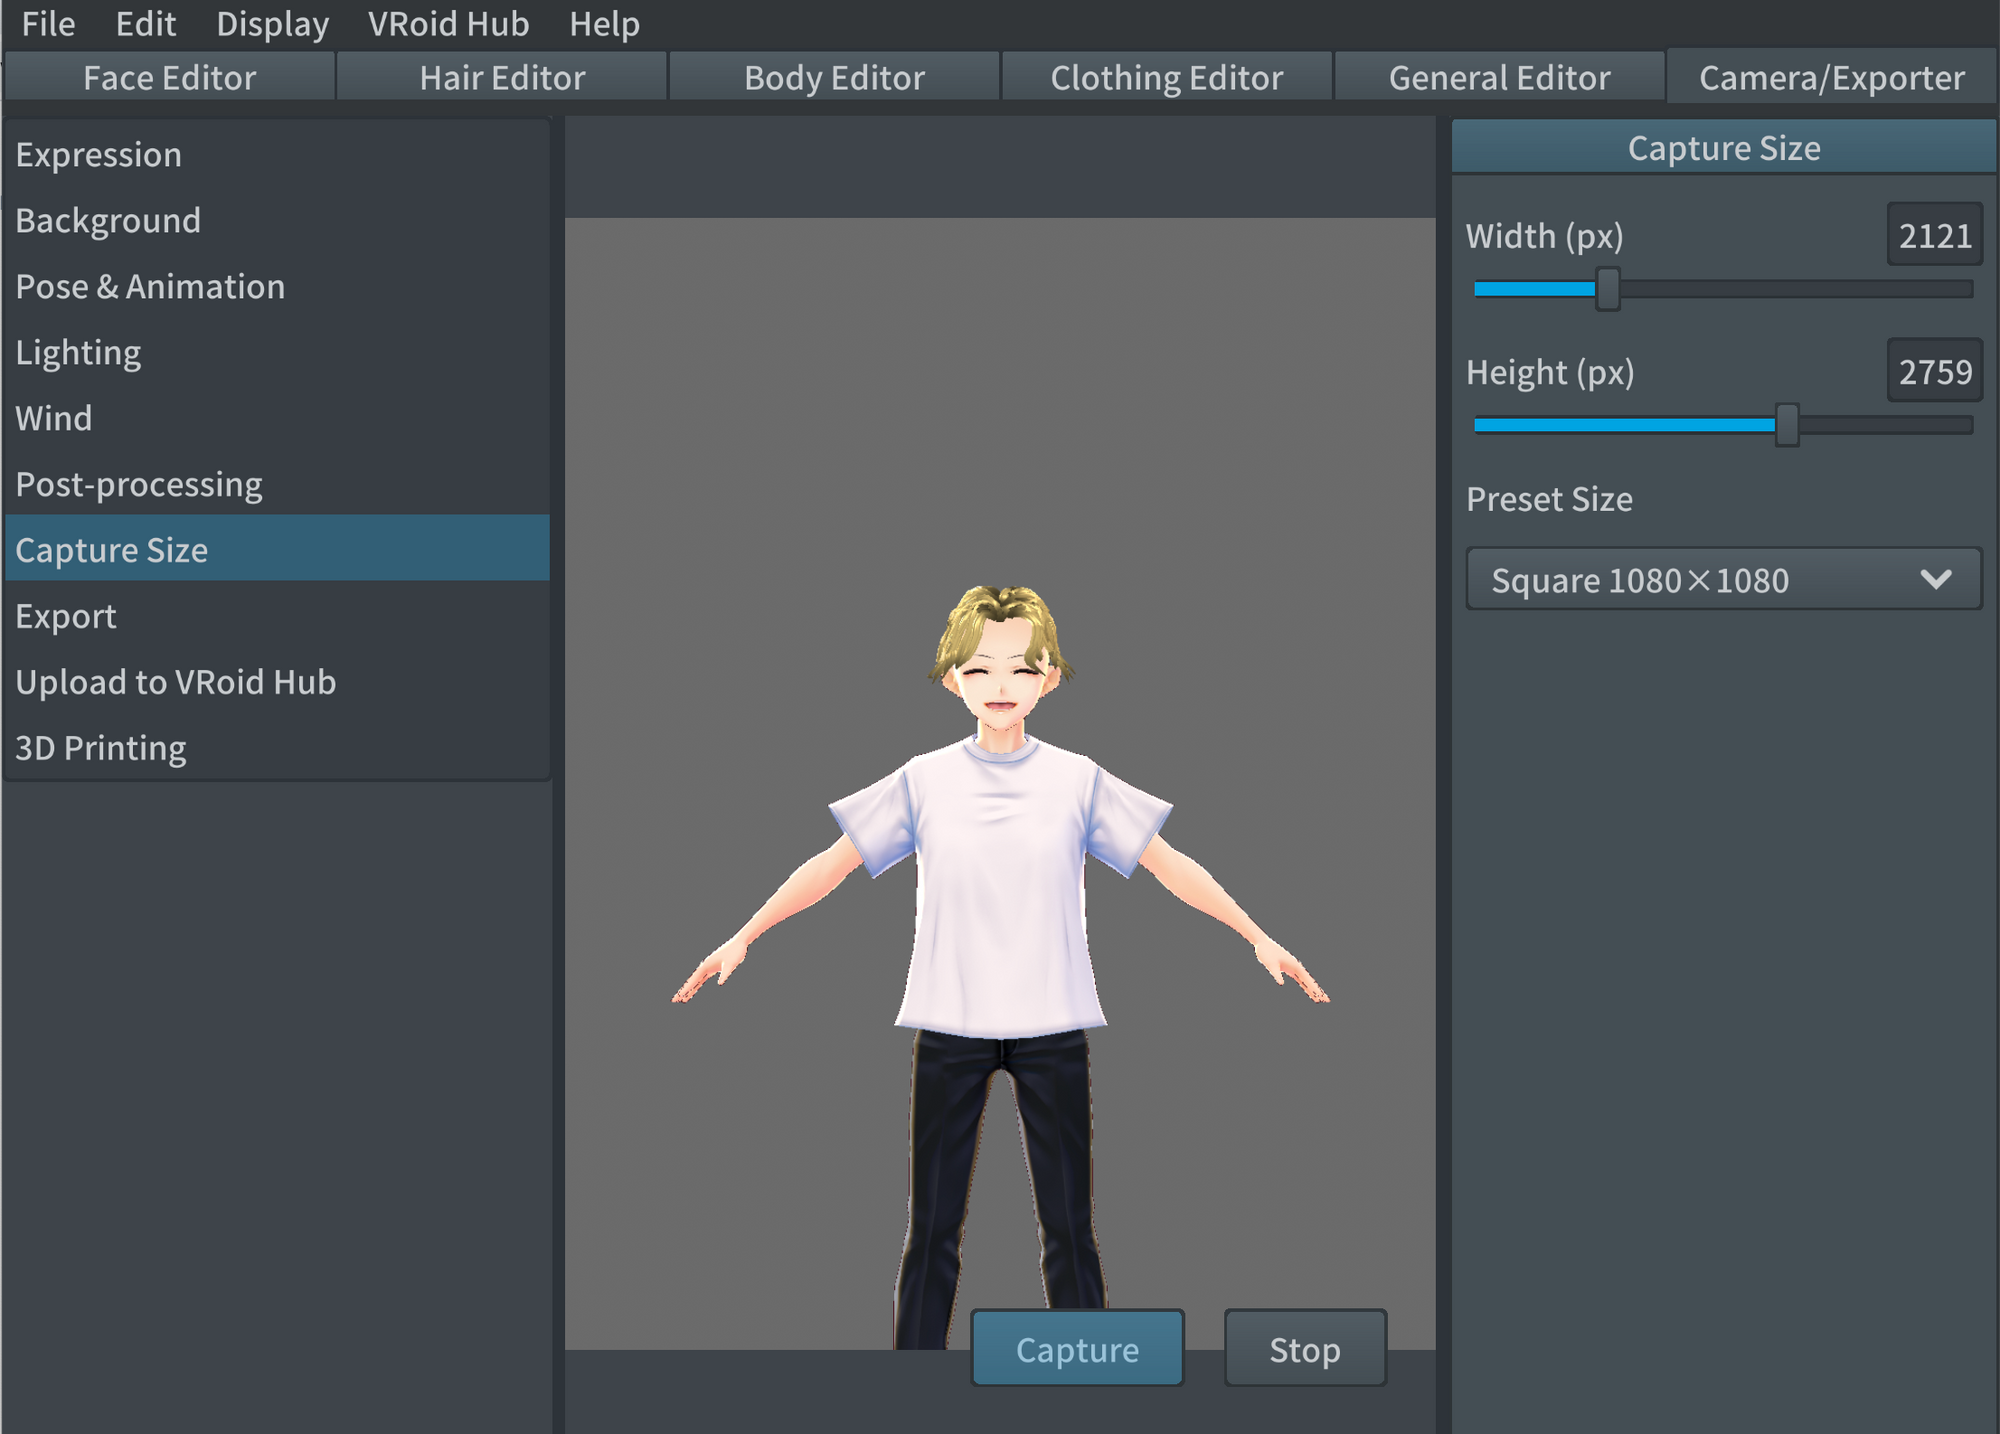
For reactive images, people tend to use VTuber-style avatars or transparent versions of their Twitch profile pictures or Discord PFPs. To make a VR-style avatar, I recommend using an online app like ReadyPlayerMe or an external software like VRoid Studio, which you can download for free on the gaming platform Steam.
Another effective reactive image for streams is a transparent version of whatever profile picture will be most recognizable to your viewers. On Twitch streams, for example, you should probably use a PNG version of your Twitch profile picture, rather than your Discord PFP.
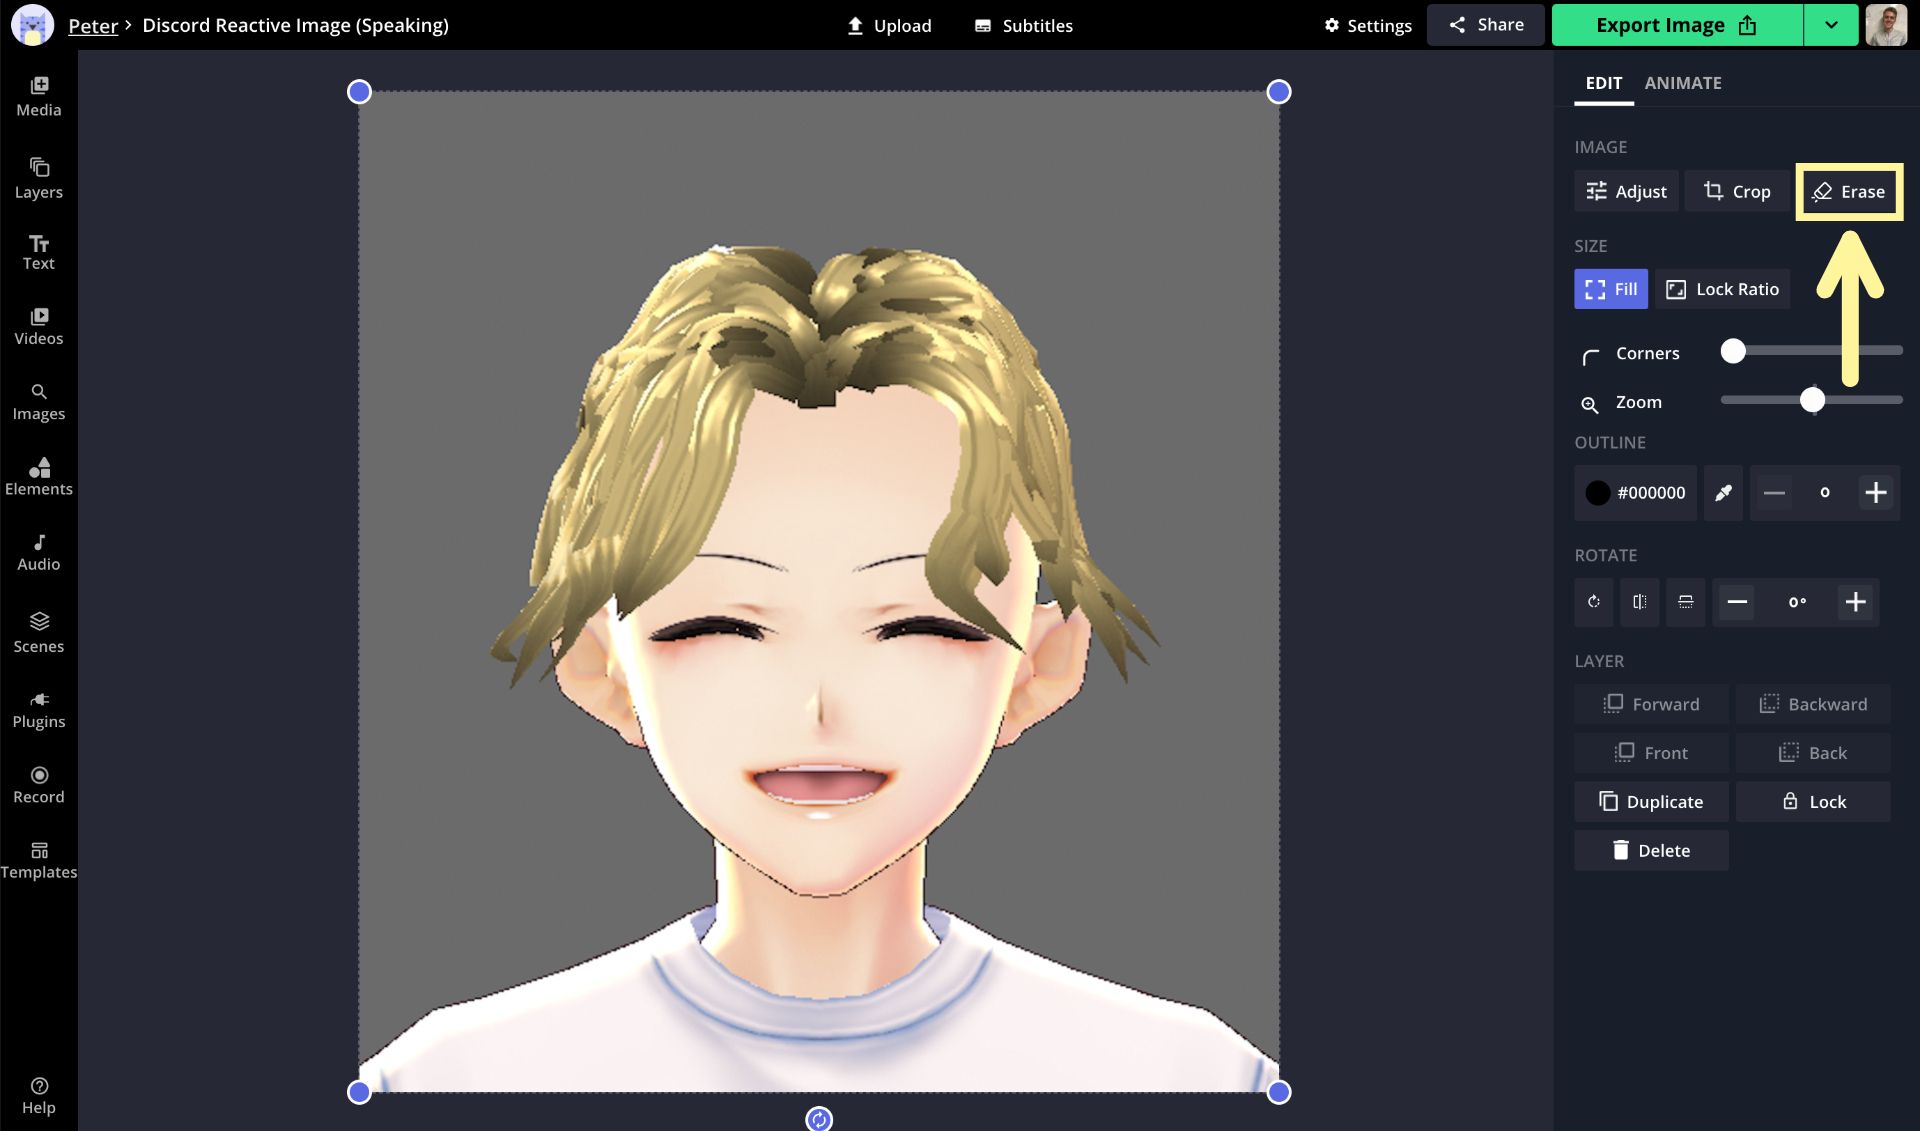
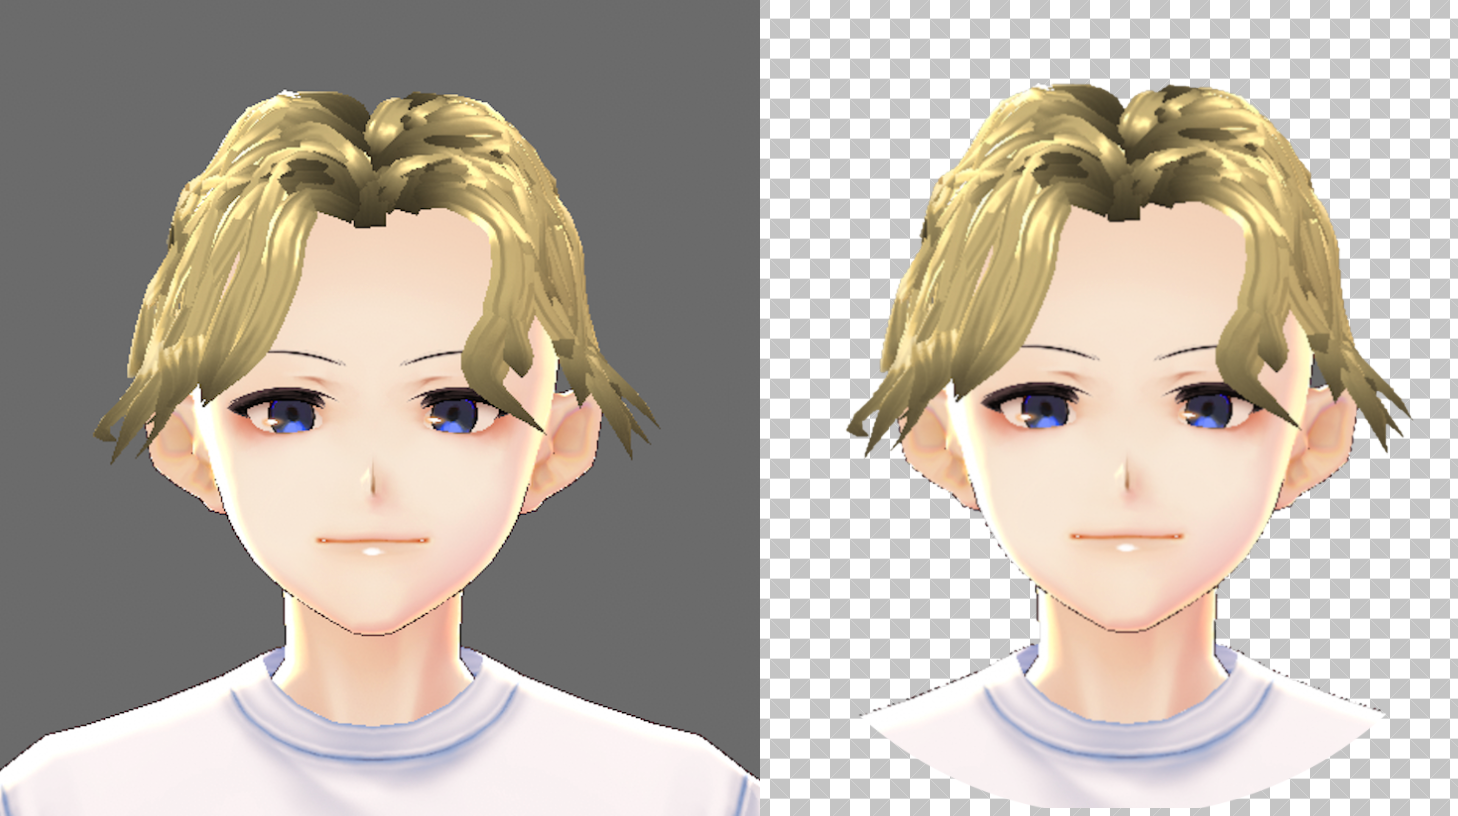
Upload the picture you want to start with to the Studio and select the Erase tool on the right. Here, you can remove plain backgrounds with a single click of the Magic Wand tool, or precisely cut out your avatar with the Erase tool. When you’ve created the transparent image you want to display when you’re not speaking, click Export Image, then Download to save the file.
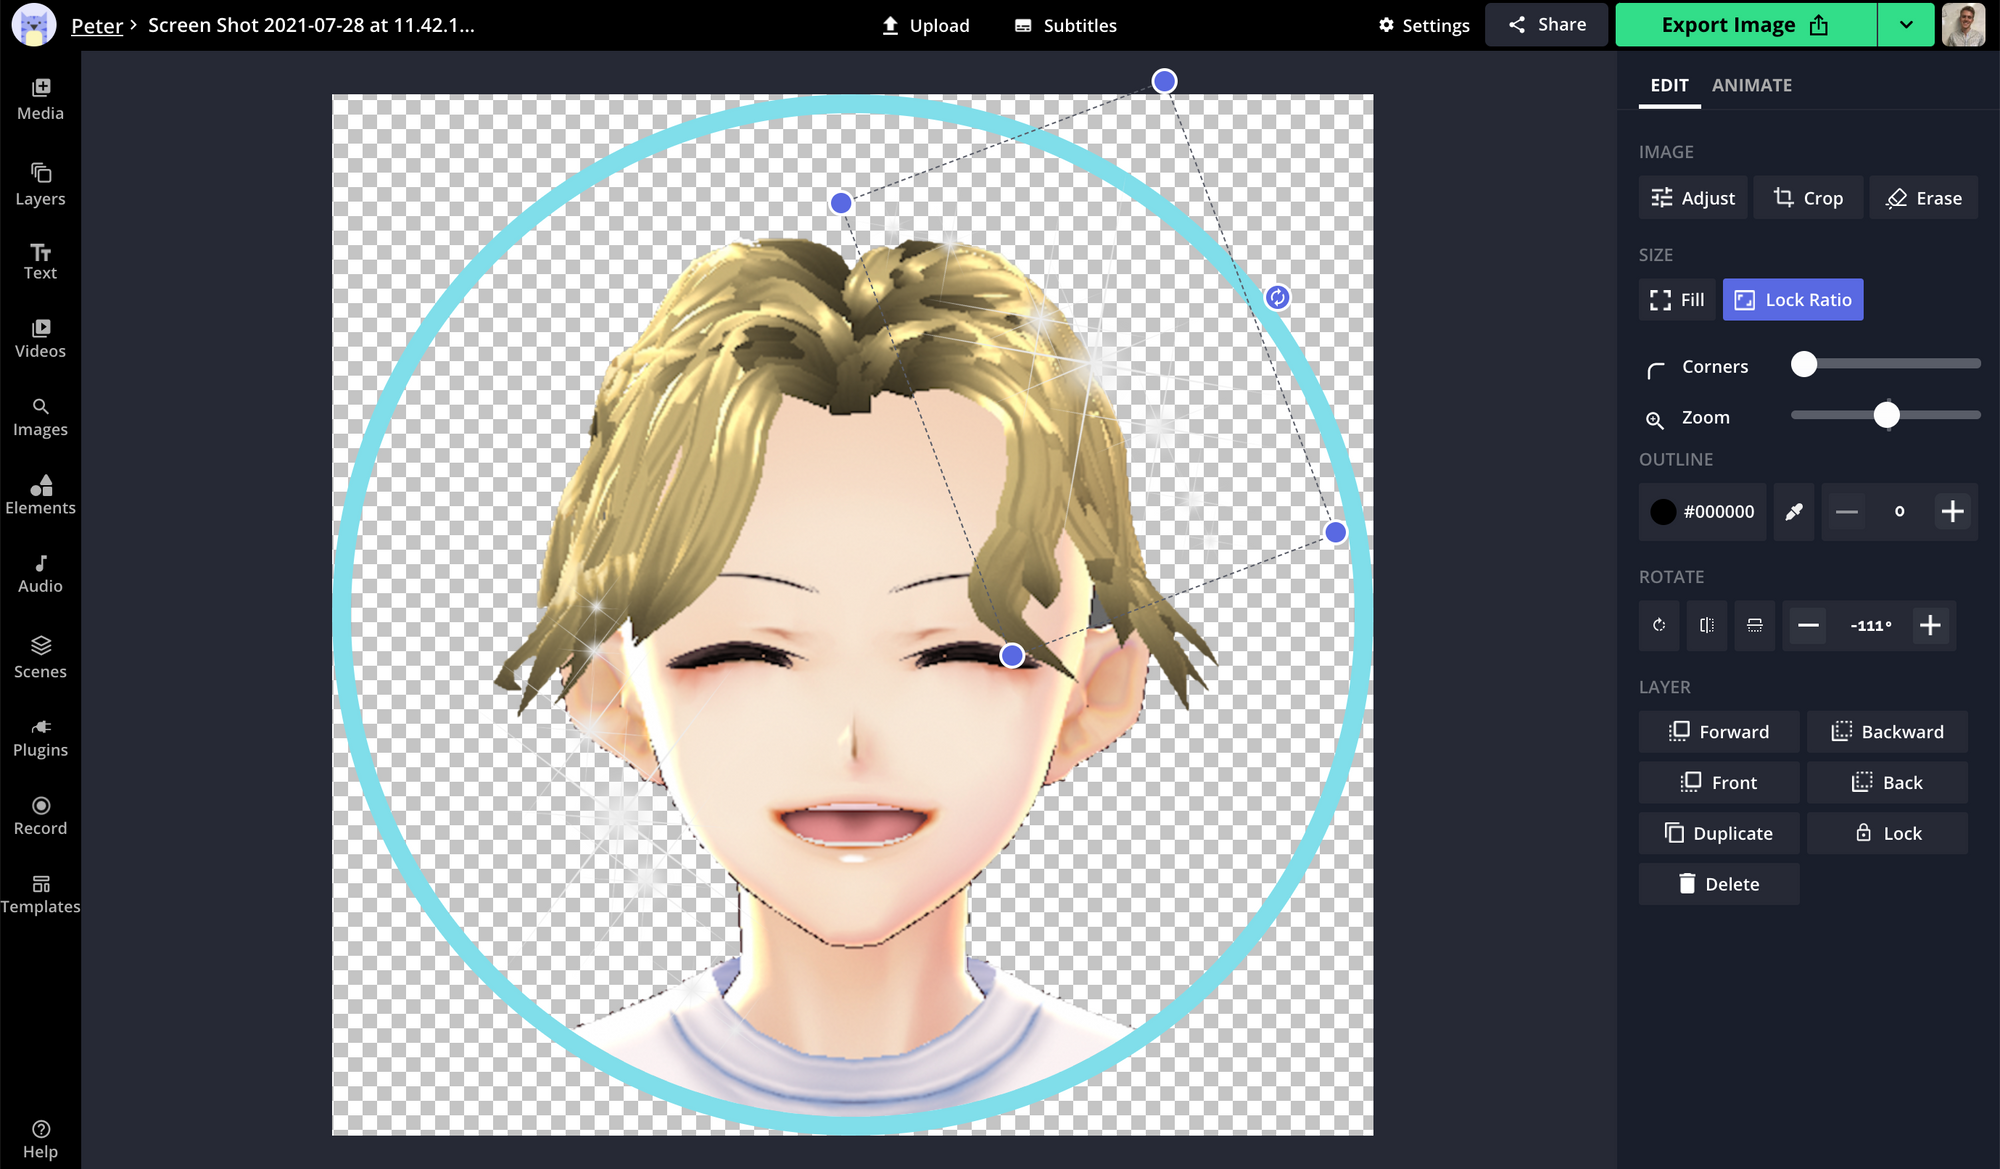
You may also want to make another version of your photo with small edits so it changes more than just its brightness when you speak on stream. Use the “Make a Copy” button after exporting the original to add a colored border, laser eyes, sunglasses, quote bubble, or any overlay to add more flair to your icon when you’re speaking.
Try these trending Discord tools:
- Discord Video Compressor Online
- Free Online Video Compressor
- Free Discord Banner Maker
- Free Online GIF Maker
Step 2: Add Images to the Discord Reactive Images Tool
The hard part is over now – everything else is simple. I recommend using Fugiman's online Reactive Images tool to integrate your Discord reactive images into your streaming software (in this case, OBS). Log in using Discord and upload both pictures you created with Kapwing – if you made just one, upload it to both the Inactive and Speaking options. Click Save for each image.
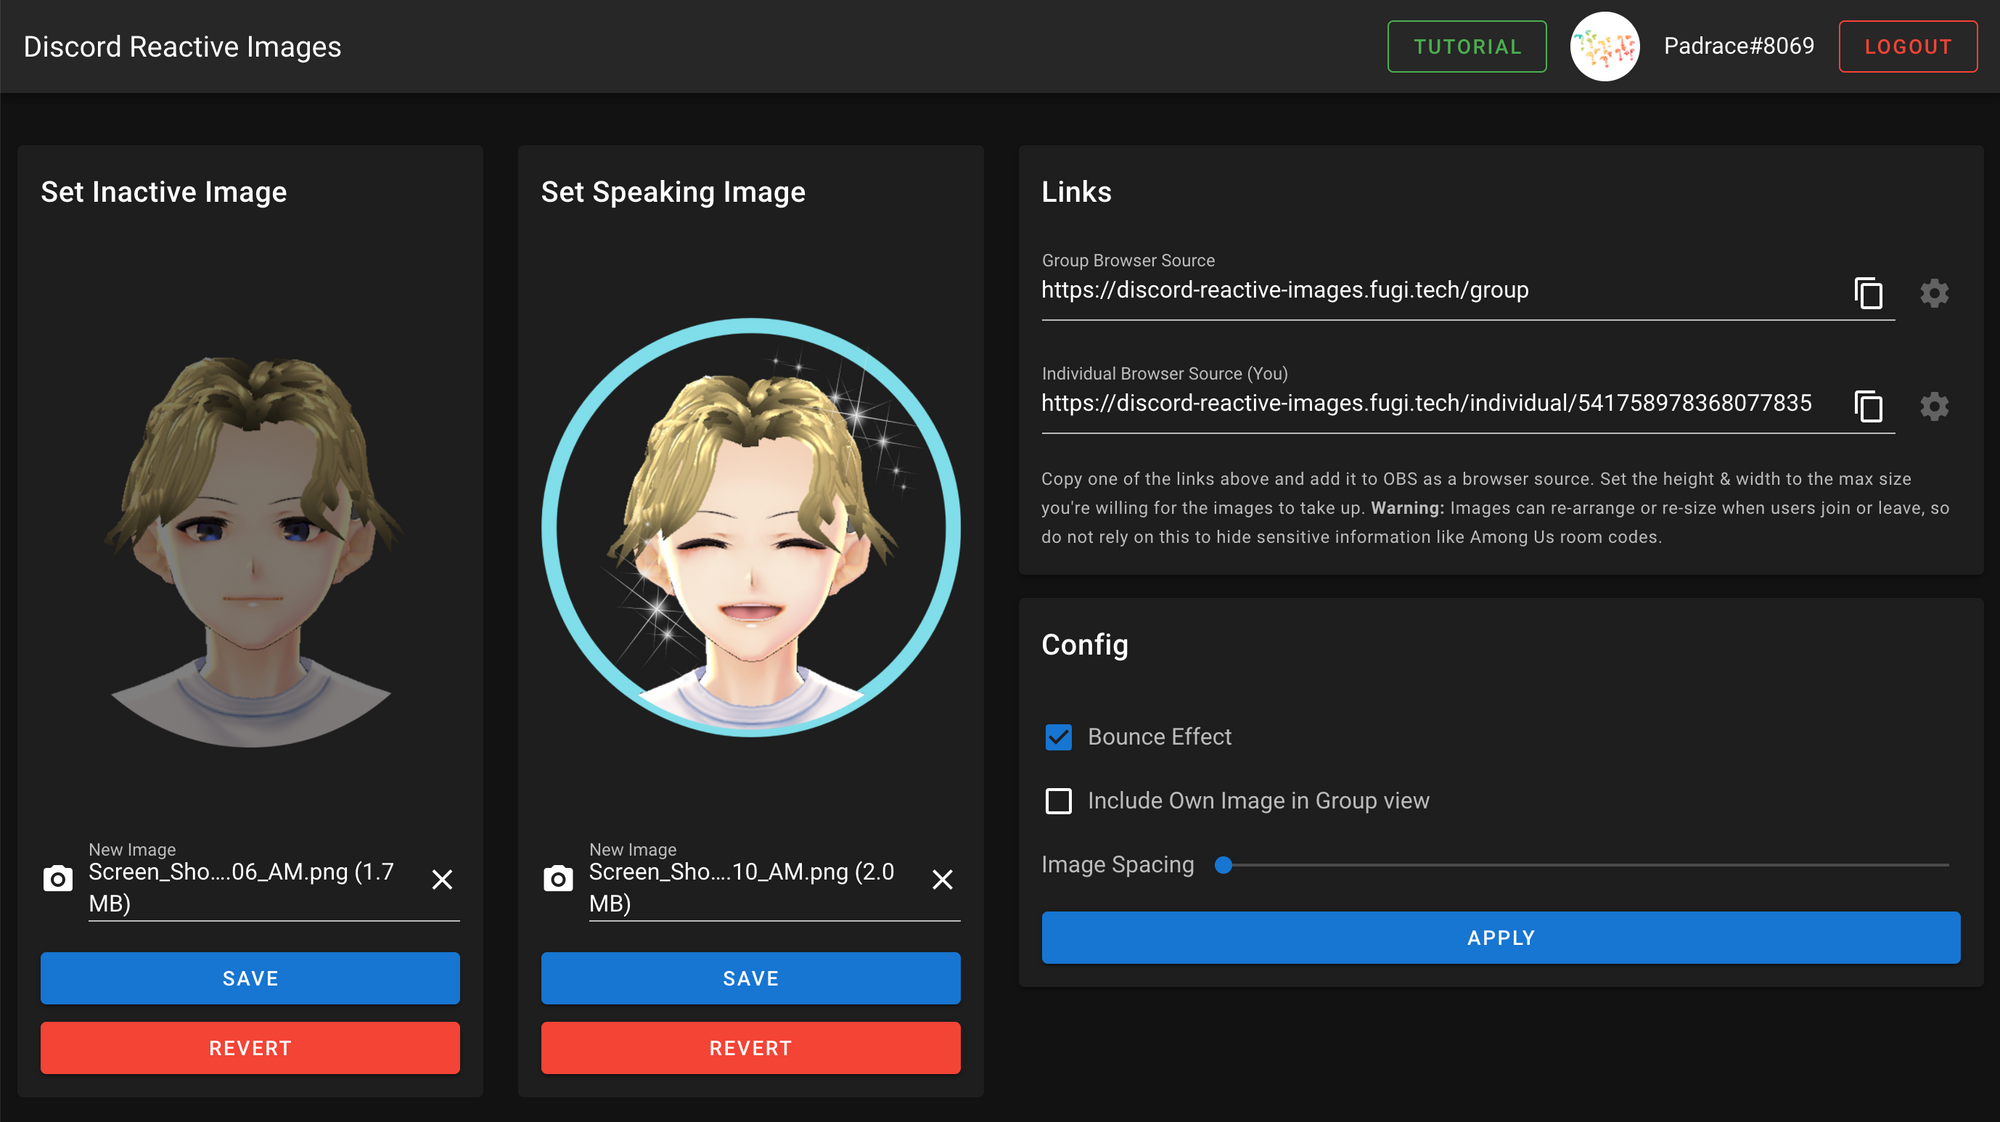
On the right, look over your options: you can add a small (10px) bounce effect to your reactive image whenever you start speaking, choose whether to include your own reactive image when streaming a whole group, and adjust the spacing between the profile images in the channel or call. Now, copy either the group link to bring everyone’s avatars and reactive images into your stream, or the individual link to show only your own.
Step 3: Create a Browser Input in OBS
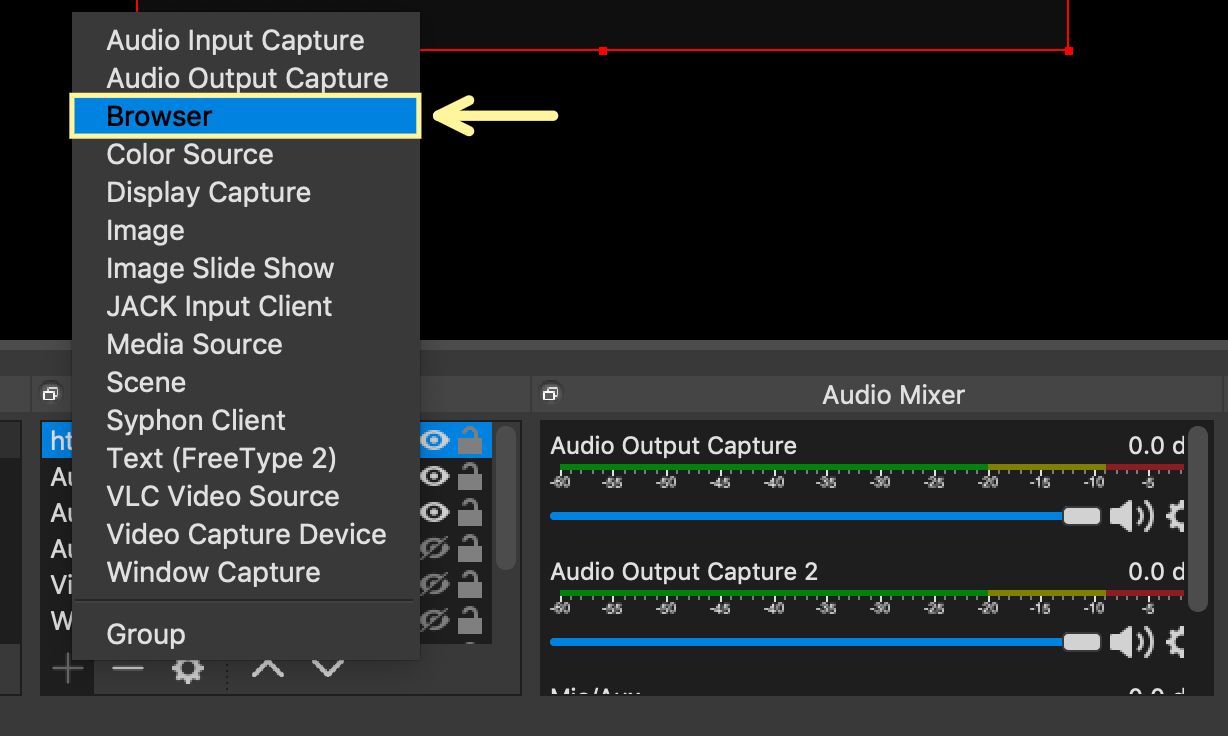
Now you’ll want to integrate your Discord reactive images with your streaming software. I’m using OBS, since it’s the most popular program out there, but the process is essentially the same in other softwares. Open OBS on your computer and add an input in the lower left. Choose “Browser Input” and add a name for your new source.
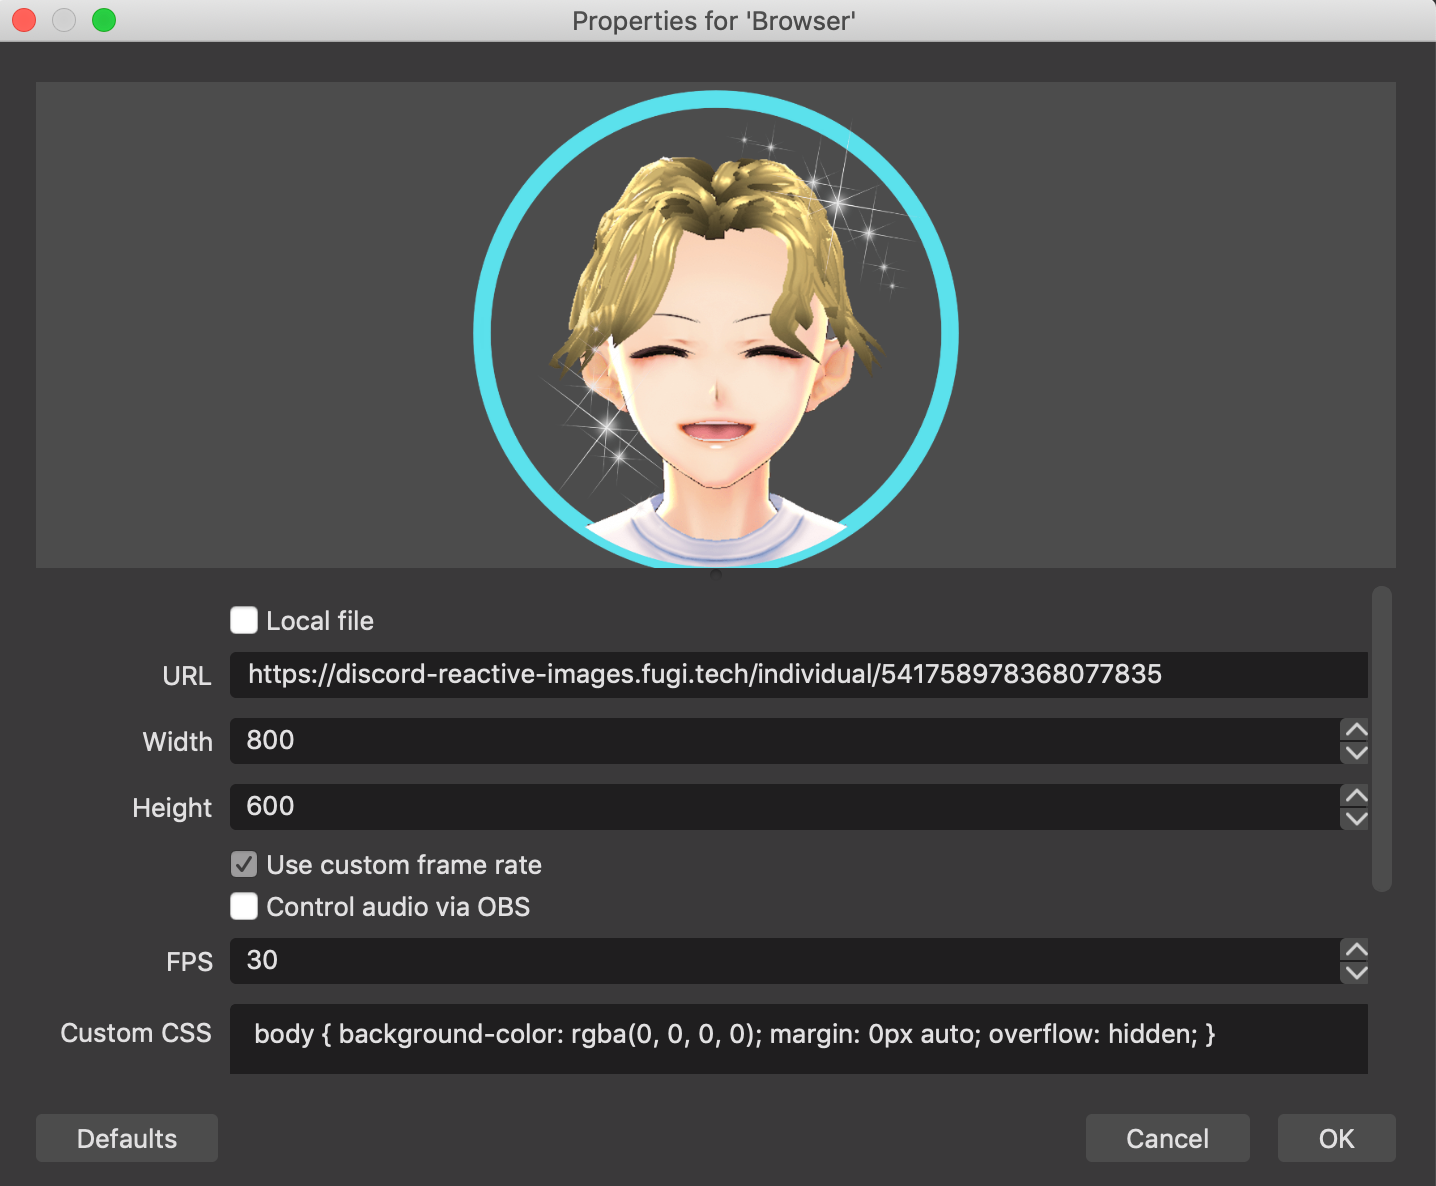
Now, paste the individual or group reactive image link you copied in the Browser Input Properties window. Once this source is visible, you can move it around your streaming window and resize it until it looks the way you want.
Step 4: Chat & Stream!
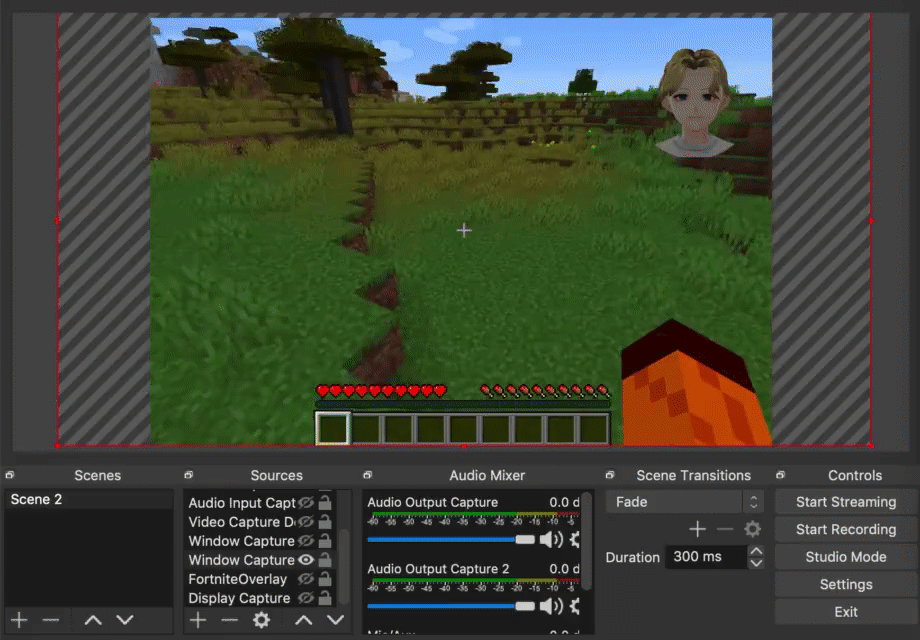
For the Discord reactive image tool to work with OBS, you need to keep it open in a browser tab, and your Discord app needs to be running with your voice channel or call. As long as all these are actively running, you can finish setting up your stream and share your conversation with any audience.
I hope this article helps you get started with Discord Reactive Images for streaming your voice channels and audio calls! If you’re interested in more tips and tutorials on creating great digital content in 2021, check out the Kapwing YouTube channel or read through some related articles on Discord, gaming, and streaming:
• How to Make Custom Discord Stickers
• How to Make a Discord Profile Banner
• How to Download Twitch Clips Online
• How to Record Minecraft on Your Computer