How to Make a Video on Chromebook (Record & Edit)
Chromebooks usually come with a webcam which makes recording videos easy. On the other hand, the tools to make a video with proper editing aren’t built-in. With Kapwing, the free web-based editing software, to make a video exactly how you want it. Interested? Keep reading and I’ll show you how:

Chromebooks usually come with a webcam which makes recording videos easy. On the other hand, the tools to make a video with proper editing aren’t built-in.
You have two options. Use the recording as is or sign up for expensive software that’ll just slow you down. Actually, there’s a third option I forgot to mention. Use Kapwing, which is a web-based tool and one of the best video editors for Chromebook. With Kapwing, you can make a video exactly how you want it. Interested? Keep reading and I’ll show you how:
- Record your video
- Edit using Kapwing
- Upload where you want
Note: Instructions in this article apply to laptops running Chrome OS.
1. Record your video
First, in the corner of your Chromebook screen, select the Launcher. Search and open the camera app. Now, click the video icon and start the recording.
After you stop recording, find your video thumbnail in the bottom right corner.
2. Edit using Kapwing
Now, open the Kapwing Studio and upload the video you just created.
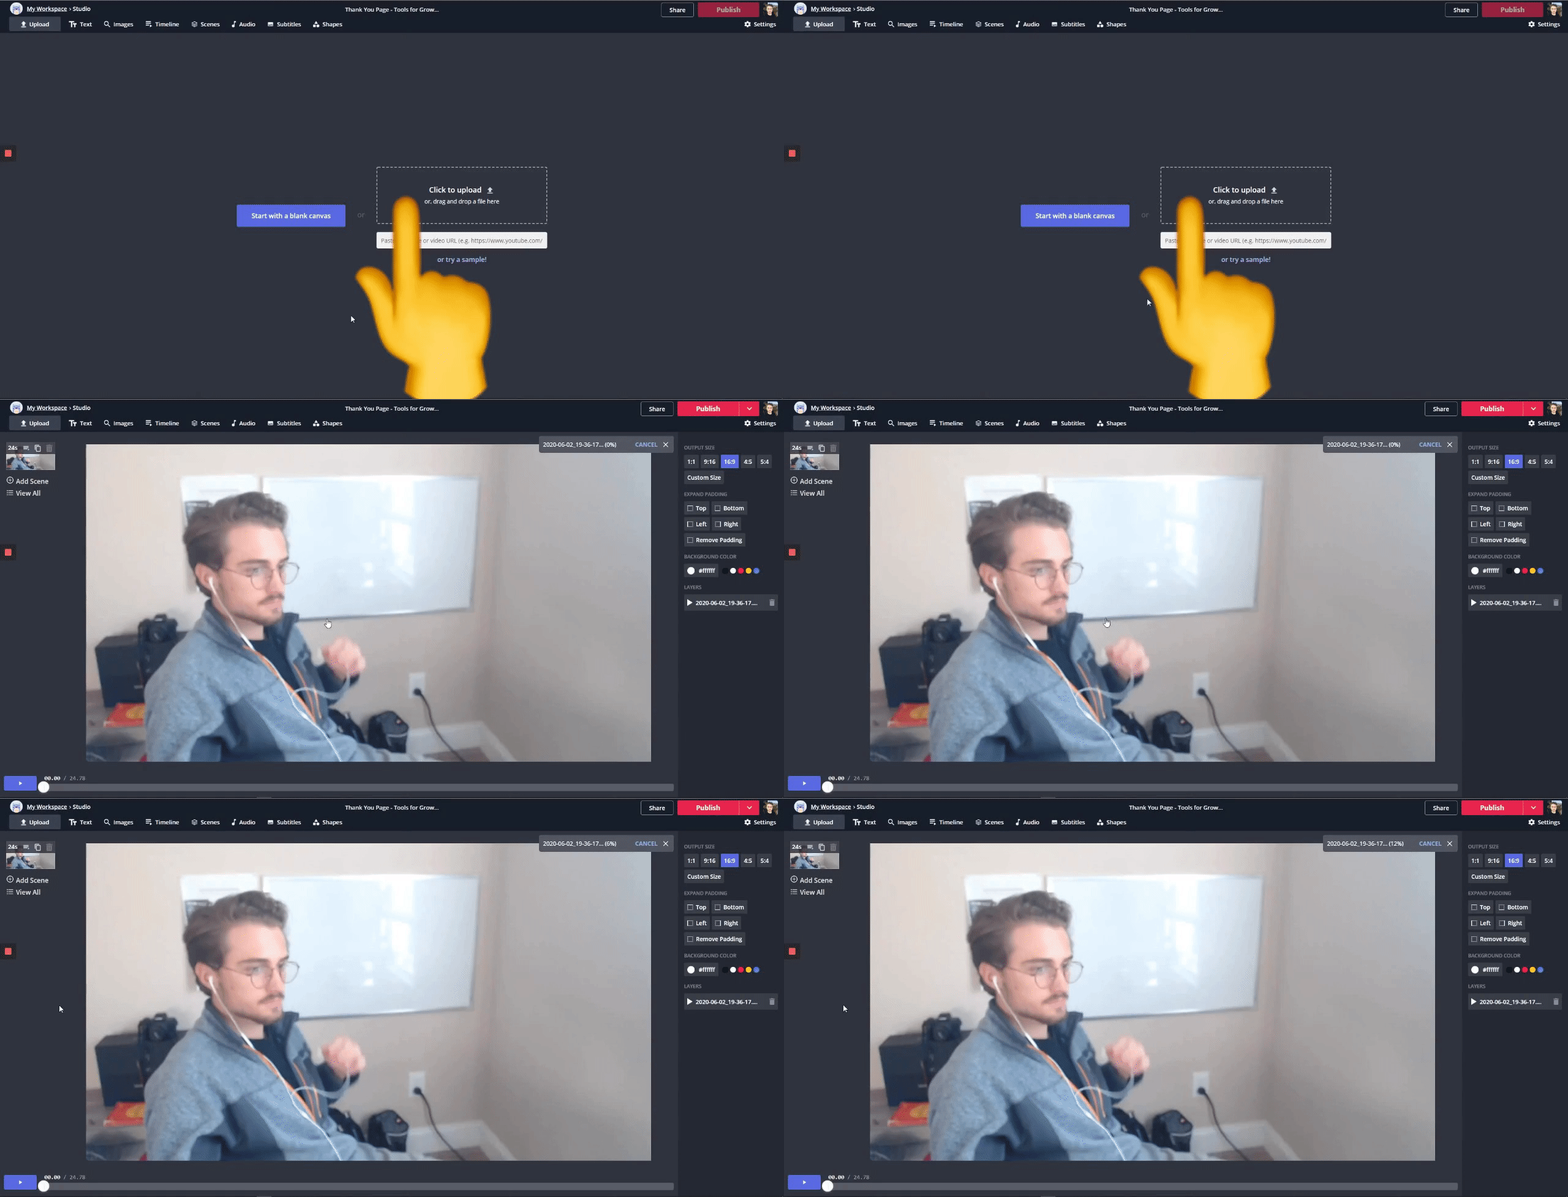
Kapwing gives you basic editing tools like trim, adjust and crop but also advanced tools like:
• Add padding around your video
• Add fully custom subtitles
• Customize your background
• Add images and logos
• Change video speed
• Mirror your video
• Cut out sections
• Combine videos
• Make a video collage
• Export as a GIF
• Add fully custom text & animations
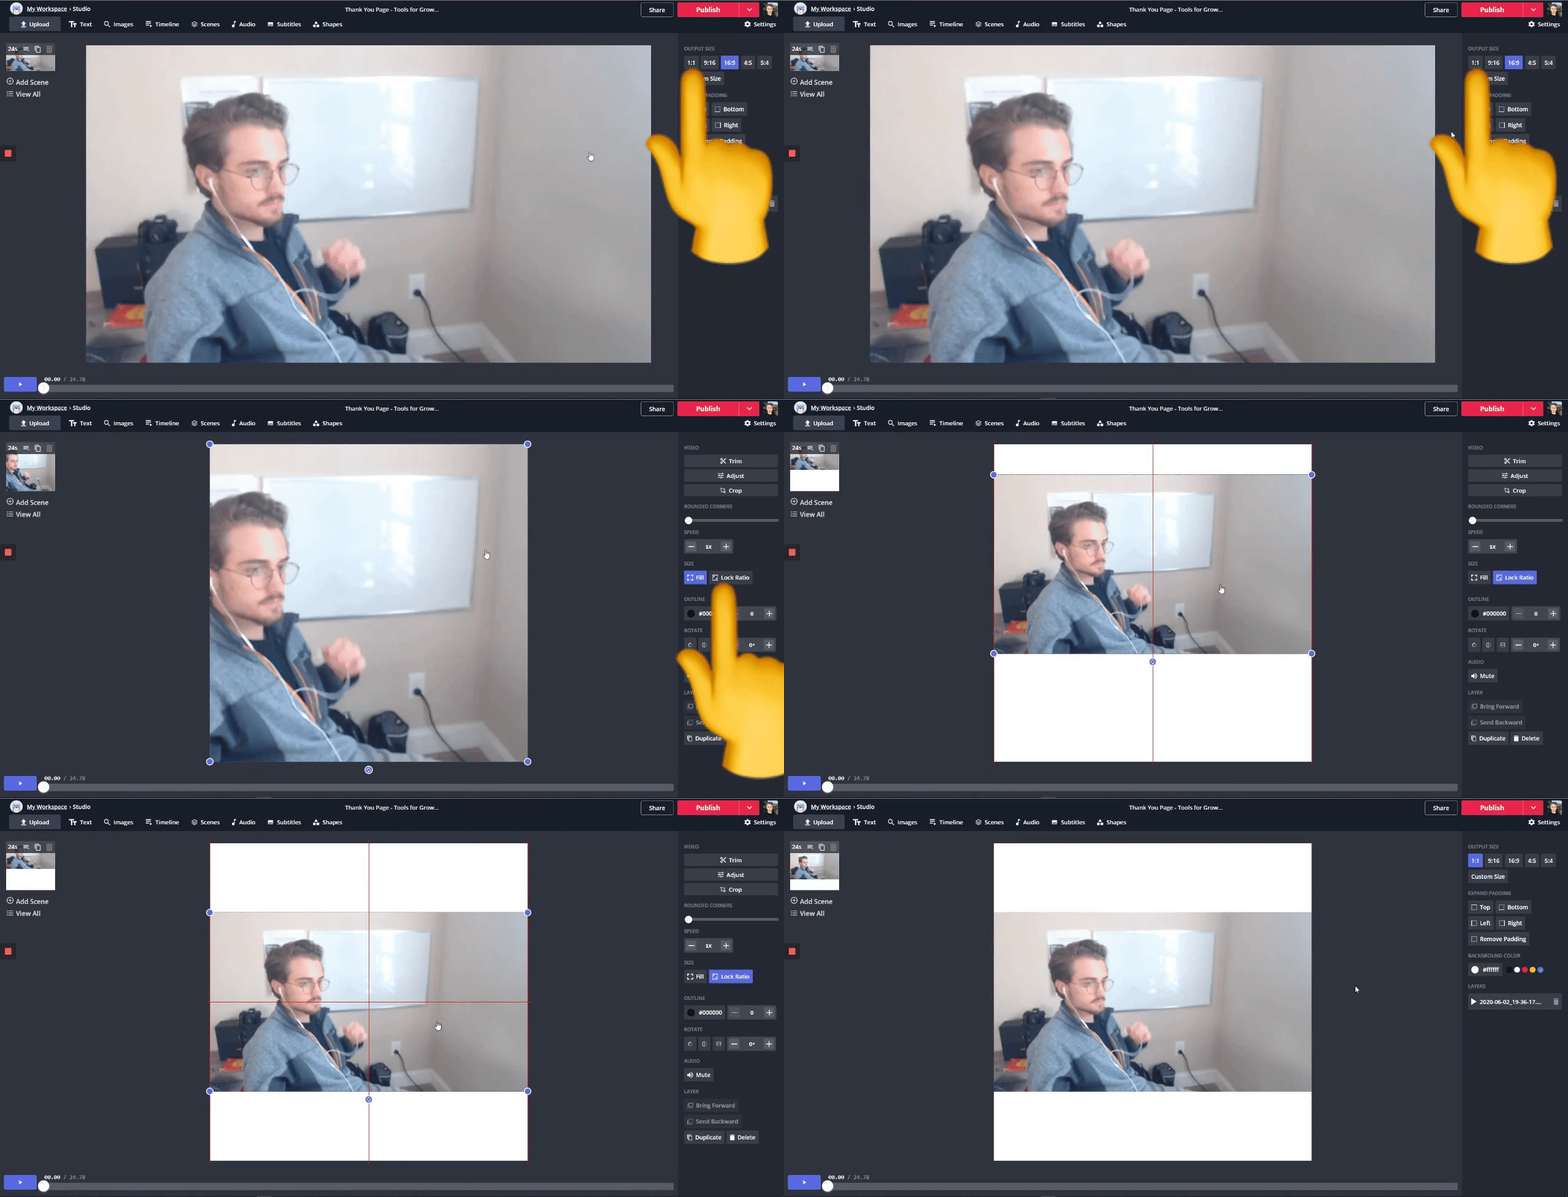
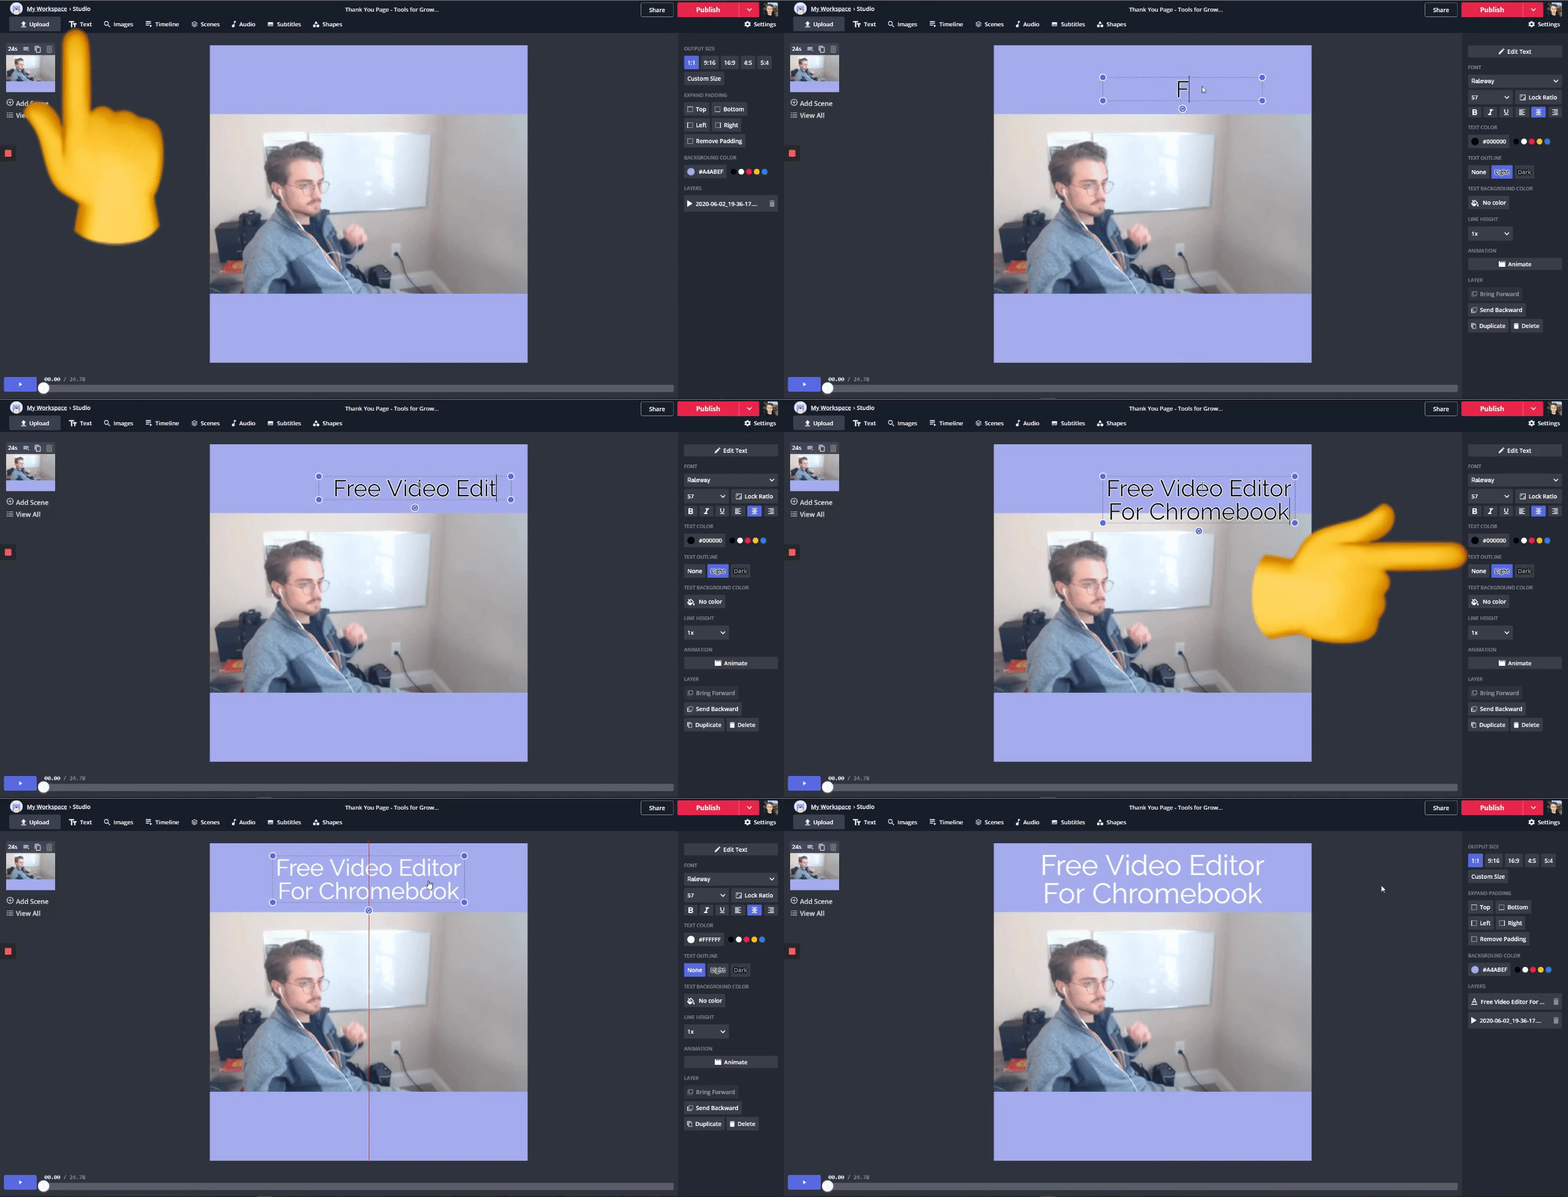
For this tutorial, we’ll make a simple video for social media. I’ll add borders, change the color and enter a catchy headline for my video.
To add borders, change the aspect ratio to 1:1, click ‘Lock Ratio’ under ‘SIZE’ and manually center the video.
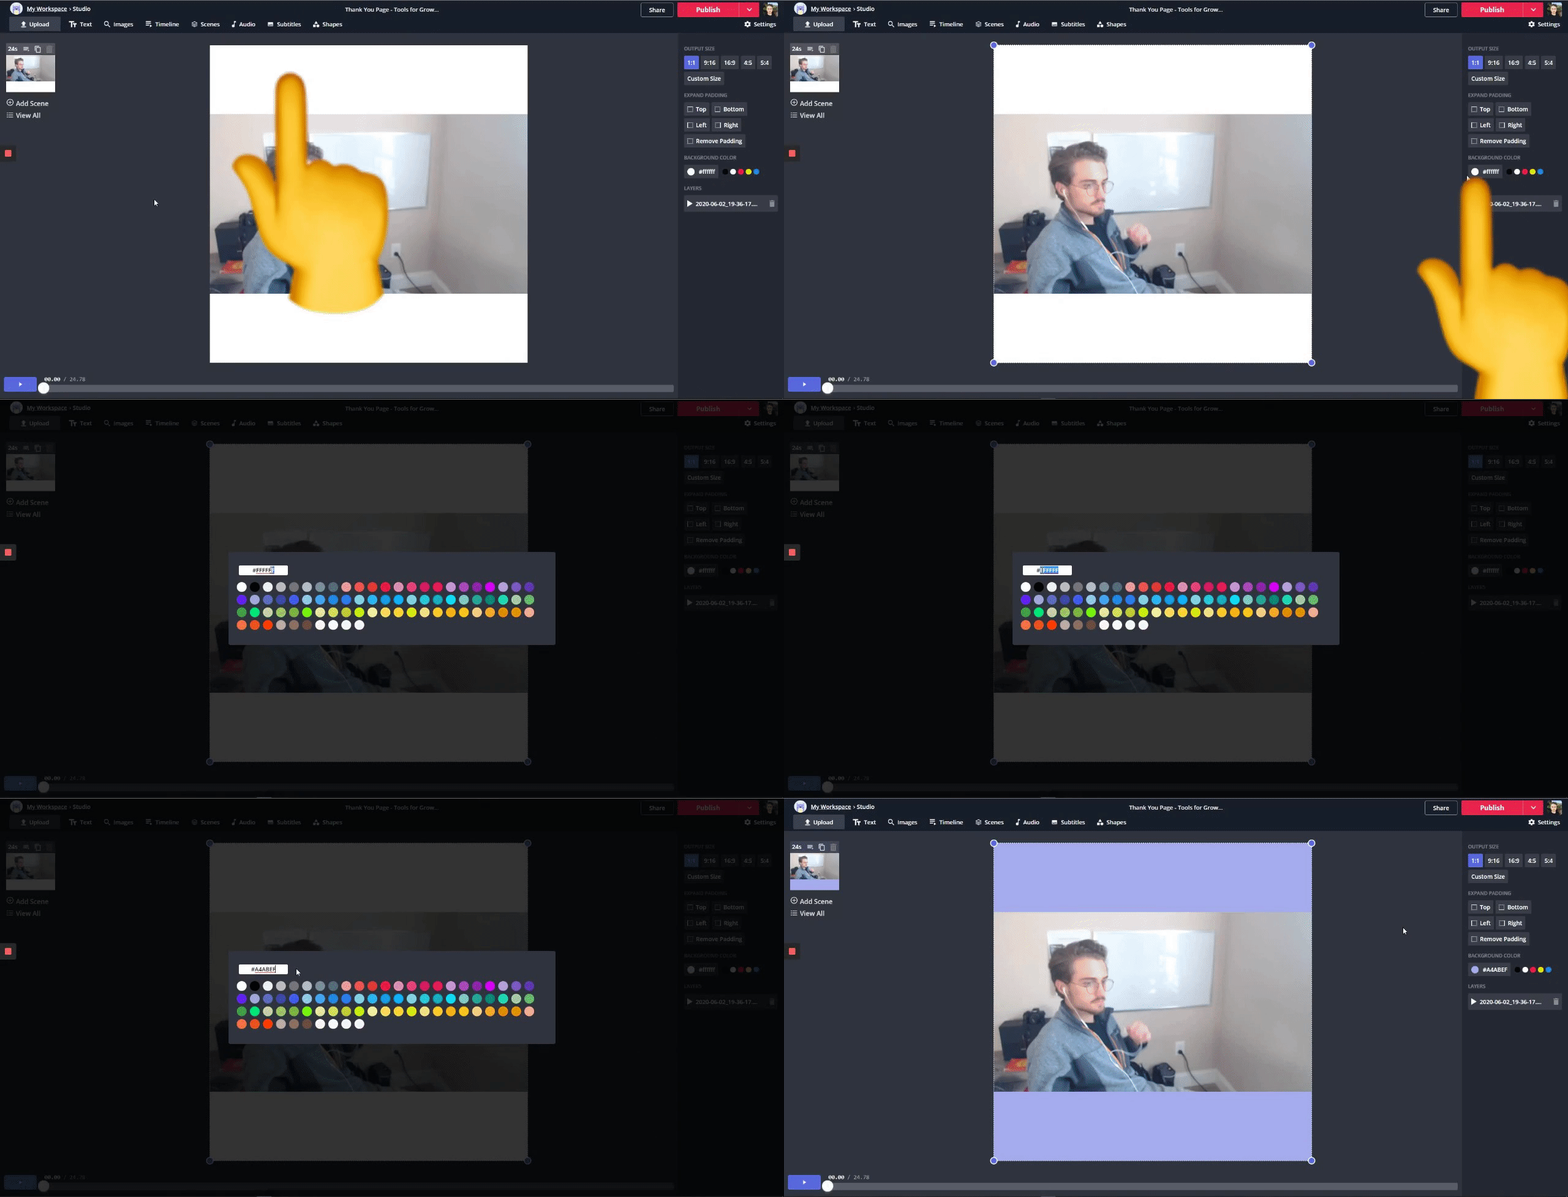
To change the background, click the border and open the color picker under ‘Background Color’ on the right.
To add text, click ‘Text’ and enter a catchy headline to grab attention. Edit the text with the toolbar on the right.
If you want, click ‘Subtitles’ and let Kapwing’s AI subtitler add closed captions beneath your video!
Check out this article about auto-subtitling your video to learn more.
3. Upload where you want
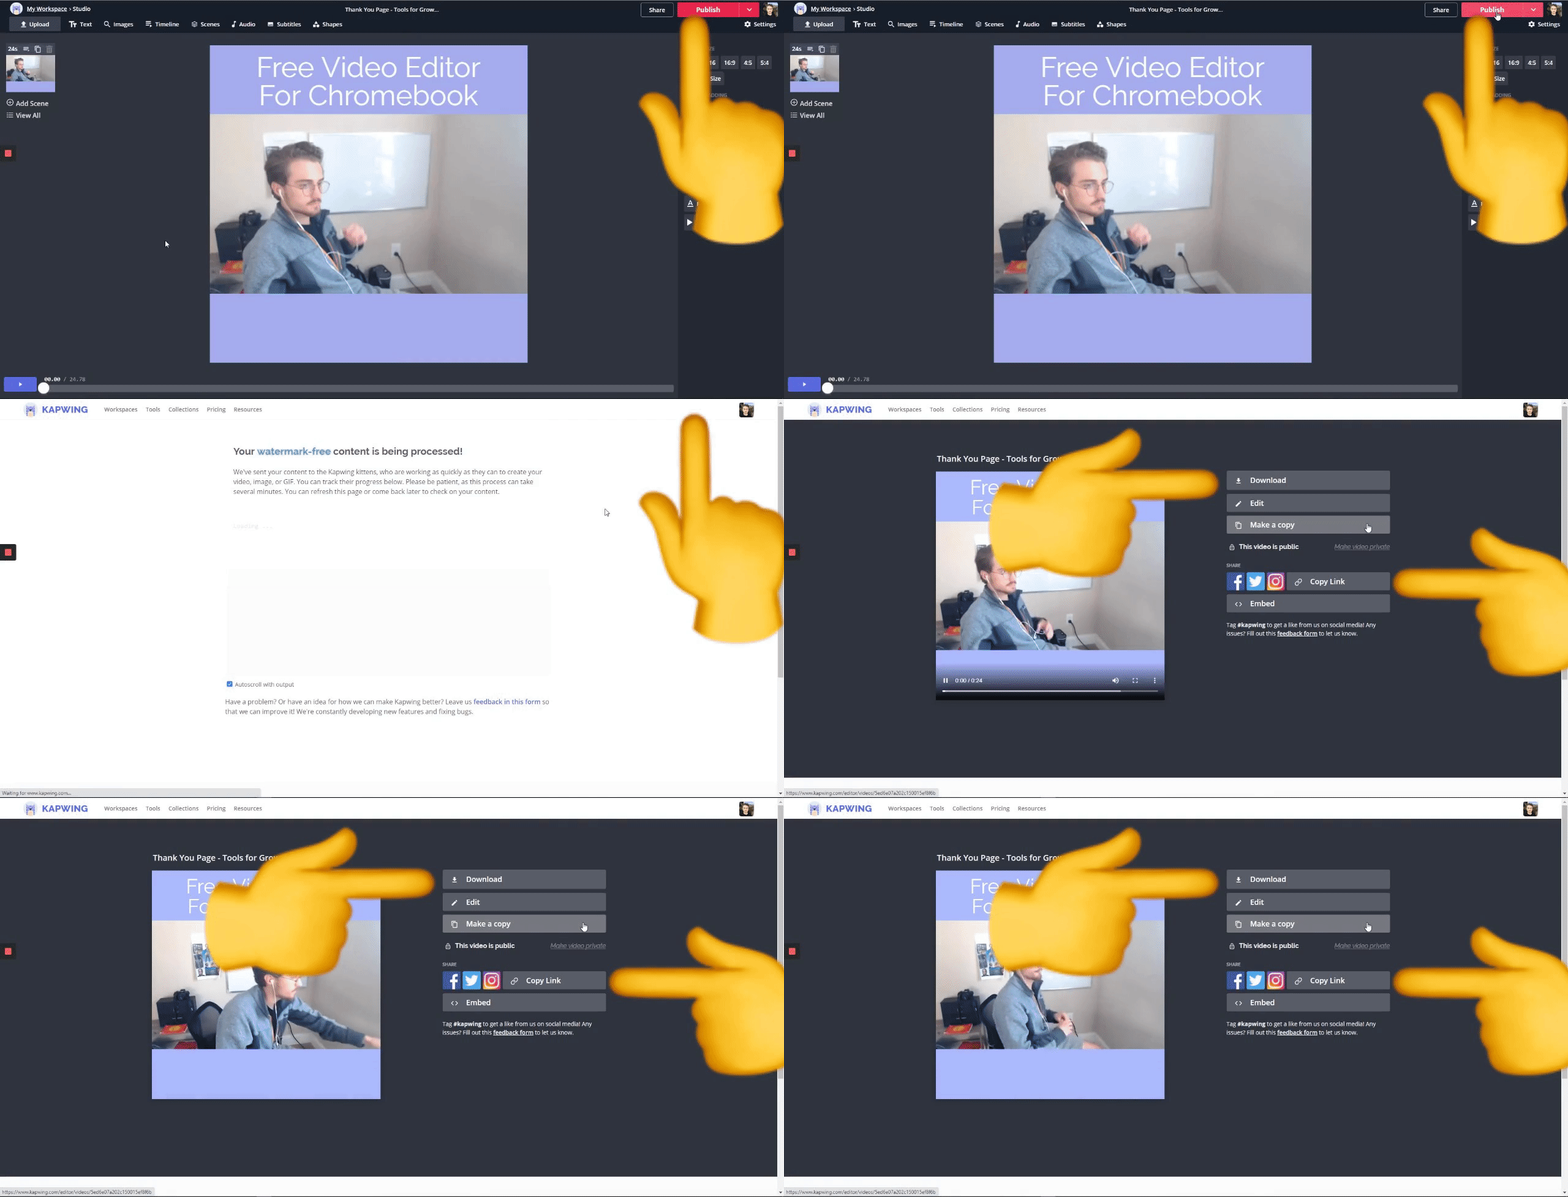
When you’re done, click ‘Publish’ in the top right and Kapwing will process the video. Then, you can download the video or share it to your favorite social platform!
Remember to tag us @KapwingApp whenever you share your content on social media – we love to see what our creators are passionate about. And be sure to subscribe to the Kapwing Resources page – we’re constantly writing new tutorials and features to help you make the most out of Kapwing.
Read these next:
- How to Edit Videos with Kapwing
- How to Make a Custom Google Chrome "New Tab" Background
- The Best Video Editors for Chromebook in 2023


