How to Use a Siri Voice Generator
With the help of text-to-speech generators, you can add voiceovers reminiscent of Siri to your videos. In this tutorial, I'll show you how to use a Siri voice generator and add the audio to a video.

Siri, the popular virtual assistant, has taken on another role and it's in the realm of content creation. Siri voice generators allow creators on all platforms to make a voice over that sounds similar in their videos.
You've likely noticed this edit taking off on TikTok. The text-to-speech feature converts text to a voiceover and you might hear something unexpected. The occasional flubbed words and monotone narration make videos 10x funnier. In addition to the humor, this feature improves accessibility so more viewers can enjoy the video.
With the help of a free Siri voice generator, you can add voice overs to your videos. In this article, I'll show you how to use a Siri voice generator using a free online video and audio editor called Kapwing.
How to Use a Siri Voice Generator
There are several Siri voice generators you can use, but in this example I opted for Kapwing. This website is free to use, lets you download the file as an MP3 or as an audio overlay on a video, and has a full editing timeline for simple customization. Let's jump into the tutorial.
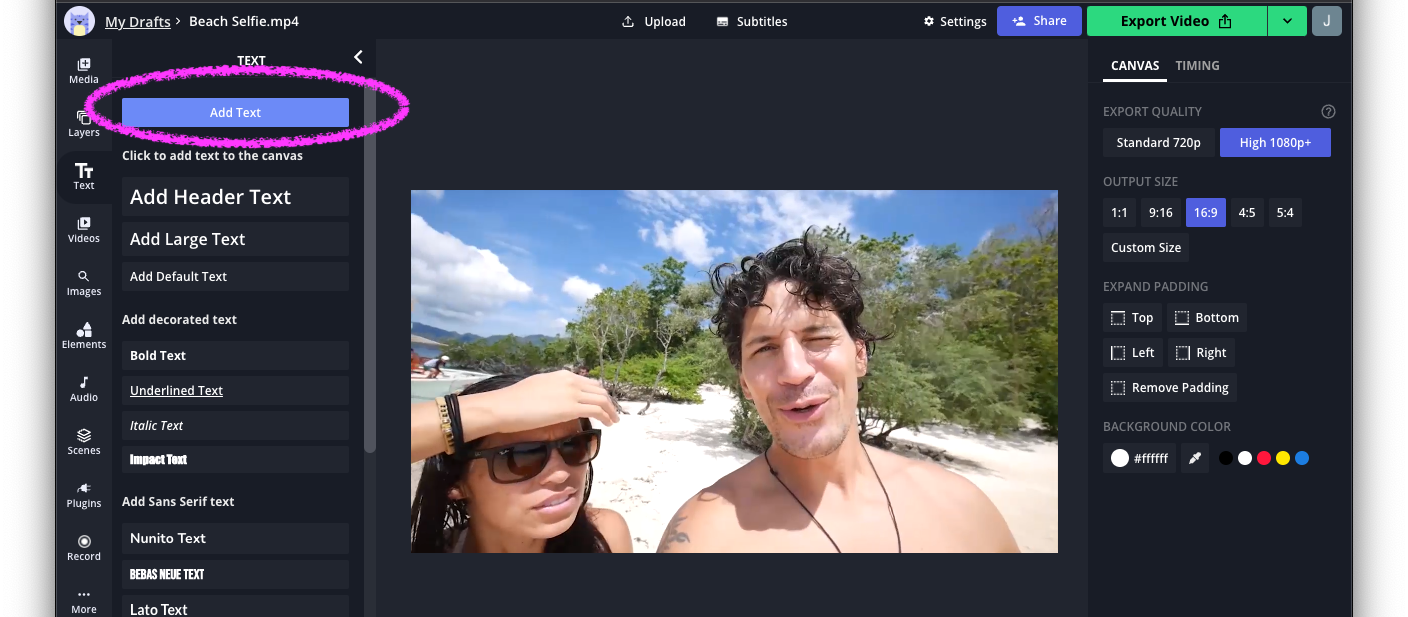
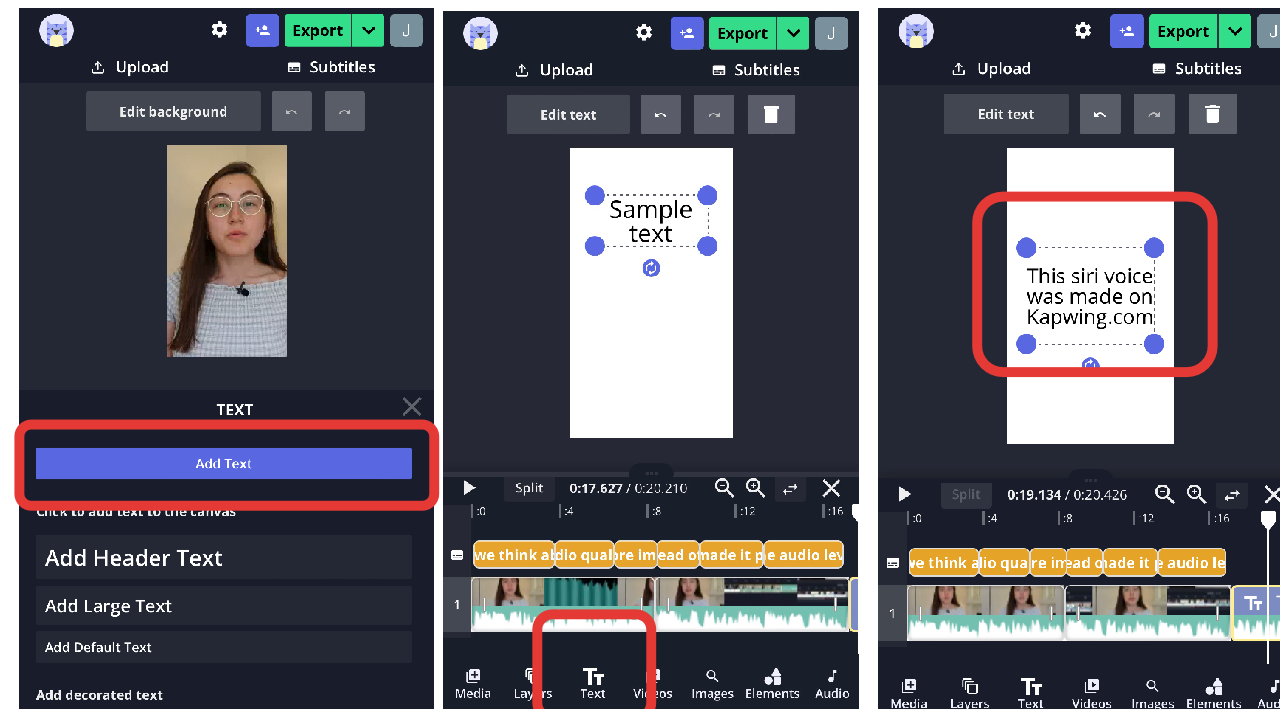
Step One: Add a Text Layer
Head to the Kapwing website and click "Get Started." You can choose to upload a video or import a video layer from YouTube, or you can start from scratch if you want the stand-alone siri voice. Then, use the Text button in the left side menu to add a text layer.
Kapwing works well on iPhones, Android, and all computers, so feel free to use it from any device. On an iPhone, add a text layer and double tap to enter your own words. You can type a short phrase for the robot voice to read out or a whole paragraph.
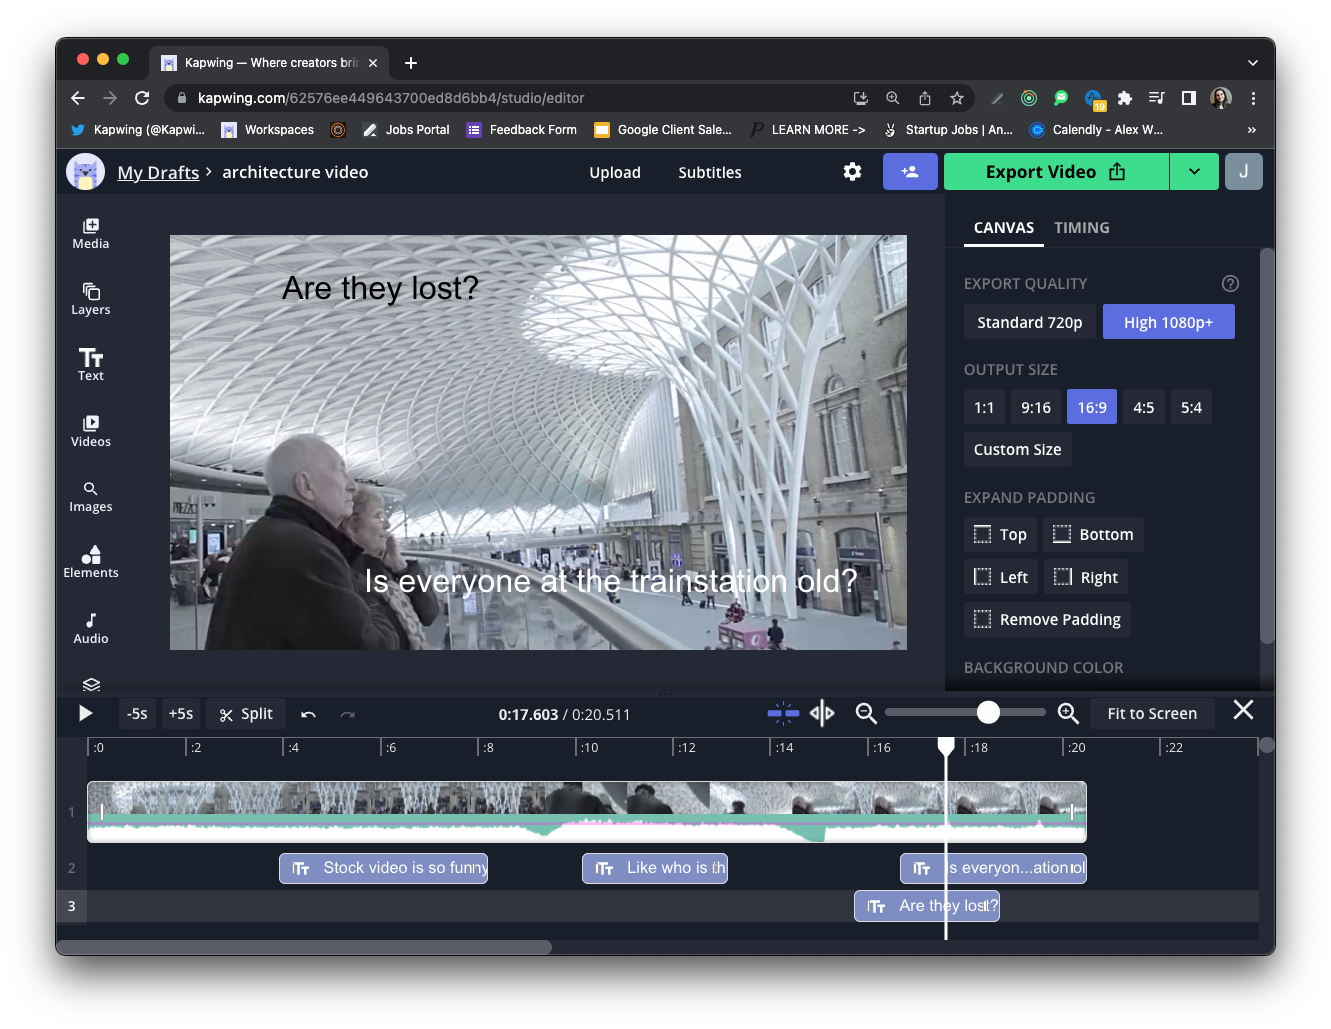
Creators can also tell a story using the Siri text generator. Add multiple text layers and type what you want to appear at each moment in your video. Then, use the timeline to time out the text layers on the timeline, crafting an original Siri story or narrating what's happening in a video.
Step Two: Make Text Layer into Speech
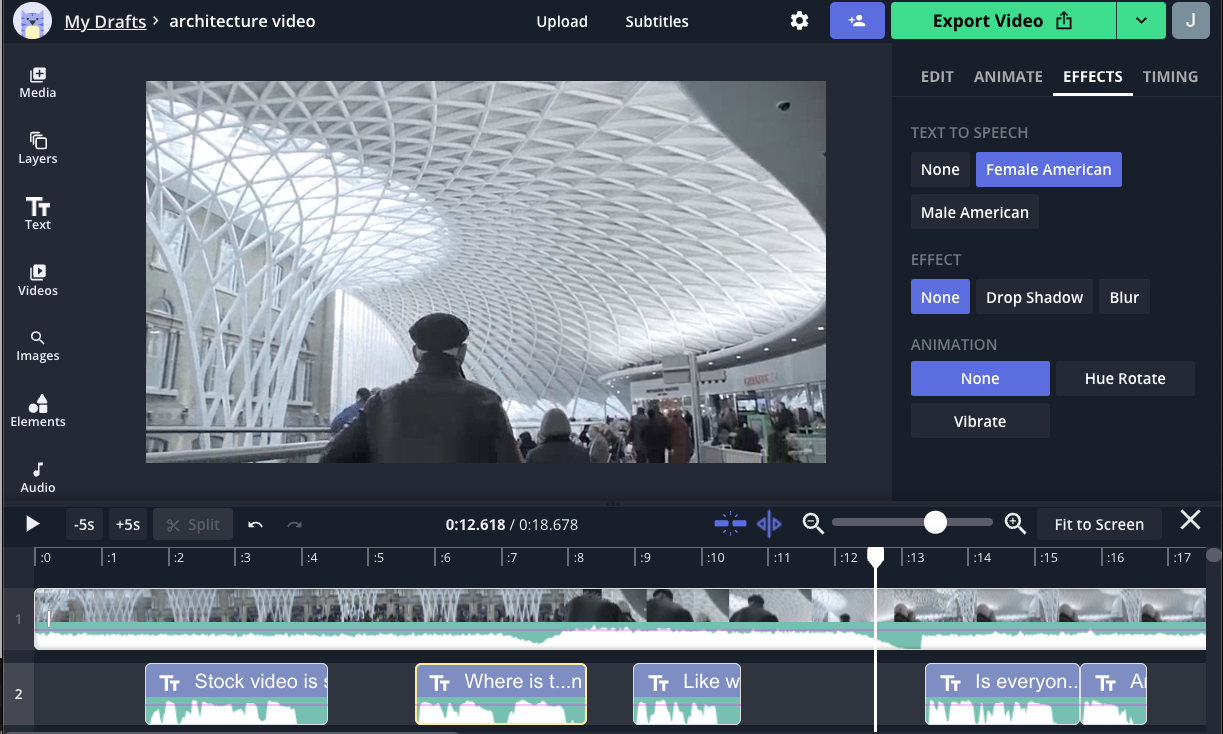
Once you've typed the words that you want to say, select the text layer. In the action menu, you will see a prominent button that says "Text to Speech." Use that button and choose a voice - "Female American" or "Male American" - to make your text layer into a Siri voice layer.
Notice that your text layer will grow in the timeline with a waveform audio shape attached to it.
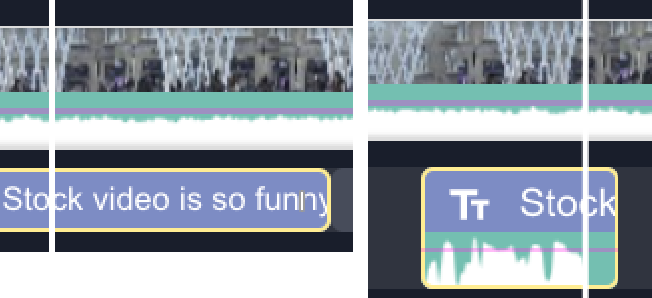
Play the video to listen to what the siri voice will sound like and toggle between the Male and Female voice to try different sounds. If you want to delete the text layer, right click (or long press on mobile) to detach the audio layer from the text layer and delete the text layer from the canvas.
You can create a pause by putting space between two Siri voice layers in the timeline. Or, emphasize words by increasing the volume of the layer; drag the volume slider up past 100%. Creators can also change the speaking rate, making the Siri voice faster or slower, by incrementing or decrementing the speed.

If you want to edit the text layer to change what the Siri voice says, just double tap the layer. You'll see a warning that you will revert back to a text-only layer, but you can re-make the text to speech layer after the update.
Step Three: Export Voice as MP3 or MP4
When you're happy with the audio, you can choose to export the Siri voice as an MP3 (audio only file) or as an MP4. Tap the dropdown arrow next to the Export button to choose "Export as MP3" instead. After you confirm, Kapwing will process your video and give you the sound file of your siri voice.
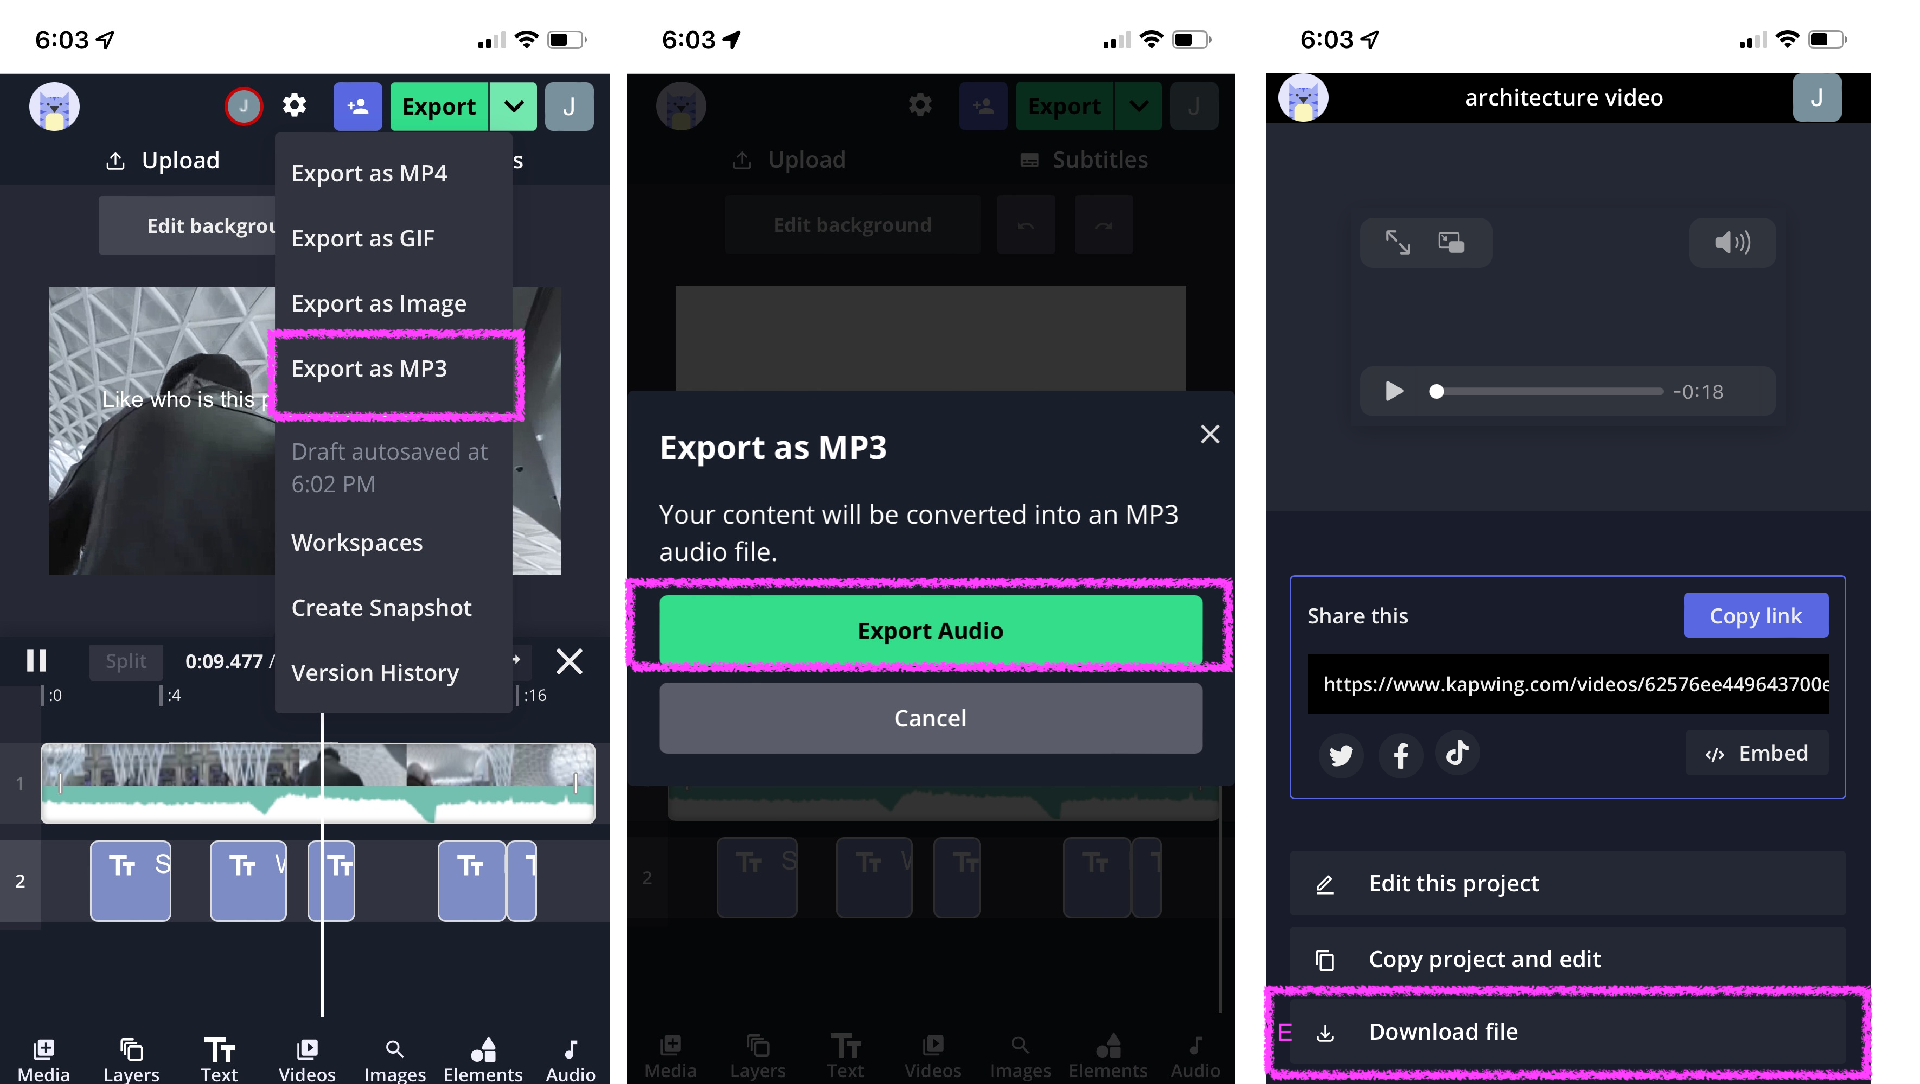
Alternatively, you can choose to download your file as an MP4 video file. This is ideal if you want to publish a video on TikTok, for example.
Step Four: Publish and Share
Once you've created your Siri voice file, you can share it with the world! Use the URL of the final page to send out the siri file to others. You can remove the watermark by creating a free account with Kapwing using your Facebook or Google login credentials.
Explore other creative video ideas with this Siri voice generator and post the results online. For more content, check out the related articles below and subscribe to our YouTube channel for trendy TikTok tutorials. Stay up to date on all things Kapwing by following us on Twitter.
Related Articles: