How to Record Audio or Voice Overs on an iPhone: A Step-by-Step Tutorial
Need to quickly record a voice over with your iPhone? Here are the exact steps to take to ensure you get the best audio quality.

Smartphones have become an integral part of video creation—we've said many times that your iPhone can be the only camera you need to record great video. But what about using the iPhone to capture high-quality audio or even to record a voice over?
Voice Memos, the native voice recorder in iOS, is a surprisingly solid option for recording audio directly from your phone. You can also lightly edit the audio right from Voice Memos, or upload the audio to a full-featured editing platform like Kapwing to make advanced edits.
Today, we'll cover both options. You'll learn how to record high-quality audio directly from your iPhone and how to edit your voice or audio recording before sending it to someone or adding it to a video.
Steps to record any audio on an iPhone
- Open the Voice Memos app
- Get situated in a quiet room
- Start recording your audio
- Pause or stop recording
- Name your audio file
- Edit your audio or voice recording
1. Open the Voice Memos app to get started
The Voice Memos app is the native iOS application with the waveform icon over a black background that's red on the left side and white on the right side. It comes standard with every iPhone so you can locate it on your home screen or search for it via Settings → the search bar, or by using Siri. Here's what you'll see when searching for it on the iPhone 15.
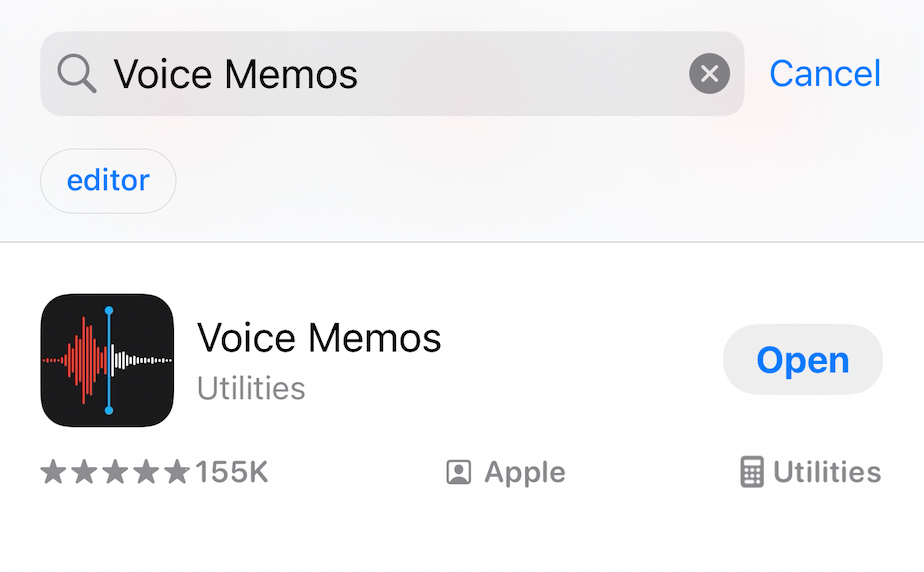
Did you recently clean up your home screen and remove the app? No worries, Voice Memos is also available on the App Store if you need to re-download it.
2. Get situated in a quiet room
If you're recording a casual TikTok voice over, they may not be as important. But generally speaking, you'll want to use a relatively quiet room with the phone about 6 inches away from your face to get the highest-quality audio you can.
Make sure your hand isn't blocking the microphone at the bottom of the iPhone and avoid recording any audio next to a wall or hard surface, as that will create a noticeable echo.
3. Start recording your audio
When you're ready to record, just tap the big red circle at the bottom of the screen inside the Voice Memos app. It's located on the start screen of the app, either below your existing recordings or on a blank slate screen.
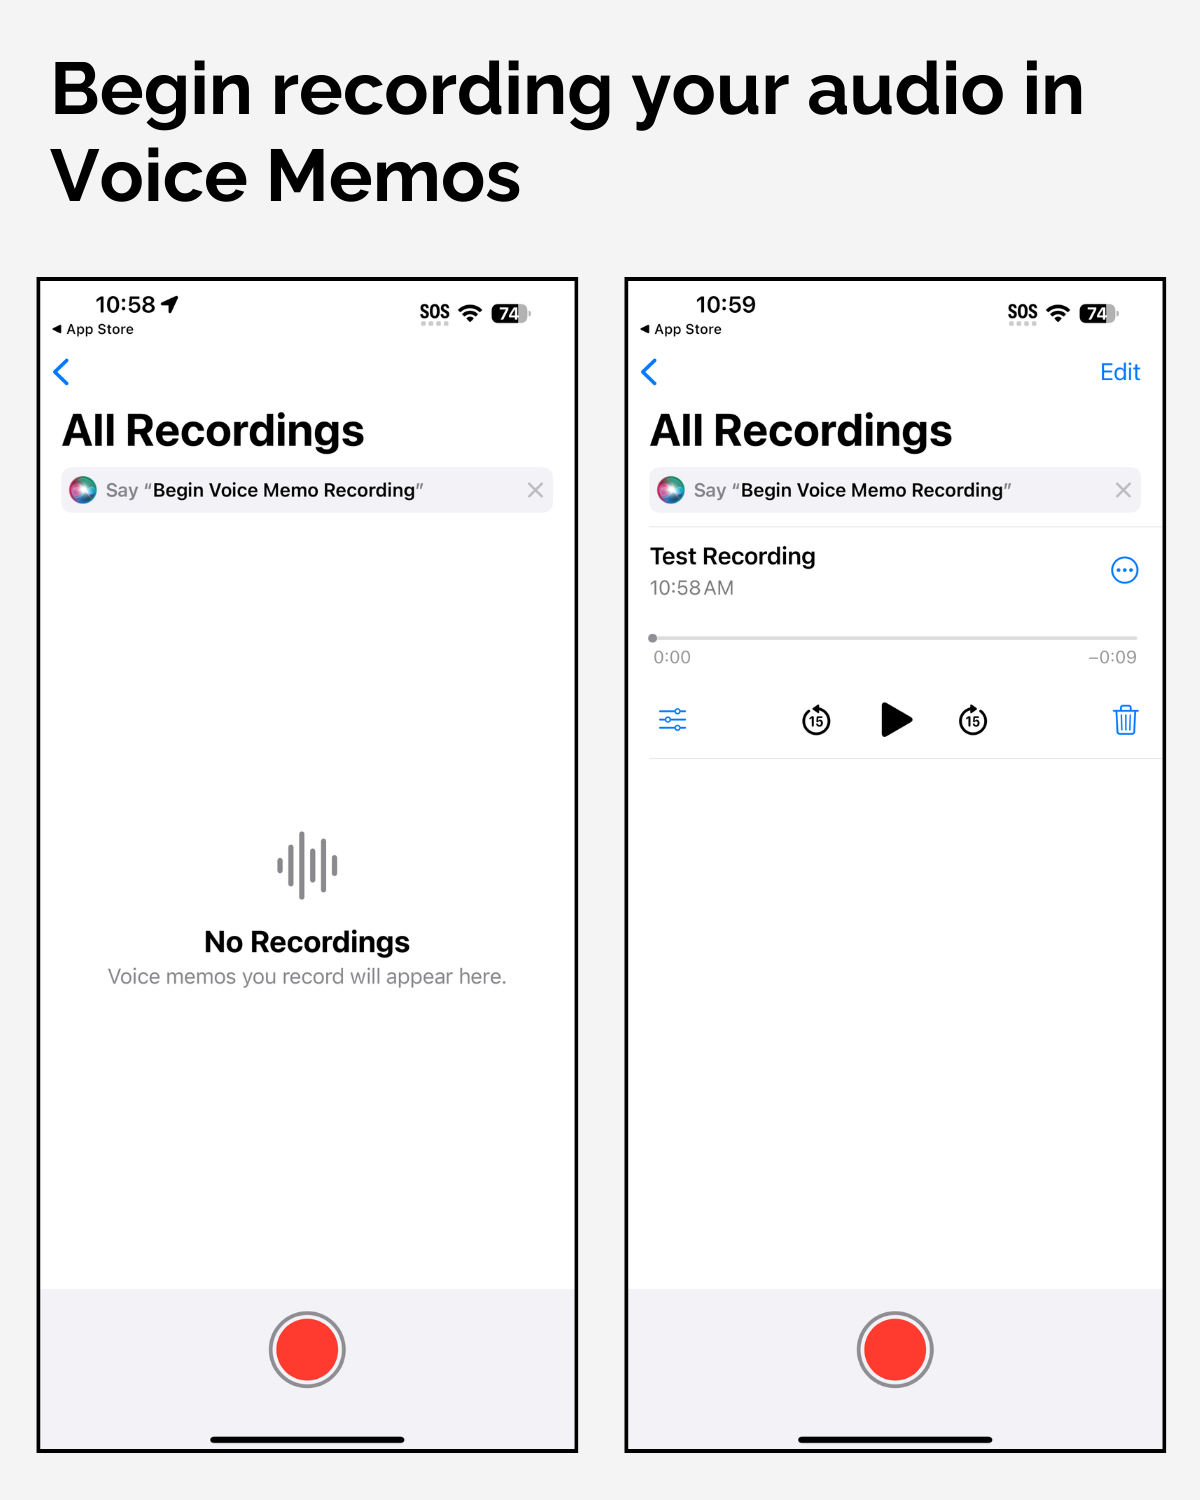
Speak clearly and hold the phone like you would on a call or by speaking into the bottom of the device; that's where the microphone is located for iPhones.
The red button will turn into the pause icon (⏸️) while recording audio and you'll see a waveform of your voice while speaking into the microphone. You'll also see an orange dot in the Dynamic Island located at the top of the screen of iPhone 14 Pro/Max and iPhone 15 Pro/Max while you're actively recording.
4. Pause or stop recording
You can pause, stop, or resume recording at any time by pressing the button you originally pressed to start recording. While recording the audio, the button will change to the pause symbol and say "Resume" when you've paused while recording your audio.
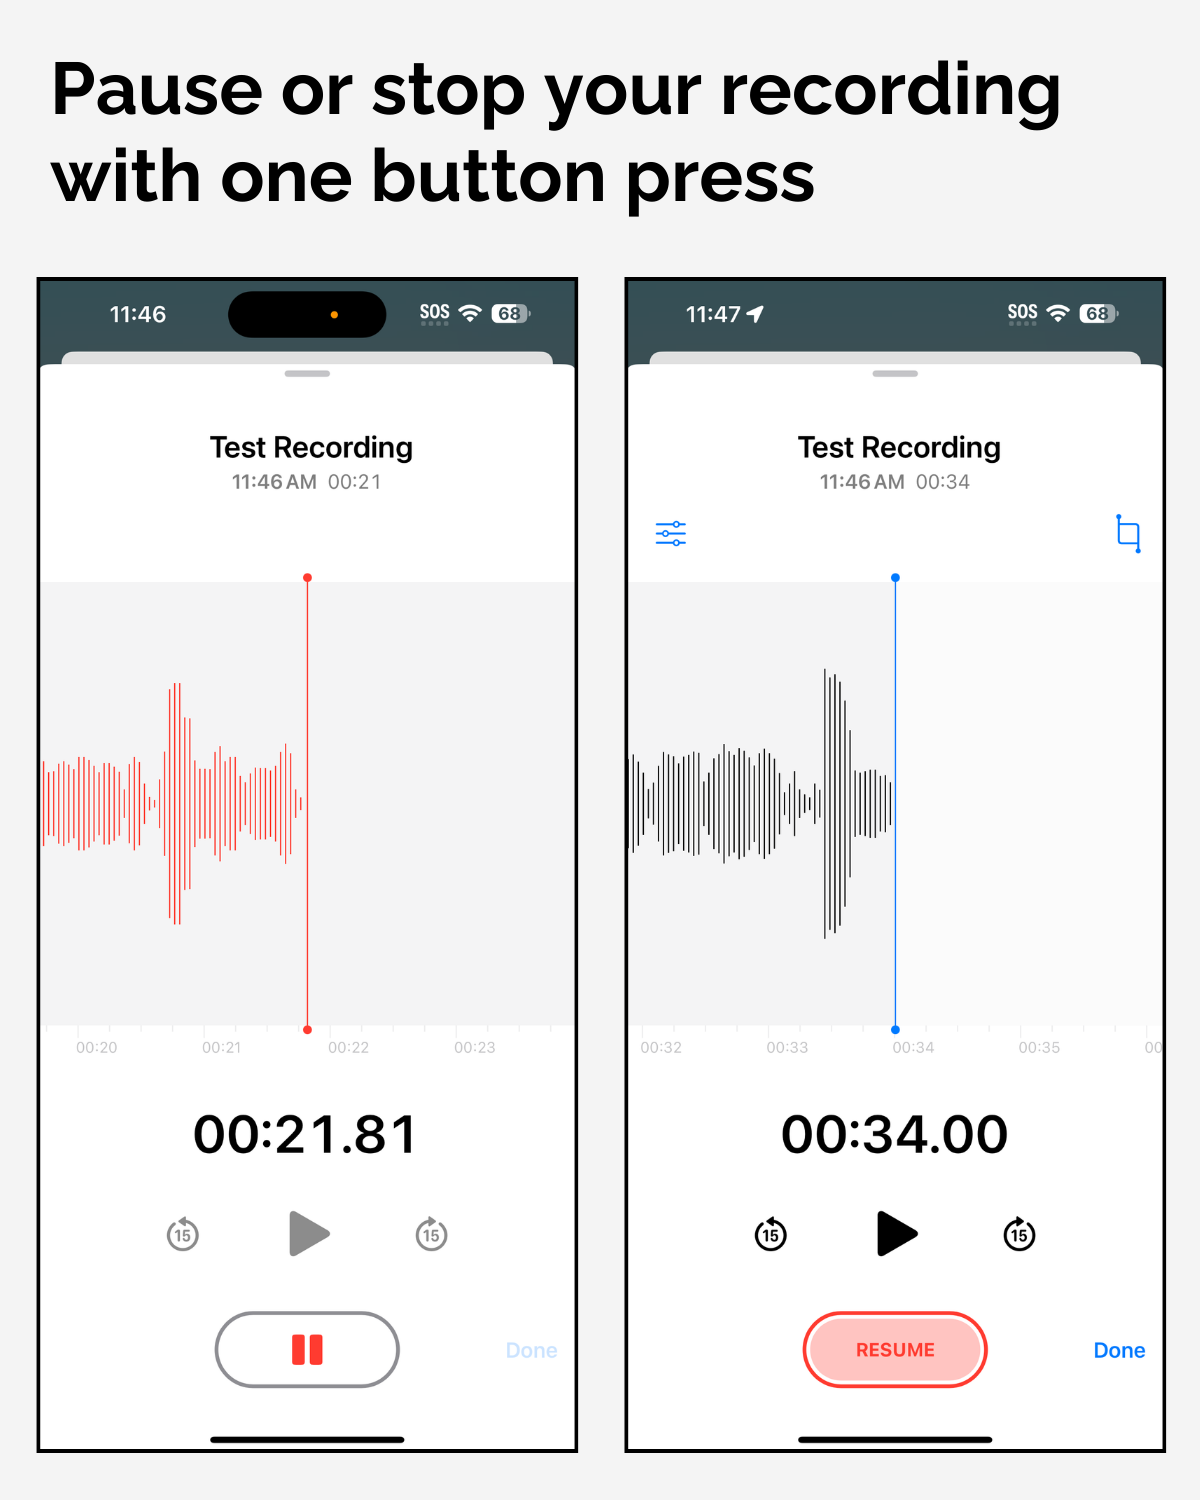
Tap the stop button to finish your recording. After that, your recording will automatically save to your iPhone.
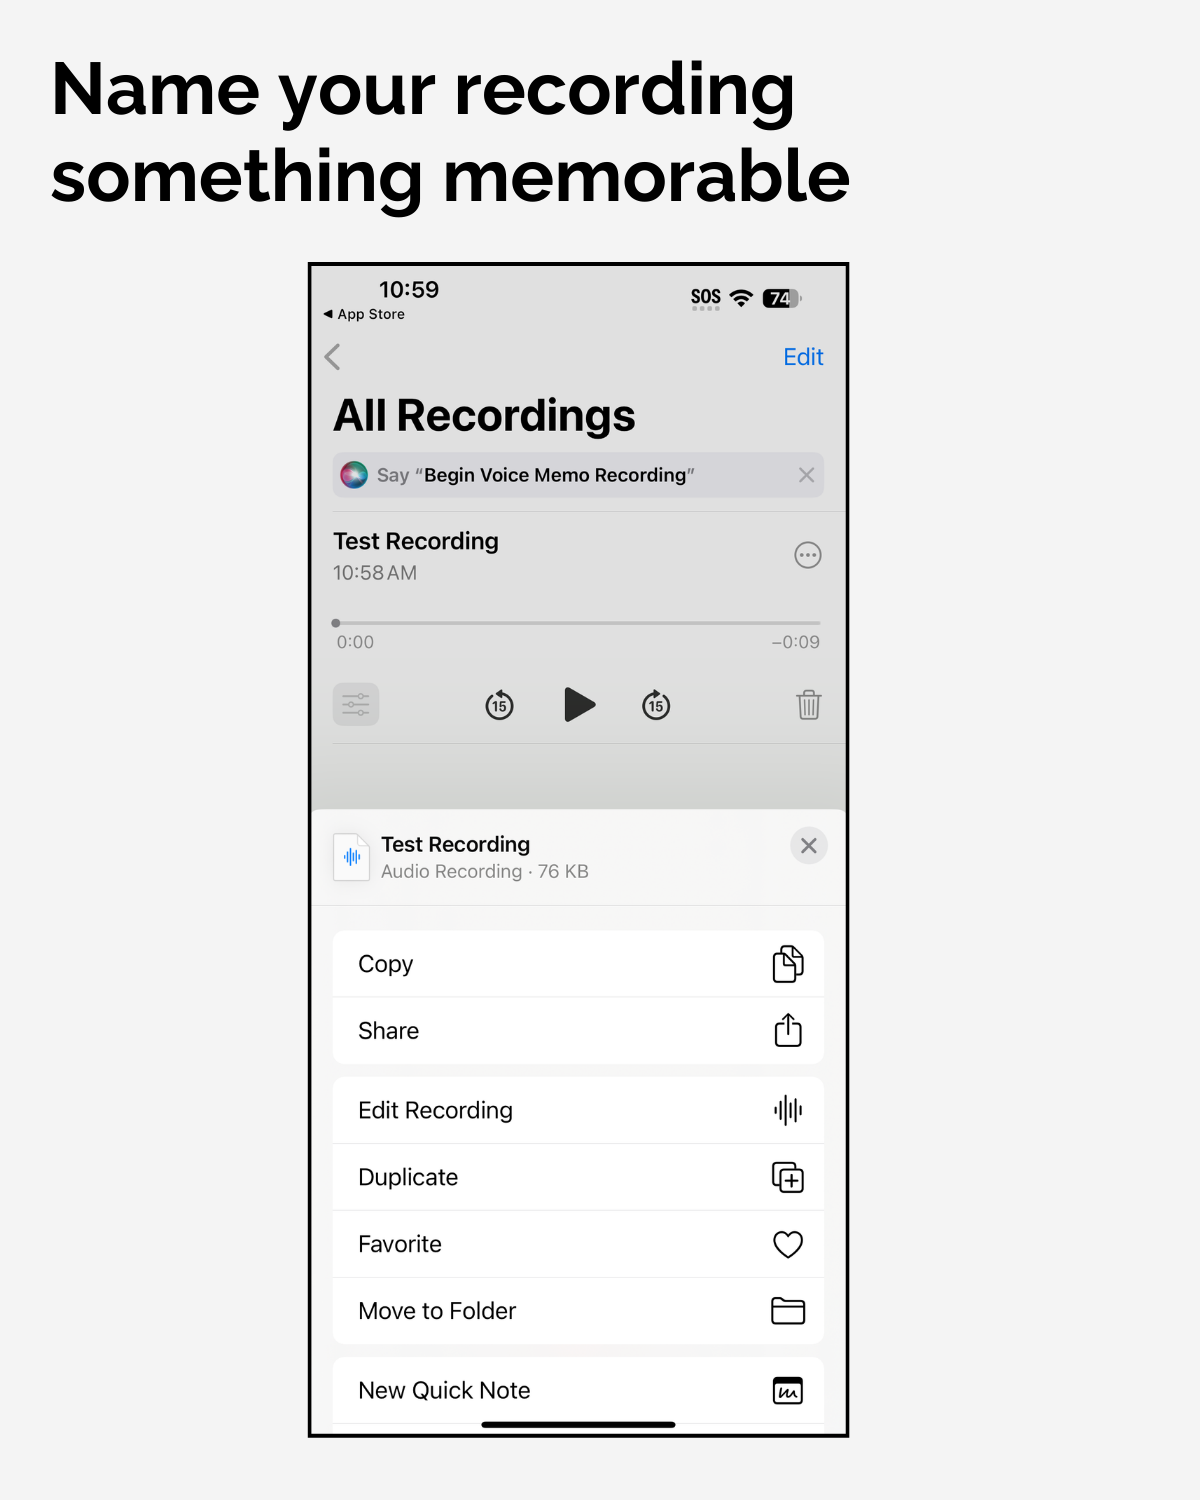
5. Name your audio file
Unless you plan on having dozens of files named "New Recording," it's time to pick a file name for your audio so you can find it easily.
Just tap the name of the recording and a text input will pop up that will allow you to rename the audio file to anything you'd like. Tap "Return" to save your new file name.
6. Edit your audio or voice recording
You can select your most recent audio recording—or any recording you've made—from the start screen in the Voice Memos app. Just tap on a specific recording to bring up the editing options.
The built-in editing options include audio trimming, playback speed, silence removal, and the ability to enhance your audio. You can also revert the edits you've made to your audio by tapping the "Reset" button to the left of the pop-up.
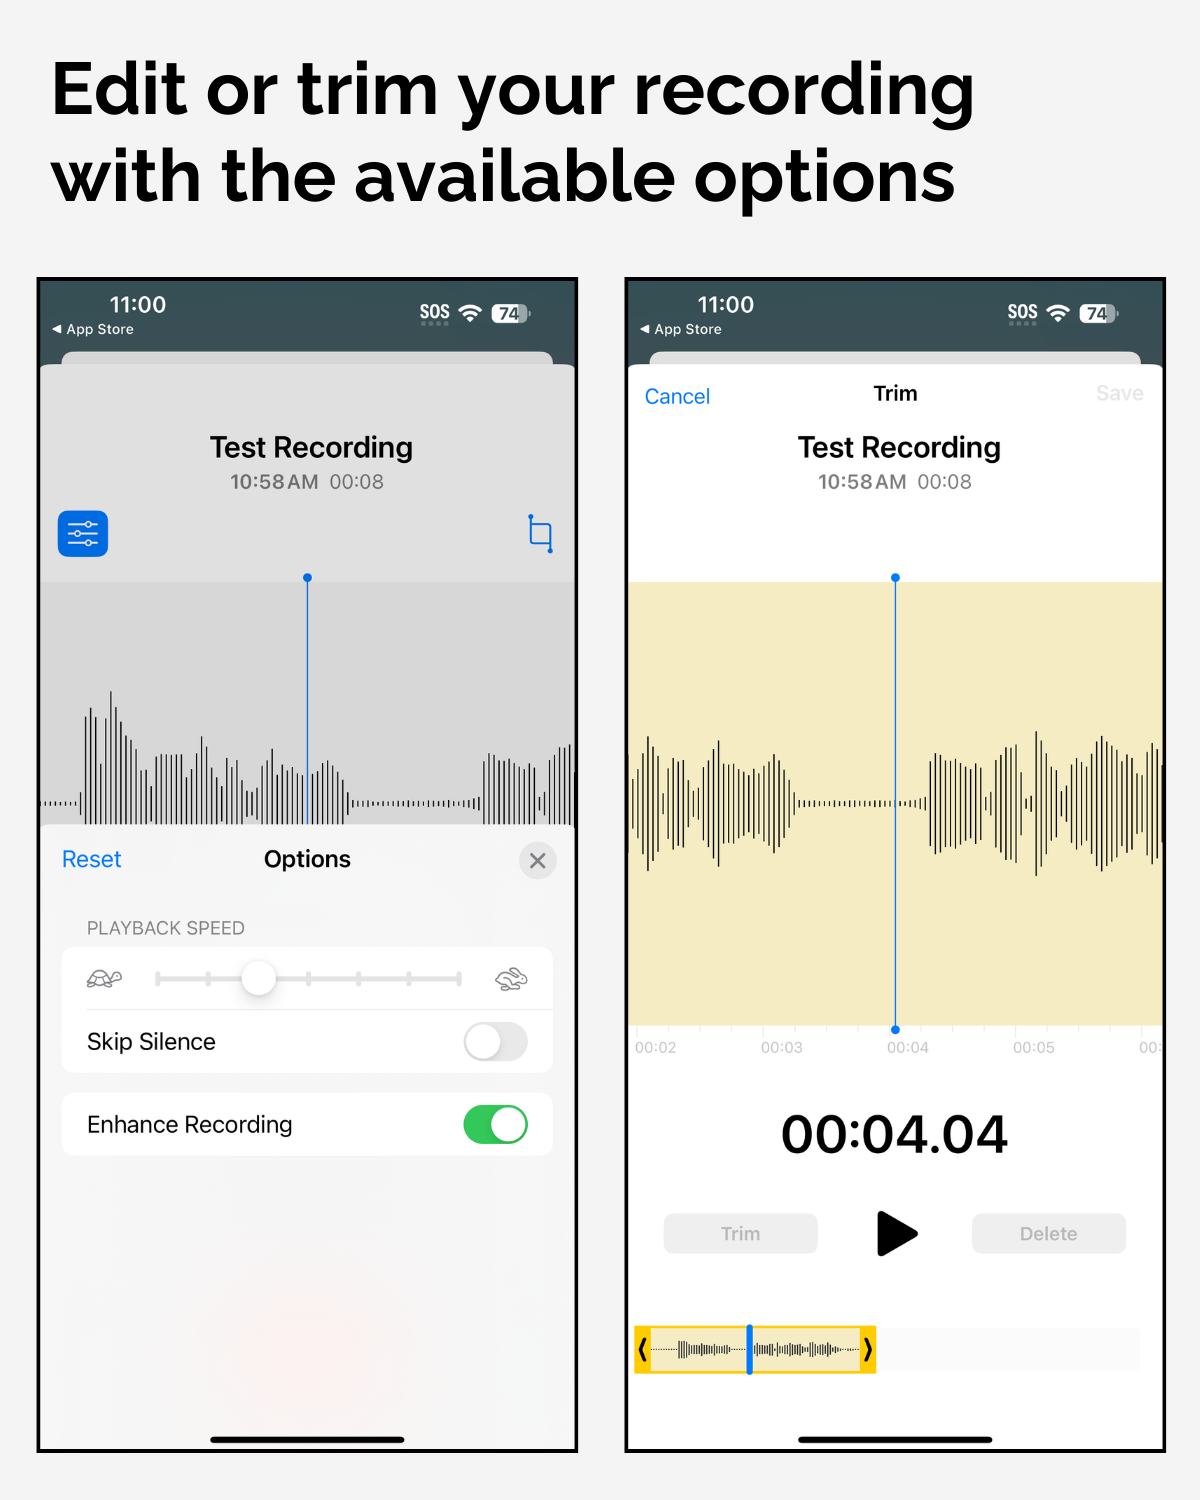
Trim your recording by tapping More Actions → Edit Recording and then tapping the Trim button in the top right; it's the square shape with timeline markers.
Drag the yellow bars to highlight a certain section of your video. Then tap the now highlighted "Trim" button to delete the rest of the recording, or tap "Delete" to remove that specific section from your recording. After you're finished editing, tap "Save" and then "Done."
How to send an audio recording from an iPhone
You may want to send your audio recording to a dedicated editing platform to make additional edits (which we'll cover below), or maybe you just want to send it to another device as a backup. Either way, it's a simple three-step process to send the audio you've just recorded to another location:
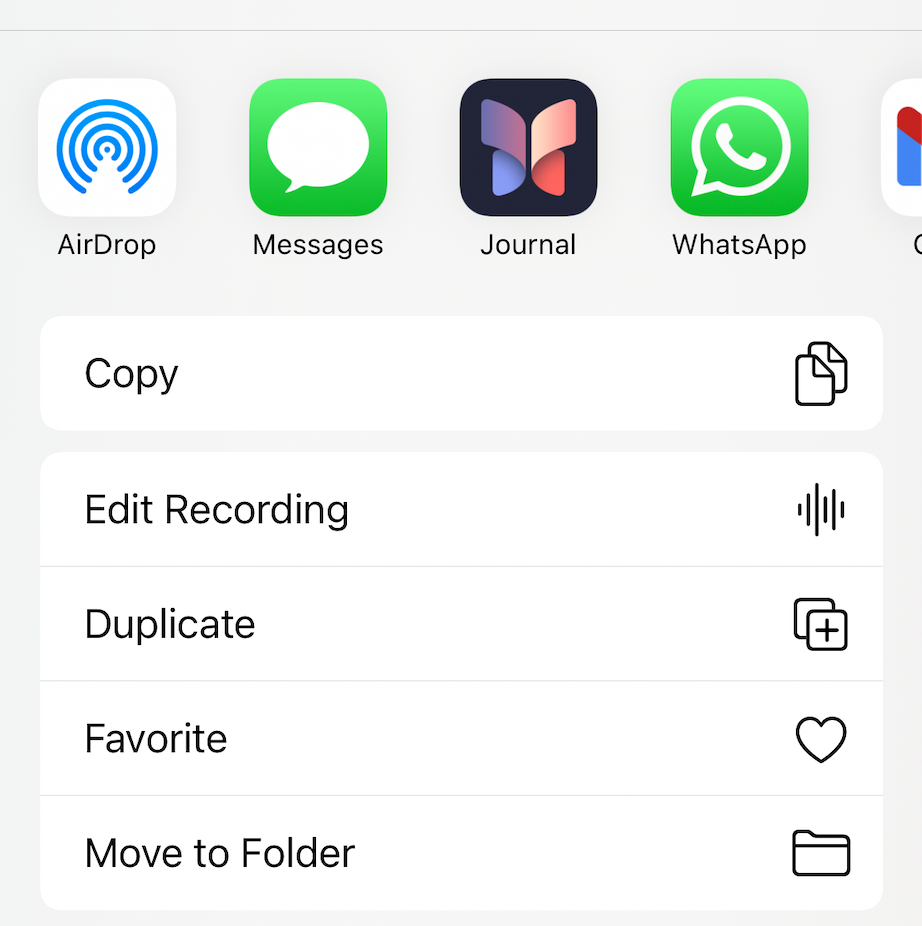
- From the start screen, select the more options (...) icon on the recording you want to send.
- Then select the "Share" button in the pop-up.
- From here, you can select a mail service, messaging platform, or AirDrop to send the file to another device or account.
How to professionally edit audio you've recorded on iPhone
The Voice Memos app offers a basic audio trimmer and simple playback edits, but for more advanced editing—such as professionally cleaning audio, adding music, or applying other effects—it's best to upload the audio recording from your iPhone to dedicated editing software.
Below, we'll show you how to upload your audio to Kapwing to continue making audio edits before sending the file or overlaying it over a video. You'll need to have the file of the recording you made on your iPhone, so save it now or check out the section above to learn how to send it to another device.
1. Upload your audio
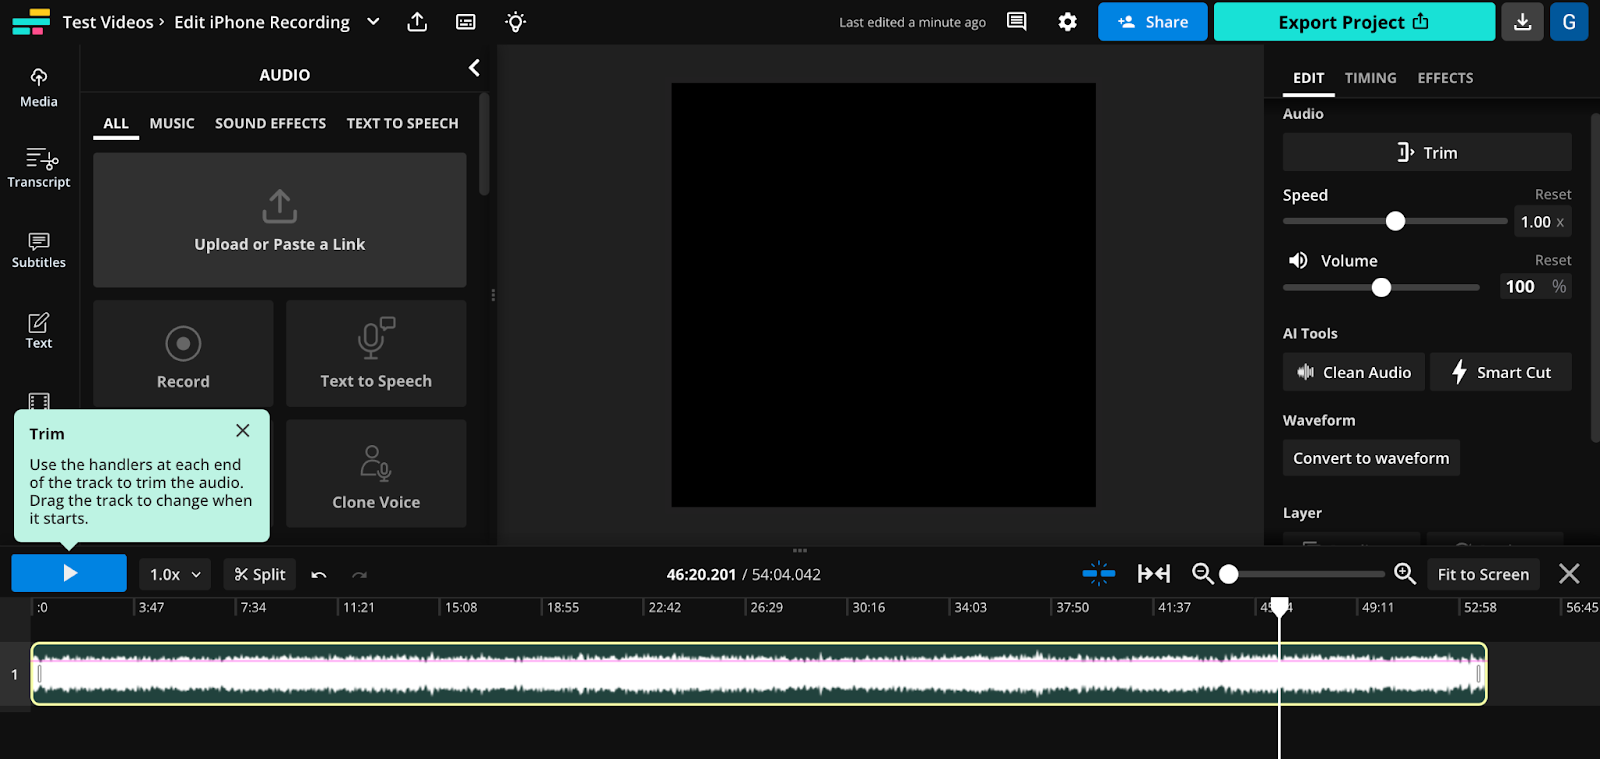
Head over to Kapwing's Audio Editor and click the "Start editing" button to begin. In the editor, select the "Audio" feature from the sidebar and then "Upload or Paste a Link" to upload your audio recording directly or link to the hosted file.

2. Edit your audio and add effects
Once the audio recording from your iPhone is uploaded, now you can begin editing the audio with Kapwing. There's a lot you can do, so let's walk through some of the options:
Change and enhance your audio
- Remove background noise. Kapwing features advanced tools that help you remove background noise from any audio file—so your voice sounds clear and crisp.
- Add music and sound effects. Add background music or other ambient noise and sound effects to your audio with a full stock library.
- Split and cut sections. Trim the length of your recording or split your audio up into separate sections, which can help you turn a single recording into multiple usable clips.
- Adjust speed and volume. Fine-tune the playback speed with our slider or adjust the audio levels to the perfect volume.
Repurpose your audio
- Transcribe voice to text. Kapwing also features instant audio transcriptions that let you convert audio to text in just a few seconds.
- Turn audio into waveforms. Want to turn your iPhone voice recording into a waveform or audiogram? You can do that in Kapwing with a single click.
Transform audio with AI
- Clone your voice. With a long enough sample, Kapwing's Voice Cloning tool can produce an AI-generated voice that sounds just like you.
- Generate an AI voice. Turn your recording into a transcript and then use Kapwing's text-to-speech software to have a pre-made AI voice read your transcript.
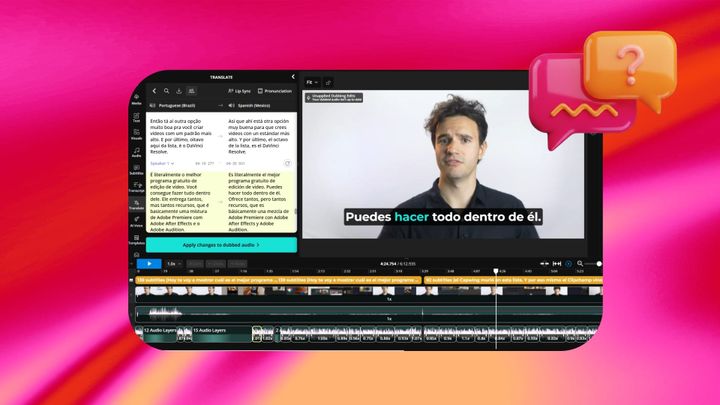
- Translate your recording. Use text-to-speech in multiple languages or even just translate the subtitles you've created based on your recording.
3. Export and share
Once you're finished editing the audio recording from your iPhone, just click the big "Export Project" button in the top right of the Kapwing editor.Now, your audio file will be available for download and you can send it to anyone you'd like, upload it to a hosting platform, or overlay it on one of your videos.
Get even more from Kapwing by learning how to take any noise or sound and turn it into your ringtone. Check out the tutorial below.