How to Make a Picture Look Like a Polaroid
In a few clicks, you can give your picture that classic polaroid picture look. In this tutorial, I'll show you how with the help of a free template.

For many, the days of buying film and lugging instant cameras around are long gone while others have found themselves with a renewed interest in these vintage pictures.
If you relate to the latter, you're far from alone. The heightened appeal in Polaroid pictures have these instant cameras flying off shelves and into the hands of photography enthusiasts. A few years ago, I gave in to this trend and purchased a Fujifilm instant camera.
However you don't need an instant camera to get aesthetic polaroid pictures. You can make any picture look like a polaroid with the help of an online editor. I'll show you two simple ways to do this. Let's get started!
Table of Contents
- How to Make a Picture Look Like a Polaroid with an AI Photo Editor
- How to Make a Picture Look Like a Polaroid with a Frame Template
How to Make a Picture Look Like a Polaroid with an AI Photo Editor
The simplest and most realistic way to make a picture look like a Polaroid is to use an AI photo editor. With Kapwing AI, you can instantly add the signature white border, vintage tones, and nostalgic lighting that make Polaroids feel authentic.
Step One: Select Your Photo(s)
The quality of your result starts with the quality of your source image. You might want to turn a single photo into a Polaroid, or join a trend like the “Hug Your Younger Self” trend. Either way, start with a high-resolution image, ideally one with good lighting and contrast.
Step Two: Write Your Prompt
Your AI image prompt is what shapes the final look. A strong prompt should include style, tone, color, and framing details. Here are a few examples you can use directly:
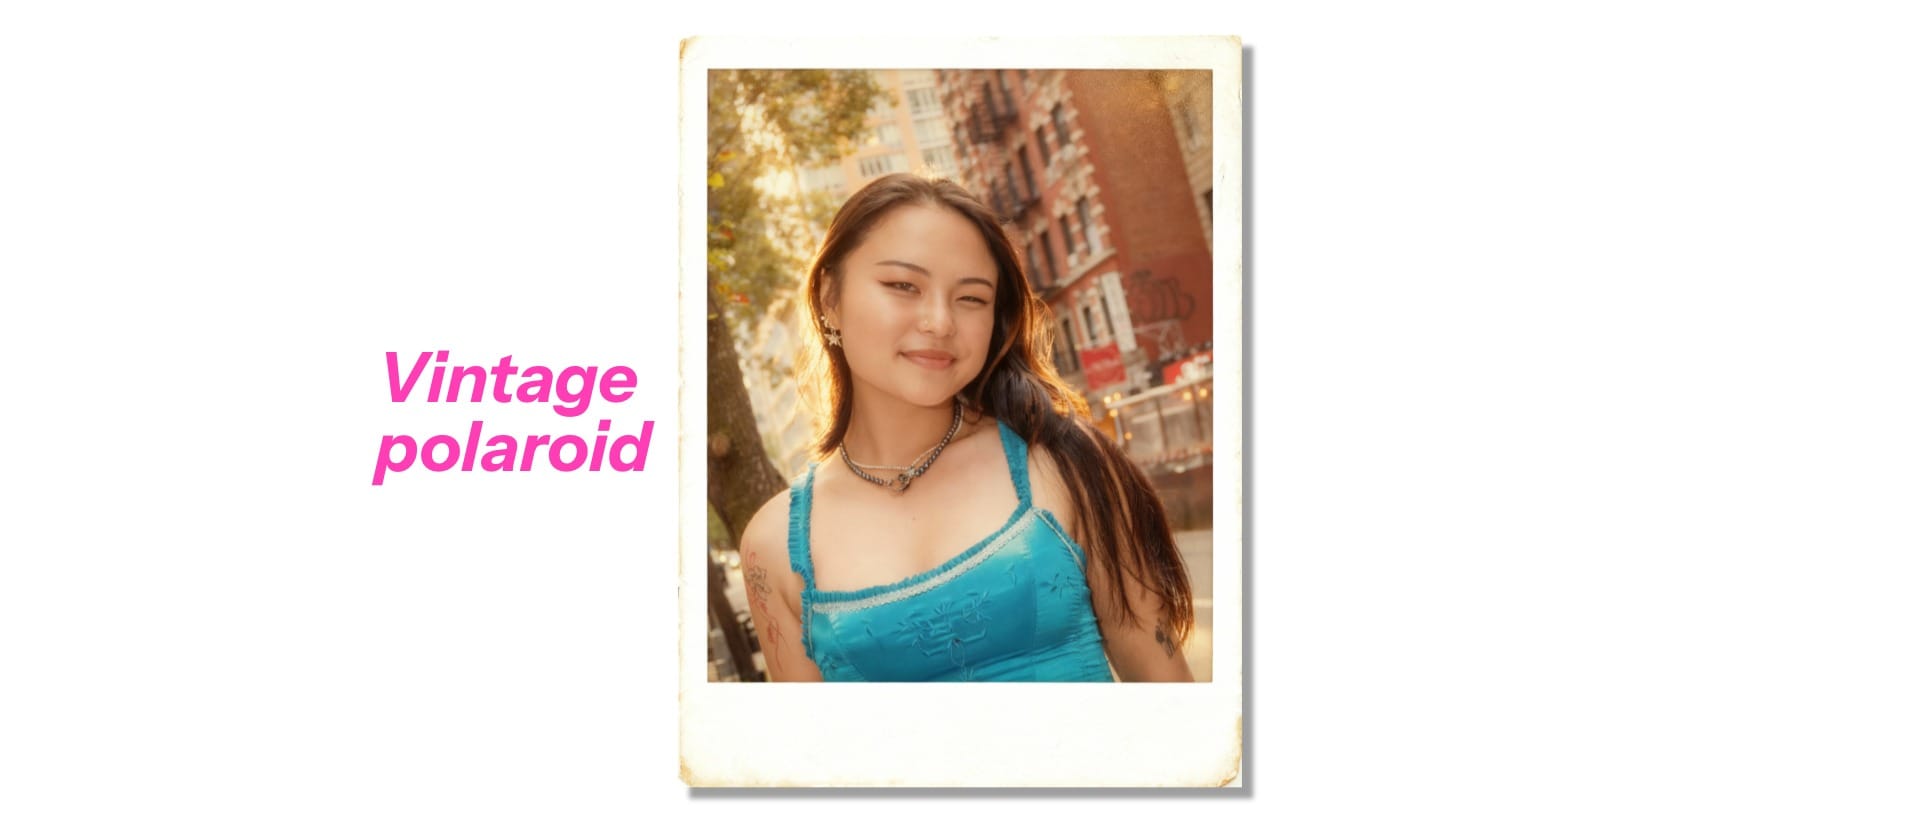
Classic Polaroid look:
“Turn this photo into a Polaroid-style image with a thick white border, soft film lighting, and a subtle warm tone. Keep the subject centered and natural, like a photo from an instant camera.”

Vintage aesthetic version:
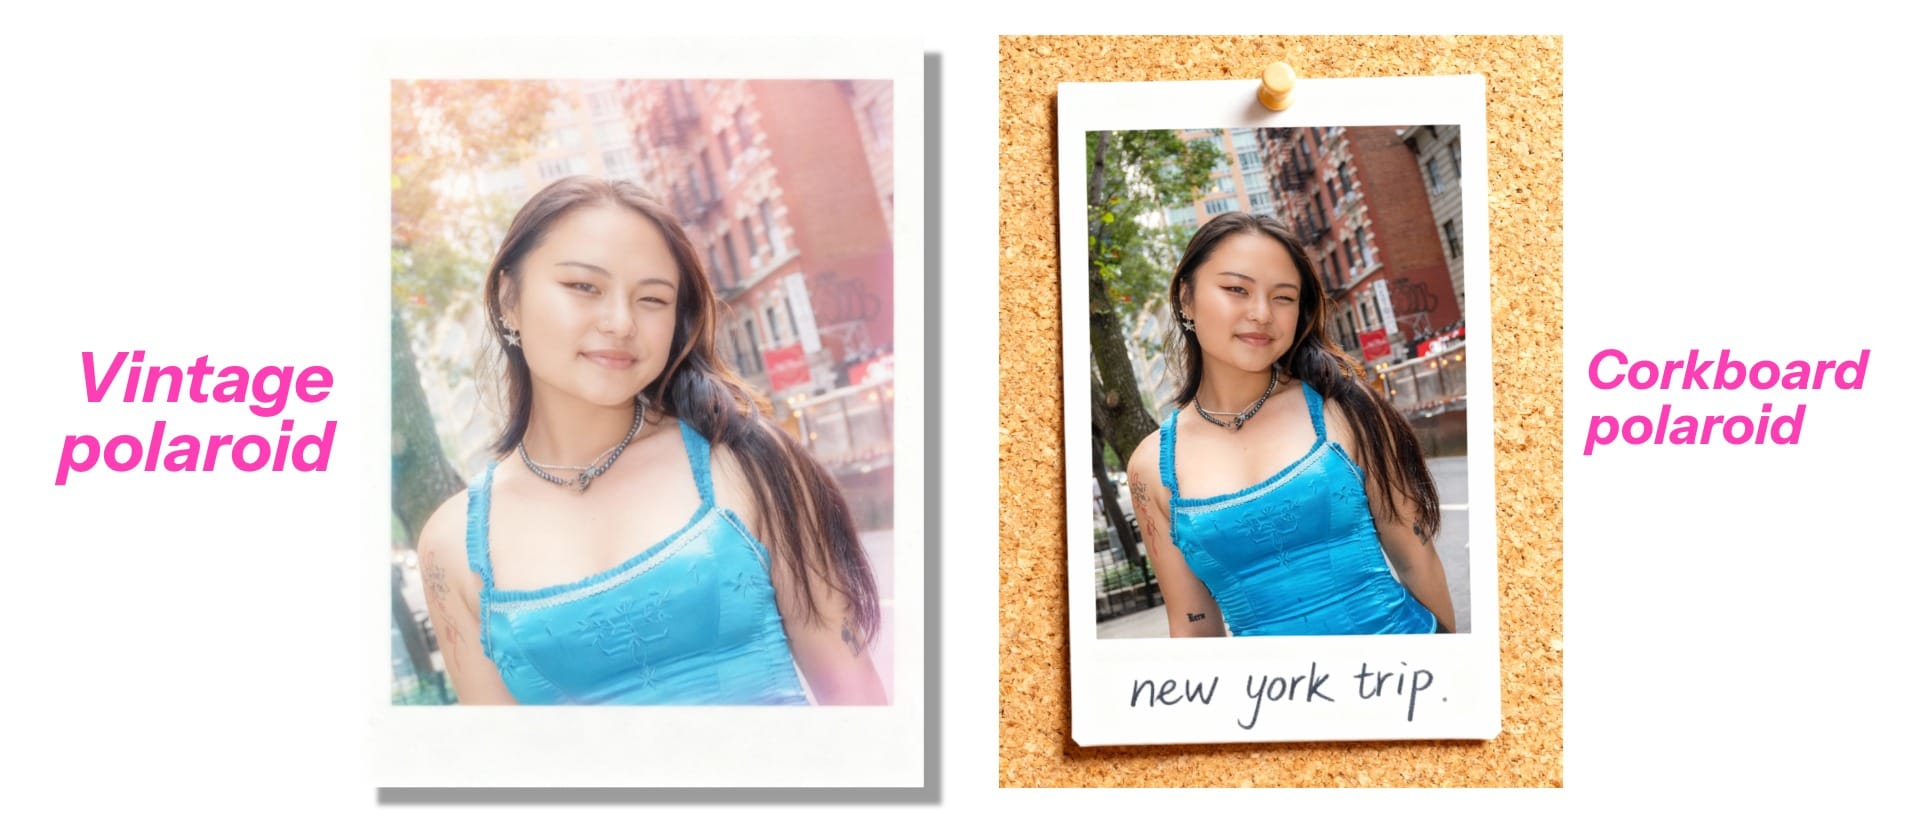
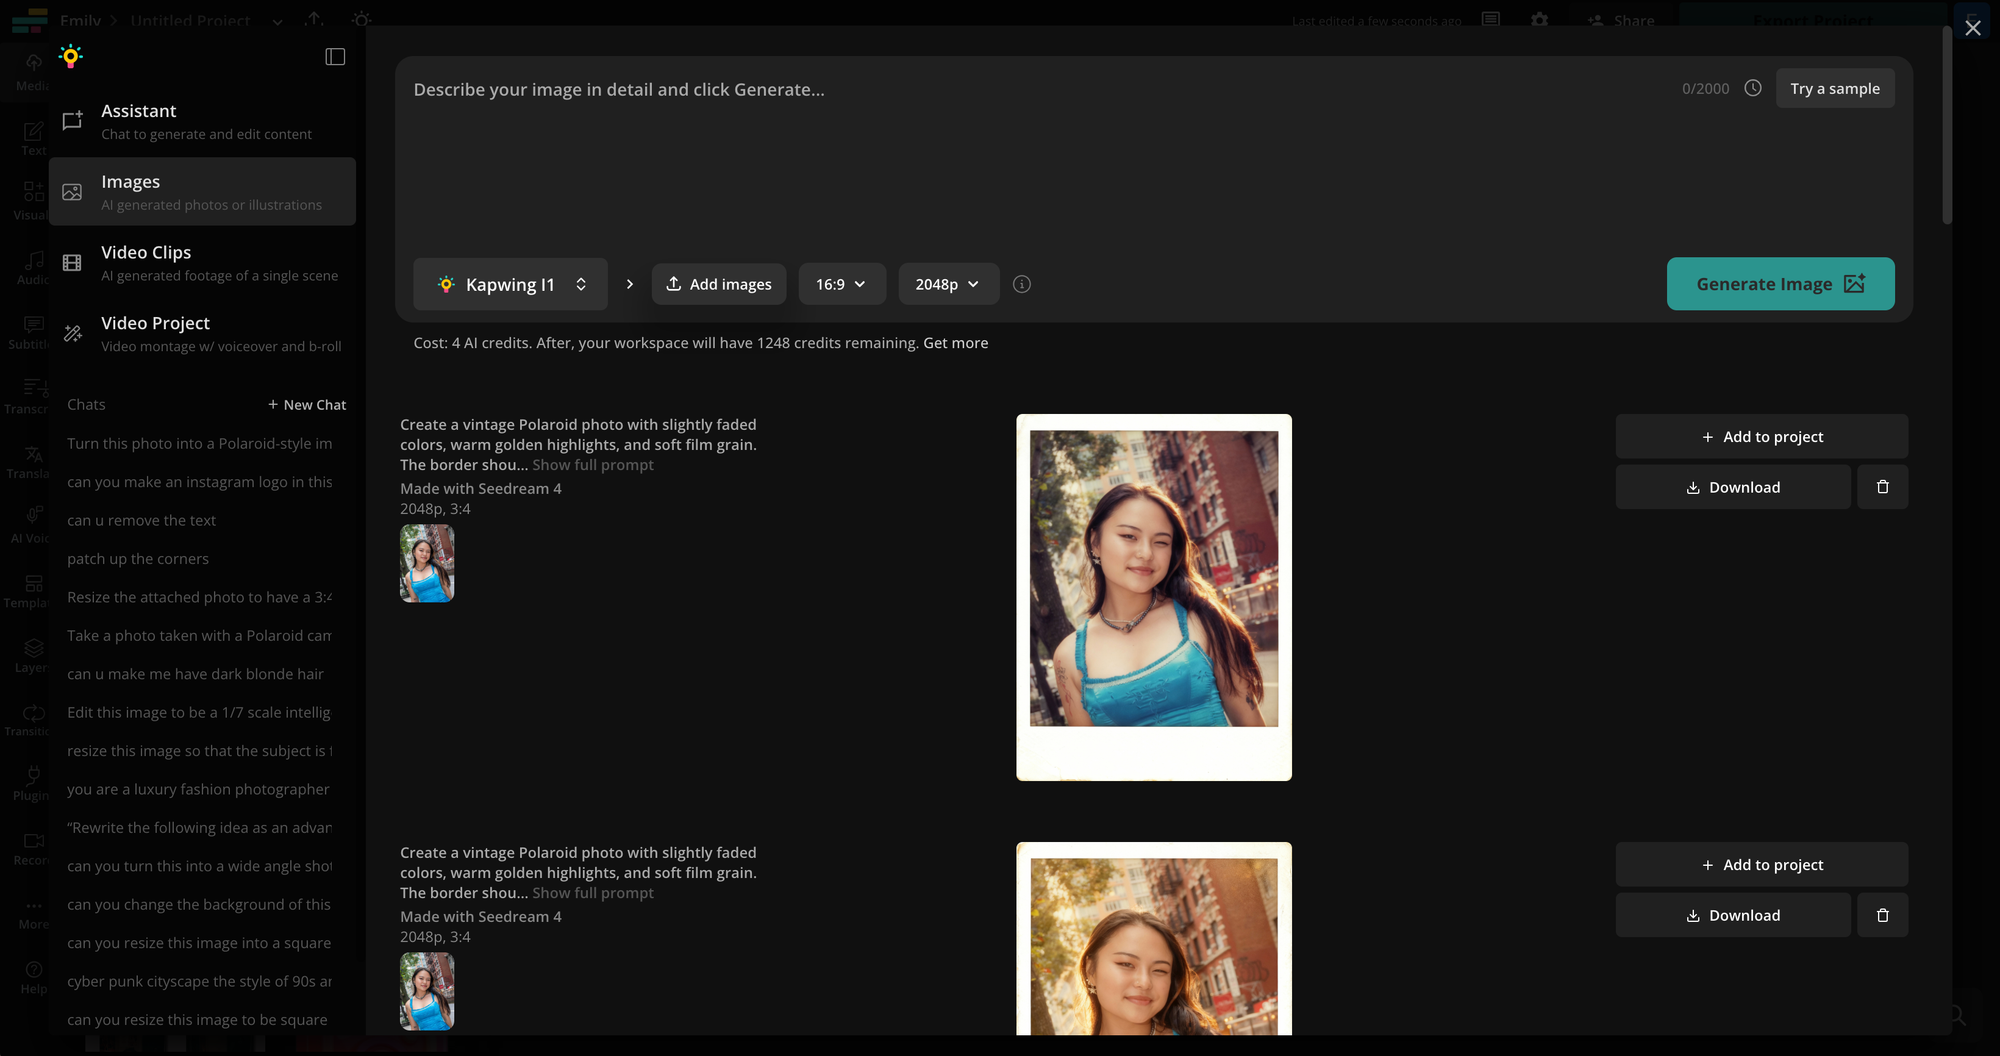
“Create a vintage Polaroid photo with slightly faded colors, warm golden highlights, and soft film grain. The border should look authentic, slightly off-white with gentle wear around the edges.”
Creative mood options:
“Make this photo look like a 1990s Polaroid with dreamy lighting and pastel tones.”“Turn this image into a film photo pinned on a corkboard — include the Polaroid frame with the handwritten caption "..." at the bottom."
Step Three: Generate with Kapwing AI
Go to Kapwing.com and select the Generate tab.
This will open Kapwing’s AI generation hub, where you can create images, videos, and even songs.
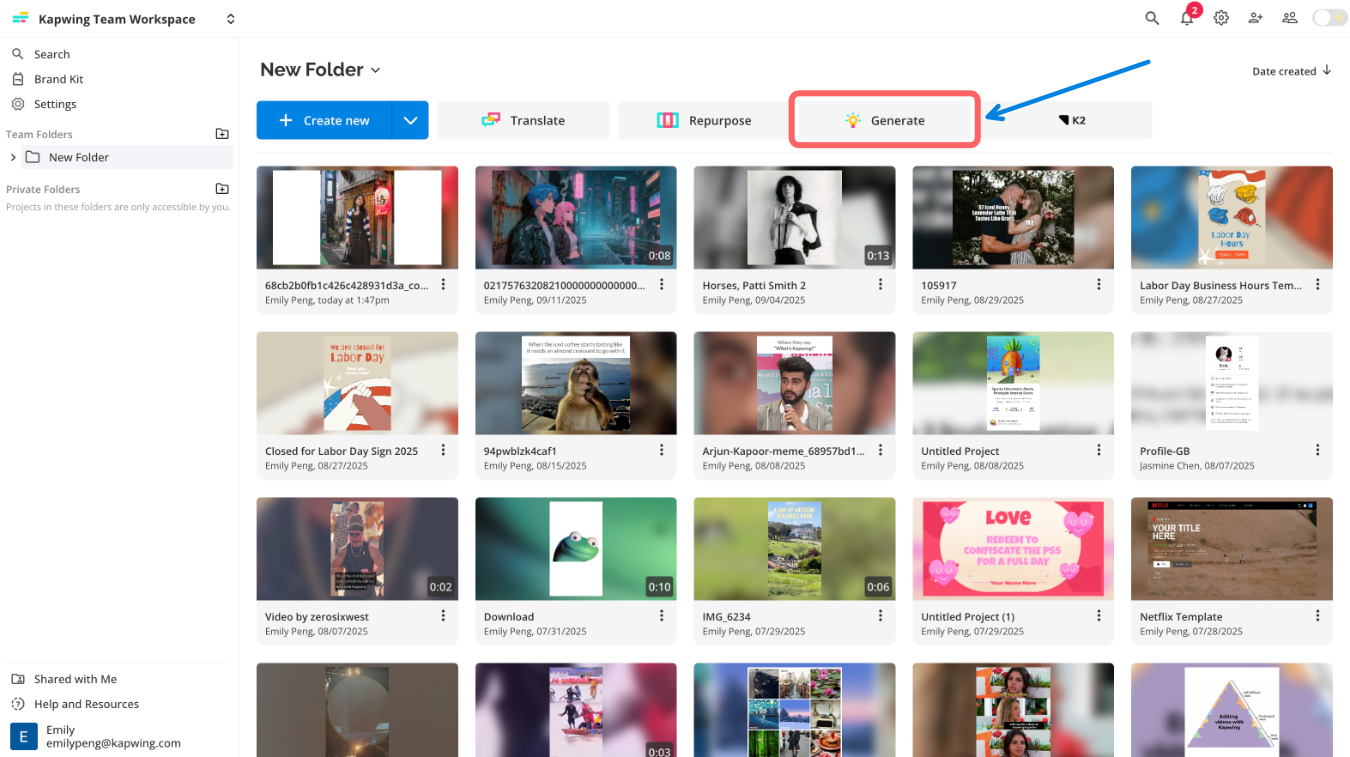
Once you’re in the Generate page, use the left-hand toolbar to switch into the Images tab. This will open a workspace with a prompt box and a history of any images you’ve previously generated with Kapwing.
In the toggle at the bottom left of the chat box, make sure the Seedream 4 or Kapwing I1 model is selected for best results.
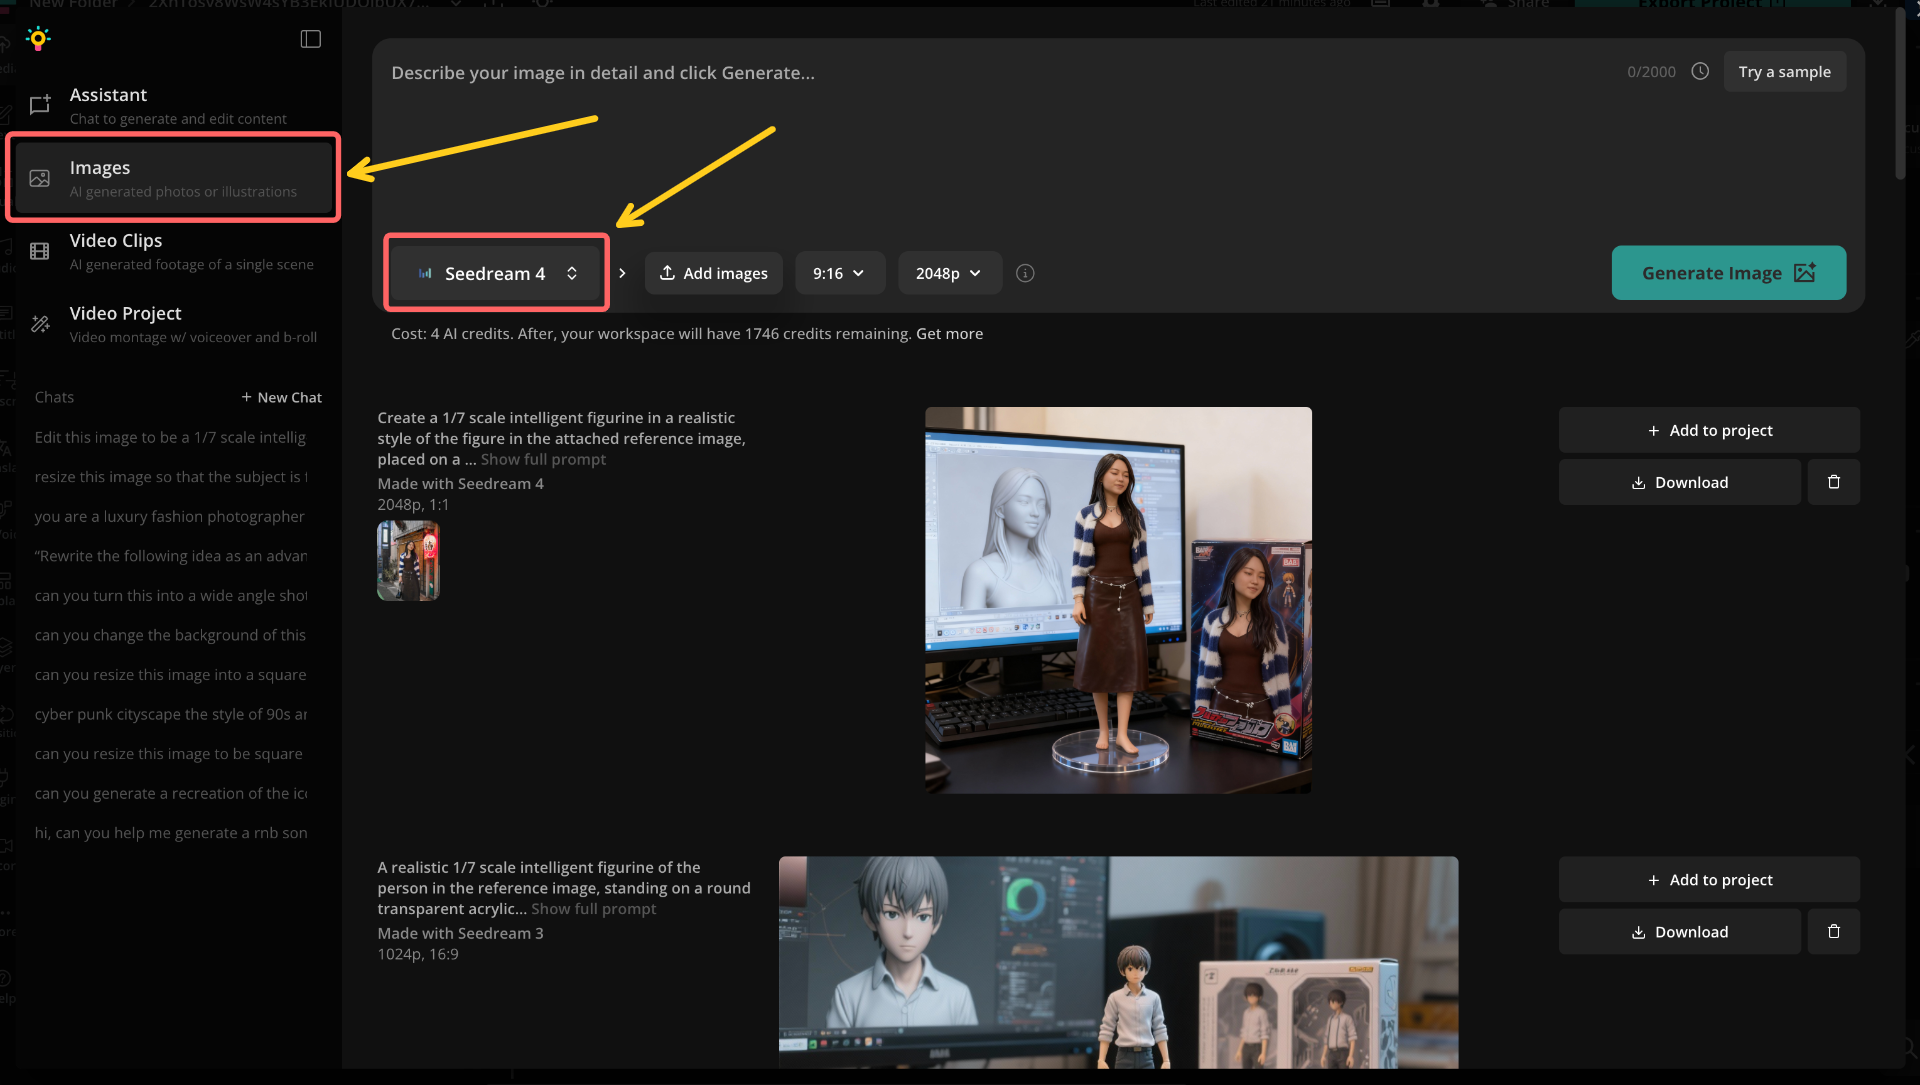
Then, click the Add Image button to upload your reference photo.
You can also set the aspect ratio and output resolution before generating. You should set it to 3:4, which most closely fits the actual aspect ratio of a polaroid.
Finally, paste your prompt into the prompt box and click Generate Image. The AI will process your photo and instructions, then return your polaroid in just a few seconds.
Step Four: Download
If you’re not satisfied with your first result, don’t worry. It often takes a few tries. Start by simply regenerating with the same prompt, since AI tools can return slightly different variations each time. If the issue persists, try tweaking your prompt for clarity or switching to a different reference photo to get a better match.
Once you’re happy with your output, you can either download it directly or save it to a Kapwing project.
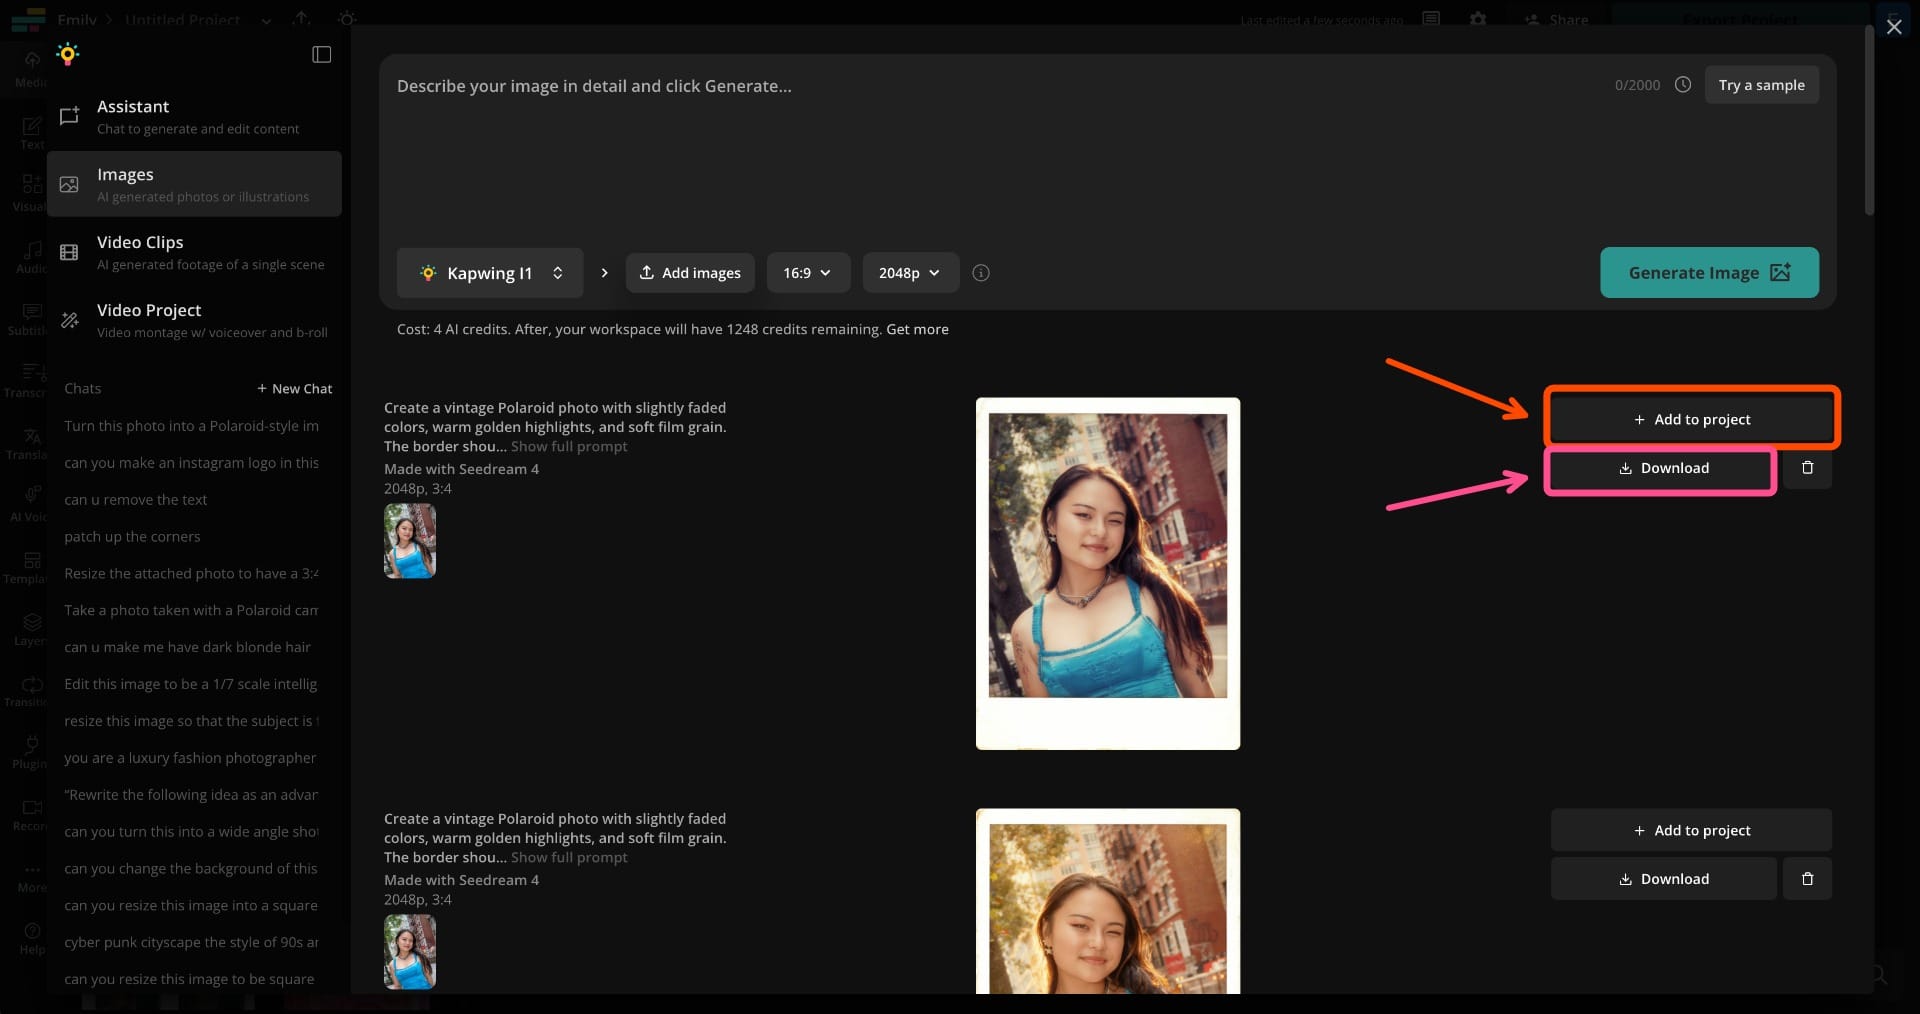
Downloading is the best option if you want to post your photo as-is. Saving it to a project, on the other hand, lets you make additional edits in Kapwing. For example, you could add text overlays or even combine multiple photos into a video.
How to Make a Picture Look Like a Polaroid with a Frame Template
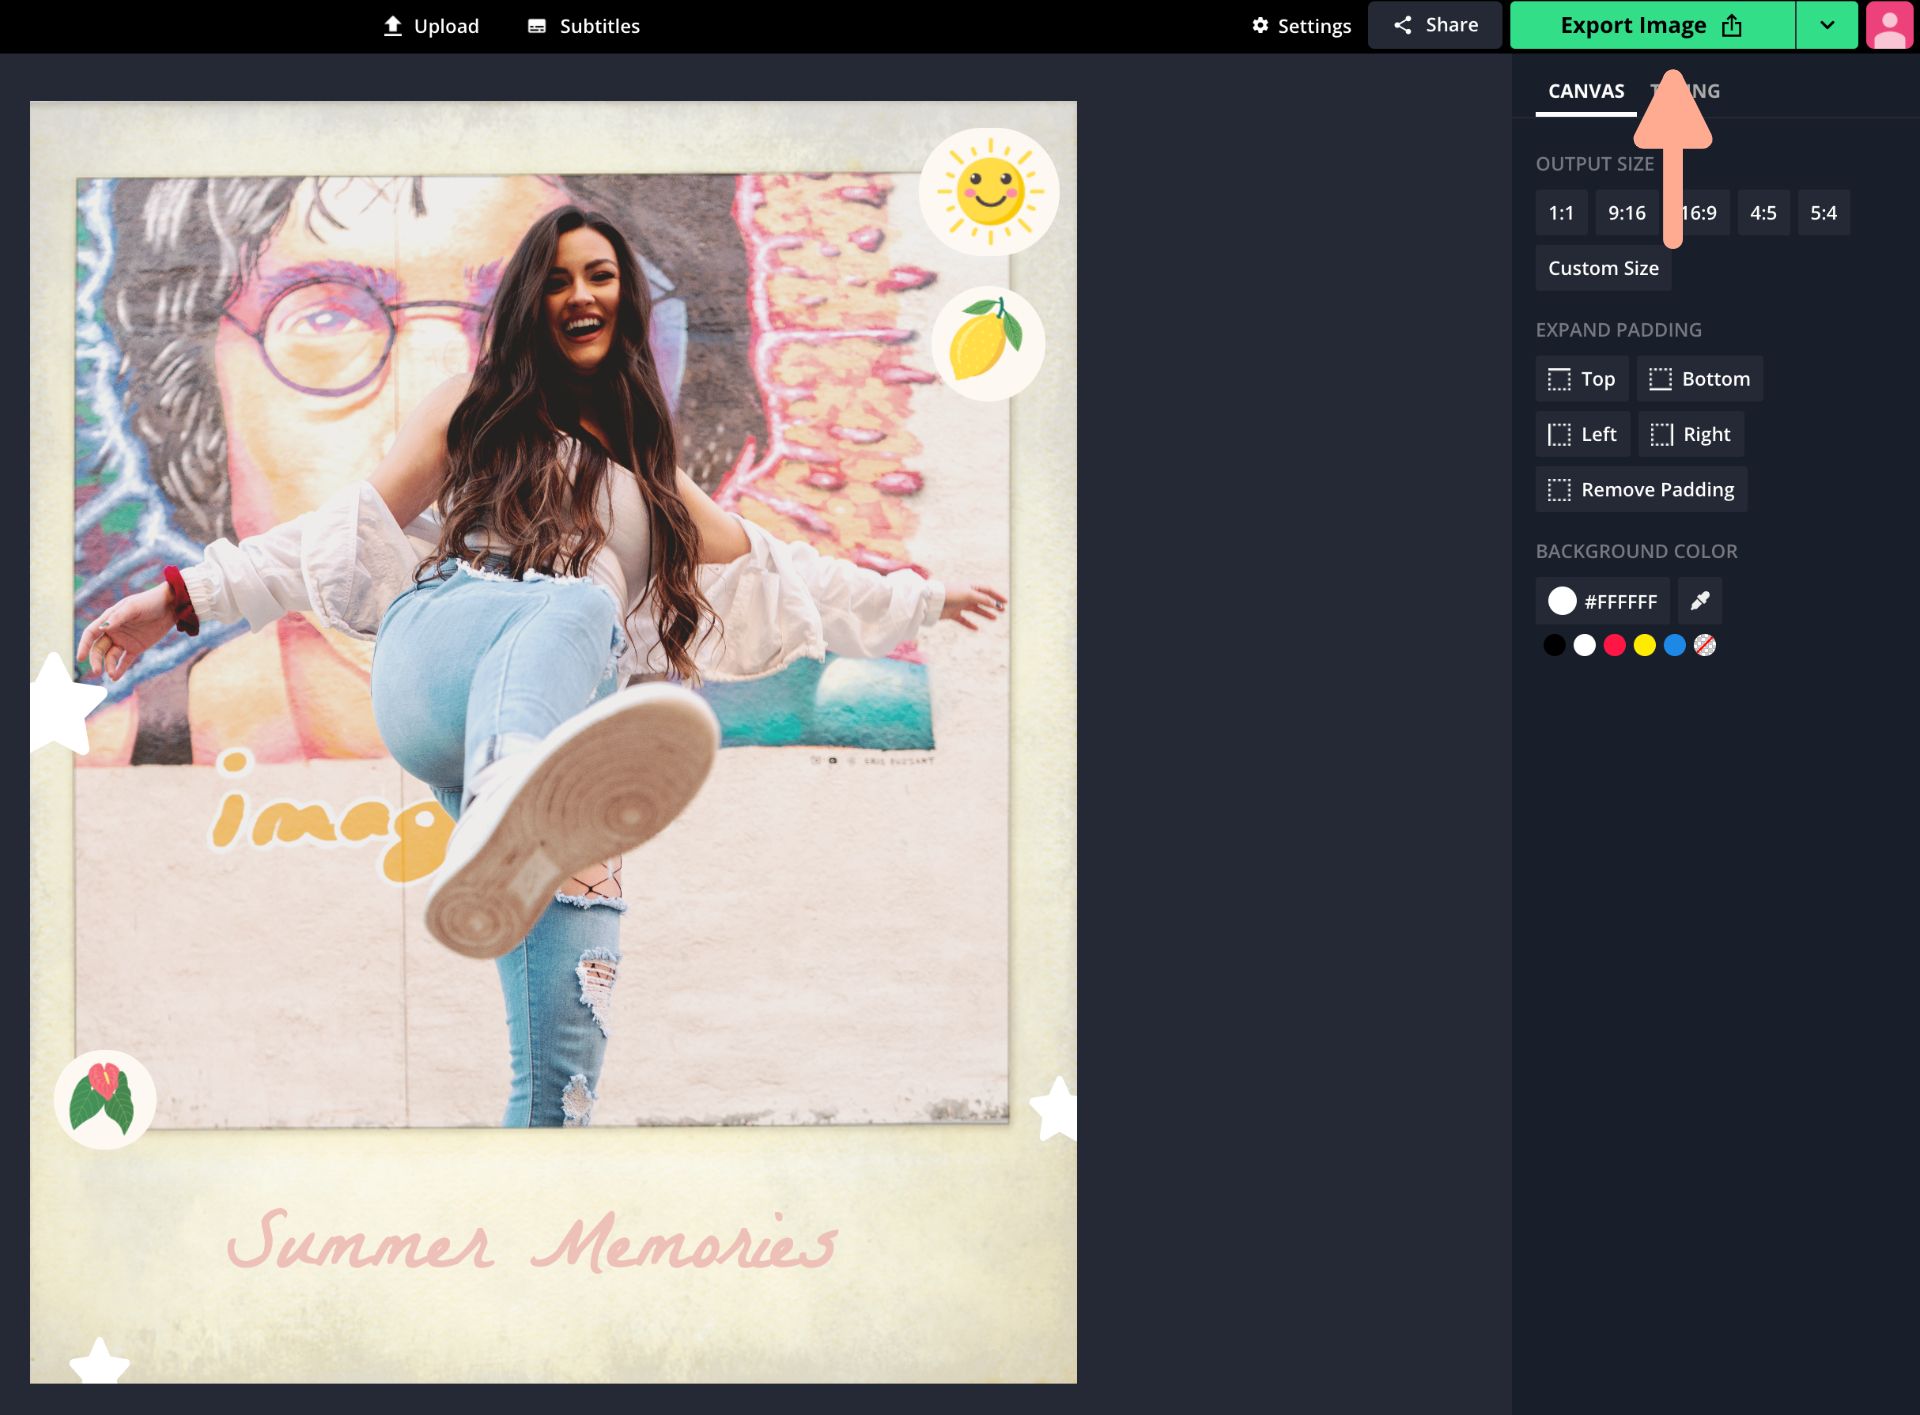
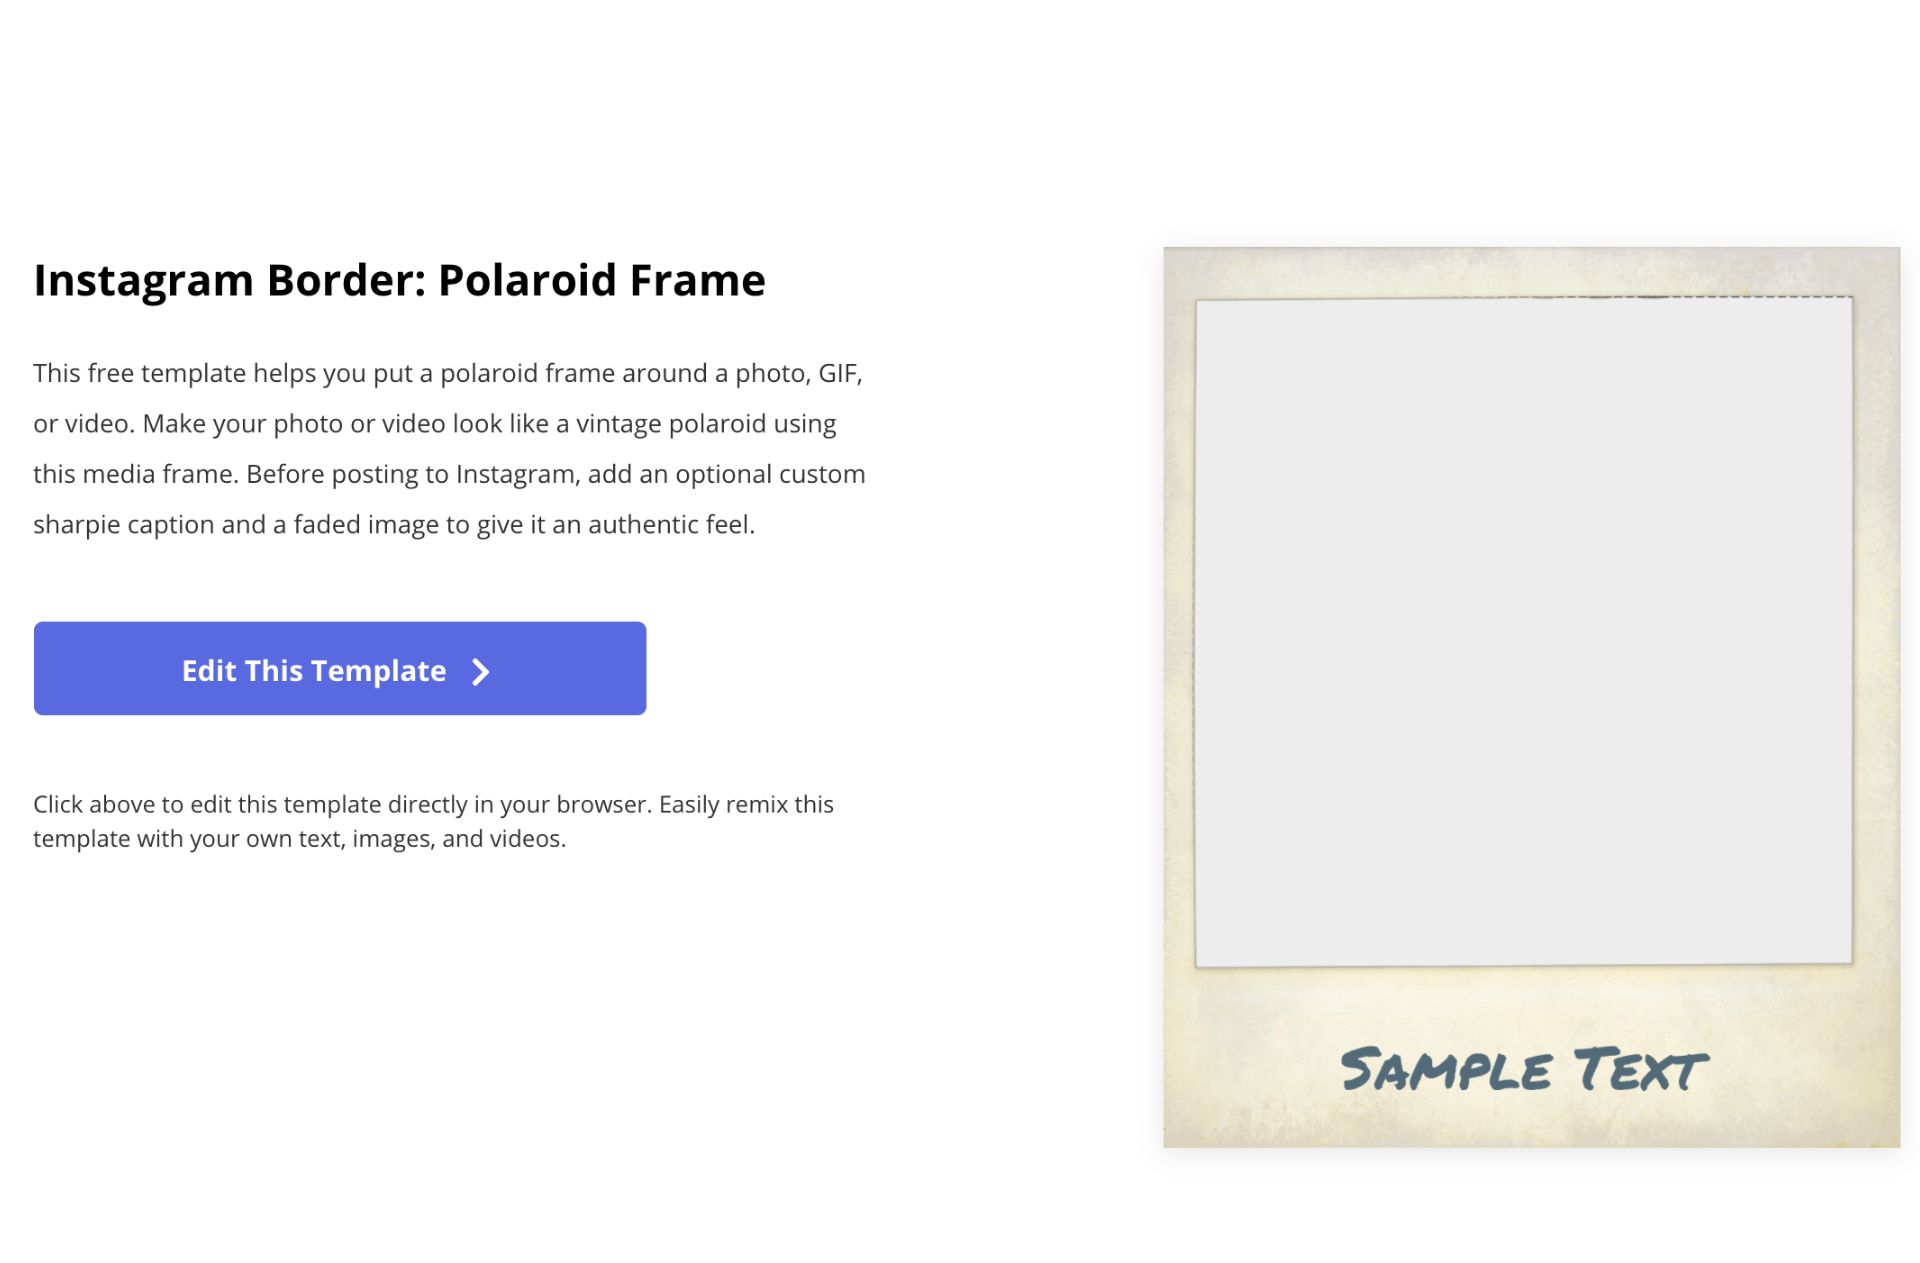
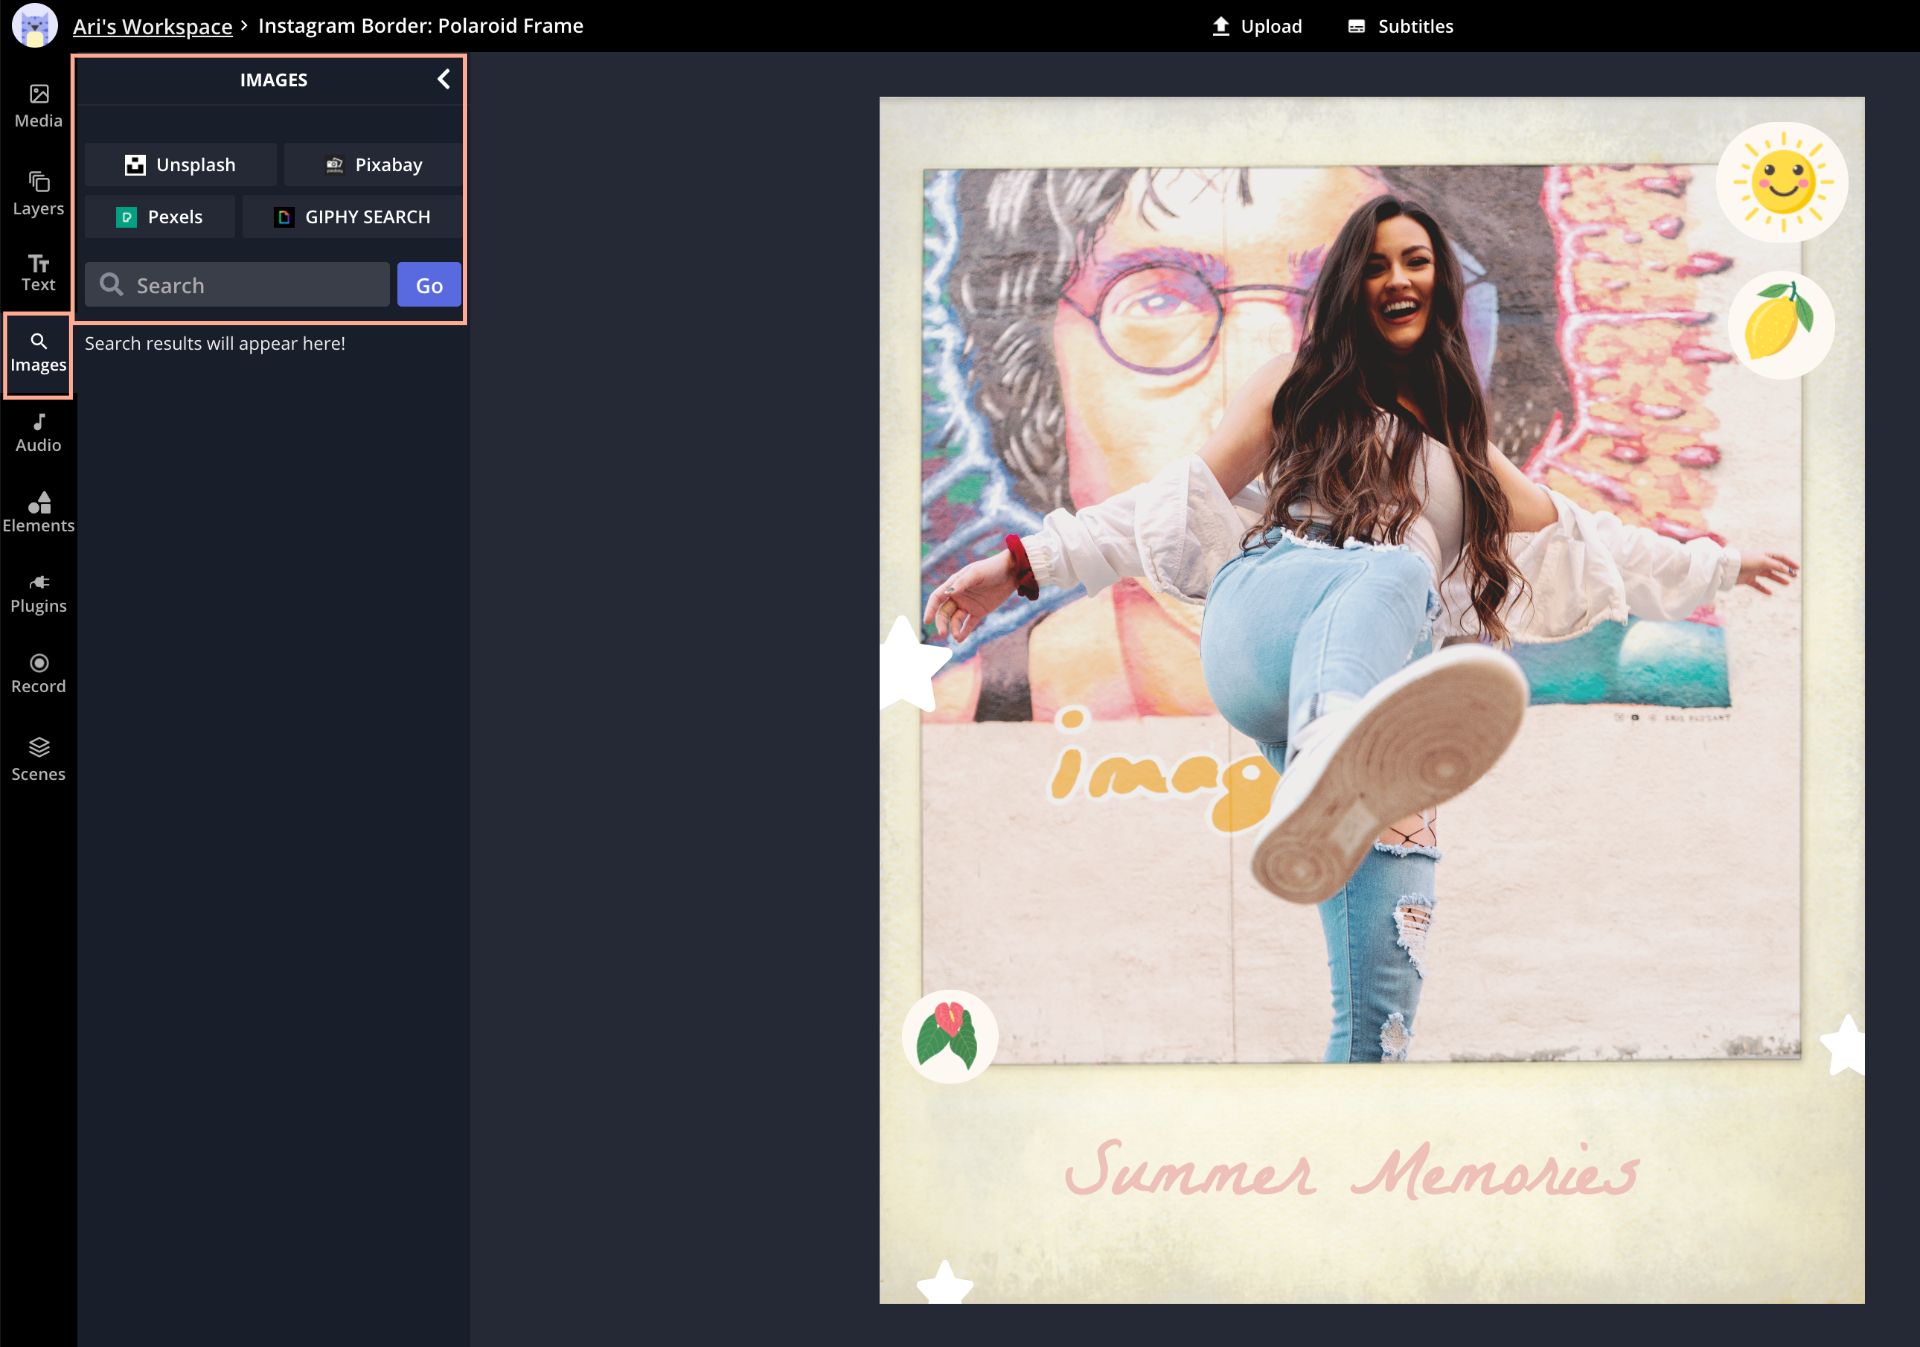
In this tutorial, I'm using a free aesthetic polaroid frame template by Kapwing to transform my image into an old-fashioned picture.
Step One: Open the Polaroid Frame Template
Begin by opening the polaroid frame template and click edit this template to open the Studio. The Studio is where your creative vision comes to life. Here, you can make digital art and edit media. You'll notice this template already has an aged and faded appearance to make the polaroid frame feel authentic.
Step Two: Upload a Picture
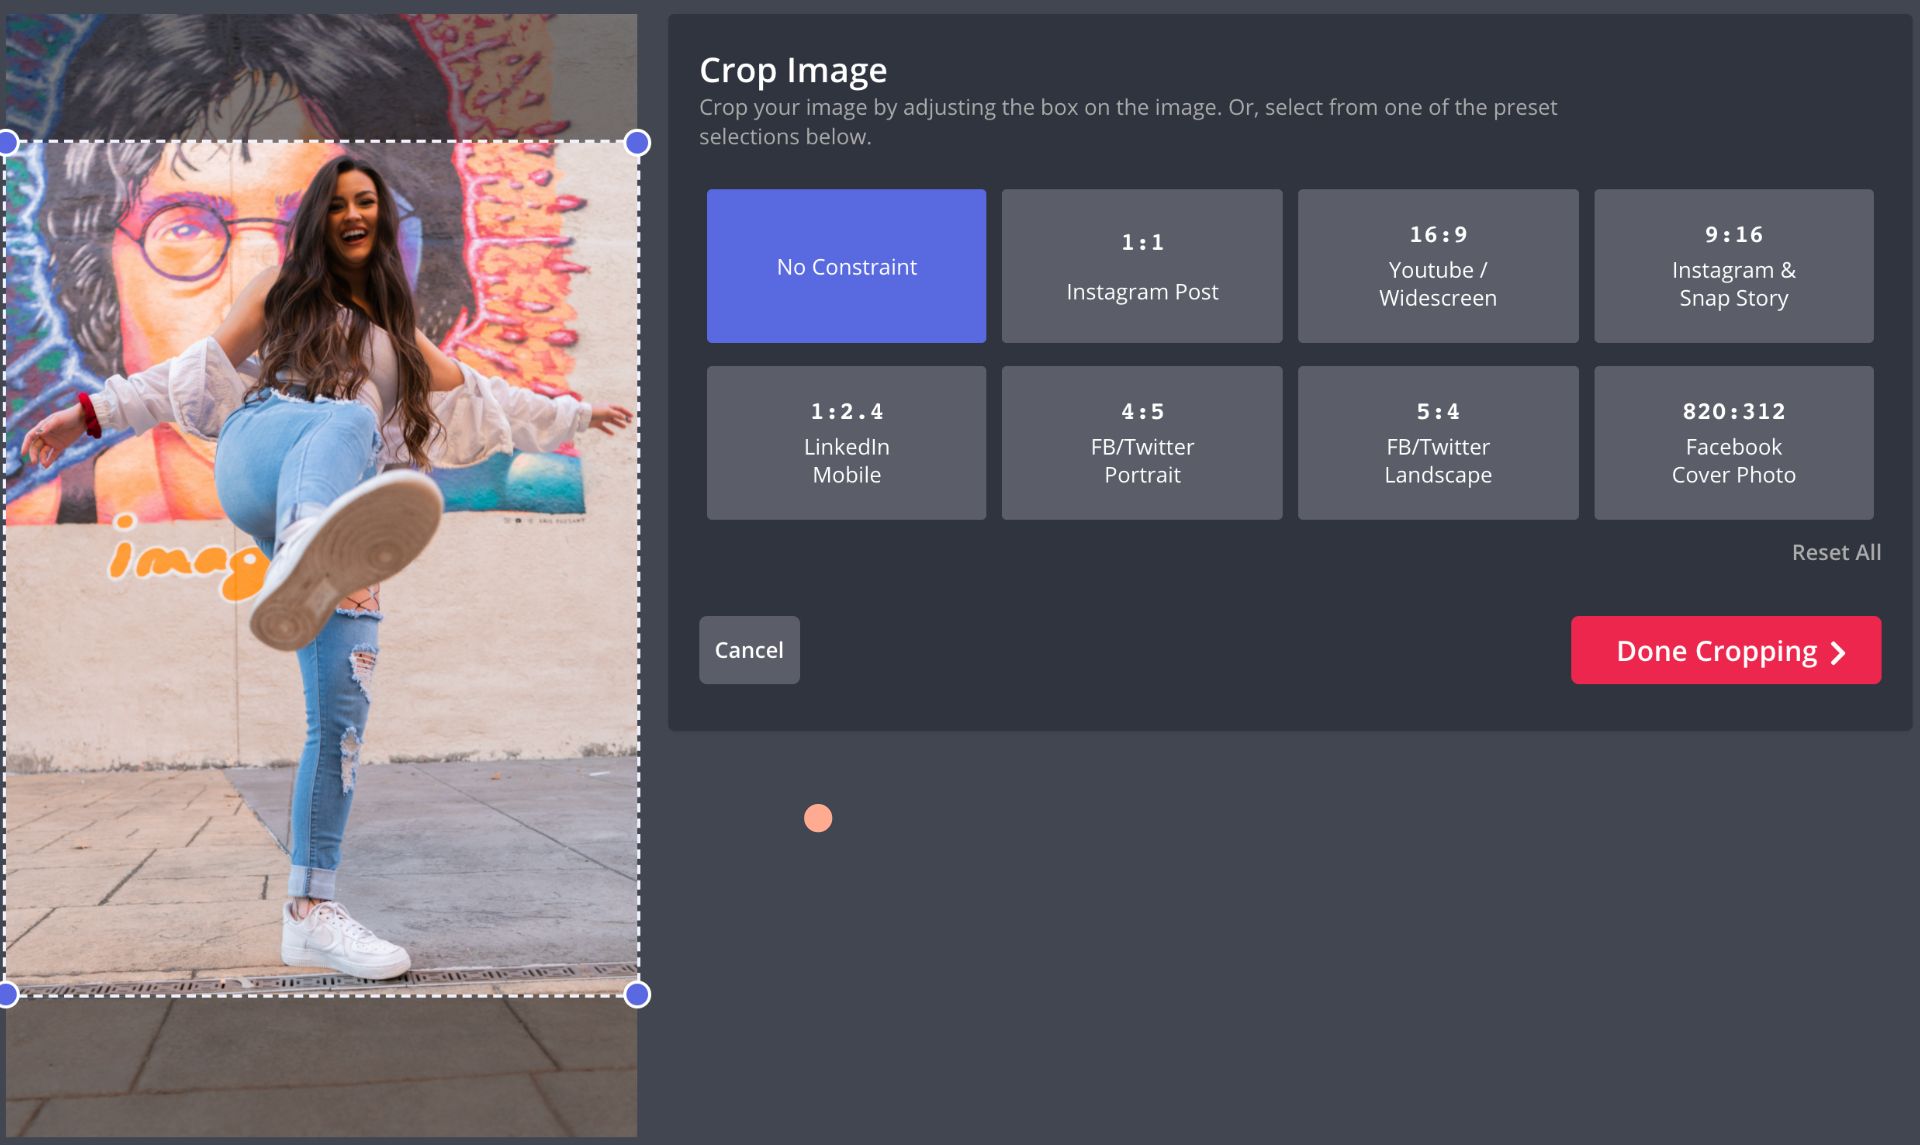
Click replace in the middle of the polaroid frame to upload a picture from your device. You can drag the blue circles on the ends of the picture to resize it or use the crop tool.

To crop your picture, select the layer, then click crop under the image heading on the right side of the Studio. I prefer to use the no constraint setting so I can freely resize my picture. With this setting, you can drag the blue circles horizontally and vertically to select the area you want to crop.
There are preset sizes for Instagram, YouTube, Twitter, LinkedIn and Facebook too. When you're happy with the look, click done cropping in the bottom right corner.
Step Three: Edit the Picture
Now that my picture is perfectly resized to fit in the frame, it's time to add some pizzazz. I'll show you a few ways you can edit your polaroid, but feel free to explore alternative approaches that resonate with you more!
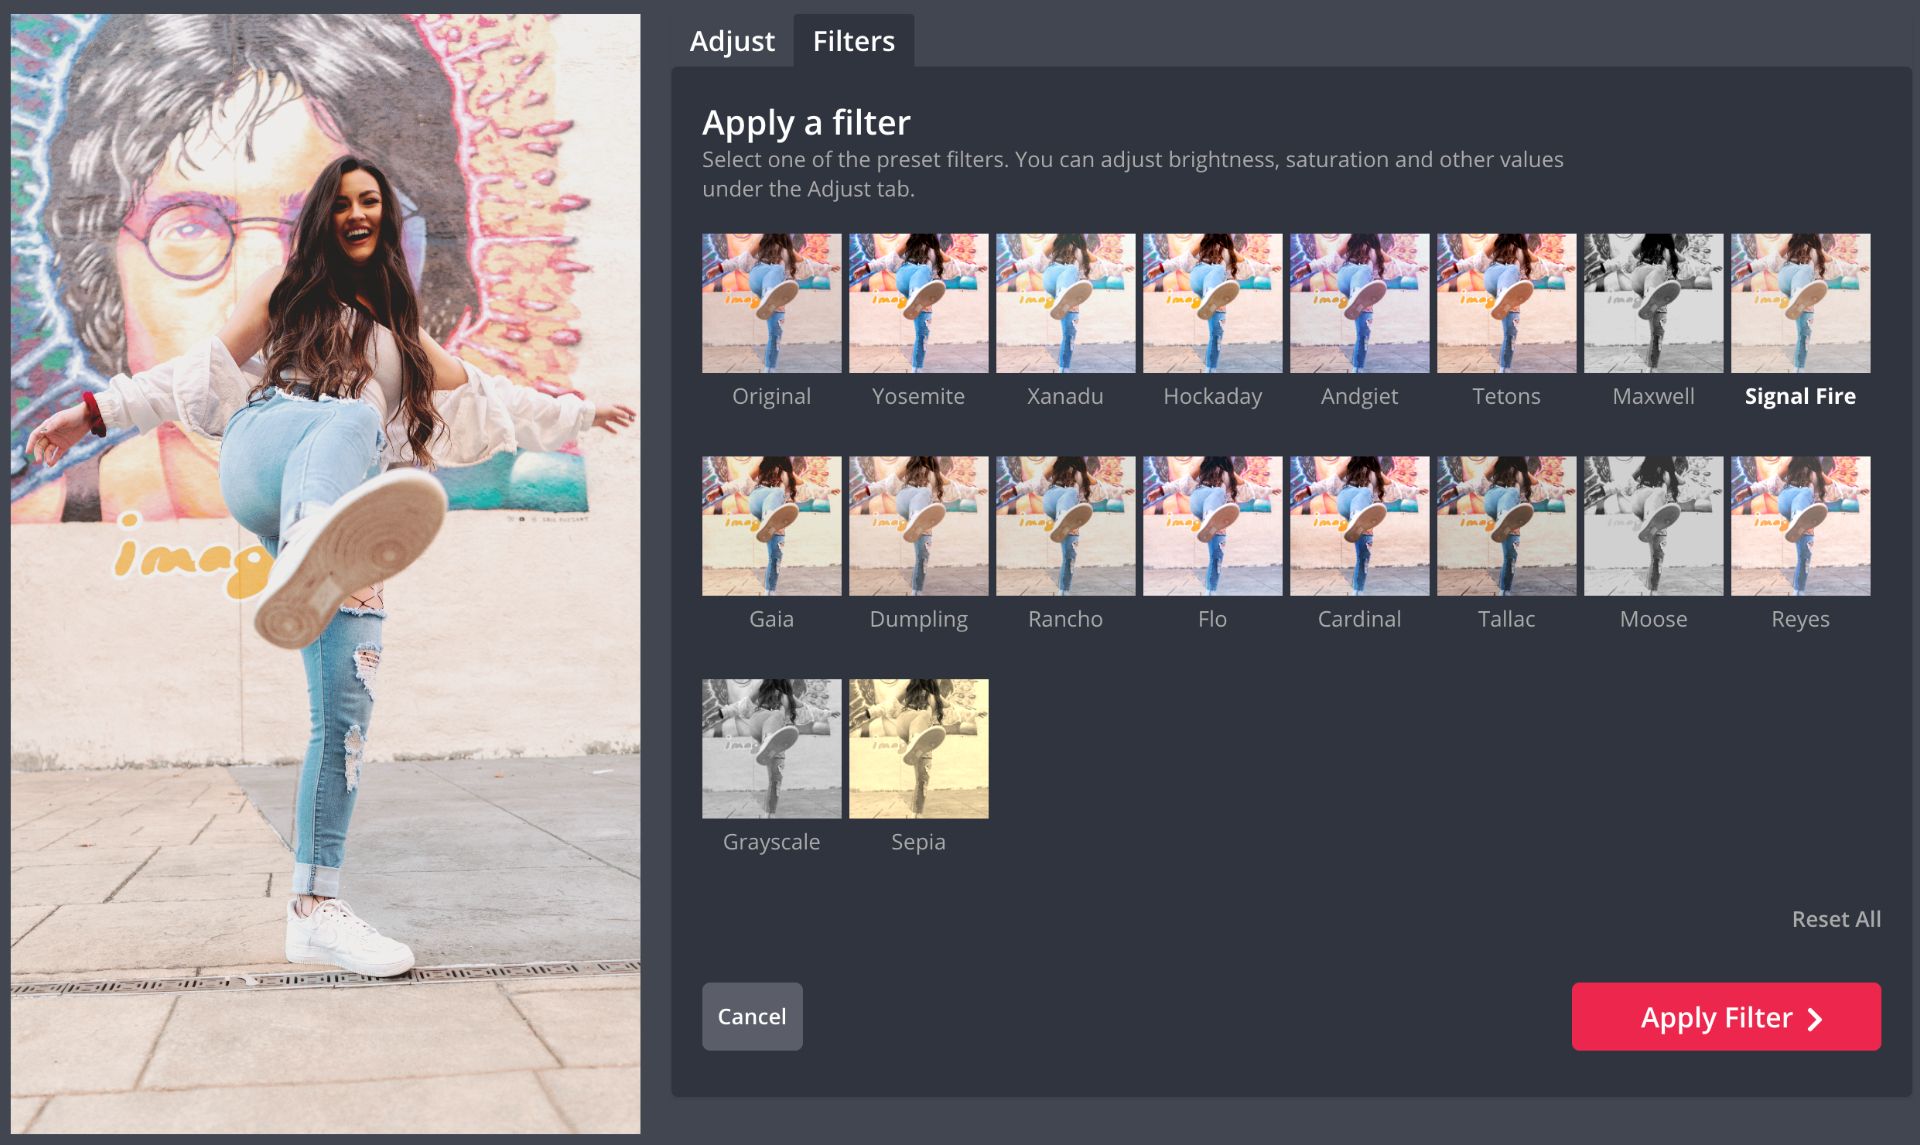
To edit the appearance of your picture, select the image, then click adjust. Drag the circle from left to right to change the intensity of the brightness, saturation, contrast and opacity.
The filters tab also has a collection of 17 unique filters you can apply and adjust to your liking. For a faded look, I recommend going with Signal Fire or Reyes.
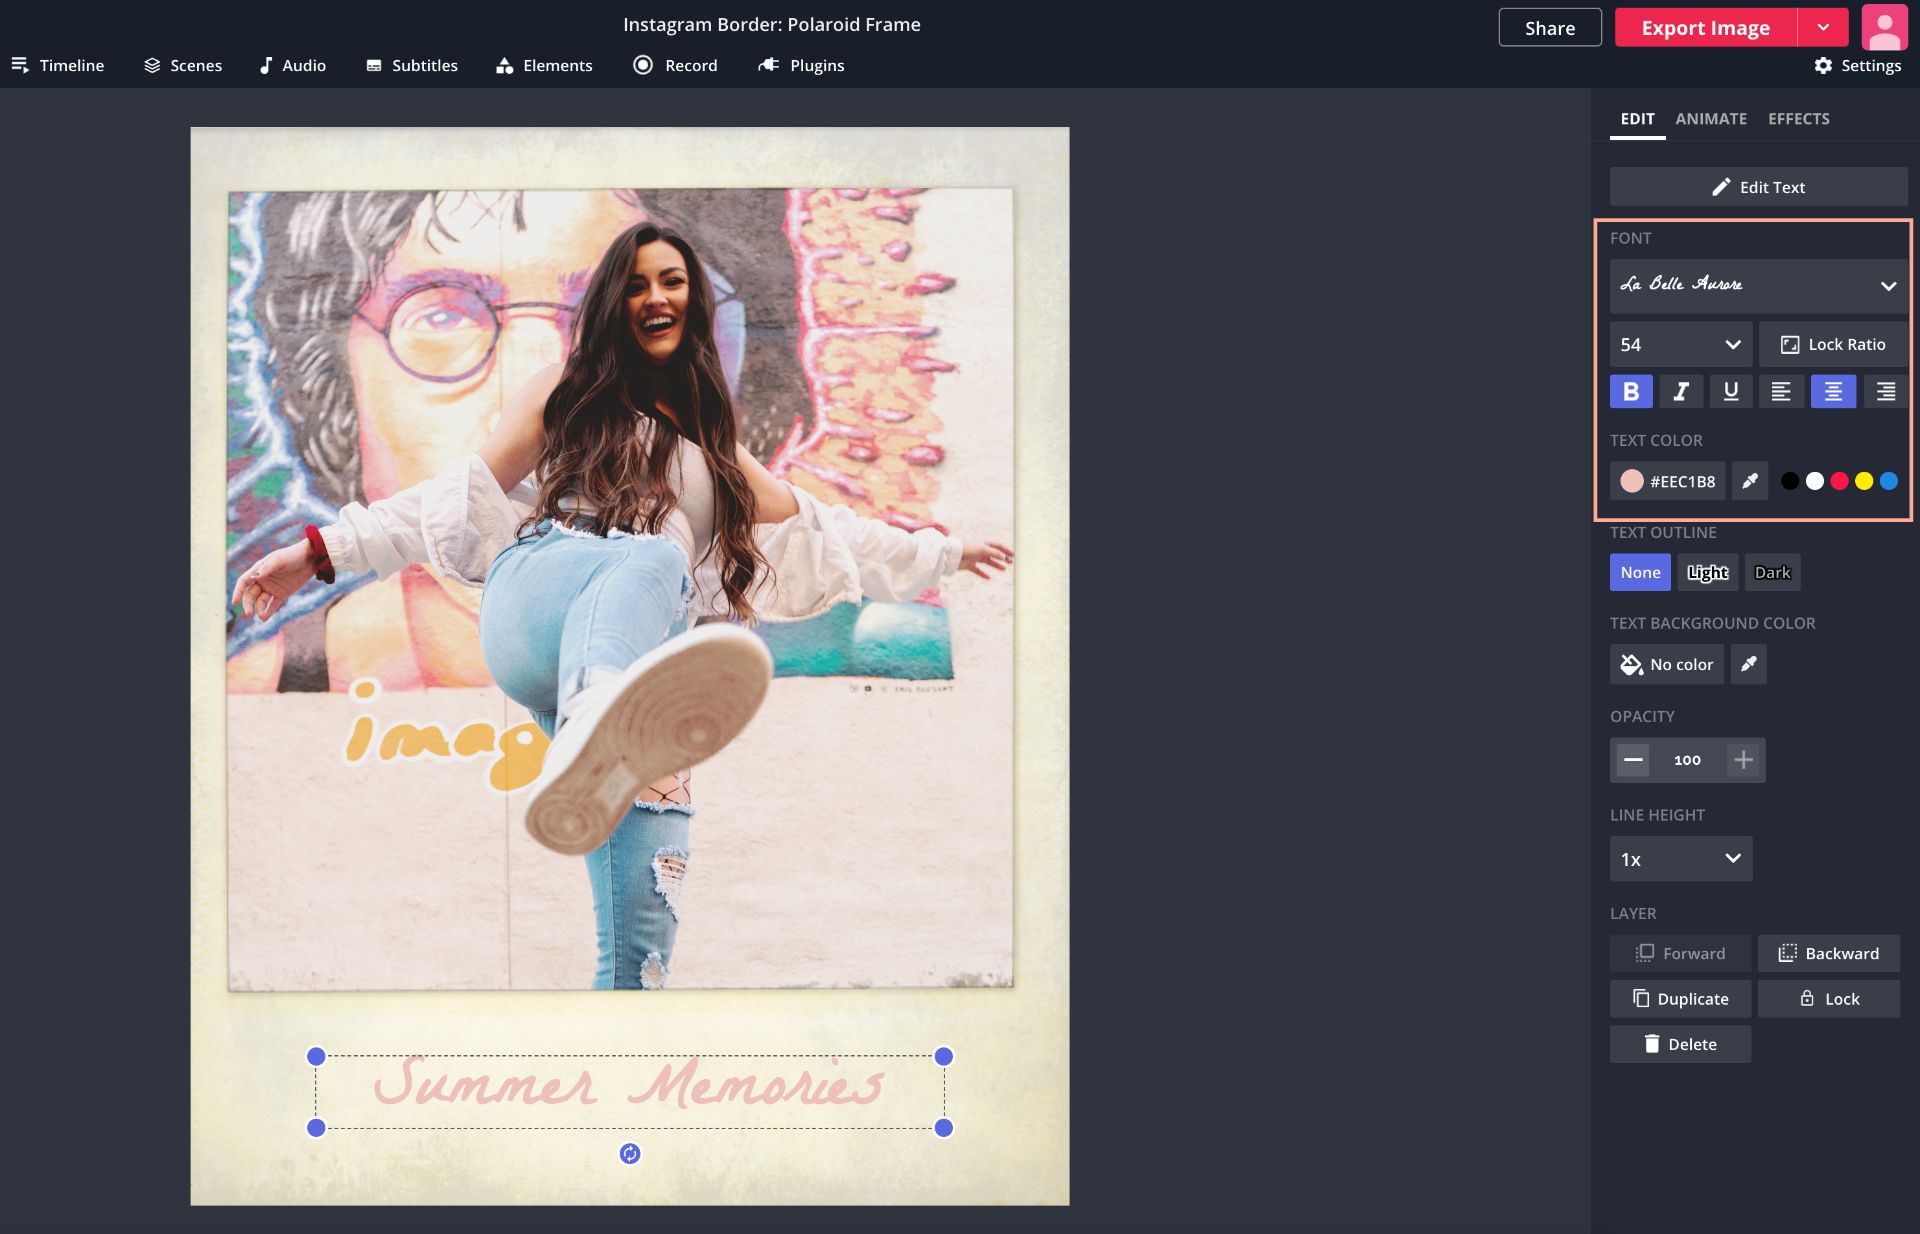
To edit the sample text at the bottom, click it then enter your own text with a font, size, and color of your choice. If you have Kapwing Pro, you can upload custom fonts, but there are plenty of options to choose from with the free version.
The fonts, Coming Soon and Chilanka are good options if you're looking for styles reminiscent of handwriting. I went with La Belle Aurore to add an elegant touch to my polaroid, then used the eyedropper to make the color match my picture.
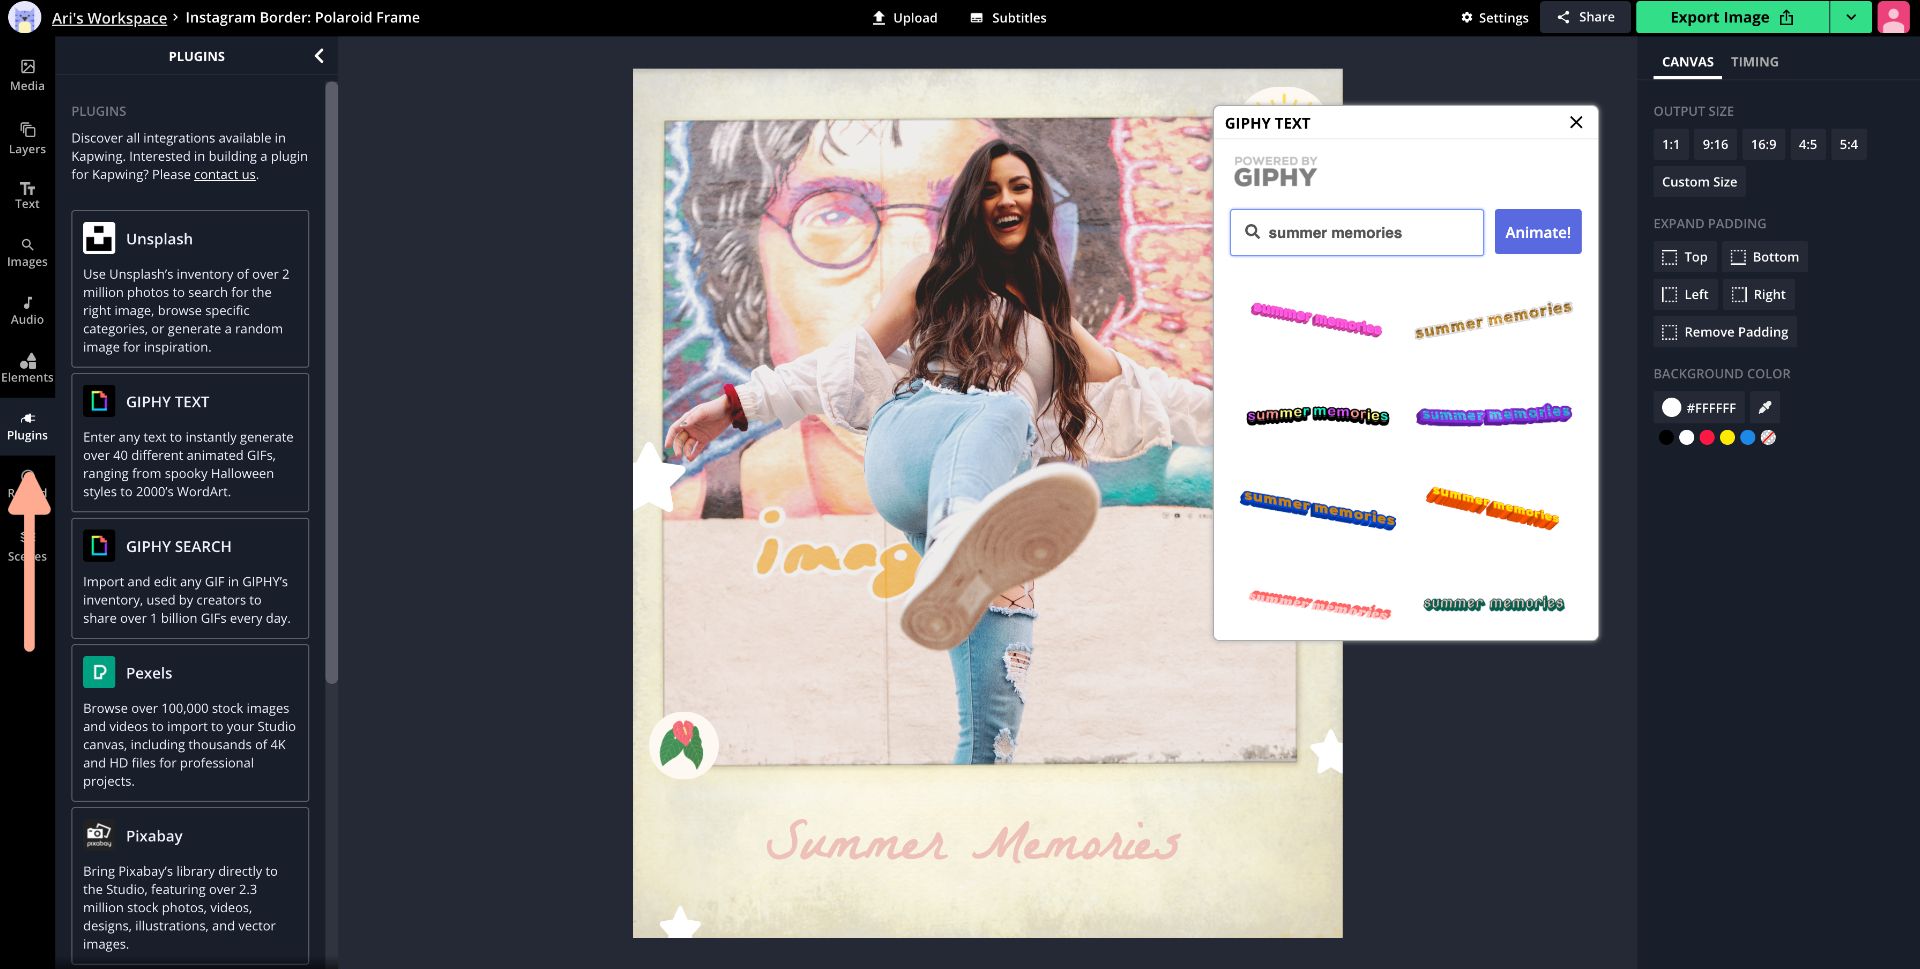
If you want to dazzle your text a little more, click plugins, then click GIPHY text. Type a few words in the search bar and click animate.
I'd like to think of this as a fun way to combine a vintage aesthetic with modern style.
You can also dress the frame up with stickers, animated GIFs, overlays and emojis for a more eye-catching look. Click image, then type a query in the search bar to find overlays and stickers. Try to use descriptive text and add "png" to your query to find pictures without a background.
To add GIFs, click GIPHY search and type a query that best describes what you're looking for. If you want, you can click elements to add shapes to create a border.
Step Four: Export and Download
When you're happy with your picture, click export image at the top right corner of the screen. Once your project has been processed, click download or sign in first to remove the Kapwing watermark.
You can click the Instagram, Facebook or Twitter icon to easily share the polaroid picture with your followers.