How to Add Text to Your Cover Photos and Profile Pictures
A photo frame, cover photo message, or profile picture change, when coupled with real activism and donations, is a great way for anyone to make their voices heard. Here's how to add your messages anywhere.

In the current weeks of worldwide protests, as with other times that demand advocacy, action, or widespread support, it's good to use every tool at your disposal to share what you believe.
Even the little things like social media graphics can be contributing parts of greater social movements. A photo frame, cover photo message, or profile picture change, when coupled with real activism and donations, is a great way for anyone to make their voices heard without crowding out other important messages.
Graphics like these are always better with the messages you think are most important and informative, though. It's easy to customize your social media banner photos and profile pictures with any text you want, all online and in under a minute. Here's how:
- Upload your photo to the studio or use a blank template
- Add and edit your text
- Download and share
Step 1: Upload your photo to the studio or use a blank template
Start by going to Kapwing.com and clicking "Start Editing" to go to the Studio. Here, you have a few options to begin. You can upload a photo from your computer, click "Images" and search for a picture on the web, or click "Start with a blank canvas" to create your cover photo or profile picture from scratch. You can also use a blank template to save some time: here are some for profile photos, Facebook covers, and Twitter banners.
Right now, it's common for people to use plain black backgrounds for their messages. Just start with a blank canvas and choose the black color swatch on the right side of the Studio next to "Background Color."
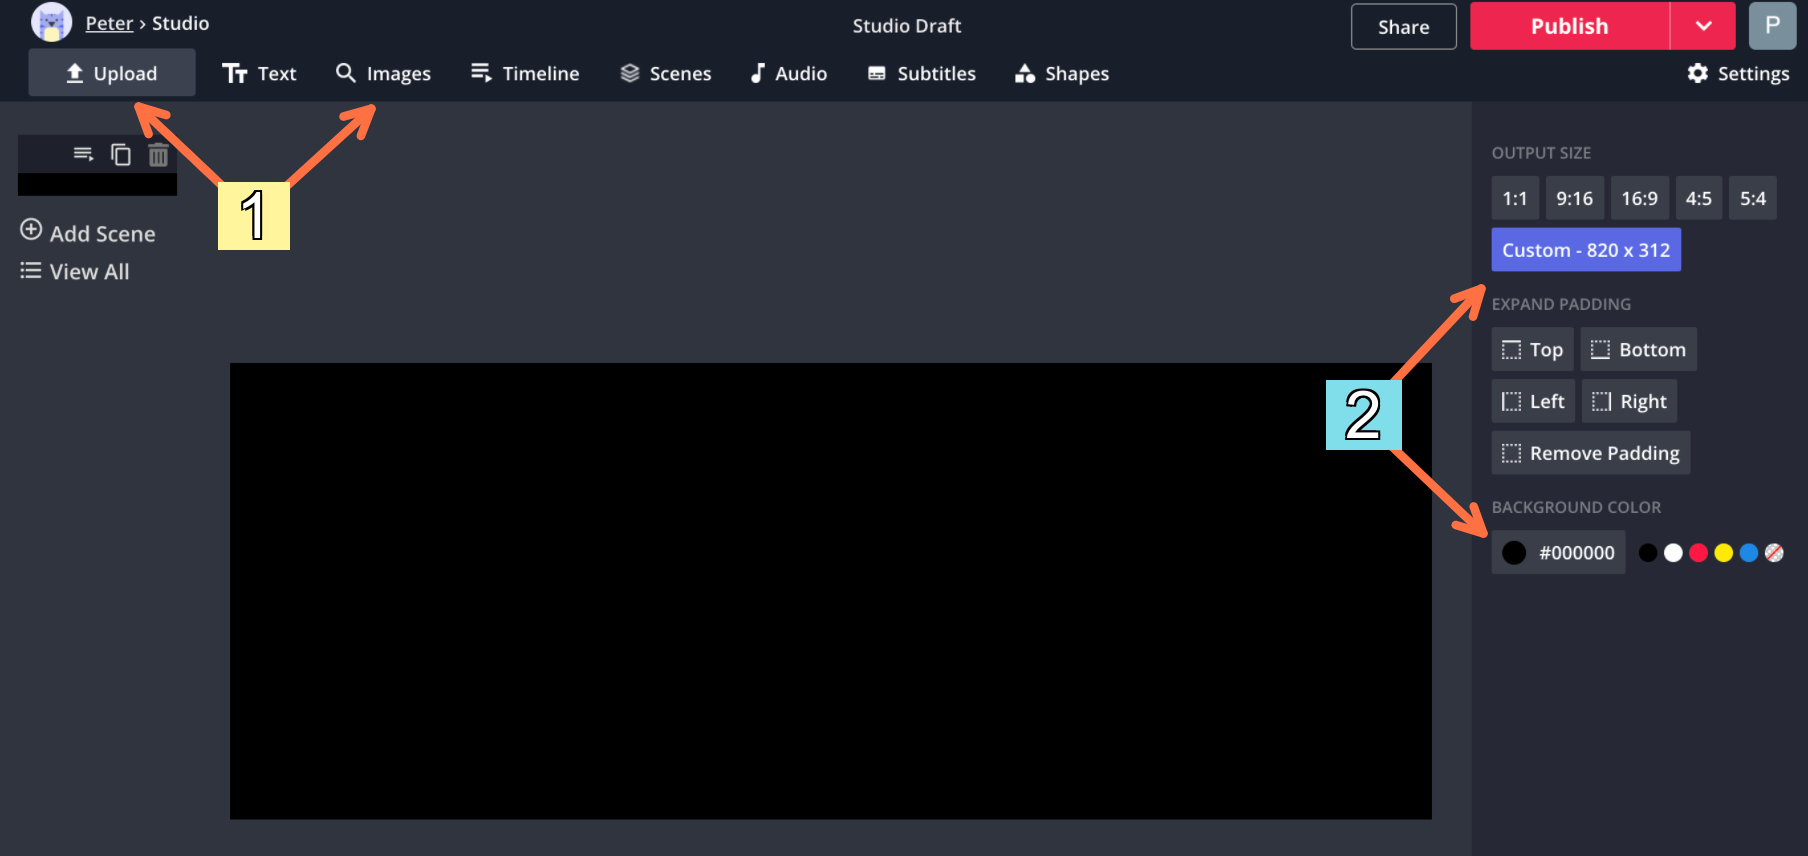
You'll also need to resize your project to fit any required dimensions. If you're making a profile picture, you should choose 1:1 under "Output Dimensions." If you're creating a banner photo, you have a couple of options: Facebook banners are 820x312, and Twitter headers should be 1500x500.
Step 2: Add and edit your text
Now it's time to write the message you want to add. Click "Text" in the upper toolbar and start by entering your message. If you're relaying a serious message, try to keep it short & to the point.

Using the tools in the right-side menu, you can make any edits your text needs. You can customize its font, size, position, color, outline, background, style, and even animation, for locations that support GIFs.
Step 3: Download and share
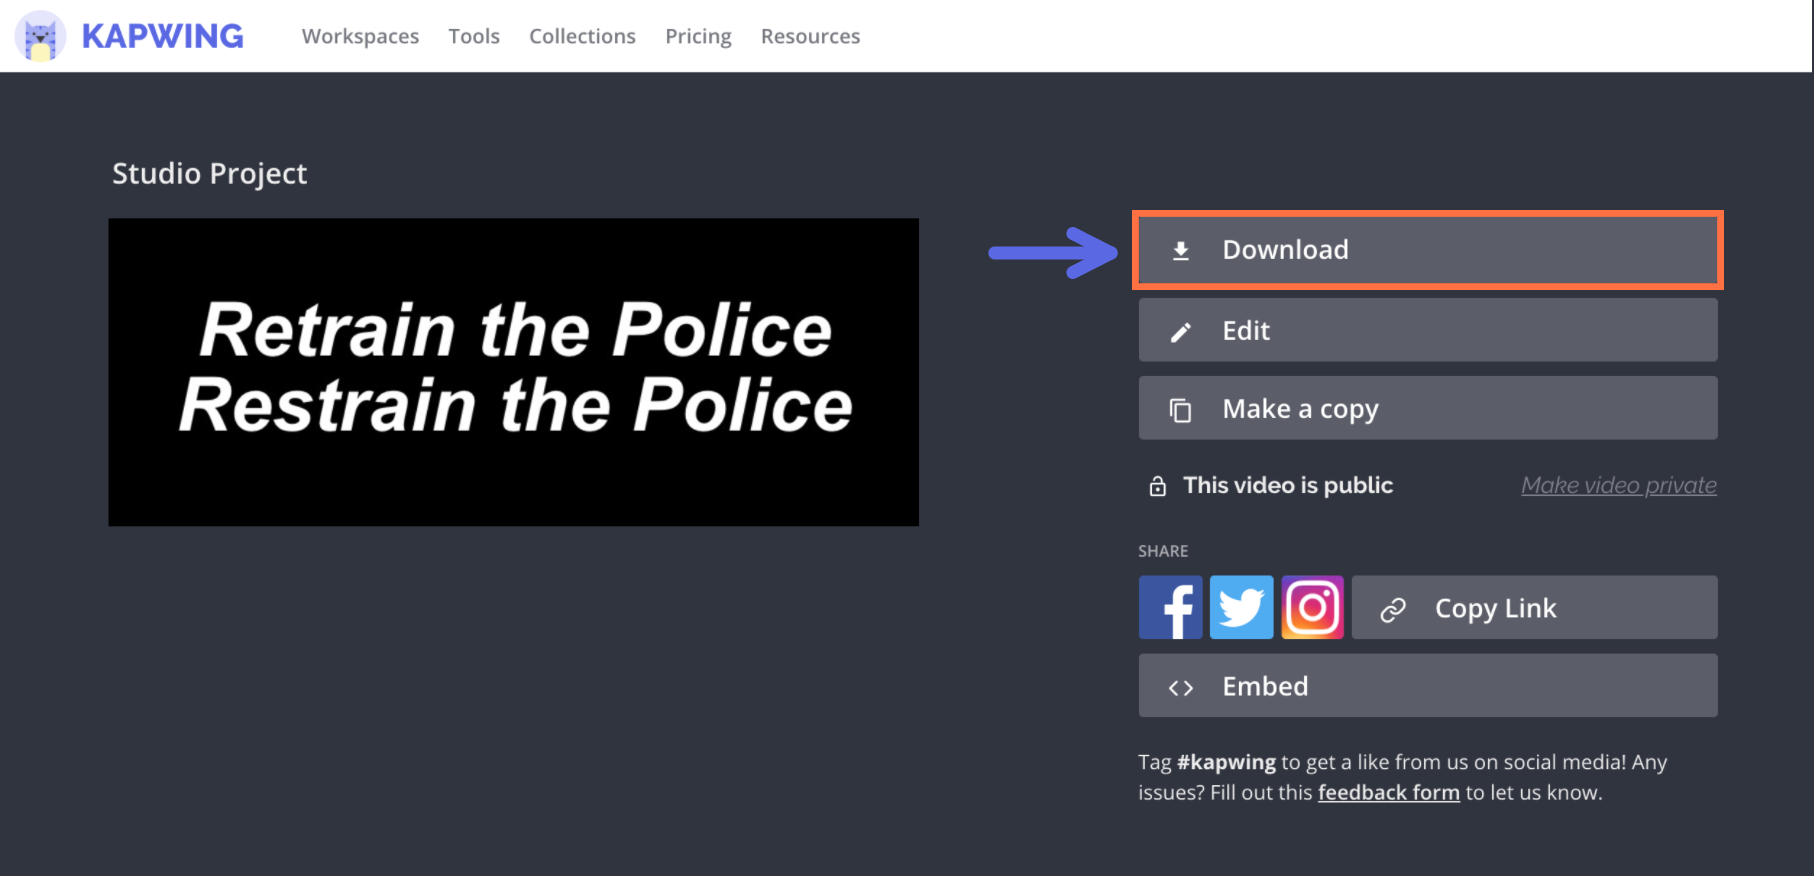
Once your banner photo or profile picture looks the way you want and you're done editing your text, click "Publish" in the upper right-hand corner. For still images, Kapwing should process your project in a couple seconds, but GIF files might take a little bit longer. When your project is ready, click "Download" to save it to your device.
Now you're free to upload your pictures to social media. Since you resized your files for specific locations, you won't have to zoom, crop, or reposition them once they're added to your profile. Just go to your profile, choose "Edit," and update the photos you want to change.
Be sure to subscribe to the Kapwing Resources page – we’re constantly writing new tutorial and features to help you make the most out of Kapwing.
Related Articles:
• What you should & shouldn't do for Blackout Tuesday
• Add Effects to Text
• Make a Twitch Banner Online