How to Add an Overlay in OBS (Fast & Free)
Overlays can be tricky. Sometimes you need a designer to make them and an internet blog to teach you how to install them. Today, we’ll be combining both thanks to Kapwing’s free editing platform. Learn how to add your overlay and, if you want, make a totally custom one in the process. Keep reading:

Open Broadcast Software, or OBS, turns the average Joe into a video streaming powerhouse. However, OBS’s suite of broadcasting tools aren’t enough to cut through the noise. That’s why you need to add an overlay to truly take your video to the next level.
Overlays can be tricky. Sometimes you need a designer to make them and an internet blog to teach you how to install them. Today, we’ll be combining both thanks to Kapwing’s free editing platform. Learn how to add your overlay and, if you want, make a totally custom one in the process. Here’s what we cover:
- Choose an overlay
- Make an overlay
- Upload it to OBS
1. Choose an overlay
If you already know which overlay you want, move on to step #3. If you want to use a template, explore Kapwing’s vast catalog of templates, sorted A-Z.
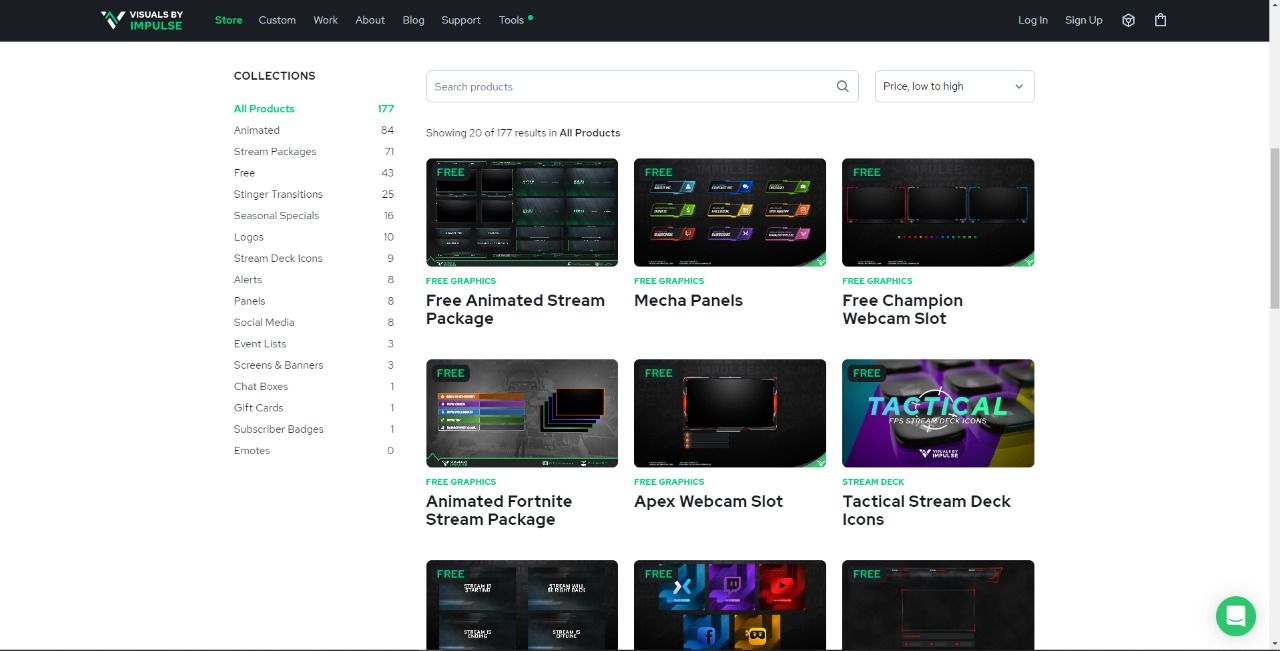
For streamers, check out Visuals by Impulse’s store to browse stream overlays.
2. Make an overlay
If you’re the type who likes to create things your way, Kapwing has your back. Using Kapwing’s studio, you can create any design you want. For this tutorial, I’ll be adding a simple social media watermark.
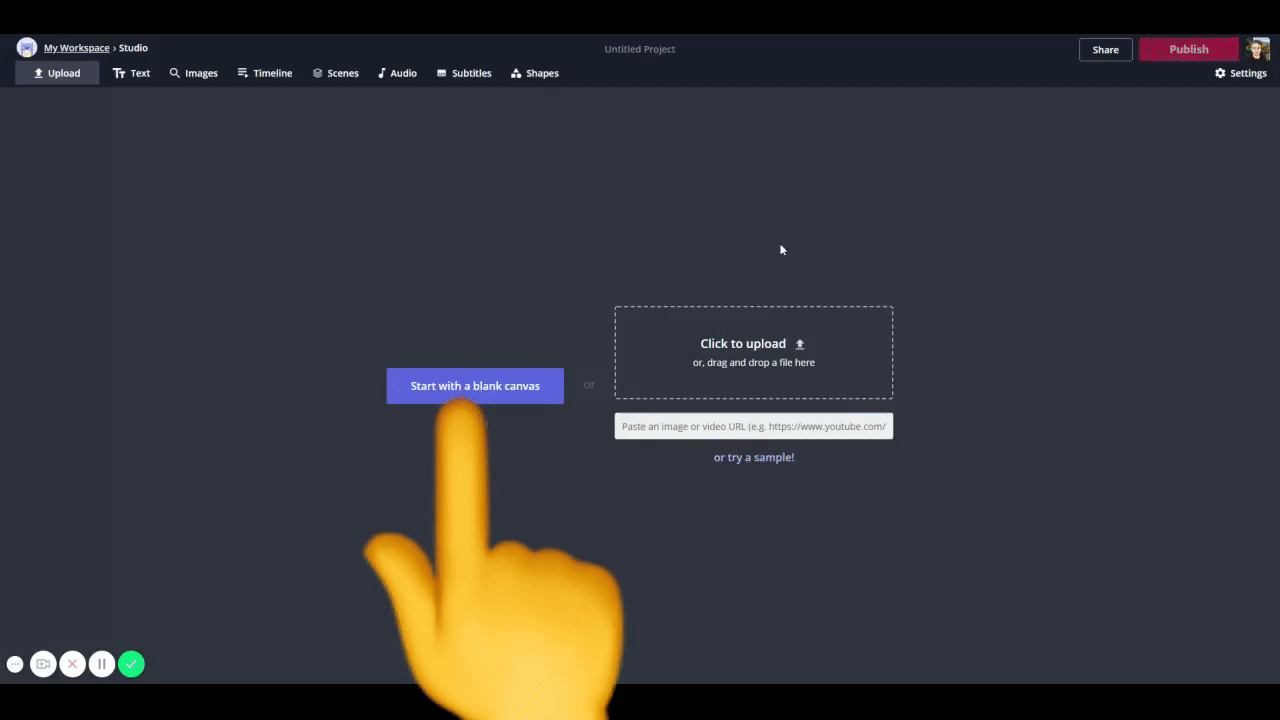
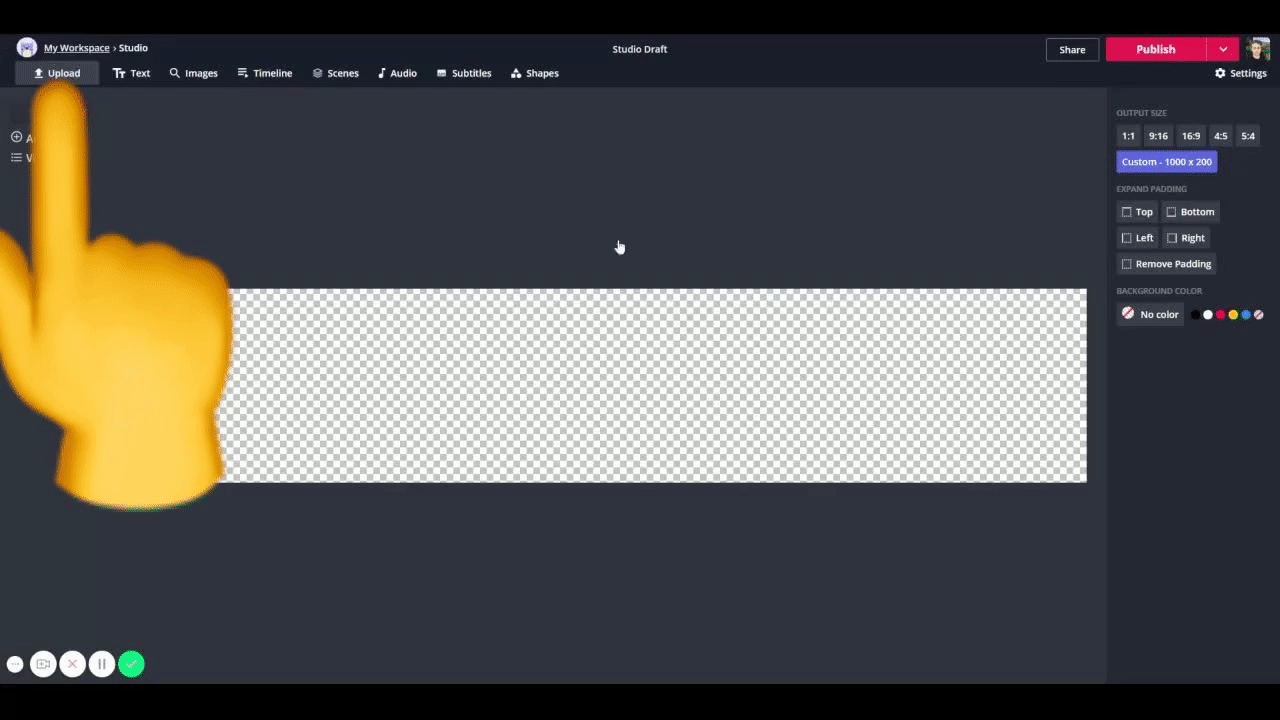
To make a watermark for yourself, open the studio and click ‘Start with a blank canvas’. Then, click ‘Custom Size’ and enter 1000px for the width and 200px for the height.
Typically, the bigger your overlay, the better the quality. Last, set the background to no color (checkered circle with a red slash) to ensure the overlay saves with a transparent background.
Now, click ‘Upload’ in the top left to add a social media icon. Then, click ‘Text’ to enter your username. For this example, I added a YouTube logo and my channel name.
When you’re done, click ‘Publish’, wait for it to process and download your new overlay. Keep in mind, you can use this process to design any overlay. Check out this collection of tutorials on creating overlays to learn more.
3. Upload it to OBS
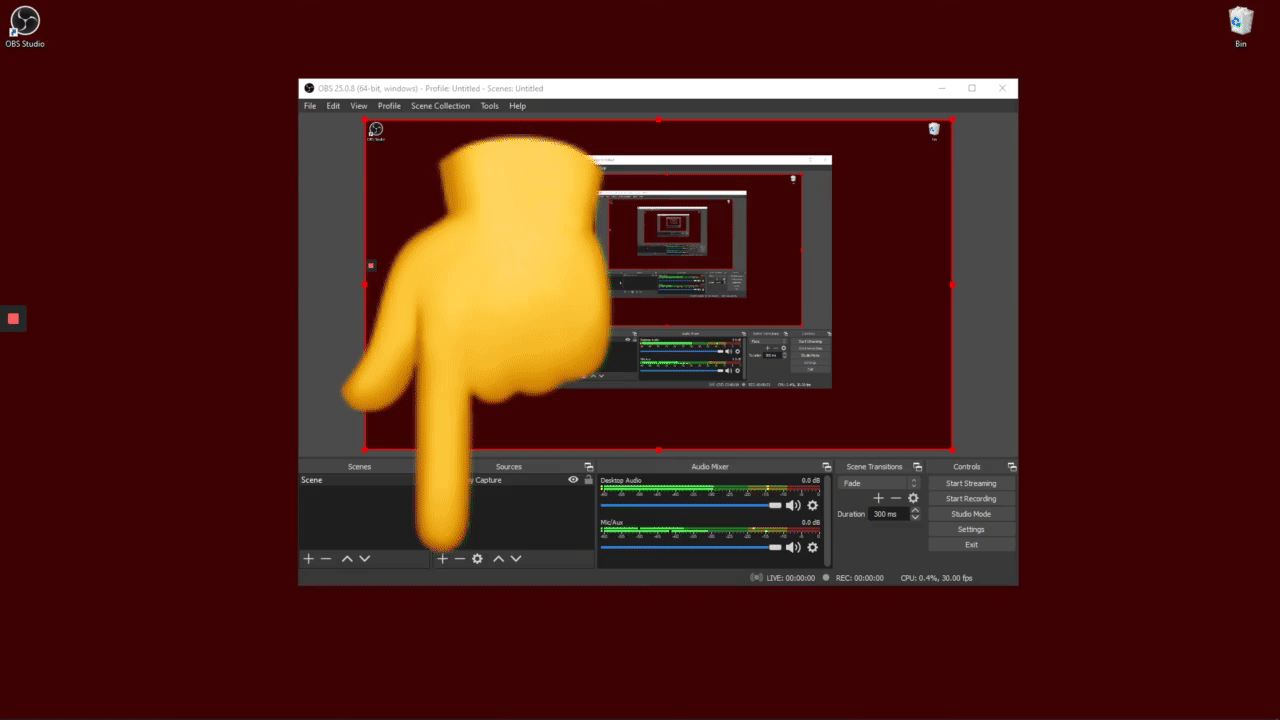
Now, open OBS on your computer and choose the scene you want to add the overlay. If you don’t have one, click the plus sign under the ‘Scenes’ section to make one.
Next, under ‘Sources’, click the plus sign and select image. Finally, upload your overlay and position it exactly where you want. That’s it! Congrats.
Remember to tag us @KapwingApp whenever you share your content on social media – we love to see what our creators are passionate about. And be sure to subscribe to the Kapwing Resources page – we’re constantly writing new tutorials and features to help you make the most out of Kapwing.
Related Articles: