How to Add a God Rays Effect to Photo or Video Online
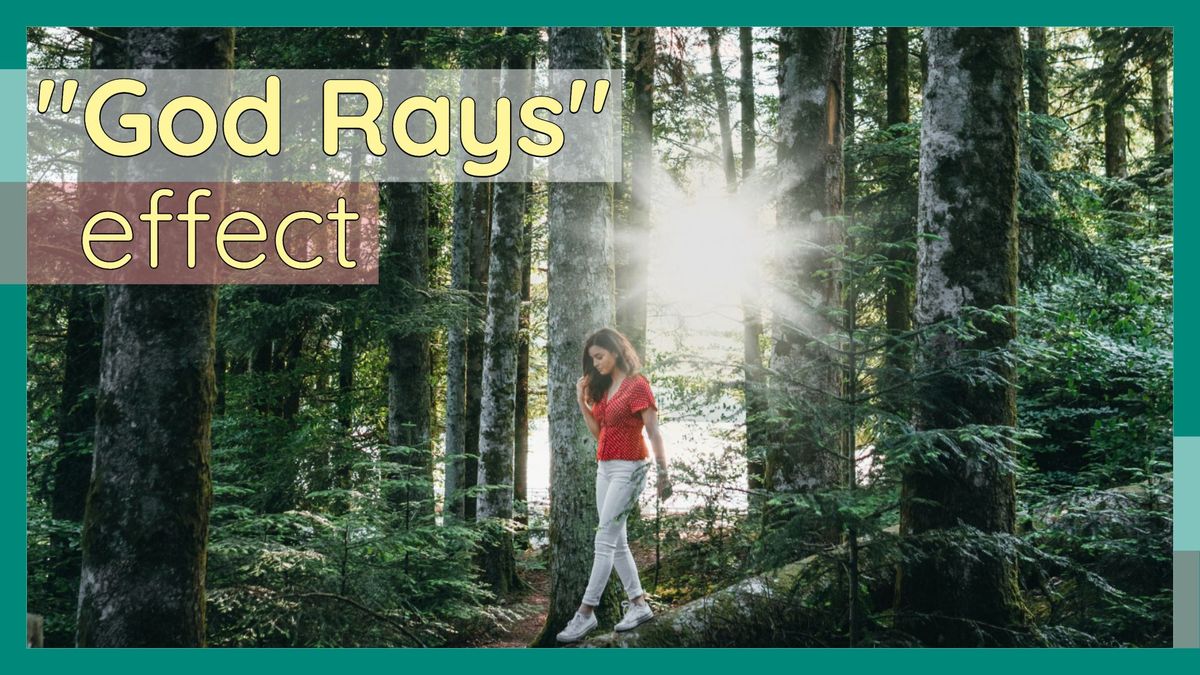
The "God Rays" effect adds atmosphere to your photos and makes them seem higher quality than they actually are. Here’s how to add God Rays to photos and videos, all for free and online.
There are a lot of different effects that we’re used to seeing in photos and videos, but we don’t know exactly what they’re called. You might know what a lens flare is, but have you heard of Bokeh, or Gaussian blur? Maybe not, but you’d immediately recognize these effects if you looked them up.
Another effect like this is often referred to as "God Rays." It’s the effect of the sun shining through a cloud, which is where it gets its name. But more commonly, you’ll see the God Rays effect when you take a picture with a concentrated area of light shining through air that is somewhat humid or dusty. It can add a great sense of atmosphere to your photos and make them seem like they have higher quality than they actually do. Here’s how to add God Rays to your own photos and videos, whether you took them yourself or found them online, all for free and online:
- Upload Your Photo or Video to the Kapwing Studio
- Add the God Rays Layer You Like the Most
- Export and Download Your Image or Video
Step 1: Upload Your Photo or Video to the Kapwing Studio
Your first step is to head over to Kapwing.com and select the Start Editing button. This will take you straight to the Kapwing Studio, where you can upload the content you’re starting with. You’ll have several options to upload content: click the Upload button to find a file on your computer, paste a link in the URL bar to import a photo or video from the web, or drag & drop a file directly into the Studio window.
If you don’t have a file on hand, you can also select the Images tab in the upper toolbar and search for images or GIFs in Google search. Click on one of the results and it will be immediately uploaded to the Studio.
Step 2: Add the God Rays Layer You Like the Most
To add God rays to your picture or video, you need to start with a PNG image or transparent GIF layer to add to your canvas. The easiest way to do this in the Studio is to use the image search tool by clicking Images in the upper editing toolbar. Here, enter a search term like “light PNG” or “God rays filter” for still images or “light rays GIF transparent” for a moving God rays effect.
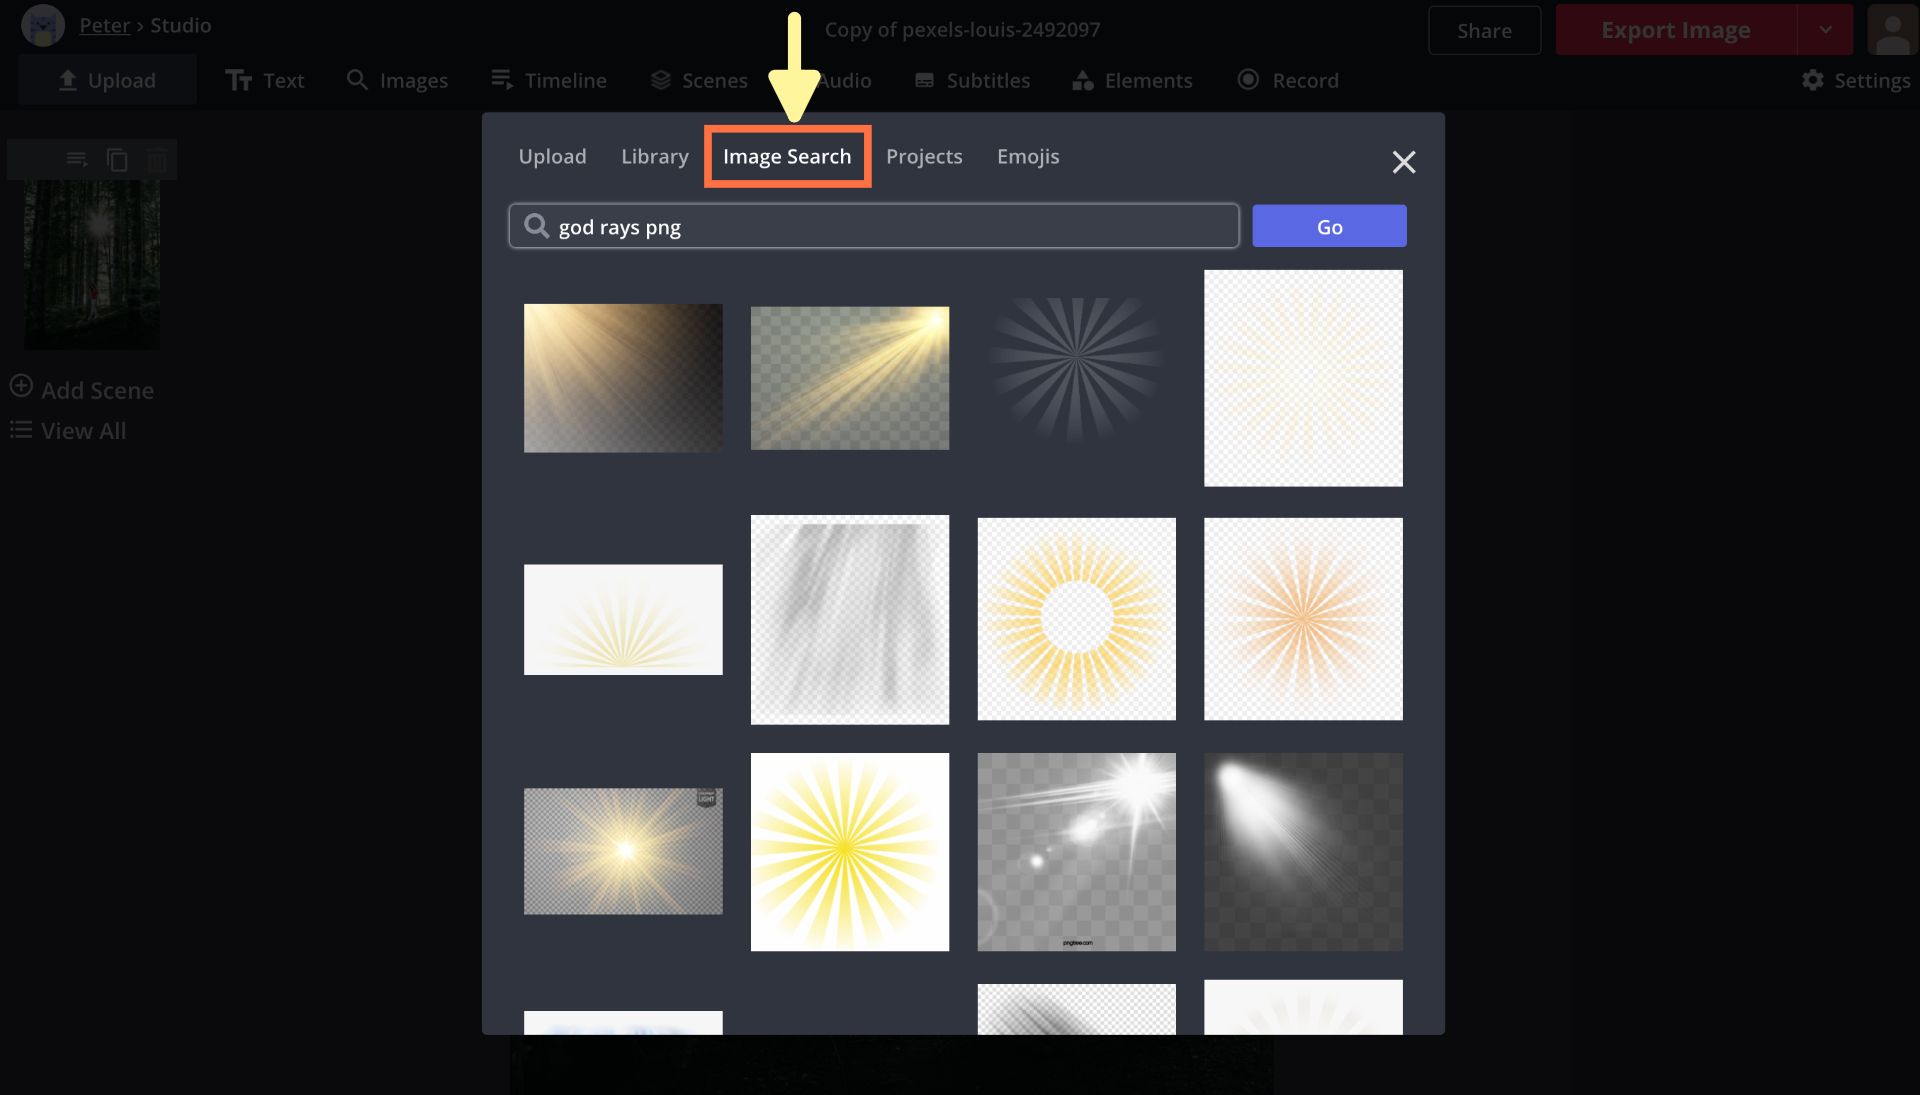
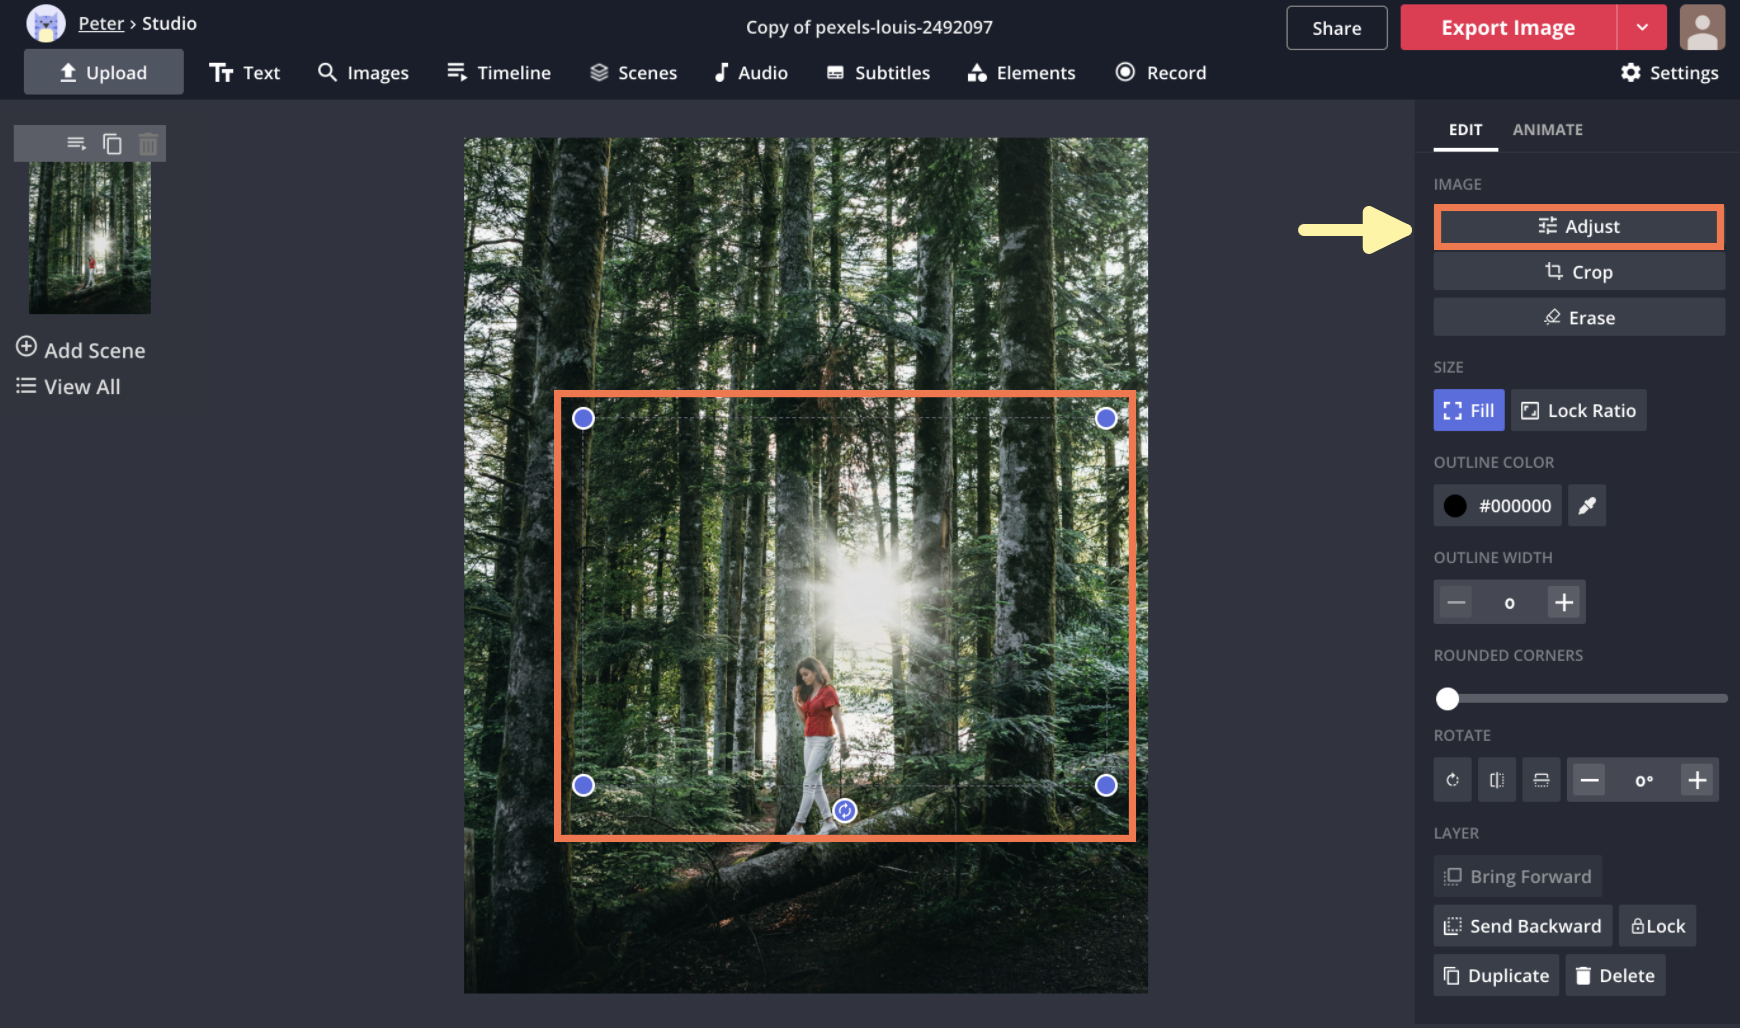
Once you find a filter layer you like, select it to upload it to the Studio. Now, you have several options for making it look as good as possible on your project. By clicking and dragging the layer on the canvas, you can move, resize, and rotate your filter layer. And using the Adjust tool on the right side of the Studio, you can change the visual qualities of your God rays to make them fit in perfectly. Here’s what I did with mine by finding the perfect transparent PNG using image search, resizing and rotating it to fit the light source in my photo, and lowering its brightness a bit in the Adjust menu to make it fit in more seamlessly:
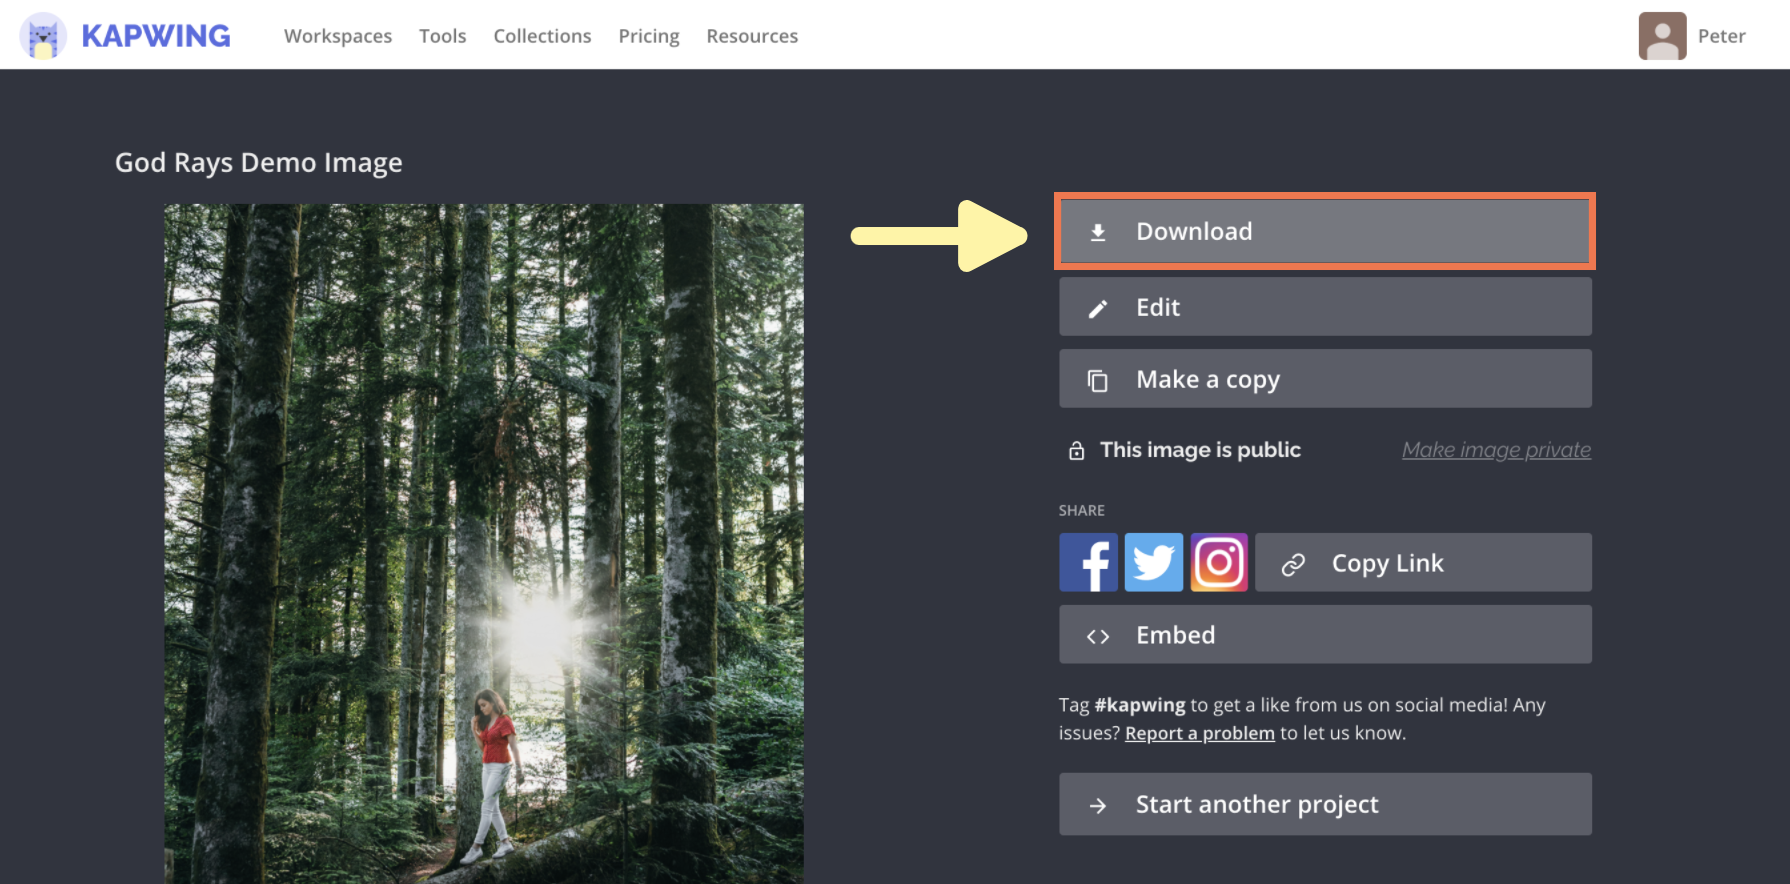
Step 3: Export and Download Your Image or Video
When you’ve added, arranged, and edited your light rays to perfection, hit the red Export button in the upper right corner of the Studio. If you’re processing a still image, your project should be ready in about a second or so, but if you’re creating a GIF or video, it might take a bit longer. Once it’s ready, select the Download button on the right side of the screen and your project will be saved directly to your device.
I hope this article helps you level up your digital photo editing skills and add some atmosphere to your outdoor shots! If you’re interested in more content like this, check out some of the videos on our YouTube channel Kapwing App. And while you’re here, take a look at some related articles on photography and visual effects:
• How to Make Custom Glowing Text Online
• 7 Ways to Add Animation to Videos for Free
• How to Add a Bling Effect to Videos
• How to Make a Video Look Old-Fashioned