How to Record and Edit a Reaction Video in Your Browser
Putting reaction videos together isn't easy to do with common editing apps, since they require a picture-in-picture video arrangement. Here's how you can make one for free & online.
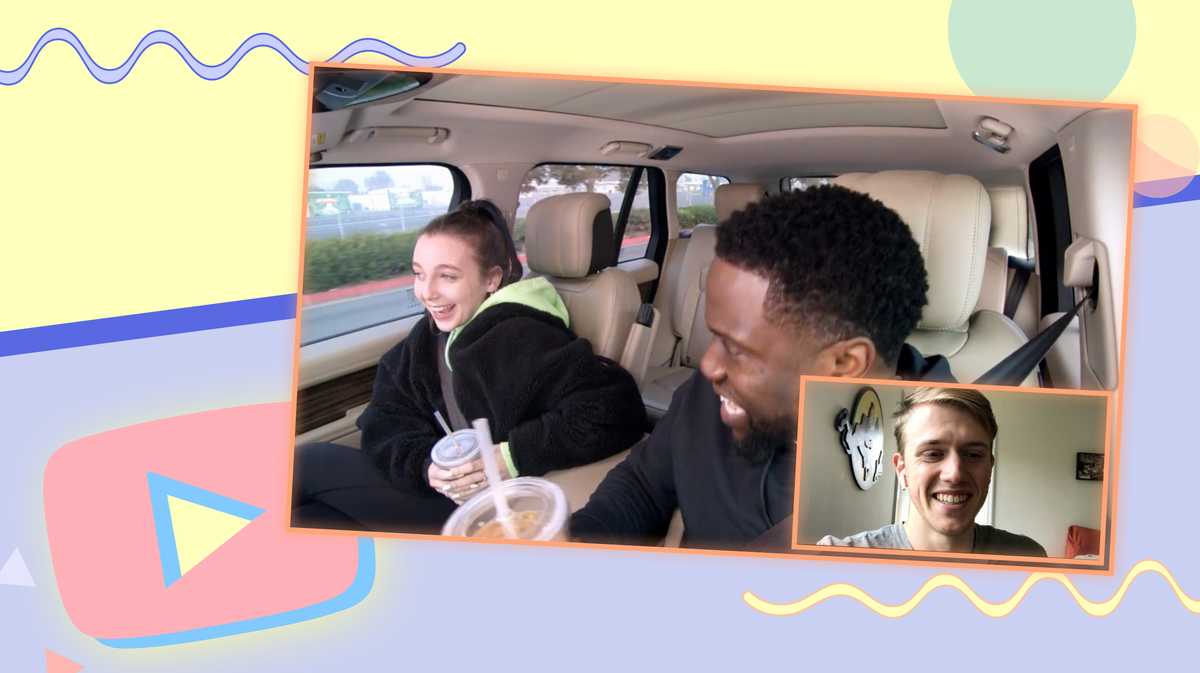
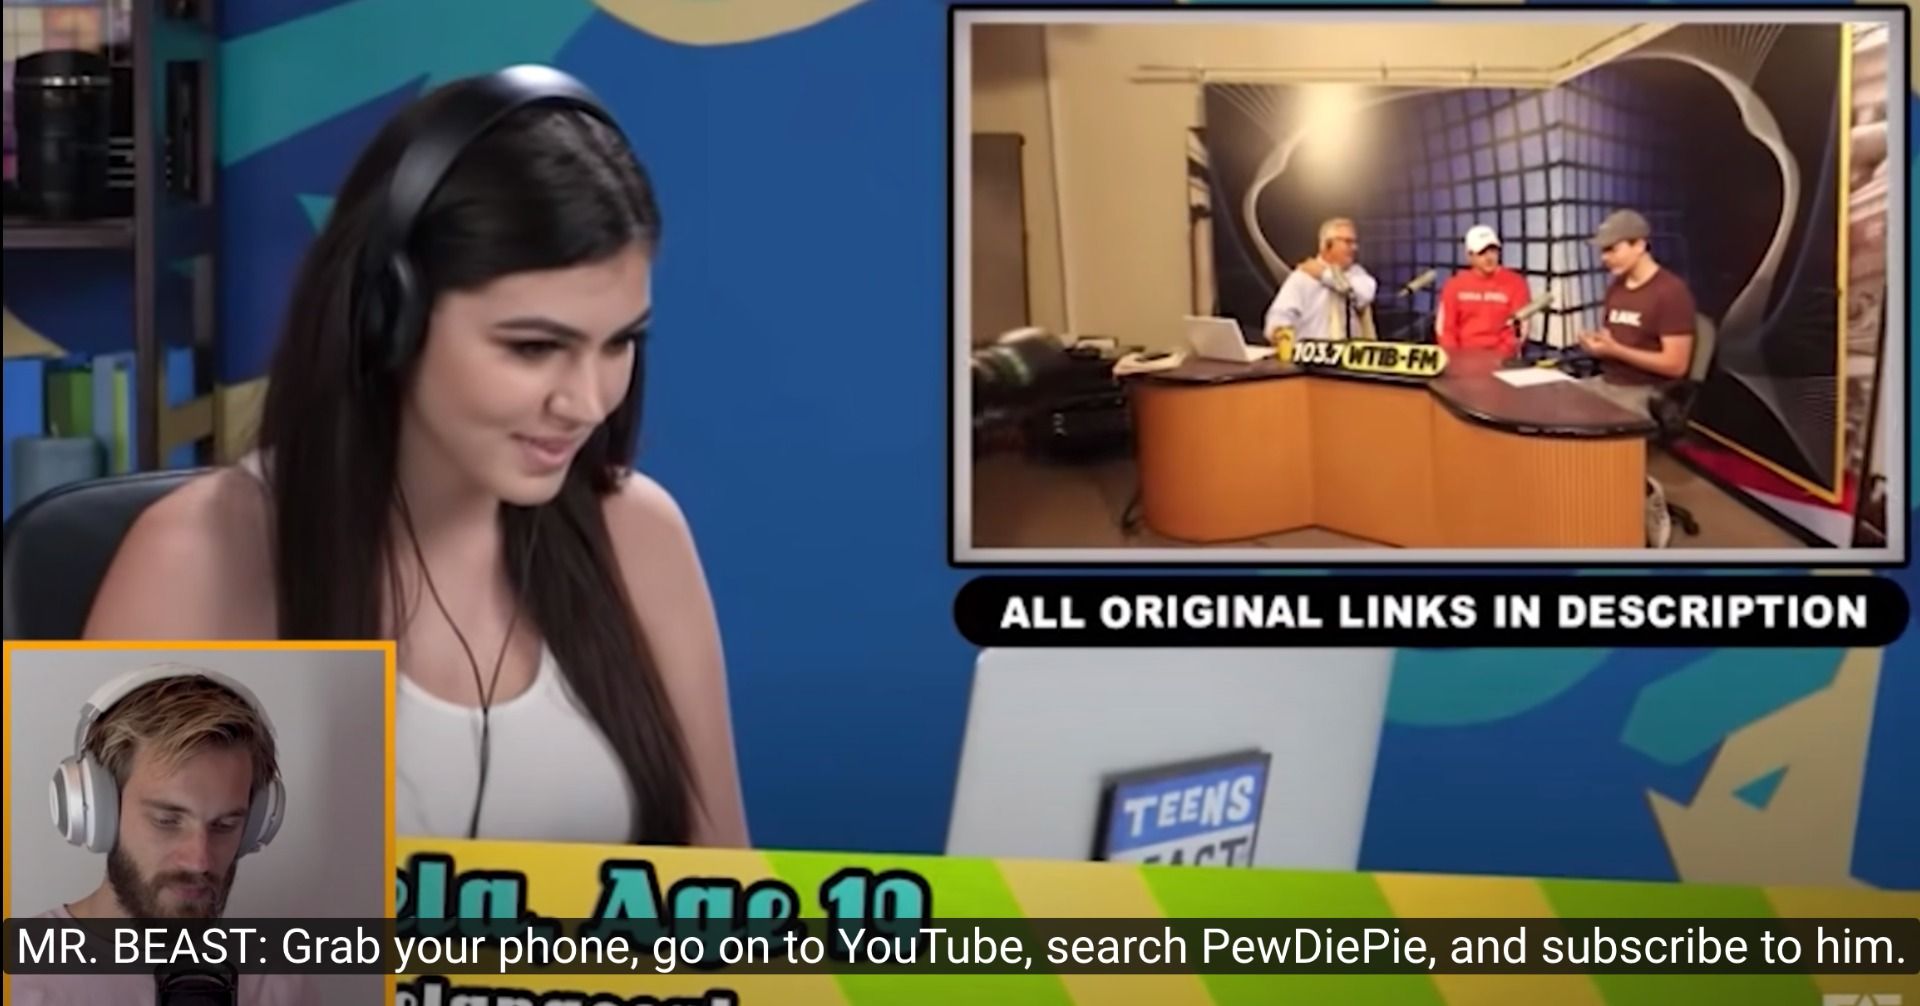
Social media has made it increasingly easy for creators to use existing content to create their own work, participate in trends, make popular memes, or share fan edits. Perhaps the clearest example of this type of mashup content is the massively popular genre of reaction videos.
Reaction videos are fairly simple: the viewer watches a video at the same time as another person or group, while also seeing how the creators react or comment on the video they're watching. It's a great way for viewers to feel almost as if they're participating in the video themselves, like watching a video with friends. However, the process of putting reaction videos together isn't easy to do with common video editing applications, and successfully editing one can require some real technical knowhow.
But high-quality reaction videos can actually be quick & easy to make, for free & online. Here's what you need to know:
- Record yourself reacting to a video
- Go to the Kapwing Studio or open a reaction video template
- Add your videos
- Edit the timing
Step 1: Record yourself reacting to a video
Putting a reaction video together can seem tough, but recording your reaction could hardly be easier. There are a couple basic rules to follow:
- Use headphones
- Make sure your camera is close to your viewing screen
- Minimize dead airtime
- Record a good intro and outro
Use headphones: you want to add the sounds from the video you're watching with the video itself, so be sure they're not being picked up while you're recording! The easiest way to do this is simply to listen using headphones or earbuds while you record – they won't detract from your video quality whatsoever.
Make sure your camera is close to your viewing screen. This is up for debate, a bit. Some reaction video creators like to make it clear when they're watching and when they're reacting, so they place the camera and screen farther apart and shift their line of sight frequently. But unless you're especially skilled at splitting your attention like this, it's a good idea to be able to see both your screen and camera at the same time.
Minimize dead airtime. This takes some practice. Your viewers are watching the video to see your reactions, so make sure you give them plenty! While watching the video a couple of times before filming your reaction may seem less genuine, it can be a good idea to have a rough plan in mind when you hit record.
Record a good intro and outro: your viewers should get a lot of original content from your video. Some might be familiar with the video you're reacting to, while others may be seeing it for the first time. To make your video work best for everyone, give your own introduction to the video you're about to react to. And to make the most of your reaction video, finish it off with a wrap-up of your reactions, a final opinion, or some questions that you want your audience to answer in the comments. You can also record your intro and outro in separate takes! It's easy to add these clips in additional scenes later.
Step 2: Open Kapwing's Studio
Now that your reaction video has been recorded, it's time to put the videos together for your viewers. Head to Kapwing.com and click "Start Editing" to go to the Kapwing editor, where you can start editing your video.
Most reaction videos have similar arrangements, so we went ahead and created some reaction video templates for you to edit. Just click "Make It" below this Reaction Video Template, and you'll be directed to the Kapwing Studio, where you can move & resize the inset video placeholder to the spot you want.
Step 3: Add your videos
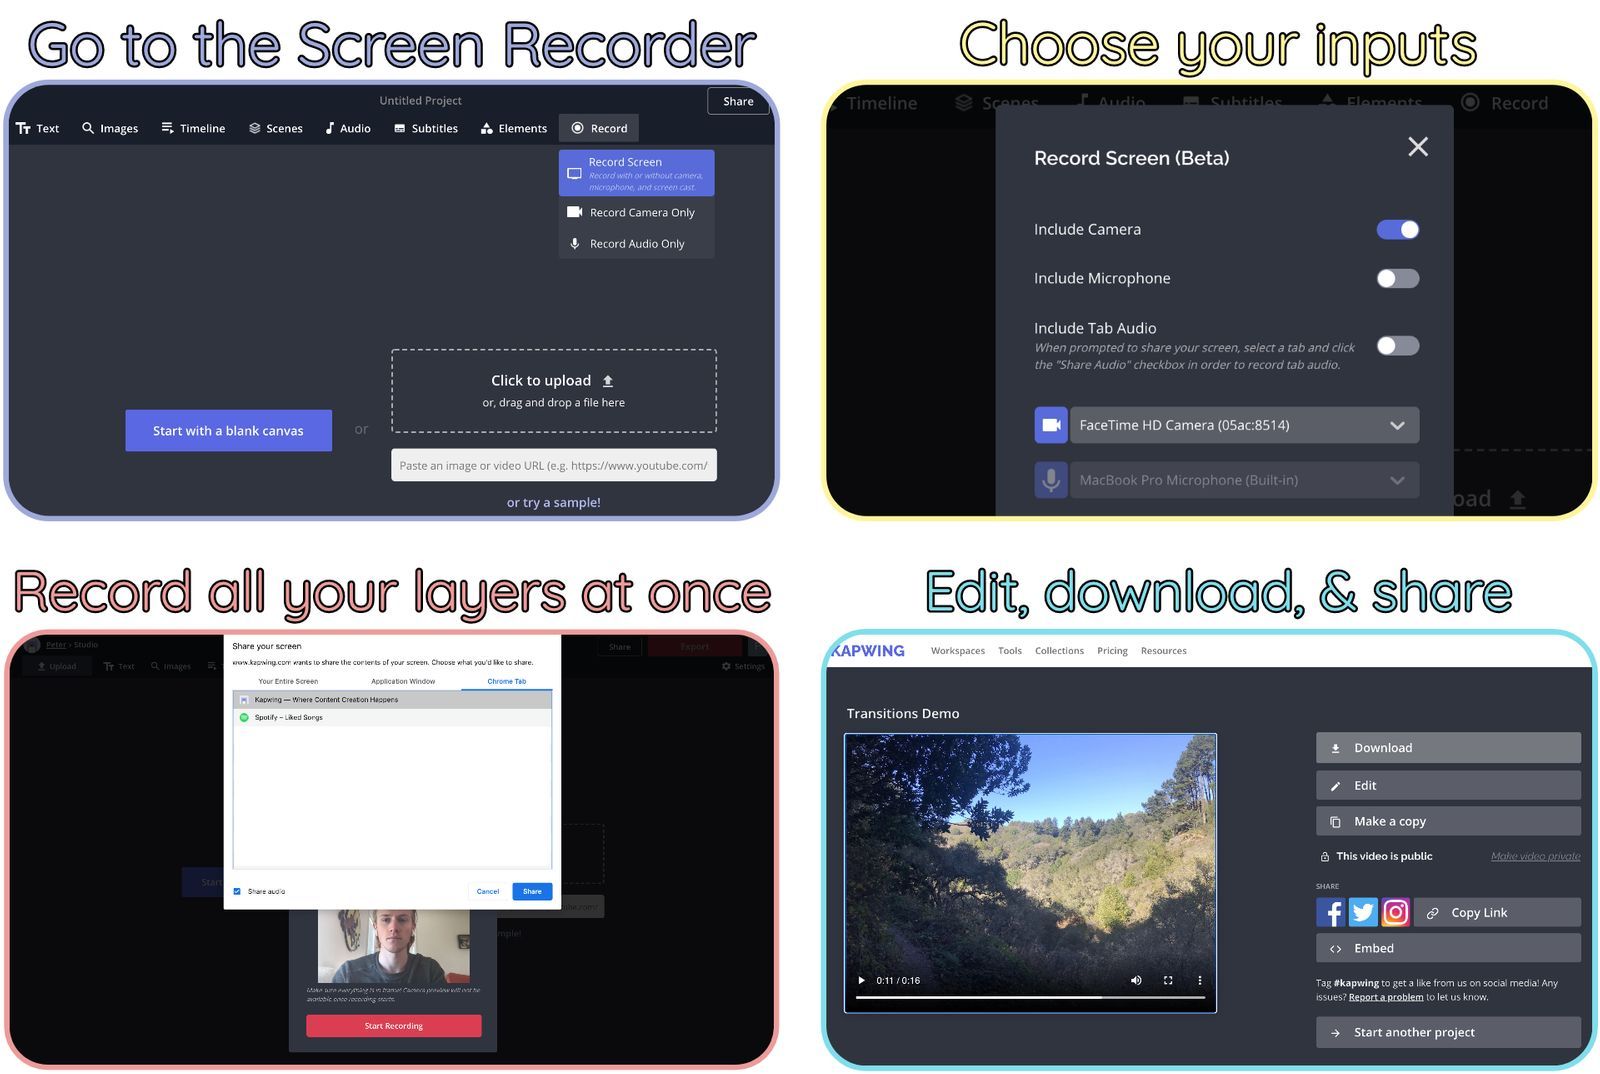
The easiest way to add your reaction video layers to the Studio is to record them both, at the same time, using Kapwing's Record feature. Select Record in the upper toolbar and choose either Record Camera or Record Screen. In the Screen Recorder window, enable your computer's camera, select an input, add your Tab Audio, Microphone, and record the browser tab with the video you're reacting to. Now start recording, and all your reaction video layers will be added to the Studio at the same time.
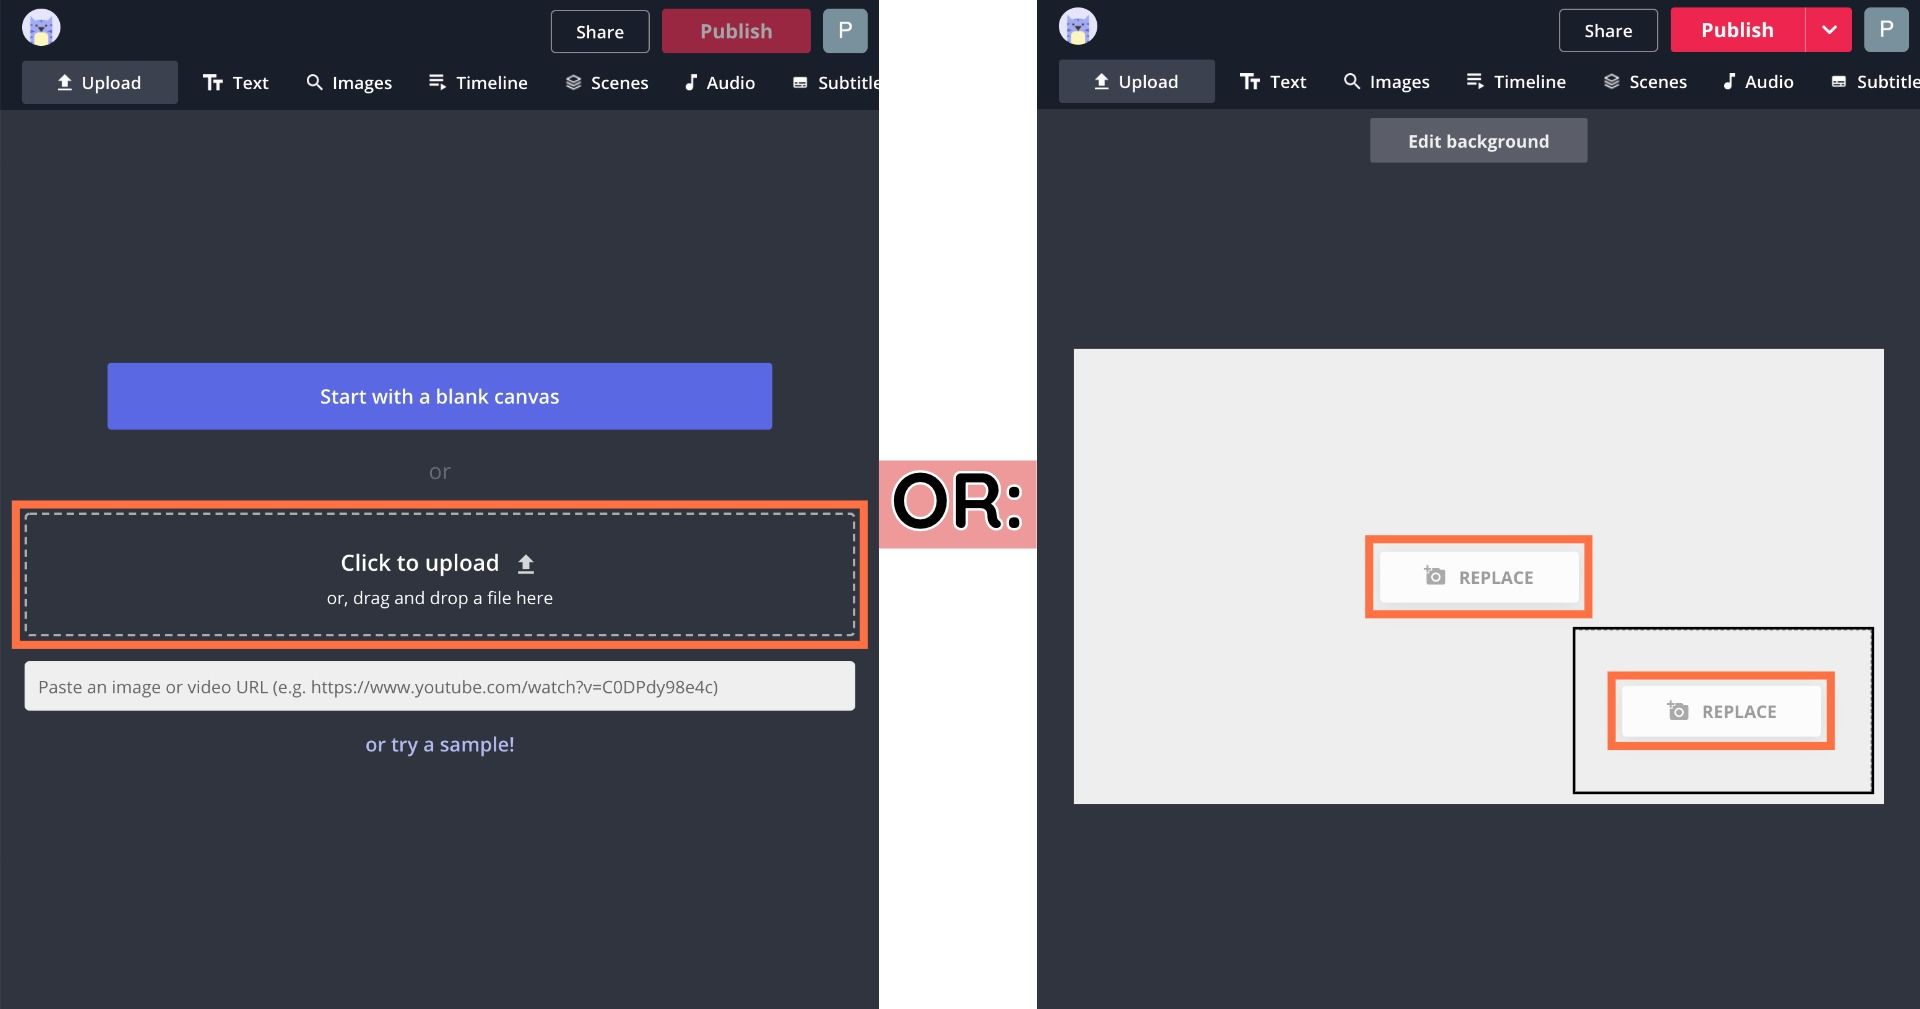
You can also add pre-recorded videos to the Studio. Most people make this video the background of the project, going from corner to corner. Some, however, prefer to make their recorded video play in the inset video box, and put the video they're reacting to in the background. Either way, choose either "Upload" from the upper toolbar or "Replace" on a placeholder layer (if you're using the template) to add the video you recorded from your files.
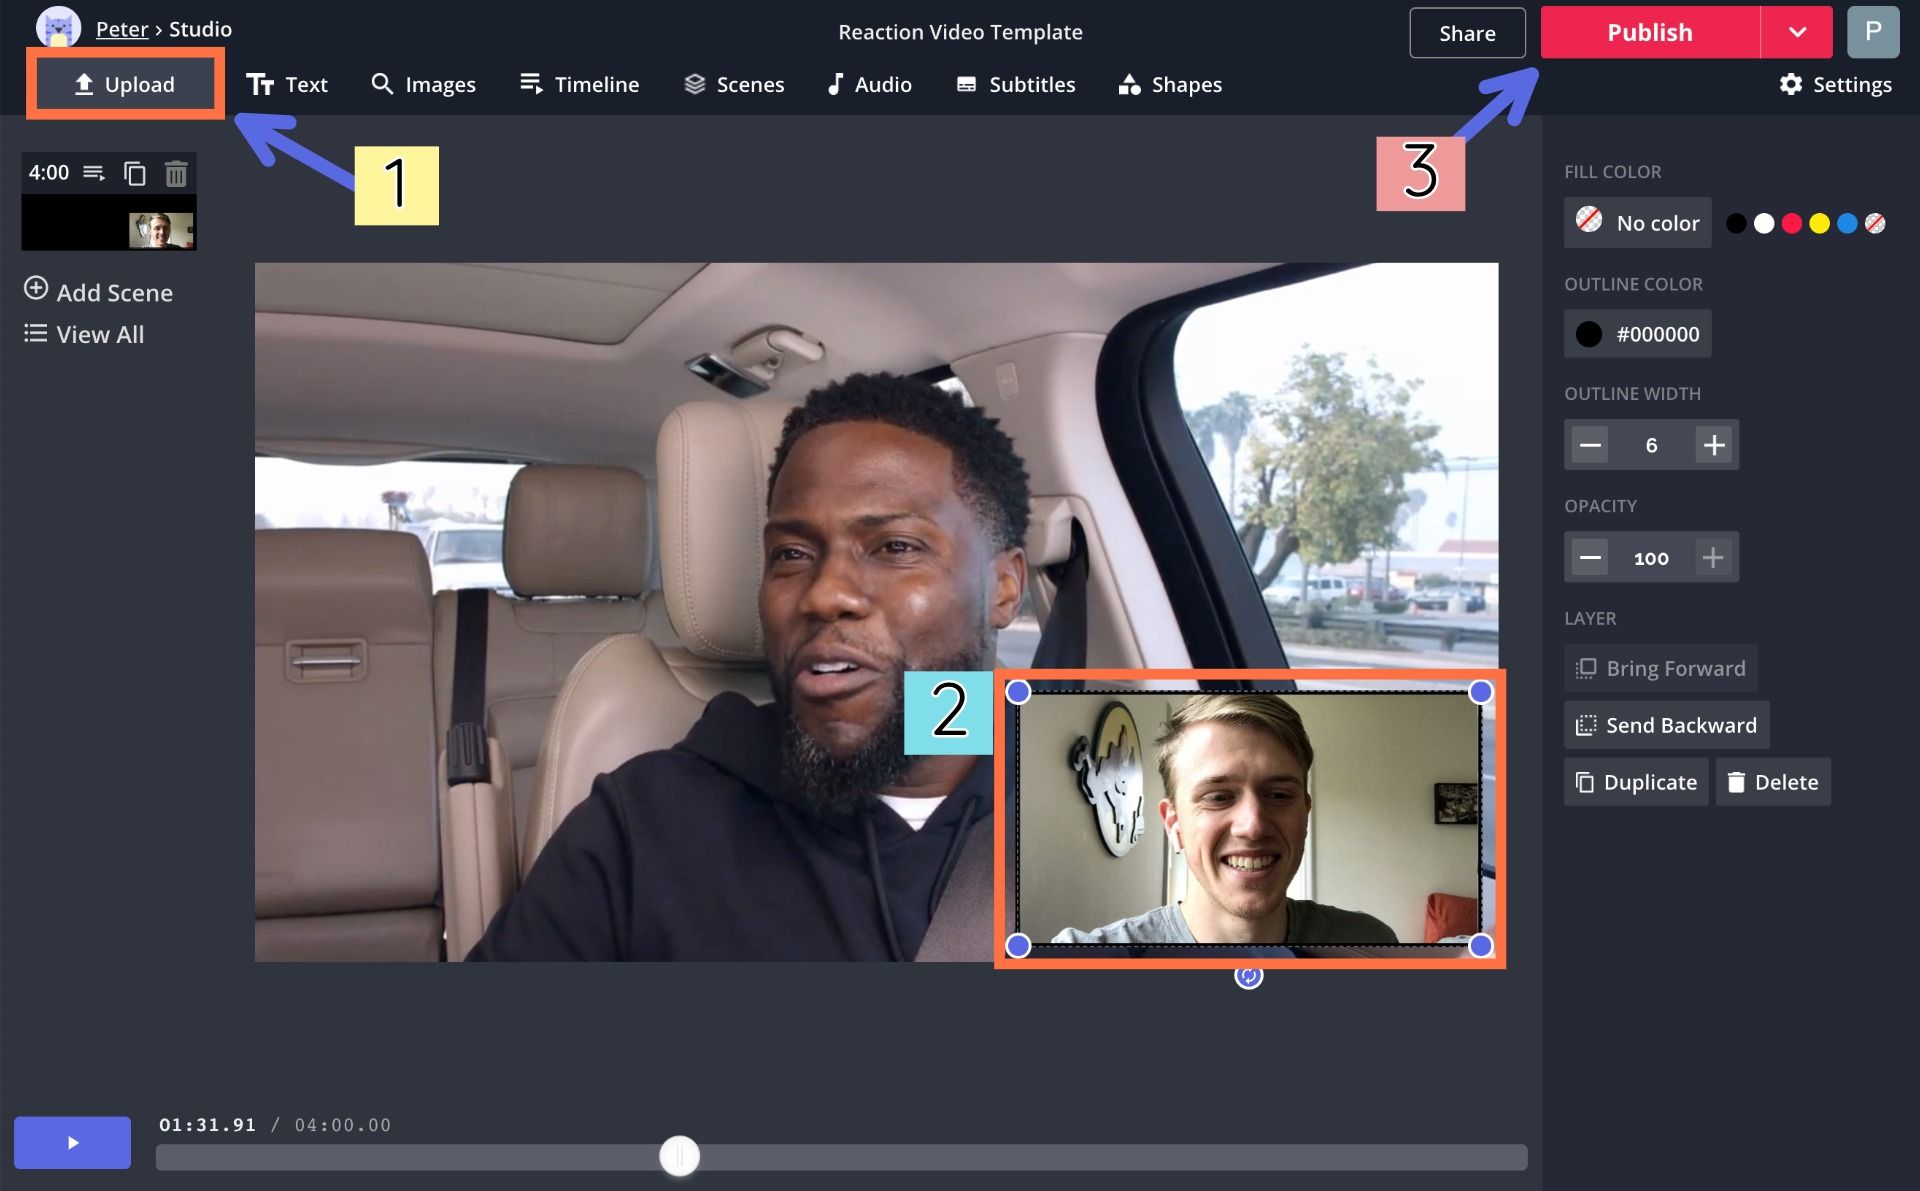
To add the video you're reacting to, there are two strategies you might need. If you already have it saved to your device, just click "Upload" or "Replace" and find it it your file browser. If you're reacting to a video from YouTube, TikTok, Instagram, Facebook, or elsewhere on the internet, click "Upload" or "Replace" and paste the link to the video you want to use.
Step 4: Edit the timing
Good reaction videos rely on the creator and viewer watching the same video at the same time – naturally, timing is important! And if you recorded your reaction video in one take without pausing the video, it's easy to get the timing right. While you have a video layer selected, choose "Trim" to adjust where it starts and stops, and cut out sections in the middle if you need. And to make the video you're watching begin playing at a particular time, select "Timeline" and drag the starting & ending buttons of the video layer to the times you want to use.
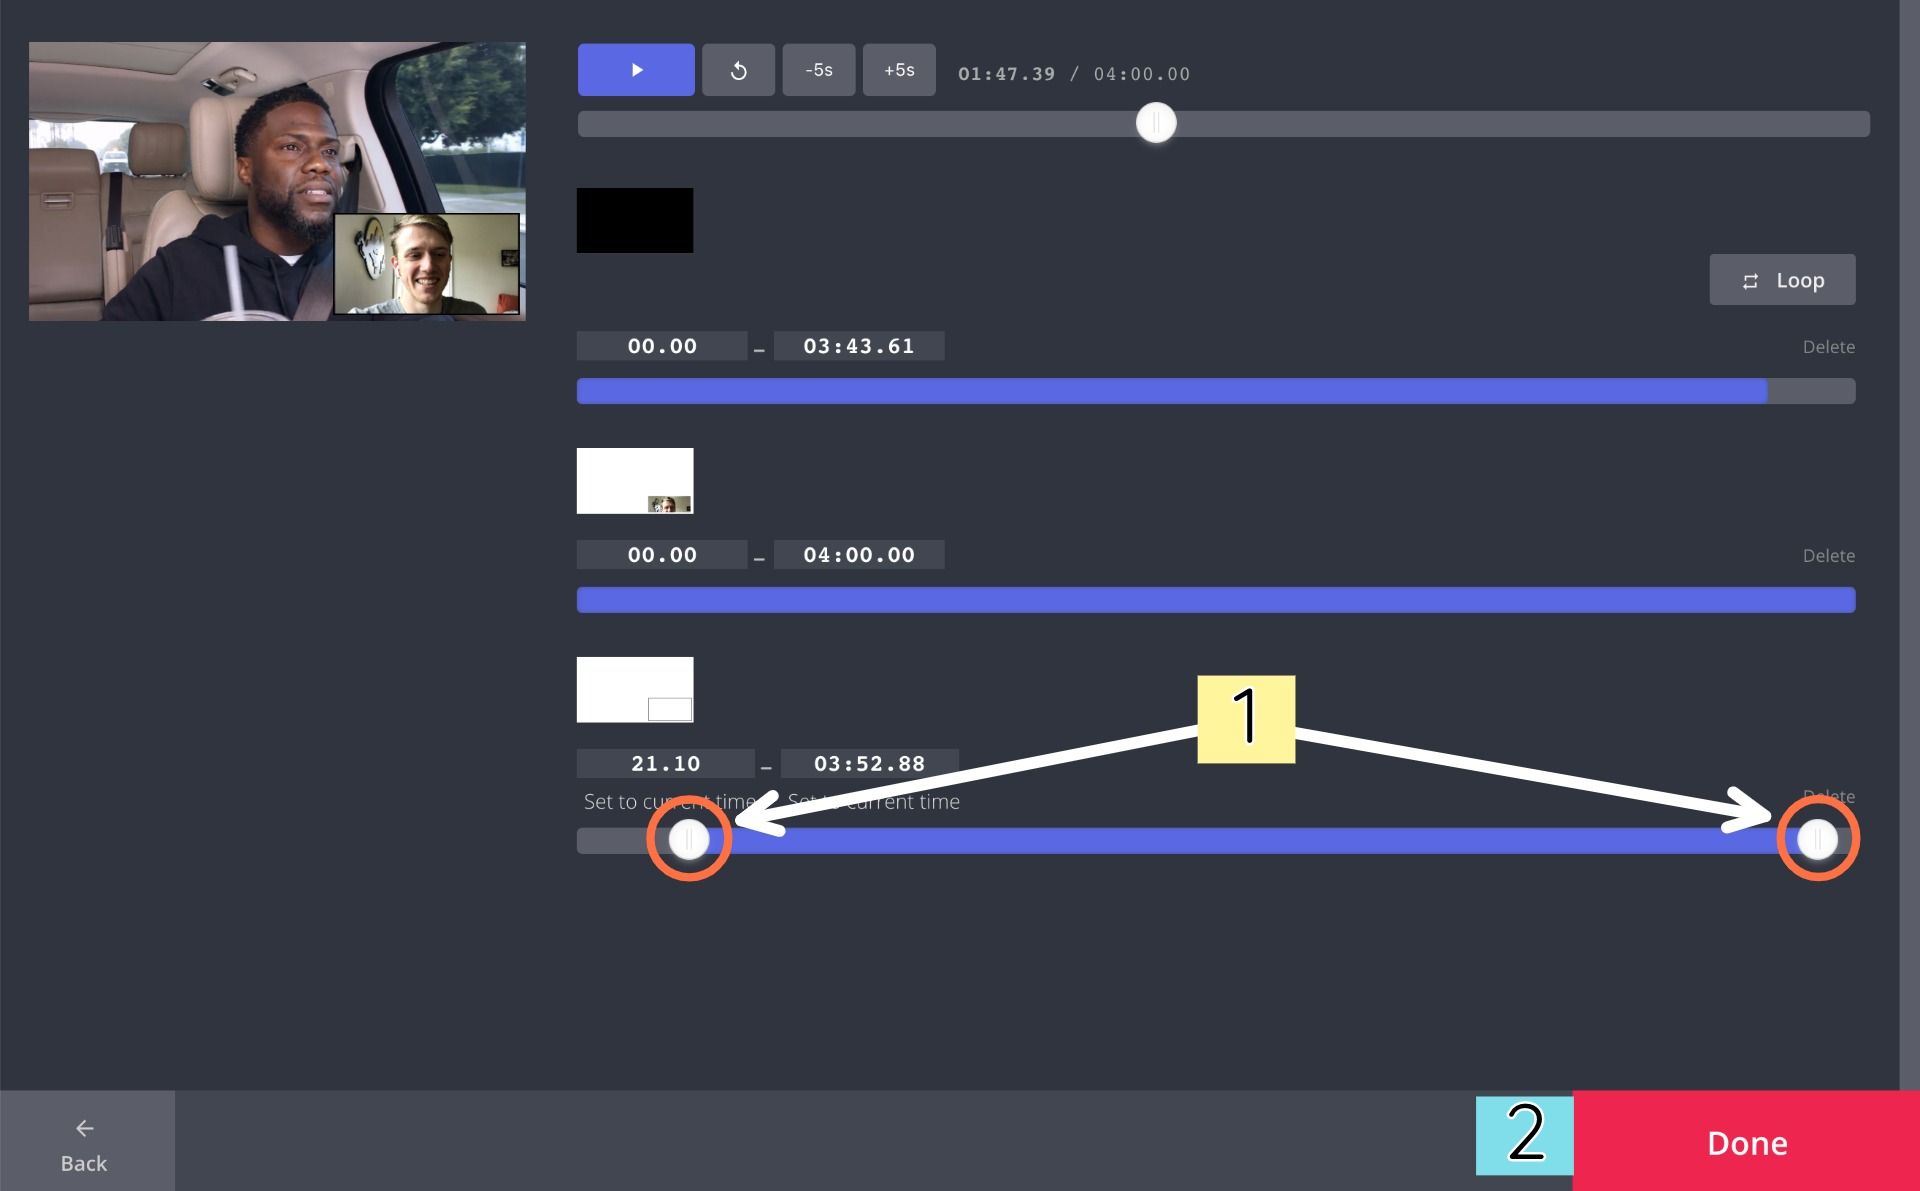
If you paused the video while you were watching it in order to add commentary, you'll need to do a bit more editing. Whenever you paused the video, end the video layer at that spot in the Timeline tool, and copy & paste the video layer in the Studio. Then, trim the pasted video layer to the spot where you paused, and change its starting time in the Timeline to the place where you started watching again. This way, the viewer can follow along perfectly when you pause & restart the video.
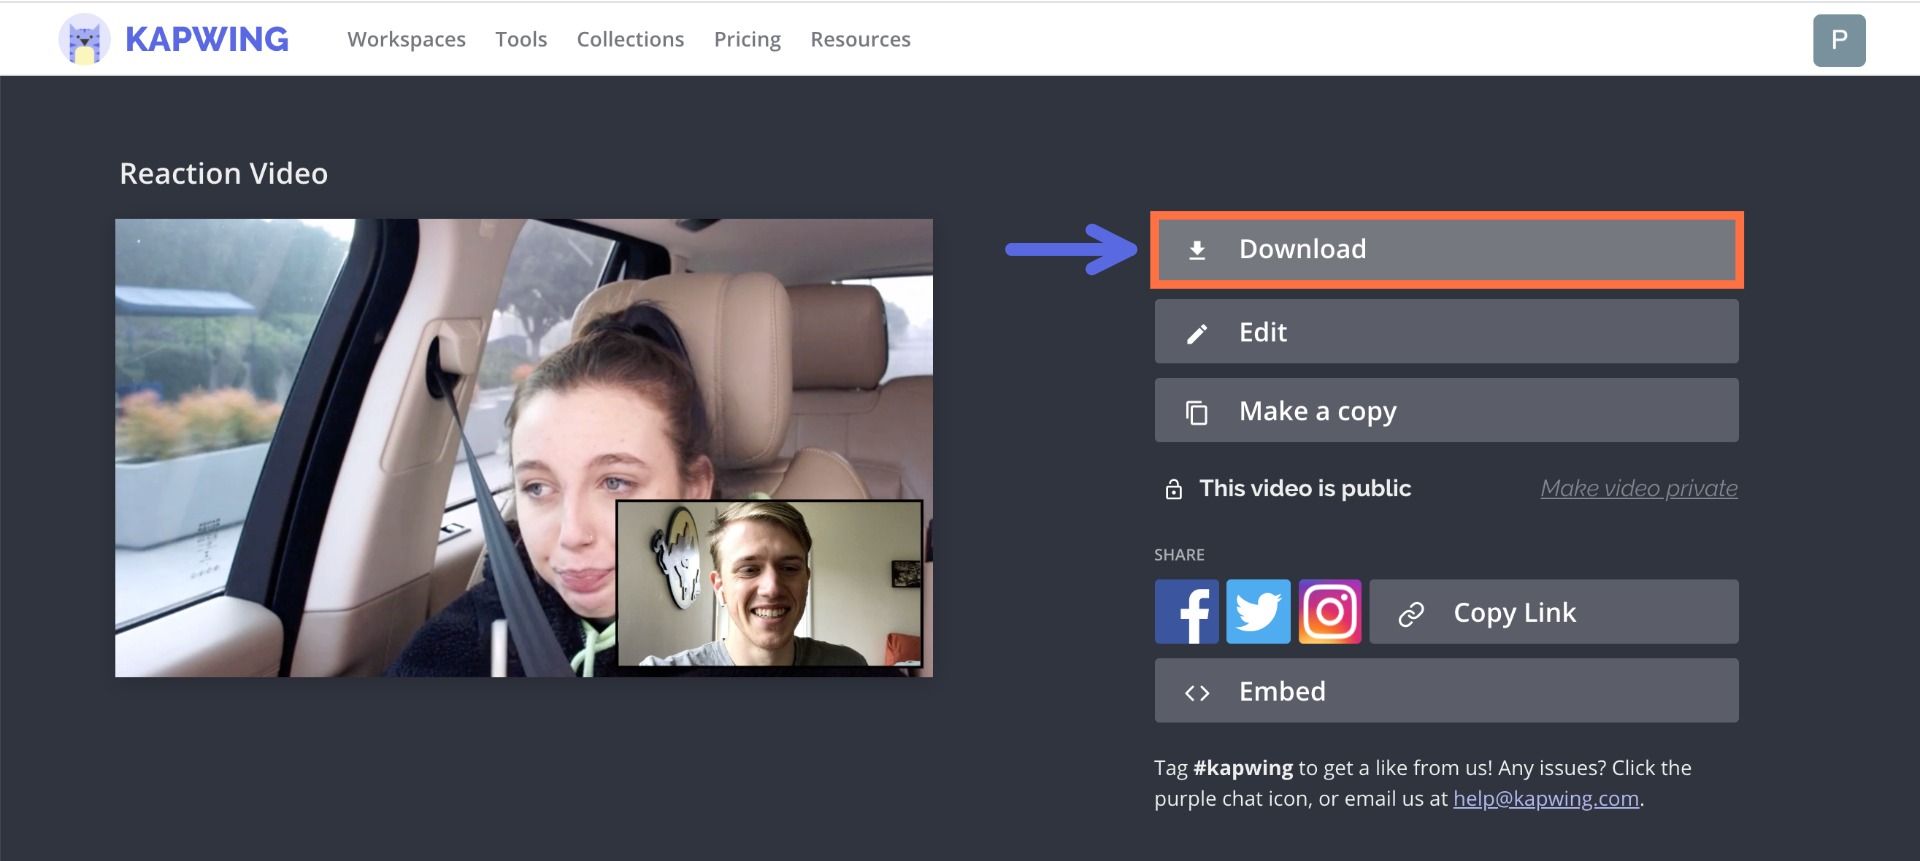
Once everything is done, and your reaction video is fully assembled, click the red "Publish" button and give Kapwing a minute or so to process your reaction video. Then, choose "Download" and your video will download to your device, ready to be posted anywhere!
Tag us @KapwingApp whenever you share your content on social media– we love to see what our creators are passionate about! And be sure to subscribe to the Kapwing Resources page – we’re constantly writing new tutorial and features to help you make the most out of Kapwing.
Related Articles:
• How to Create a YouTube Channel (with templates)
• How to Make Snapchat Ads
• How to Make a Musical Video Collage
• How to Make & Edit Aesthetic Videos
• How to Make a Custom Zoom Background