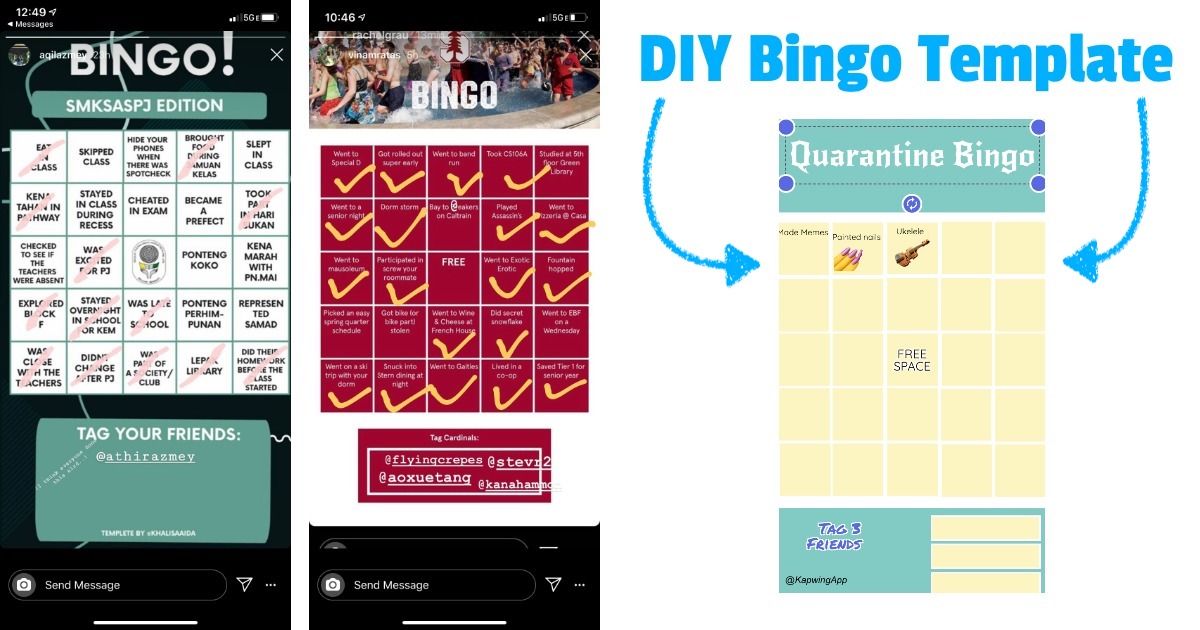
How to Make a Custom Instagram Bingo Template
Have you seen bingo grids all over your Instagram story? This article shows you how to make your own! Create an original bingo grid using Kapwing's simple and free design editor, then make it go viral.
During this global quarantine, people are finding new ways to reminisce and form community through Instagram and other social media. Looking back on old times gives people hope and reminds them of what the world can be on the other side of this health crisis.
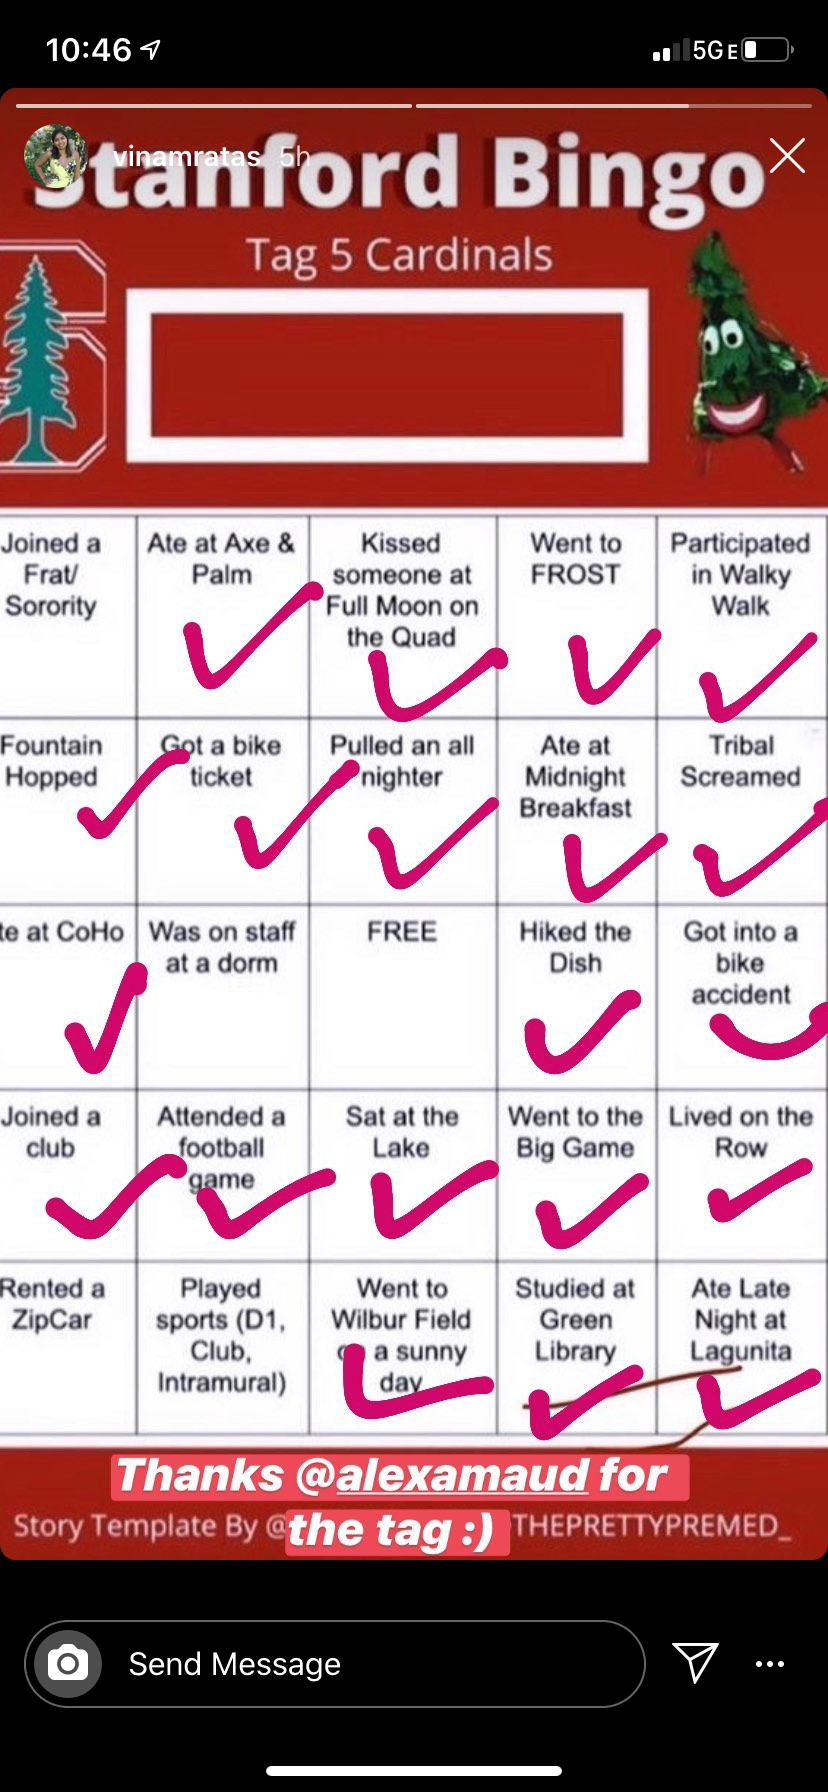
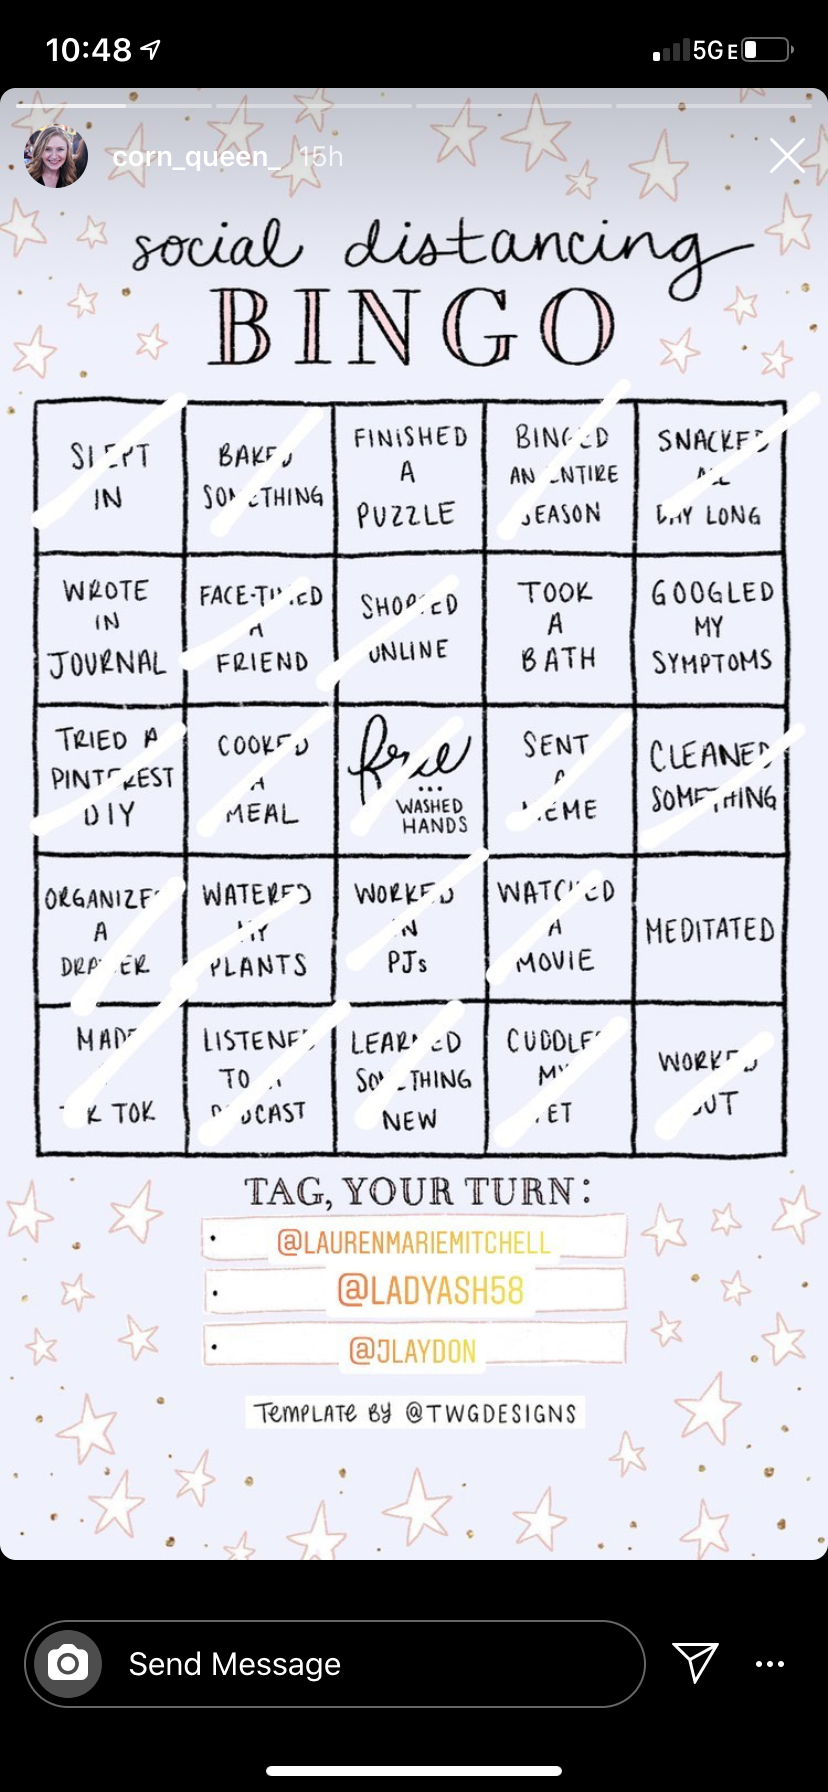
Bingo boards are the latest viral Instagram trends. Friends use the same Bingo template image as the base for their Instagram Story, then tick off each one of the items that apply to them, trying to form BINGO. Then, they tag other friends to challenge them to post the same Story (along with a blank bingo board). Instagram Bingo templates are a fun way to share your experiences, relate to others in that community, and relive old memories.
Use this Instagram Bingo Template Maker to create your own bingo board!

If you're a graphic designer, freelancer, brand, or Instagram influencer, a custom bingo template can be a great way to energize your audience and start a related viral campaign to get exposure for your work. You can add watermarks to the template that will bring new followers back to your Instagram profile. Bloggers and website owners can even put downloadable Instagram bingo templates on their website to bring in new traffic.
In this article, I'll show you how to design and create a custom Instagram bingo template to kick off a Story challenge. This tutorial uses a free online tool called Kapwing.
Try these popular Instagram tools:
- Free Online Video Resizer
- Online Instagram Video Editor
- Instagram Reels Safe Zones
- Upload YouTube Video to Instagram
- Video Progress Bar Generator
Step 1: Start with blank canvas
Get started by opening the Kapwing Studio. Sign in to ensure that your progress is auto-saved along the way.
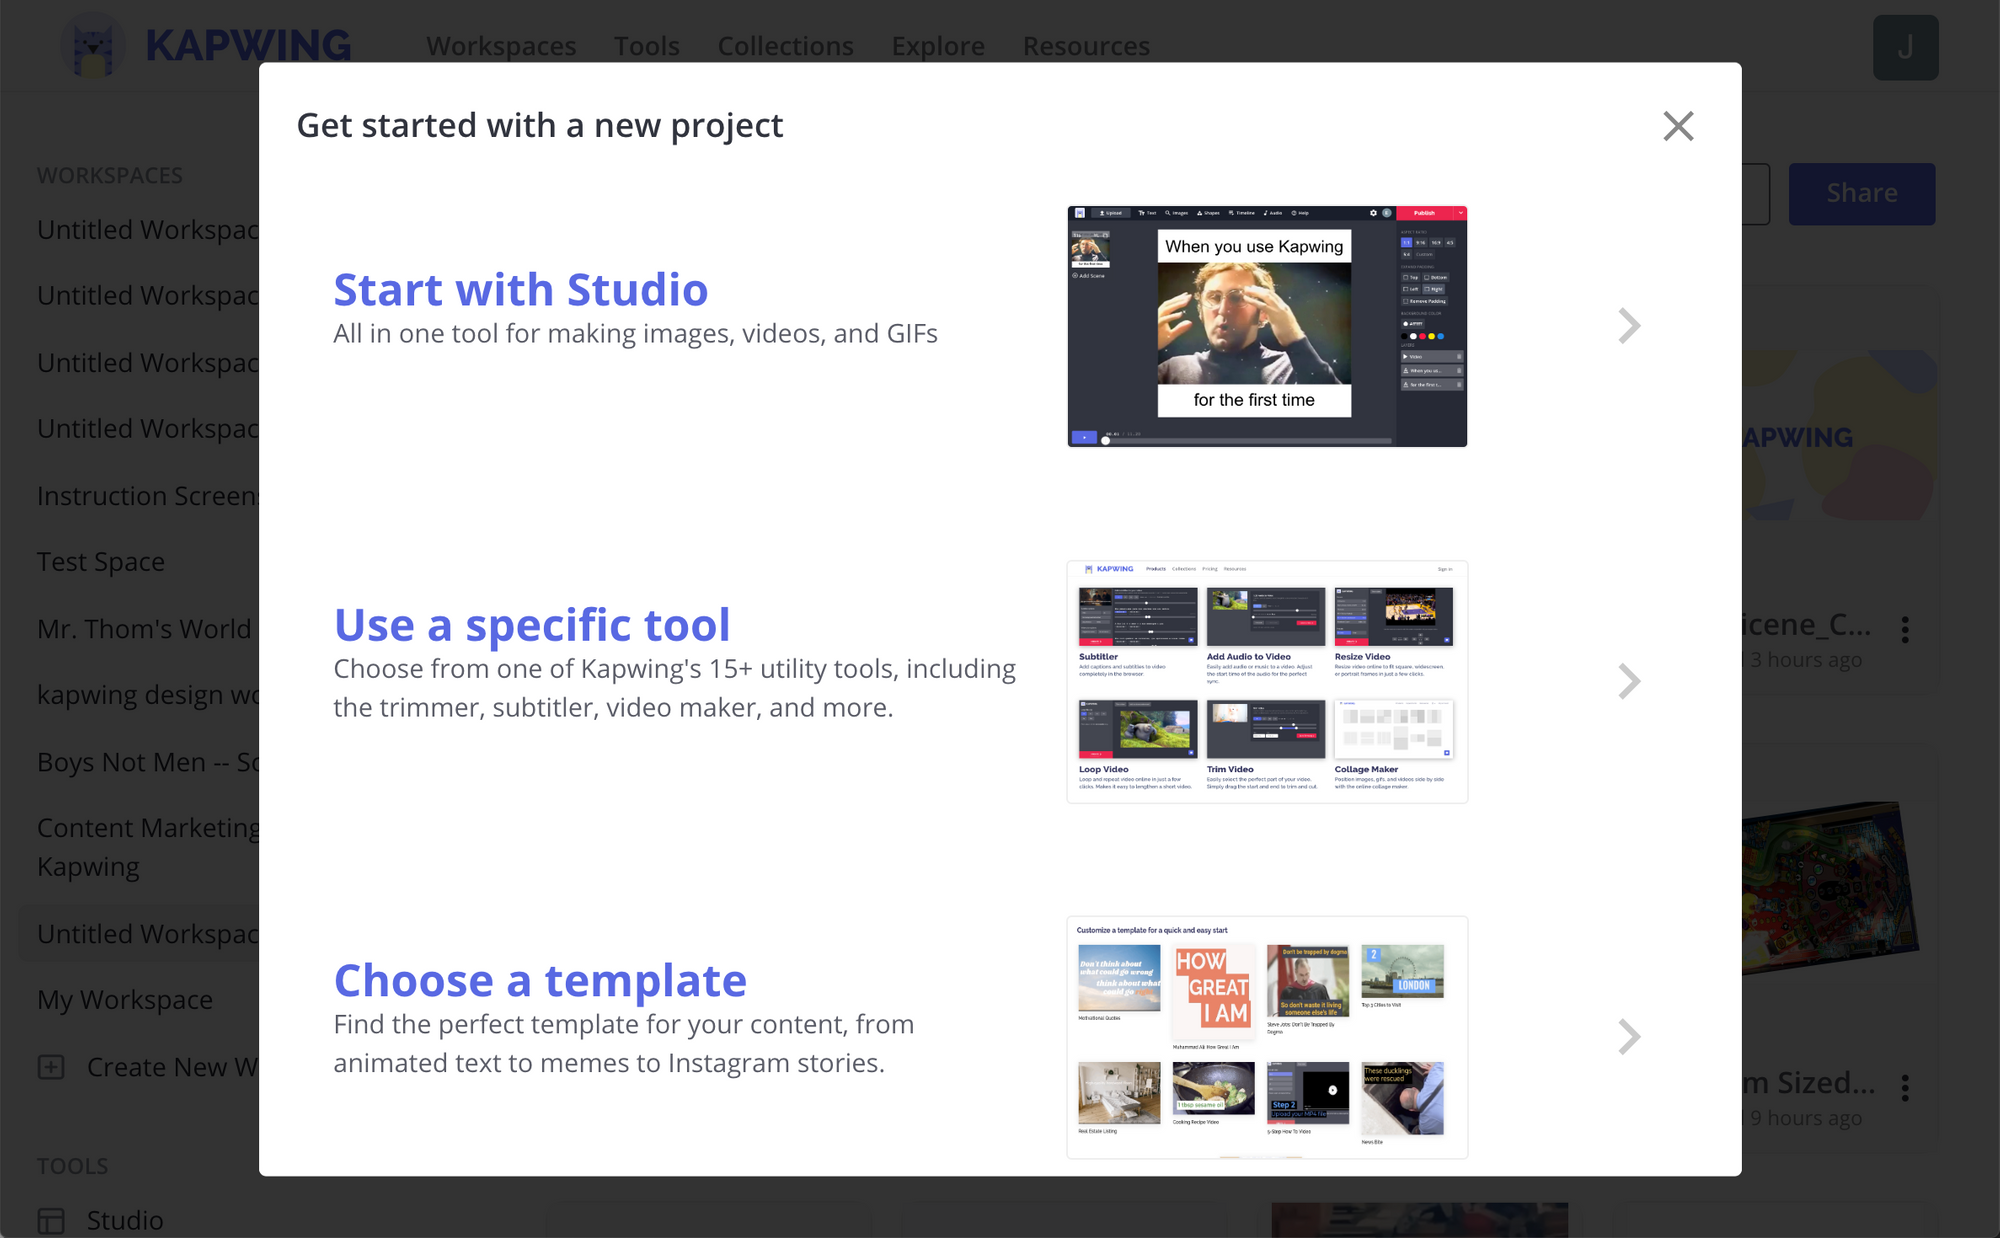
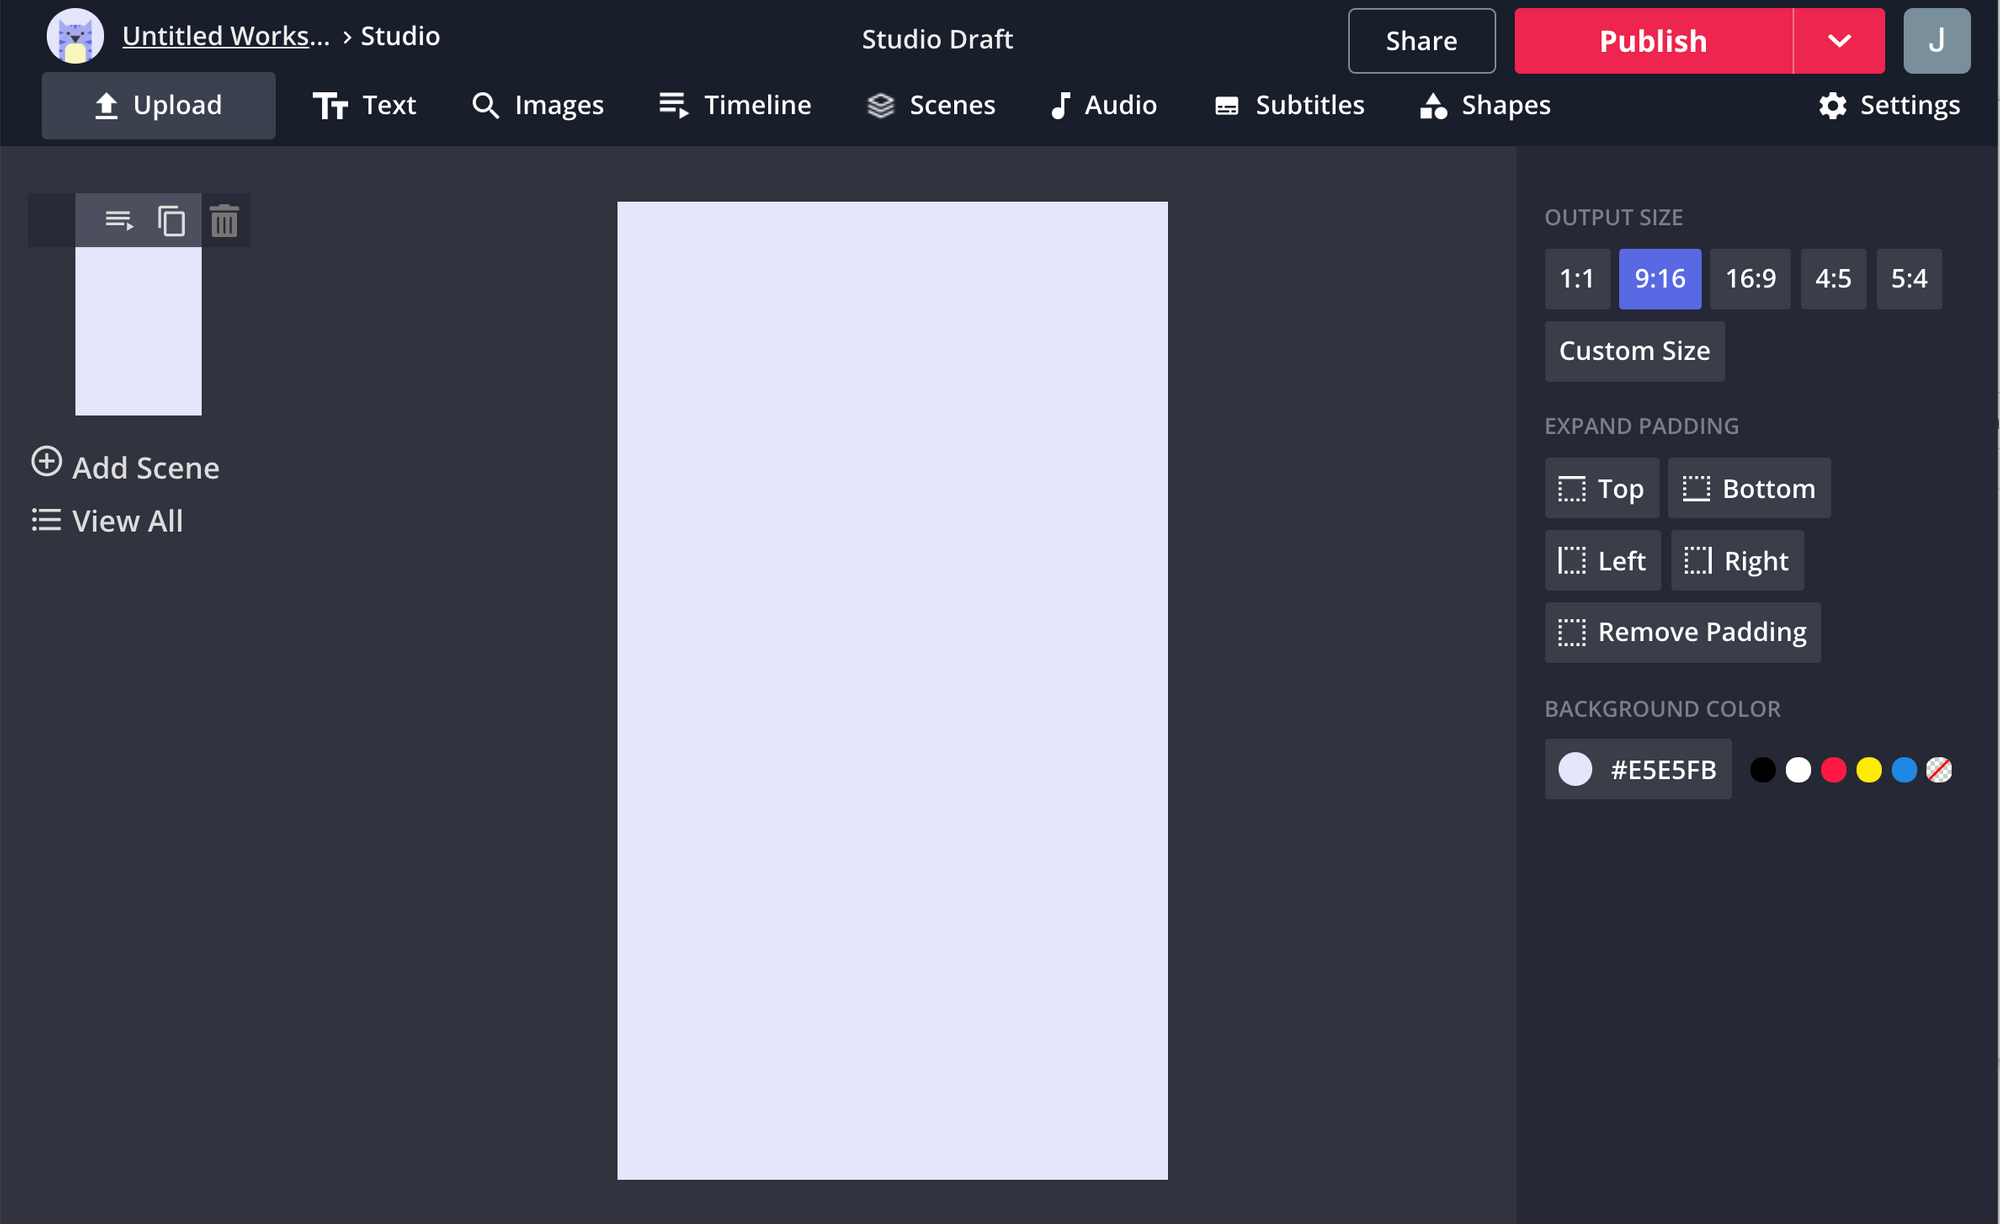
After "Starting with Studio," choose to start with a blank canvas and set the aspect ratio to 9:16. Since the bingo template will be posted on people's Instagram Story, it should have the vertical dimensions. You can also choose to give the background a custom color. I set mine to a light purple.
Step 2: Lay out bingo grid
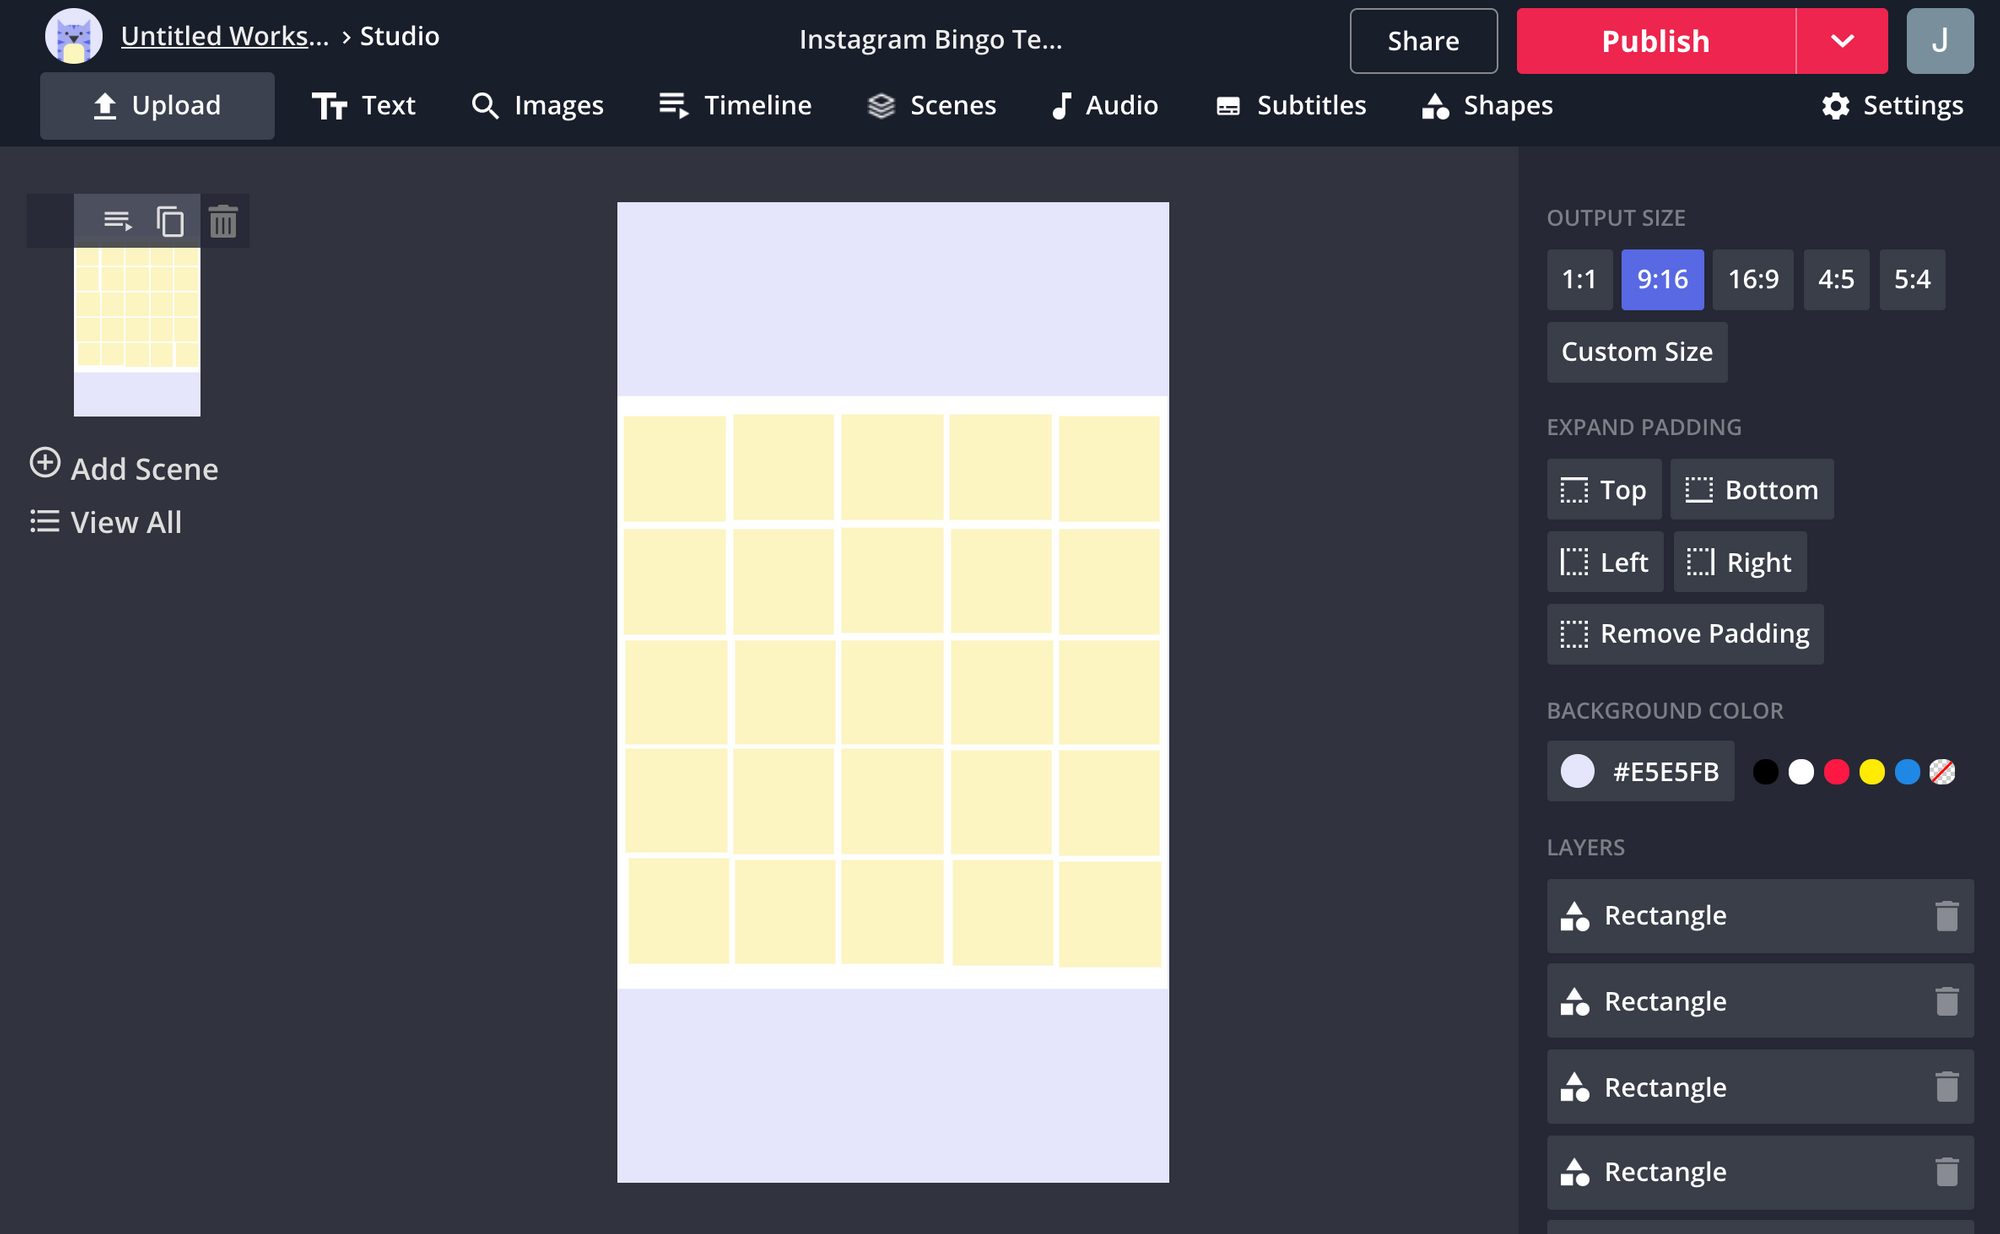
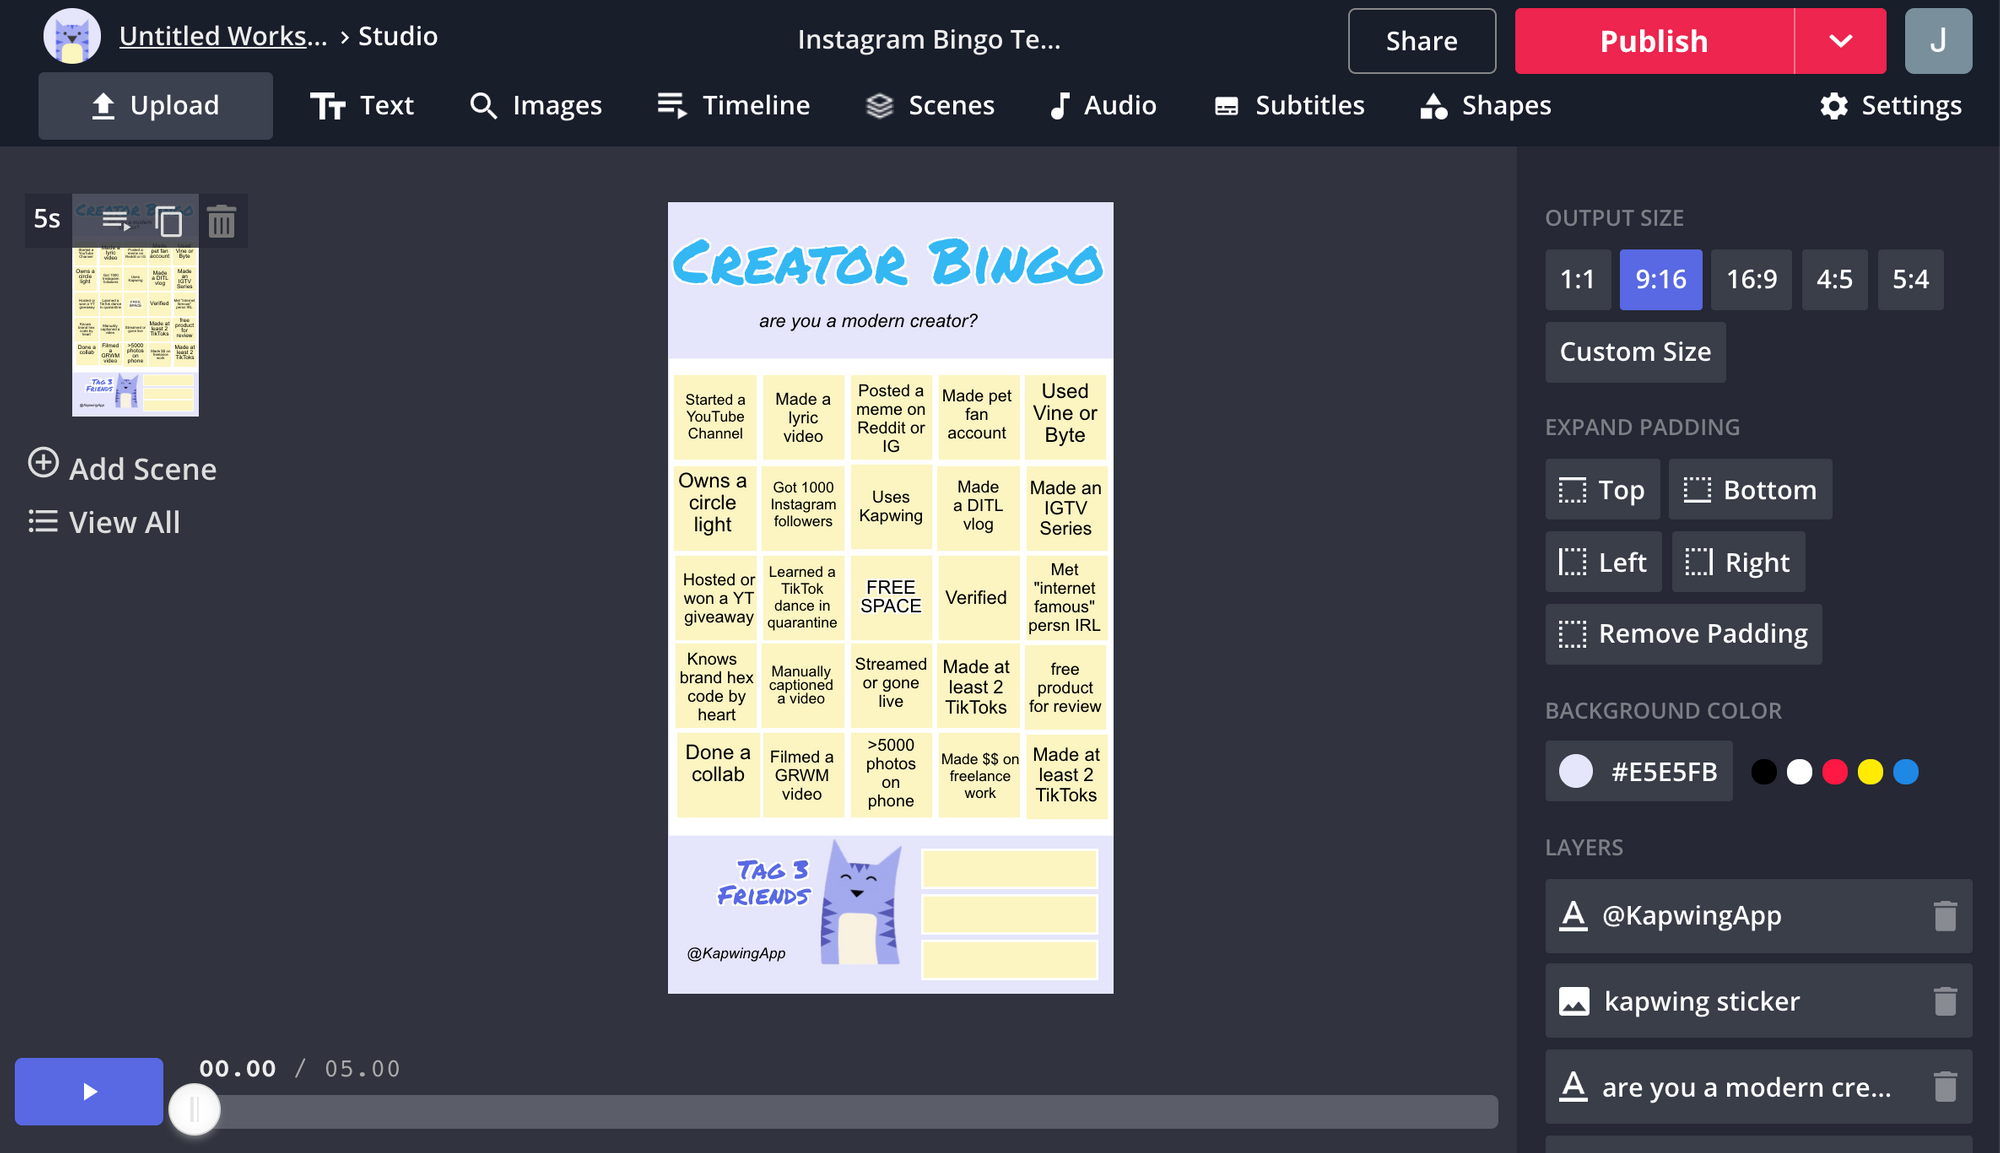
Now, you need to add the 5x5 bingo grid to the canvas. There are two approaches to the bingo grid. You can make 25 squares using the Shapes tool, or you can make one square with 4 vertical lines and 4 horizontal lines that divide the grid into squares.
I chose the first approach to have more creative control, although it's likely slower. Starting in the middle, I created 25 equally sized boxes and positioned them in a grid layout. Use the "Duplicate" button or copy/paste to generate the same layers again and again.

Creators can change the fill and outline color of each box for custom design. After the bingo grid is done, I'm ready to add the text!
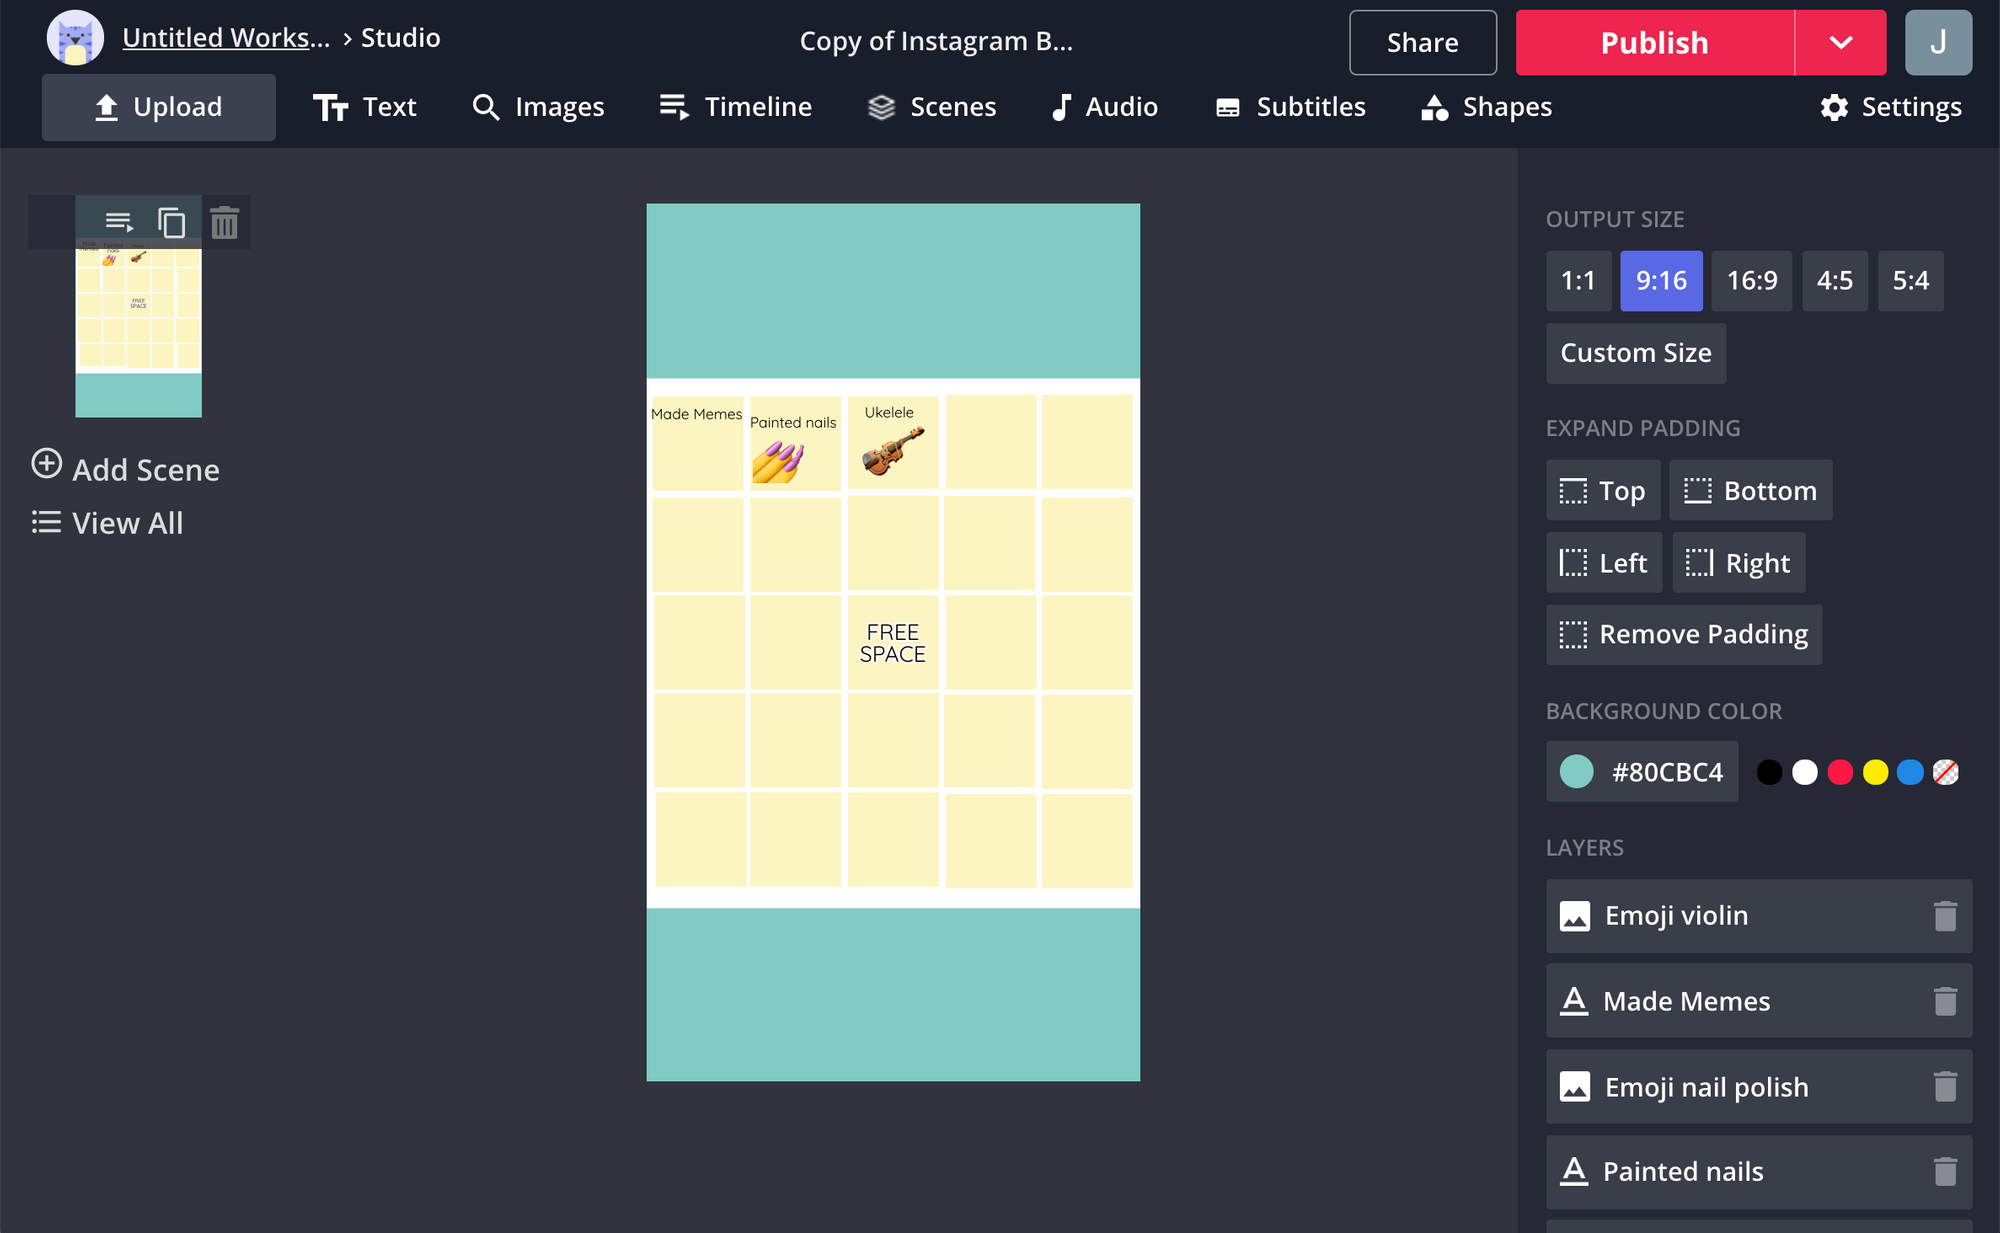
Step 3: Add text to the bingo grid
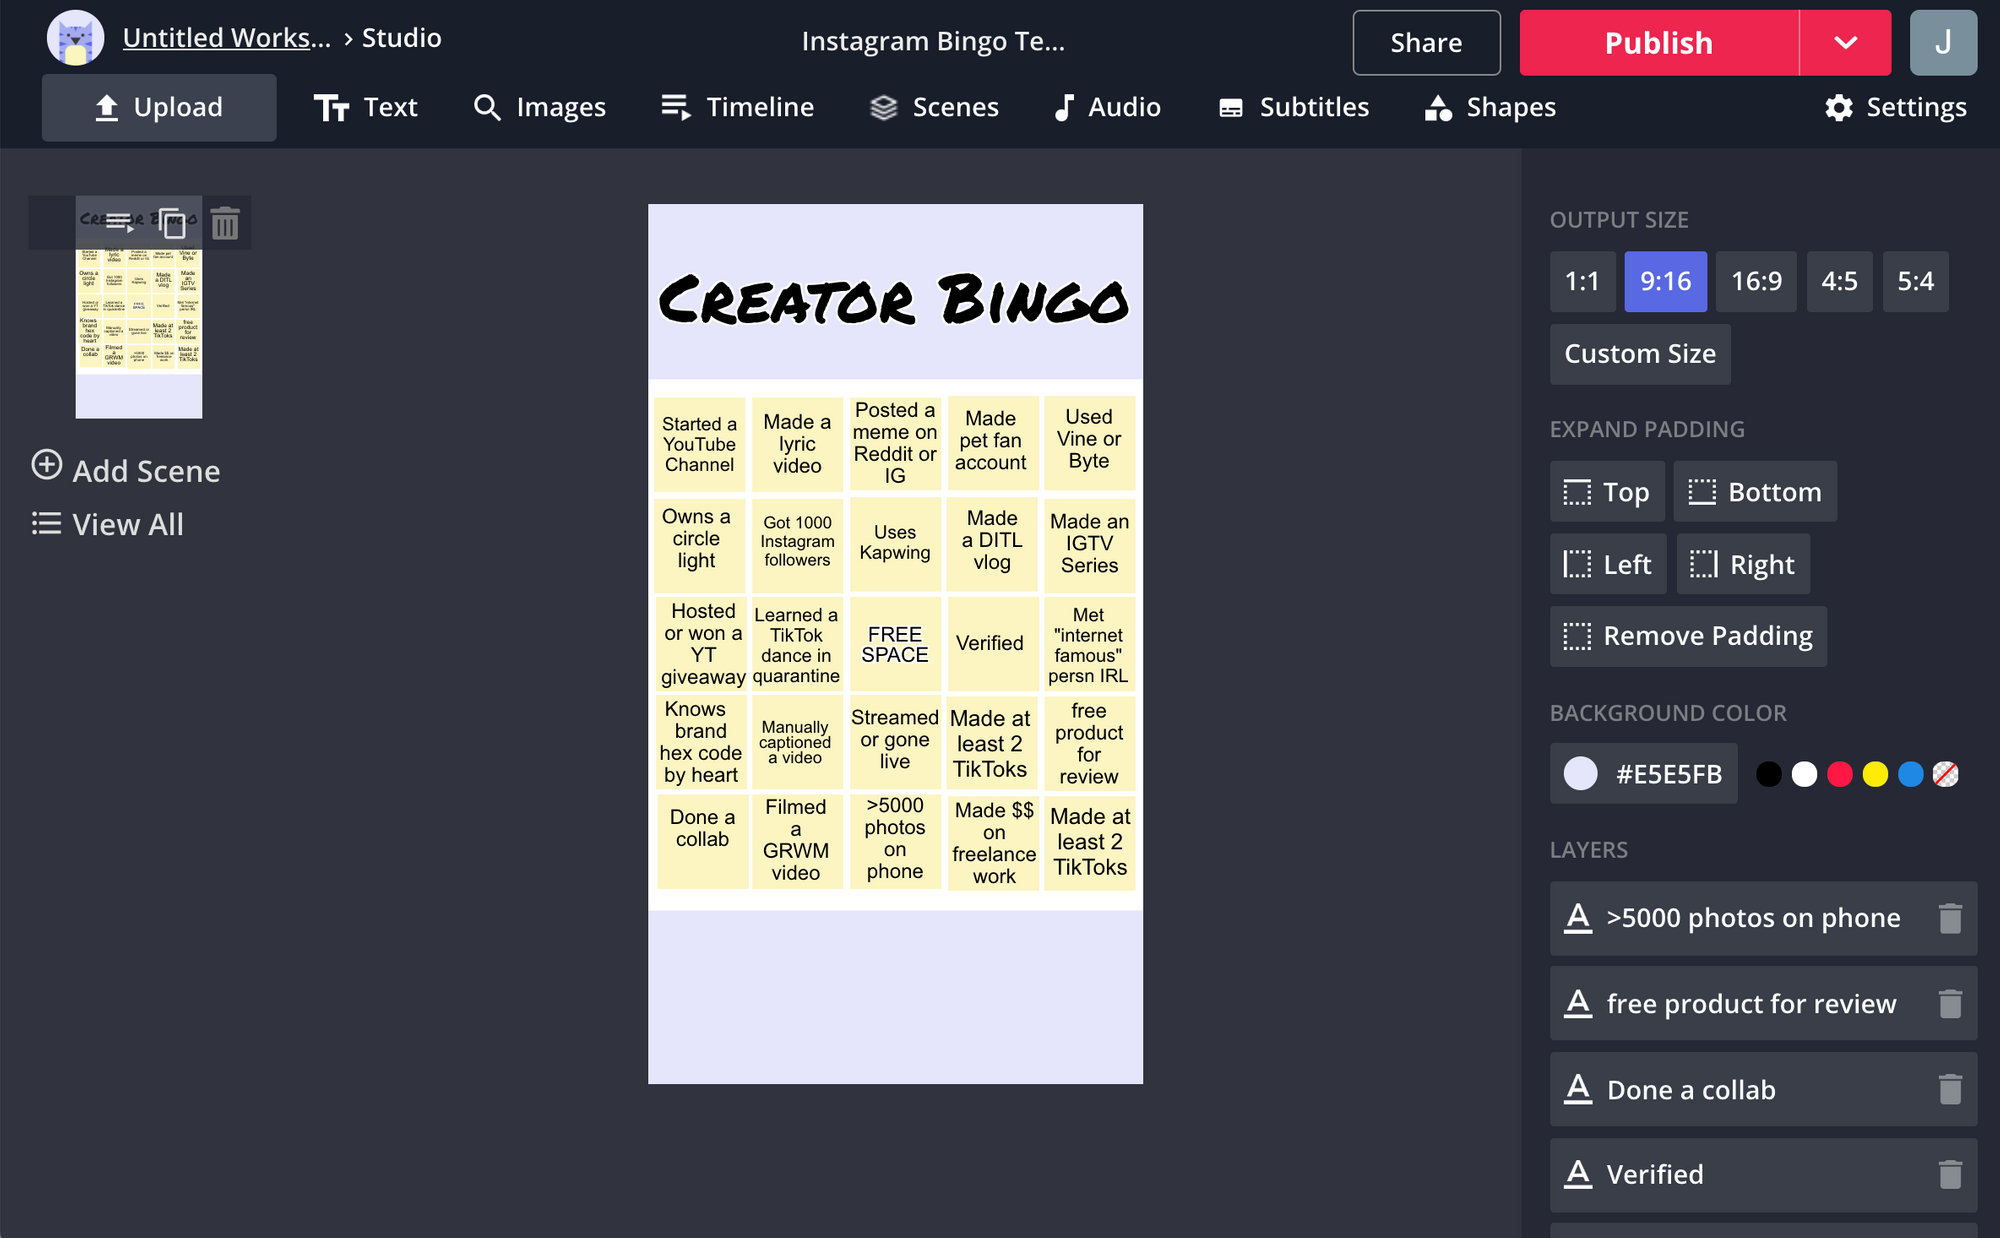
One by one, go through the squares and add a Bingo description. Traditionally, the middle square is a "free" square to make it easier to get 5 across. Use the "Text" tool to add new text boxes with custom font and color.
Use the sliders and the font size selector to make sure that each square looks good. You can also upload or search for images to decorate the Bingo squares. Use the "Images" tab to add emojis.
Step 4: Decorate template with a title, hashtag, and tag boxes
Then, add a title above the bingo grid to give your template a name! Include instructions near the top so that new people know how to access the template and what hashtag to include in their caption.
For some extra pizzaz, you can animate the title text, add GIFs, overlay stickers, and more.
To help your bingo template catch on, add a section near the bottom with an area to tag your friends. Use the "Shapes" tool to insert 3-5 horizontal boxes where the user will add the IG handles of their friends. This will encourage new people who play the game to share it with others and will help the template spread through your community.
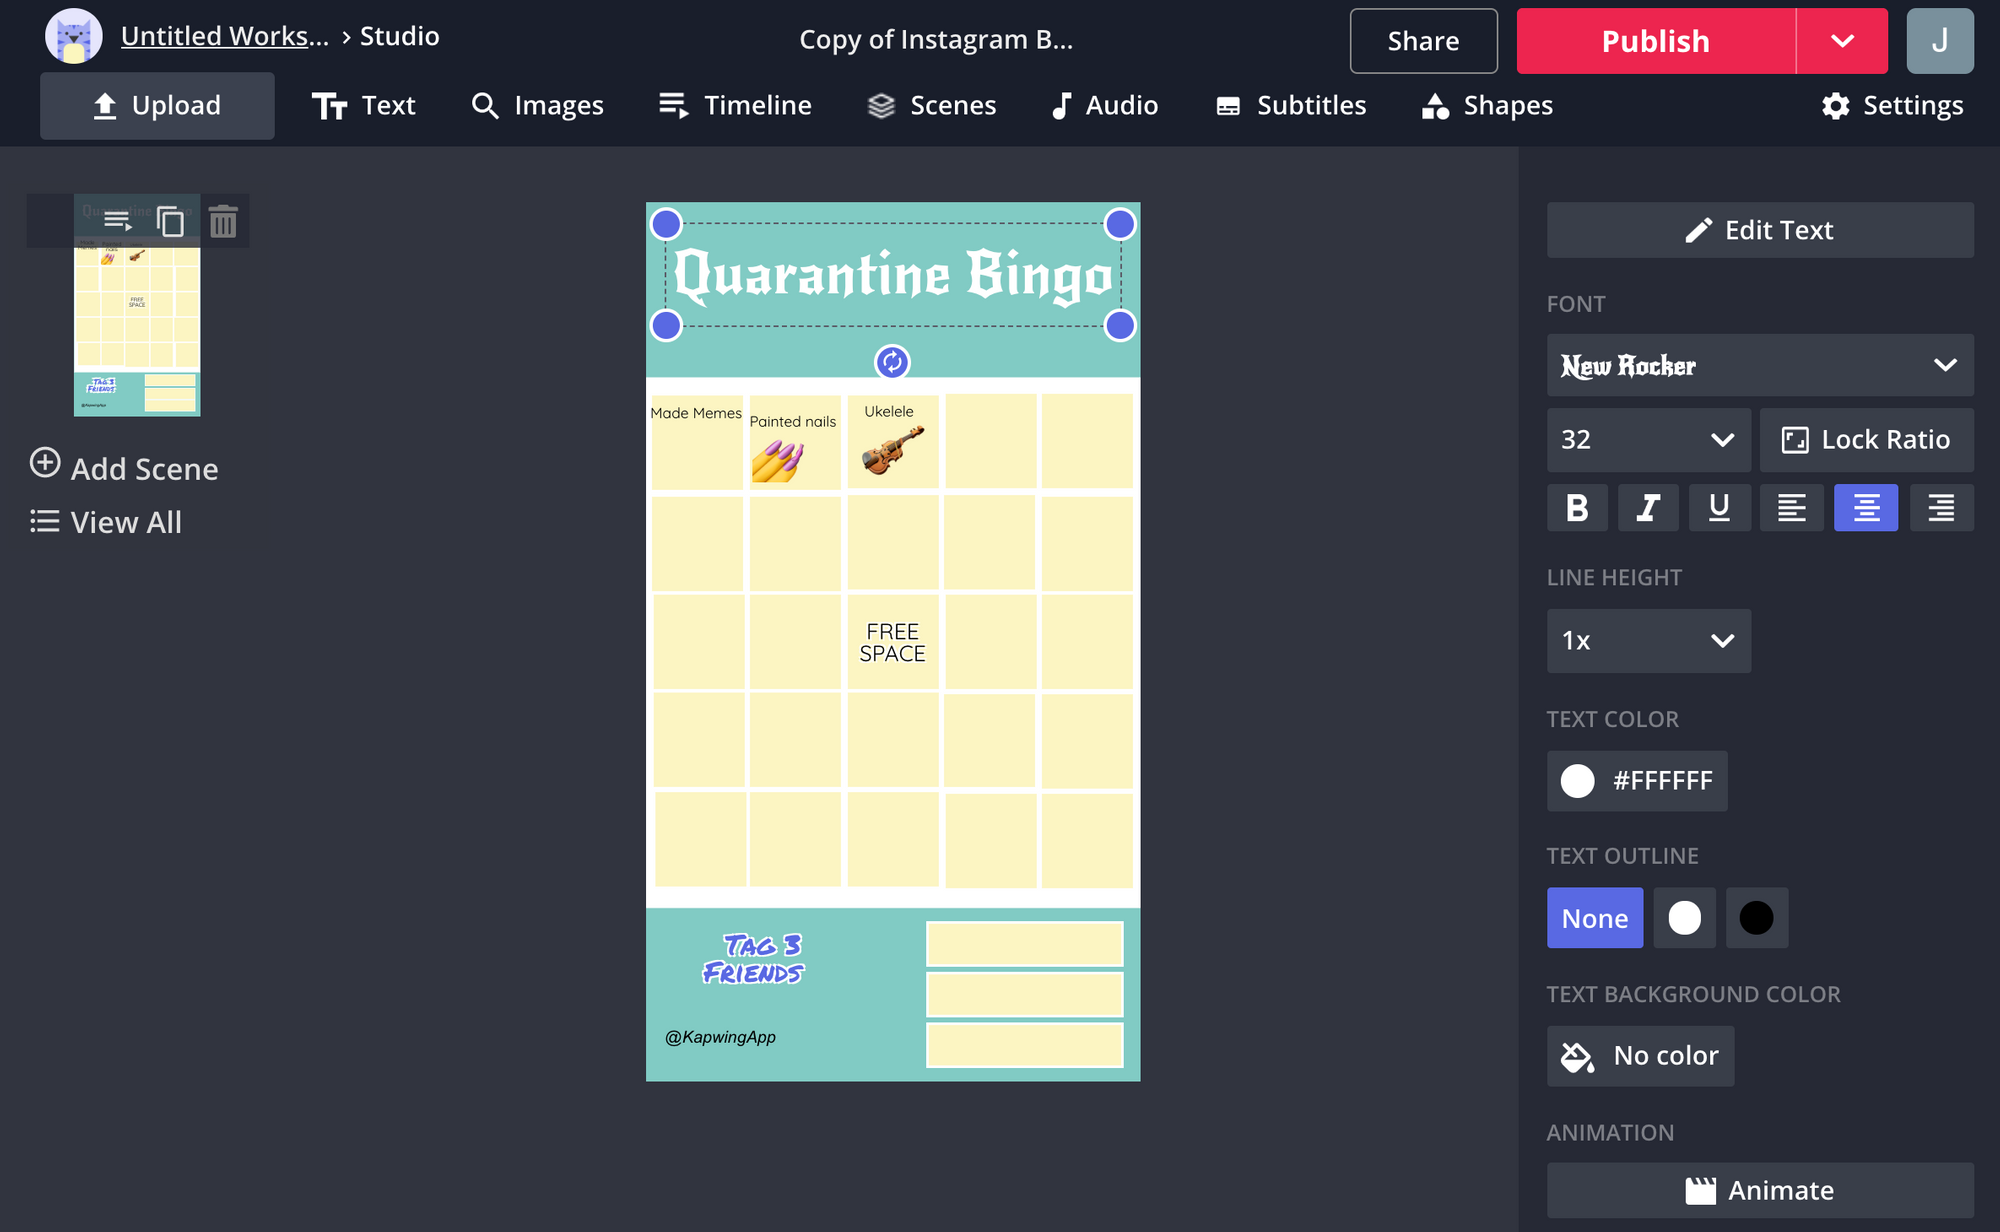
You can also add also include a watermark for your template design so that people know who the original creator was.
Pro tip: Instead of an image, make the template into a longer video so that the Story reader has time to take in the full effect before Instagram skips to the next story. Use the "Timeline" button to make your bingo template 15 seconds long.
Step 5: Download and kick it off!
When your design is finished, click the "Publish" button to burn it all together into a downloadable asset. Kapwing will process your image or video and return it to you. Since Kapwing is online, you're always able to re-edit and tweak the text or layout.
Download the template and post it on your Instagram Story! Start off by just posting the blank template so that other people can access the template later. Save it as a "Highlight" on your profile so that others can save and use the template even after yours expires after 24 hours.
Using Instagram's marker tool, tick off the bingo boxes that you've done or that you can take credit for. Tag three of your friends and ask them to nominate their friends to help it spread.
Conclusion
I hope these instructions help you make your own bingo board for your community or subgroup! These Instagram bingos boards have been all over my social media recently, so I'm glad that Kapwing can be a resource to enable funny, meaningful, and nostalgic community fun.
For inspiration, check out examples of bingo boards in the gallery on our Bingo Template Maker. Thanks for reading!
Related:
- How to make a custom Instagram Story template
- How to make a reusable Instagram Story template
- How to make a reusable YouTube thumbnail template