
YouTube's AI Auto Dubbing Feature Explained
YouTube's dubbing tool offers translation into eight languages for free
While 70% of the top videos on YouTube are in English, the demand for non-English content continues to grow. Expanding your reach by creating content accessible to non-English speakers is one of the easiest ways to tap into this trend. Unfortunately, doing so manually is both complex and time-consuming.
YouTube’s new AI-powered auto dubbing feature simplifies this process by automatically generating audio tracks in multiple languages, building on their previous multi-language audio tool. Currently, it supports eight popular languages: Spanish, Portuguese, German, French, Italian, Hindi, Indonesian, and Japanese.
However, there are limitations to this tool. Let’s explore YouTube’s AI auto dubbing in detail — how it works and whether an alternative might better suit your needs.
Table of Contents
- What is YouTube's AI Auto Dubbing?
- How to Turn Off Auto Dubbing (and On)
- How YouTube's Dubbing Feature Works
- Should You Manually Review Dubs on YouTube Videos?
- Benefits of YouTube's Auto Dubbing
- Alternative: How to Dub Videos with Kapwing
What is YouTube's AI Auto Dubbing?
YouTube’s AI auto dubbing is a feature that automatically translates your video’s audio into different languages, generating a synthesized audio track. When this feature is enabled, viewers can select their preferred language directly from the video settings menu.
Even for viewers who understand English, many may prefer to watch and listen to content in their native language. AI dubbing offers a quick and easy way to expand your global reach without requiring extensive manual effort.
Unlike subtitles, AI dubbing provides a more immersive experience by offering a fully translated audio track. However, as it’s an automated process, potential issues such as incorrect translations or mismatched audio may arise.
Important Note: Auto dubbing began rolling out in December 2024 and continues into 2025, but it is not yet available on all user accounts. At the time of writing in April 2025, auto-dubbing is available to all creators in the YouTube Partner Programme (YPP), though it is not yet available to non partner creators.
How to Turn Off Auto Dubbing (and On)
While YouTube automates the dubbing process, you can manage whether or not the feature is active on your account.
Step 1) Log into YouTube Studio
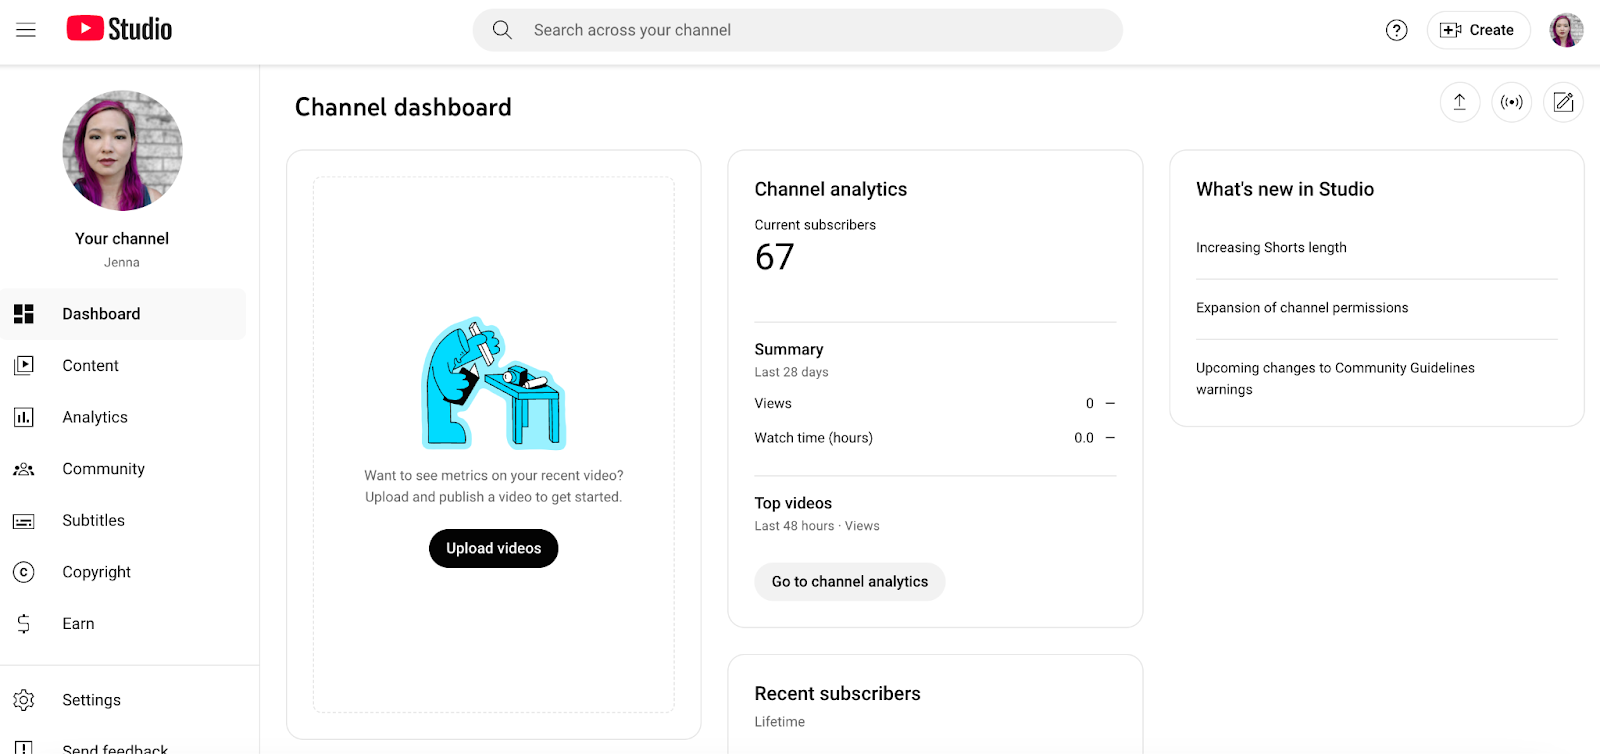
Step 2) Navigate to Settings > Upload Defaults > Advanced Settings.
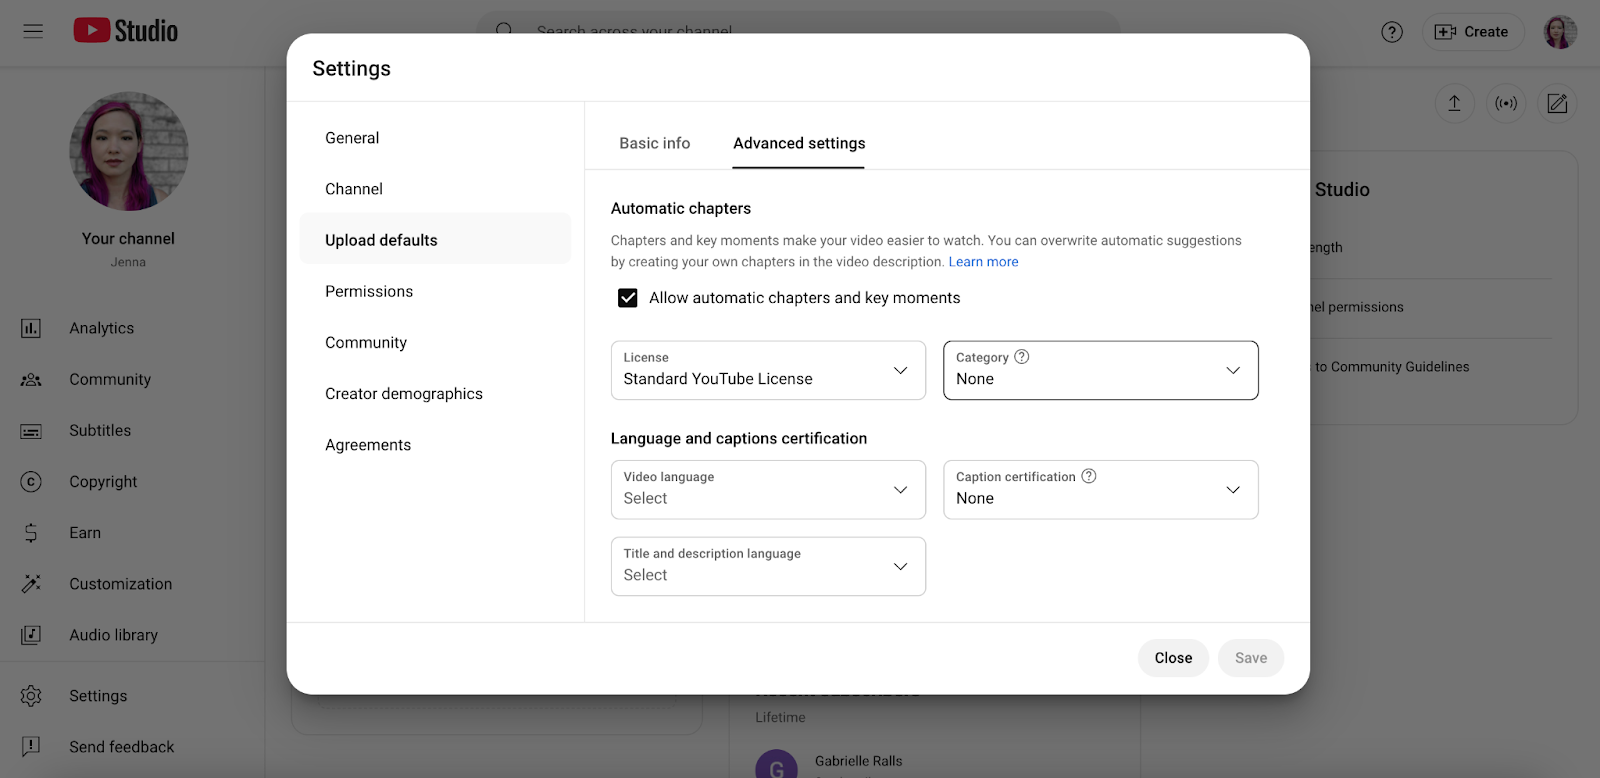
Step 3) Check the “Allow Automatic Dubbing” box
If you don’t see the box, it means this feature has not yet been rolled out to your account. As a new addition, YouTube is introducing it gradually, rolling it out to members of the YPP initially. This feature is closely related to YouTube’s multi-language audio tracks feature, which you can explore as an alternative.
In an update from YouTube posted on April 22, 2025, the company confirmed that all creators in the YPP now have access to auto dubbing, though no timeline for wider access was given.
In a video update, a senior Google employee told viewers:
"We're happy to announce that now, all creators in YPP have early access to auto-dubbing, and can self-enroll via YouTube Studio. We're working to expand auto-dubbing to more creators in the future, so stay tuned."
Users can become YPP eligible by amassing 1000 subscribers, plus either 4,000 valid public watch hours in the last 12 months or 10 valid public Shorts views in the last 90 days.
How YouTube's Dubbing Feature Works
YouTube's new AI dubbing feature is automatic. But it's worth it to take a look at what's happening behind the scenes, once you’ve turned on AI auto-dubbing.
- Video Upload by Creator: Upload your video to YouTube as usual. The platform will process the content and prepare it for potential dubbing. The cleaner your audio is, the more likely it is that the audio dubbing will work as expected, so you may want to use a Remove Background Noise tool first.
- Language Detection: YouTube's AI analyzes the video's original language to determine if it's supported for dubbing. Currently, the feature supports a limited number of languages. If your video is in English, it will be translated into the other eight languages (Spanish, Portuguese, German, French, Italian, Hindi, Indonesian, and Japanese) YouTube currently supports. If your video is in one of those other seven languages, it will be translated into English.
- Translation Process: The AI translates the original audio into the target language(s) using advanced natural language processing algorithms. This begins with a text script.
- Voice Synthesis: The translated text is converted into speech through AI-driven voice synthesis technology. The resulting audio may sound less natural compared to human narration or voice cloning, but it’s becoming more advanced.
- User Experience: YouTube integrates the synthesized audio tracks into the video, allowing viewers to select their preferred language from the settings menu during playback.
Should You Manually Review Dubs on YouTube Videos?
YouTube's newest auto dubbing feature is designed to operate entirely automatically. You don't even see the dub being processed, it just appears on the user's side.
But while that's efficient, it can cause some potential problems:
- Sound quality can significantly impact translations. If your audio isn’t crystal clear, auto-dubbing may struggle, leading to errors in the translated audio.
- There may not always be a one-to-one match for certain terms between languages. Even human translators face challenges with nuanced translations, and AI translators are no exception — YouTube, in particular, has a reputation for errors in subtitle translation.
- Translations may not be "clean." For example, a single word in English might require several words in Spanish, which can either extend or shorten your video's length. This becomes especially critical if your content is close to YouTube Shorts' new 3-minute rule.
So, when you consider reviewing your auto dubbing, you need to think about three factors. Is it feasible for you to review it? Is it important to be accurate? And how many people will see it?
- Do you speak the language that you're being dubbed in? It may not be possible for you to manually review multi-language dubs because you don't speak seven different languages. You would need to get reviewers who speak the other languages.
- How important is it that the content be accurate? If you're shooting a promotional video for a product in France, the "vibe" may be more important than the exact words. But if you're shooting an educational video for your law practice, your words need to be precise.
- How many people will see the video? If you're developing a flagship video about your company, many millions may see it. If you're shooting a fast-and-dirty developer's update, only a few of your most fervent fans may view it.
Performing a cost-benefit analysis for manual review is likely something that will need to be done on a case-by-case basis. So, while it's a good general best practice, it may not be economically feasible every time.
Benefits of YouTube's Auto Dubbing
So, why would you want to use YouTube's AI auto dubbing? Mostly, it’s easy. Because it’s automatic, you can simply set and forget it. Turn on auto dubbing for your channel, and all your videos will be automatically dubbed in the eight languages YouTube currently supports.
However, there are some key limitations:
- Accuracy: As an automated process, AI dubbing may lack precision. For some channels, this might not be a significant issue, but for technical content or when promoting a complex product, inaccuracies could pose a problem.
- Limited Language Support: YouTube’s auto dubbing currently supports only eight languages and there’s no clear timeline for expansion. Additionally, translations are limited to and from English; for example, it won’t translate directly from Spanish to German. For those needing translations beyond these options, this Translate tool supports 1o0+ languages.
- Synthetic Voice Quality: YouTube doesn’t allow users to choose their AI-generated voices, which can result in audio that lacks natural intonation. These synthetic voices may fail to reflect your brand’s tone or personality as effectively as desired.
Why Kapwing Might Be a Better Choice
For creators seeking greater control and broader language options, Kapwing offers a robust alternative and provides several major advantages over YouTube’s AI auto dubbing:
- Extensive Language Support: Supports 40+ languages, enabling you to cater to a more diverse audience.
- Customizable Voiceovers: You can adjust voice style, tone, and pacing to better match your brand's identity and the emotional context of your content.
- Integrated Editing Tools: Beyond dubbing, the studio also provides a suite of video and audio editing features, allowing for comprehensive content customization.
- Available to all: While YouTube's Dubbing tool is still being rolled out gradually, anybody can access Kapwing's dubbing feature. AI-powered dubbing feature is free for all users to try for up to three minutes, with 80 minutes of dubbing available monthly to all members with a Pro Account.
Alternative: How to Dub Videos with Kapwing
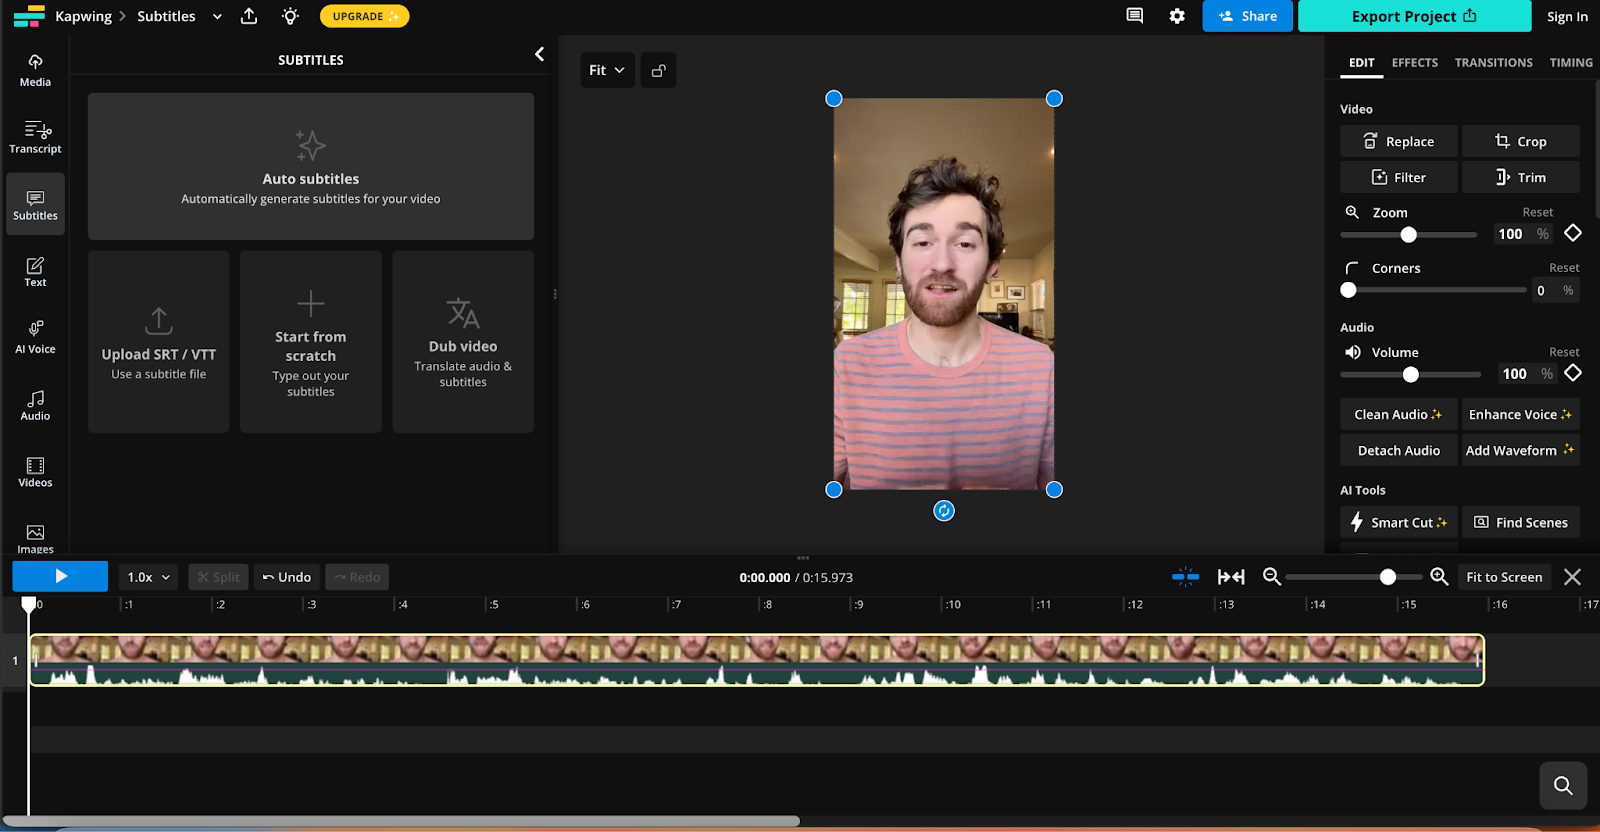
Step 1) Upload Your Video
Upload a video to The Editor. You can upload a video of any resolution and aspect ratio.
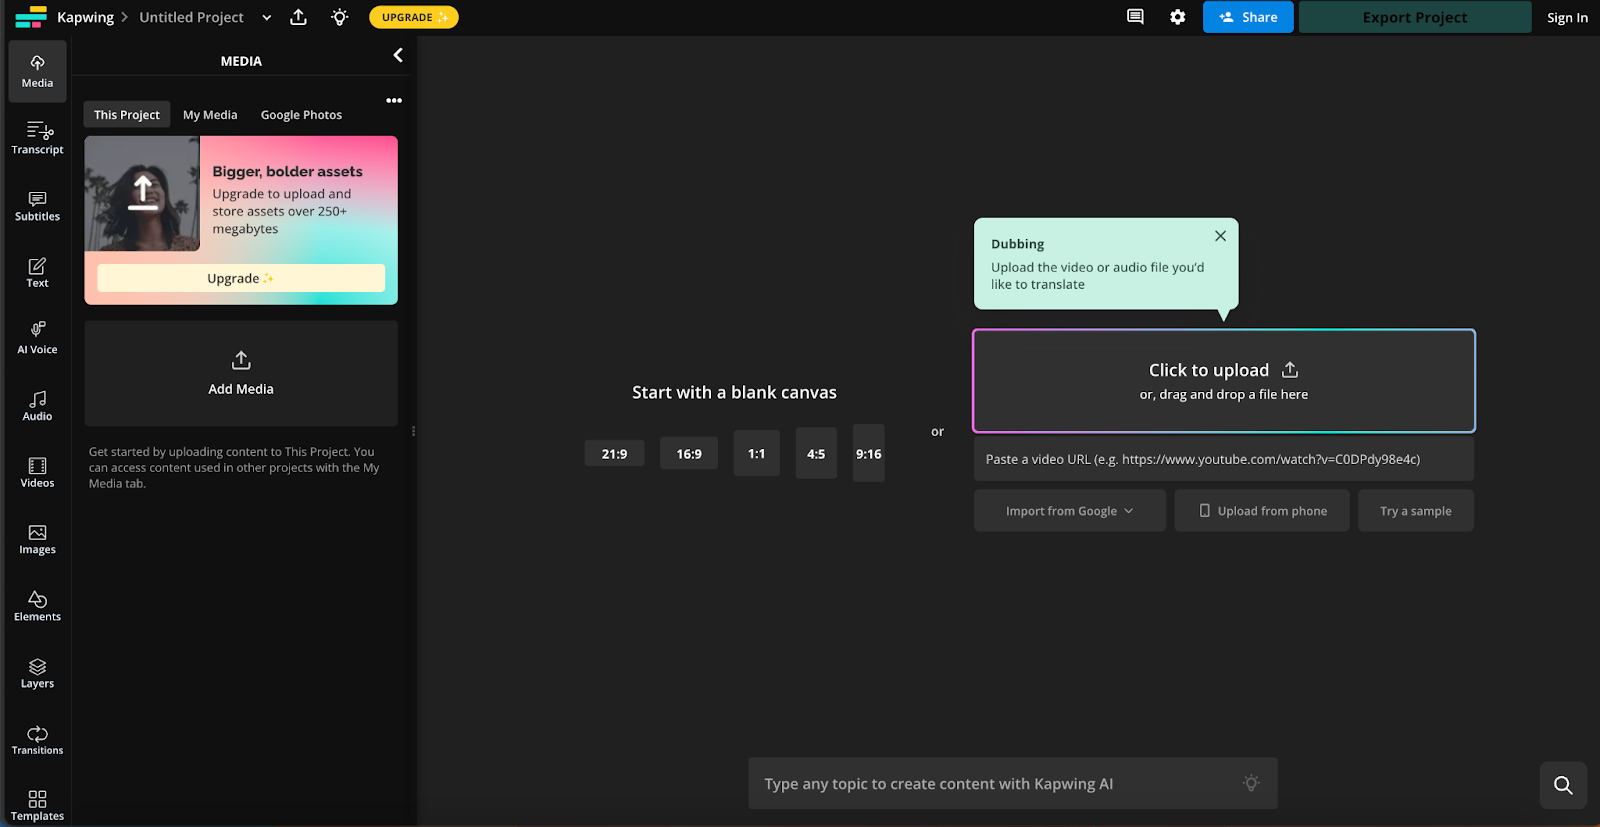
Your video will appear in the video editor.
Step 2) Select “Dub Video”
In the left side panel, under “Subtitles,” you’ll see the option to “Dub video.”
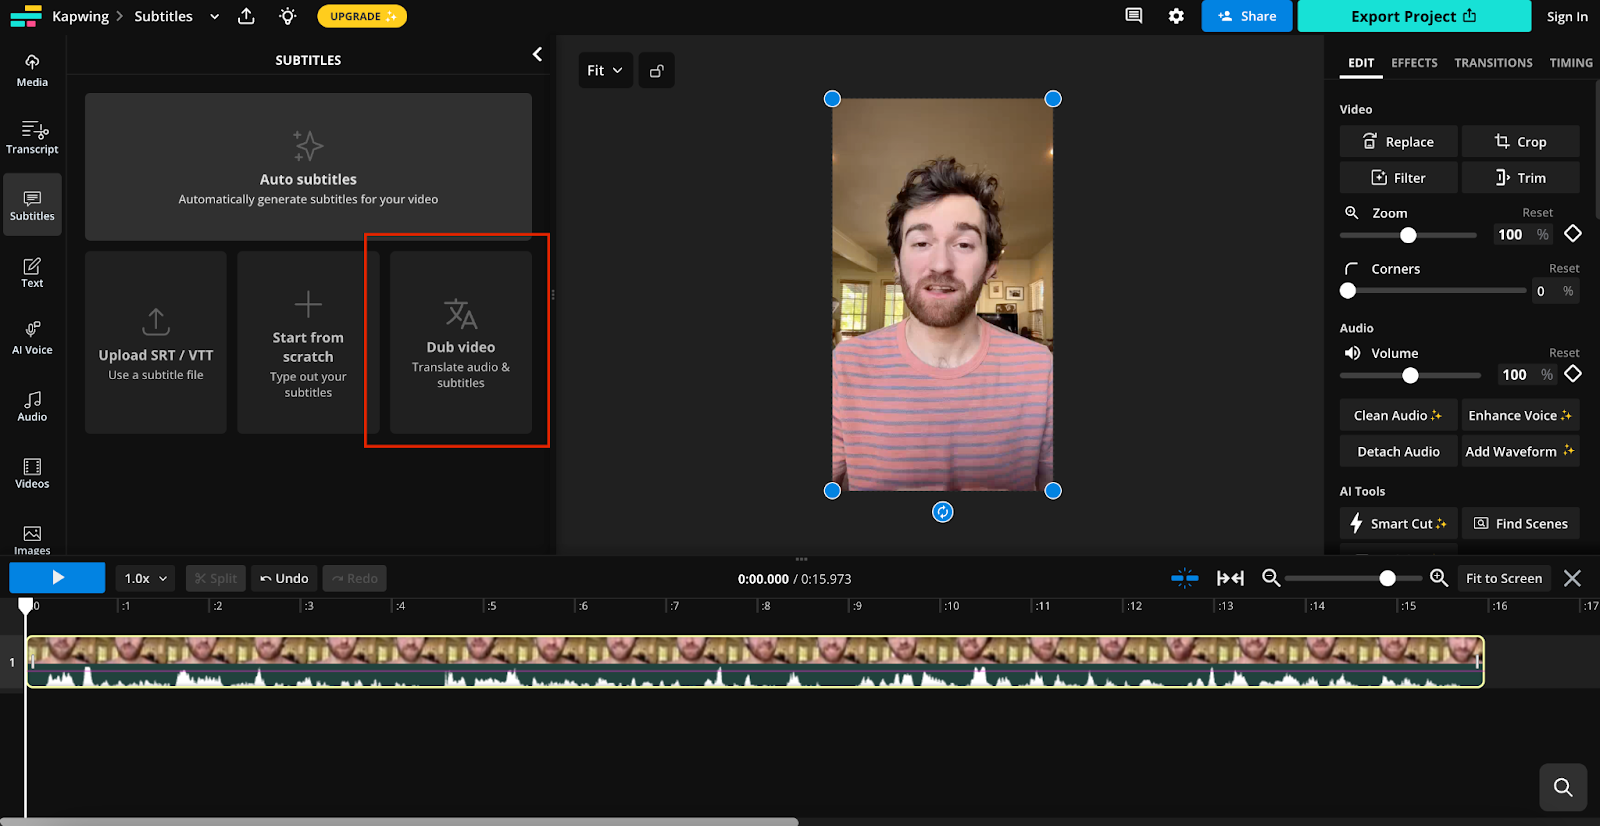
Click on “Dub video” and you’ll be brought to the video dubbing tool.
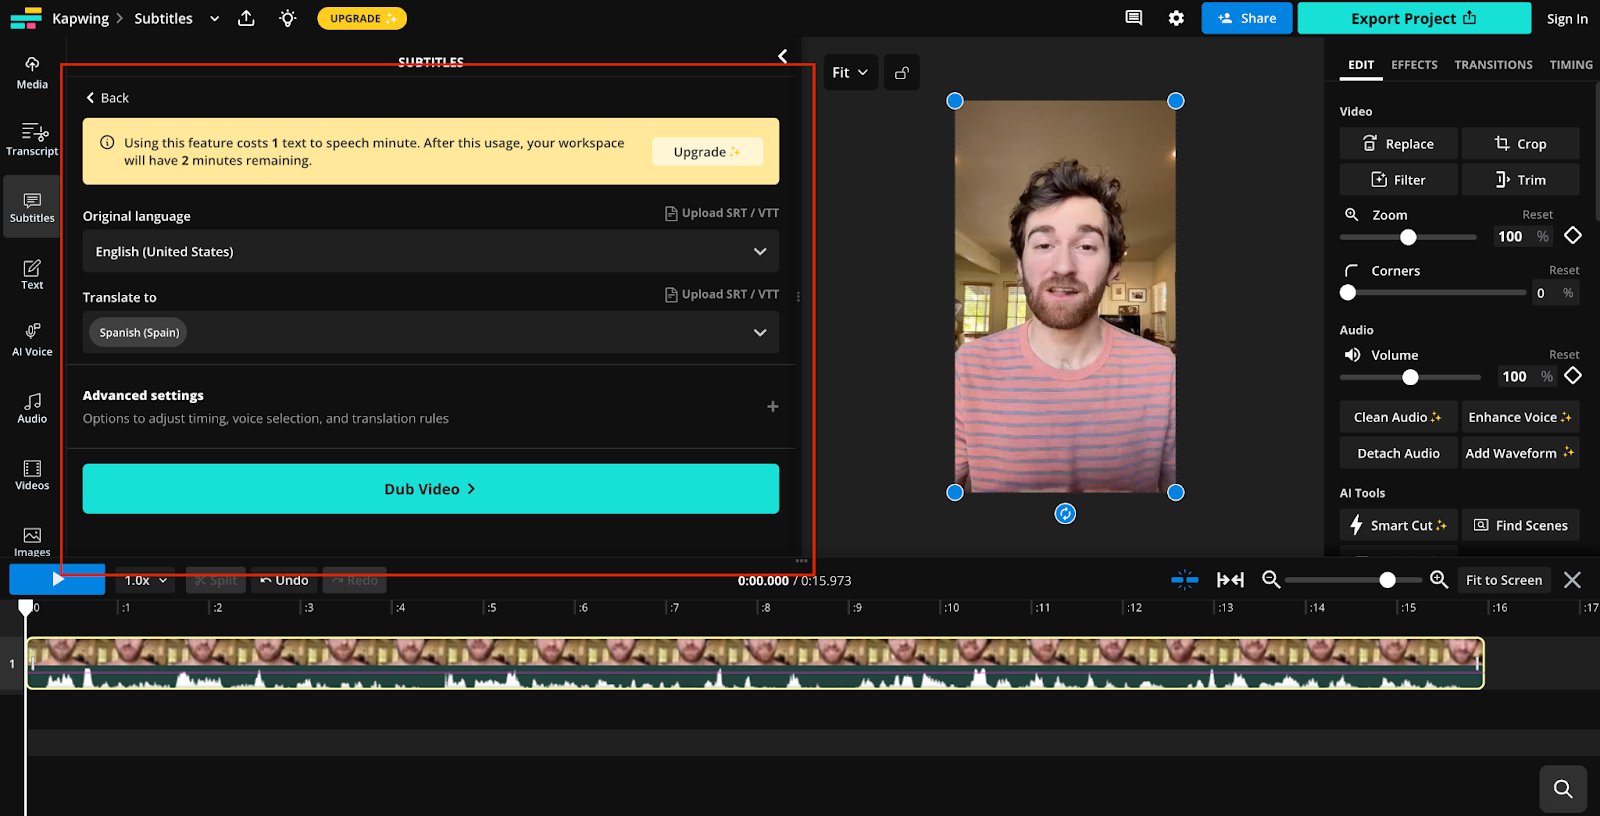
Step 3) Set Your Options
In the panel, you’ll see several options for dubbing.
- Original language: Select the original language of your video. You can choose from over 37 languages and dozens of dialects.
- Translate to: Select the language you want to translate your video to.
- Advanced settings:
- Allow adjustments to video speed: Different languages may take different intervals of time to say the same thing. You can let Kapwing adjust your video speed to improve the timing of the dubbing.
- Audio: You can choose to clone the voice for reuse in the future or choose from a diverse stock library with voices that vary in style, accent, and speaking pace.
- Number of speakers: You can manually set the number of speakers or let this be auto-detected.
- Brand glossary: You can add any terms that the translation system might not automatically know, such as brand names, to a Brand Kit.
Step 4) Click “Dub”
After going through your settings, you will have a button that either says “Dub video” or “Dub with cloned voices.”
Click the button.
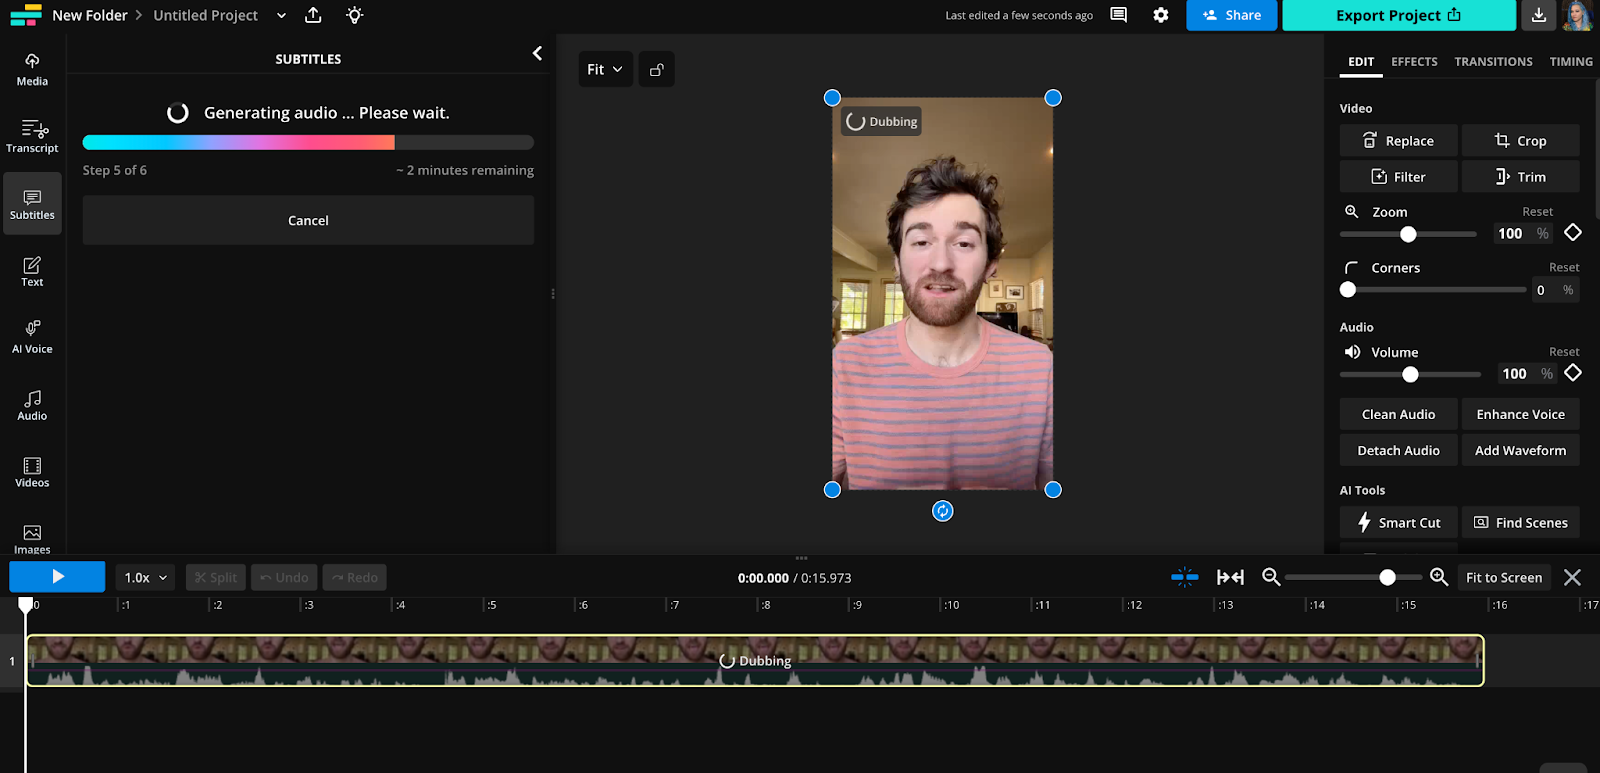
The online dubbing tool produces not only a dub but also a text translation of your video.
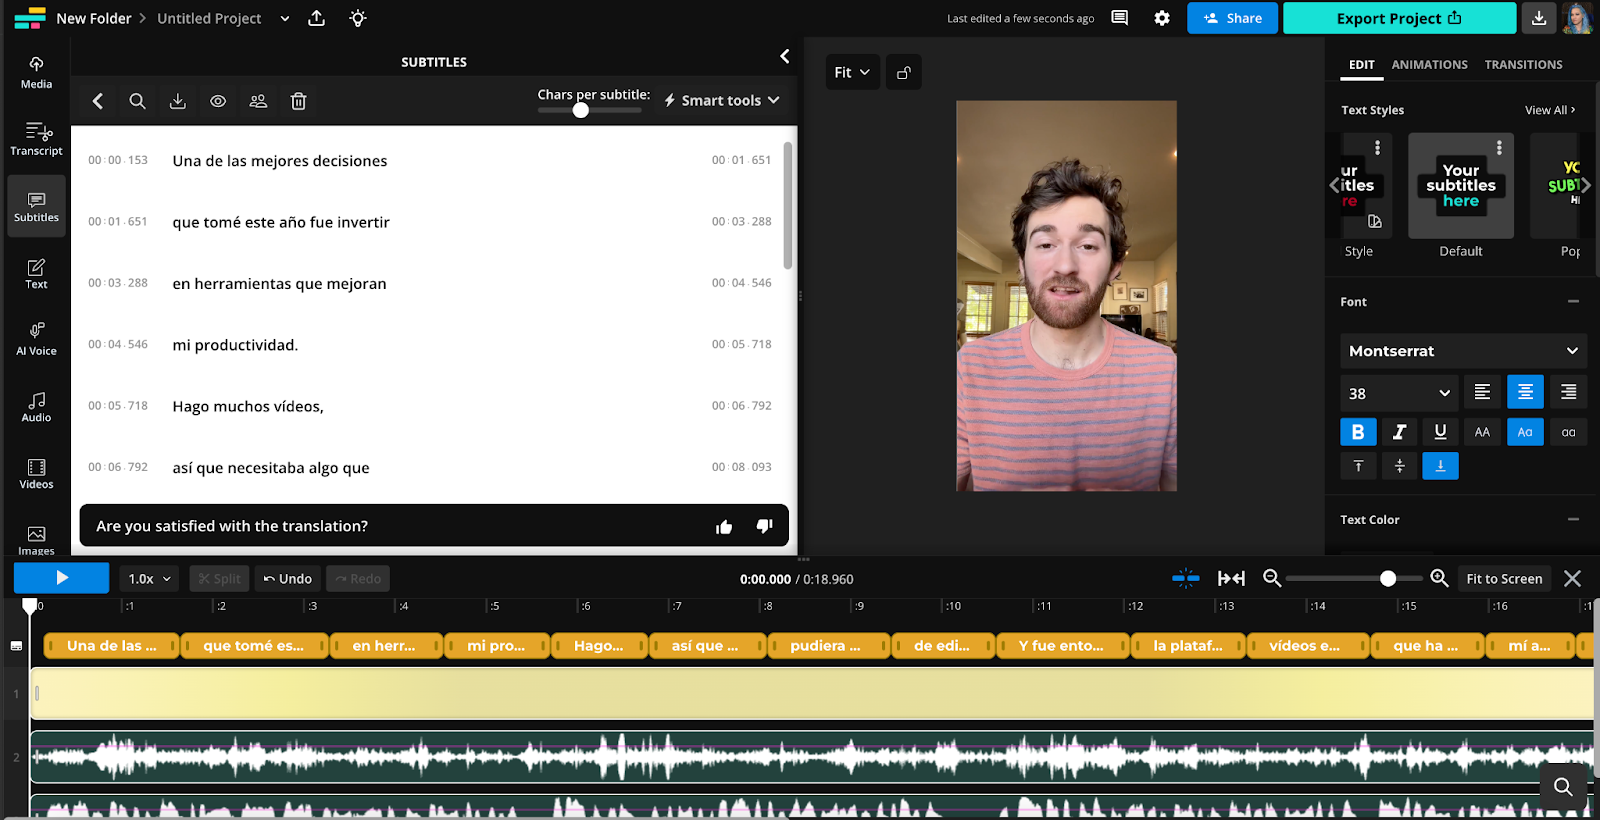
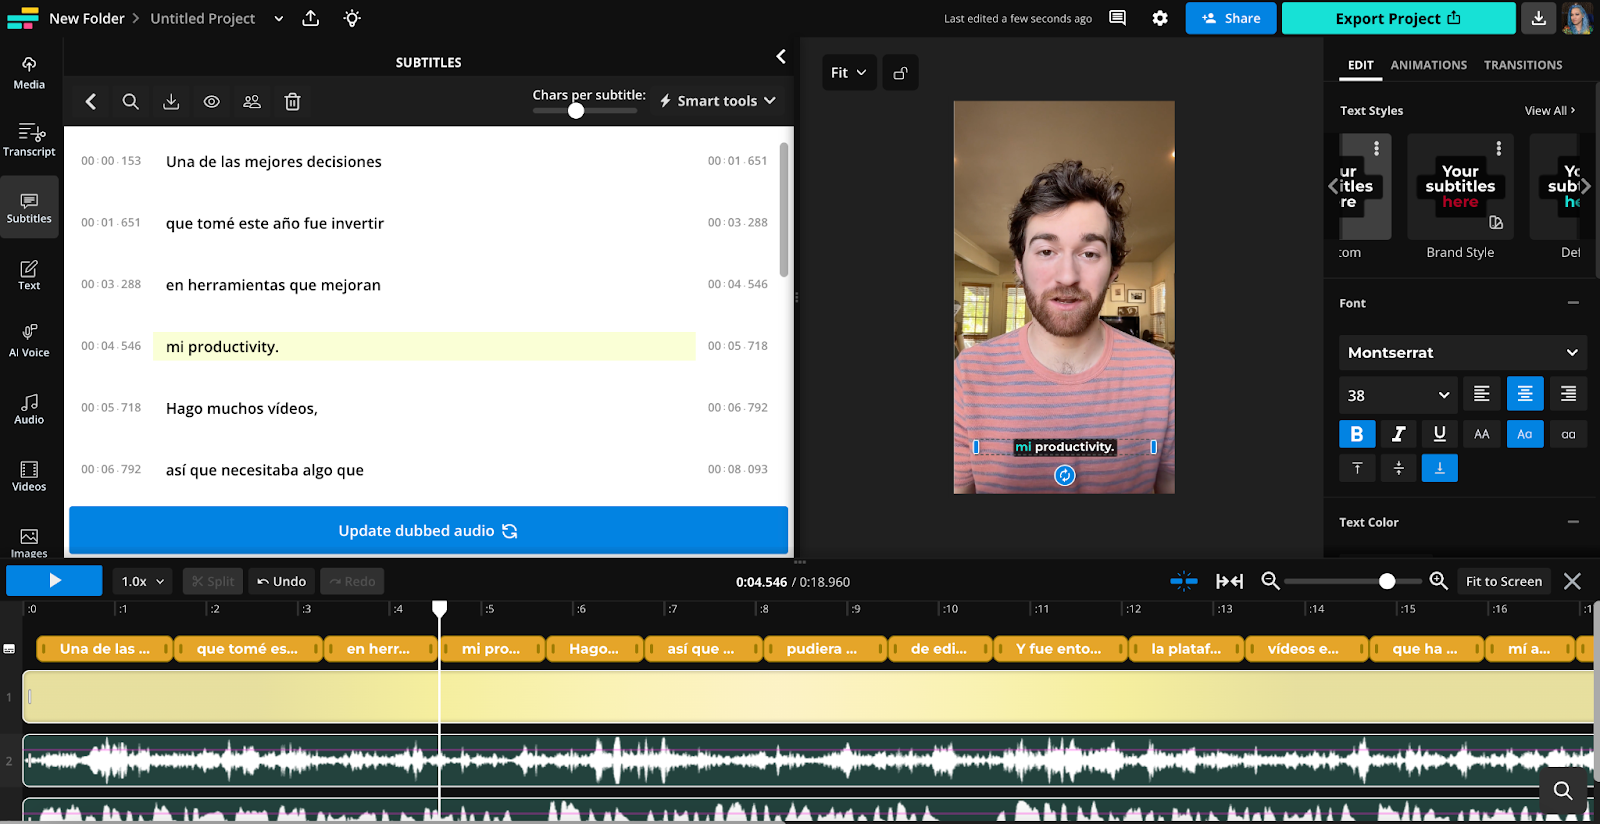
(Optional) Step 5) Edit and Augment Your Dub
Once you have your dub, you can edit the transcript by in-line editing the text. If you edit the text, you’ll get a button that you can click on that says “Update dubbed audio.”
Step 6) Export Your Video or Audio
You have two options for getting your new AI dub on YouTube:
- If you have altered the lip-syncing or the speed of your video: If you made updates to the visuals of your video, such as altering its duration or adding lip-syncing, you’ll need to upload the entire video.
- If you have not made any alterations to the speed of your video, you can simply upload the audio.
Either way, your next step is to export your project:
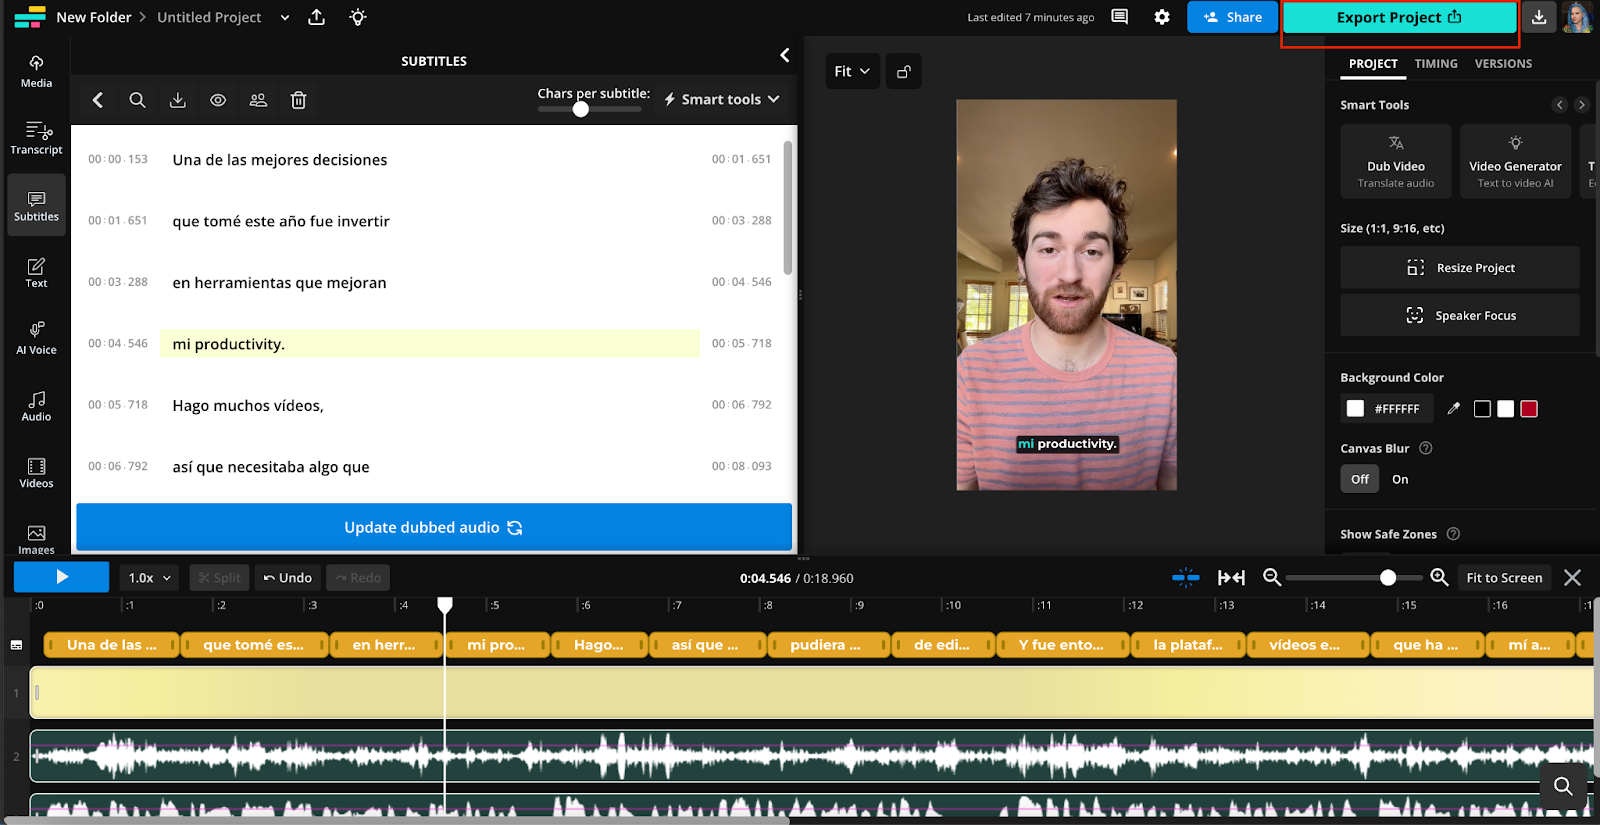
When you click “Export Project,” you’ll get the following options:
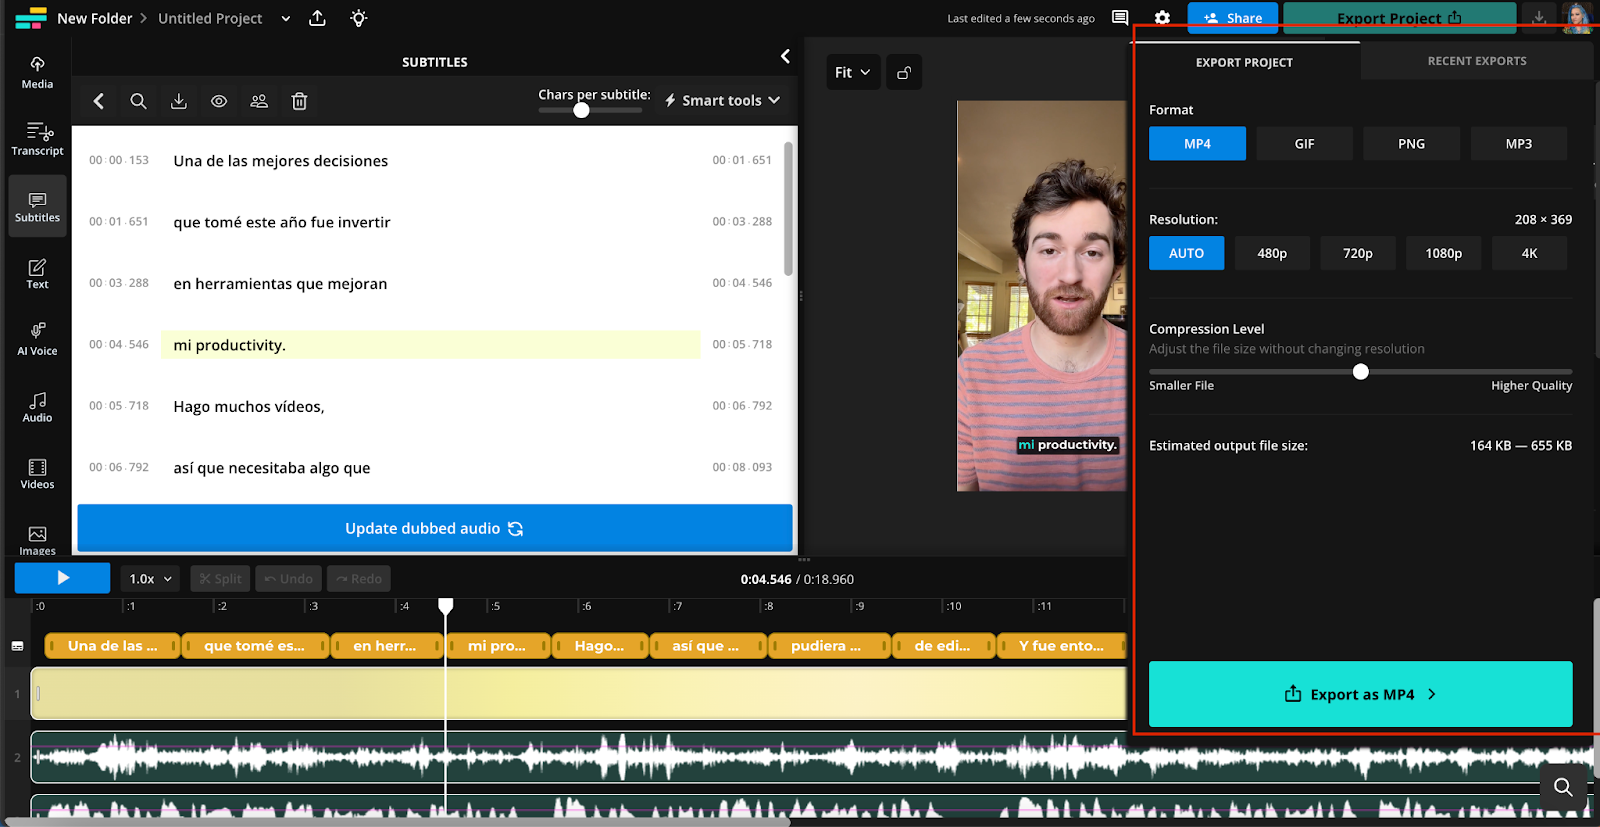
For YouTube, you can export as MP4 (video) or MP3 (audio).
You can also select the resolution: Auto, 480p, 720p, 1080p, or 4K. Generally for YouTube, the higher the resolution, the better.
Step 7) Upload Your Dubbed Video or Audio to YouTube
It’s time to head back over to your YouTube Dashboard.
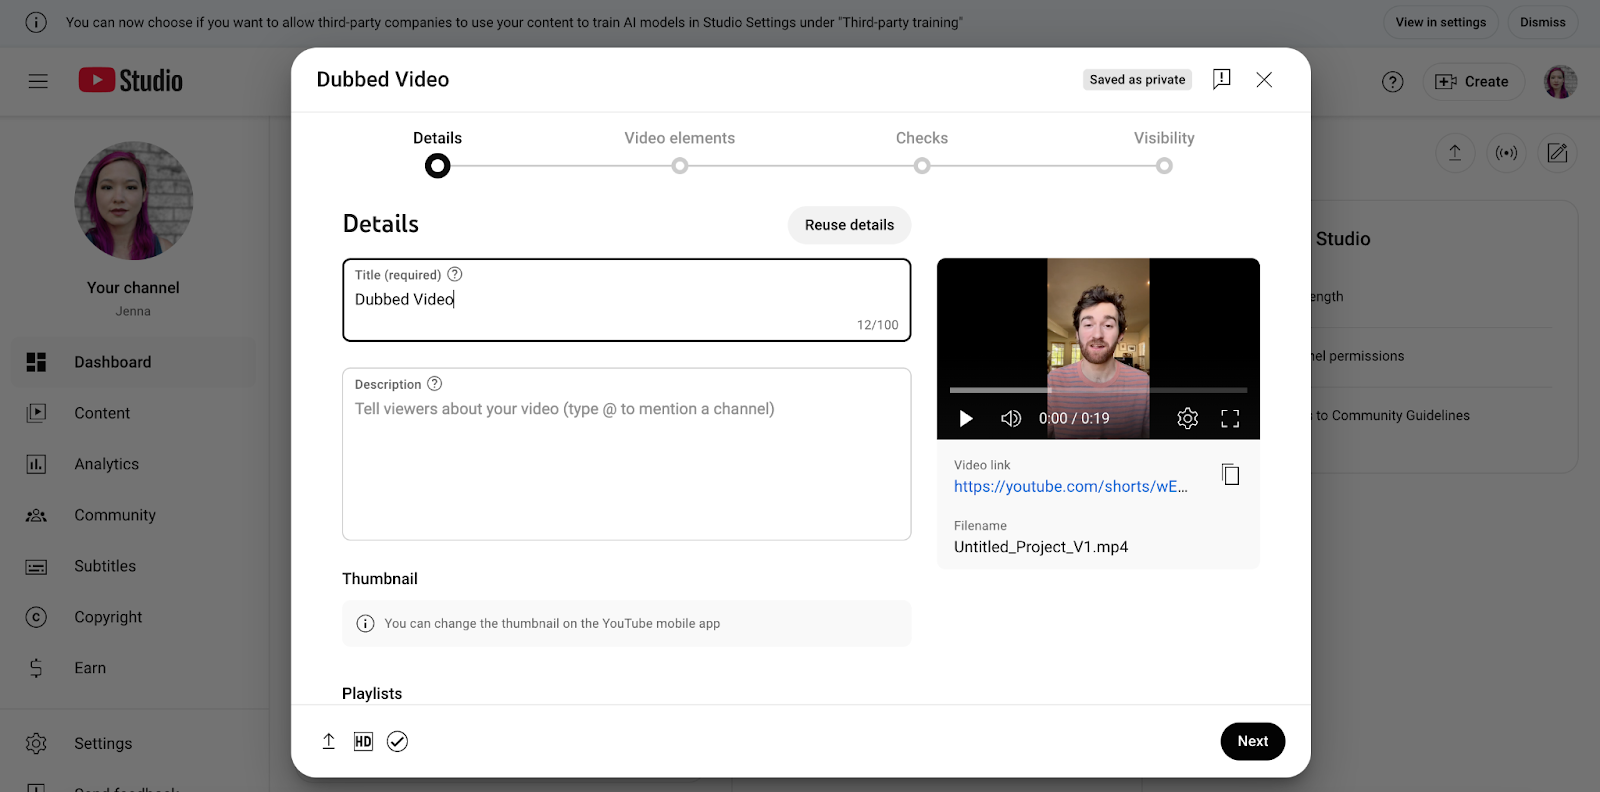
If you’re uploading a full, dubbed video, all you need to do is upload your video as normal. YouTube will automatically detect the language of your video.
If you’re uploading just the audio for a video, you’ll instead navigate to the video you’re adding the dubbing to then click on “Subtitles.”
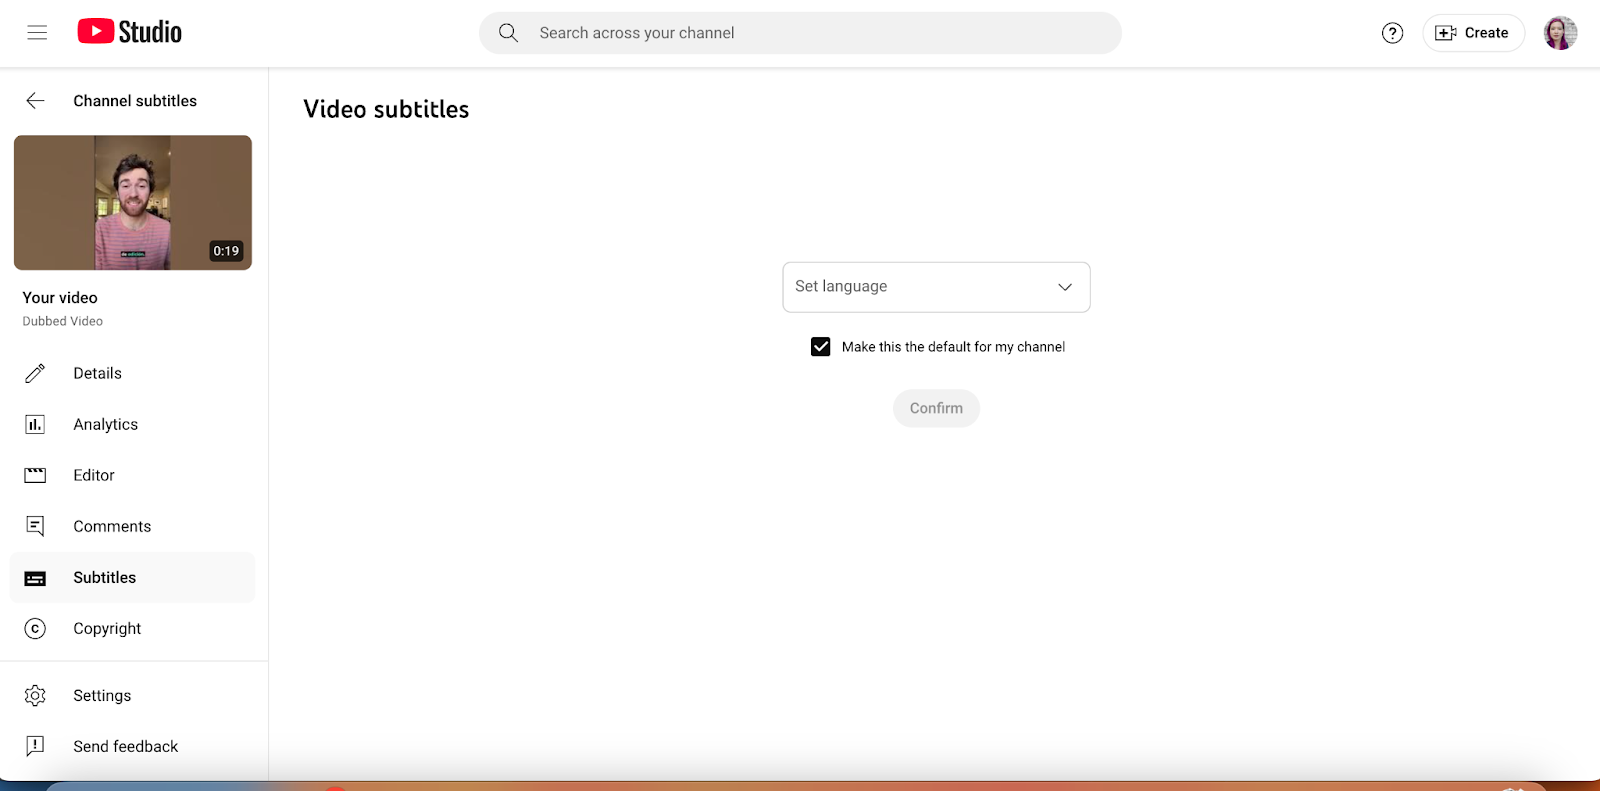
Here, you’ll be able to upload your multi-language audio track. However, you may not have the option. If you don’t have the option, it’s because this has not yet rolled out to you.


