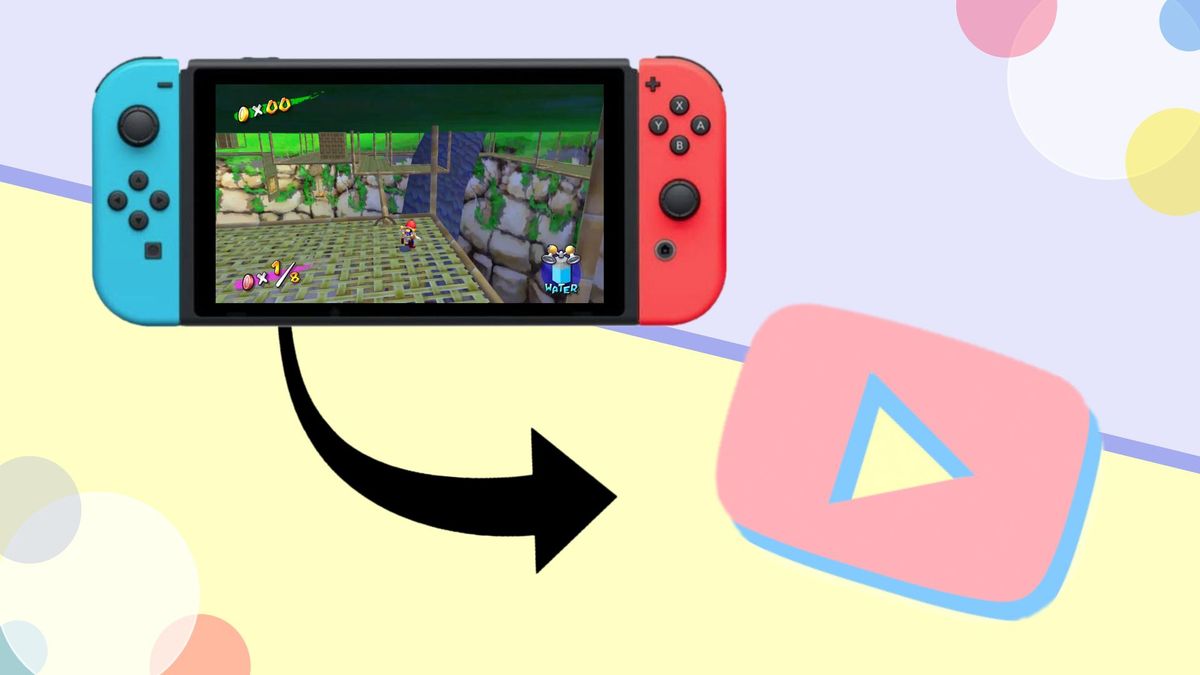
How to Share Nintendo Switch Video Recordings on YouTube (without capture card)
Your Nintendo Switch allows you to save 30-second clips as you play, but it only lets you share them on Facebook or Twitter. I'll go over the easiest way to post your Switch clips to YouTube online.
Video games have come a long way over the last couple years. Yes, new consoles have been released, new gaming platforms have launched (and flopped) and particular titles have taken over the lives of millions. But the biggest at-large trend in gaming is its increasing online socialization. Not only is gaming a full-fledged industry – now, it’s joined by streaming, both competitive and non-competitive, and gamer YouTubing.
Getting started in the streaming and YouTubing world of gaming can be pretty easy for some games and platforms. If you generally play games on your computer, you can easily stream or record your gameplay using OBS or other streaming software. But with some consoles, it’s not quite as simple. With a Nintendo Switch, for example, you can stream and record gameplay directly on your console. But it takes a bit more effort to share your recorded videos on YouTube, and the more typical process of using a capture card and streaming software can be very expensive – plus, it can only be done while the Switch is docked.
Instead, you can record gameplay videos on your Switch itself, whether it’s docked or handheld & on the go, then use Kapwing to help upload them to YouTube. Here’s what you should do:
- Record 30 seconds of gameplay on Switch
- From your album, share the video to Facebook or Twitter
- Download the shared video from Facebook or Twitter
- Upload the saved video to YouTube
NOTE: Not all games on the Switch support video recordings. It worked with every game I tried, but Nintendo itself reported that it will not be available for all titles.
Step 1: Record 30 seconds gameplay on Switch
Nintendo has made it extremely easy to capture any cool moments that occur during your gameplay. Whenever anything happens that you want to show people later, just hold down the capture button on the lower side of the left joycon. That’s it! You’ll see a thumbnail icon in the upper right-hand corner letting you know that your video clip has been saved to your gallery.
Step 2: From your album, share the video to Facebook or Twitter
Your Switch also allows you to share your 30-second clips easily, but it doesn’t give you many options. Go to your album from the Switch homepage, choose the video you want to share to YouTube, and press A to share to either Facebook or Twitter. If you haven’t synced your accounts already, you can select either one to sign in and add a caption before sharing. Since your final destination is YouTube, this post is mostly just a placeholder for your clip. For that reason, I recommend posting to Facebook, since you can share your video privately, without clogging your friends’ timelines, only to delete your post later.
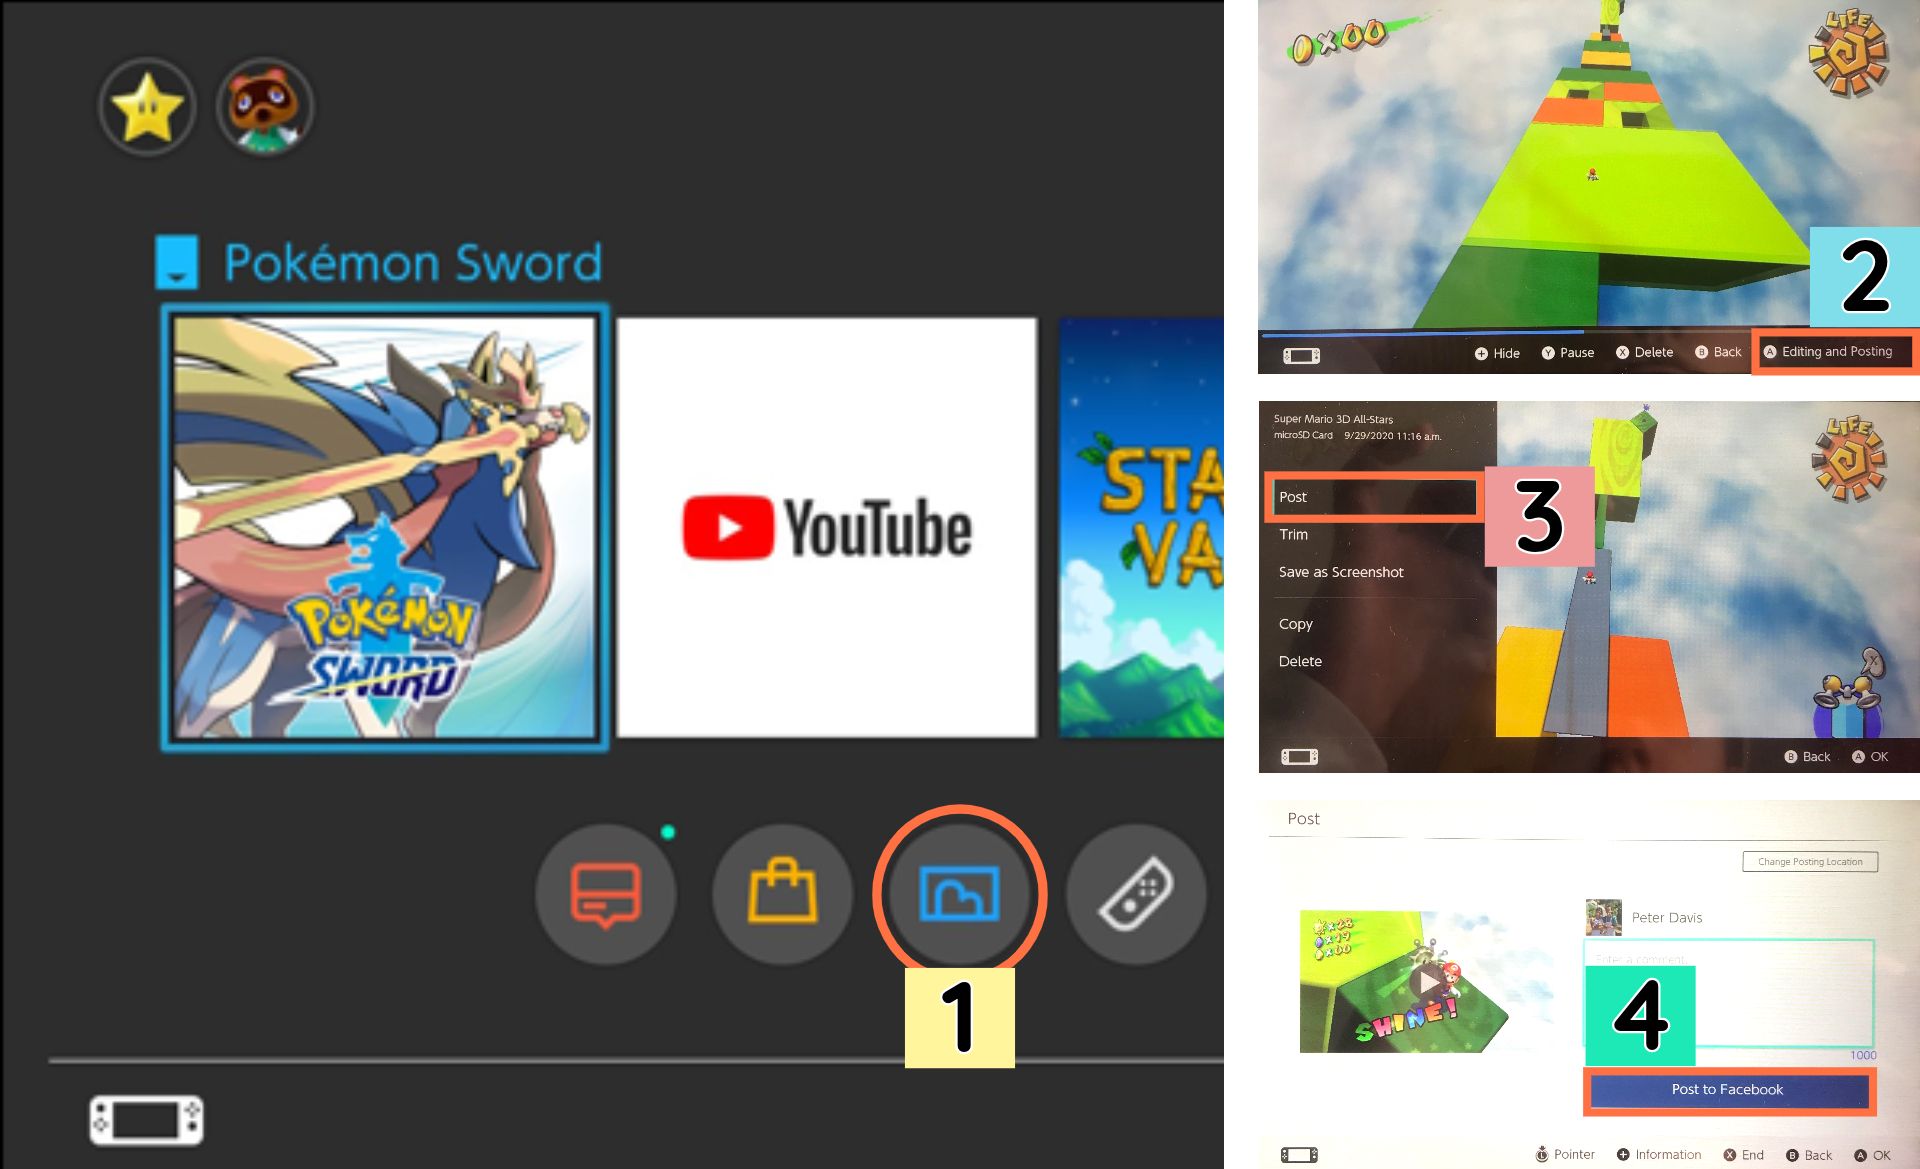
NOTE: If you want to post privately to Facebook as a storage place for your videos before posting to YouTube, you’ll need to select “Only me” in your sharing settings when you sync your Facebook and Nintendo accounts. If you selected another option when syncing your accounts, you’ll need to un-sync your accounts, then link them again.
Step 3: Download the shared video from Facebook or Twitter
Go to your Facebook or Twitter profile, find your recent post with your gameplay clip. Copy its link in the URL bar and head over to Kapwing.com. Here, click “Start editing” to enter the Kapwing Studio and paste your copied link into the URL field. Your clip will upload, and you can make any edits your video needs before you share it on YouTube, like cropping, trimming, or adding text, music, additional clips, effects, or titles.
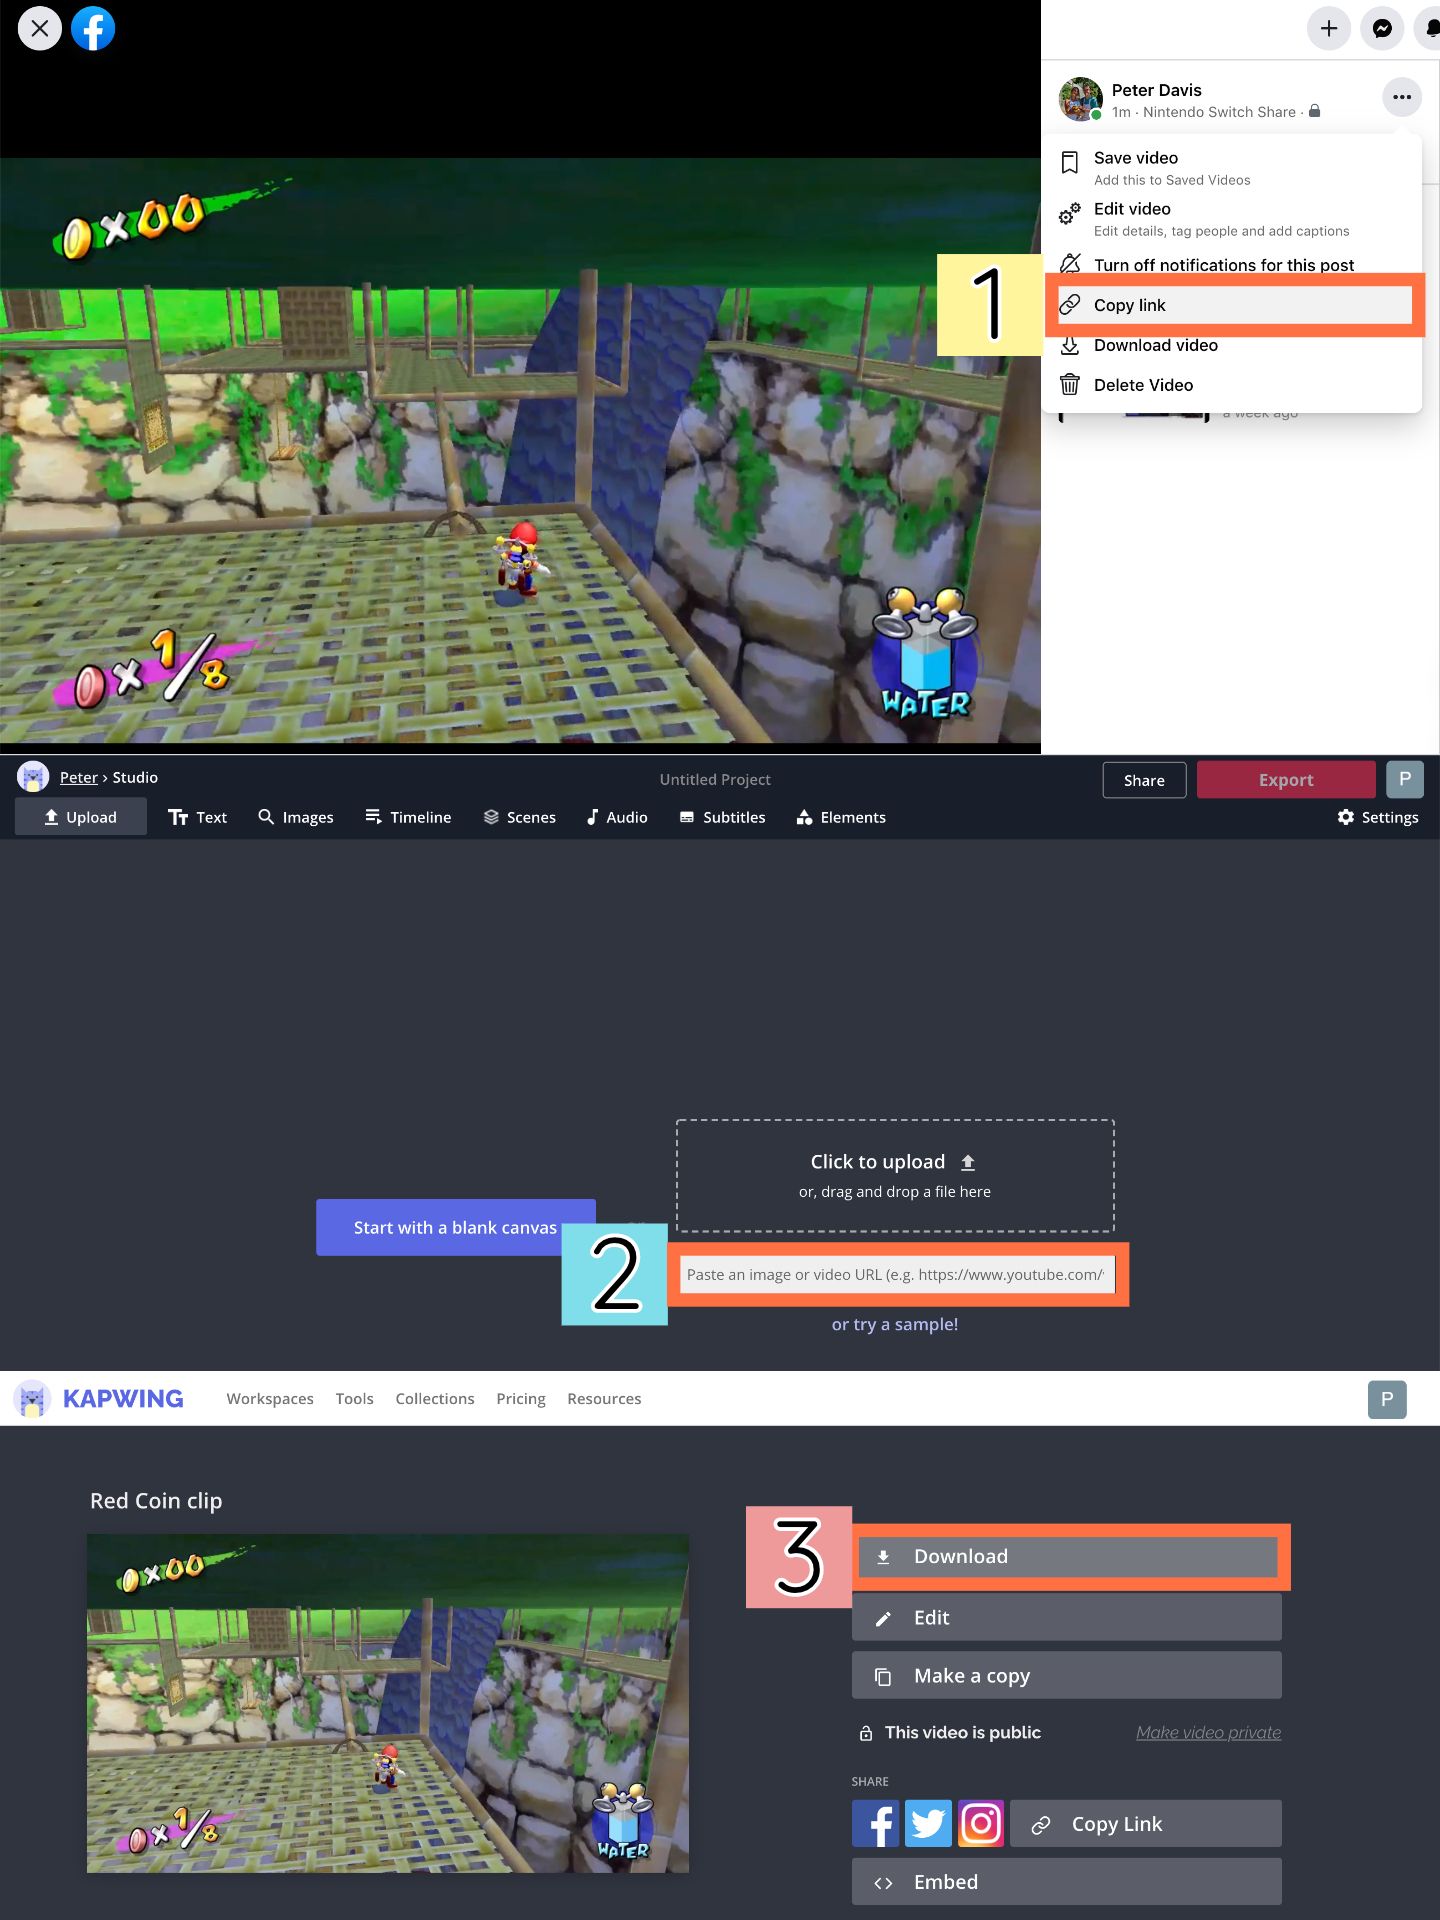
When your video is in good shape and ready to be shared on YouTube, click the red Export button in the upper right corner of the Studio and give Kapwing some time to process your video. Since it’s most likely under 30 seconds long, it shouldn’t take too long. When it’s ready, just click the “Download” button and your video will be saved directly to your device.
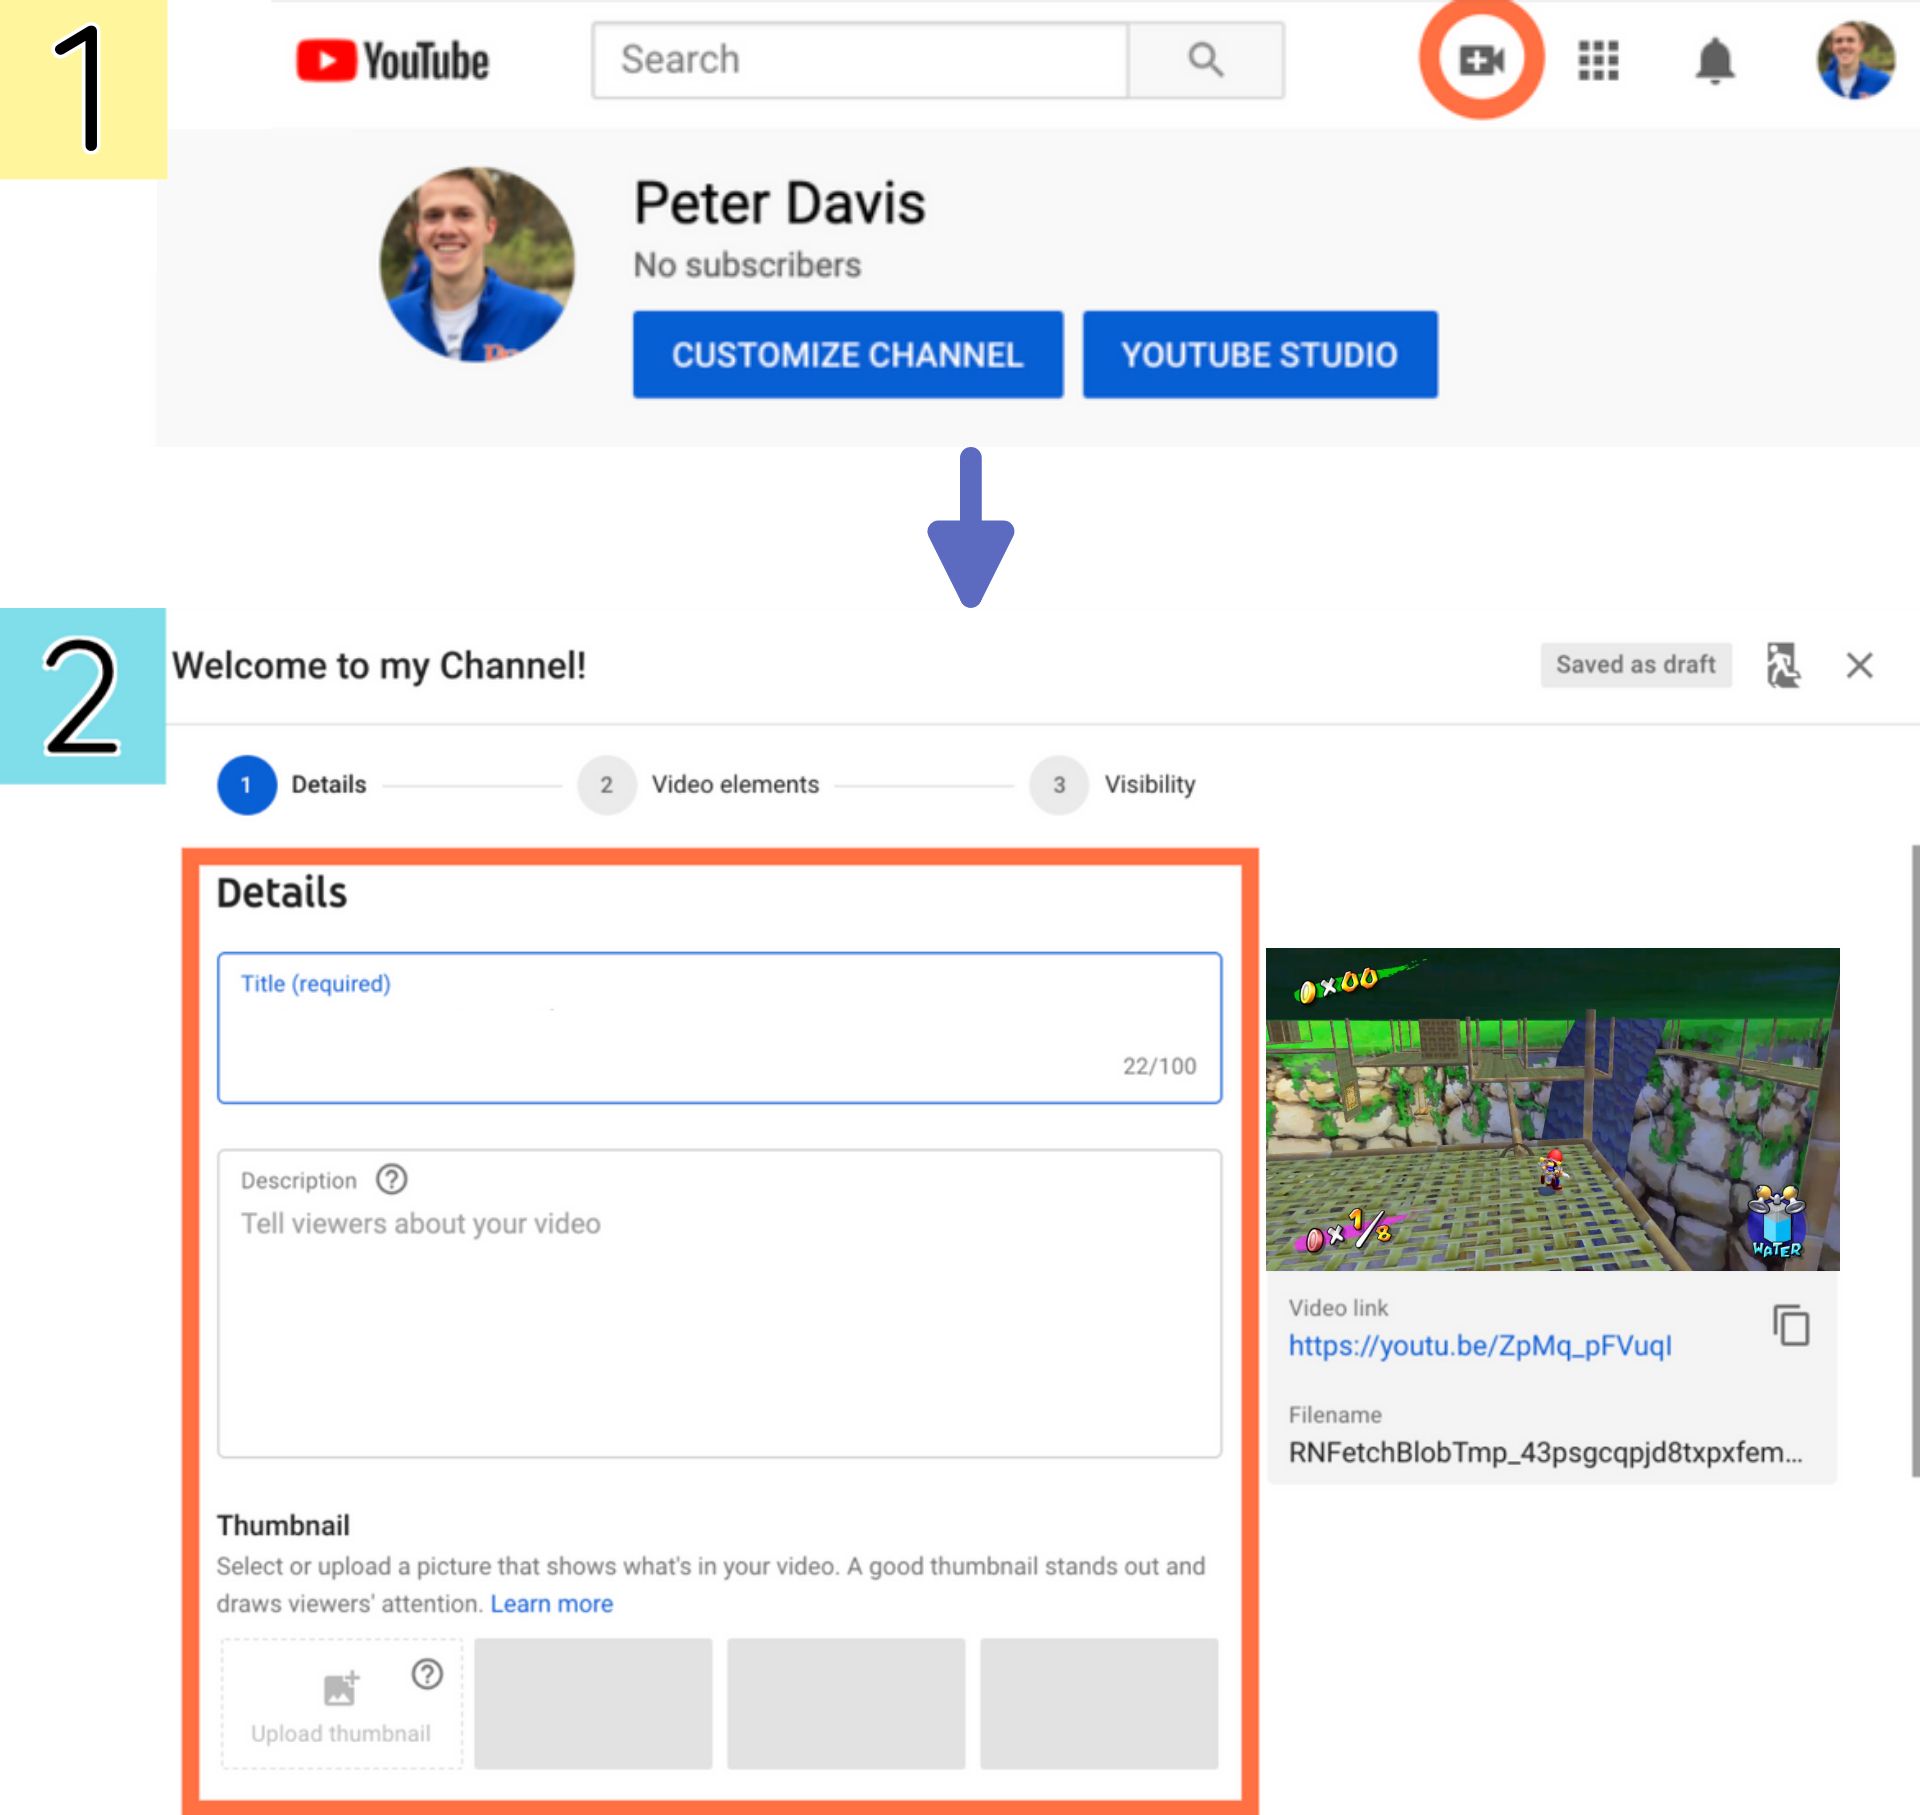
Step 4: Upload the saved video to YouTube
Once you’ve downloaded your Switch gameplay clip, head over to YouTube and make sure you’re signed into the correct account. Now, just click the Upload button near the upper right-hand corner (it looks like a little camera with a plus sign on it). Here, you can simply drag & drop the video file you downloaded right into YouTube’s pop-up window, edit the details of your post, and share it with the world!
For more product updates, content tutorials, and social media tips, subscribe to Kapwing App on YouTube or follow us on Twitter @KapwingApp. In the meantime, check out these related articles on gaming and streaming:
• How to Make Minecraft Videos Online
• How to Make Discord Emotes Online
• How to Make the Perfect Fortnite Thumbnail Online
• How to Make a Discord PFP Avatar Online