How to Make an Invisible Watermark Without Photoshop
Adding a watermark to your content to deter plagiarism doesn't have to interfere with it. Here's how to make an invisible watermark online.

Online platforms make it easier than ever for small creators to be affected by piracy, plagiarism, and content theft. The most common and effective way to avoid this is watermarking, which you’re most likely accustomed to seeing on professional photographs and stock images.
You don’t need to be a pro to use watermarks as a deterrent to digital plagiarism, and your safety measures don’t have to interfere with your content at all, either. It’s possible to make a watermark minor and insignificant enough that no one will ever know it’s there until it’s time to prove that you’re the original creator. I’ll show you how to make your own and add it to your content, without any money or editing experience:
- Upload your content to Kapwing
- Add watermark image or text
- Adjust watermark size, opacity, and color
- Export and download
Step 1: Upload Your Content to Kapwing
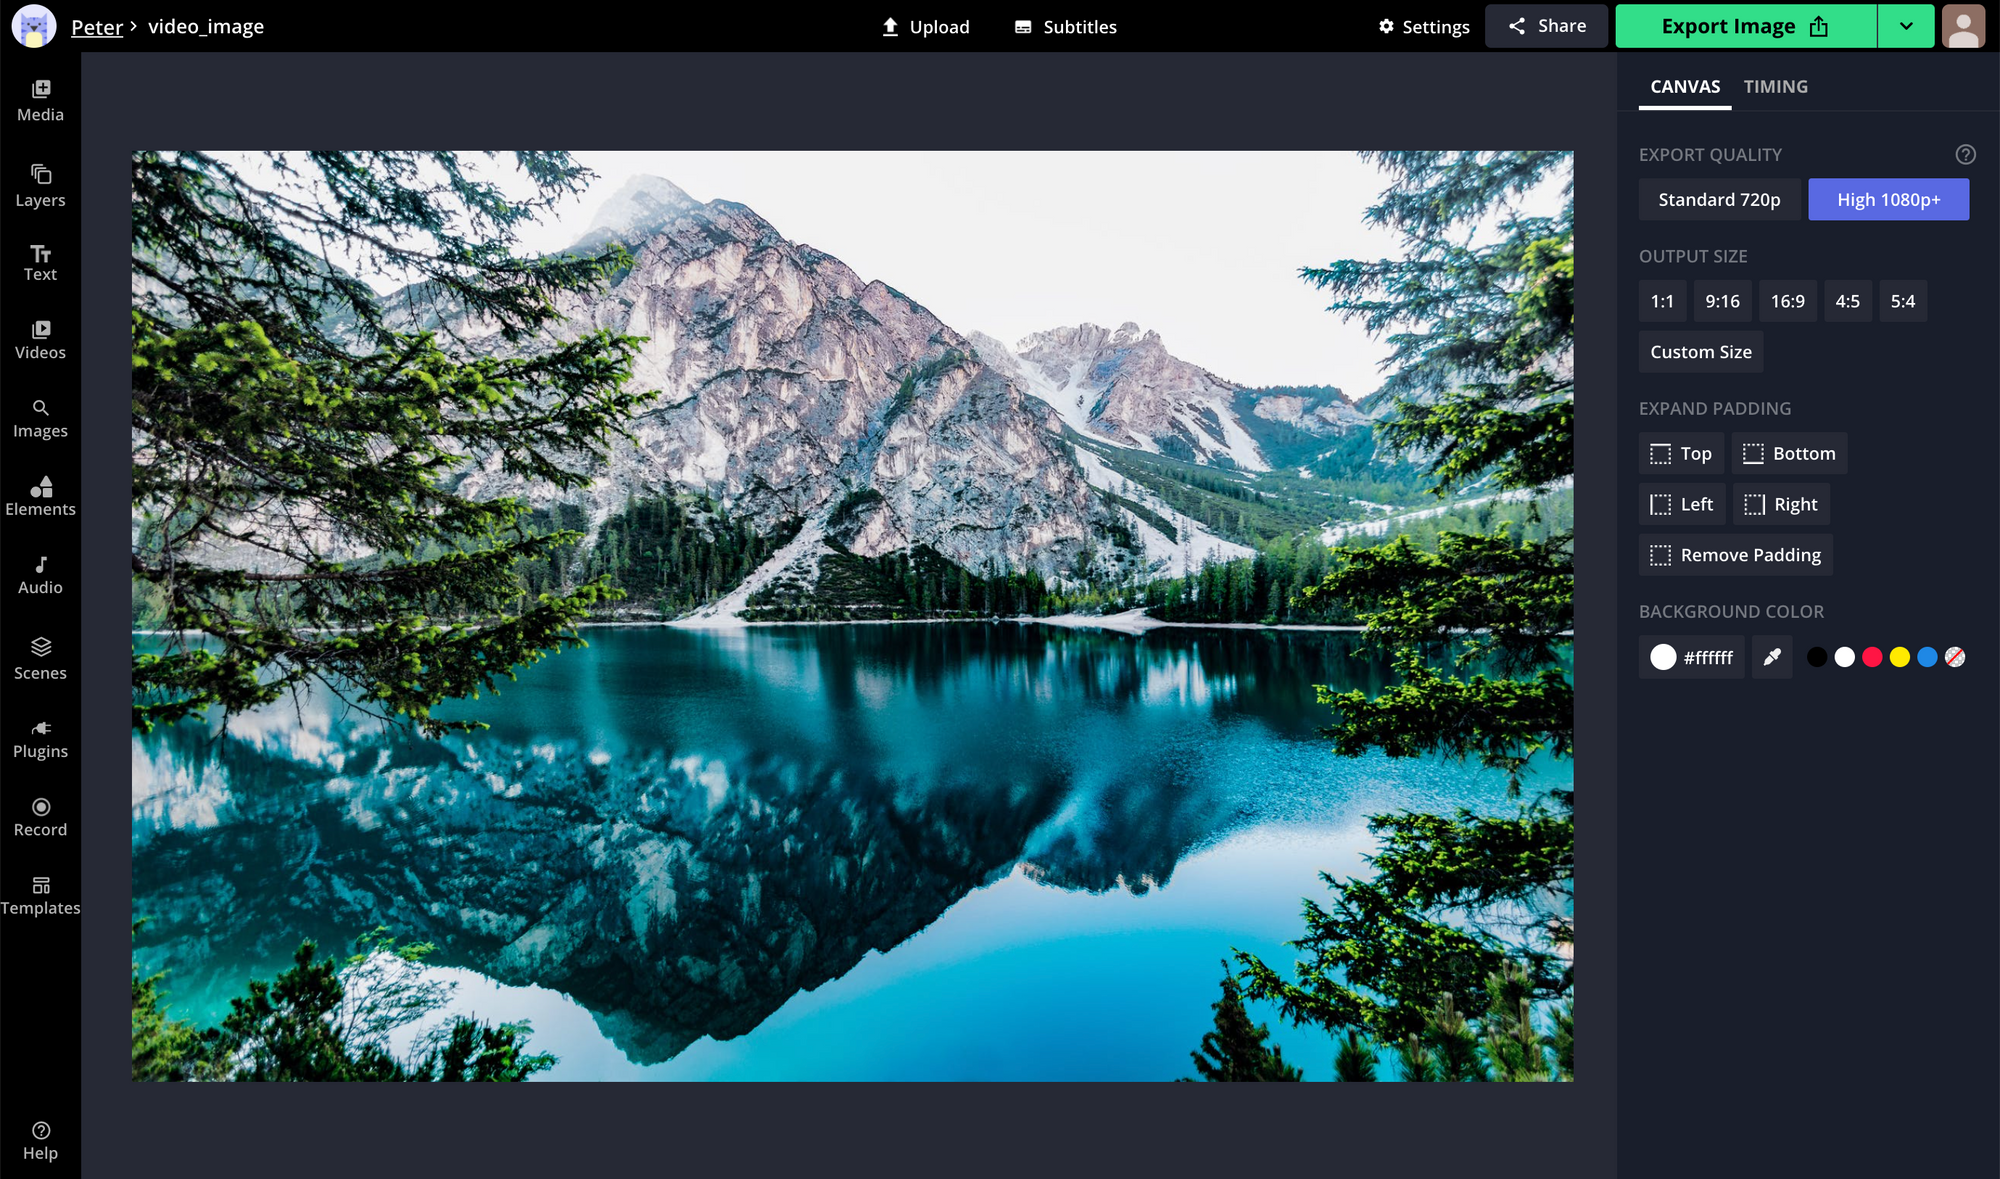
Start by finding the content you want to protect with your invisible watermark and head to Kapwing.com in your browser. Use the Get Started button to enter the Kapwing Studio and upload your photo or video by using the Upload button to browse through your files or using the URL bar to paste the link to content you’ve stored online. Give Kapwing a couple seconds to upload your content (up to a minute for longer videos) and you’re ready to start editing.
Step 2: Add Watermark Image or Text
A watermark can be anything: a logo, signature, word, copyright, or emblematic image. If you already know what you’ll use, click the Upload button again to bring it into the Studio, or use the Text tool on the left-side menu to add a text box watermark.
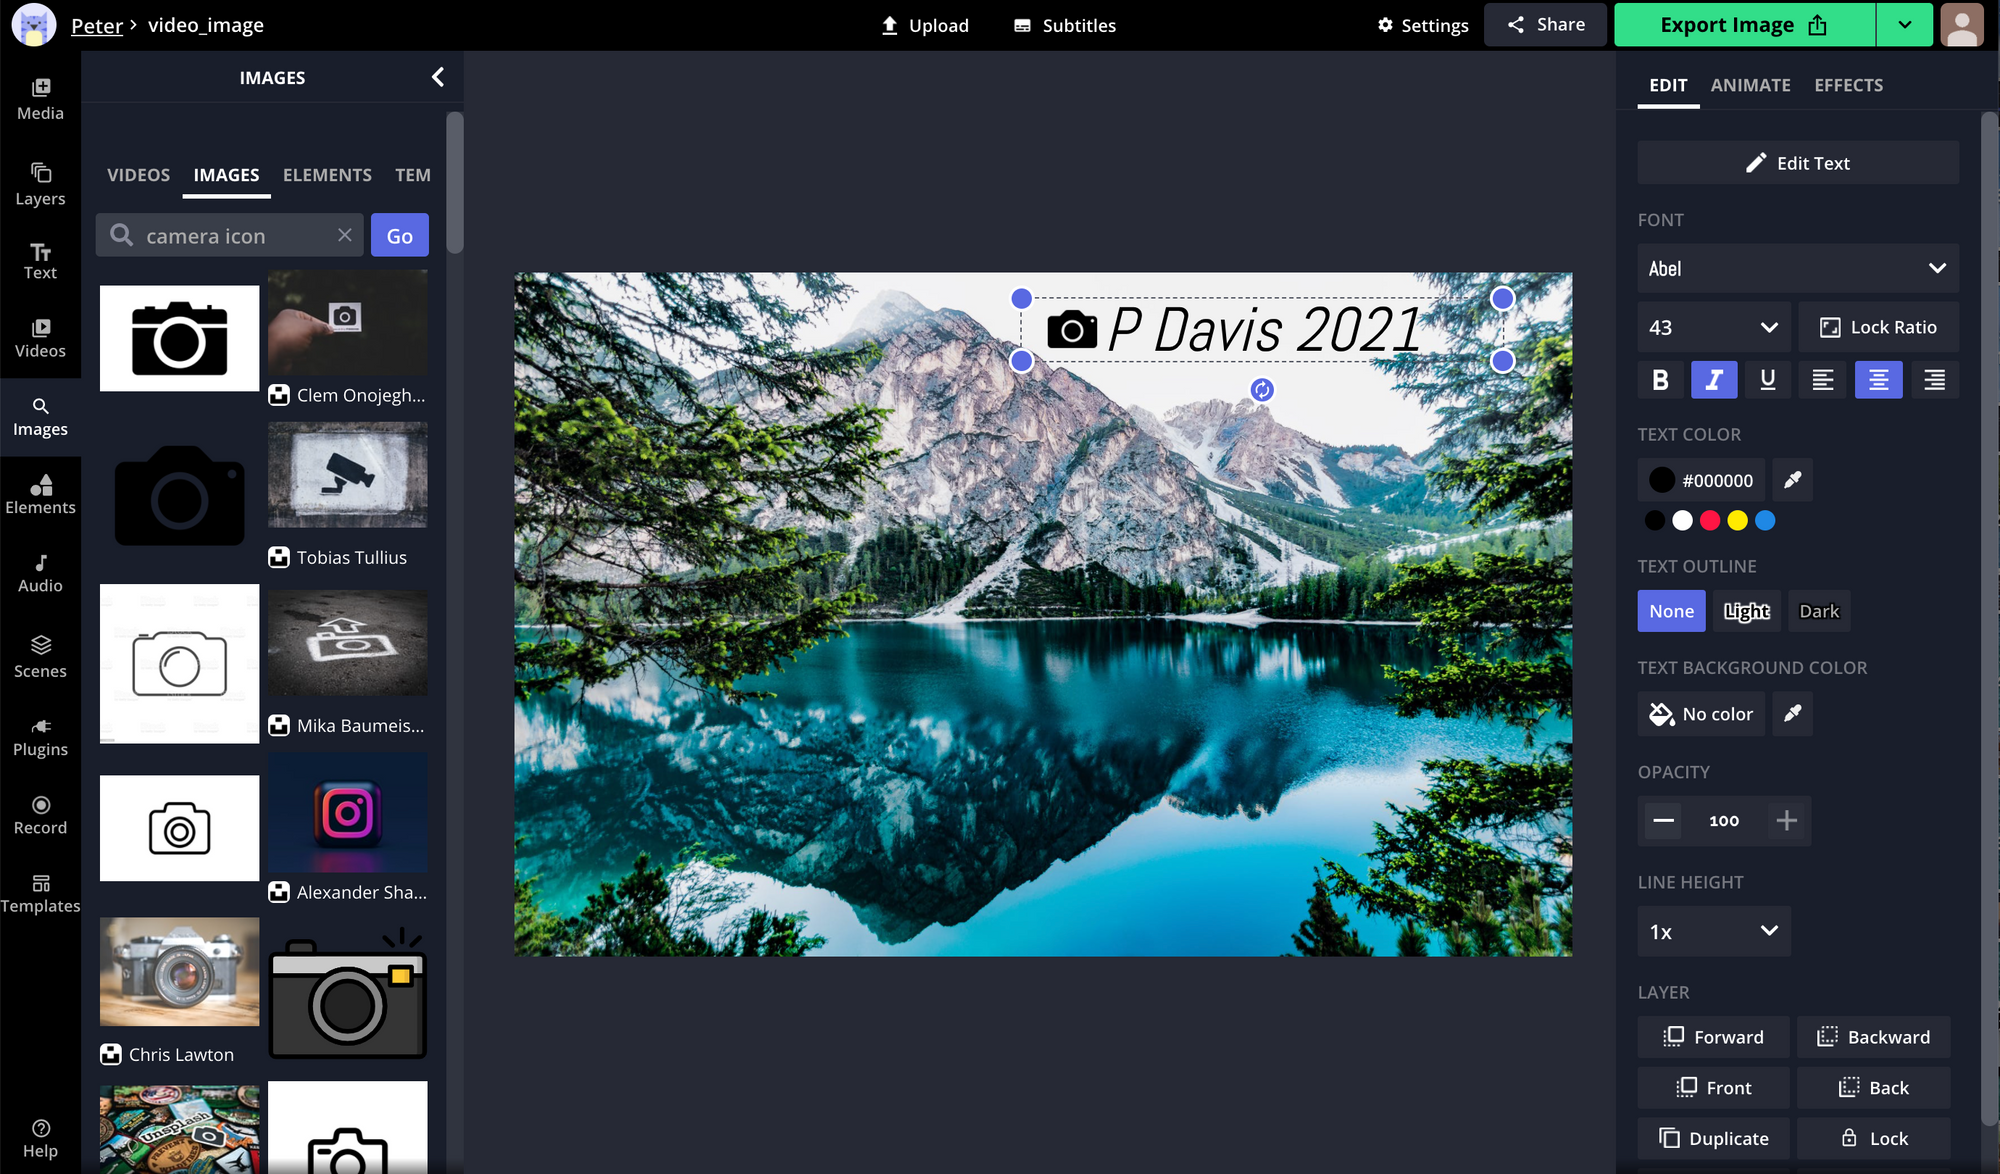
If you’re not sure what you want to use for your watermark, you can search for the right thing using the Images tab on the left and experiment with different text options using the Text tab. If you find the right image to use in a watermark icon, I recommend removing the background using the Erase tool, so it’s easier to make it invisible on your content. If you’re using a text watermark, you can use the editing tools on the right side of the Studio to adjust its font, color, style, and outline, and even add effects like drop shadows. We’ll get into the edits you’ll need to make in step 3, but start by making your text watermark look the way you want.
Step 3: Adjust Watermark Size, Opacity, and Color

Once you’ve created your watermark, it’s time to make it invisible. Although size is the most obvious change, let’s start with Opacity and Color. The Opacity tool in the Studio will allow you to make your layer literally invisible, but that’s not what we want – instead, select your watermark layer, move it to the area where you want it to be displayed, and click the Opacity toggles on the right side of the Studio until you get down into the 10-40% range. For colors and shades close to the background, use higher opacity, and for colors and shades with high contrast, use lower opacity.
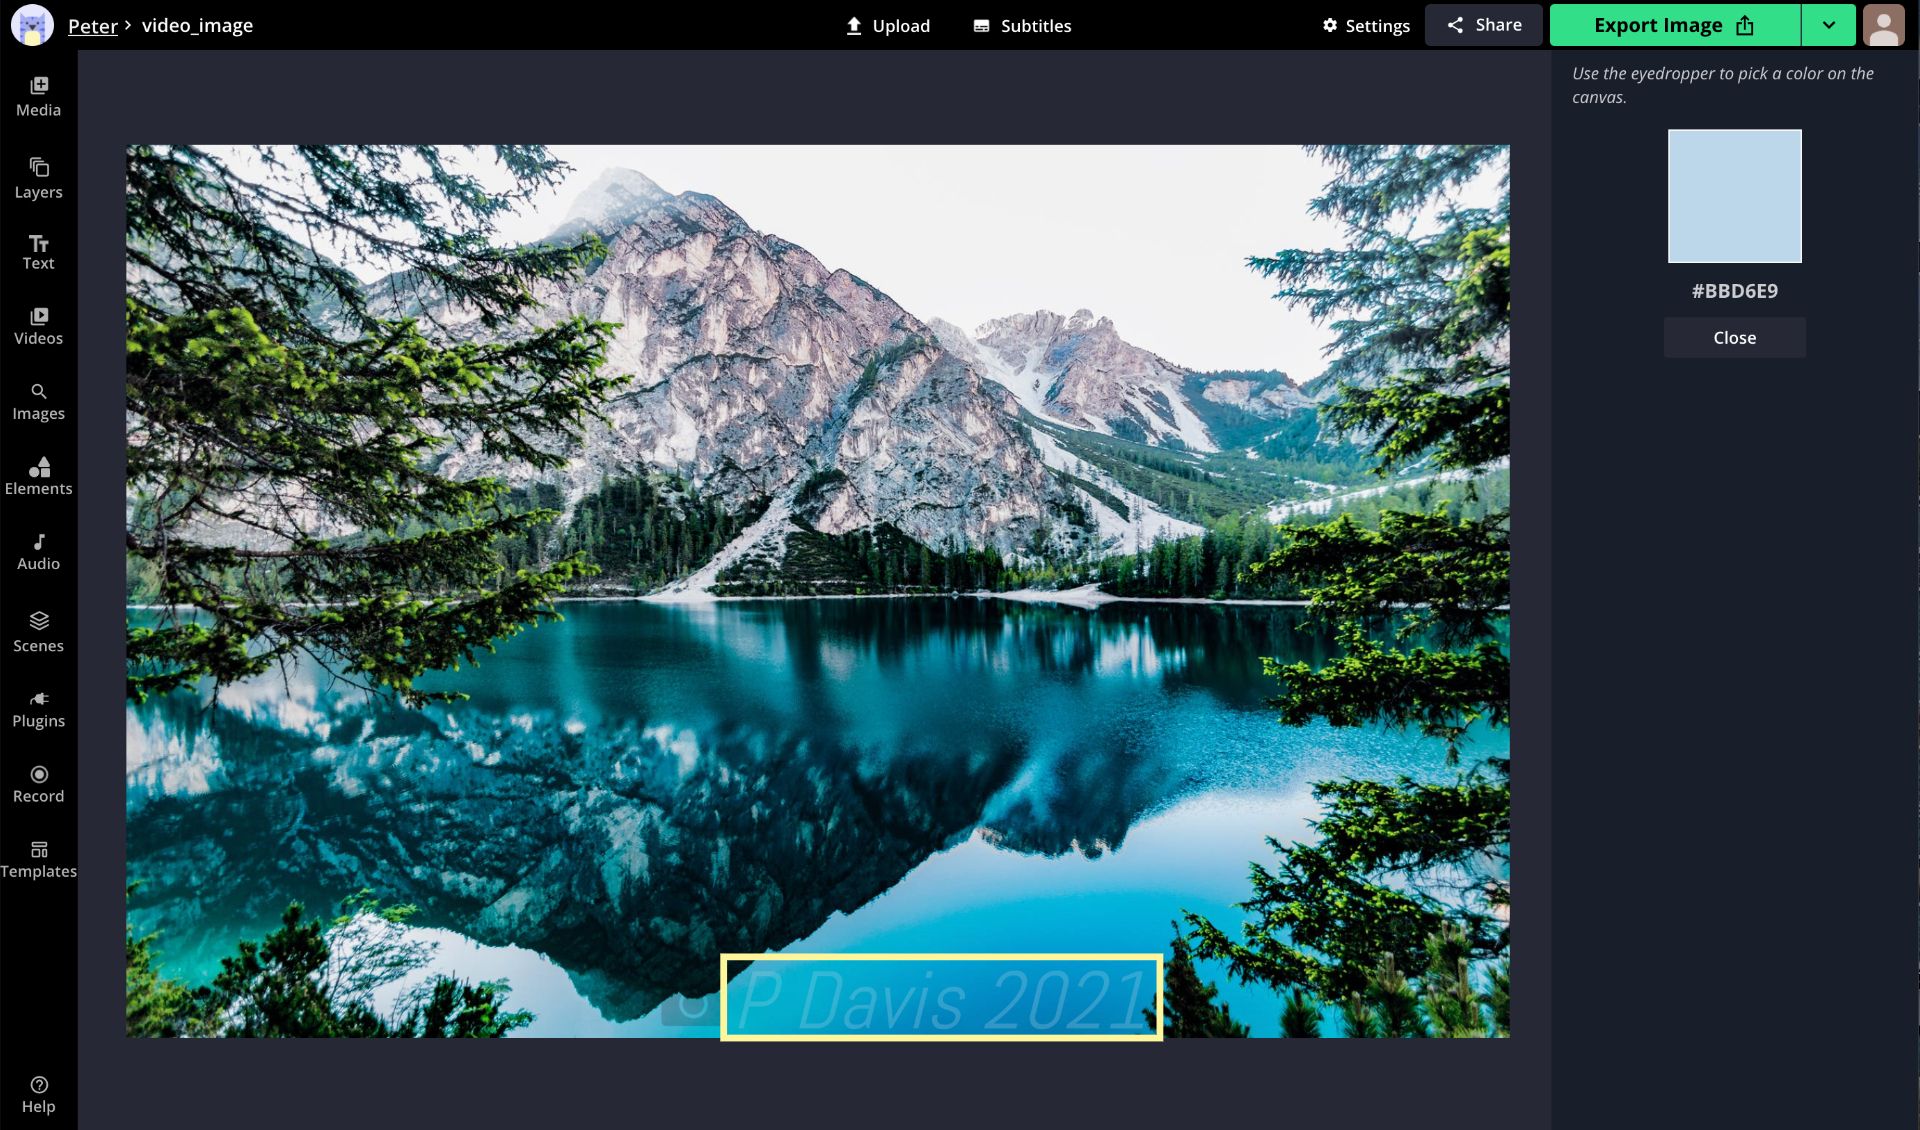
You can also adjust the color of your watermark layer directly, which is especially useful for text watermarks. Move your text to the area where you want to place it and use the eyedropper tool next to Text Color to set it to something near a hue in your image or video. This may take some trial and error, because you want your text to be distinguishable from the background, but not by too much.
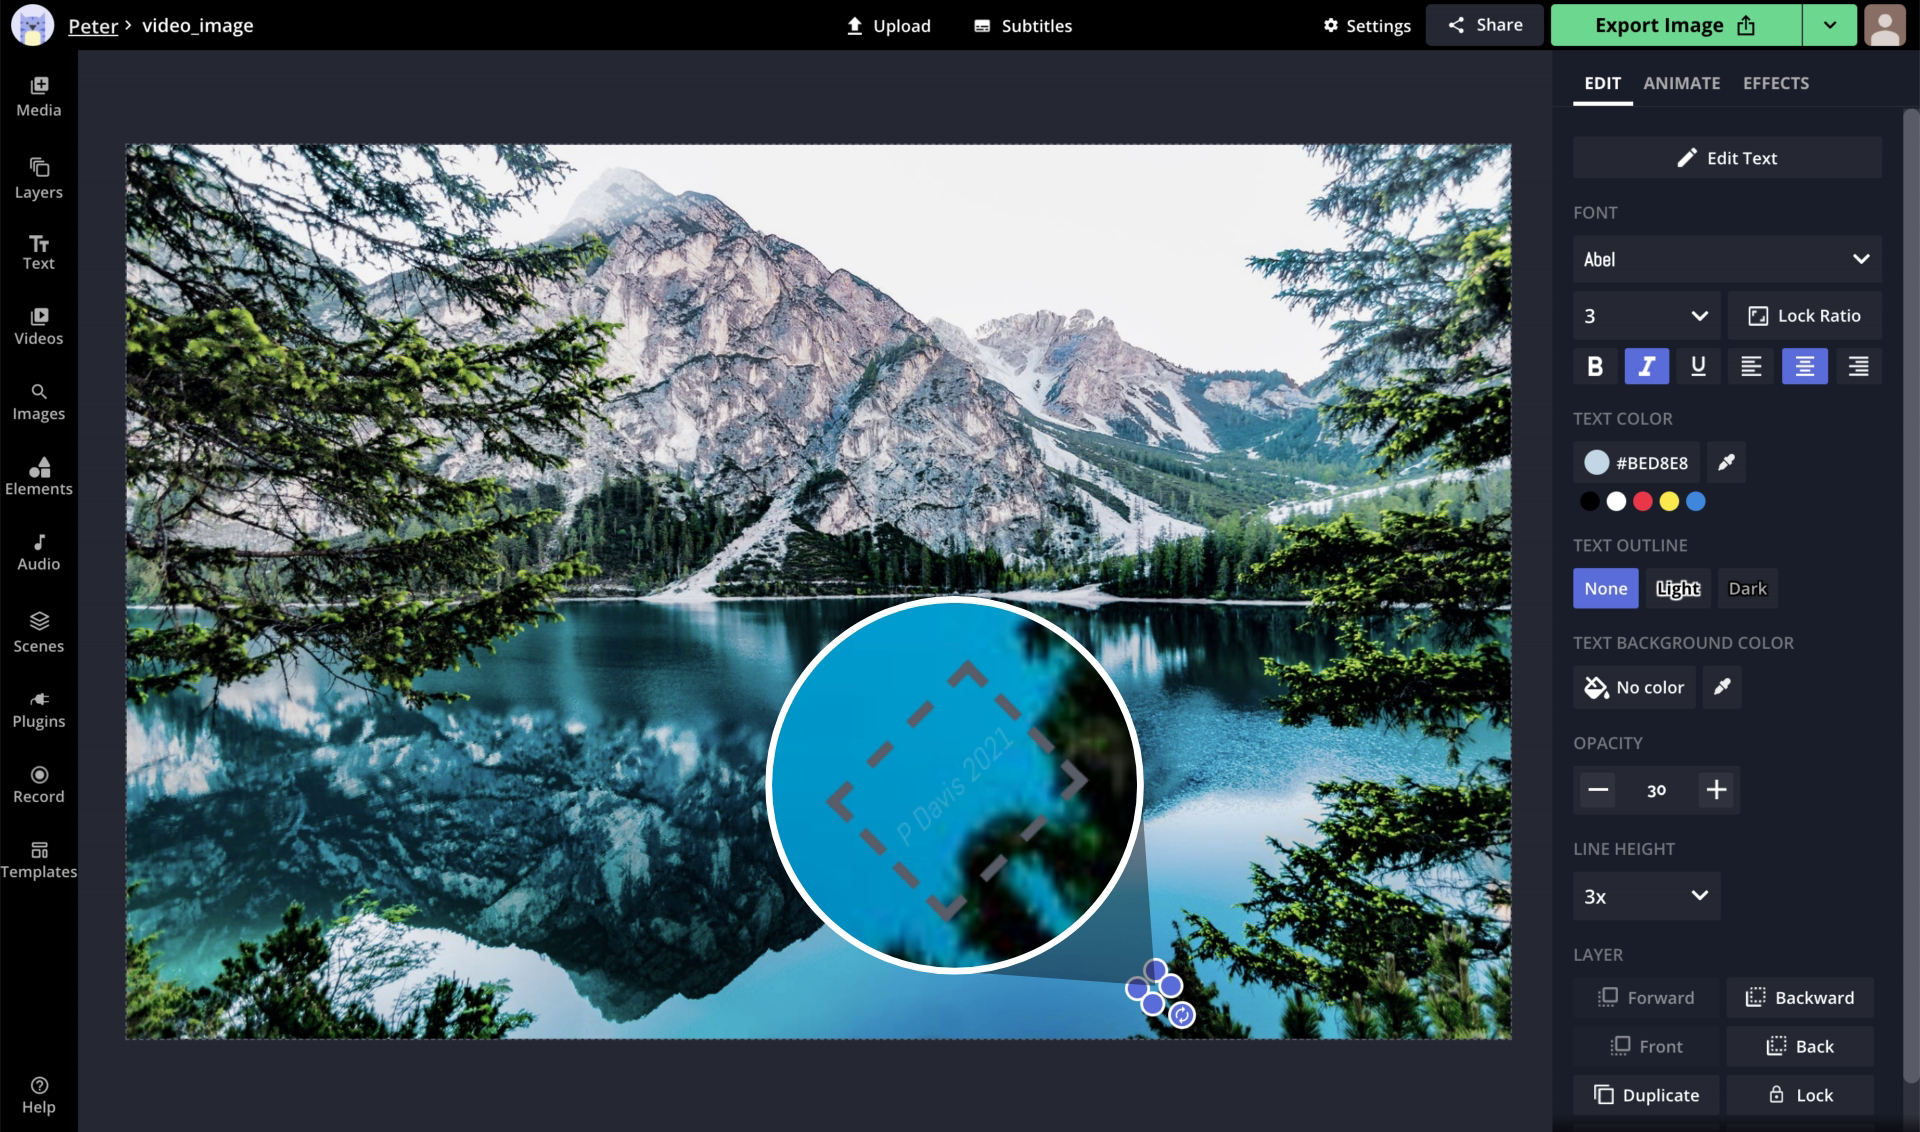
Once you’ve initially set your watermark’s opacity and color, it’s time to make it tiny. If your watermark is an image, select Lock Ratio on the right and drag one of its corners as close as possible to the opposite one – you may want to hold down the Command key, or CTRL on Windows, to turn off layer snapping so it’s as small as possible. For text watermarks, set Line Height to 3, then bring the corners as close to each other as you can – depending on the font you used, you should
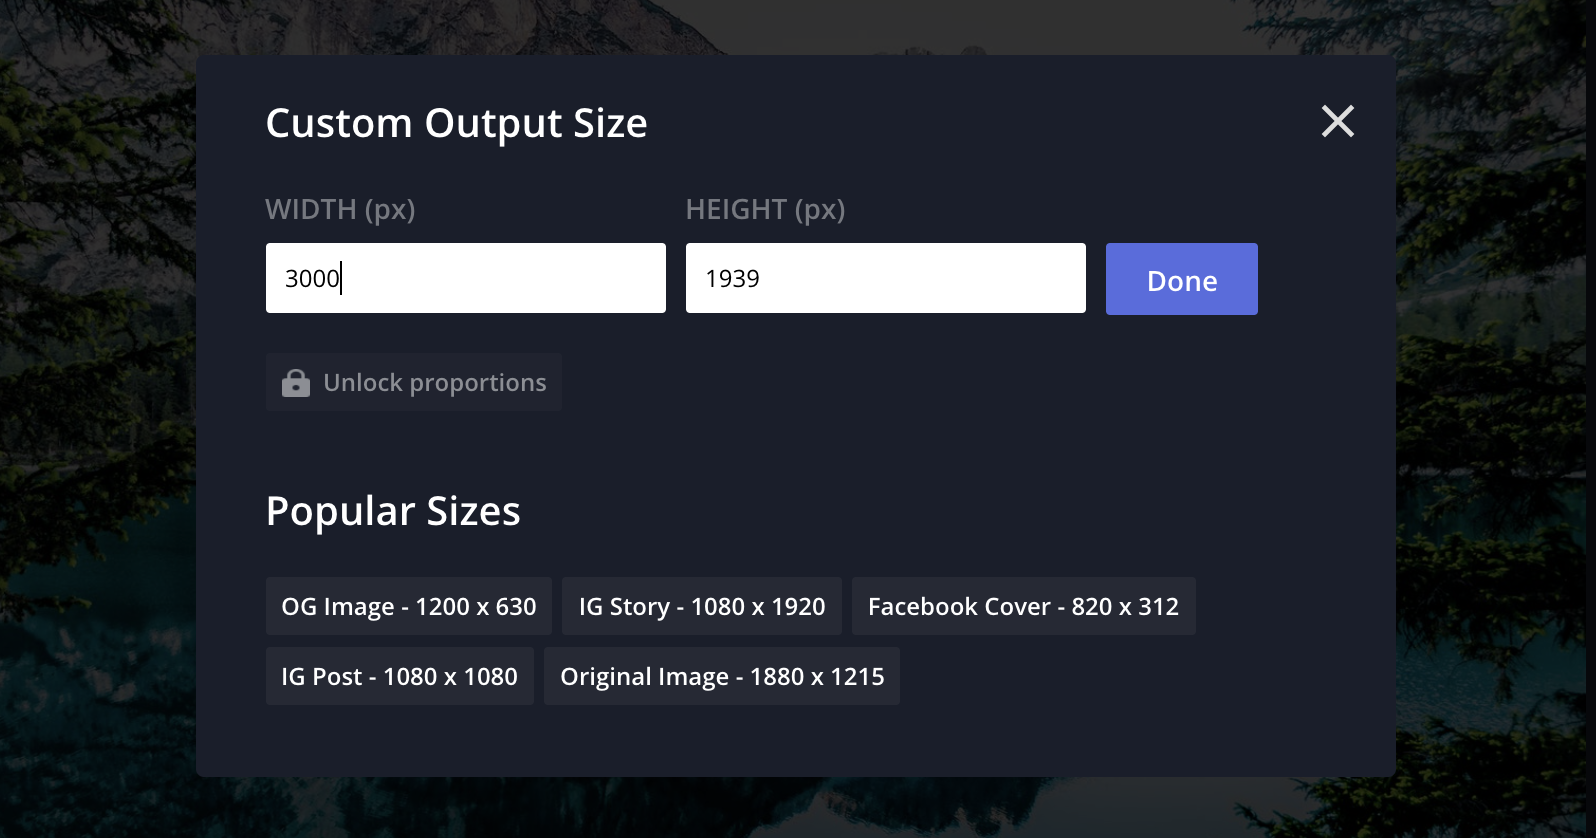
I also recommend exporting your content at the maximum size, especially if its resolution isn’t particularly high. To accomplish this, click Custom Size under Output Size on the right, choose Original Image, then re-enter the Output Size editor to select Lock Proportions and set the longer of the two sides to 3000 pixels.
Step 4: Export and Download
Once you’re done creating and editing your watermark, position it where you want it to be placed on your content and use the Export button in the top right to process your watermarked project. Once it’s done processing, use the Download button to save it to your device, or use the sharing options to post it directly to social media.

When you’ve downloaded it to your computer, open it and make sure you can make out your watermark when zooming in far. If it’s not quite visible no matter how much you zoom in, re-enter the Studio editor and increase its size, opacity, or color contrast by a little bit.
I also want to note that for highly professional uses, the digital watermarking company Imatag provides industry-leading invisible watermarking technology, but their pricing is likely prohibitive for smaller amateur creators.
I hope this article helps you add barely traceable watermarks to protect your content from plagiarism without interfering with it visually! For more tips and tutorials on creating great digital content in 2021, check out the Kapwing YouTube channel, or read through some related articles on content safety and security:
• How to Add a Watermark to a Word Document
• What Is a Watermark? How to Make Your Own
• How to Add a Custom Transparent Watermark to Photos
• How to Create a Watermark for Your YouTube Channel