How to Make a Google Classroom Banner
Get your students excited for a new semester with a custom Google Classroom banner. In this article, I'll show you how to make a compelling banner, then upload it to your classroom.
The design of a classroom can be a source of inspiration and creativity for students. Teachers using Google Classroom can recreate a similar feeling by adding a custom banner.
Consider the impact book covers have on potential readers while brainstorming banner ideas. A cover with a striking design will urge you to flip the page while dull covers collect dust on the shelf. In this tutorial, I'll help you make a compelling banner students will be excited to see after joining your class. In case you're wondering, you don't need professional design skills or fancy software. All you need is a browser and a few ideas!
- Open Kapwing Studio
- Resize the background
- Customize the banner
- Export and download
- Upload to Google Classroom
Step One: Open Kapwing Studio
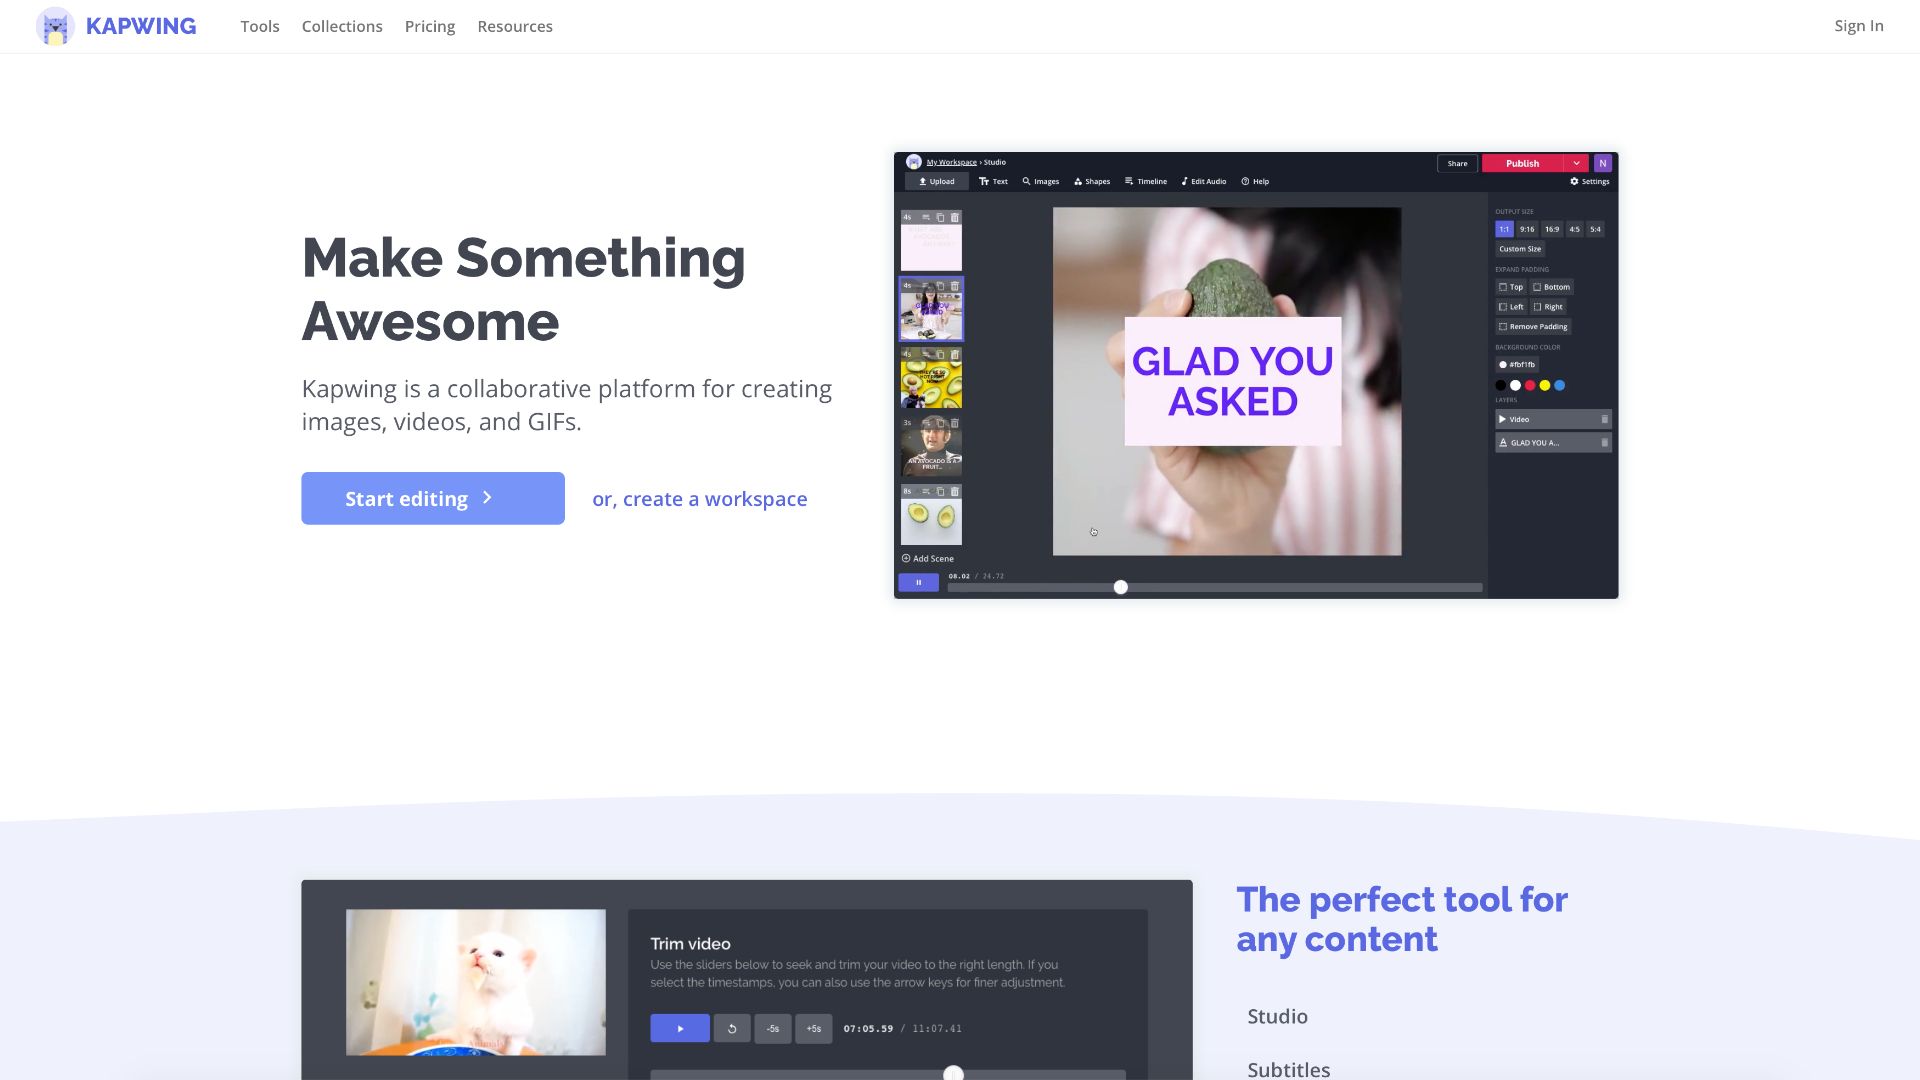
Head over to Kapwing, click start editing and start with a blank canvas to launch Kapwing Studio. This free online video editor can be used on any iPhone, Android, PC, or tablet. I highly recommend using a PC for this tutorial and a Chrome, Safari, or Firefox browser will do.
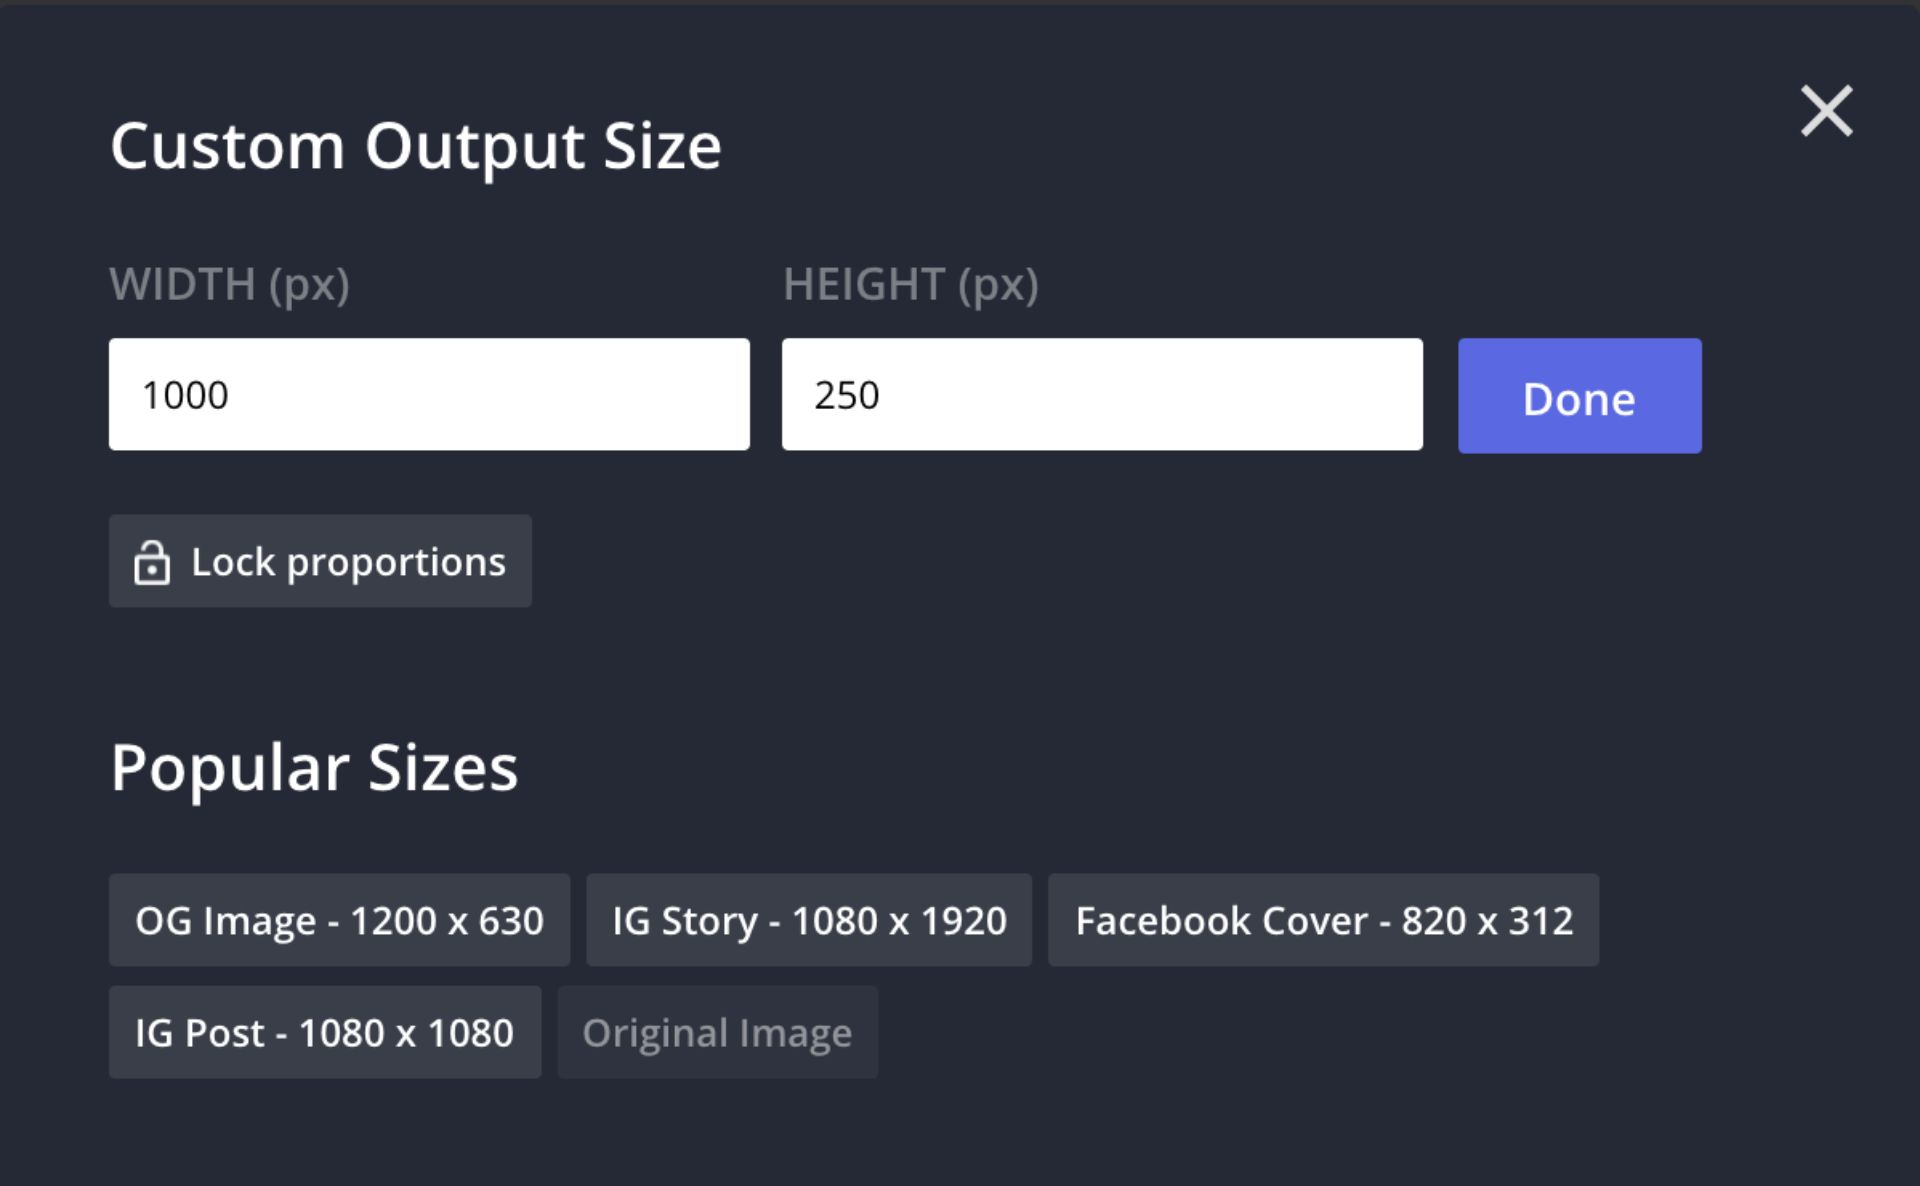
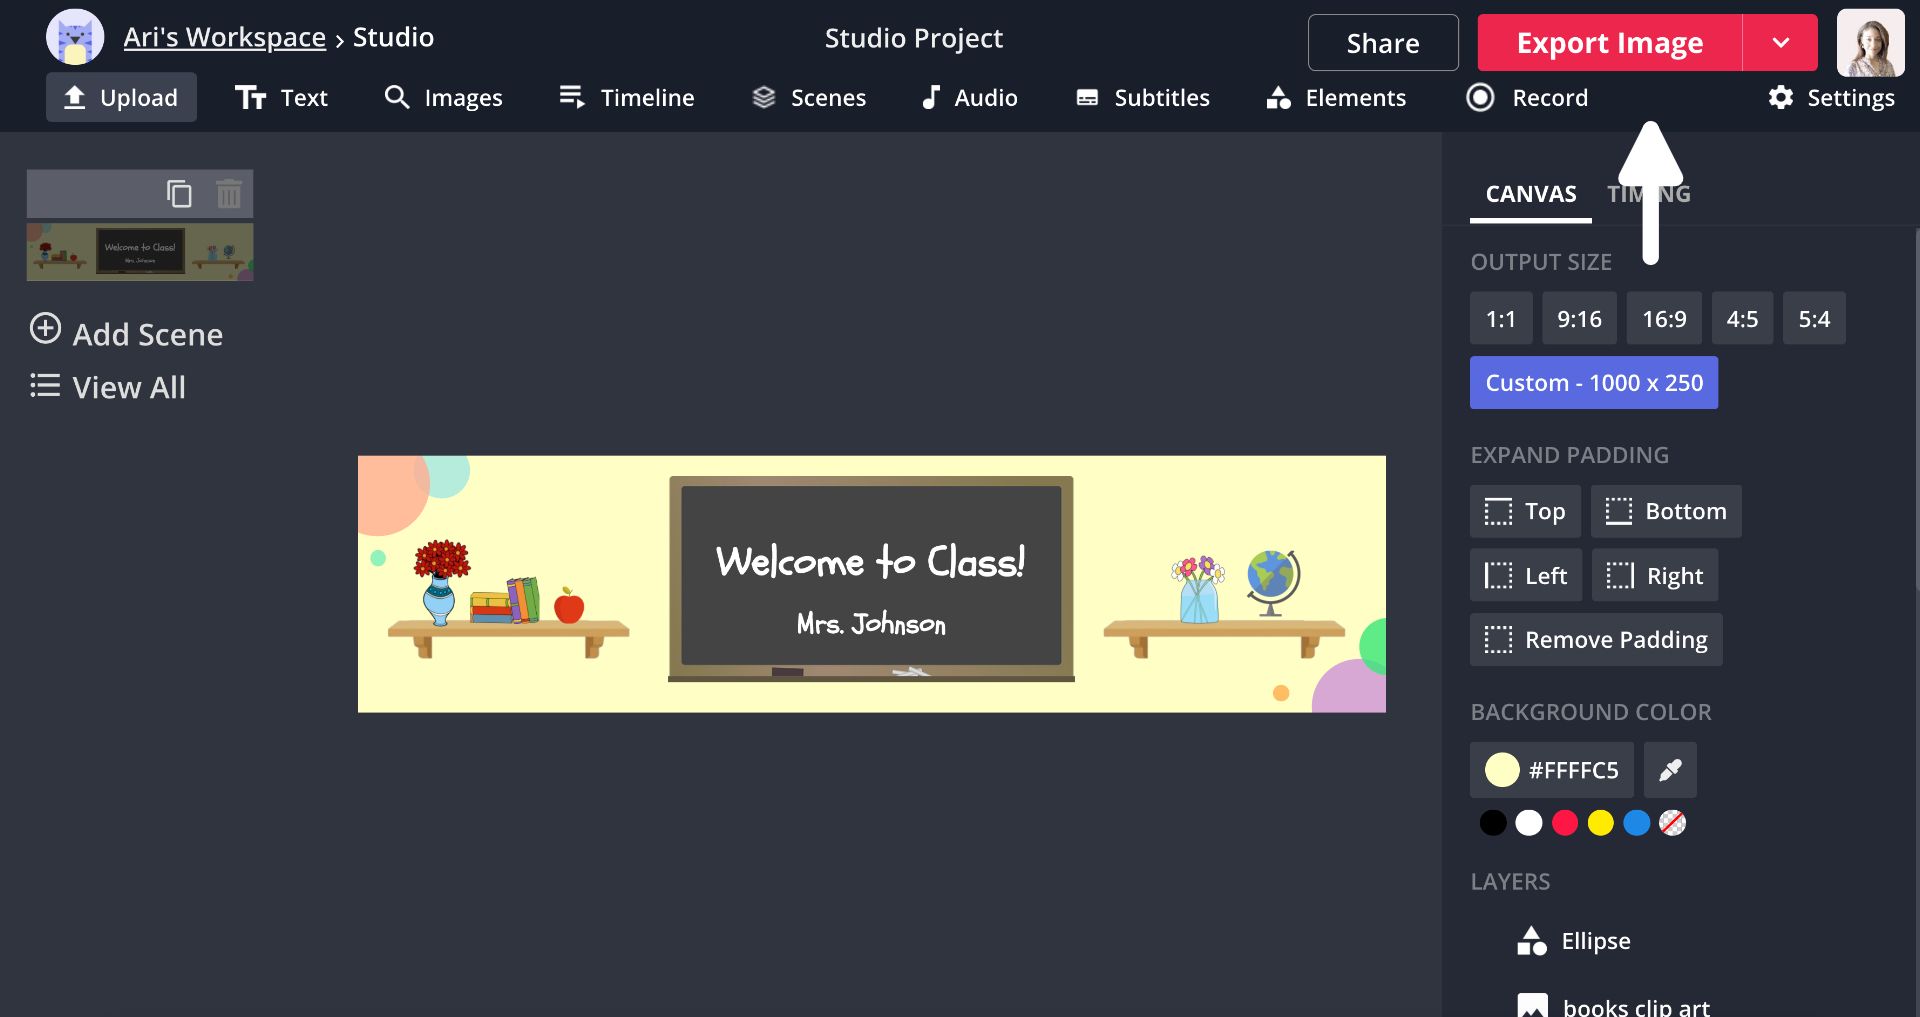
Step Two: Resize the Background
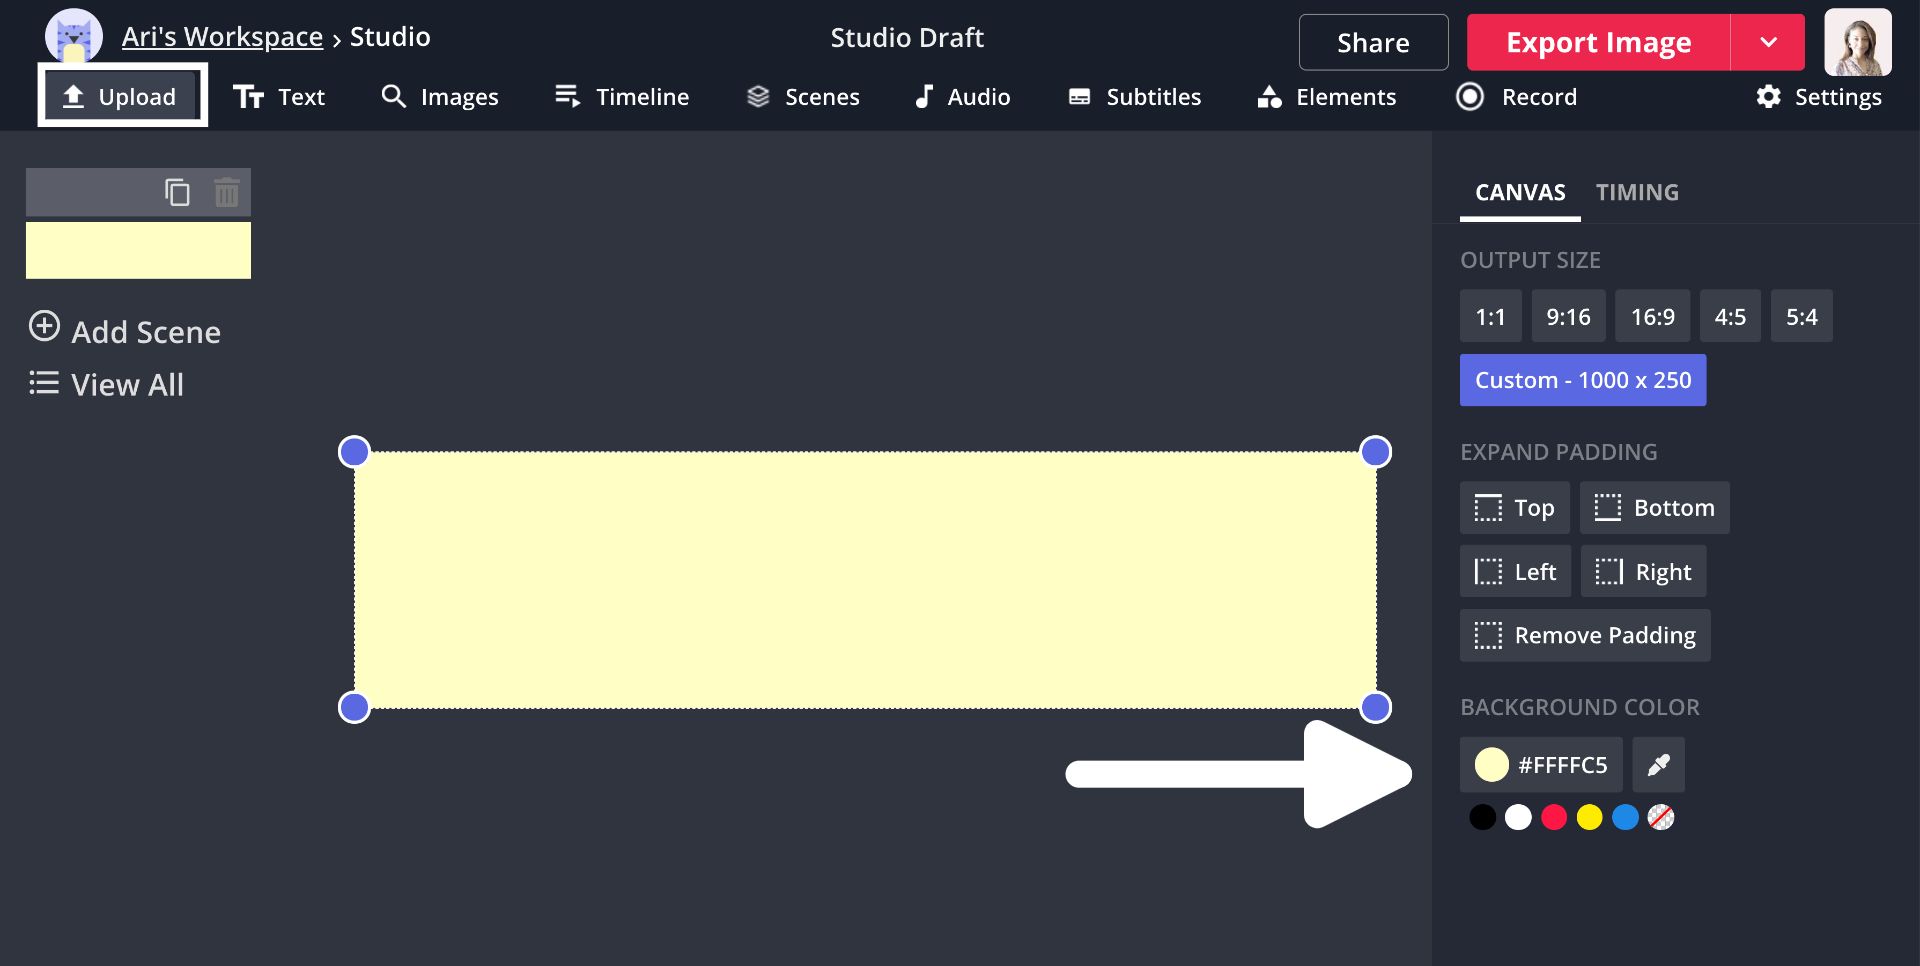
Let's make sure the background is the right size for Google classroom. On the right side of the Studio, click custom under output size and change the width and height to 1000 x 250 pixels. You can lock the proportions to maintain the aspect ratio.
Step Three: Customize the Banner
There's one thing to consider before customizing the banner. Google adds a black overlay onto the entire banner so avoid using dark text and pictures. I'm going to start by changing the background color to yellow, but you can upload a background too. Click upload, drag and drop an image, or paste an image URL to add a background. If you want to search for backgrounds, click images, then image search and type a query.
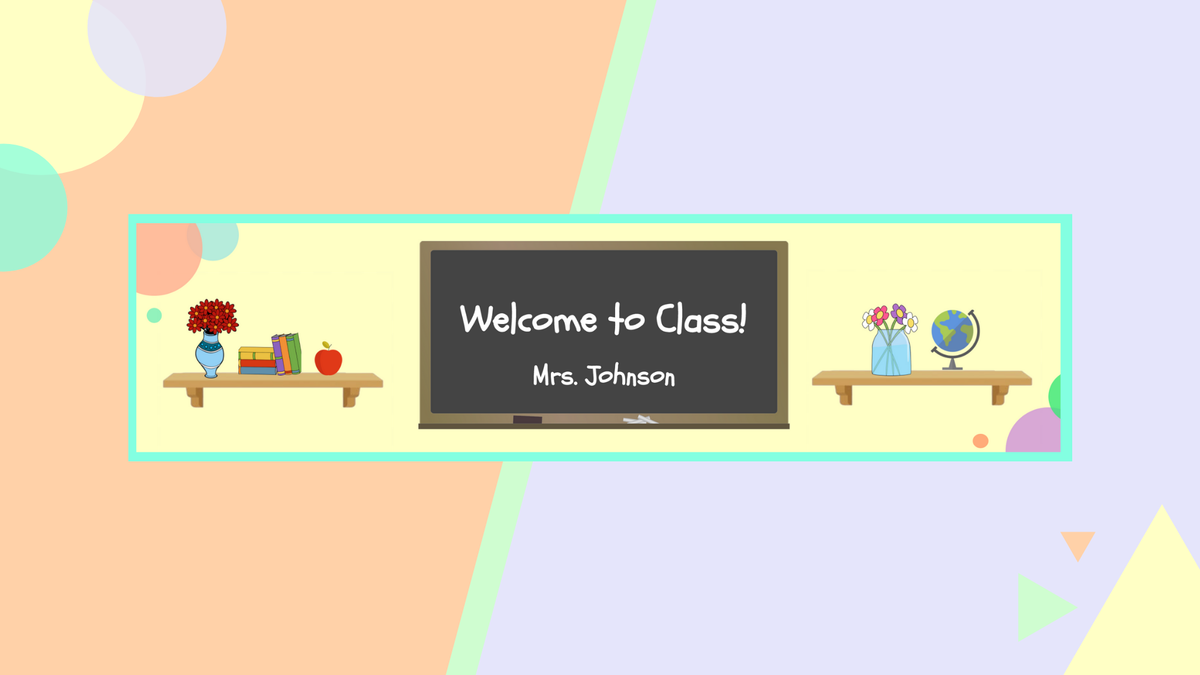
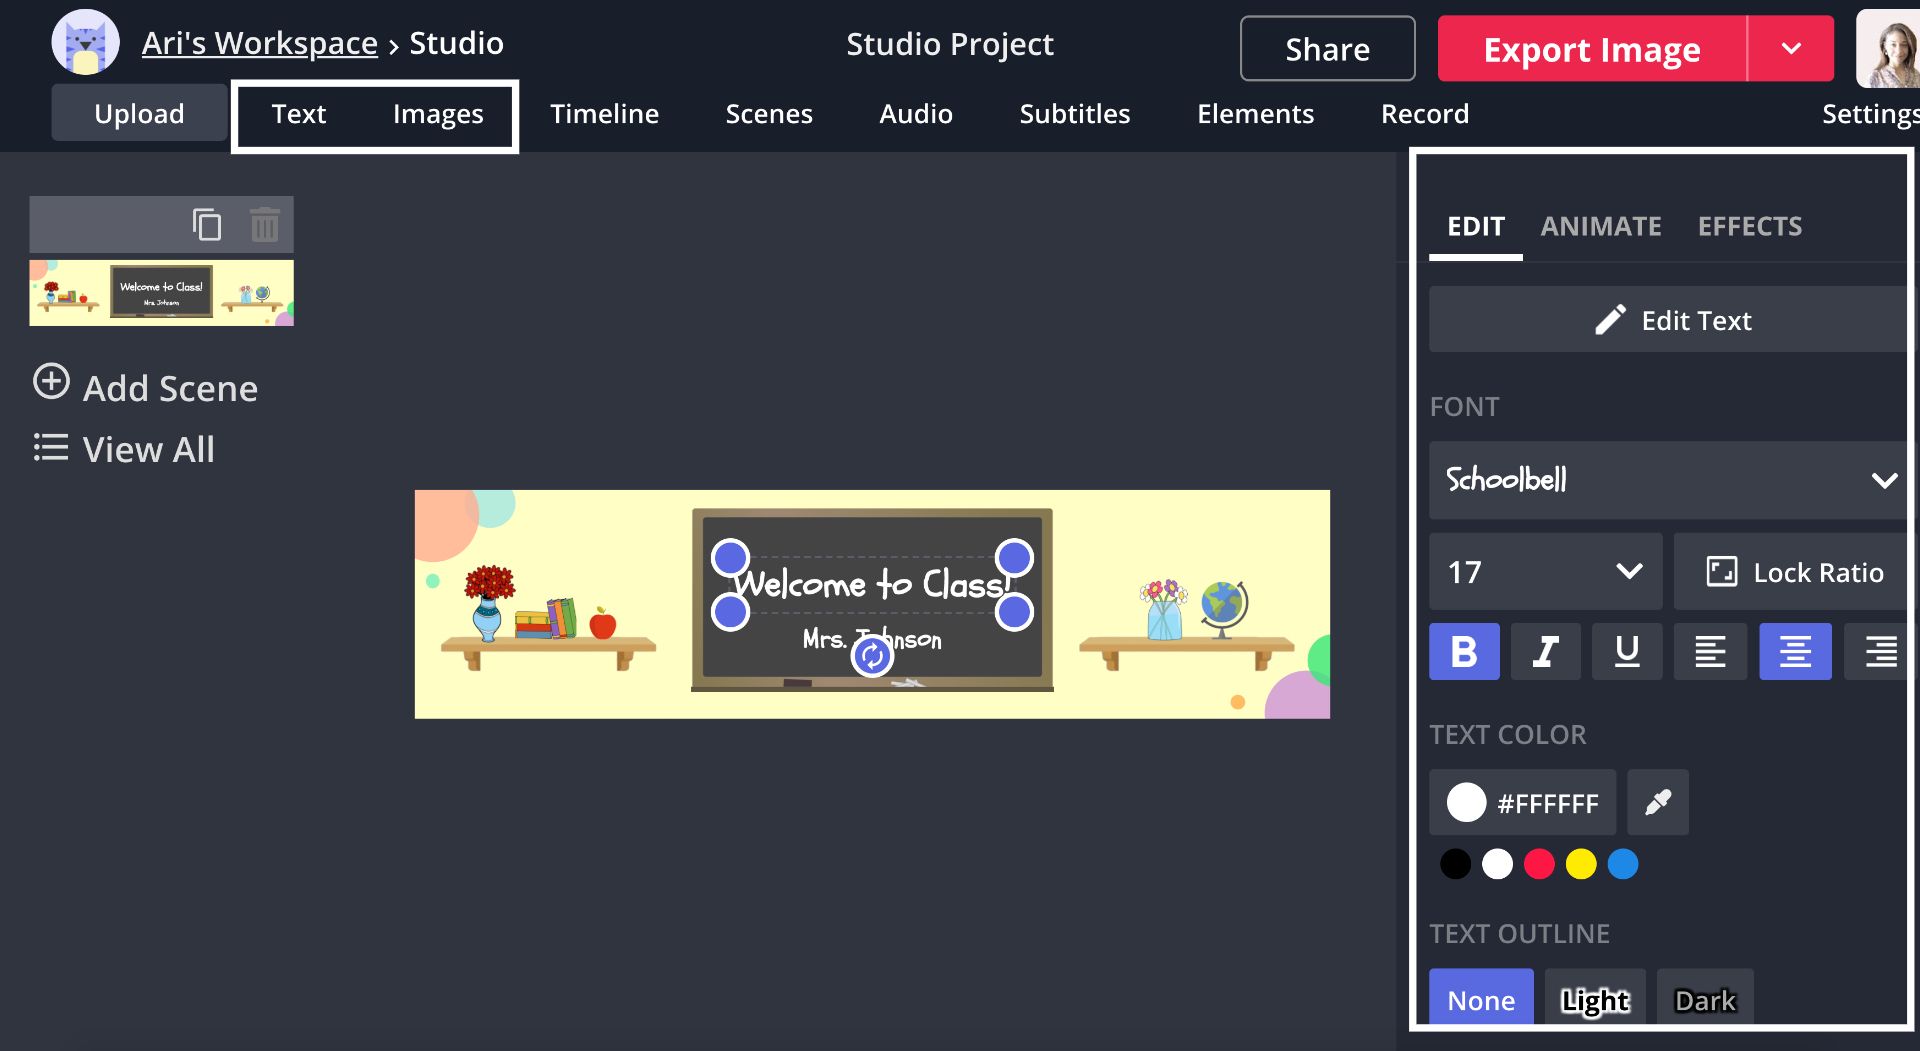
Let's insert a few pictures to liven up the background. I used the image search tab to find a chalkboard, and placed it in the center. Then, I added two shelves and put them on each side of the chalkboard.

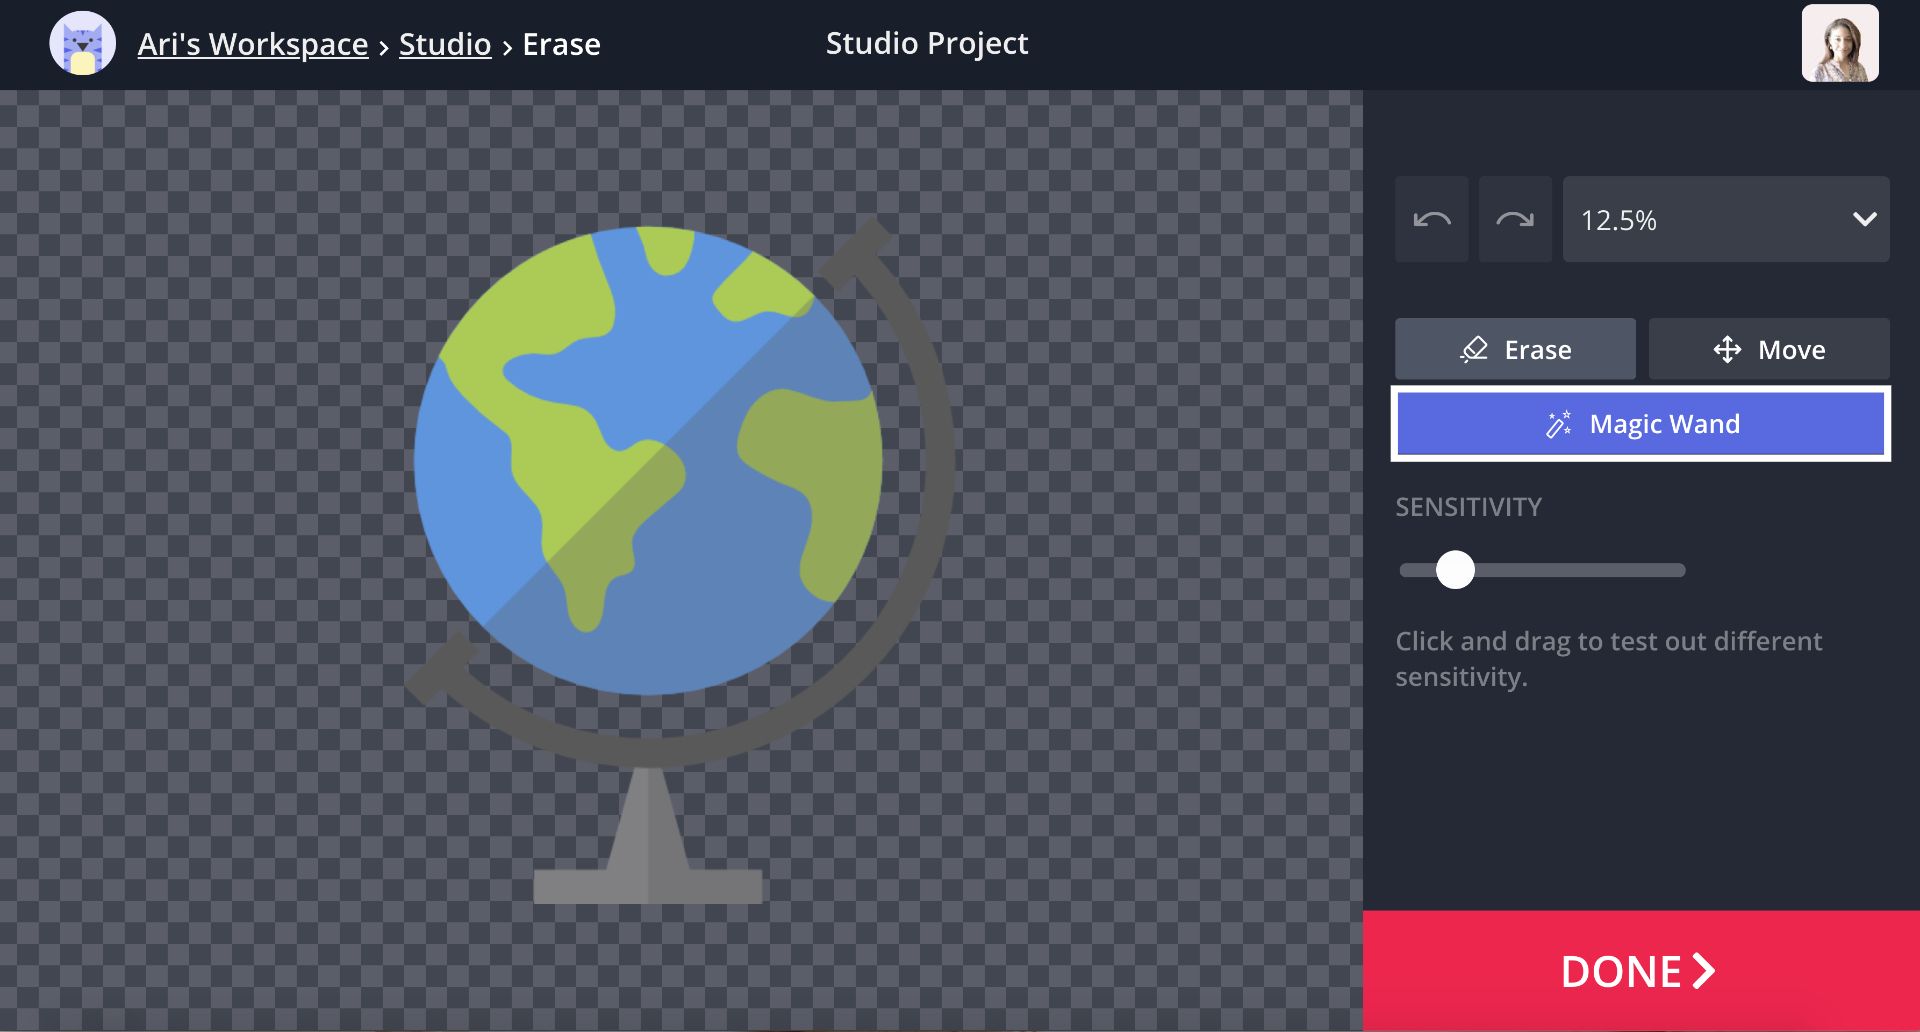
For a little decoration, I put popular classroom items on each shelf. A globe, apple, books, crayons, and pencils are a few ideas. Add "png" at the end of your query to pull up pictures with transparent backgrounds.
Science teachers could search for planets, test tubes and microscopes to set the tone. If you're a reading teacher, try searching for bookmarks, highlighters, and glasses. If you need to remove the background from an image, click erase and use the magic wand to select and delete the background.
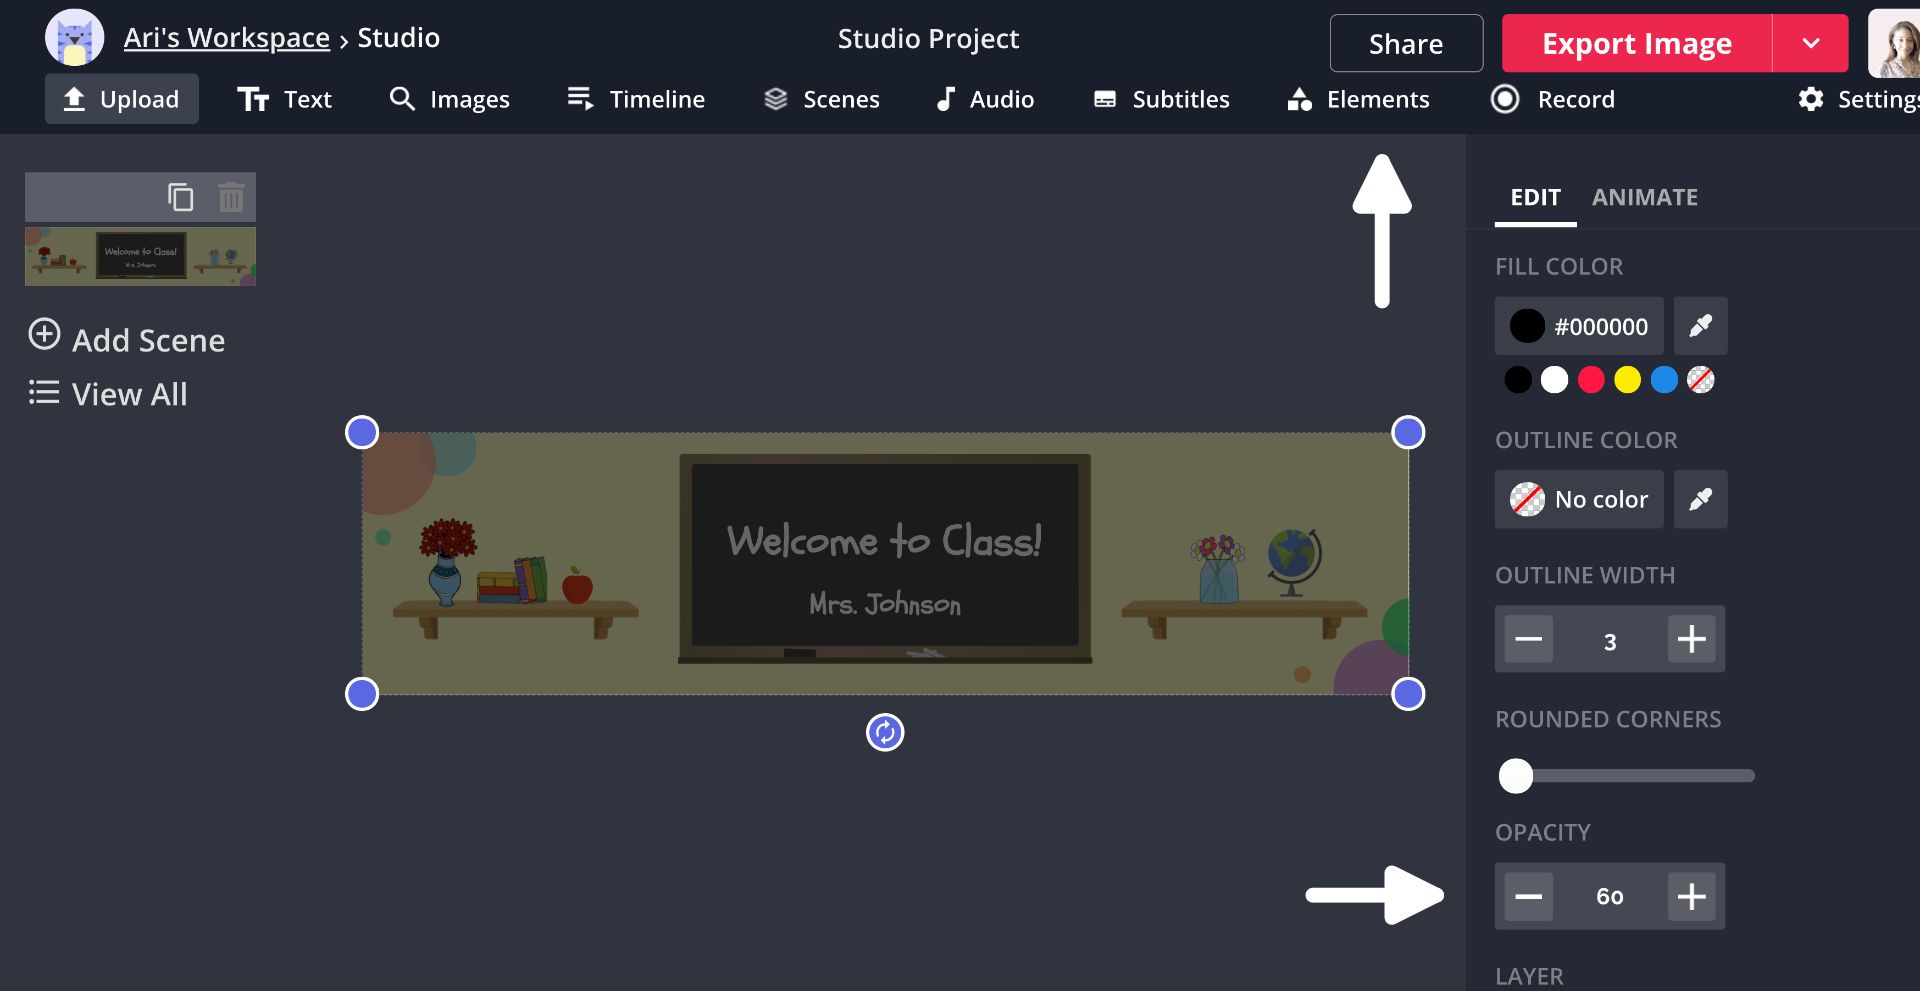
Click text and change the font, color, and size to add a message to your banner. Finally, I added multi-colored circles in the corners to create a border for my banner.
This step is optional, but I recommend it to ensure your banner will be visible on Google Classroom. Click elements and add rectangle with a black fill color. Place it over your entire banner and lower the opacity to 60. This is how your banner will appear after uploading it to your classroom. Remember to remove the rectangle before you click export image!
Step Four: Export and Download
Review your Google Classroom banner and add any final touches. When you're finished, click export image at the top right corner of the Studio. Remove the watermark by creating a free Kapwing account using your Facebook or Google login credentials.
Step Five: Upload to Google Classroom
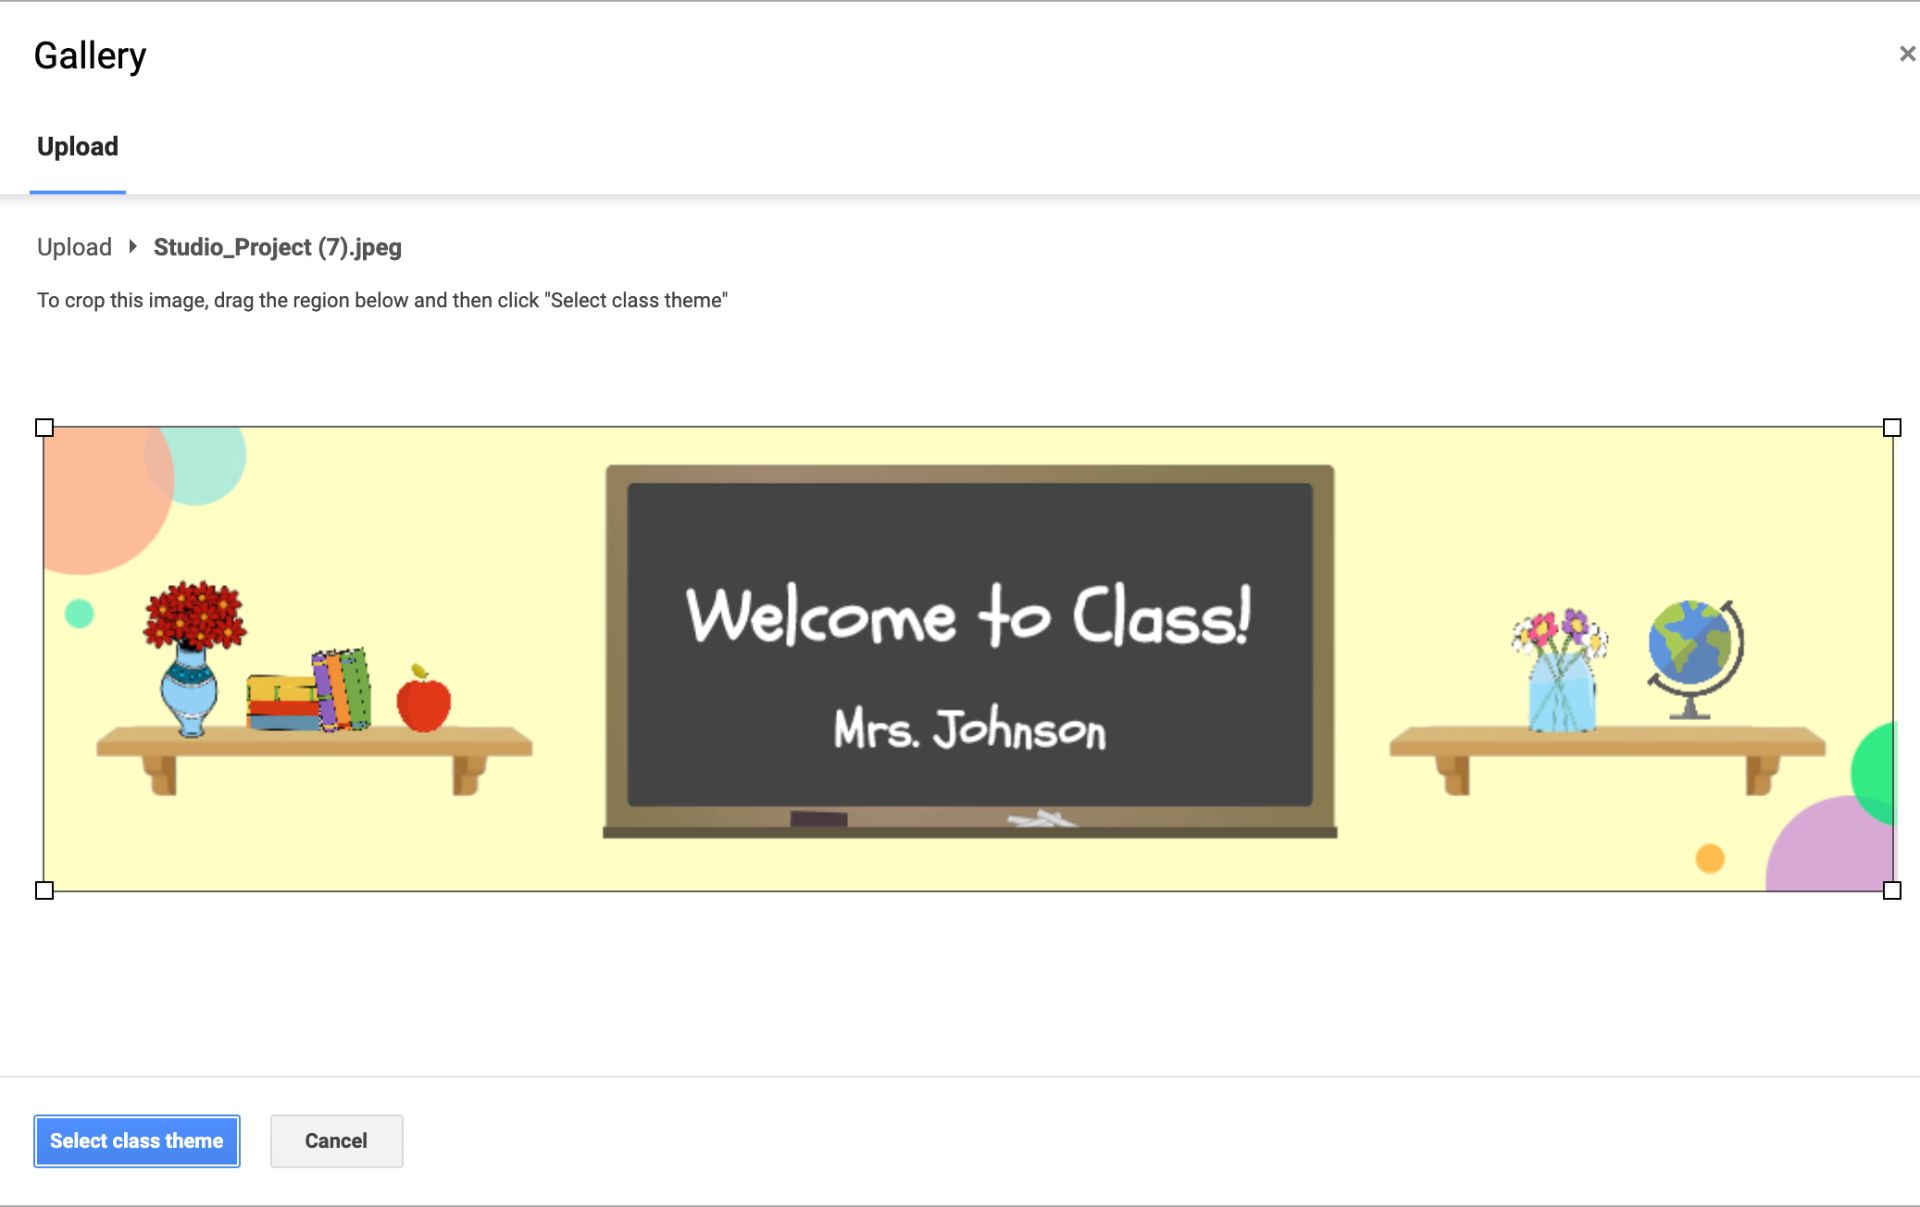
Login into your classroom and click upload photo in the corner of your current banner. Drag and drop your picture into the upload box and select the entire banner with the crop tool. Click, select class theme to save your changes.
Good luck setting up the rest of your Google Classroom! For more content, subscribe to our YouTube Channel. You'll get tutorials on the latest TikTok trends and tutorials on how to use Kapwing. Hit the follow button on Twitter to stay up to date on all things Kapwing.
Related Articles: