
How to Go Live on Instagram: Tips and Best Practices
Instagram Live is an effective way to reach and engage with your followers. Learn how to Go Live on Instagram with these tips and best practices.

Instagram Live is an effective channel to reach and engage with your audience in real-time. There are a few benefits to utilizing Instagram Live consistently:
- You can increase your visibility: People who follow you on Instagram get a push notification when you go live and have the option to tune in right away.
- You can increase audience engagement: Instagram Live allows your audience to chat with you in the comments or start a Q&A which can help bring in new followers.
- You can build and foster relationships: You have the option to accept requests for other accounts to co-host an Instagram Live session which can build community engagement and relationships.
In this tutorial, I’ll show you how to go live on Instagram and go over some tools to help you engage with your audience and followers.
Before we dive in, here’s one key thing to know: Instagram currently requires users to have at least 1,000 followers to go live. If you're not quite there yet, don’t worry. There are plenty of strategies to grow your following and build a strong creator presence.
Whether you’ve already hit the 1K mark or you’re planning ahead, here’s how to go live on Instagram and make the most of it:
- Start an Instagram Live Broadcast and Adjust Your Settings
- Save your Instagram Live Broadcast
- (Optional) How to Create a Cover Photo Using Kapwing
- (Optional) Export & Upload Your Cover Photo on Instagram
Step One: Start an Instagram Live Broadcast and Adjust Your Settings
Open the Instagram app and go to Settings > Privacy > Story. Under Story Controls, scroll down and make sure Save Live to Archive is toggled on so you can view your Instagram Live videos after you have ended them.

Before going live, make sure you are in a space with enough lighting and a stable internet connection. This is essential if you want to give your audience a great live experience.
To start an Instagram Live from the main feed, swipe right like you would if you wanted to post a story. Choose the Live tab from one of the options on the bottom of the screen. On the top of the screen, you can see how many of your followers are currently active. On the left-hand side, click the lines icon and add a title for your Live Broadcast. Use a short, but descriptive title to let your followers know what to expect. Some examples would be “Releasing a new song tonight”, “Making Steak For The First Time”, or “Q&A with a Content Creator”. You get the idea!

After adding your title, press the circle in the middle to start your live broadcast. From here you can accept requests for people to go live with you, people can ask you questions, and chat with you by leaving comments.

Step Two: Save Your Instagram Live Broadcast
When you end your live broadcast, you can immediately share it on IGTV. Press the X at the top right and select End Now. Tap Share to IGTV, select a cover photo, then Next or Download Video. If you want to create your own Cover Photo instead of selecting a still from your Instagram live, go to Step Three.

(Optional) Step Three: How to Create a Cover Photo In Kapwing
A good cover photo uses large text, photos, and colors to grab attention and make people want to click on a video. To create this, go to the Kapwing Studio on your iPhone and tap Get Started.
Select Start with a blank canvas, click on your canvas and you’ll be able to change the output size to 9:16, the recommended dimension for Instagram Cover Photos for IGTV. You can change the background color of your canvas under Background Color and you can select any color that your heart desires!
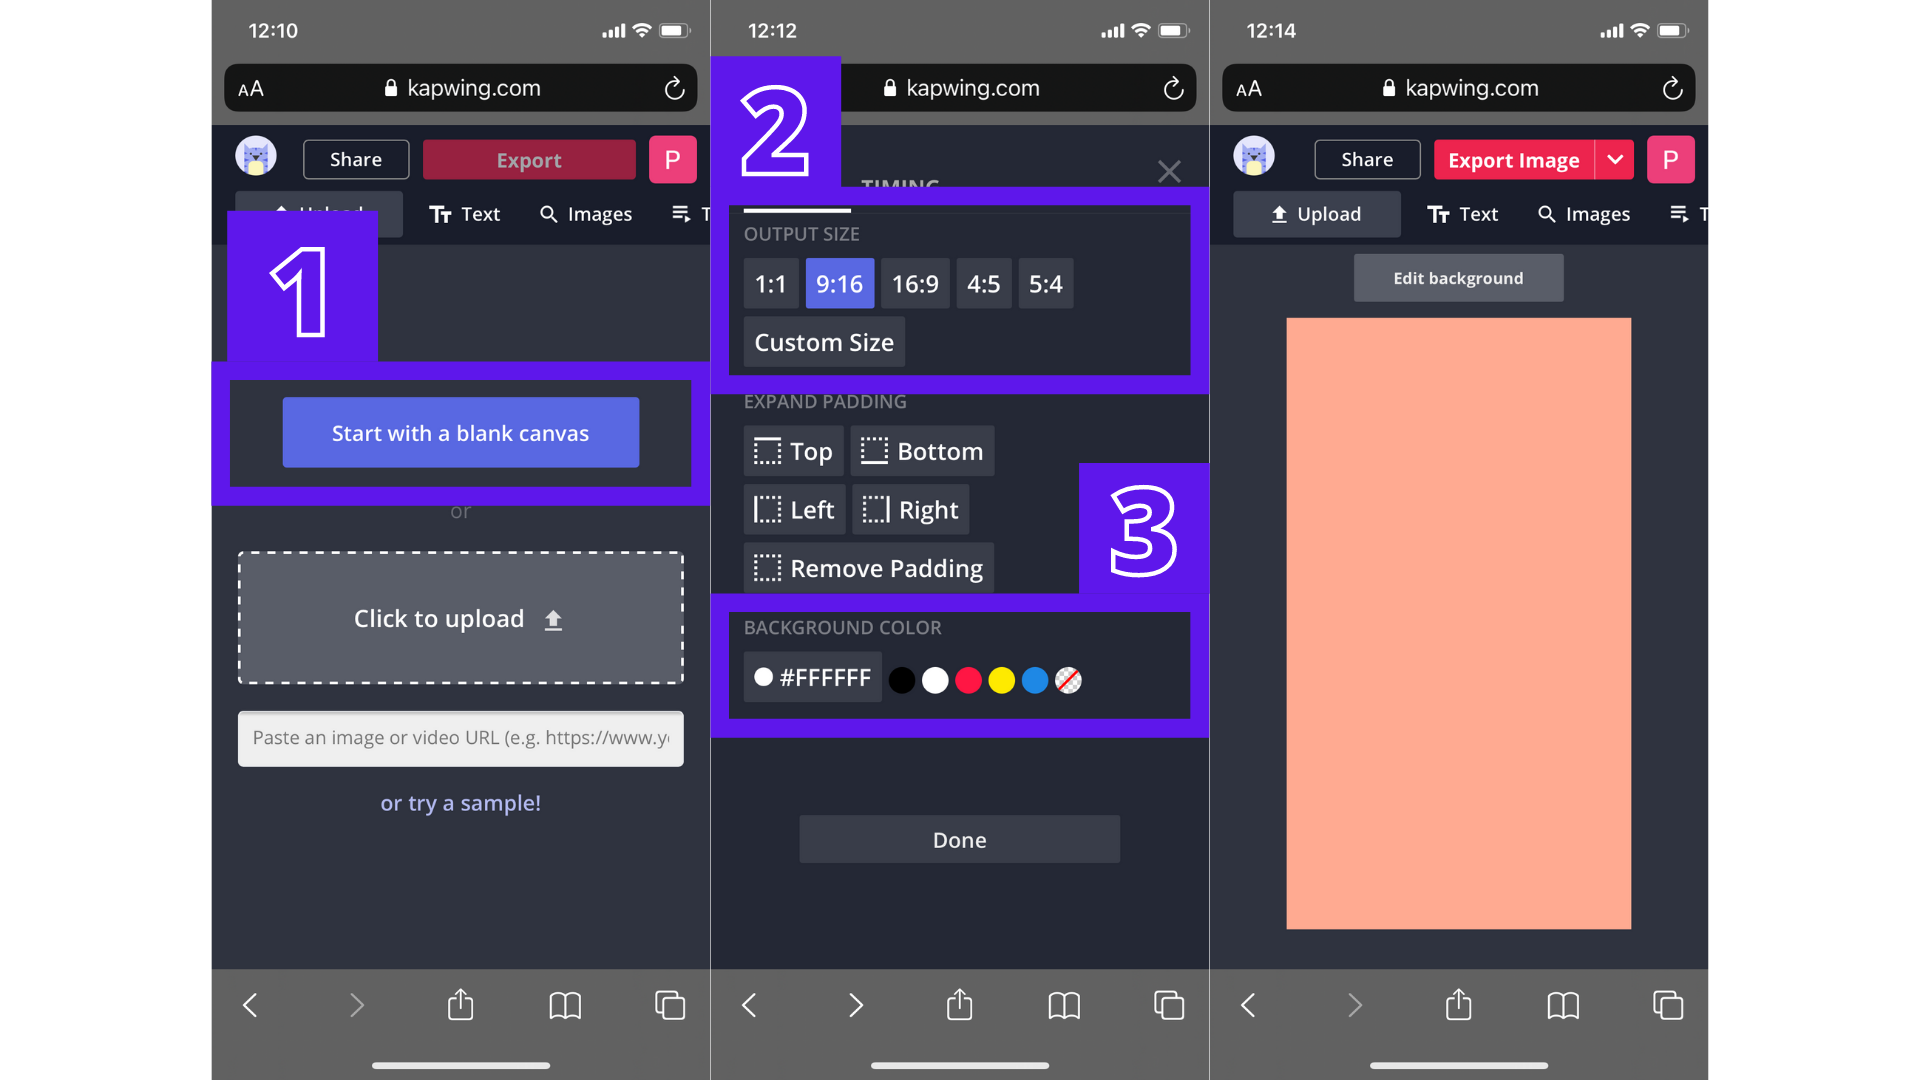
Select Text at the top toolbar and select a font style, size, color, and background color.

Next, we are going to upload an image to add to the background. Select Upload, then Click to upload and you can find an image in your photo library. I’m going to use a selfie that I took and use that in the background for my cover photo. To resize the image, select Edit Image and use the Zoom Slider tool to make the image smaller or larger.

You can erase your background image by clicking on your image and selecting Edit Image. Locate the Erase tool and select the Magic Wand tool, which will help you remove backgrounds easily by selecting different sections of your image. The selected sections should appear a bit gray to show that section will be erased. You can use the Eraser to help you remove unwanted sections that the magic wand tool may have missed.

In Kapwing, you can add other images to your cover photos such as icons, GIFs, or emojis! I searched for “Instagram Icon” and used the “Partying Face” emoji in my photo.
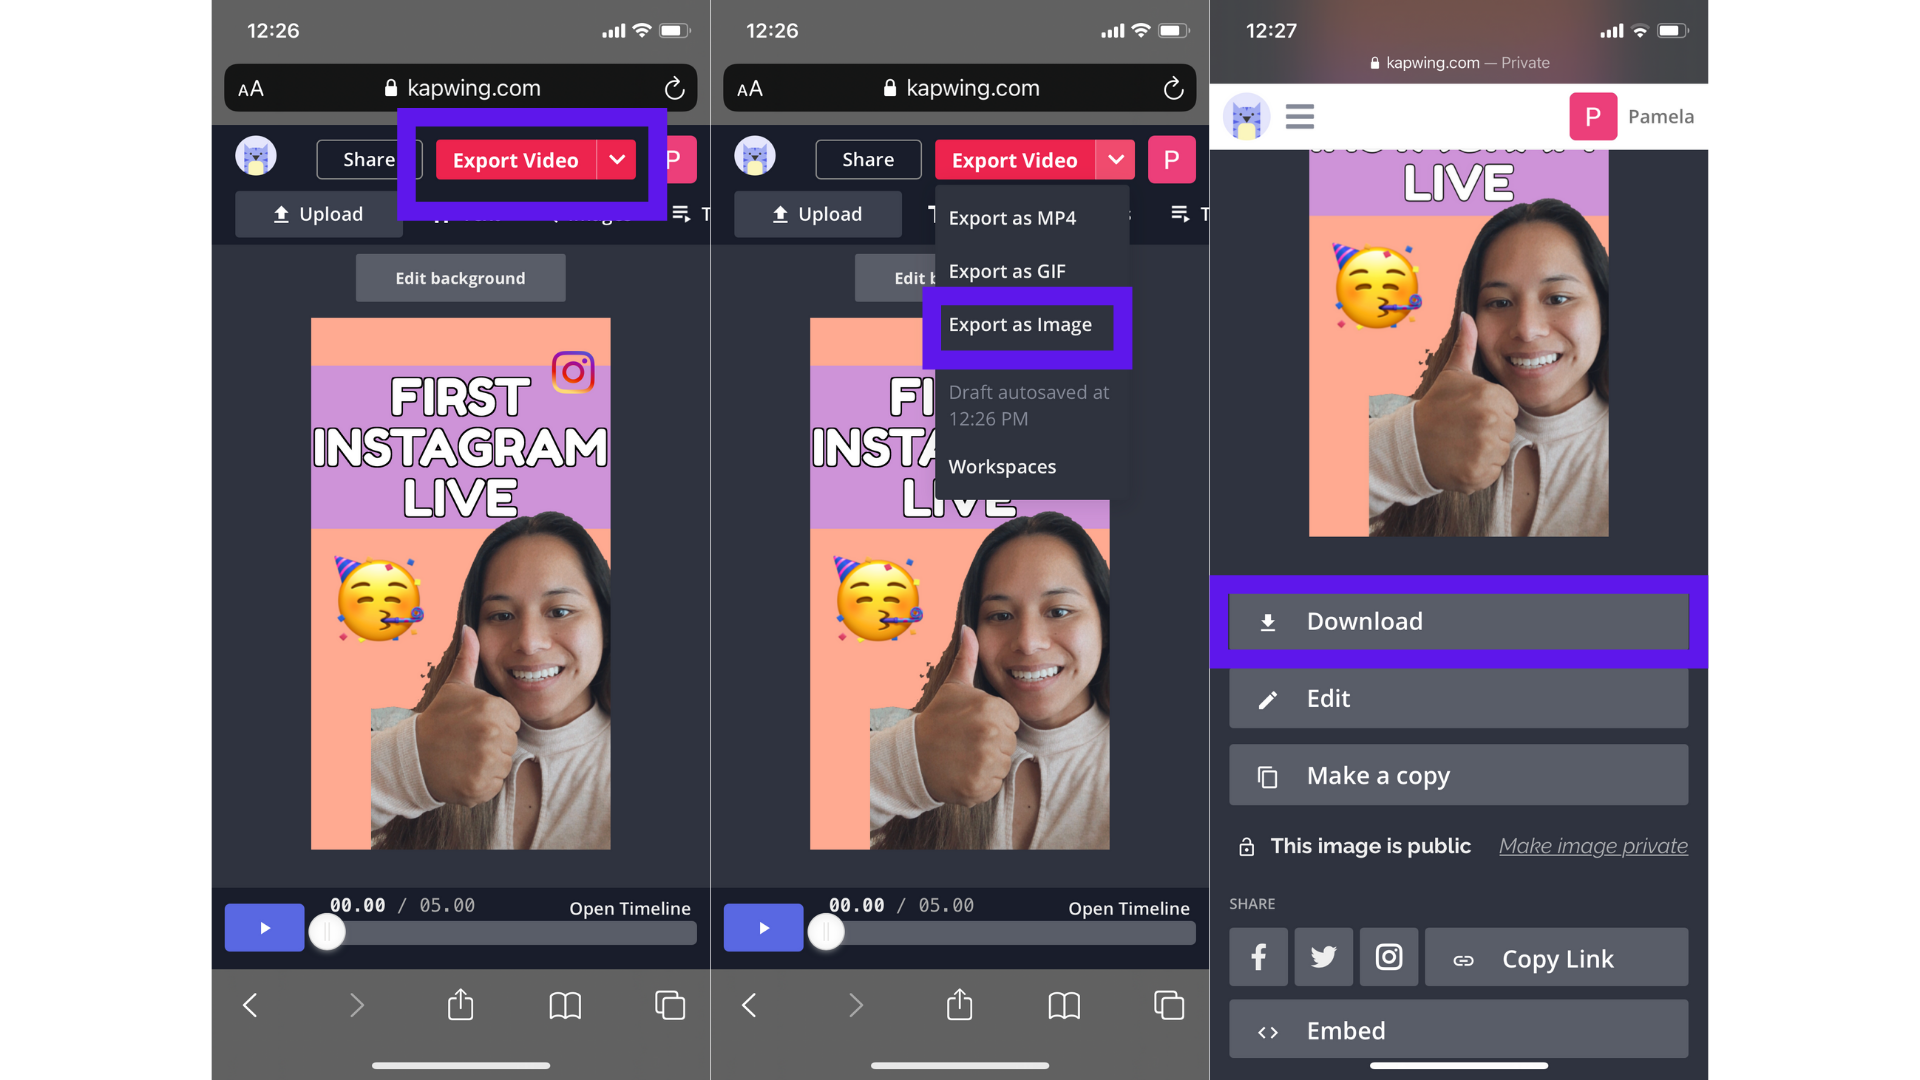
(Optional) Step Four: Export & Upload Your Cover Photo on Instagram
When you’re finished creating your cover photo, select the arrow on the red button at the top to view export options. Select Export as Image and wait a few seconds to be taken to another screen. Your image will process and you will then be given the option to Download or Share the image. Select Download and your image will be saved on your device.
Go to your Instagram profile and tap the three lines on the right then select Archive. Tap Post/Stories Archive at the top, then select Live Archive. Tap Share at the bottom of the screen to create a title, description, and select the downloaded image you made in Kapwing from your camera roll to use as the cover photo.

I hope this article provided you with new tips and best practices for going live on Instagram. If you’re interested in more Instagram tutorials, visit our Instagram Resources page. We also post new videos on YouTube and Instagram every week! While you’re here, check out some related articles:


