How to Create an OnlyFans Banner Image with the Right Dimensions
To stand out from the intense competition on OnlyFans, you need to work on every detail. This article will show you how to make the perfect profile banner.

The OnlyFans profile banner is the first impression that someone gets when they check out your channel. It's a crucial piece of digital real estate to make an impression and entice people to scroll and subscribe.
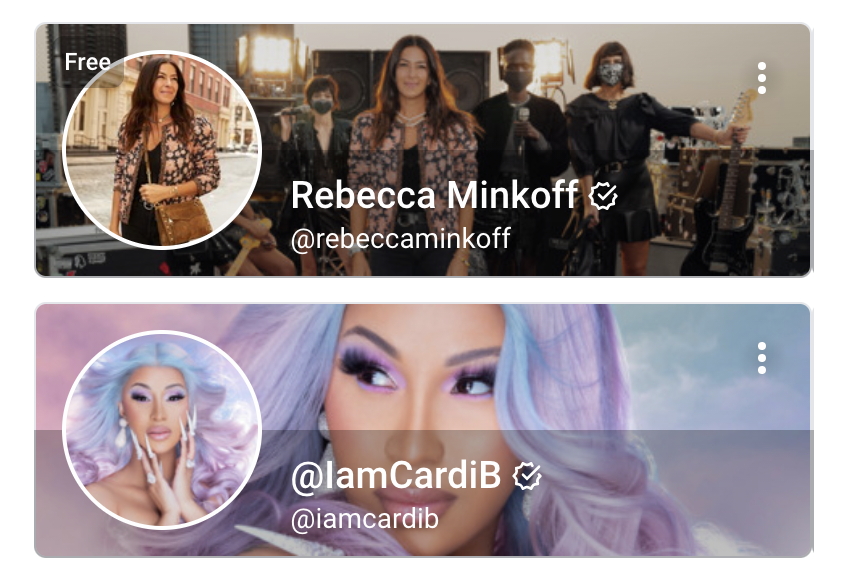
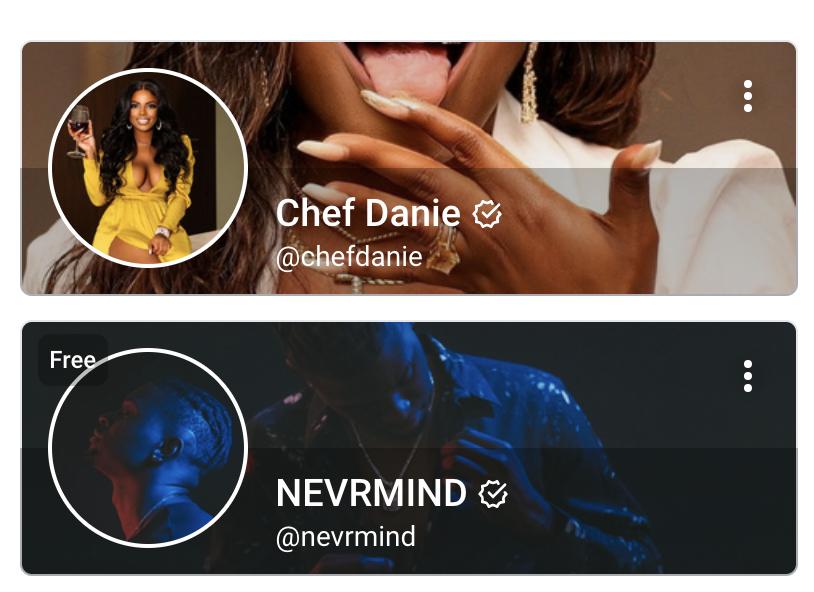
Here's two examples from verified celeb profiles on OnlyFans:
As OnlyFans has gotten more competitive, the OnlyFans banner is also a chance for you to rise above the noise and differentiate from other creators to get the coveted “Top 5%” or “Top 1%” OnlyFans credentials. In order to rise to the top, make your page as jaw-dropping as possible. You'll also want to ensure that your design fits in the header area and doesn't get cropped off.
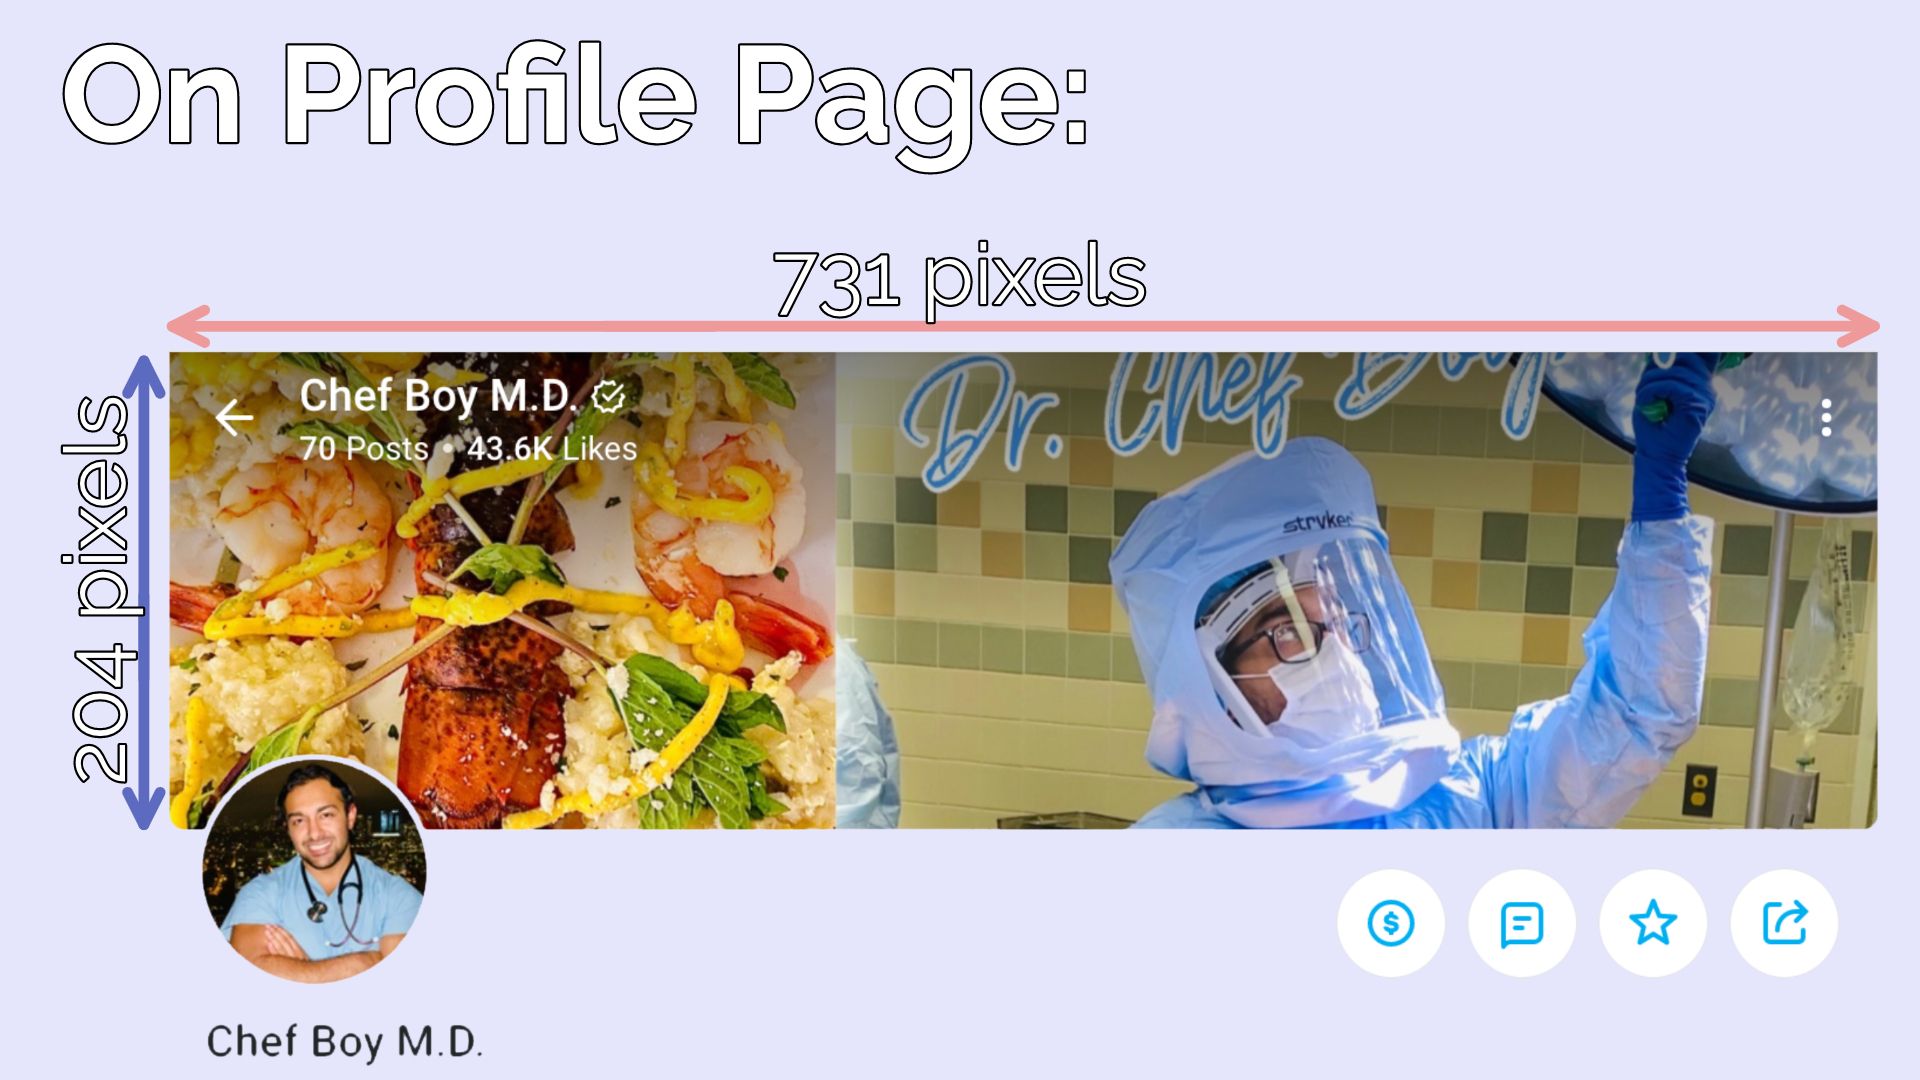
TL;DR: The best dimensions for your banner image are 731x204 pixels.
In this article, I’ll show you how to make an OnlyFans banner image with the perfect dimensions, text, filters, and effects. I'll also explain which areas are "off limits" because they're blocked by the profile picture and give you several examples of great designs.
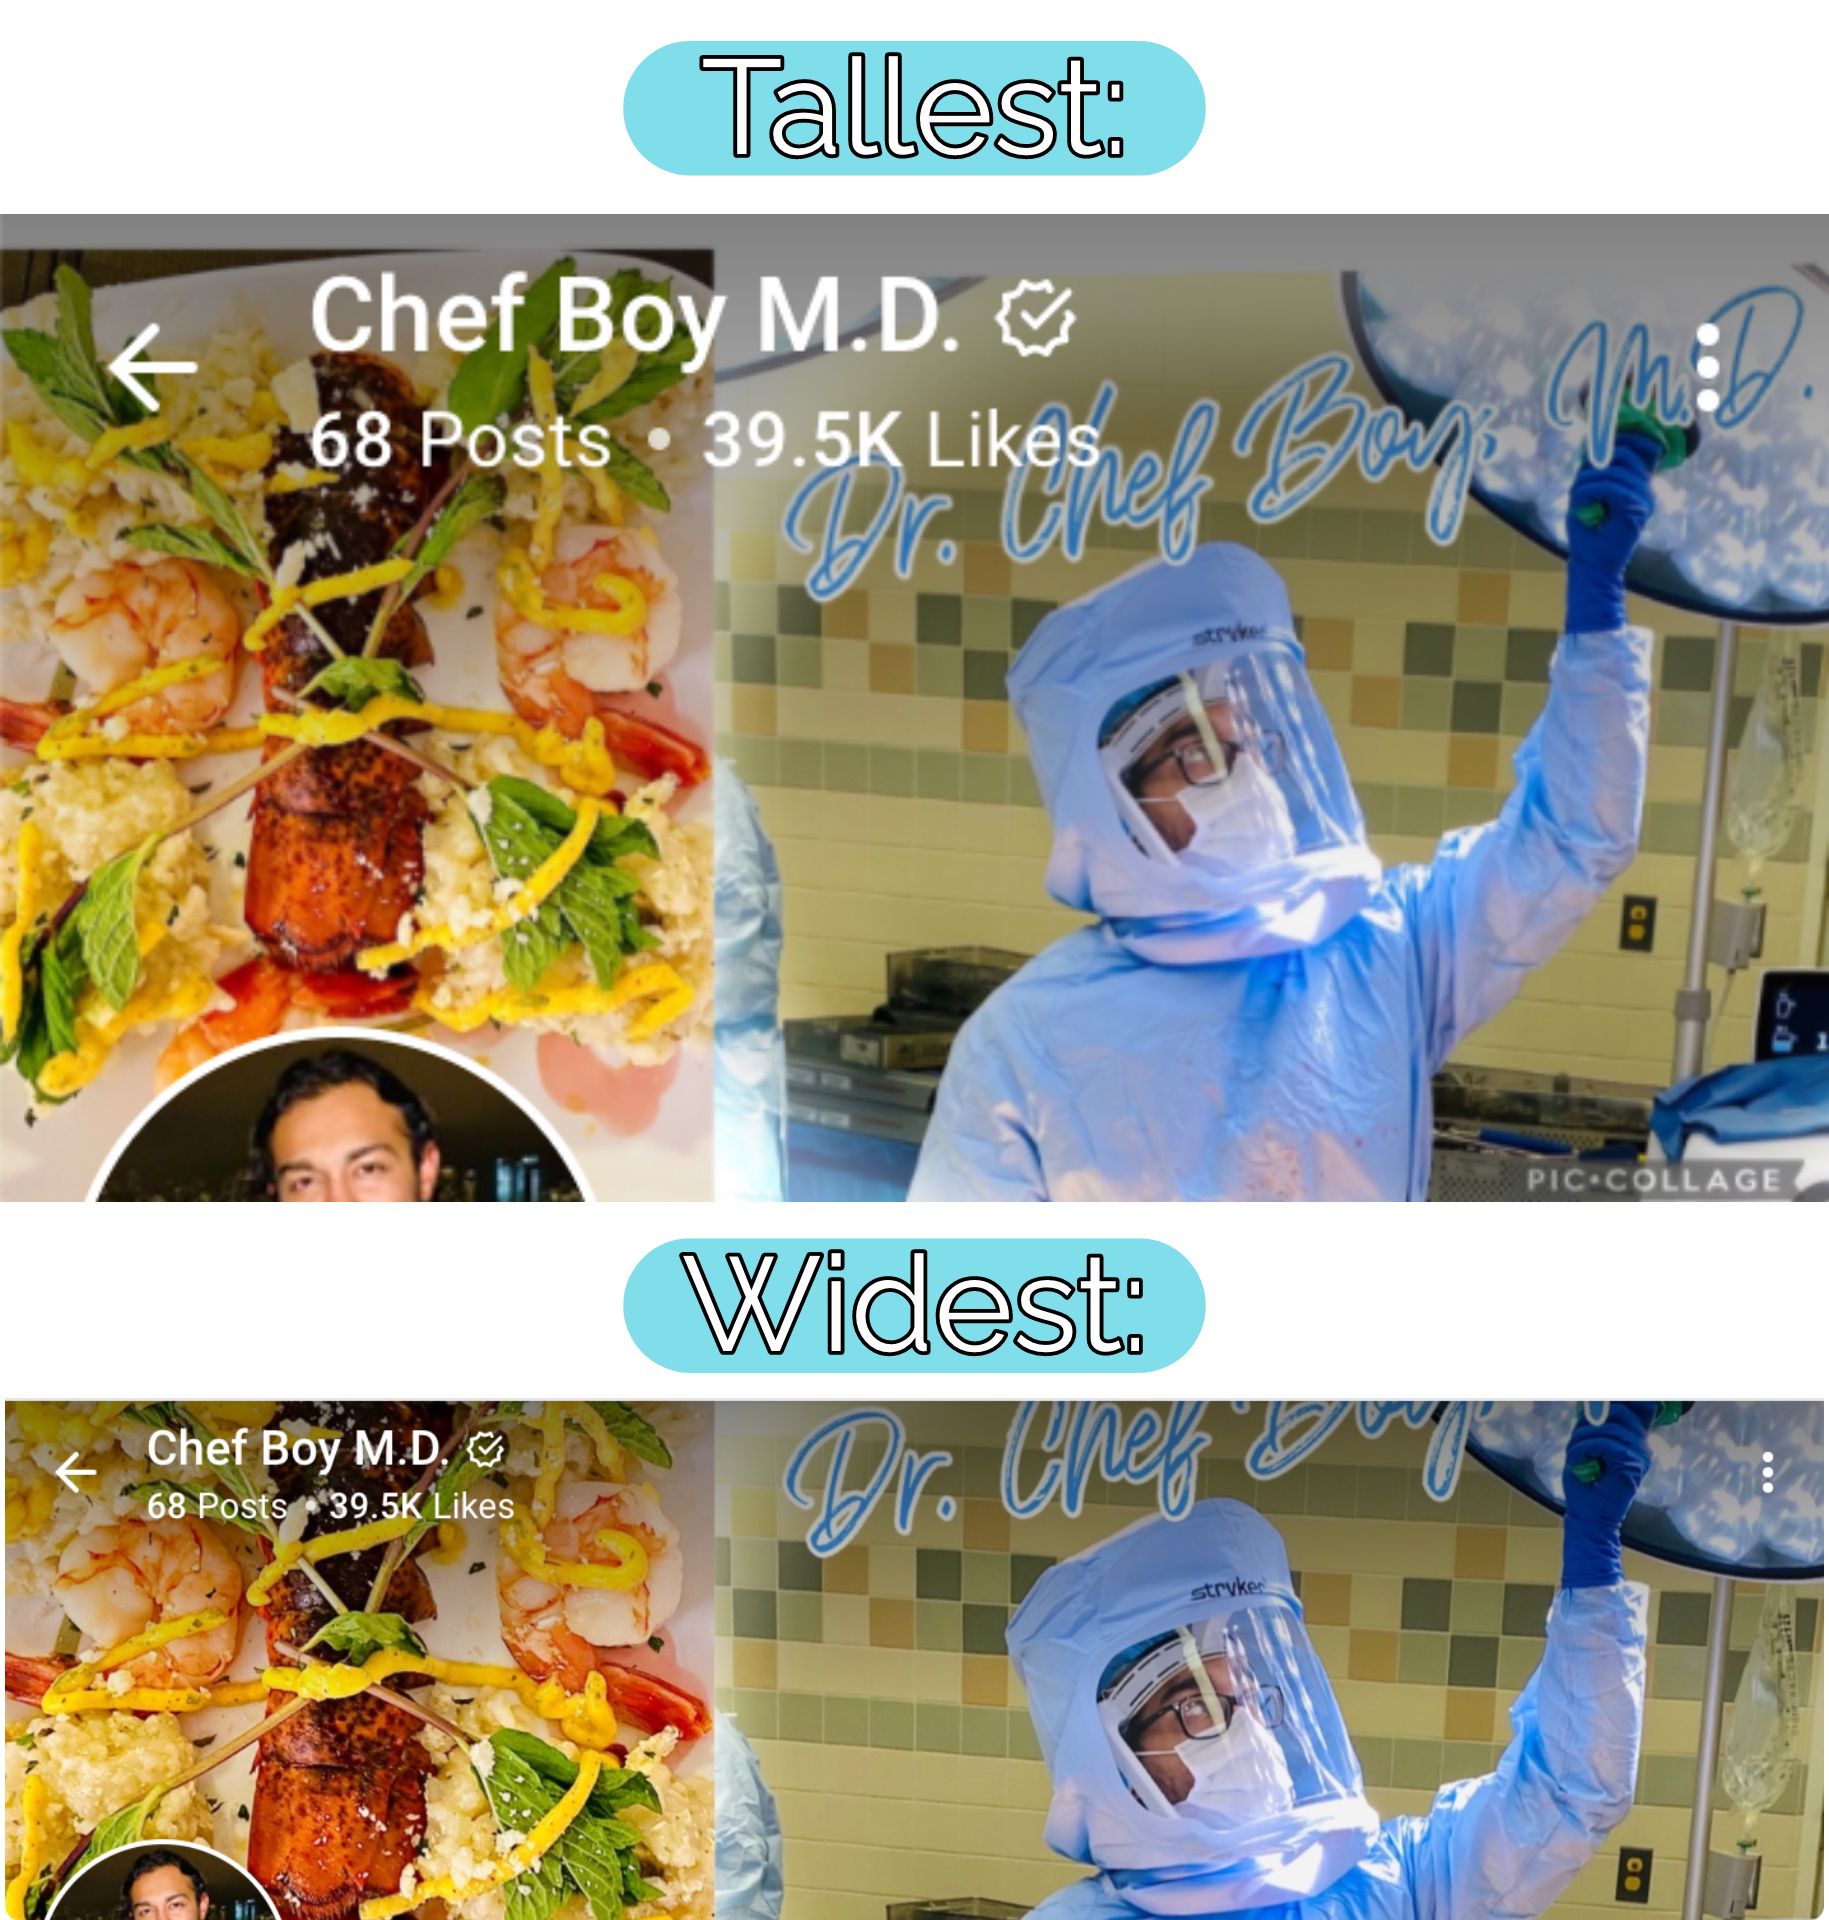
Full Dimensions on Your OnlyFans Page
The OnlyFans banner image is wider than most banner images on places like LinkedIn, YouTube, or Twitter. When viewed at full width, the dimensions of an OnlyFans banner are 731x204 pixels, or an aspect ratio of about 3.6:1.
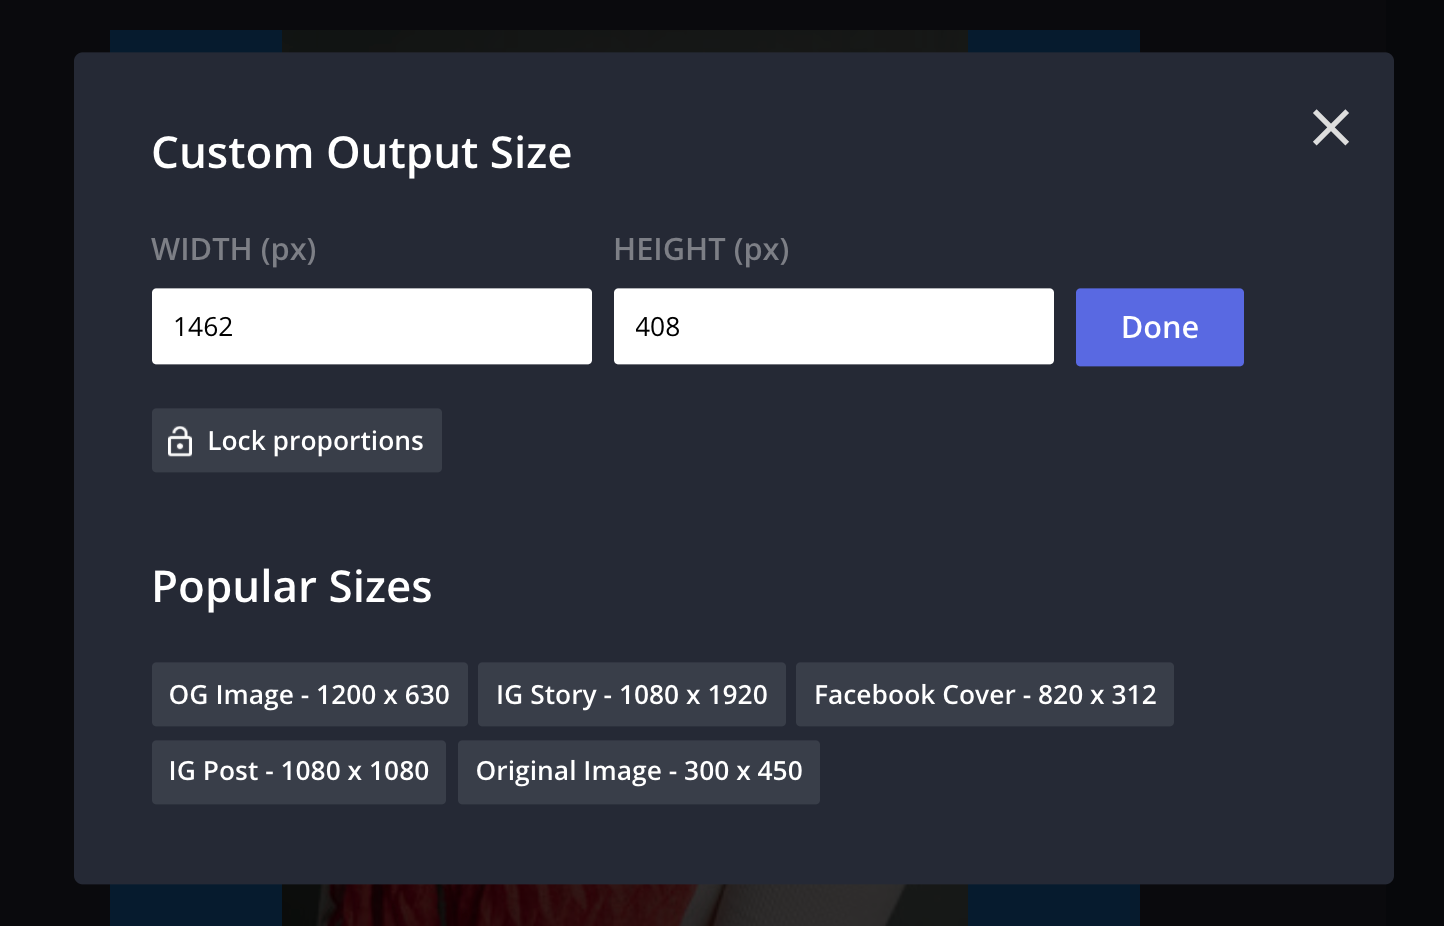
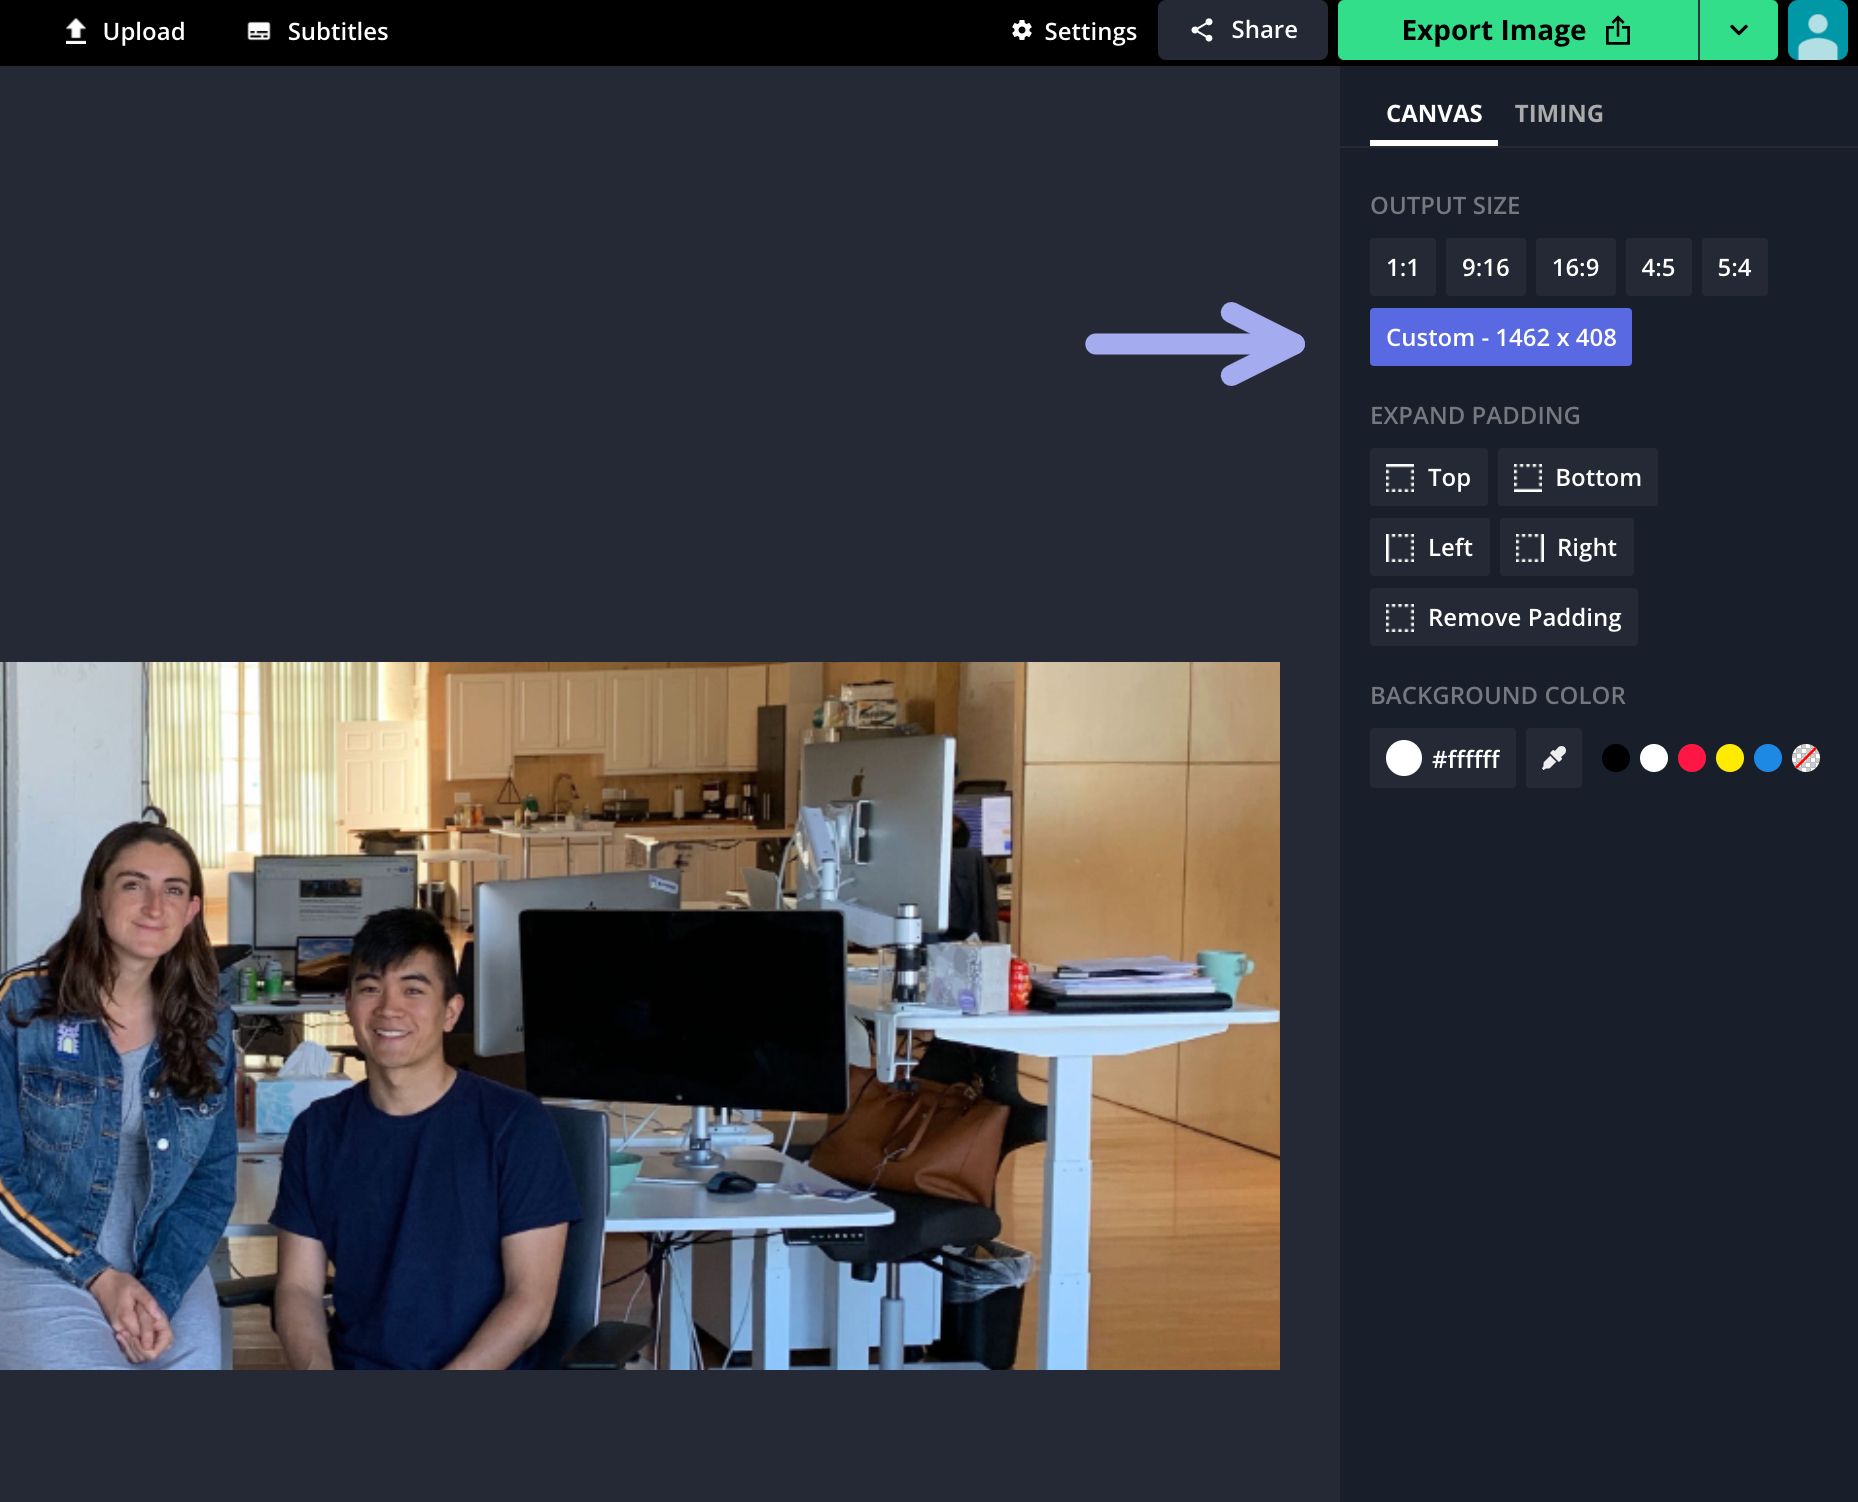
To resize the image you want to use for your banner, go to Kapwing.com in your browser and click “Start Editing” to enter the Kapwing Studio. Here you can upload any photo you have saved on your device, as well as any content you have stored online. When your picture is fully uploaded to the Studio, click on “Custom Size” in the right-hand toolbar and enter 1462 for your width and 408 for your height – this way, your banner will be formatted perfectly, with high resolution.
Then, drag the corners of your image to cover the whole digital canvas. Or, create a design using text, image, colors and shape layers.
The “Safe Zones” for Text and Important Sections
The exact dimensions of the OnlyFans banner will change when displayed in different browser sizes, devices, and menu locations. In mobile browsers or narrow desktop browsers, for example, your banner will be cropped on both sides, so you should keep your face, text, and other important sections relatively near the center of your image horizontally.
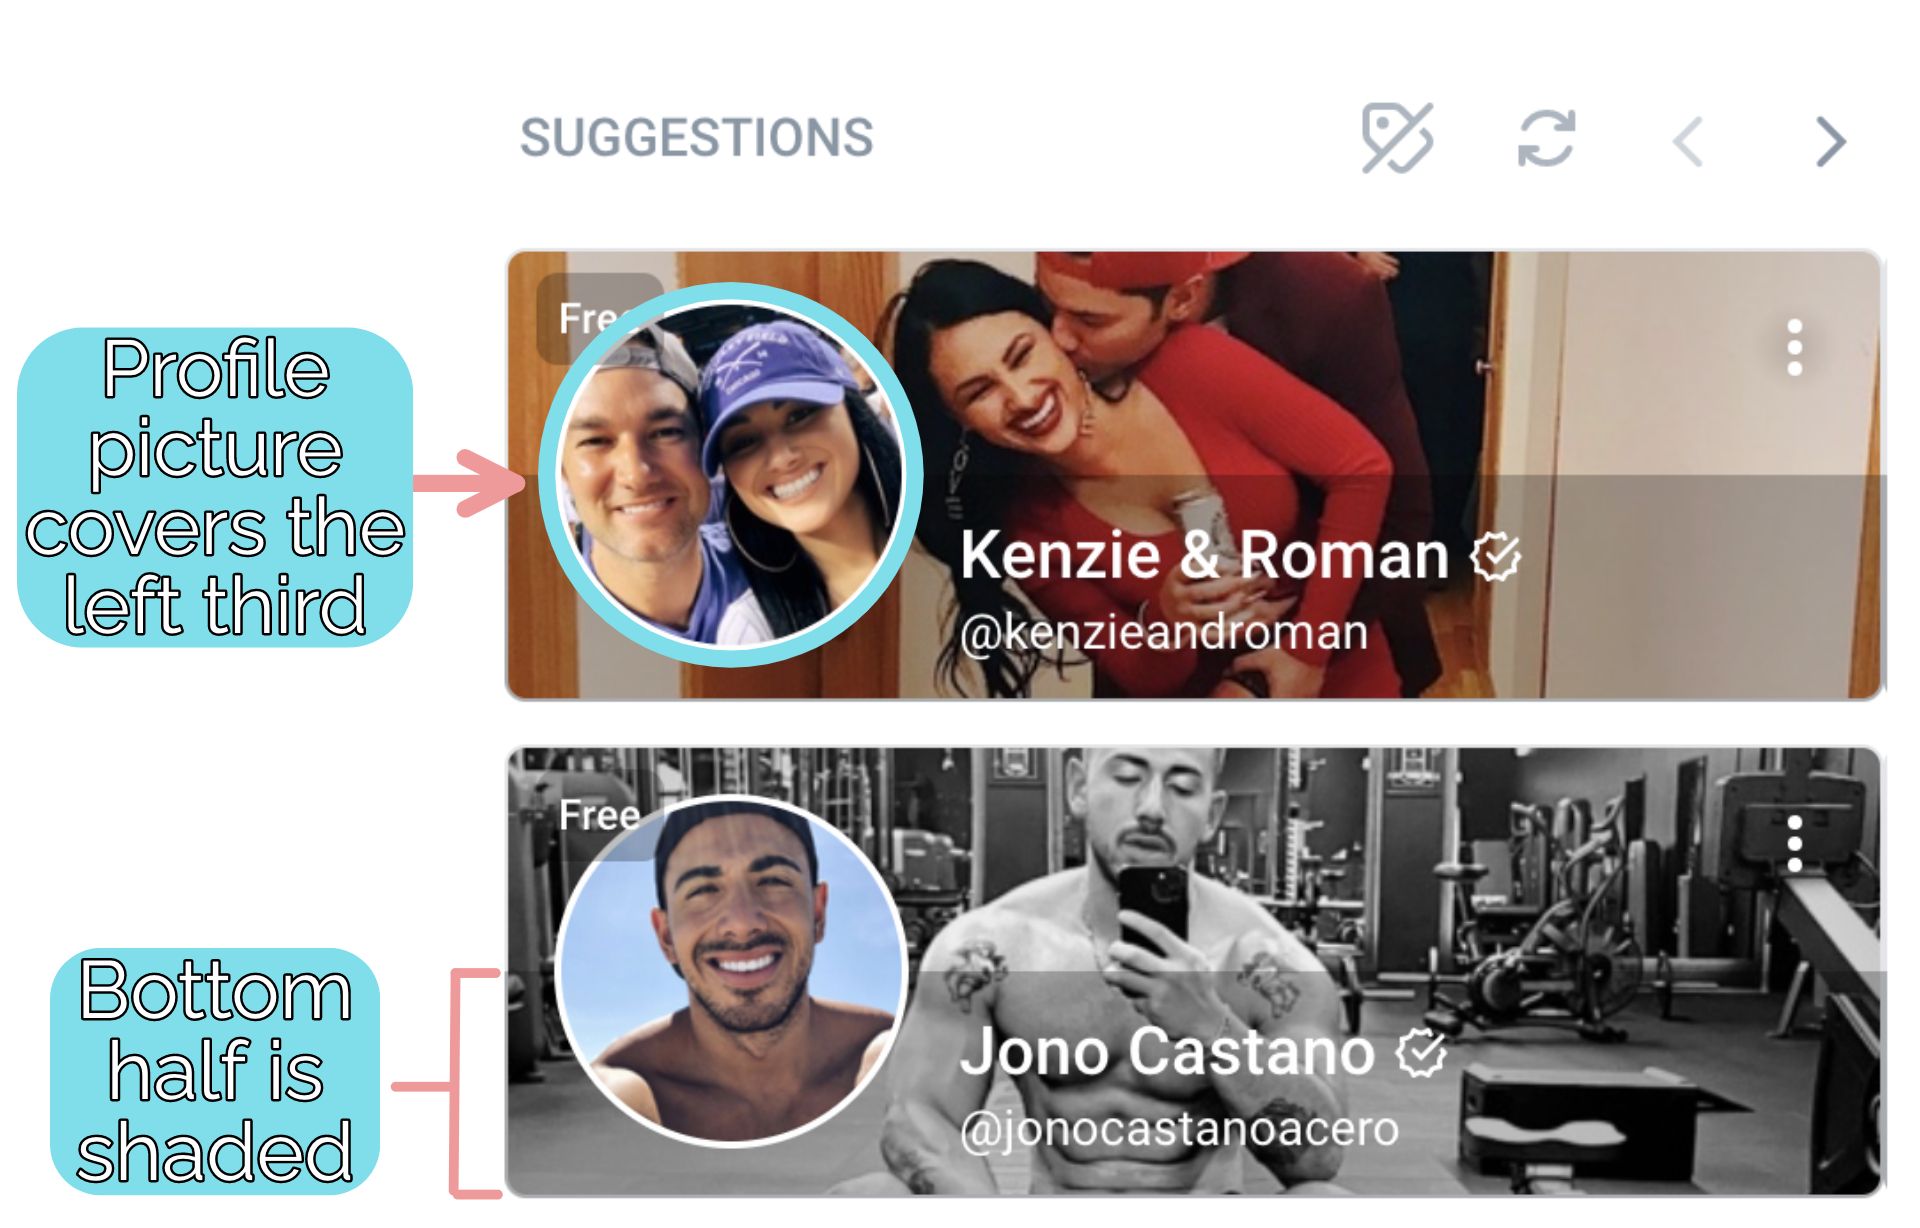
Profile Picture: Another issue is that when your profile is suggested to OnlyFans users, your profile picture will be displayed fairly largely on the left side of your banner. Make sure the most important parts of the image are kept out of the left third of the frame.
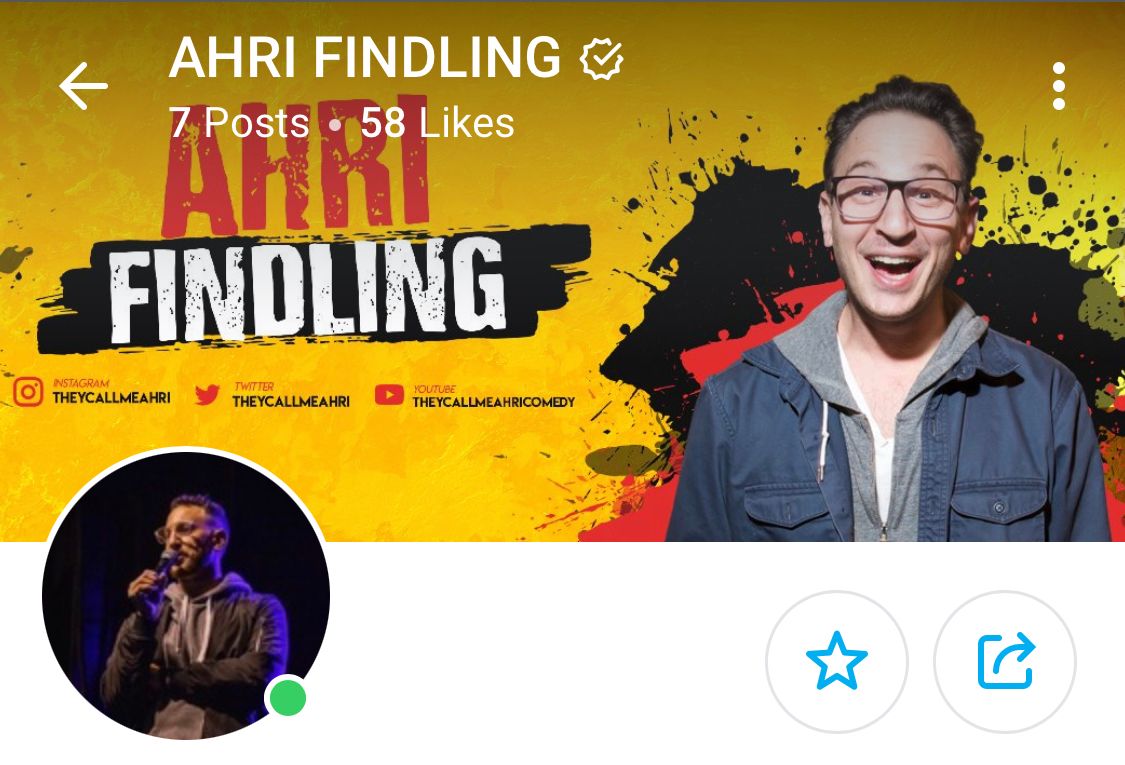
In the below example, Comedian Ahri Findling's banner is hidden by the profile picture overlay when it shows in the OnlyFans feed.
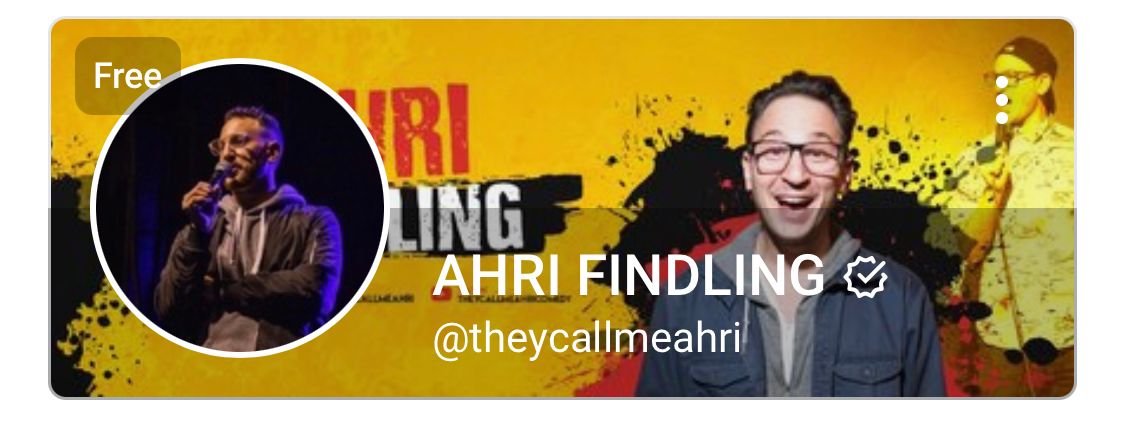
However, the text of the OnlyFans banner shows when you click to his profile.
Name Overlay: In the OnlyFans feed and suggestions area, the bottom half will be darker, covered by the profile name overlay. In the profile, the banner image's top half will be covered. Use bright colors and text outlines to avoid your design being obscured by these overlays.
Additionally, when your banner image is displayed in some menus and lists, it may be wider than its full display format and will be cropped on the top and bottom. For this reason, you should also make sure all your text and important parts aren’t close to the very top or bottom of your banner.
How to Add Text, Filters, and Effects to Your Banner
To look as distinctive and polished as possible, it’s a good idea to add your profile name and other details in text, along with filters or visual effects. Many creators embed their other social media handles or usernames as watermarks on the OnlyFans banner image.

In the Kapwing Studio, you can create text boxes with custom font, color, style, border, and even drop shadow or glow effect. Select Text on the side toolbar, enter the text you want, then change anything about your text box’s appearance using the editing tools in the right side menu. For aesthetic filters, select your banner photo and choose Adjust from the menu on the right – here, you can choose from 18 different filter styles, or edit the brightness, saturation, contrast, and opacity of your banner manually.

Some overlay effects are popular on OnlyFans, as well. If you want to add accents like glitter, lens flare, or god rays, select Images on the left toolbar and search for the type of overlay effect you want to add to your image. Select anything from the results to upload it immediately to the Studio canvas, where you can rotate, resize, recolor, and arrange your effects.
I hope this article helps you move up in the competitive world of OnlyFans! If you’re interested in more tips and tutorials on creating great digital content in 2021, check out the Kapwing YouTube channel, where we post multiple new videos every week. And while you’re here, check out some related articles on creating great banner images for different locations:
• How to Make YouTube Channel Art
• How to Create a Discord Server Banner
• How to Make an Offline Banner for Twitch
• How to Make a Facebook Event Banner Image