How to Create an Aesthetic YouTube Banner for Your Channel
In this article, I'll show you how to make and edit aesthetic YouTube banners with text, a picture you took, or an image you found somewhere online.

If you're trying to get your YouTube channel off the ground, you want to make it look as appealing and aesthetic as possible. A large part of this is your YouTube banner image, formerly known as channel art, which greets everyone who visits your YouTube channel.
YouTube recommends an image with dimensions of 2560x1440 pixels, and it has to be at least 2048x1152. That's a very large image. In this article, I'll show you how to make and edit aesthetic YouTube banners with text, a picture you took, or an image you found somewhere online. Here’s how you can get started:
- Upload your image to the Kapwing Studio
- Resize it to 2560x1440
- Add aesthetic filters and edits
- Download and add to YouTube
NOTE: Use this free YouTube channel art template to resize an existing image to the correct dimensions or get started with a blank canvas.
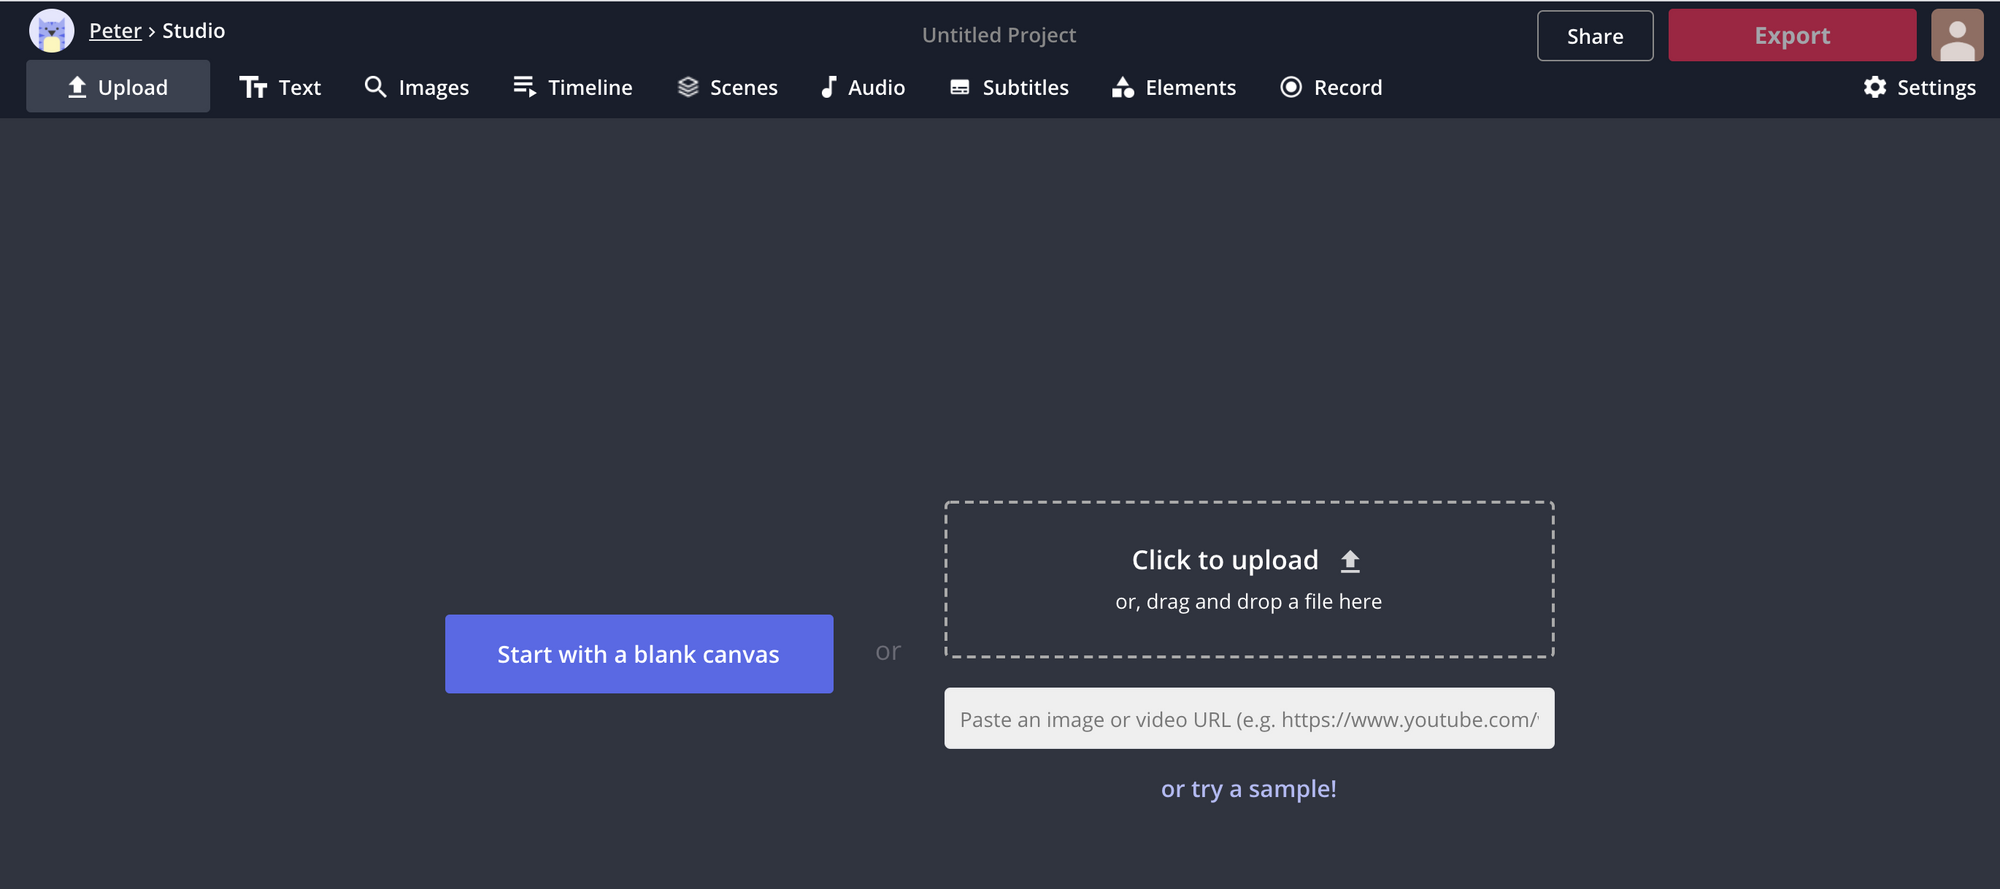
Step 1: Upload Your Image to the Kapwing Studio
Before you start making your YouTube channel art, you'll need to find a starting point. Try to choose something large, like a photo you would use for your computer's desktop photo. It should also have a horizontal aspect ratio, since it will only be visible with a 16:9 aspect ratio or wider. If you're uploading photos from a computer, it's a good idea to have your file browser open, so you can click & drag your content into the Kapwing Studio.
For abstract designs and minimalist header images, use the Images tool in the top toolbar to search the web for any banner image backgrounds you want to use. Terms like “aesthetic wallpaper HD” and “aesthetic banner 1080p” are good places to start. You can also change your project’s background color in the editing menu on the right for minimalist, plain designs.
Step 2: Resize It to 2560x1440
You can start with YouTube’s guide on creating channel banners, but it doesn’t help much with the most important parts of the process. It recommends using Preview or Microsoft Photos to resize your image, but neither of these tools can perform more than the most basic resize functions – not nearly enough for well-formatted banners.
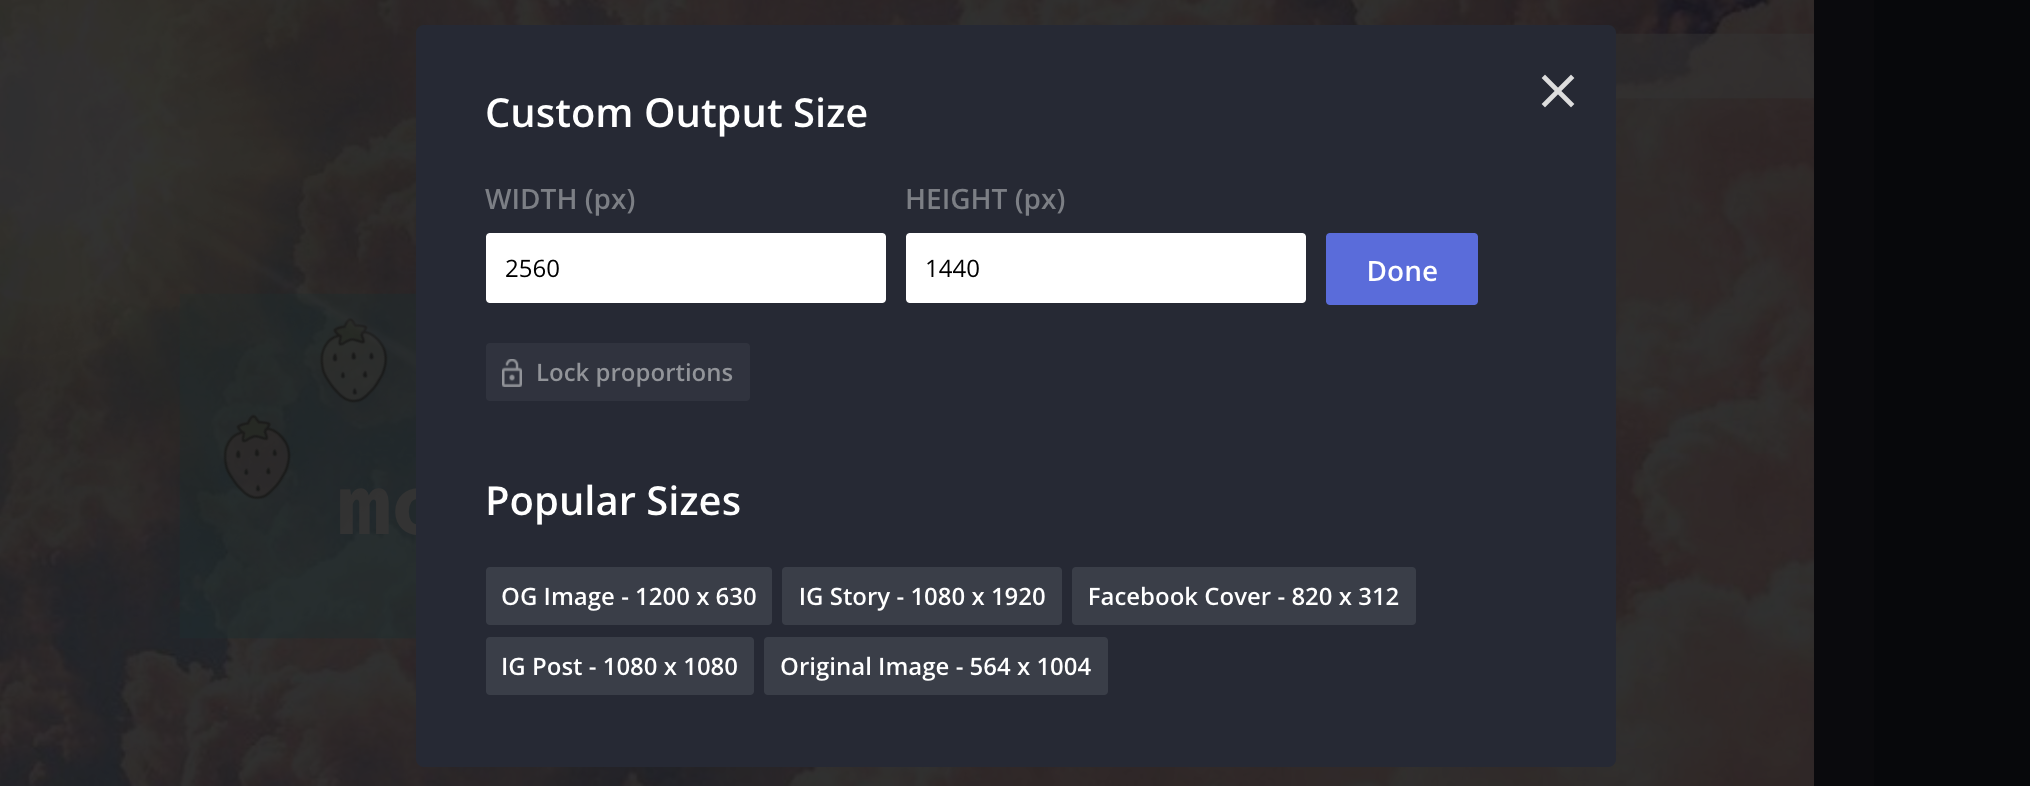
Once your picture is uploaded to the Studio, start by resizing your image to fit YouTube's specifications for banner images: their recommendation is 2560x1440. Click on Custom Size on the right-hand side and enter 2560 in the Width field and 1440 for Height. This is an aspect ratio of 16:9, which will only display fully on TVs, but is required for your channel art banner.
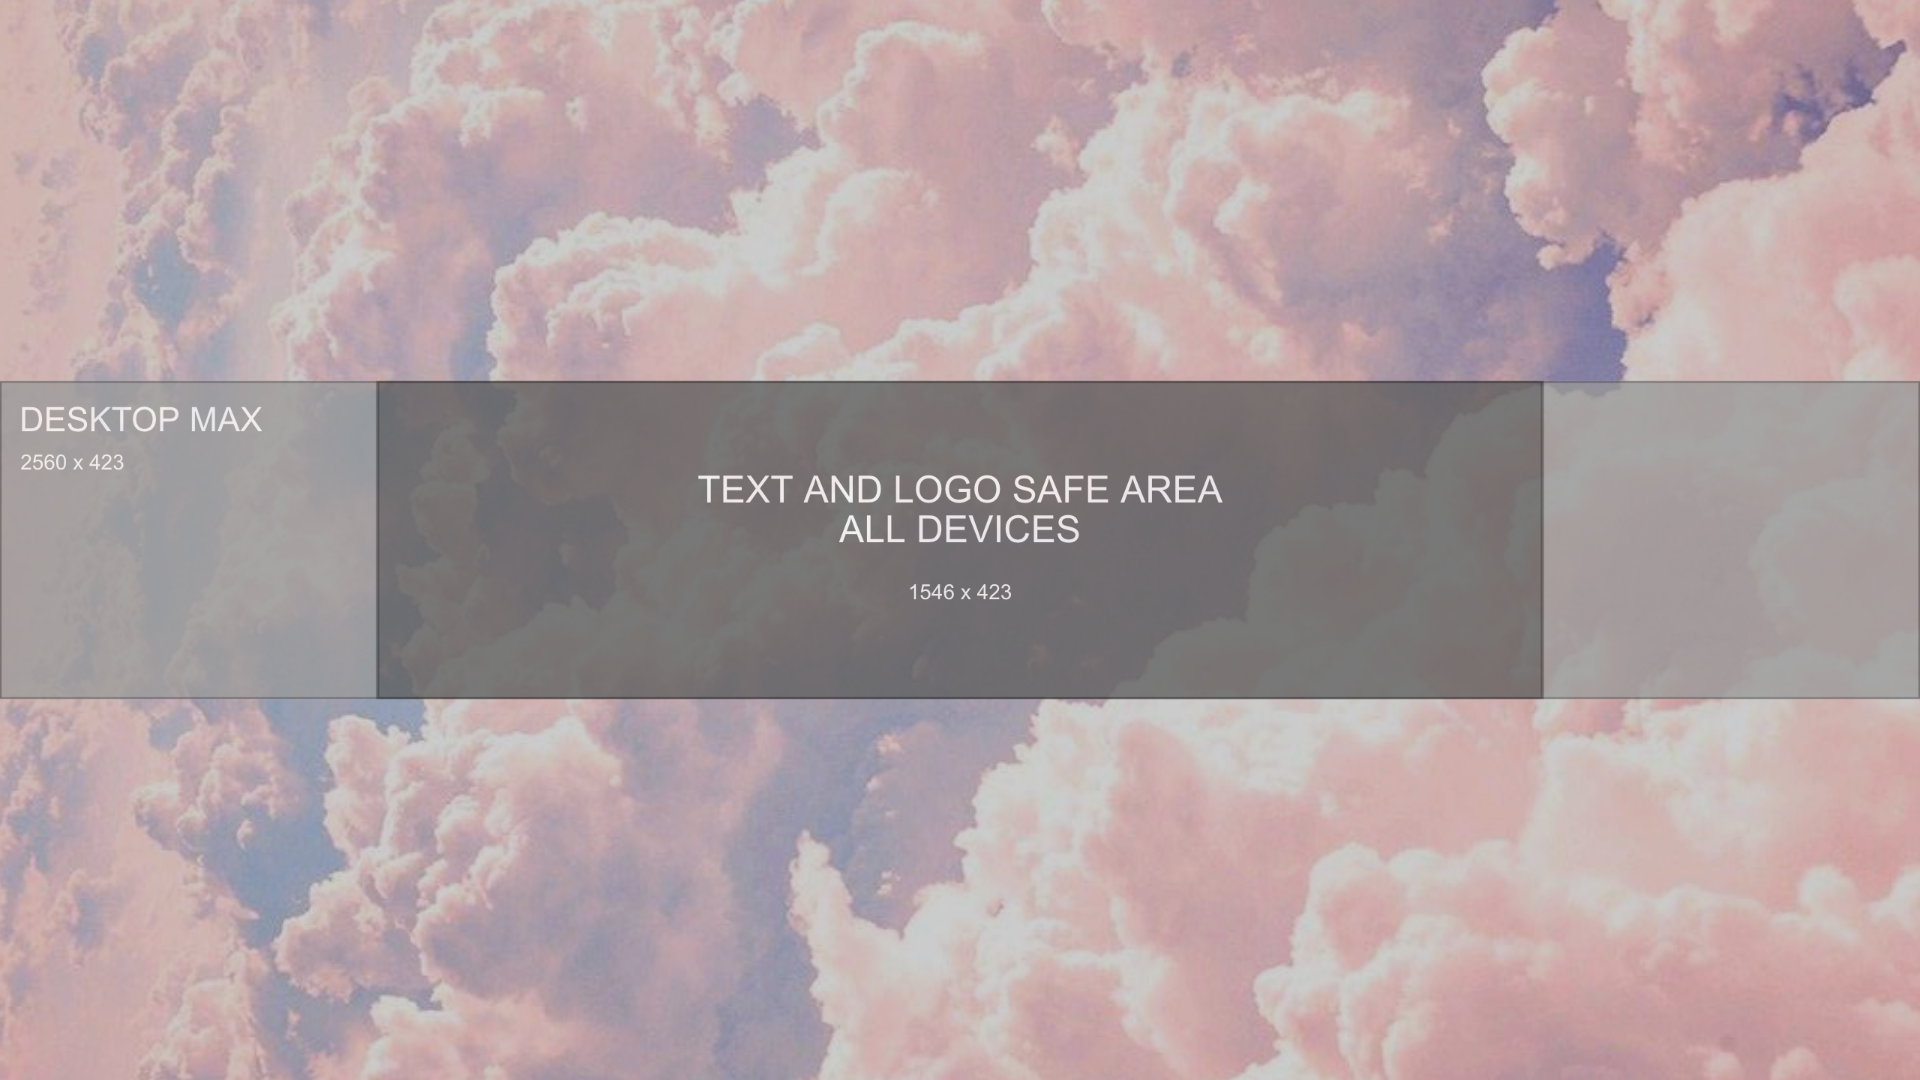
For most users, a lot of your banner will be significantly cropped, so you should keep this in mind. The center area - according to YouTube’s specification guide, 1546 x 423 - will always display in view, regardless of the viewer's screen size. Keep your most important words and images directly in the center of your design, or use this YouTube banner image template to make sure the most important parts are inside the bounds.
Step 3: Add Aesthetic Filters and Edits
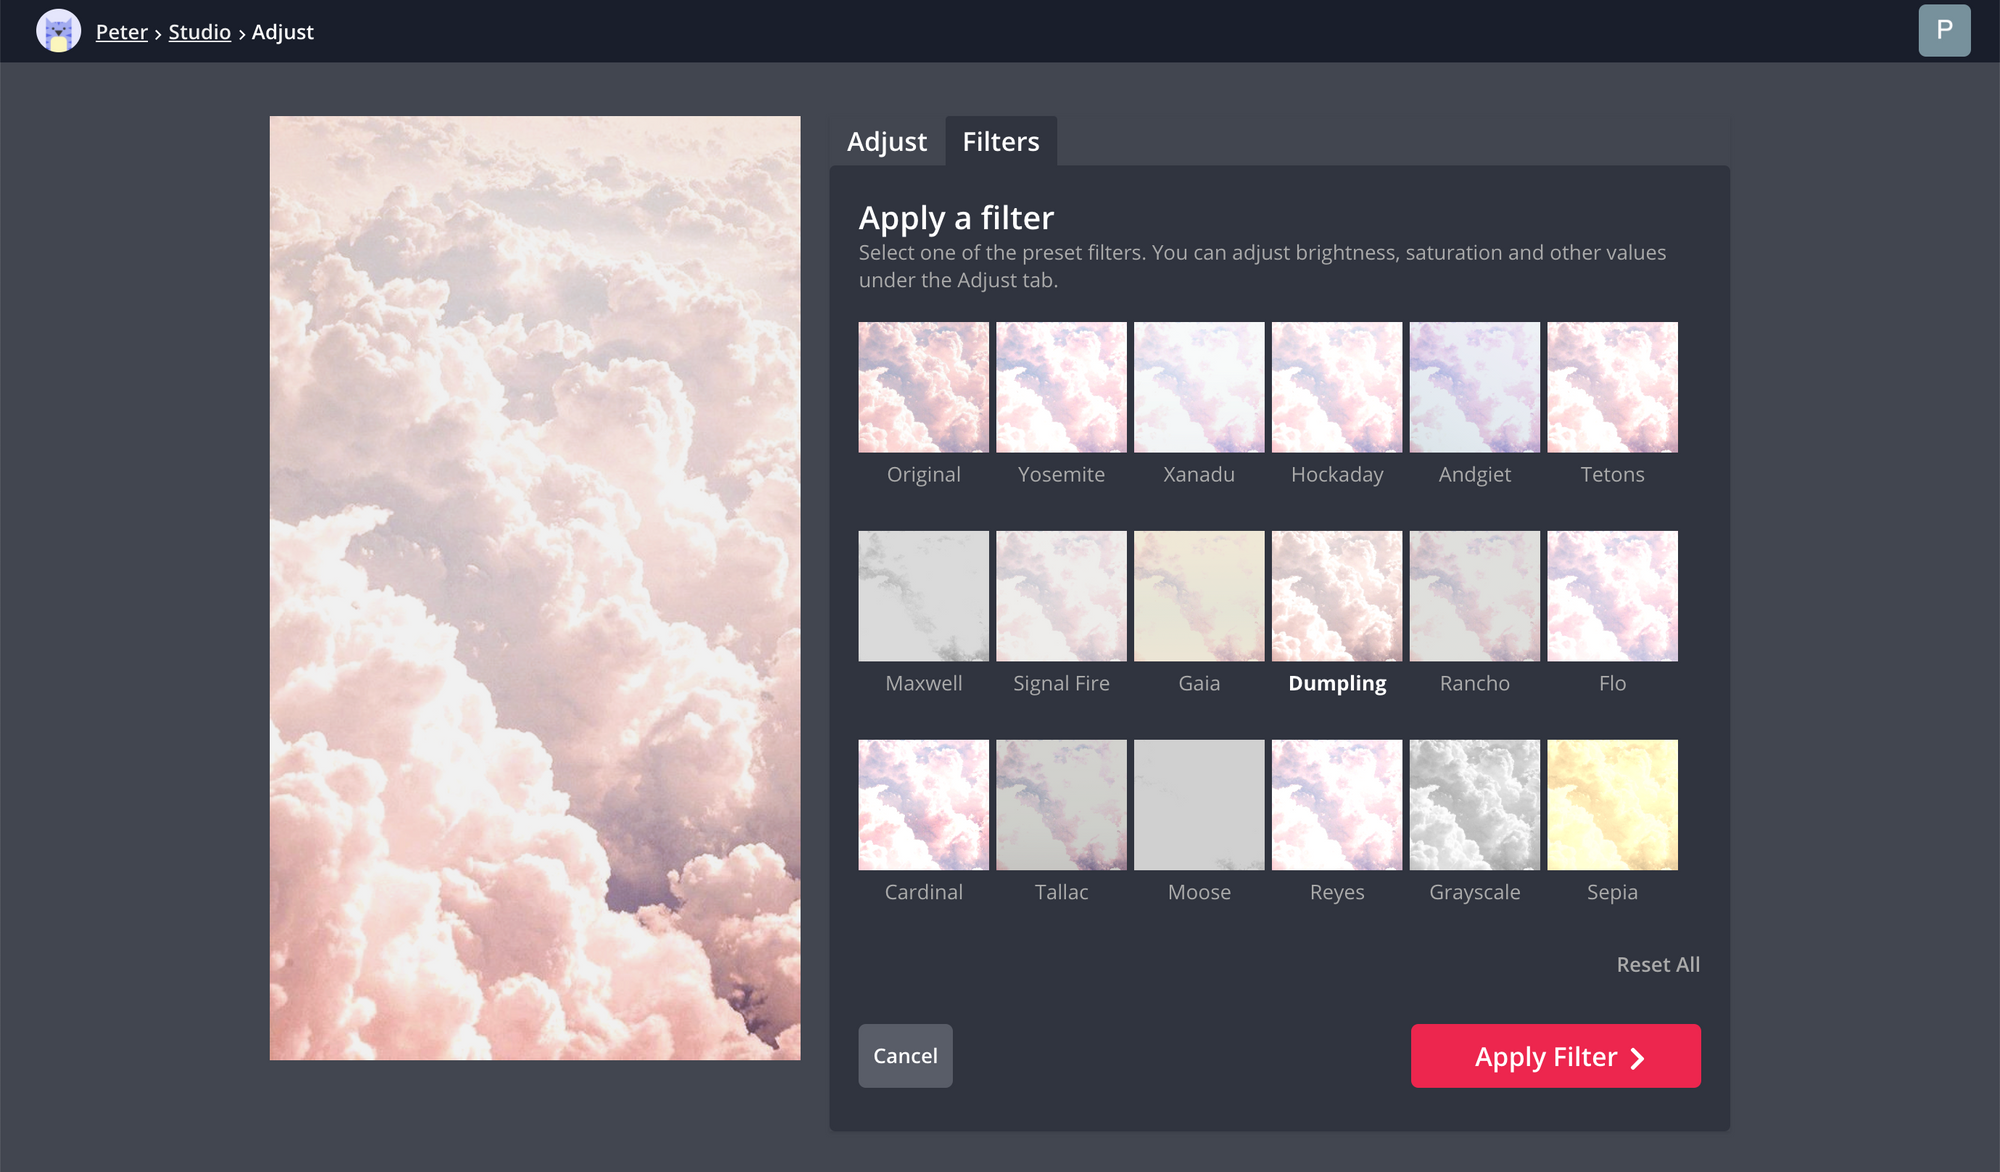
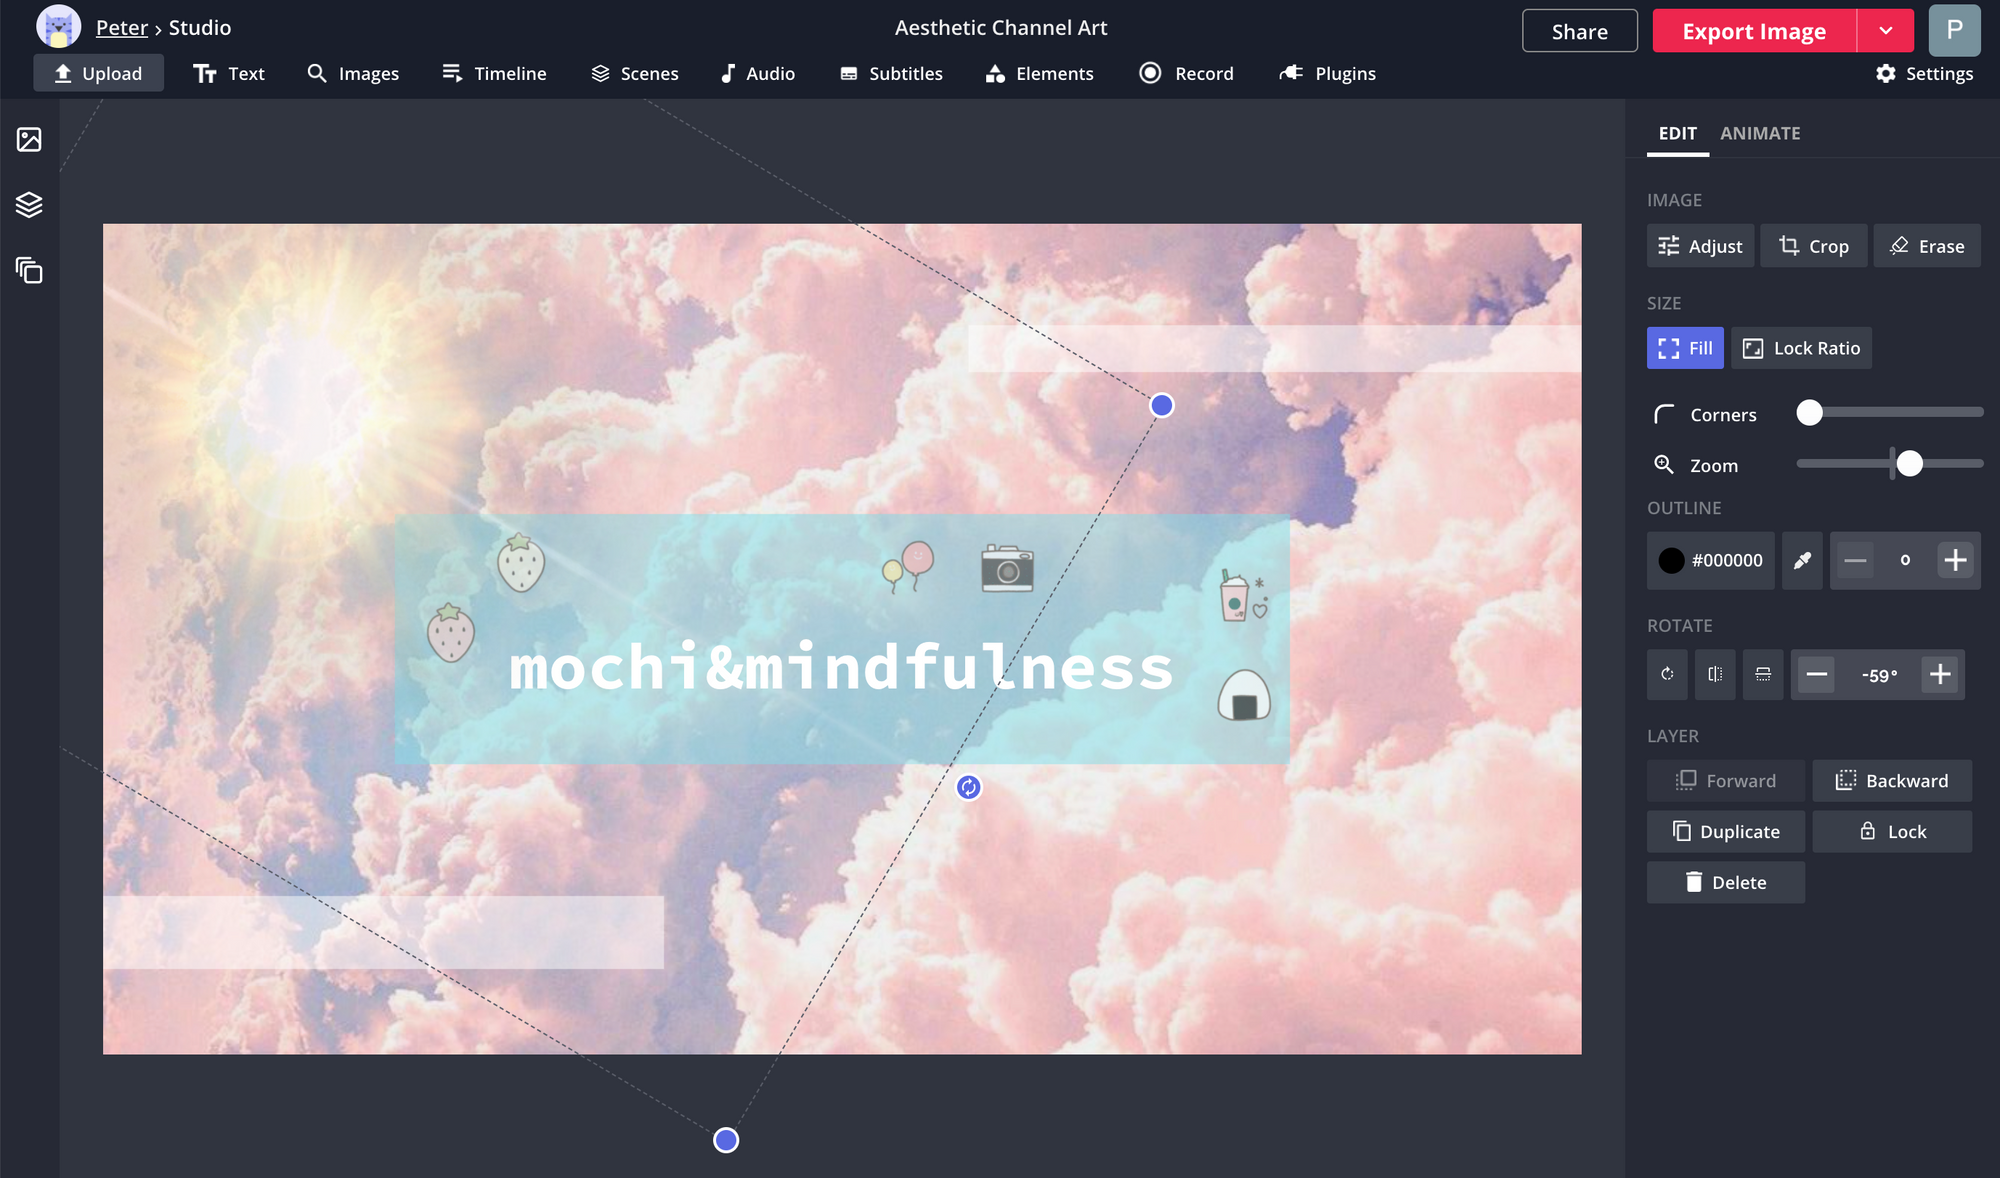
Now it’s time to make all the aesthetic edits your banner needs to catch your audience’s eye. The easiest way to create a distinctive aesthetic for your banner is to use some combination of filters, visual overlays, and custom text. To add a filter, select Adjust in the right-side menu. Here, you can select the Filters tab to choose from 18 different aesthetic preset filters, or select the Adjust tab to manually change your opacity, brightness, saturation, contrast, and blur.
You can also add fancier effects to your channel art using semi-transparent overlays. Select Images from the top toolbar and search for things like “glitter transparent” or “VHS effect PNG.” Overlaying one of these flashy effects can be perfect for aesthetic image edits.
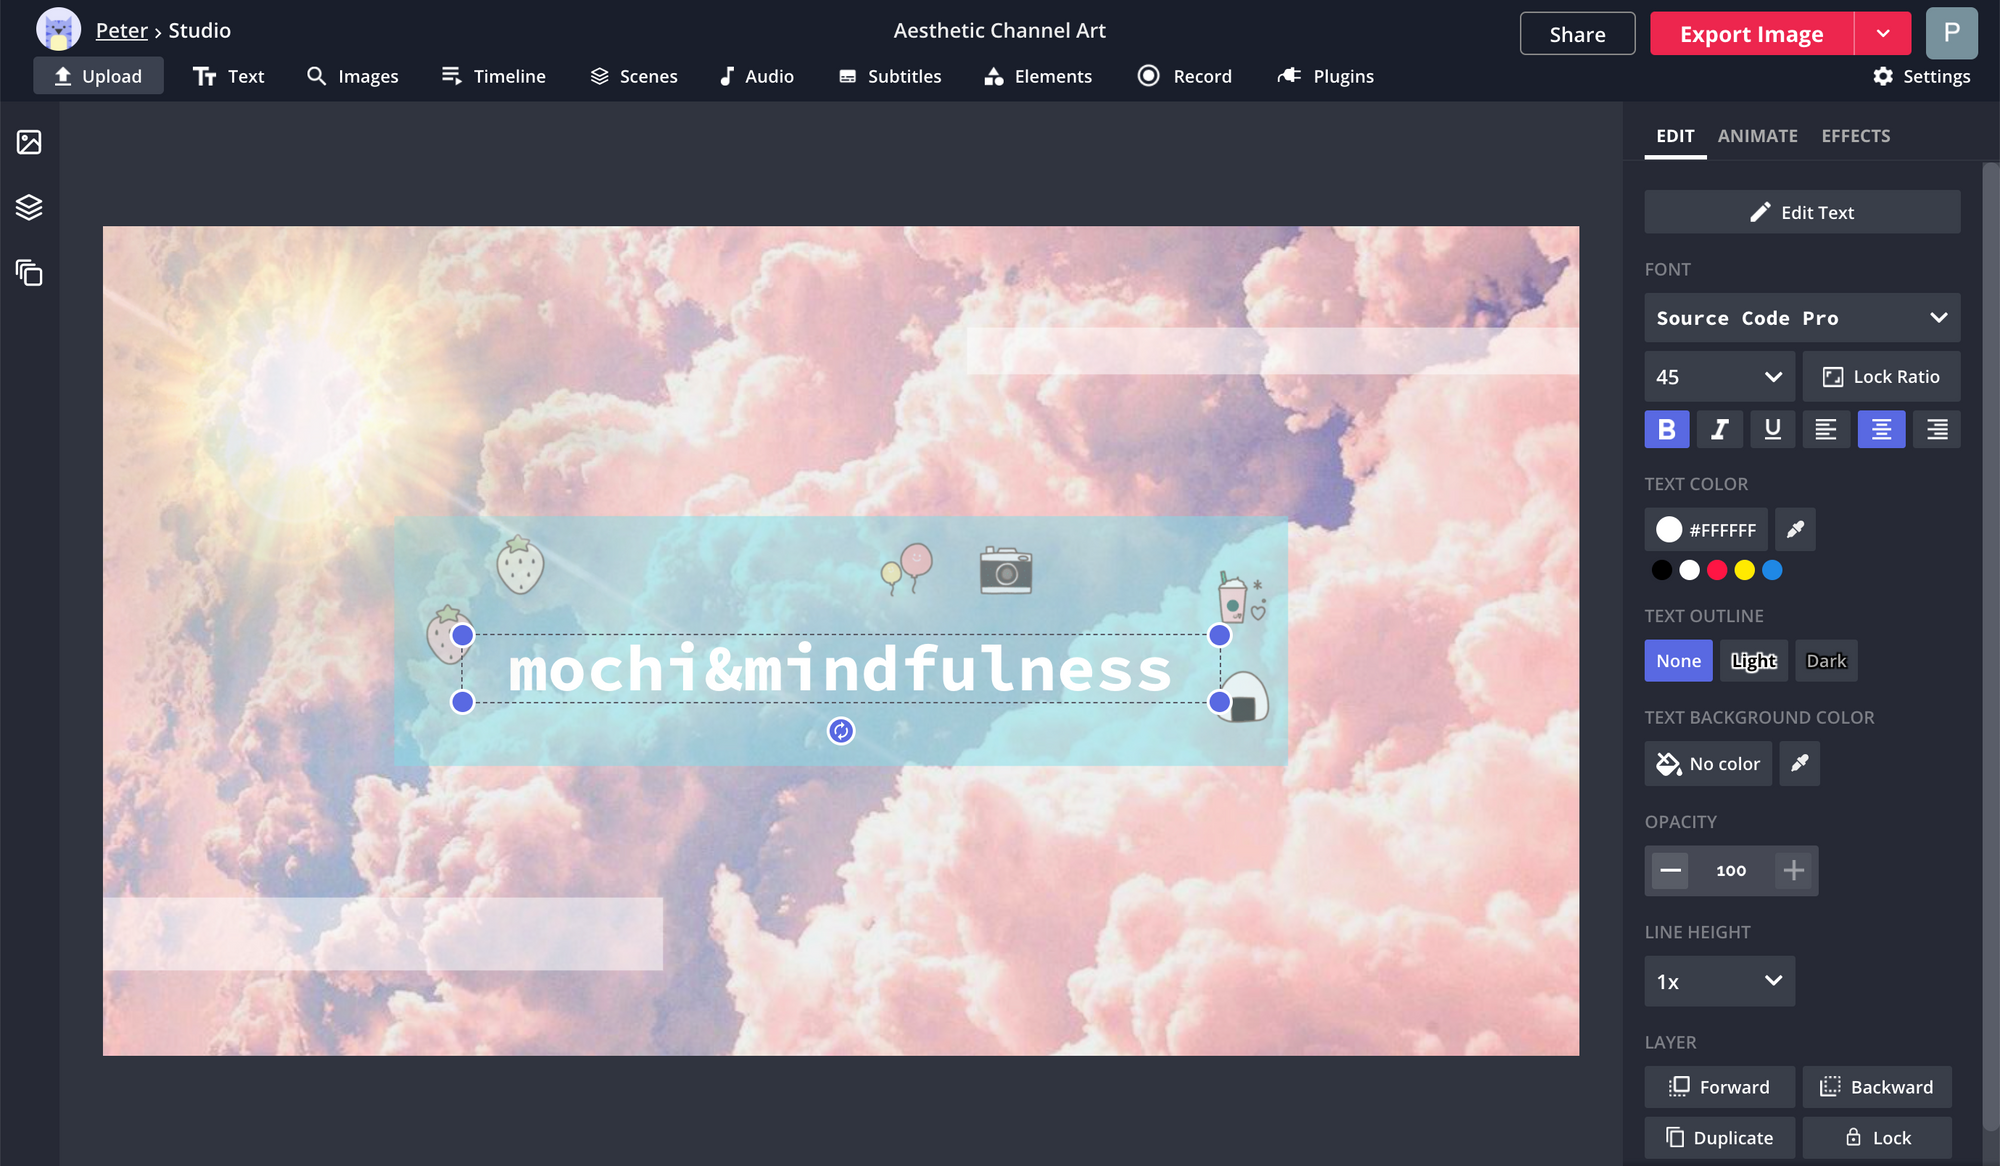
Custom text is also a big part of aesthetic visual edits. Select Text from the top toolbar, enter the text you want to use, and customize everything you want in the right-side menu. You can customize your text’s font, color, outline, background, and even drop shadow or glow effect.
Step 4: Download and Add to YouTube
Once you've edited your banner’s aesthetic and resized it to fit YouTube's specifications, click Export Image in the upper right-hand corner. Kapwing will automatically begin processing your YouTube banner image, and it will be ready to download in under a second.
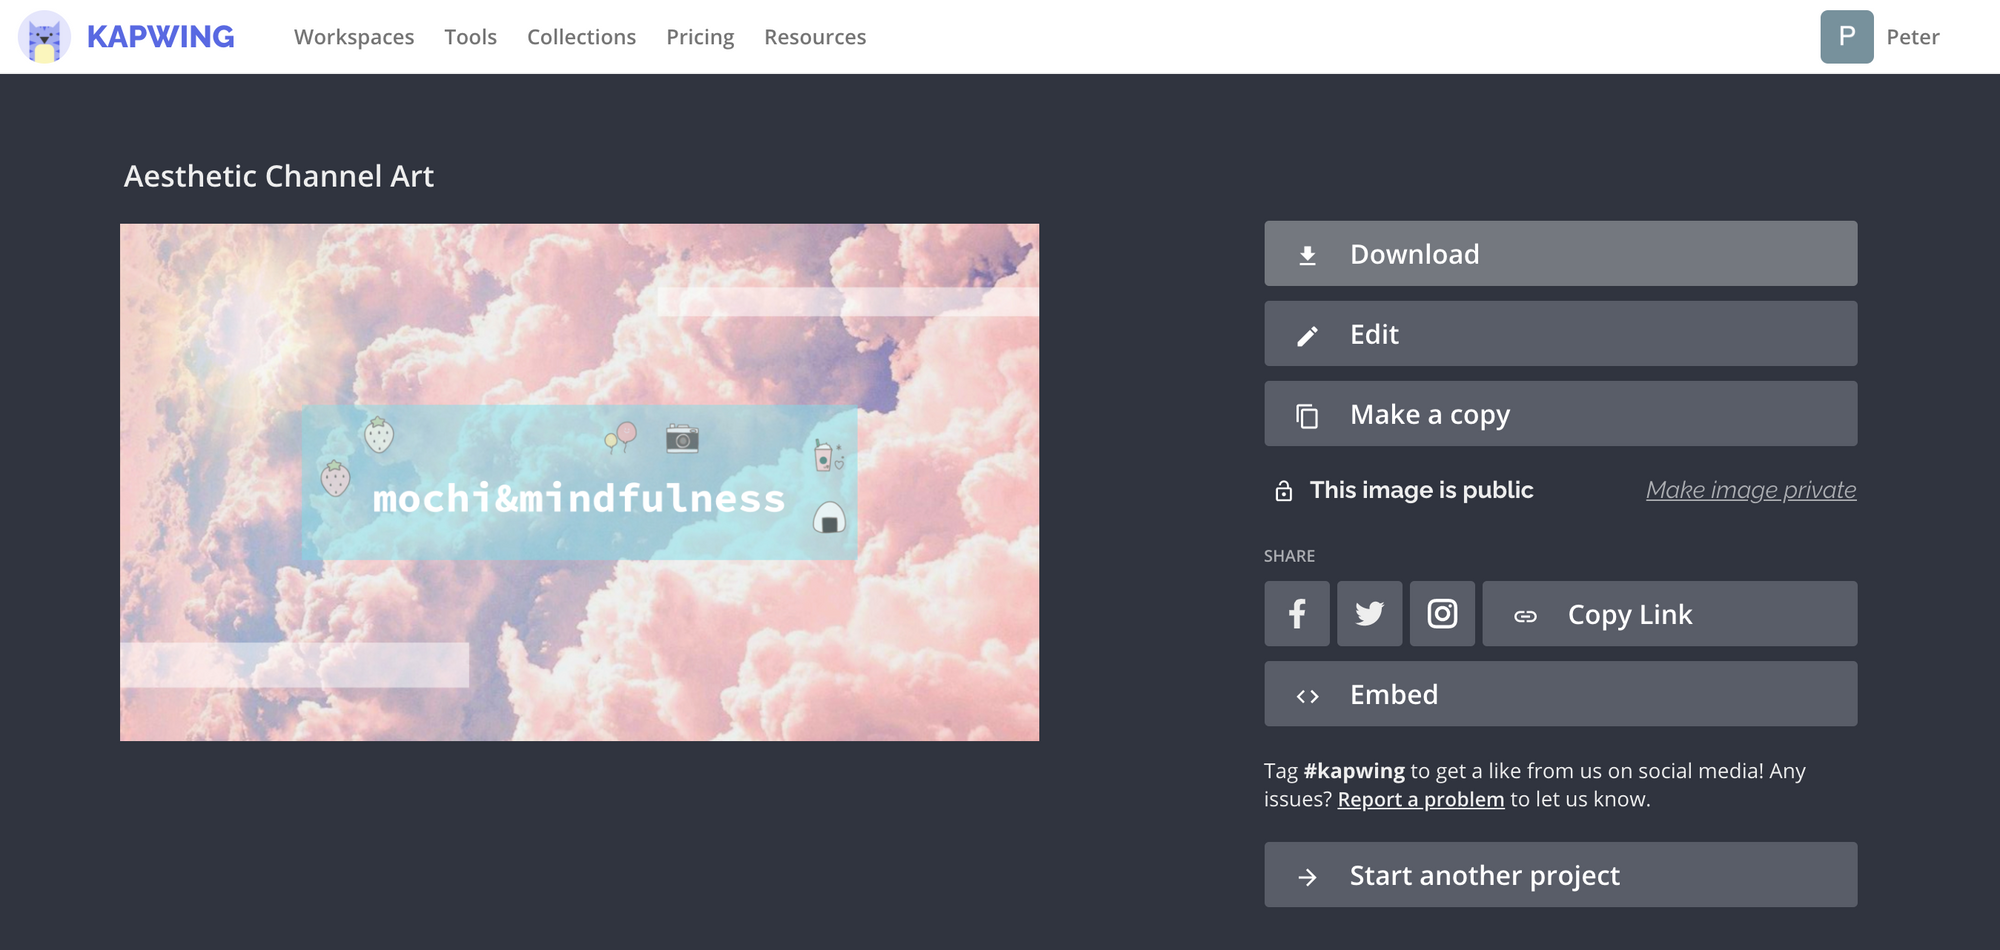
Use the Download button to save your banner to your files and head over to YouTube. Click your profile icon in the upper right corner of the window and choose Your Channel from the dropdown. To change your channel banner, click on Customize Channel.
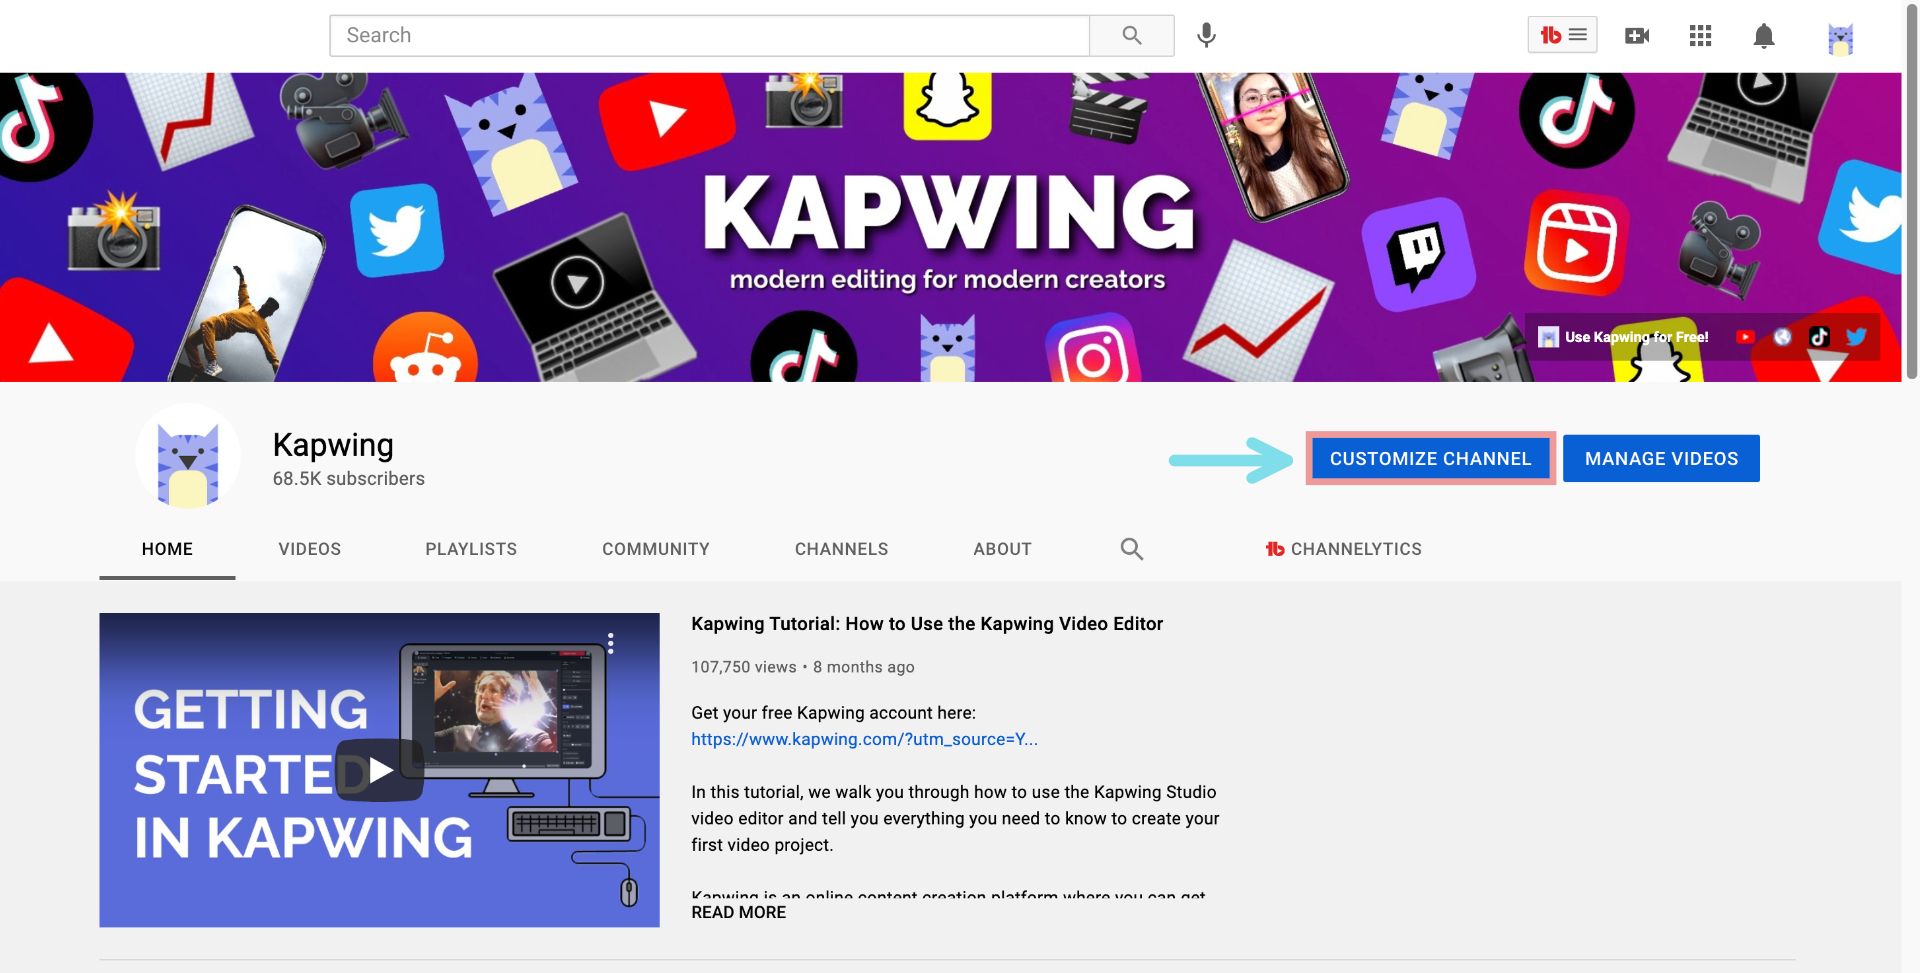
Go to the Branding tab and find the Banner Image section. Click Upload or Change and find the photo you downloaded from Kapwing in your file browser. YouTube will show you how your banner will look on different devices: click Select, and your YouTube channel banner image is all ready to go.
I hope this article helps you create the ideal YouTube banner for your channel! For more tips and tutorials on creating great digital content in 2021, check out the Kapwing YouTube channel or read through some related articles on YouTube channel growth:
• How to Use YouTube Shorts: Everything You Need to Know
• How to Make an Engaging YouTube Channel Trailer
• How to Add Any Music to Your YouTube Videos
• How to Download YouTube Live Streams in 2021