
How to Add Accurate Subtitles to Veo 3 Google Gemini Videos
Veo 3 subtitles can be unpredictable — let's fix that
The Veo 3 video generator by Google Gemini is capable of producing high-quality, audio-synced video clips from detailed prompts. However, many users have found that the tool often includes subtitles by default — and not always accurately. In other cases, subtitles are omitted when they’re actually needed.
In this article, we’ll cover how to address both sides of the problem: how to prevent Veo 3 from generating subtitles when you don’t want them, and how to add accurate, fully customizable subtitles when you do. You’ll learn how to write prompts that reduce the risk of automatic captions and how to use an AI-powered captions generator to create clean, editable captions after your video is made.
Whether you're aiming for a text-free VEO 3 generation or polished subtitles to match your video, this guide will walk you through the most effective methods available.
Table of Contents
- How to Use the Veo 3 Video Generator
- Generating a Veo 3 Video Without Subtitles (or any Text)
- Creating Accurate Subtitles for a Veo 3 Video
How to Use the Veo 3 Video Generator
The Veo 3 model is Google's most advanced video generation tool currently available. While it offers higher quality outputs, the user experience remains almost identical to previous models.
For a full walkthrough of how to generate content using Google Gemini, check out our guide on generating videos with Veo 3 (or Veo 2).
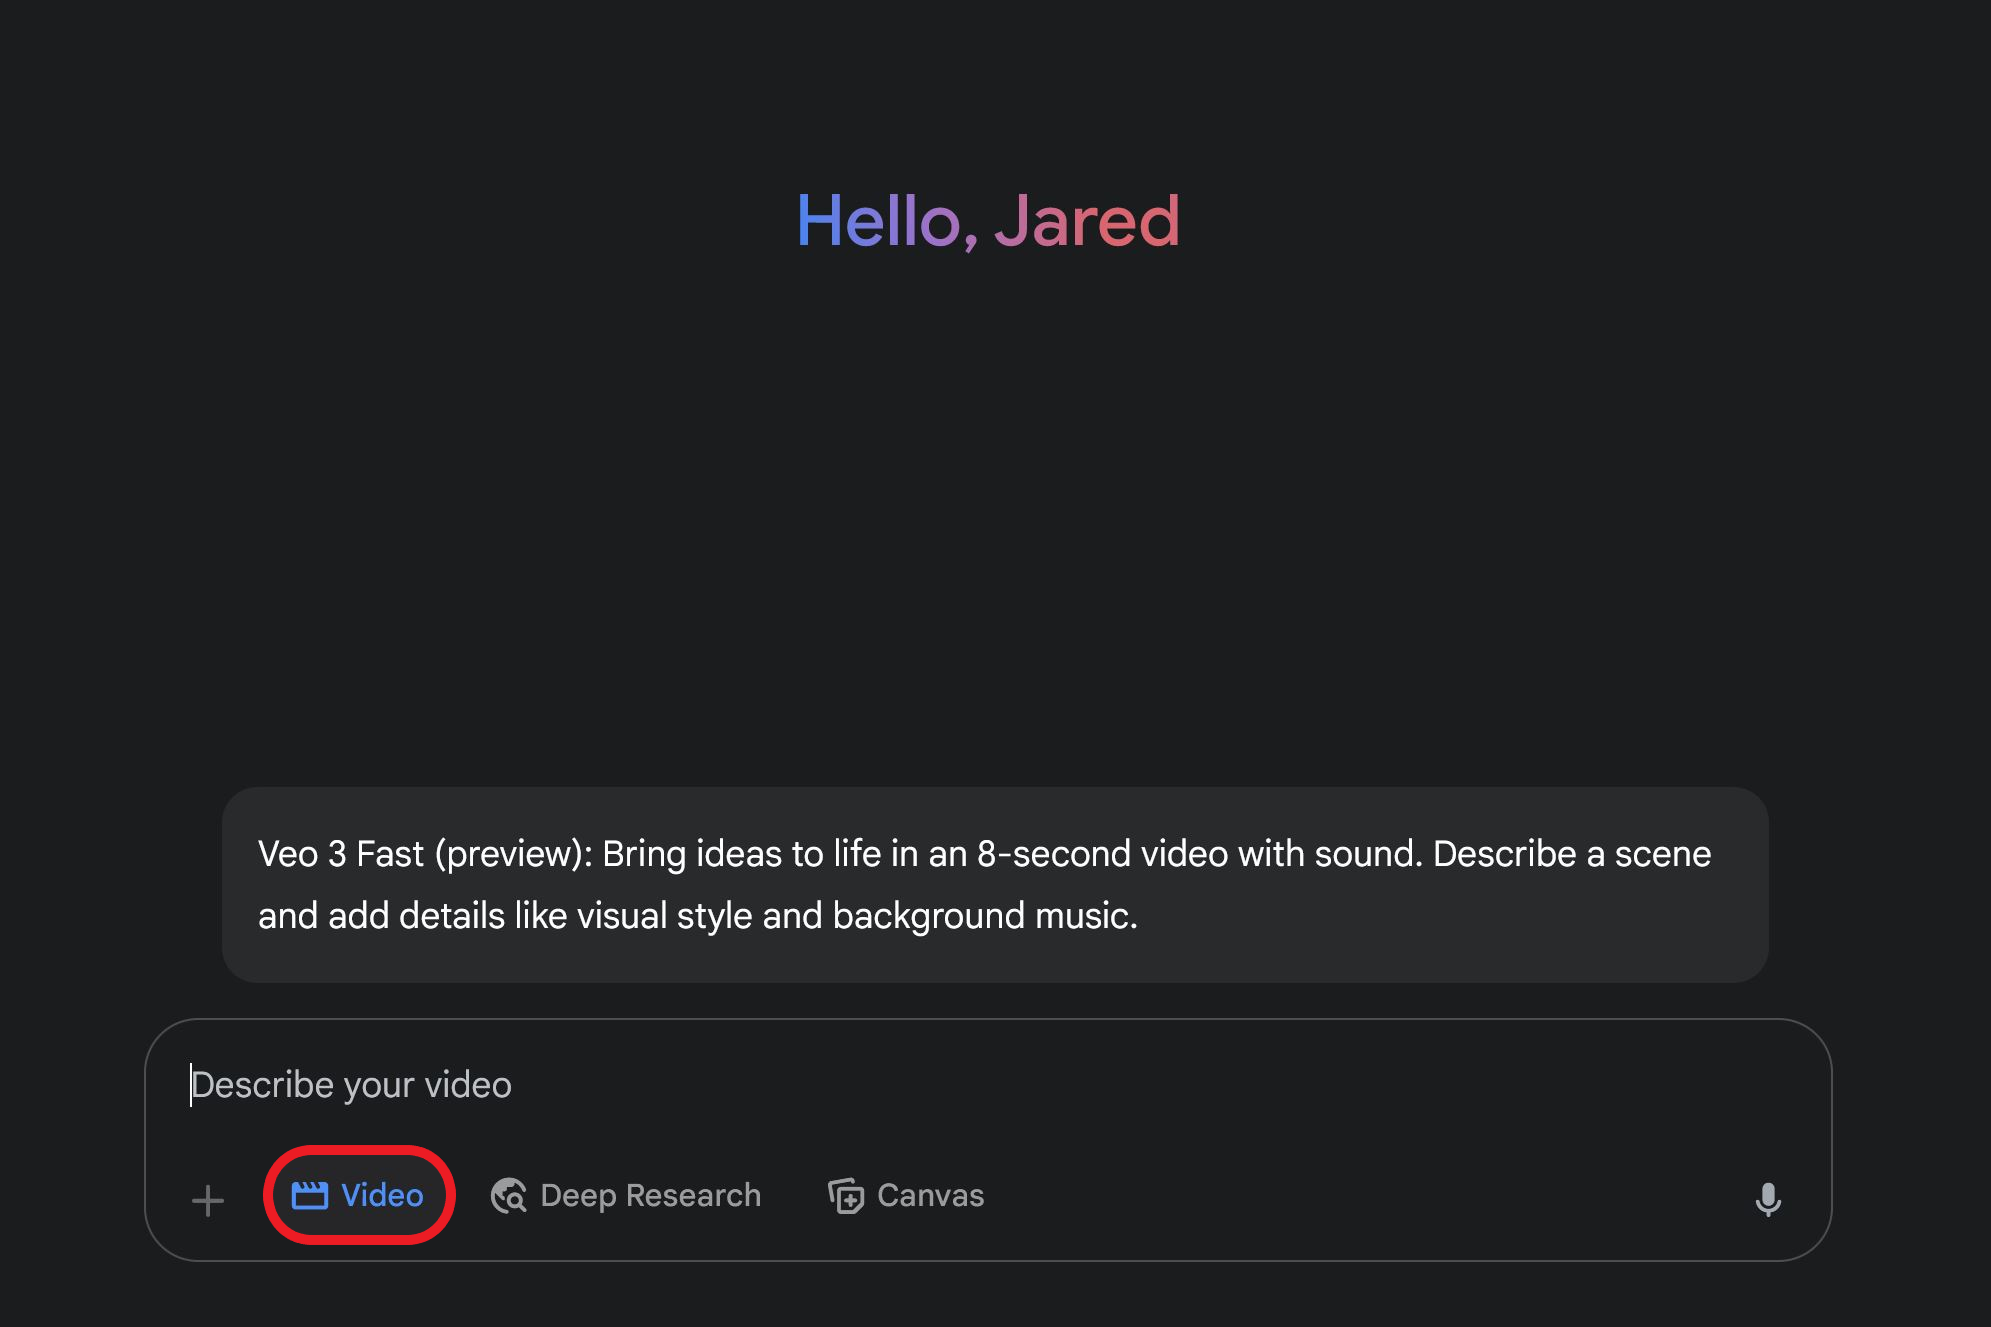
1. Select the Veo 3 Model
Click the Video button in the Gemini interface and choose the Veo 3 option from the model selector if not selected by default.
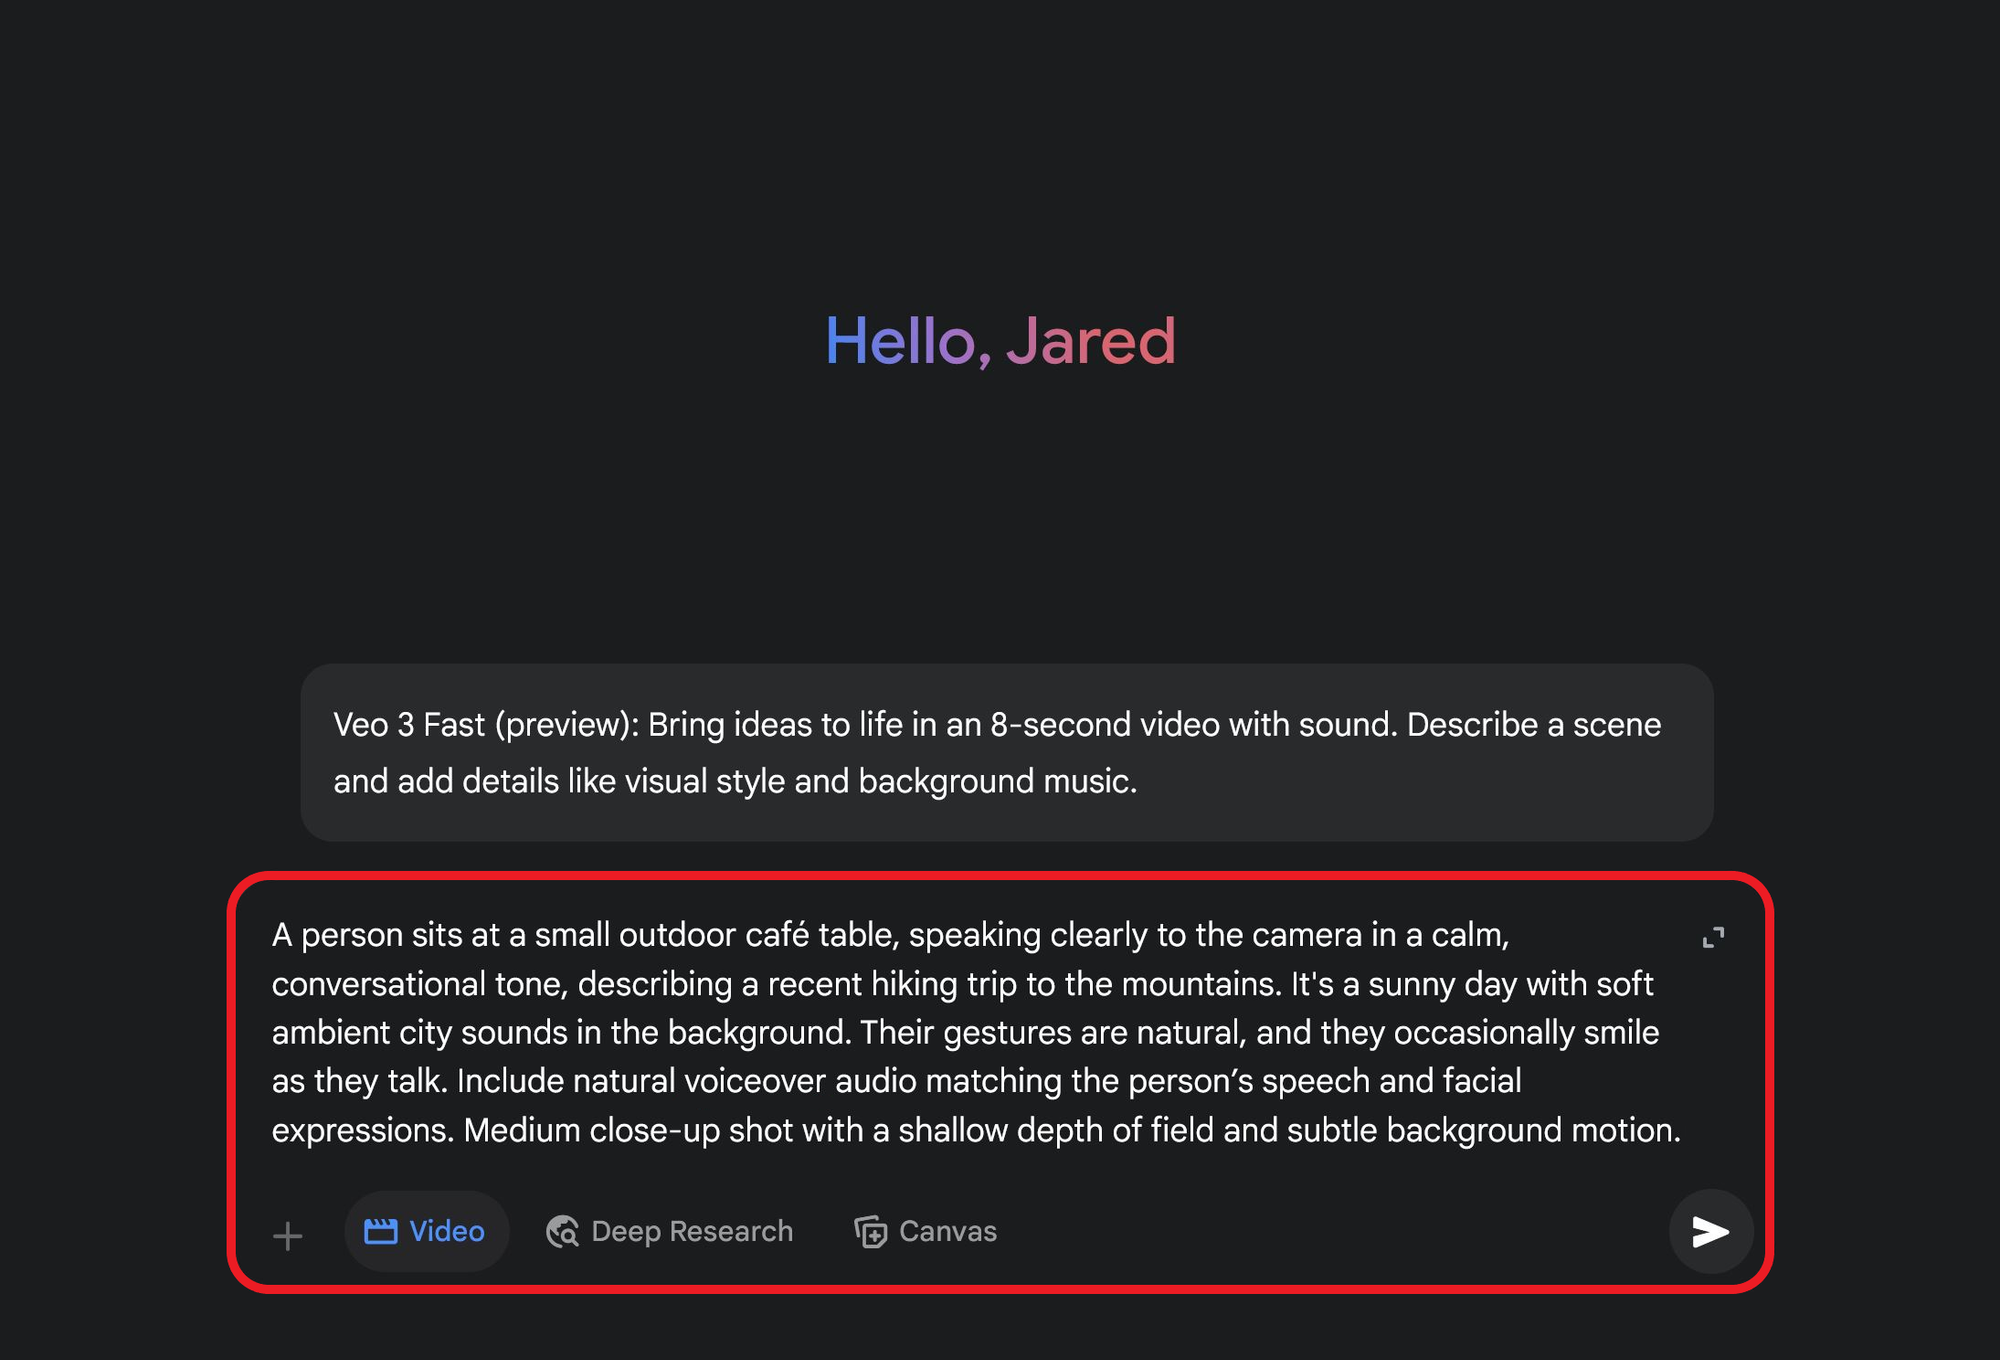
2. Write your Video Prompt
Enter a detailed video prompt describing your scene. Using an AI assistant like ChatGPT can help refine your prompt and lead to more accurate and visually coherent results.
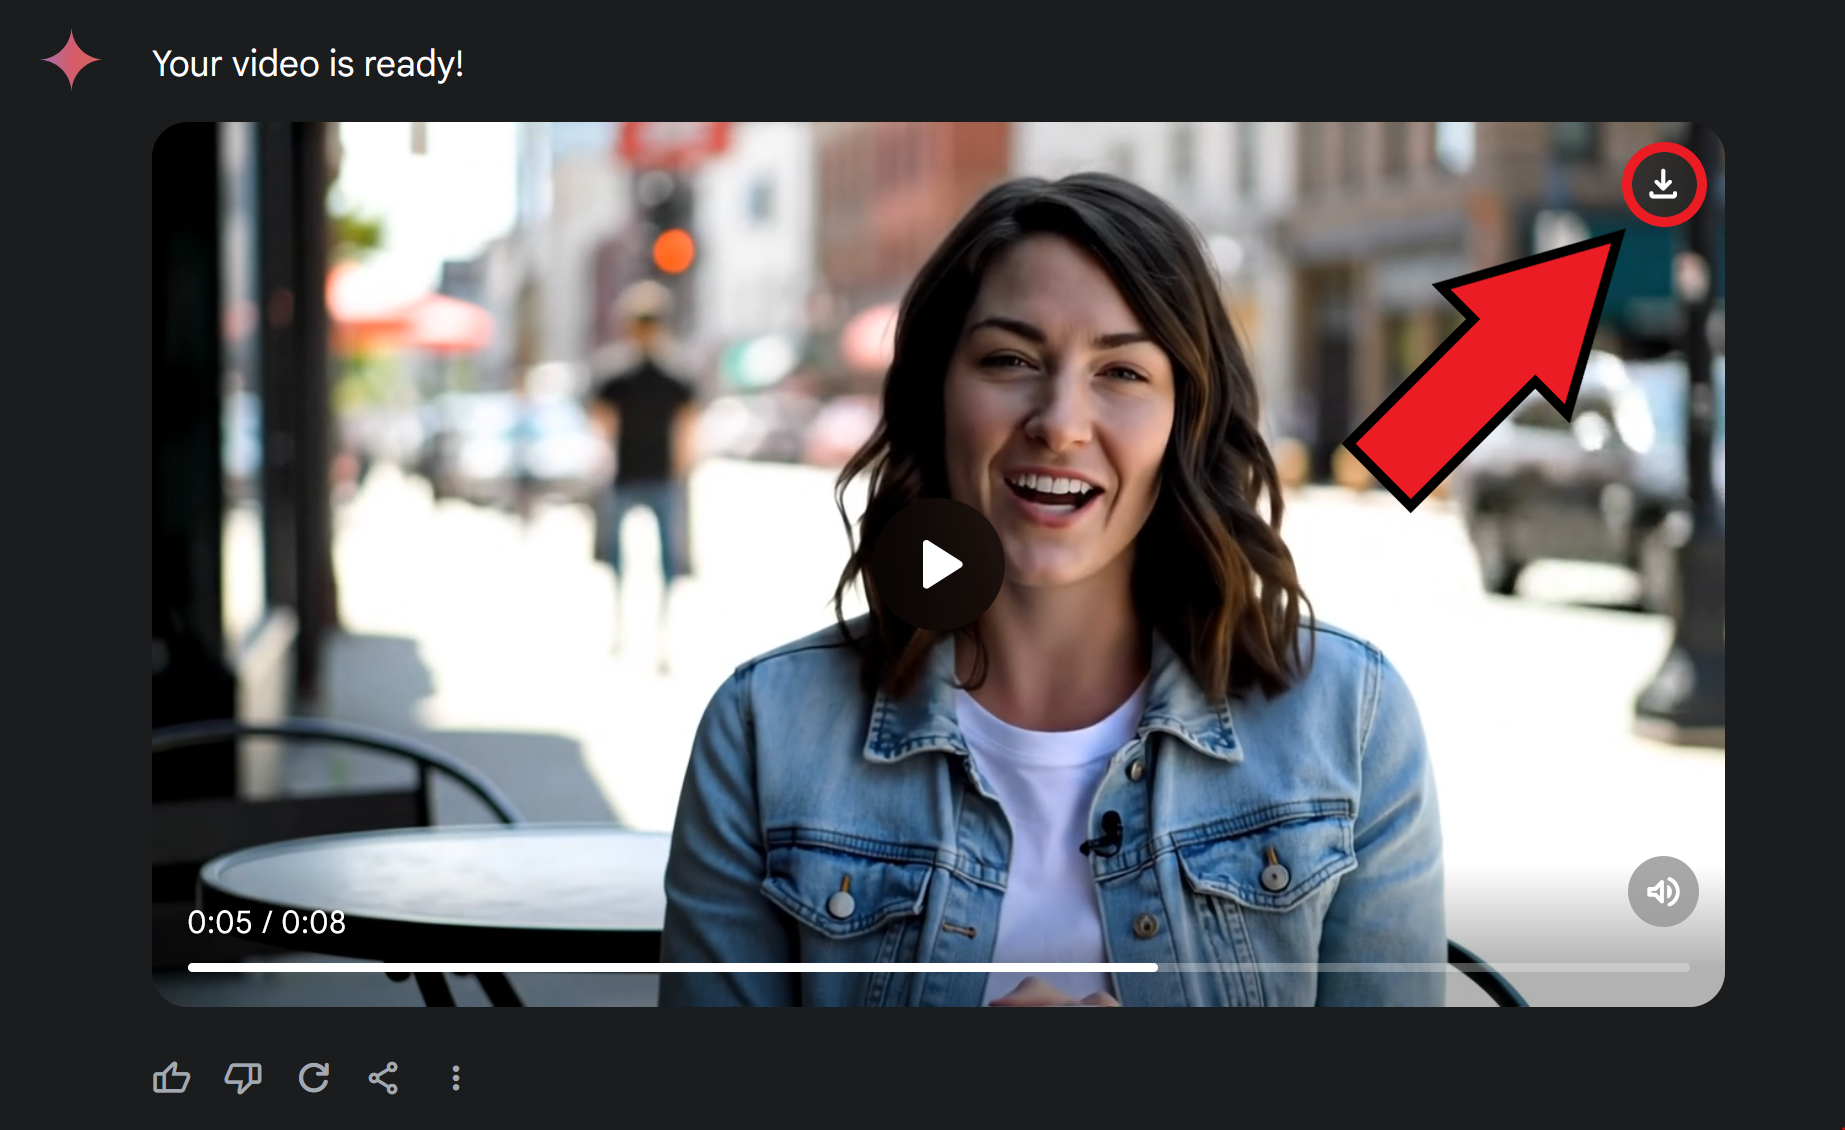
3. Download and Share
Once the video is generated, hover over it to reveal the Download icon in the top right corner. This will save the video to your device, enabling you to share it or begin making adjustments in a video editor.
While future updates may expand Veo 3’s capabilities, including longer durations or higher frame rates, the current video specs are:
- Format: MP4
- File Size: Approx. 5MB
- Resolution: 1080 × 720 pixels
- Frame Rate: 24 fps
- Audio: 48 kHz, 2-channel stereo
Note: All videos generated using Veo 3 are created in a landscape aspect ratio. To post on social media, most videos will need to be resized to a vertical aspect ratio.
Generating a Veo 3 Video Without Subtitles (or any Text)
While the Veo 3 video generation model is highly capable, many users are running into a recurring issue with improper subtitles or video captions.
These problems fall into two categories:
- Subtitles that are added unexpectedly
- Subtitles that are expected but are inaccurate or poorly formatted
Both of these can be equally frustrating. Since Veo 3 generates a single-layer video file, there's no way to toggle these subtitles off after the fact. The only real solutions are to prevent them during generation or to remove them afterward with editing — a topic we’ll cover later in this section.
To demonstrate the issue, here is an example of a Veo 3-generated video where subtitles were included but misaligned with the actual spoken audio.
By default, Veo 3 videos suffer from subtitle limitations, making them unsuitable for commercial use.
As seen in the example, the subtitles suffer from several problems:
- General misspellings
- Incorrect timings and moving text
- Small font size and poor visibility
That said, one thing the AI does get right is its color formatting. The white text with a black outline creates high-contrast captions that are visible on almost any background.
Before we explore how to generate your own accurate captions, let’s start by breaking down how to avoid getting any captions or on-screen text in the first place. Keep in mind that generating without text involves a degree of luck. While no method is guaranteed to work every time, the following strategies are the most consistently recommended by users across the web.
“Top to Bottom” Descriptive Prompts
Those familiar with AI video generation, especially when using a tool like Veo 3, already know that the quality of your results depends heavily on how well you write your prompt.
But beyond the basics, there’s a lesser-known technique that can help you avoid issues like unwanted captions: writing a “top to bottom” prompt.
This approach involves filling out your prompt with so much specific detail that the AI has no room to improvise. When nearly every element in the frame is accounted for — from camera angle and lighting to background motion and character behavior — the model is less likely to insert anything unexpected, like unrequested subtitles.
Writing at that level of specificity isn’t easy, which is where tools like ChatGPT can help. For example, I wanted to generate a video of a skateboarder explaining a trick without any on-screen text. I described the scene and my goal, and ChatGPT returned the following prompt:
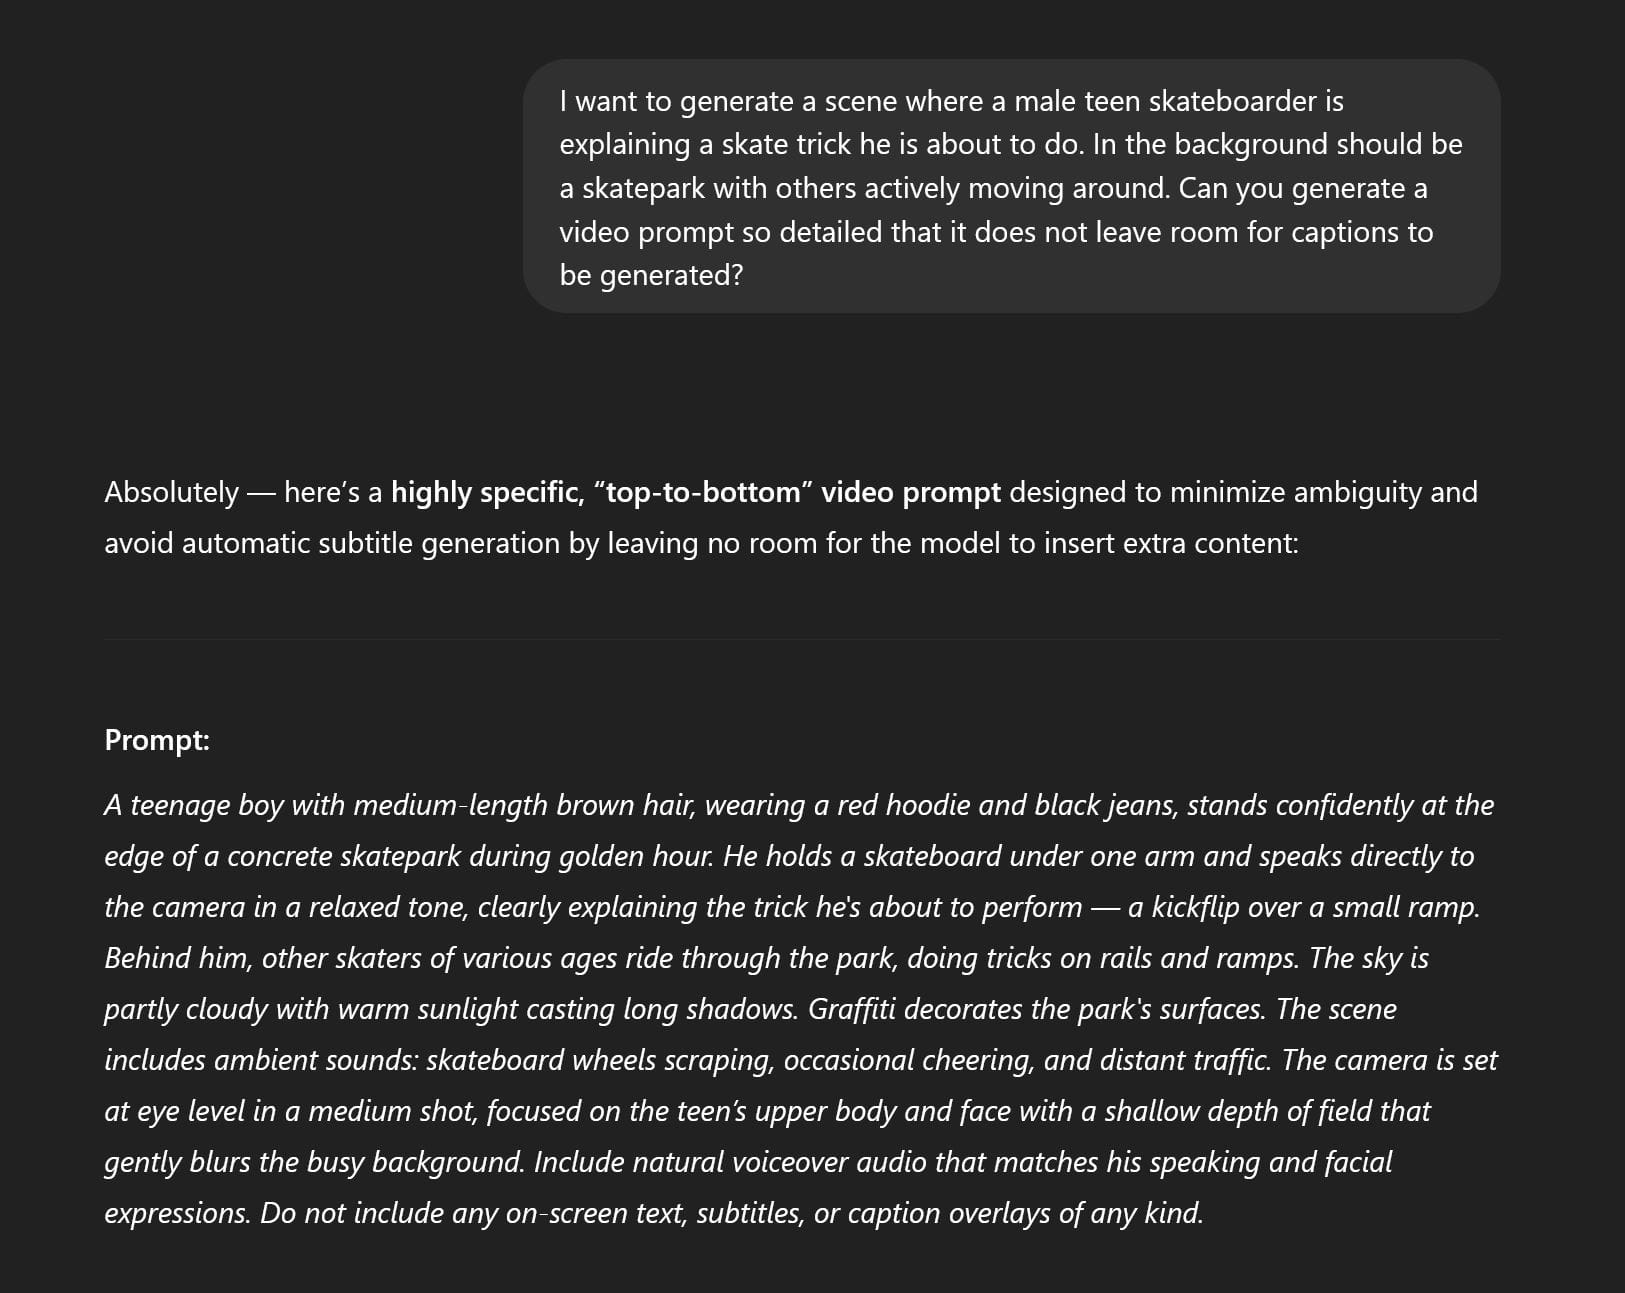
The result was a video that aligned with my vision and produced no subtitles.
This Veo 3 video was generated using a highly detailed prompt, which helped avoid unwanted elements like subtitles.
Using 'Negative Prompts'
To avoid 3-generated even more directly, you can use what’s known as a negative prompt.
Think of a normal prompt as a positive prompt — you’re telling the AI what you want it to generate. A negative prompt, on the other hand, tells the AI what to avoid. While Veo 3 doesn’t have a separate field for negative prompts, you can include these instructions at the end of your regular prompt.
Try ending your prompt with clear statements like:
"Do not include subtitles or on-screen text"
"Exclude any written text of captions."
"No subtitles or text overlays should appear."
An example prompt using this would look something like this.

While this method is not foolproof, it significantly improves the odds of getting a clean video focused only on visuals and audio.
Using negative prompt details typically prevents Veo 3 from adding unwanted text or captions.
Removing Text with an AI Tool
If you've already generated a great video and it came with baked-in subtitles, your only option is to remove them manually. Since these captions are embedded in the video itself, basic video editing software may not be enough.
Instead, you can turn to AI-powered tools that specialize in text or logo removal. The following video walks through a few of the most accessible options, ranging from professional frame regeneration tools to quick-and-dirty blur effects.
Here are three of the simplest solutions featured in the video. Direct links to all tools mentioned in the video can be found in the video description on YouTube.
- AI Watermark Remover — Regenerates video frames to erase logos or subtitles
- Logo Mask — Blurs text but leaves a visible smudge in its place
- AI Text Remover — Uses generation to remove subtitles or logos more seamlessly
Creating Accurate Subtitles for a Veo 3 Video
The best way to create accurate subtitles for a Veo 3 video is by using a dedicated Automatic Subtitle Generator. This method ensures your captions are precise, easy to edit, and fully customizable. Even if the first draft isn’t perfect, you can revise the subtitles as much as needed without regenerating the video.
Here’s how to do it.
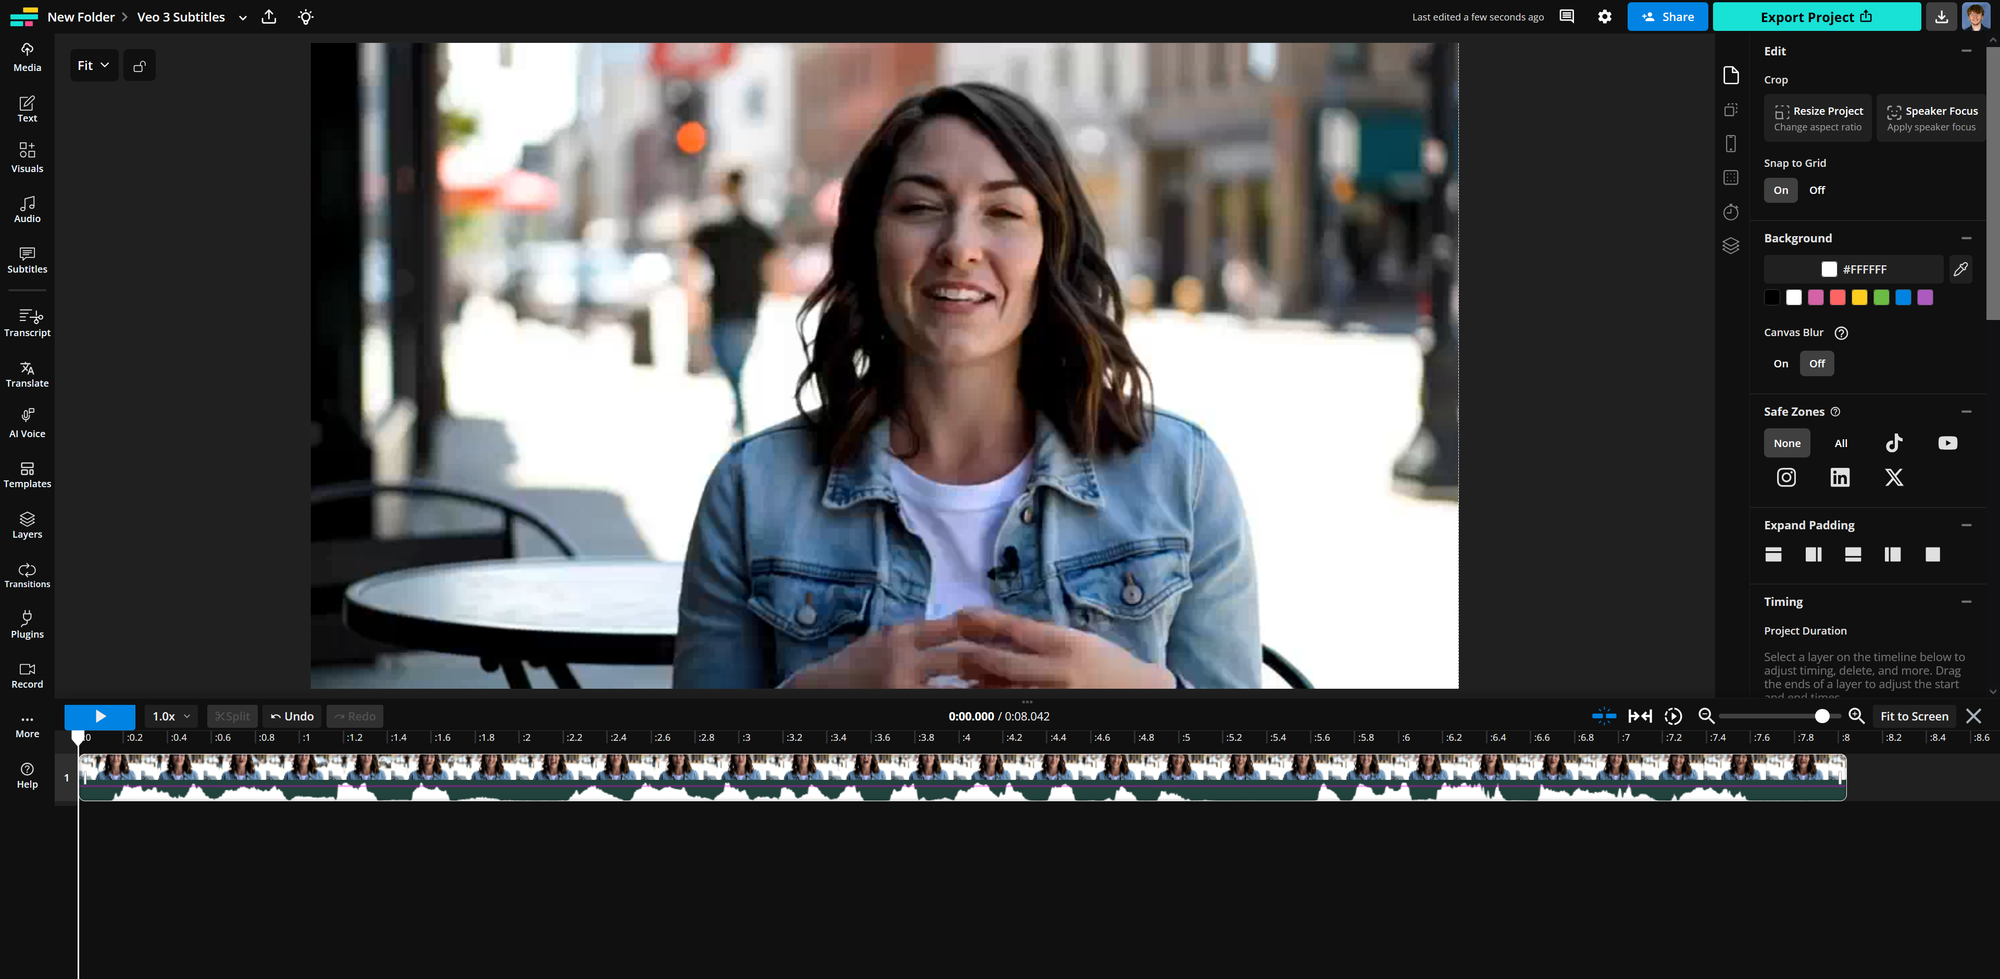
1. Create a Video Project
Start by uploading your Veo 3-generated video to the Kapwing editor. The tool will automatically detect and load your video and audio into a new project. From here, you can start making general edits or move straight into generating subtitles.
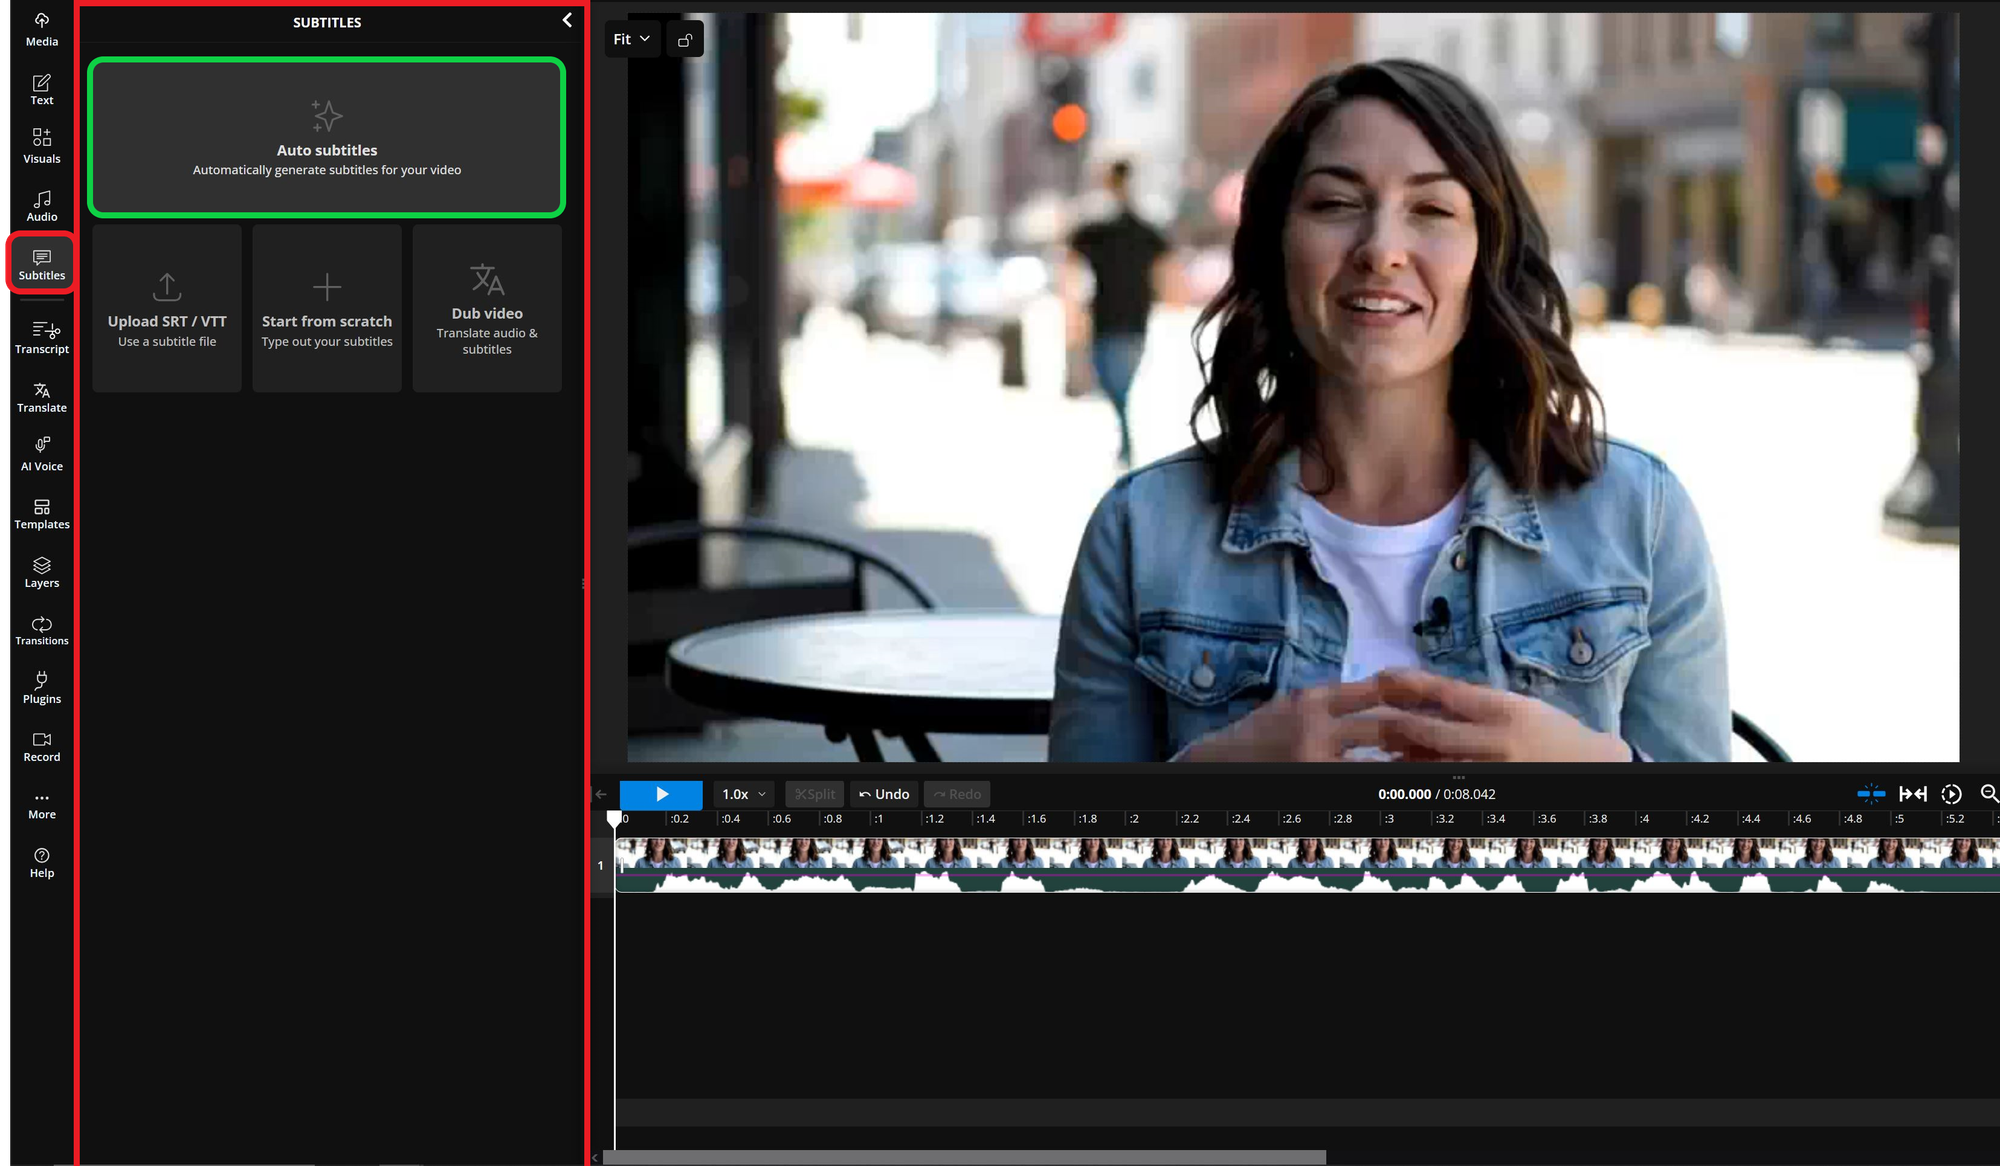
2. Generate Subtitles
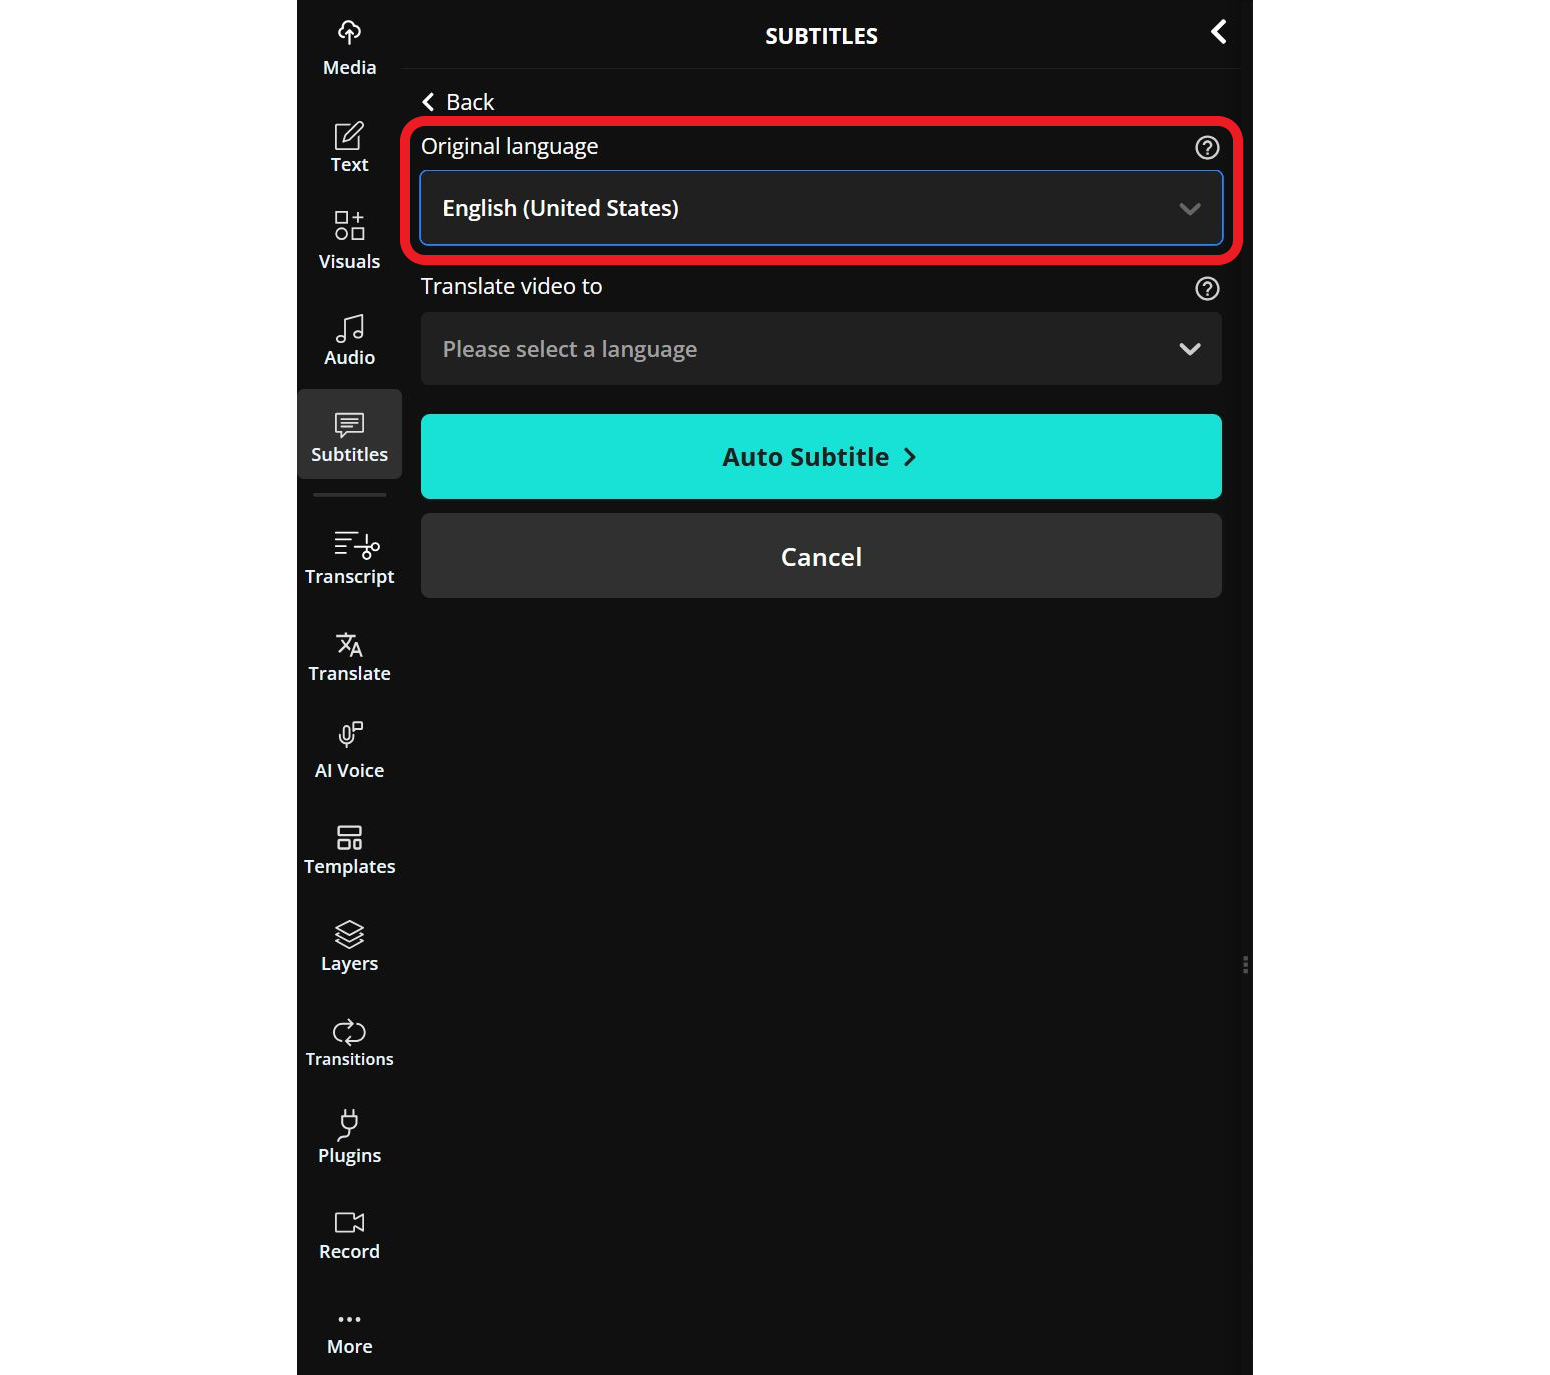
Open the Subtitles menu from the left-hand sidebar and click the Auto Subtitles button.
You’ll be prompted to confirm the language spoken in your video. Once selected, the subtitles will automatically generate and appear timed with the spoken content.
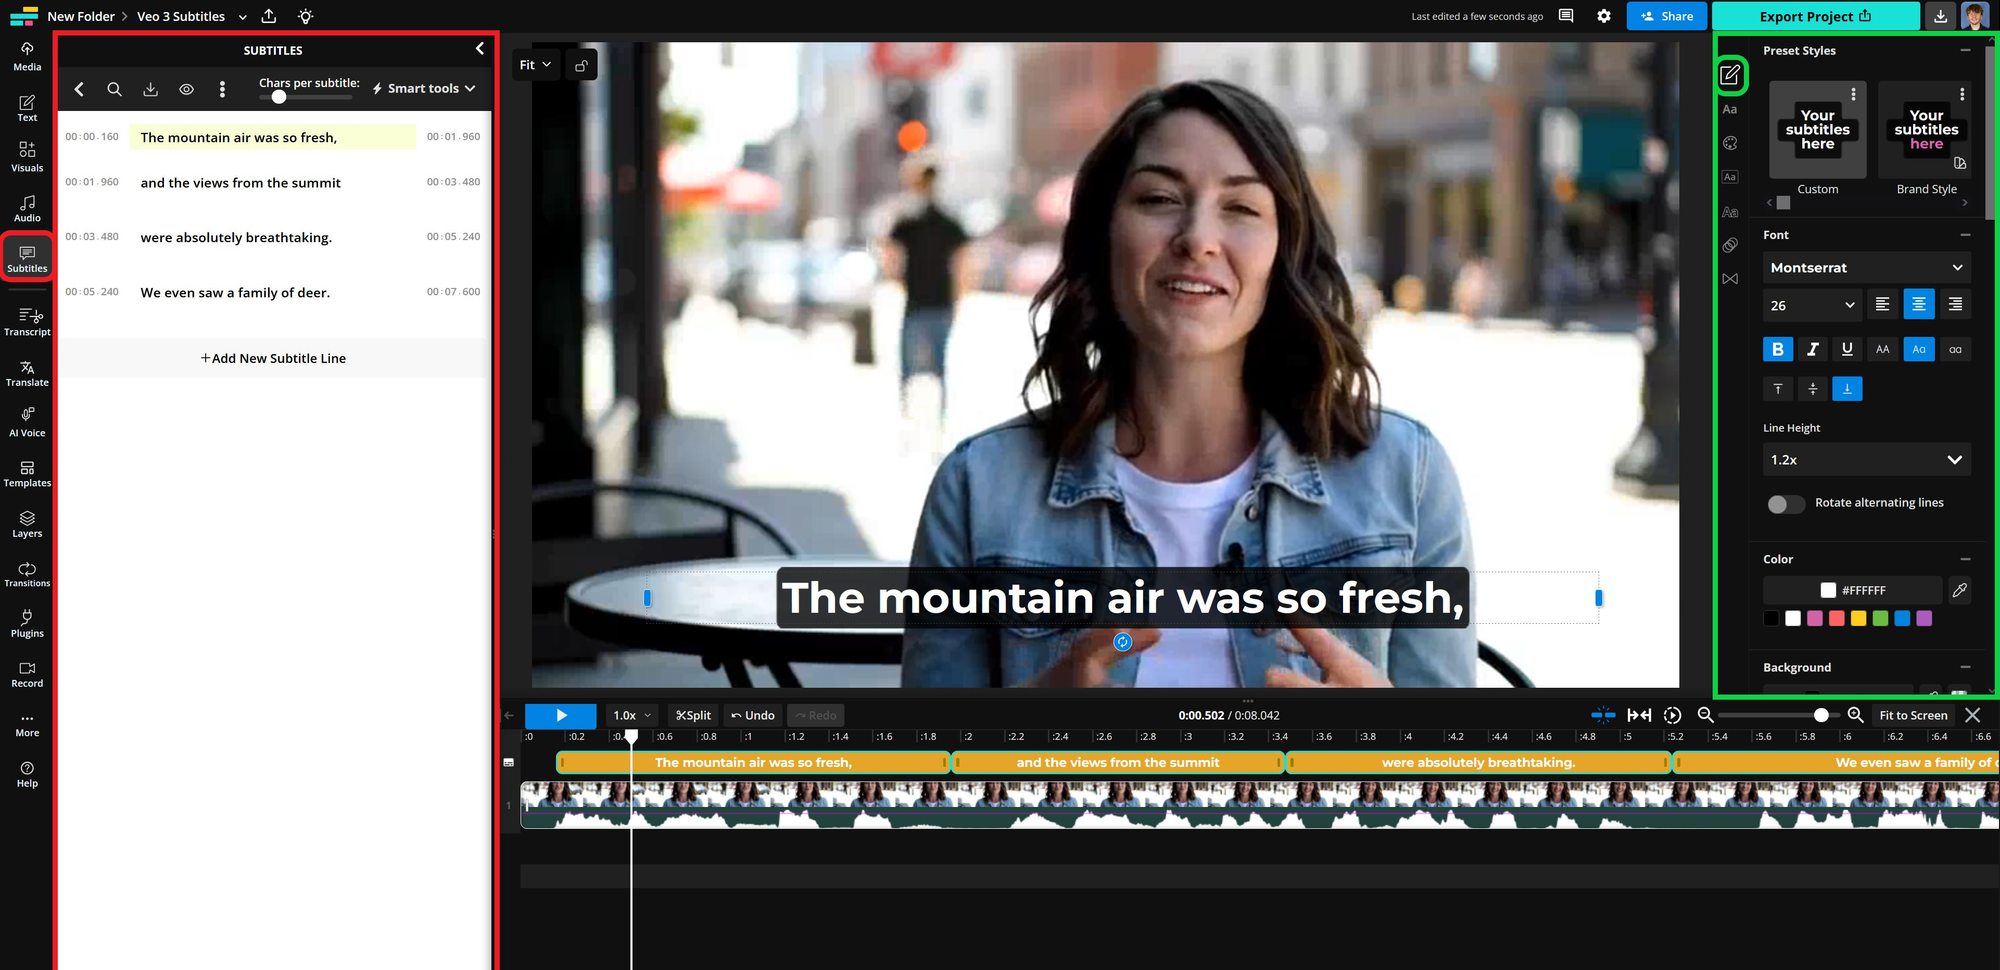
Once the subtitles are generated, they will appear directly over your video, automatically synced with the spoken audio. From there, you can customize their appearance, including the color, font, animations, and more.
3. Editing your Subtitles
For fine-tuning, the left side of the editor displays the full transcript. This is useful for correcting any transcription errors, which can occur if the original audio is unclear or mumbled.
On the right-hand side, you can adjust styling options such as font, size, color, outline, and more. These controls help ensure your subtitles are easy to read, meet accessibility guidelines, and align with your brand’s visual style.
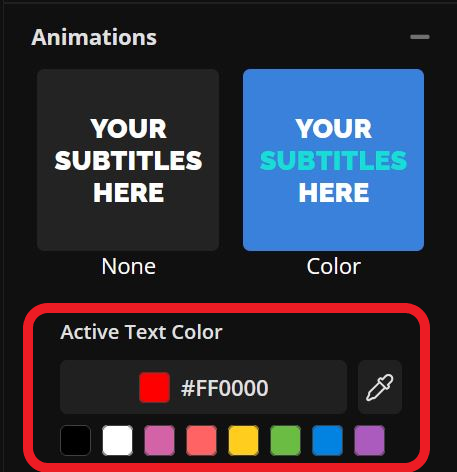
One standout feature is Active Text Color, which highlights each word as it’s spoken. This not only improves readability but also adds subtle rhythm and pacing to the video, making it easier for viewers to follow along.
After generating automatic subtitles for my Veo 3 video and applying bold styling with active text highlighting, the final result looked like this:
Edit your Veo 3 generated videos in the Kapwing editor for better control over text and subtitles.


