
Using ChatGPT as a Thumbnail Maker (for YouTube and More)
90% of the best performing videos use custom thumbnails — generate one with ChatGPT
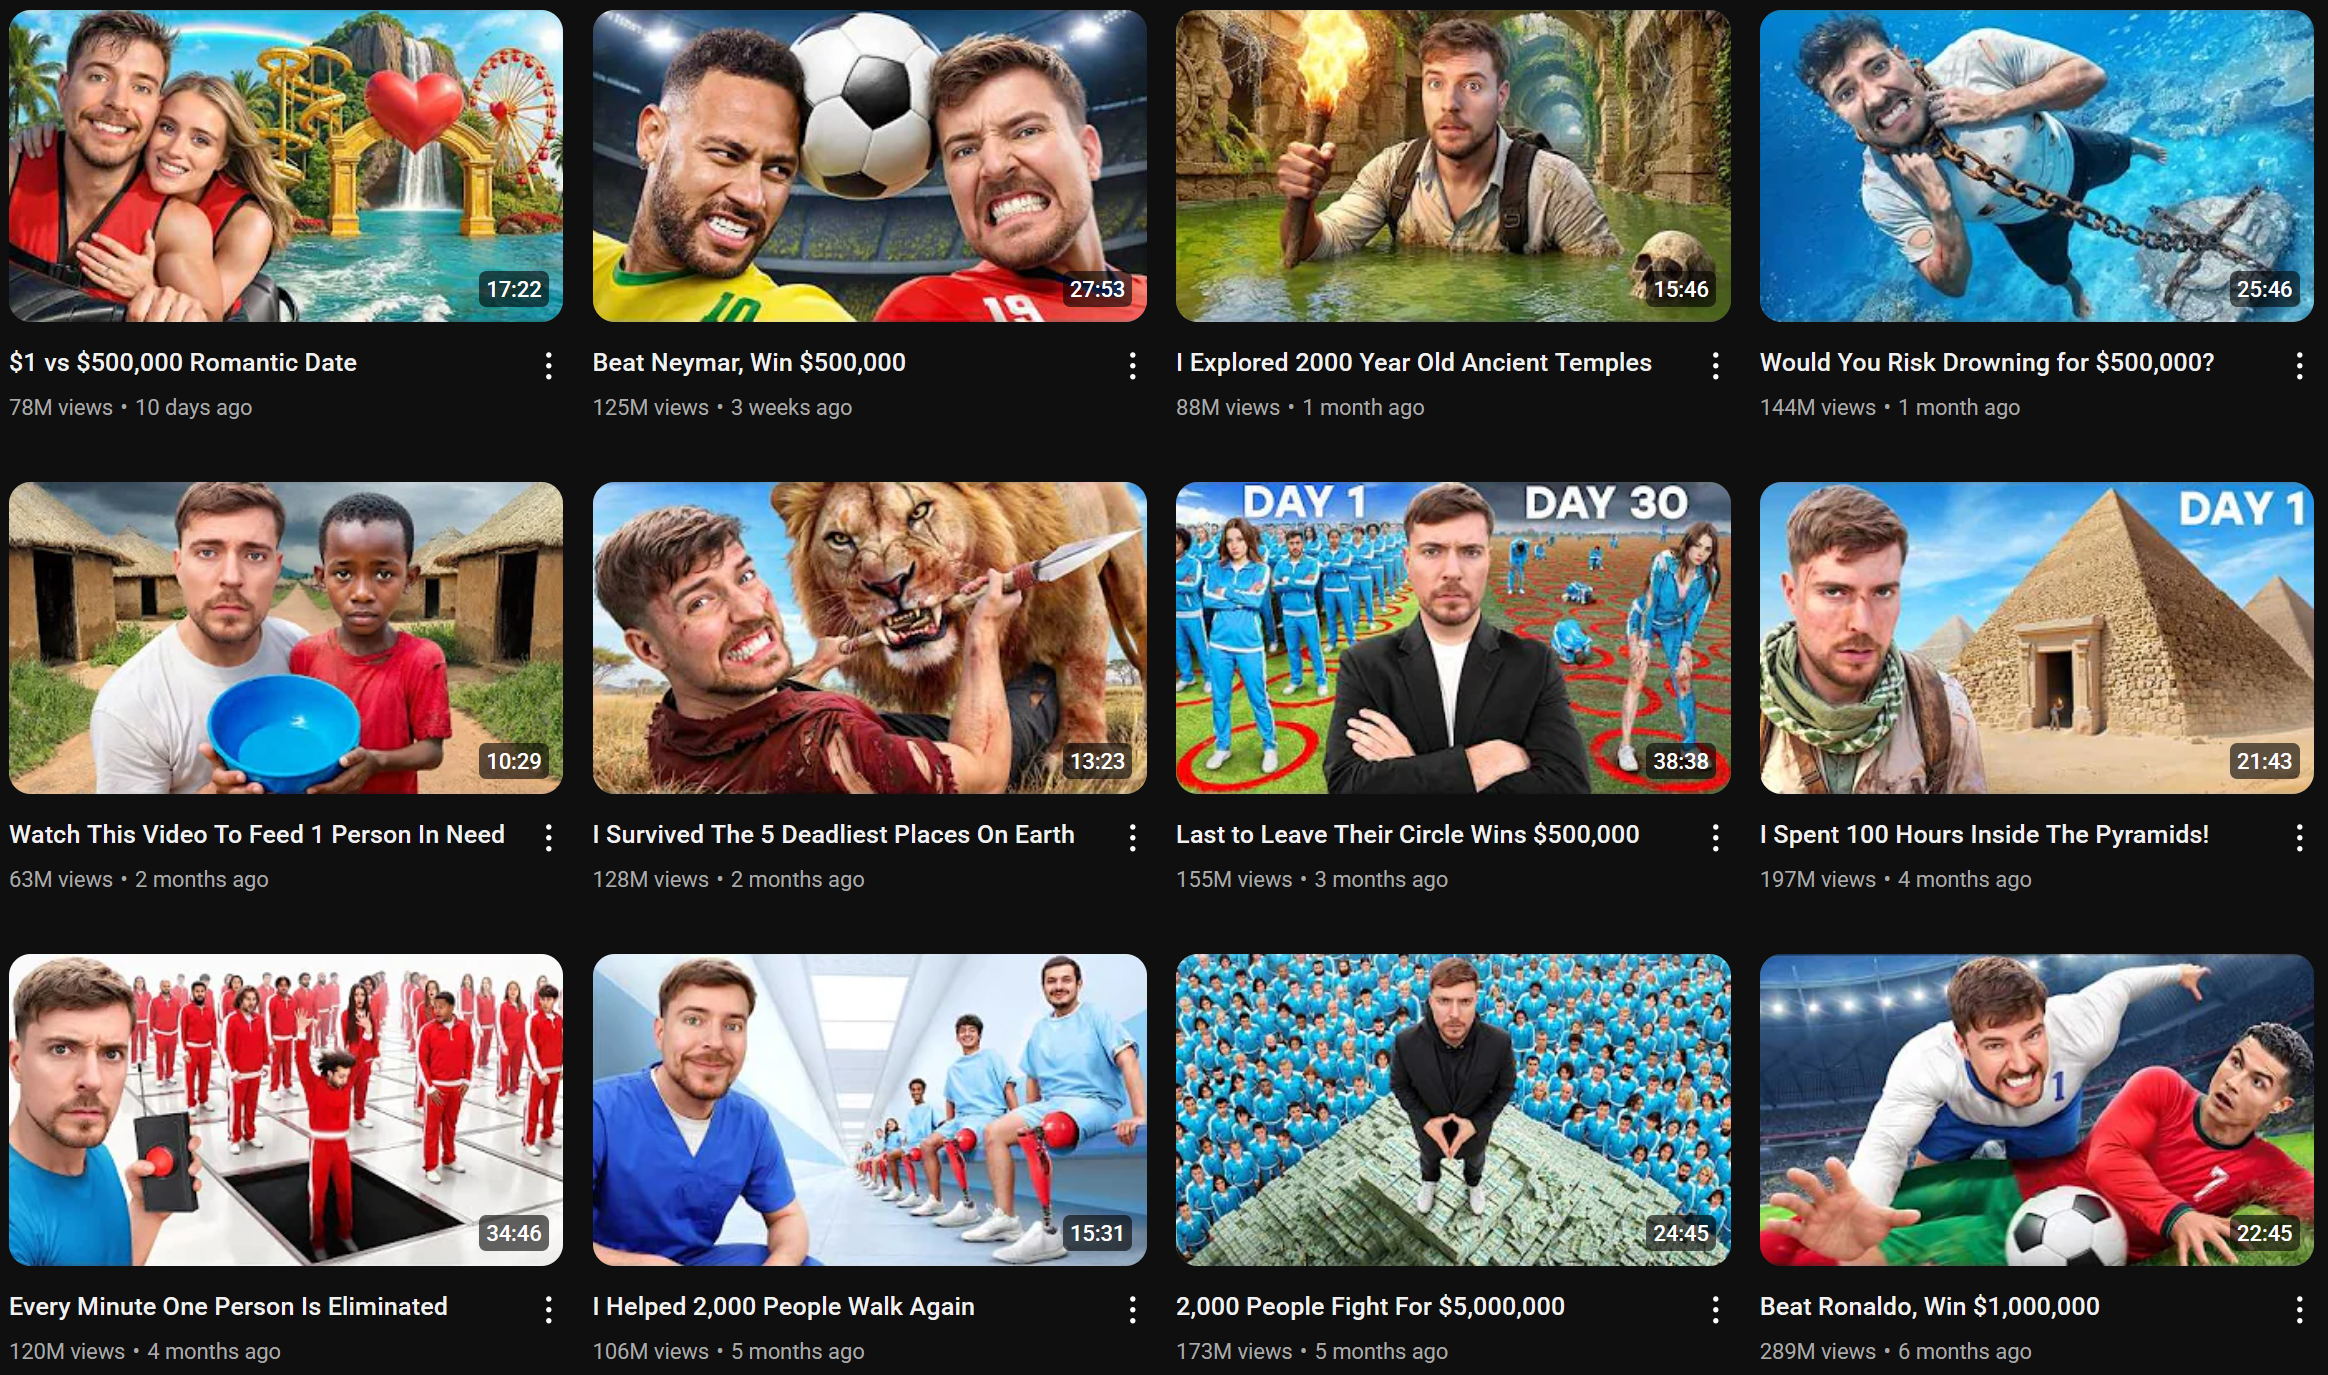
Thumbnails are the first thing a potential viewer sees when browsing through videos. In fact, YouTube recently introduced a feature allowing creators to upload up to three thumbnails to test for engagement, reinforcing just how important they are.
Because of this, it’s crucial to understand how to design and create successful video thumbnails. With the image generation capabilities of ChatGPT, creators have a powerful new tool for quickly producing attention-grabbing visuals.
In this article, we’ll cover how to use ChatGPT as a thumbnail maker, including prompt writing tips, image editing guidance, resizing advice, and a walkthrough for using your video script to generate personalized thumbnails.
Table of Contents
- How to Create a Thumbnail with ChatGPT (Tips)
- ChatGPT Thumbnail Process (Step by Step)
- Social Media Thumbnail Size Guide
How to Create a Thumbnail with ChatGPT (Tips)
When generating a thumbnail or any image with ChatGPT, writing a strong prompt is crucial for success. Let's dive into the keys to creating an effective prompt, with some copy/paste examples you can use along the way.
Using a Reference Image
Thumbnails often include the face of a channel owner to add instant recognizability to the video, even if that person is not predominantly featured in the content.
Since ChatGPT doesn't know what you look like, the best way to include a picture of yourself in a generated thumbnail is by uploading an image.
To do so, select the + icon in the bottom left corner of the prompt bar.

Once uploaded, you can begin building your thumbnail prompt. By referencing the image you uploaded, you can create a thumbnail that matches your video theme and integrates your likeness, making it easy for viewers to recognize your content.
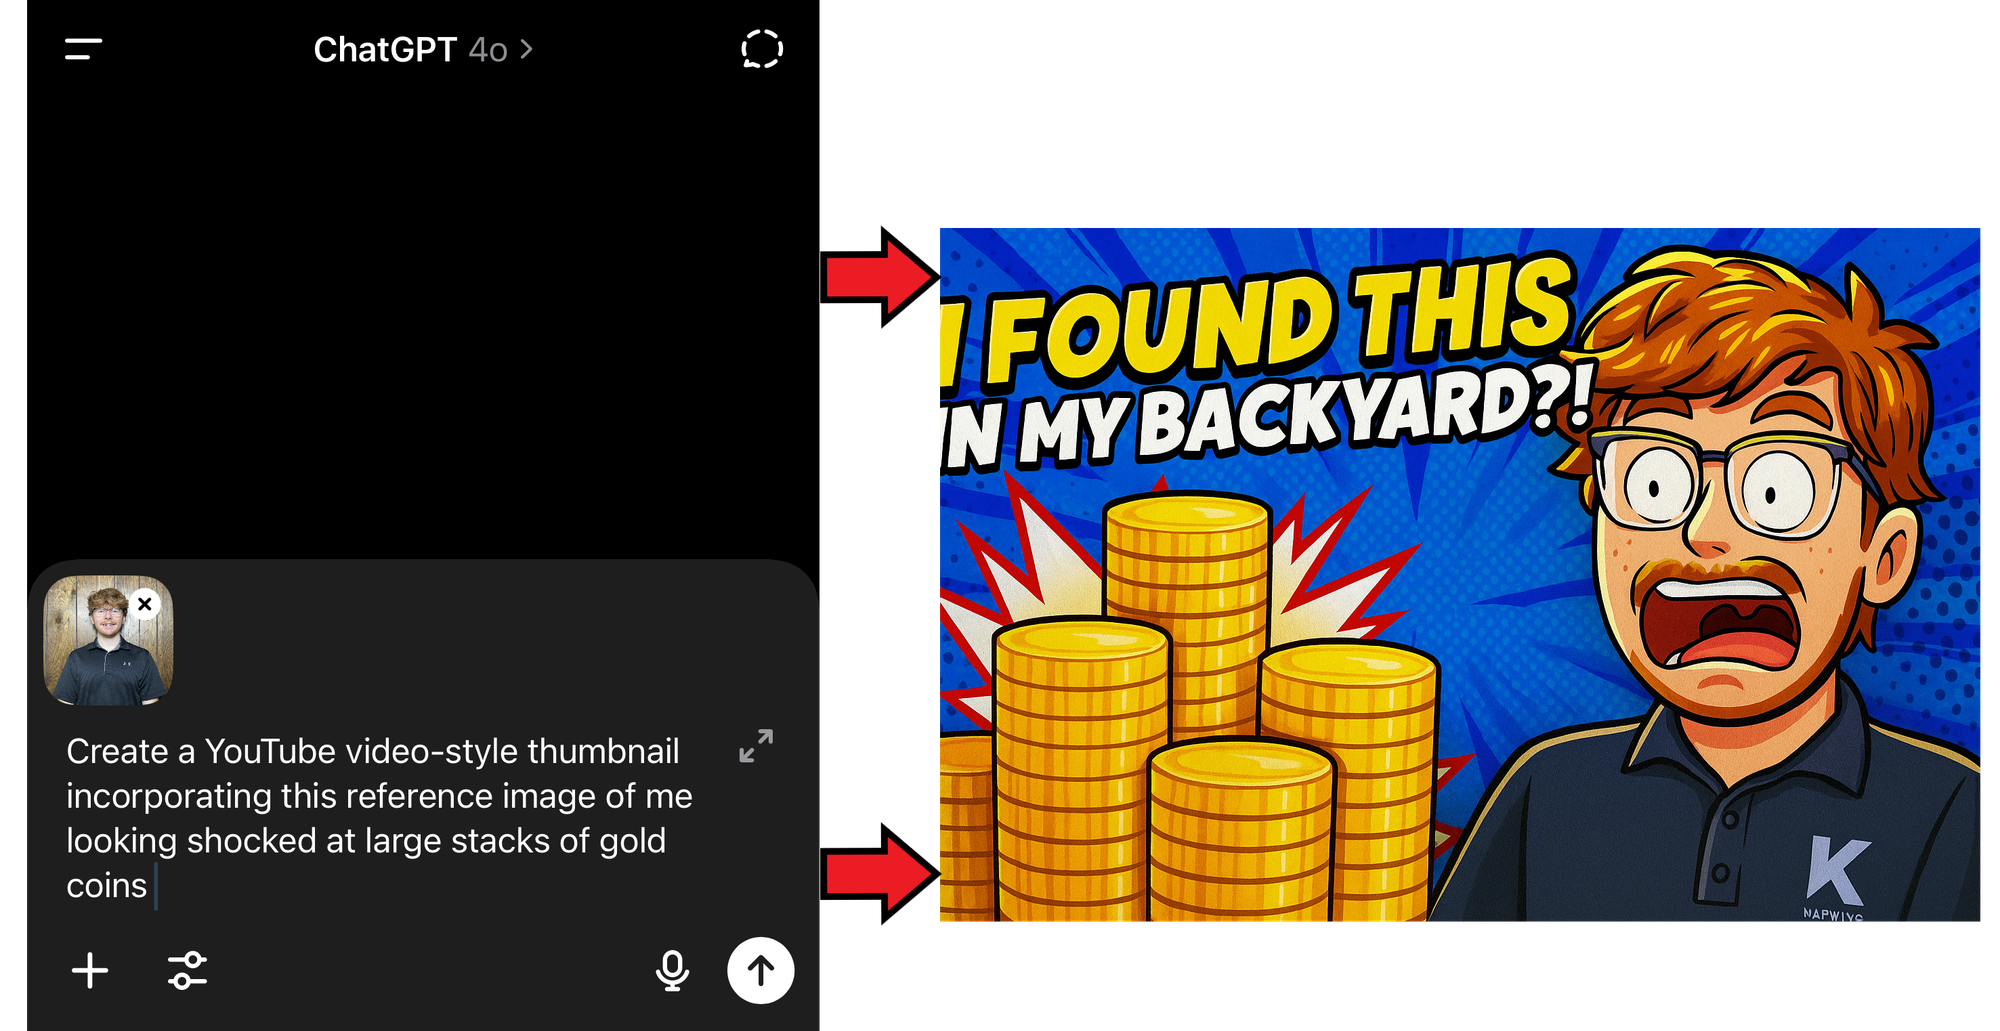
As you’ll notice, without much detail, ChatGPT may generate images by making assumptions. These might include a default art style or unnecessary on-screen text. To better control the final image, it’s important to be more specific in your prompt.
Text Prompt Tips
When generating a thumbnail with ChatGPT, prompt specificity is everything. Without it, you might end up with a professional-looking image, but it may not match the aesthetic you want. To increase your chances of success, focus on these four areas:
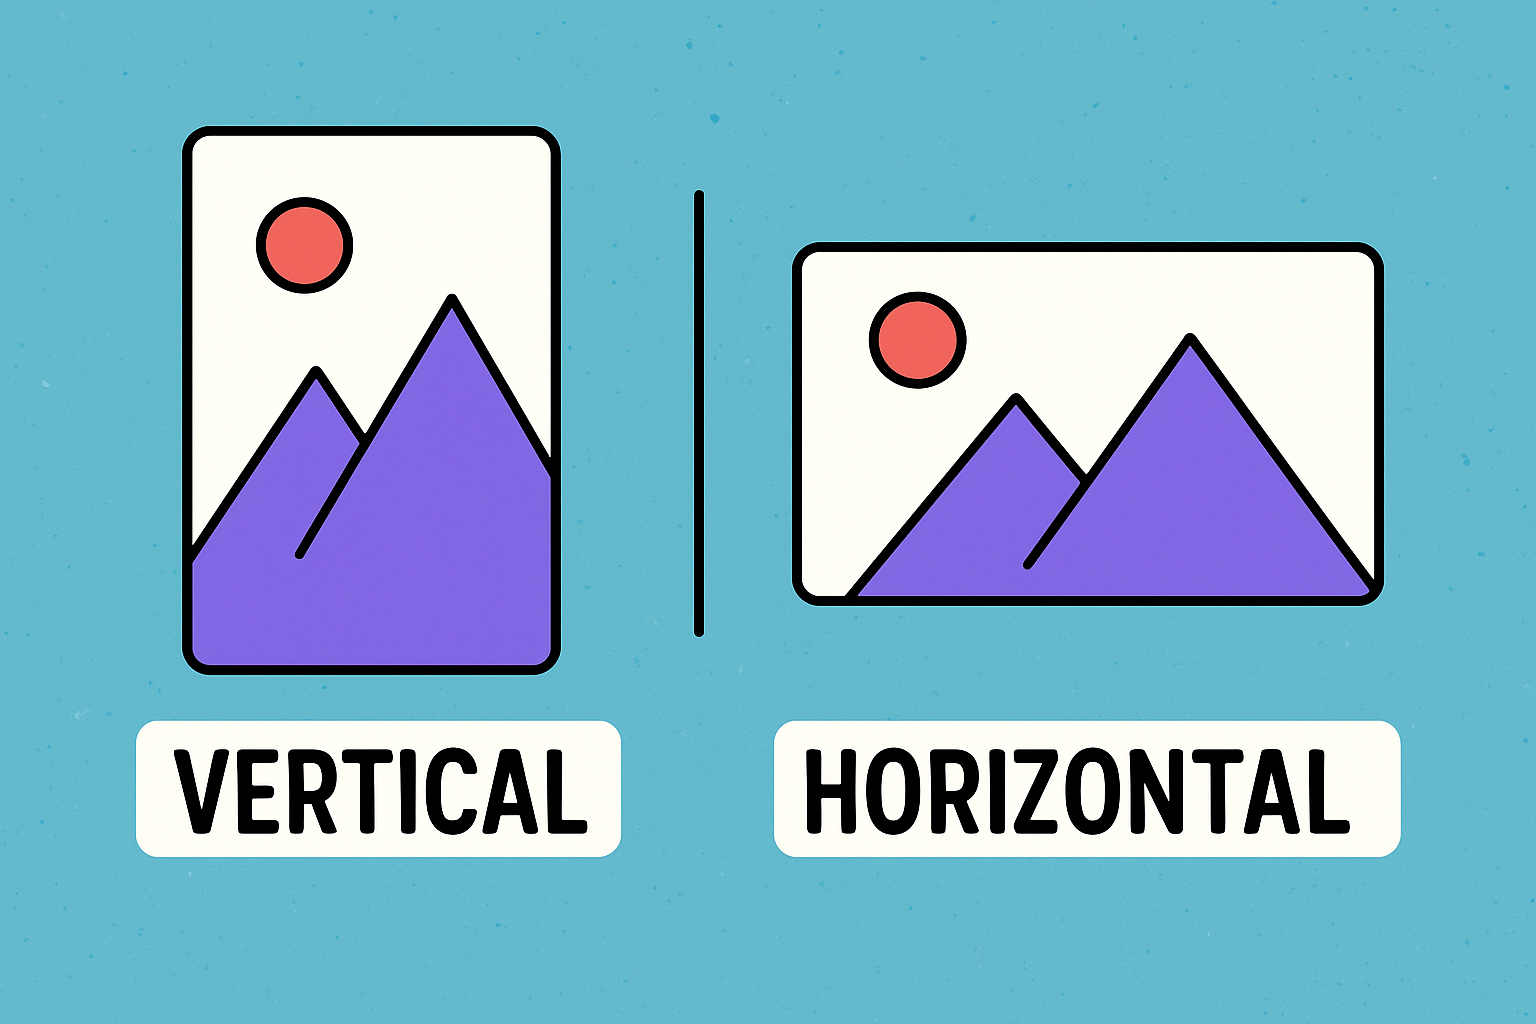
- Intended Platform: While ChatGPT cannot guarantee exact aspect ratios or resolution, mentioning the platform, like “Instagram-style thumbnail” or “YouTube-style thumbnail,” helps the AI understand whether to make a vertical or horizontal image. This makes resizing easier later.
- Image Style: Specifying an image style will have the biggest impact on the result. Prompts like “2D cartoon,” “watercolor,” “photorealistic,” or “fisheye lens” all produce different outcomes. For consistent branding, stick with the same style across your thumbnails.
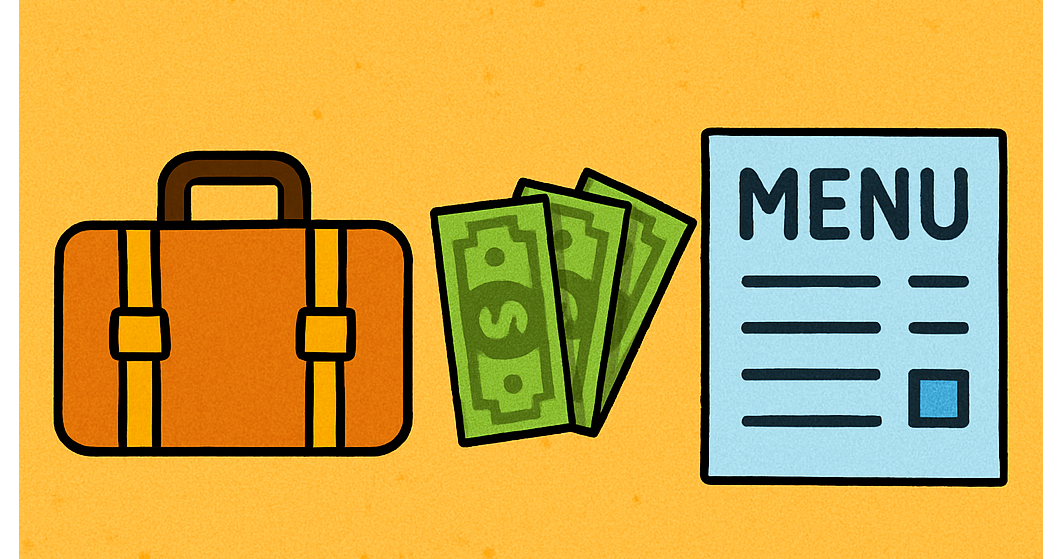
- Individual Image Details: The small stuff makes a big difference. Try referencing objects or themes related to your video without giving too much away. A suitcase for a travel vlog, dollar bills for an economics explainer, or a menu for a food review all help convey the topic quickly.
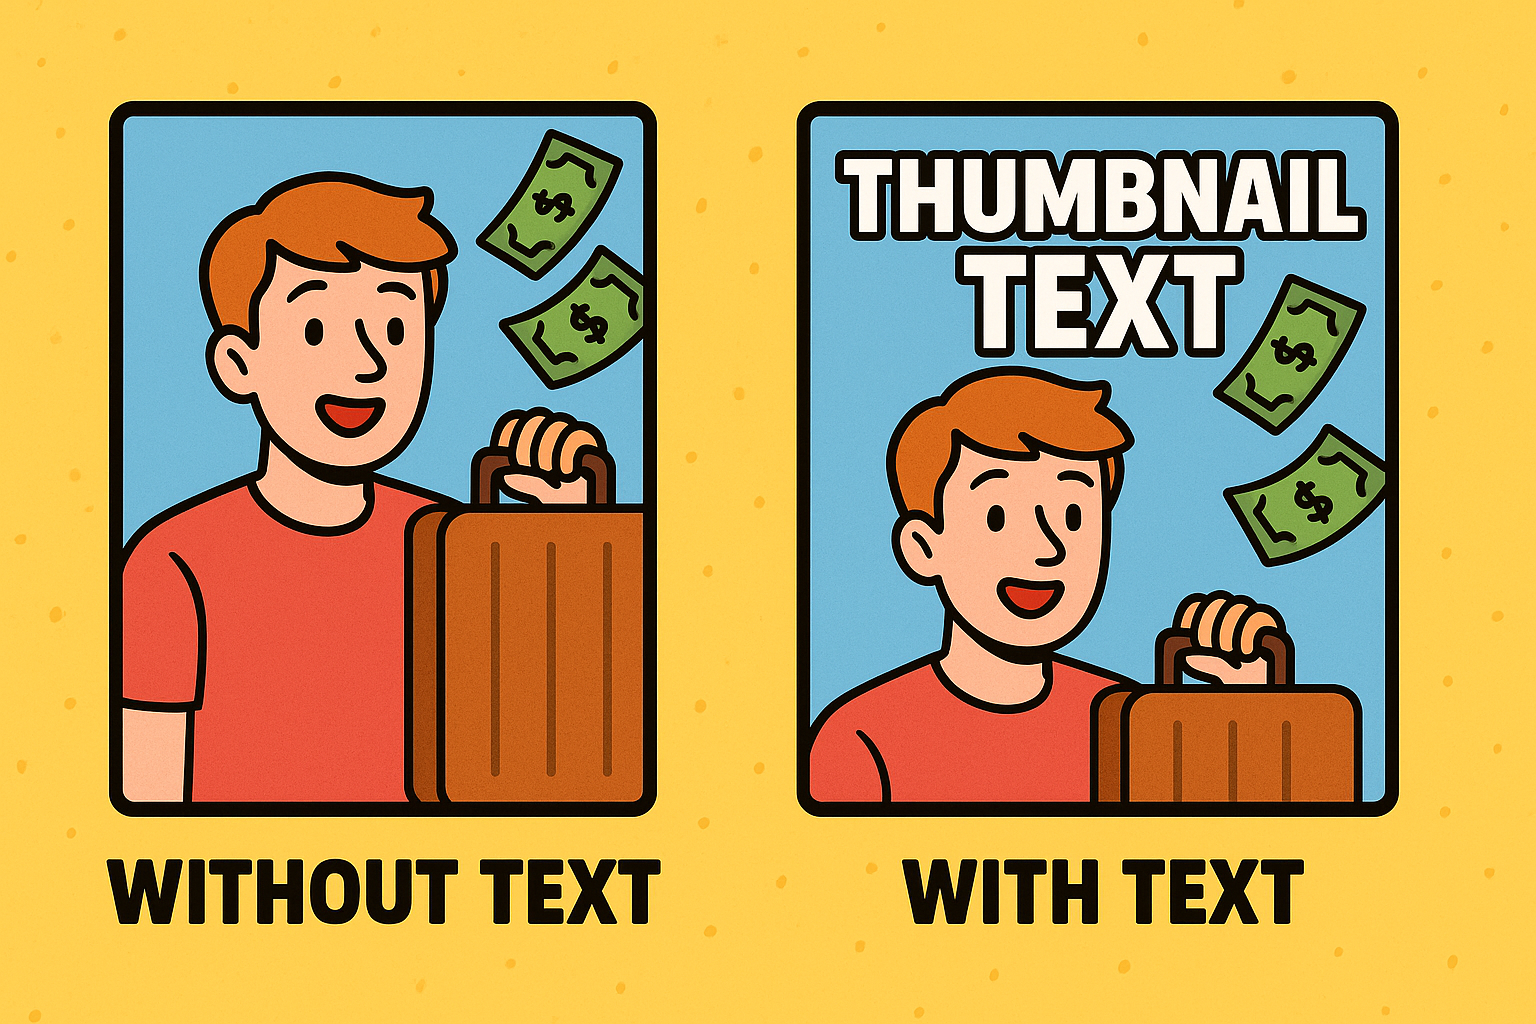
- Thumbnail Text: Some thumbnails have text, others don’t. While opinions differ on whether text should be used in a thumbnail, ChatGPT should not decide for you. Remember, unless speed is your number one priority, adding text to your image later will always result in more customization control, from fonts to colors and more.
With these tips in mind, here are a few ChatGPT thumbnail prompts that you can copy and paste, optimized for producing a quality thumbnail image efficiently.
Prompt 1: YouTube 2D Cartoon Thumbnail
2D cartoon-style illustration for a YouTube thumbnail. Horizontal layout. Show [insert subject or character, e.g., a person holding a suitcase] in front of a [insert setting]. Use bold colors, simple shapes, and high contrast. No text in the image. Thumbnail should feel exciting and click-worthy.
Prompt 2: Generic Vertical Thumbnail with Text
Bright and eye-catching vertical image in a clean digital art style. Show [insert character or object] on top of a stylized background color like [insert color]. Include large, centered text that says “[insert text here]” in quotation marks. Make the layout readable and mobile-friendly.
Prompt 3: Instagram Reel-Style Thumbnail with Text
Realistic-style vertical image designed as an Instagram Reel cover. Show [insert subject, e.g., a person opening a gift box] in front of a blurred background, with lighting focused on the subject. Include small overlay text in the corner that says “[insert short title or phrase]”. Use bright colors and a modern aesthetic.
Using a Video Transcript
While ChatGPT cannot yet understand video inputs, it excels at interpreting text. One final way to generate a video thumbnail using the AI is by providing the script from your completed video. Here’s how to do that automatically:
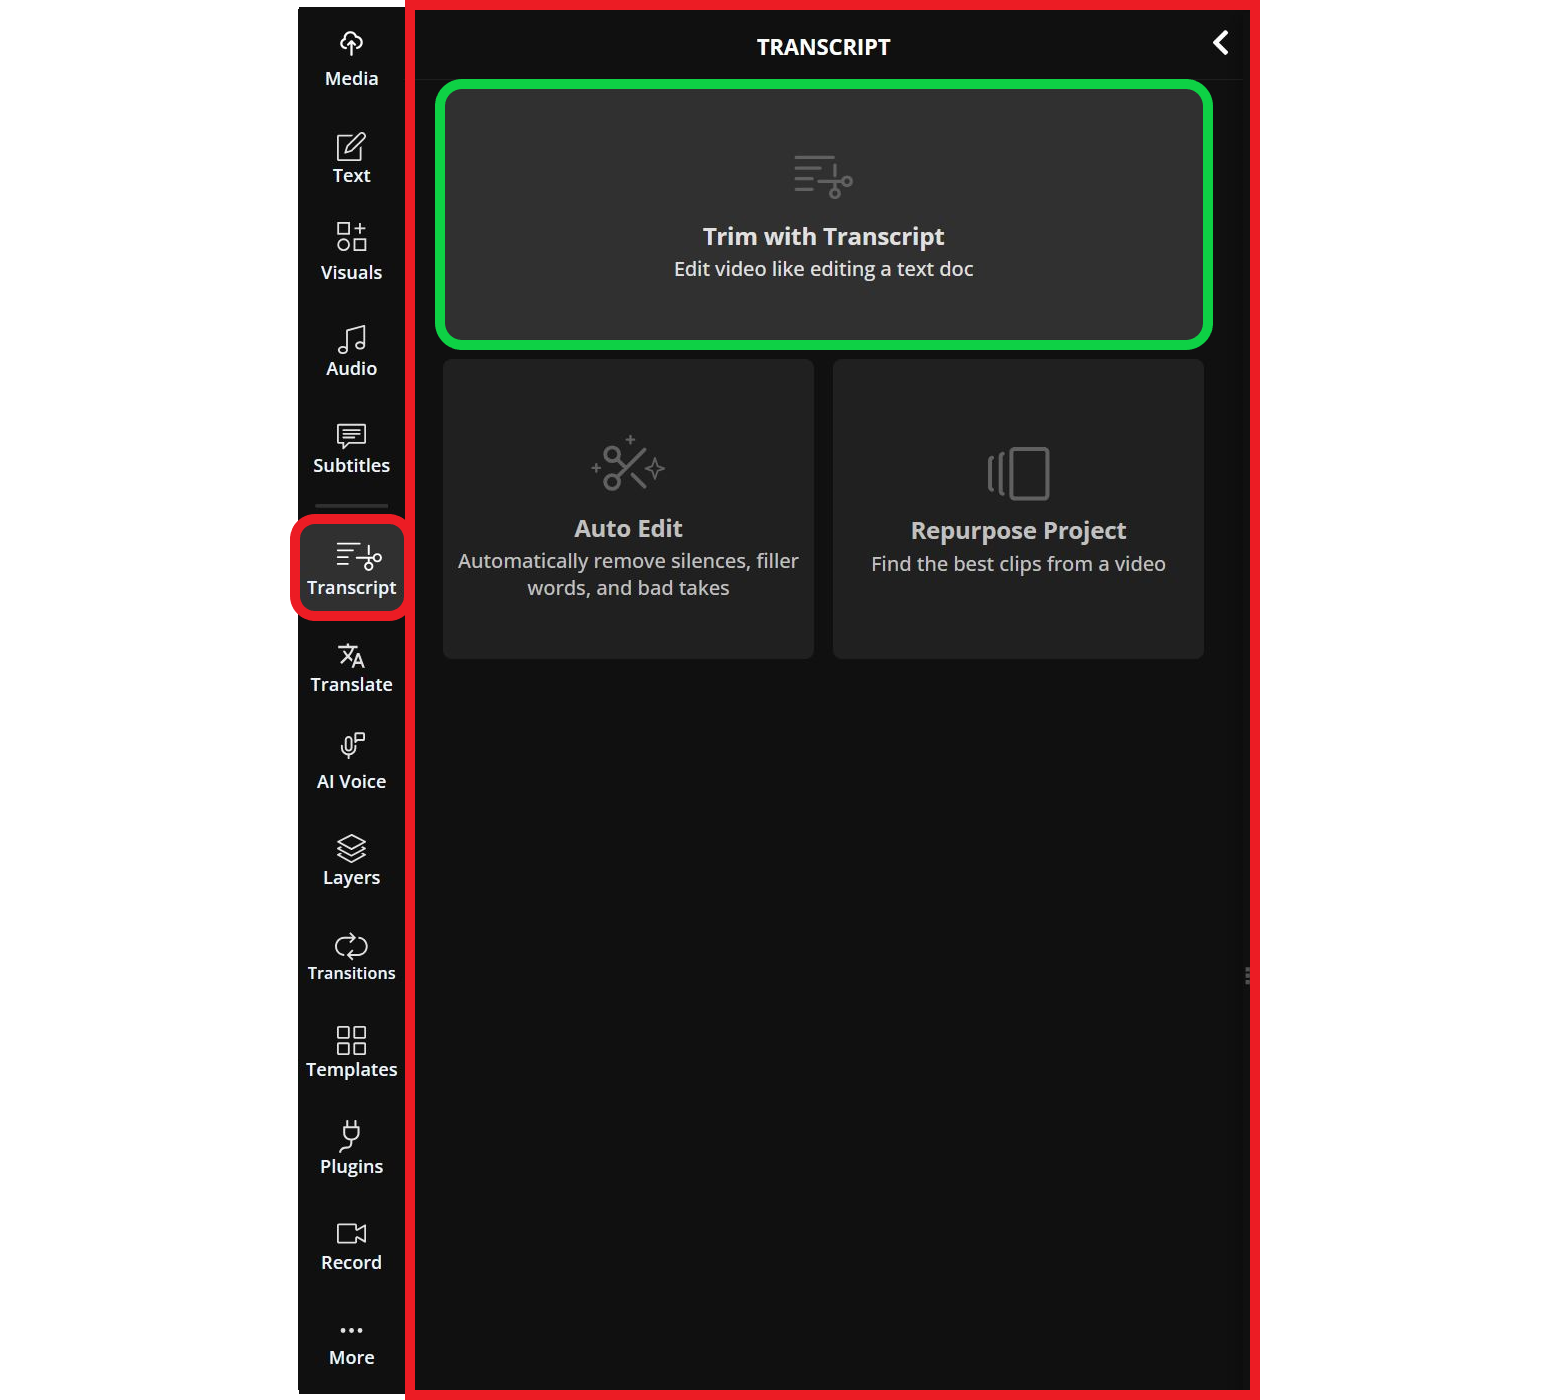
Either create or import your video into the Kapwing editor. Then, navigate to the left-hand sidebar and open the Transcript menu.
Next, select the Trim with Transcript button.
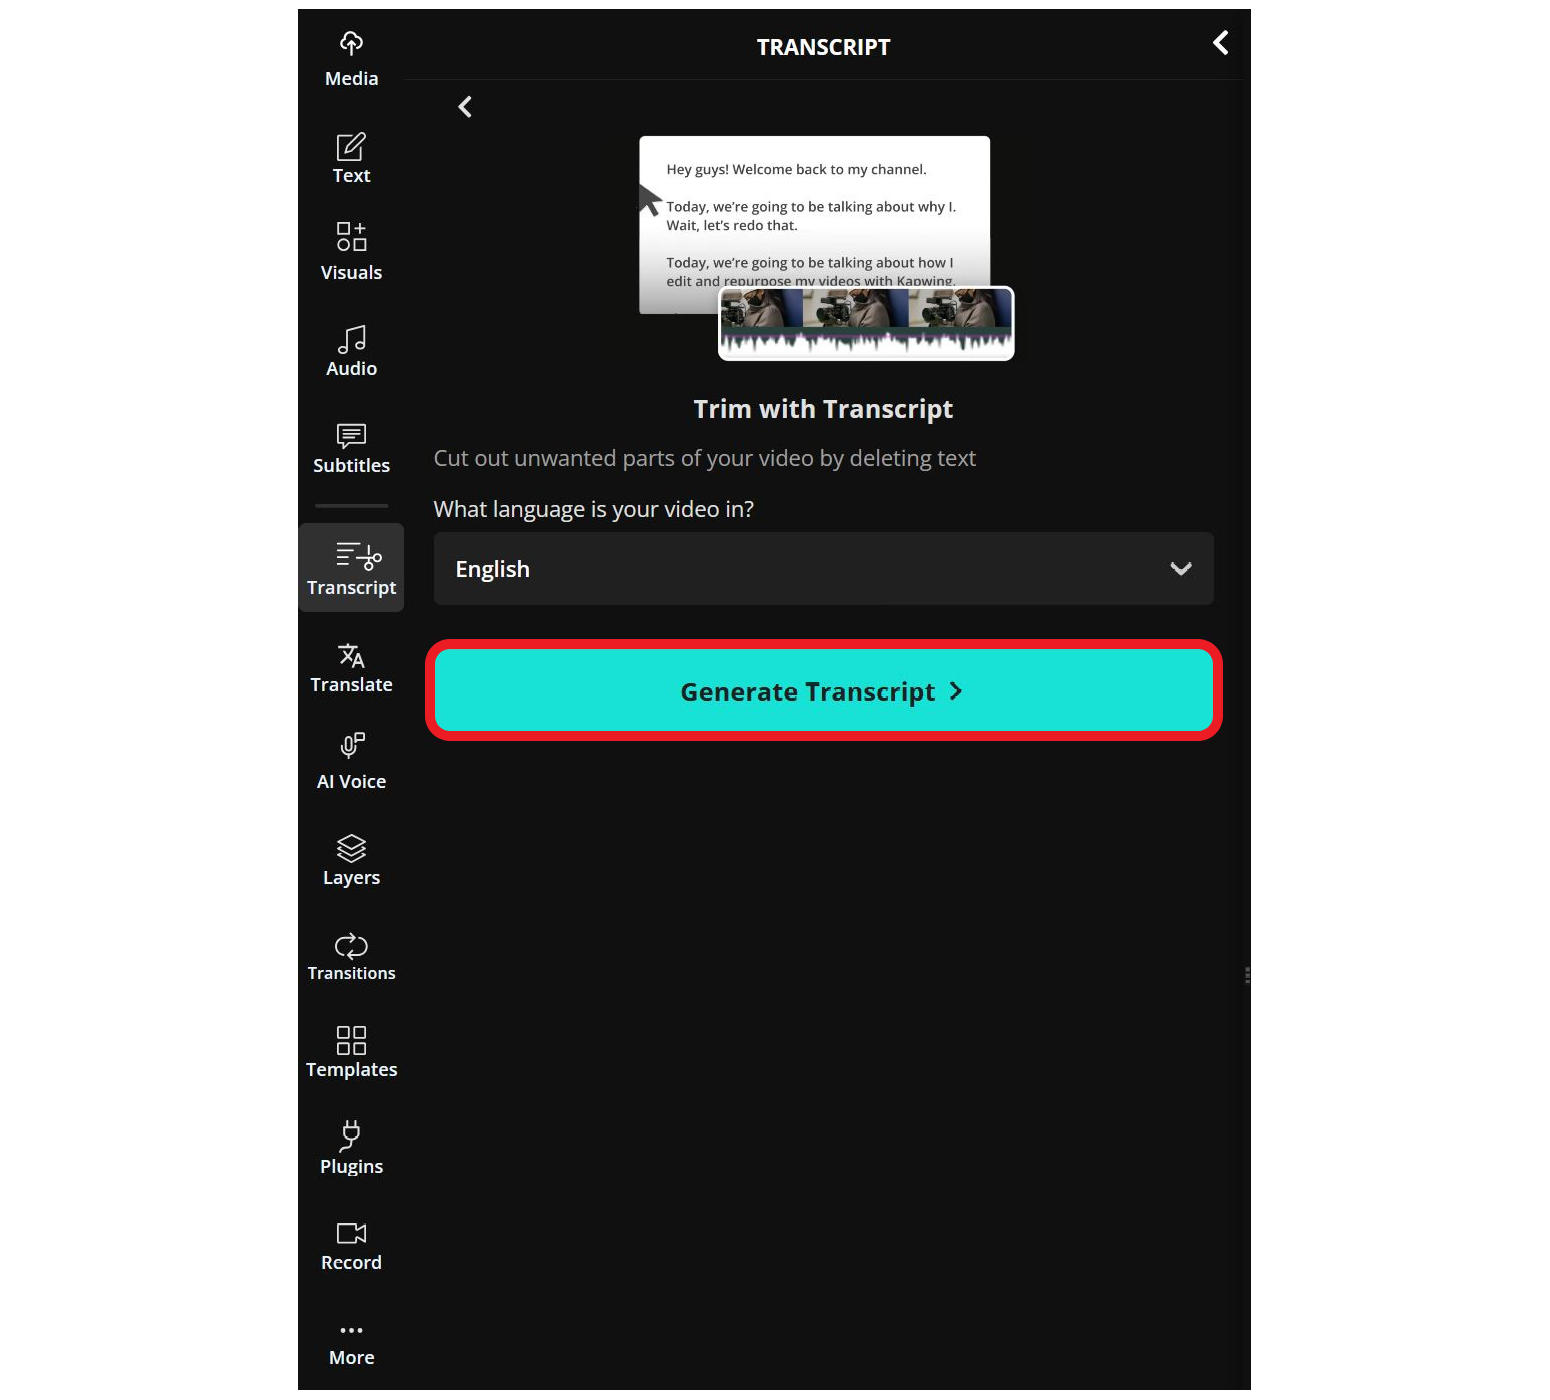
Begin generating by clicking the Generate Transcript button.
Once the transcript is ready, download it by selecting the Download icon at the top of the transcript tab.
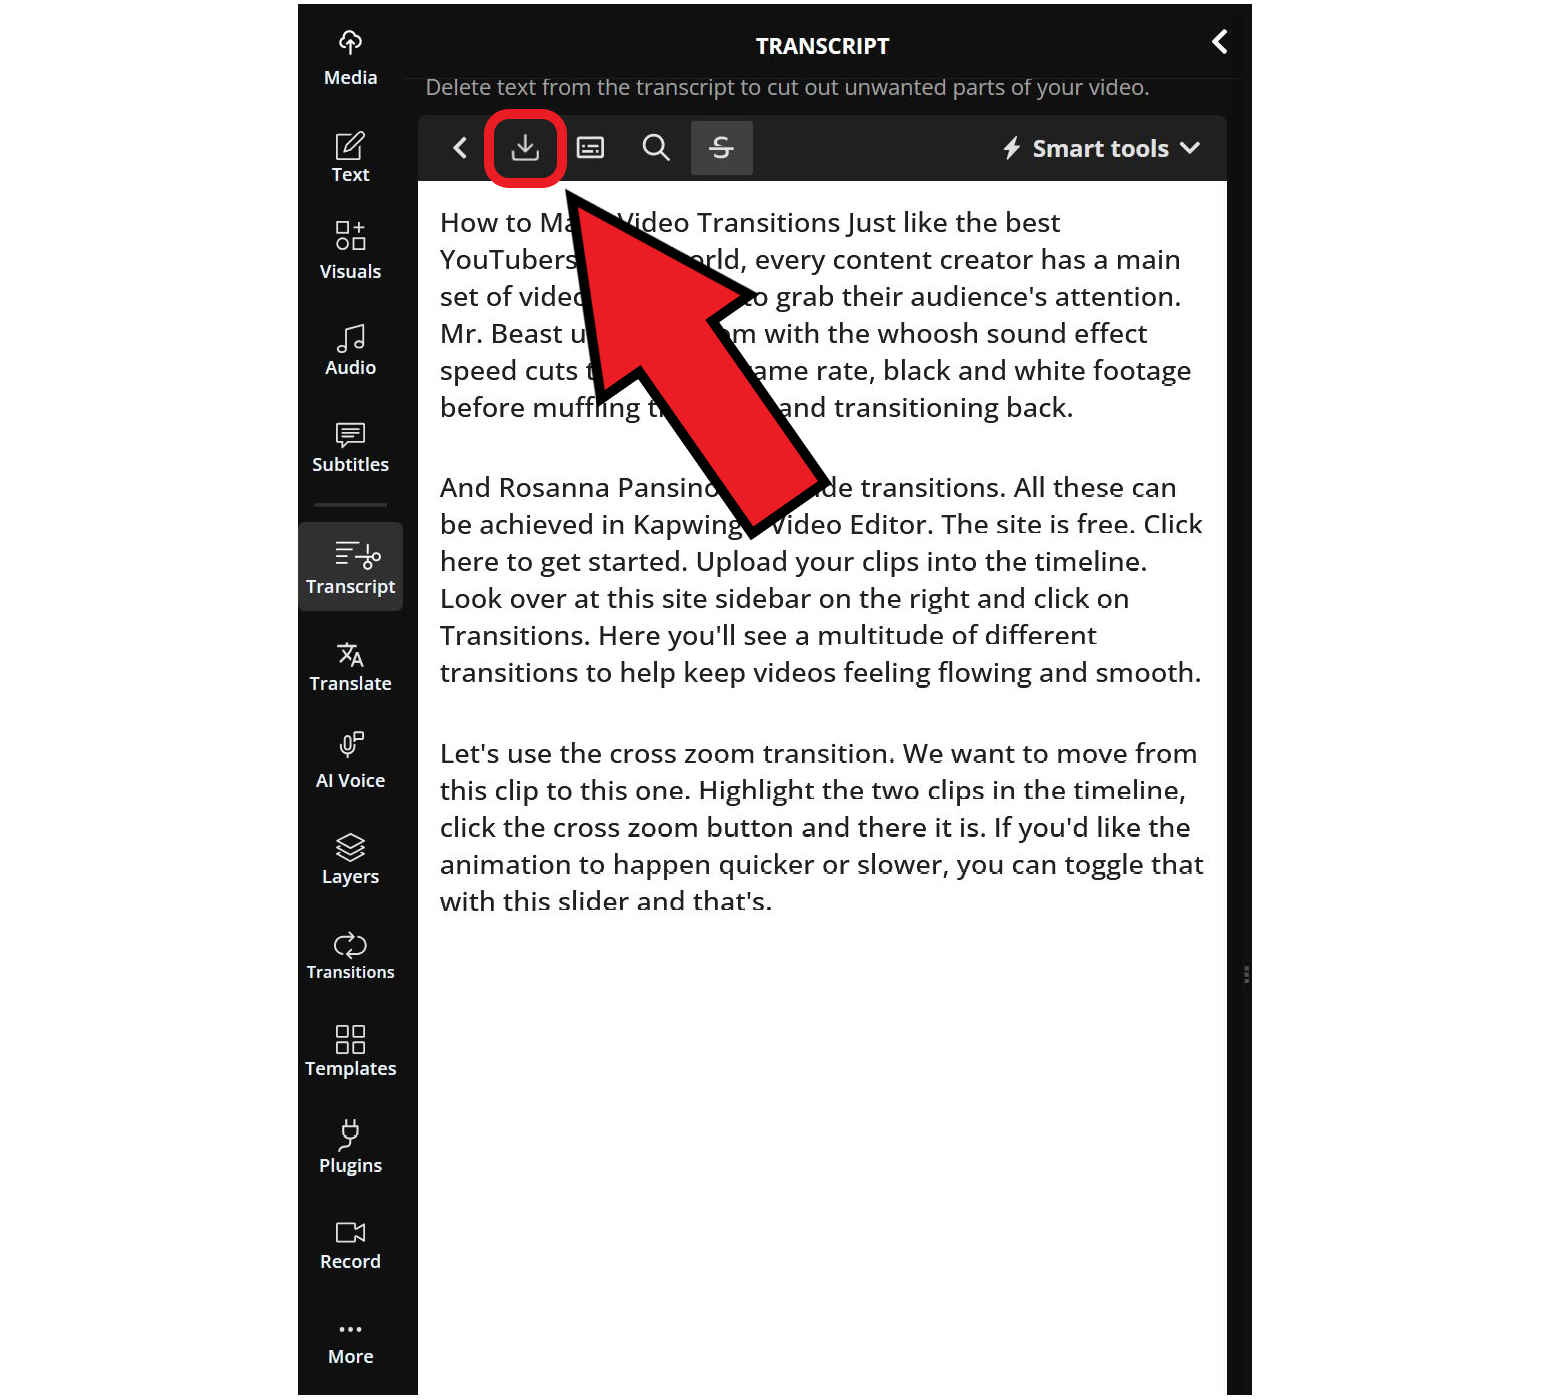
Your transcript will be exported as a TXT or plain text file, which is the most readable format for ChatGPT. Just like when uploading an image, select the + icon to upload your transcript, then add a prompt to generate a thumbnail that matches the theme of your video.
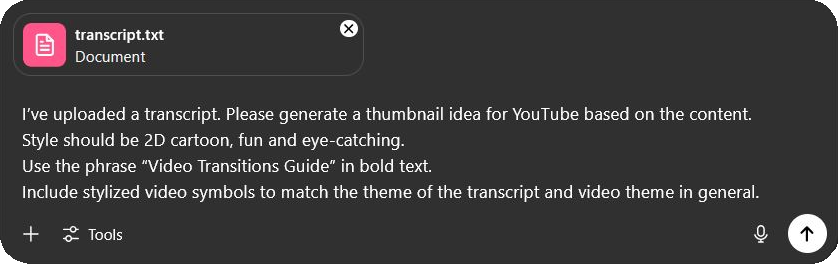
Here is the prompt I used:
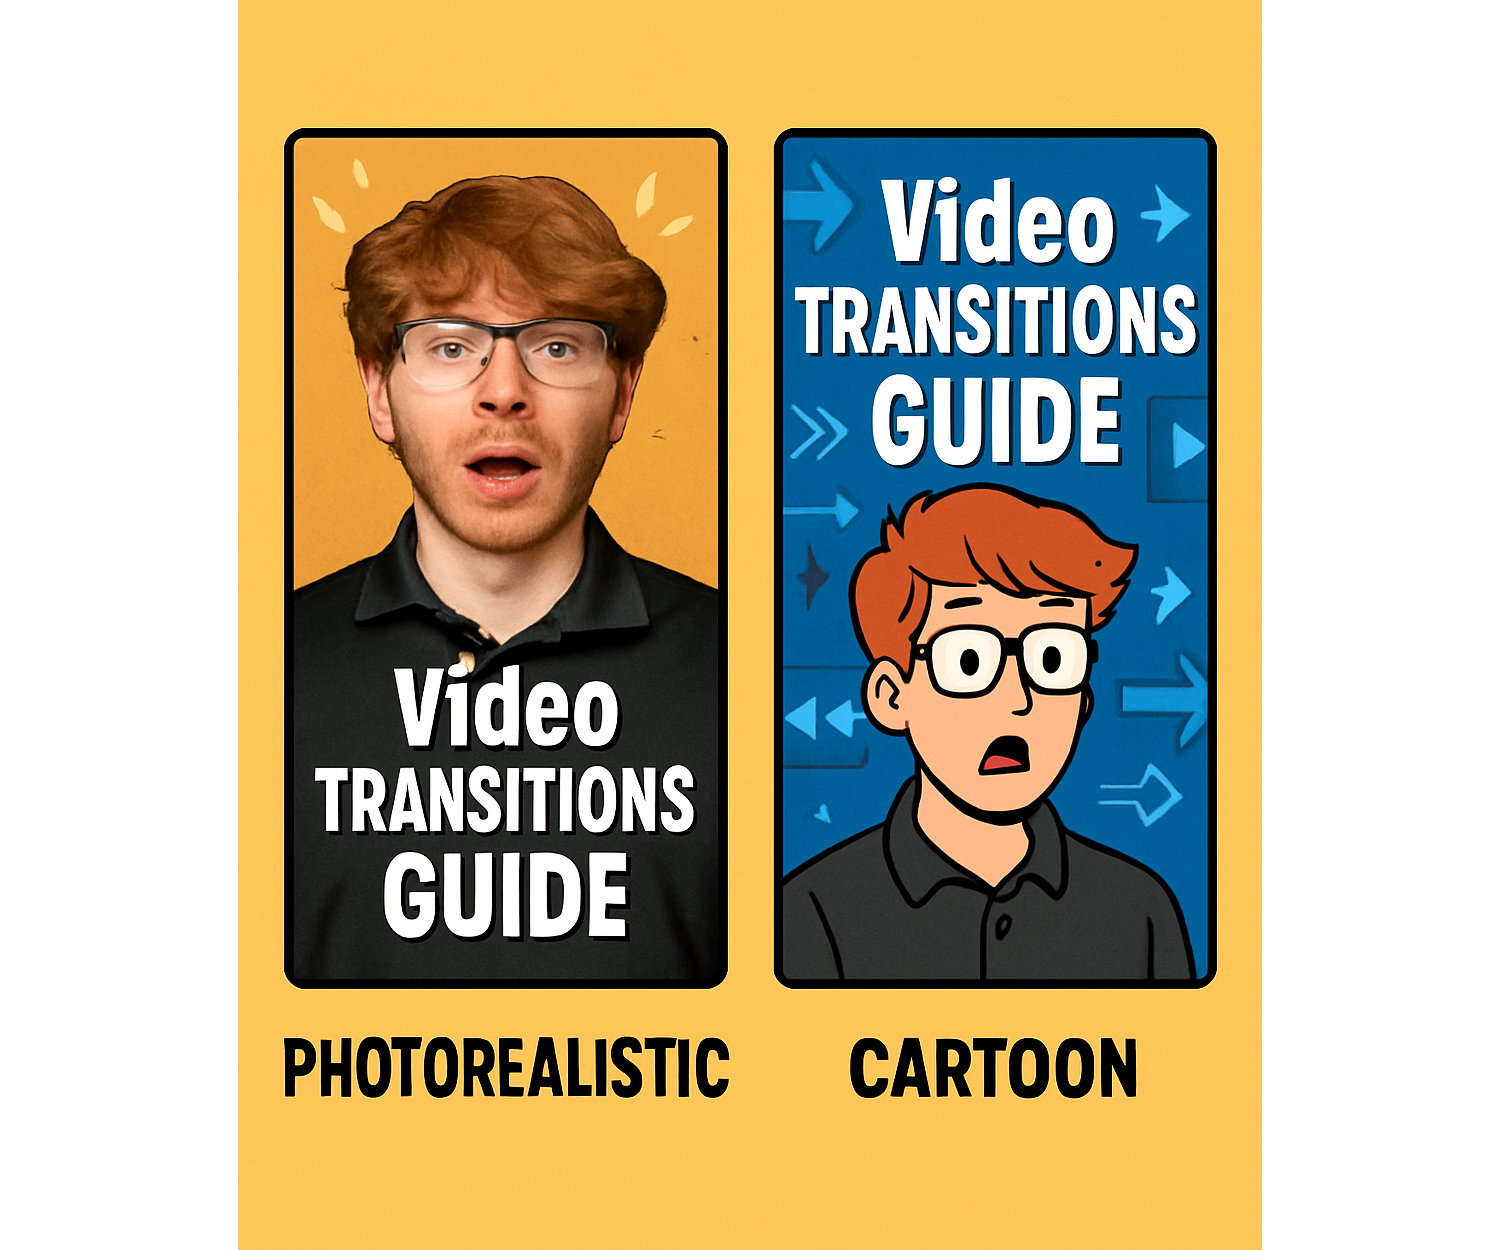
I’ve uploaded a transcript. Please generate a thumbnail idea for YouTube based on the content. Style should be 2D cartoon, fun and eye-catching. Use the phrase “Video Transitions Guide” in bold text. Include stylized video symbols to match the theme of the transcript and video theme in general.
Here is the thumbnail I received:
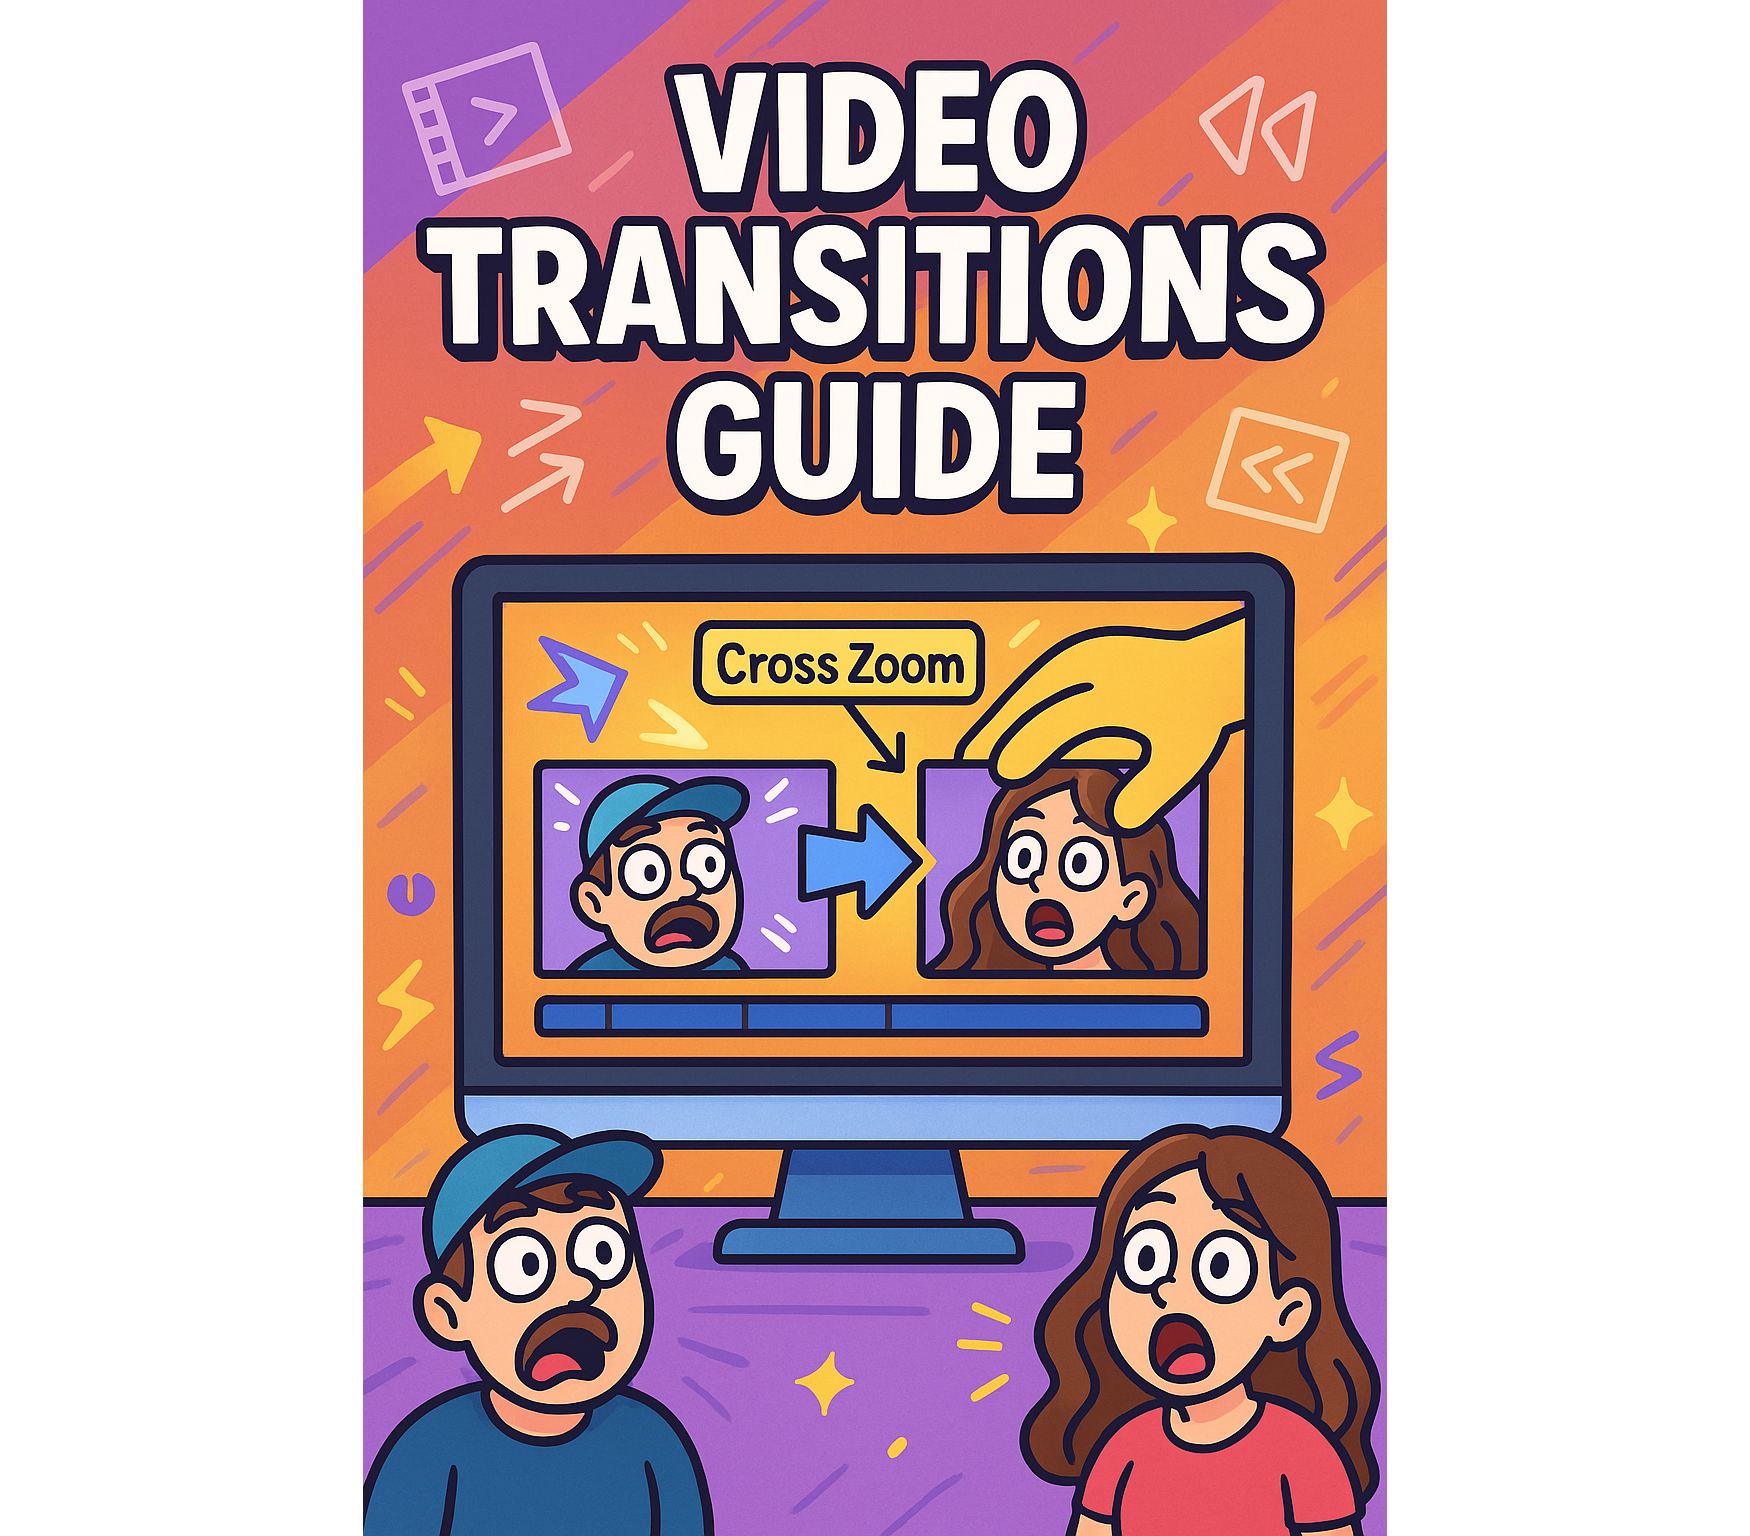
As you can see, this process creates a result that feels more personalized to your content, while still offering flexibility to customize the final image to match your vision.
Whether you choose to generate your ChatGPT thumbnail using a preset prompt or by uploading a video transcript, using the tips in this guide will help you create more content in less time and give you greater control over your video’s visual identity.
ChatGPT Thumbnail Process (Step by Step)
Now that we've taken a look at how to write a ChatGPT thumbnail prompt, let’s put these steps into practice by generating a thumbnail for a real video.
To start, the video I am working with is titled "How to Add Video Transitions Like A Pro."
Since this is a YouTube Short, the thumbnail will need to be formatted vertically in a 9:16 aspect ratio.
Considering this, I used the second prompt featured above with a few adjustments:
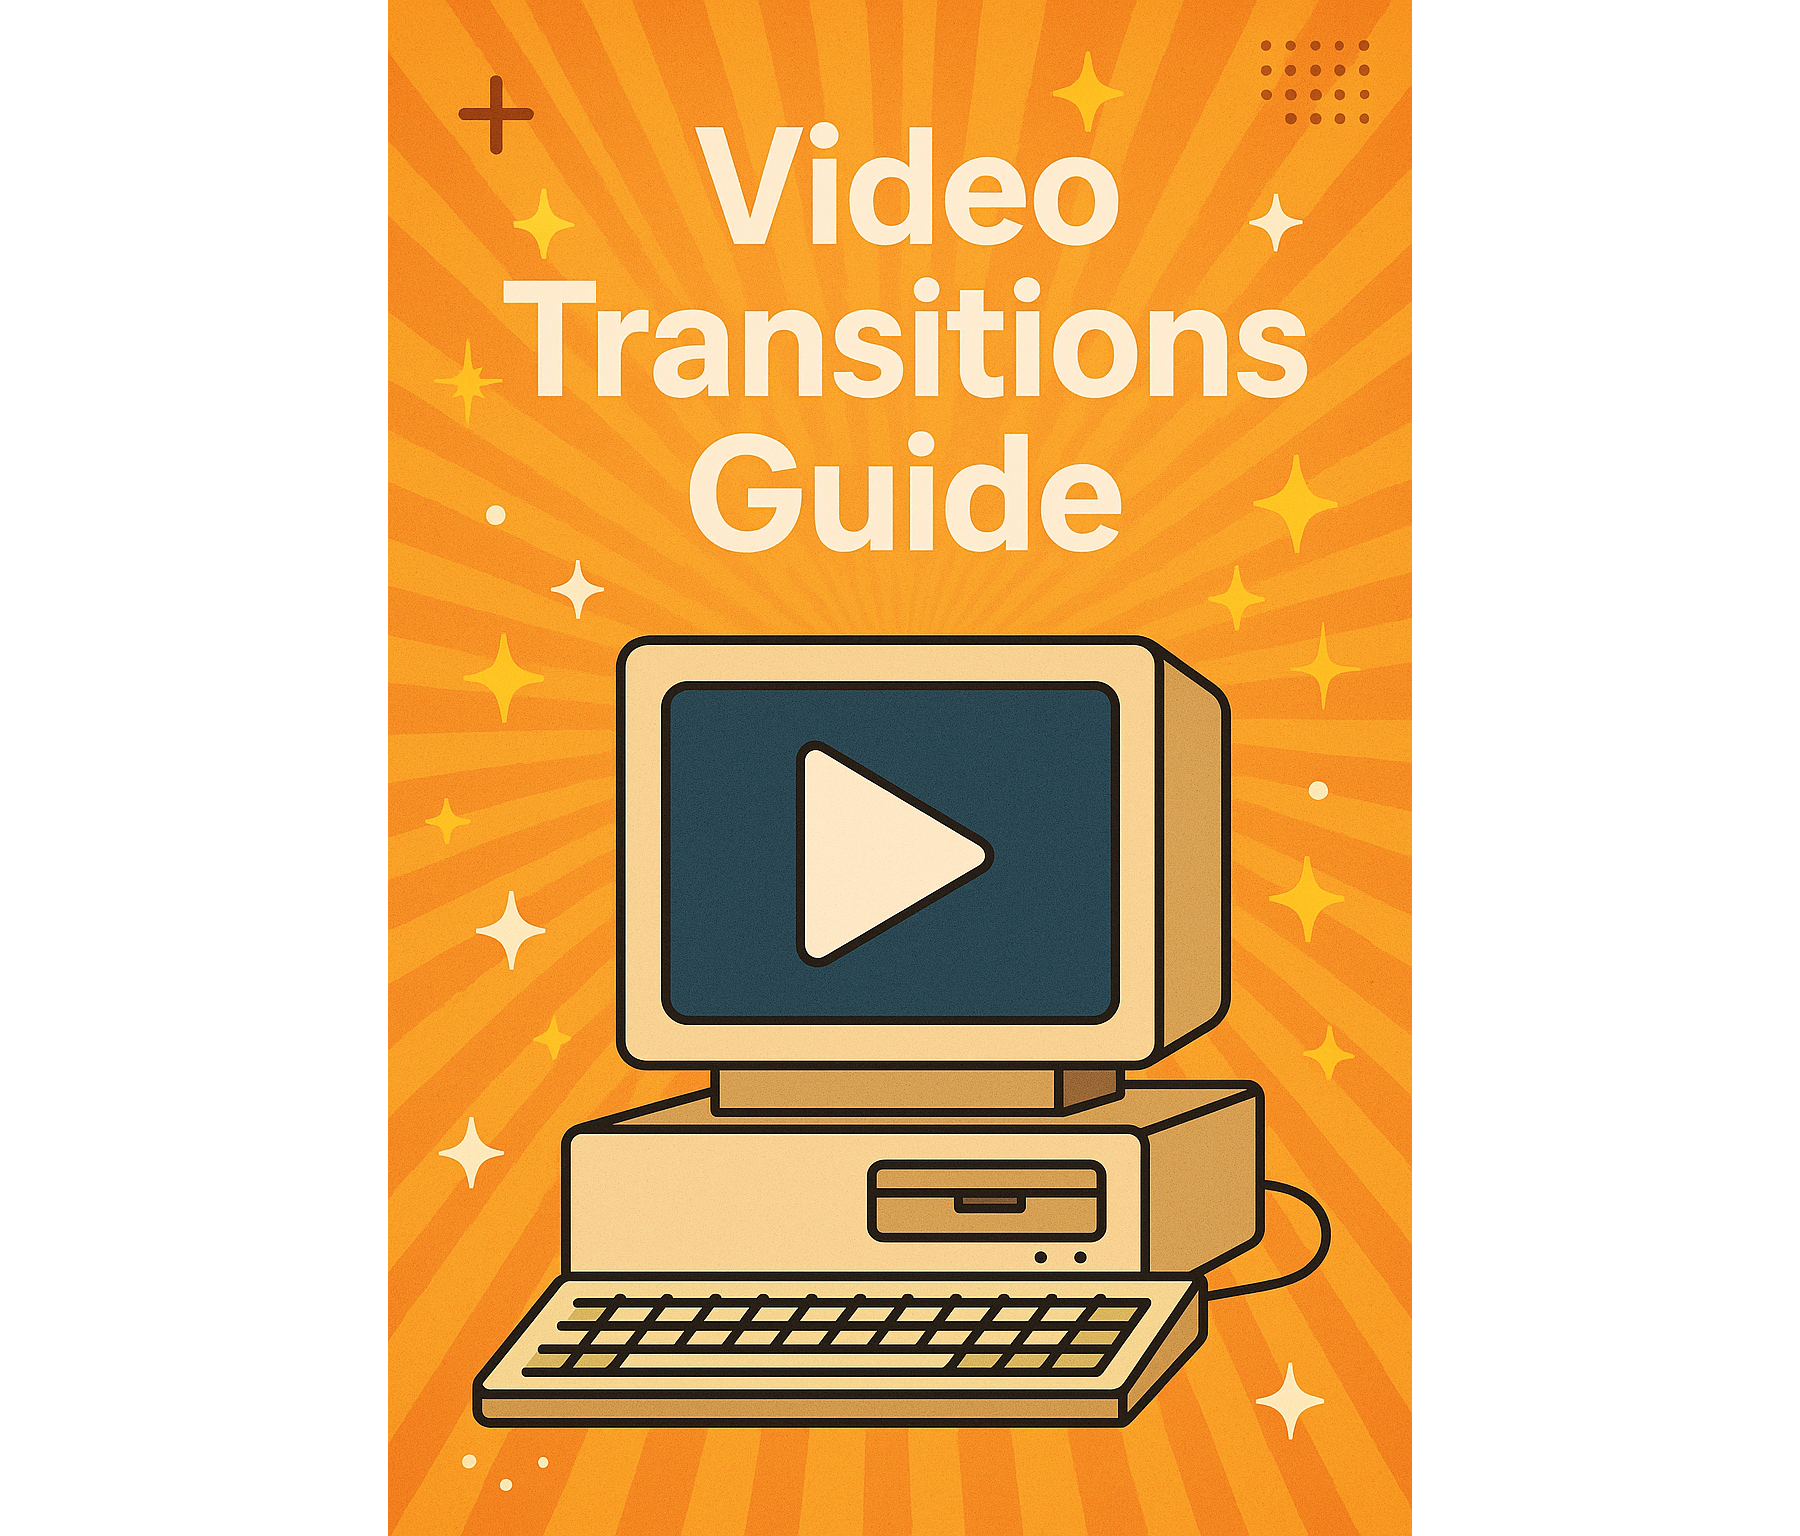
Bright and eye-catching vertical image in a clean digital art style. Show a retro desktop computer on top of a stylized background color like light orange. Include large, centered text that says “Video Transitions Guide” in quotation marks. Make the layout readable and mobile-friendly.
That prompt generated the following image:
Satisfied with the result, I then ported it into the Kapwing editor to make final adjustments, such as confirming the correct dimensions.
Making Final Edits
After generating your image with ChatGPT, it’s still a good idea to make small tweaks in a Thumbnail Editor. While ChatGPT can create vertical or horizontal images, it cannot match exact dimensions, which means you’ll need to resize the image so it displays correctly on your chosen video platform.
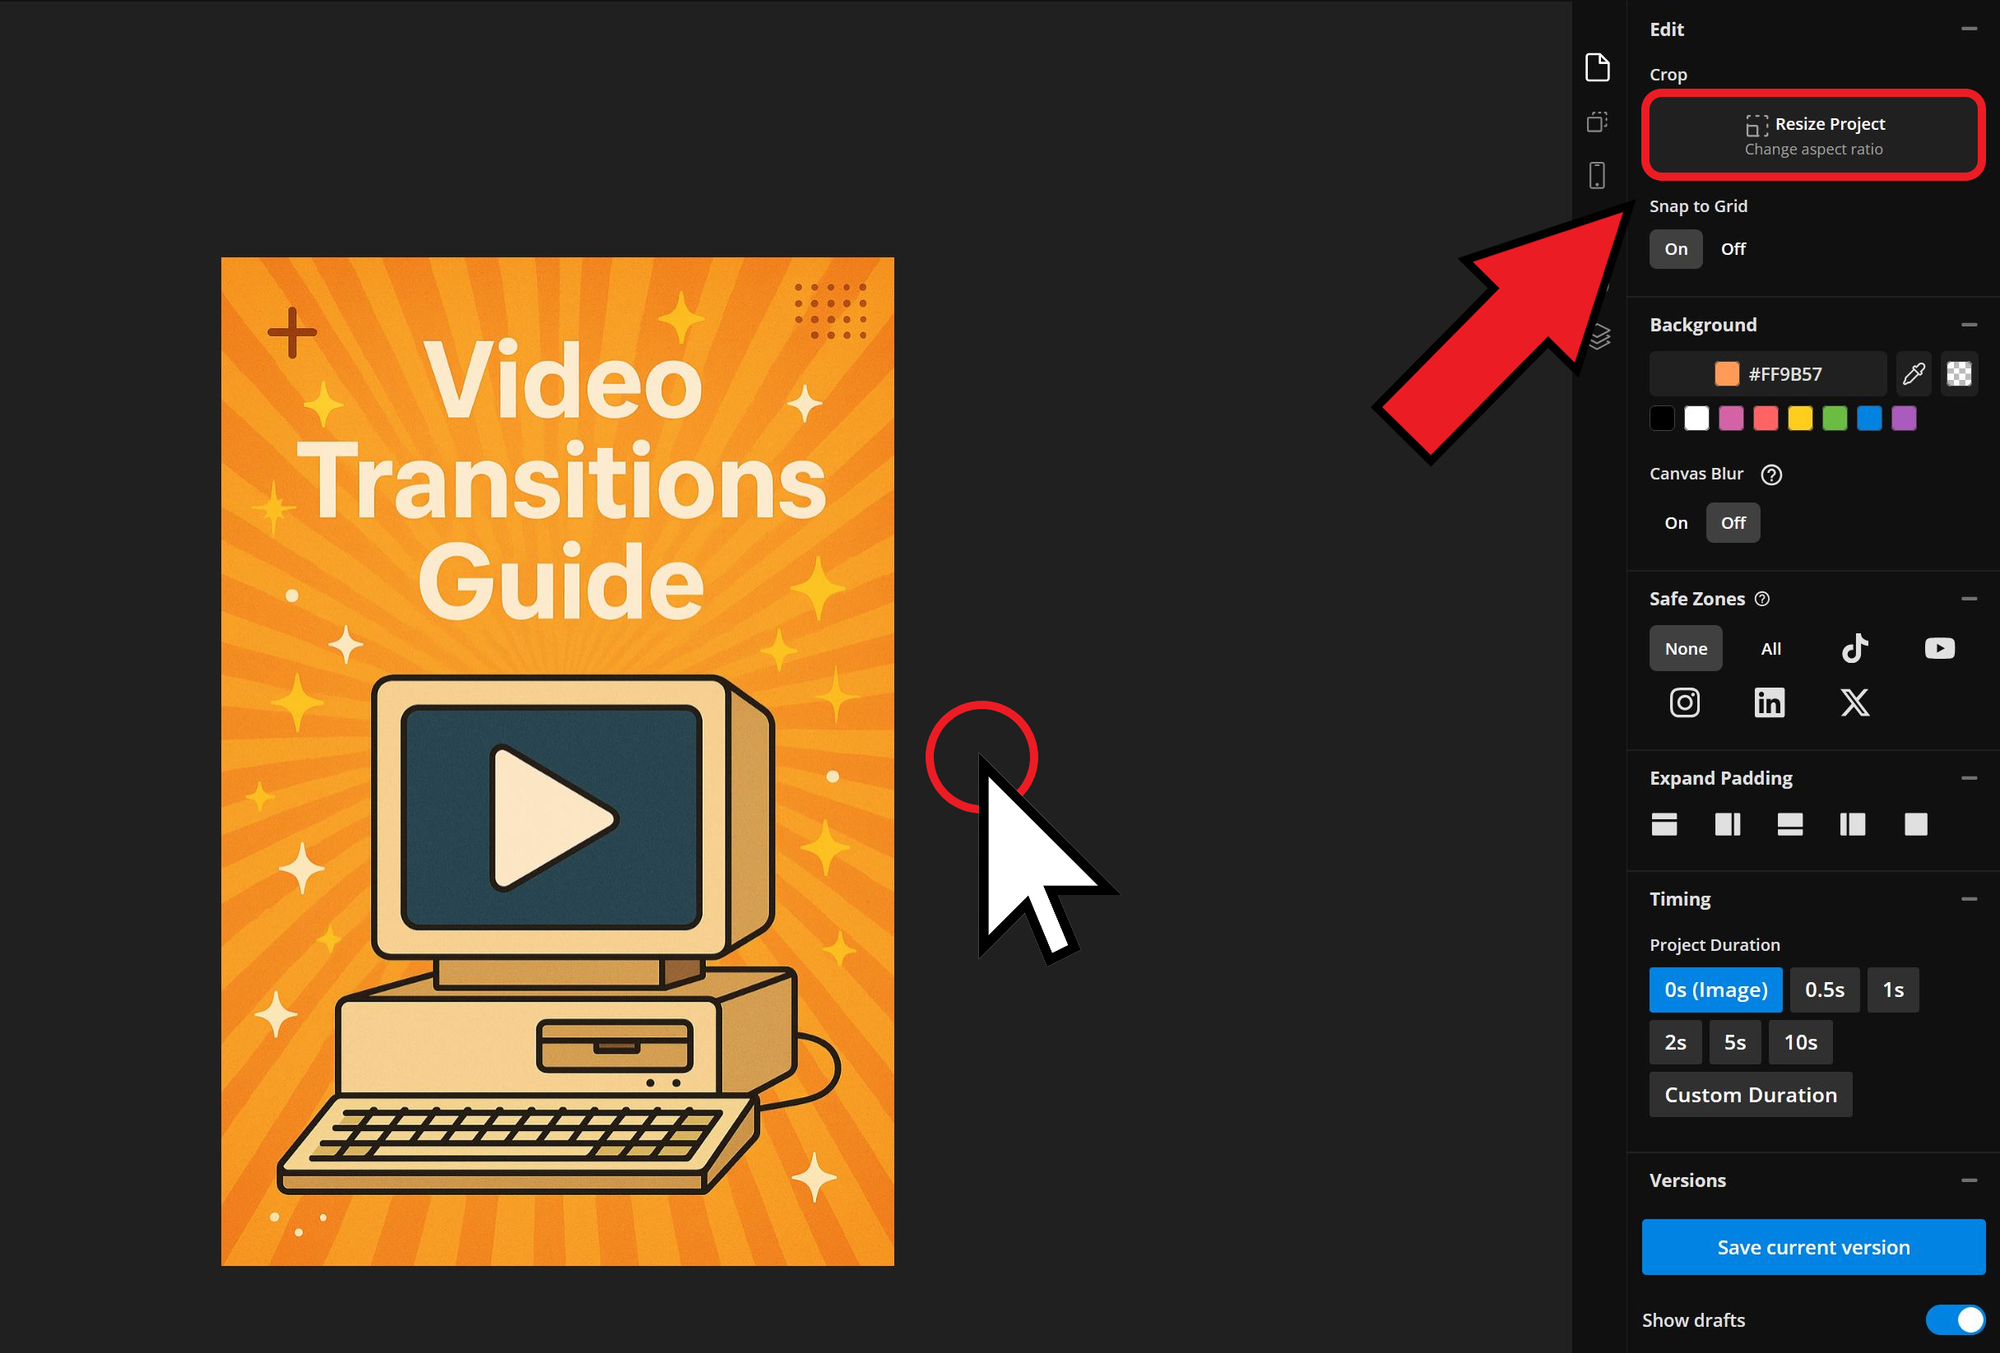
To resize, start by selecting the background of your project to access the Resize Project button on the right-hand side.
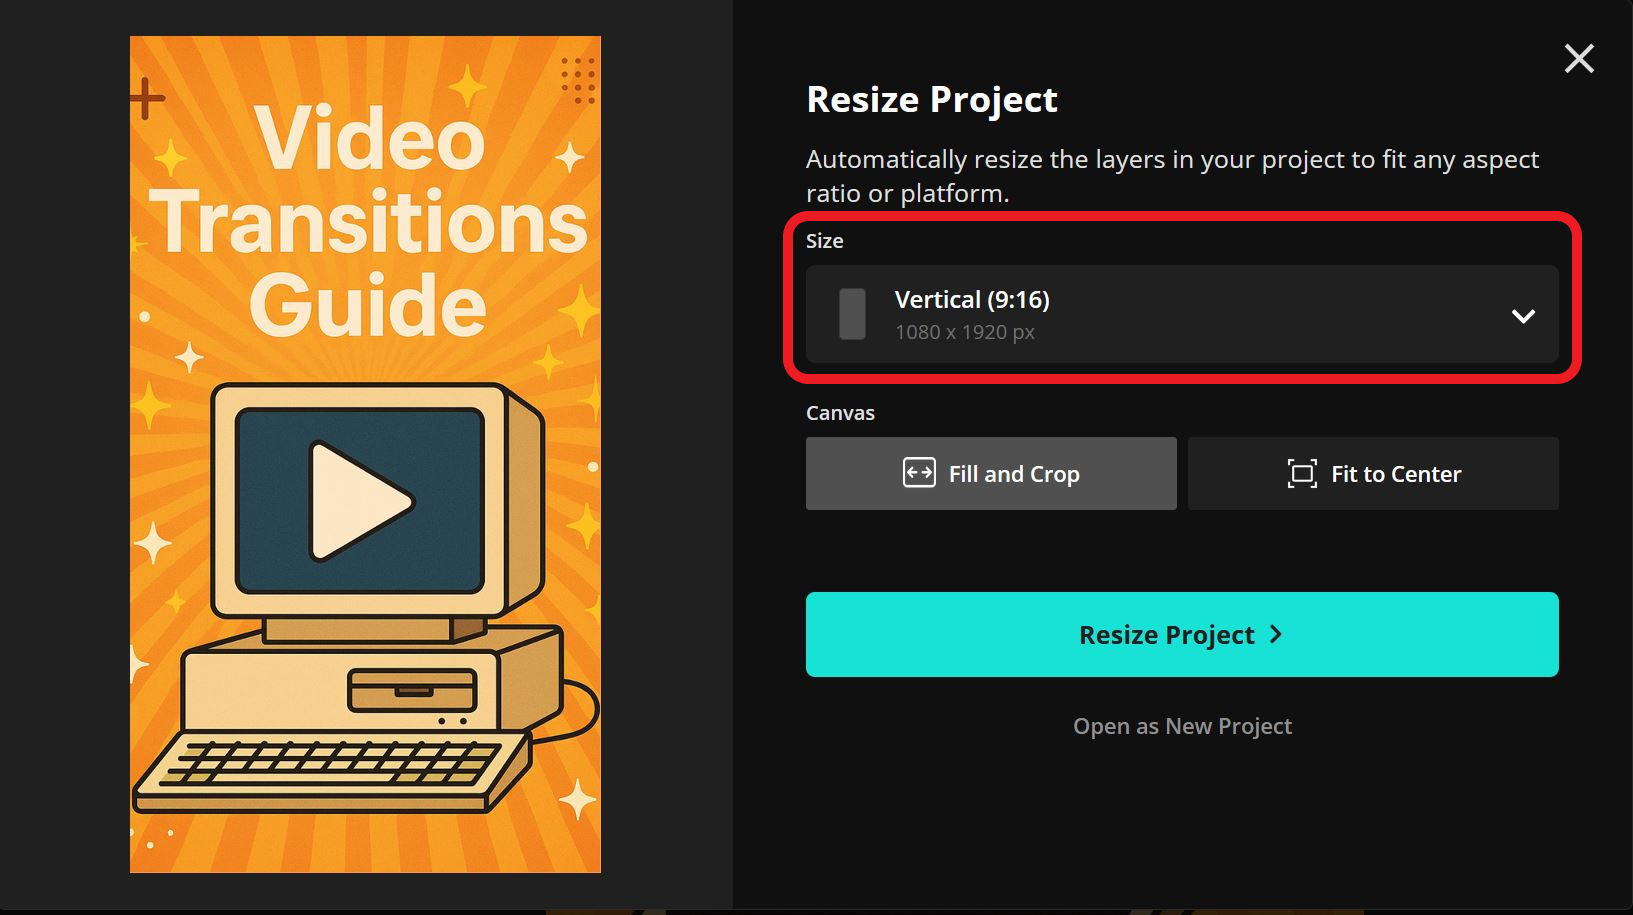
Next, open the Size dropdown and choose your desired aspect ratio. Since I am creating a thumbnail for YouTube Shorts, I selected the 9:16 preset.
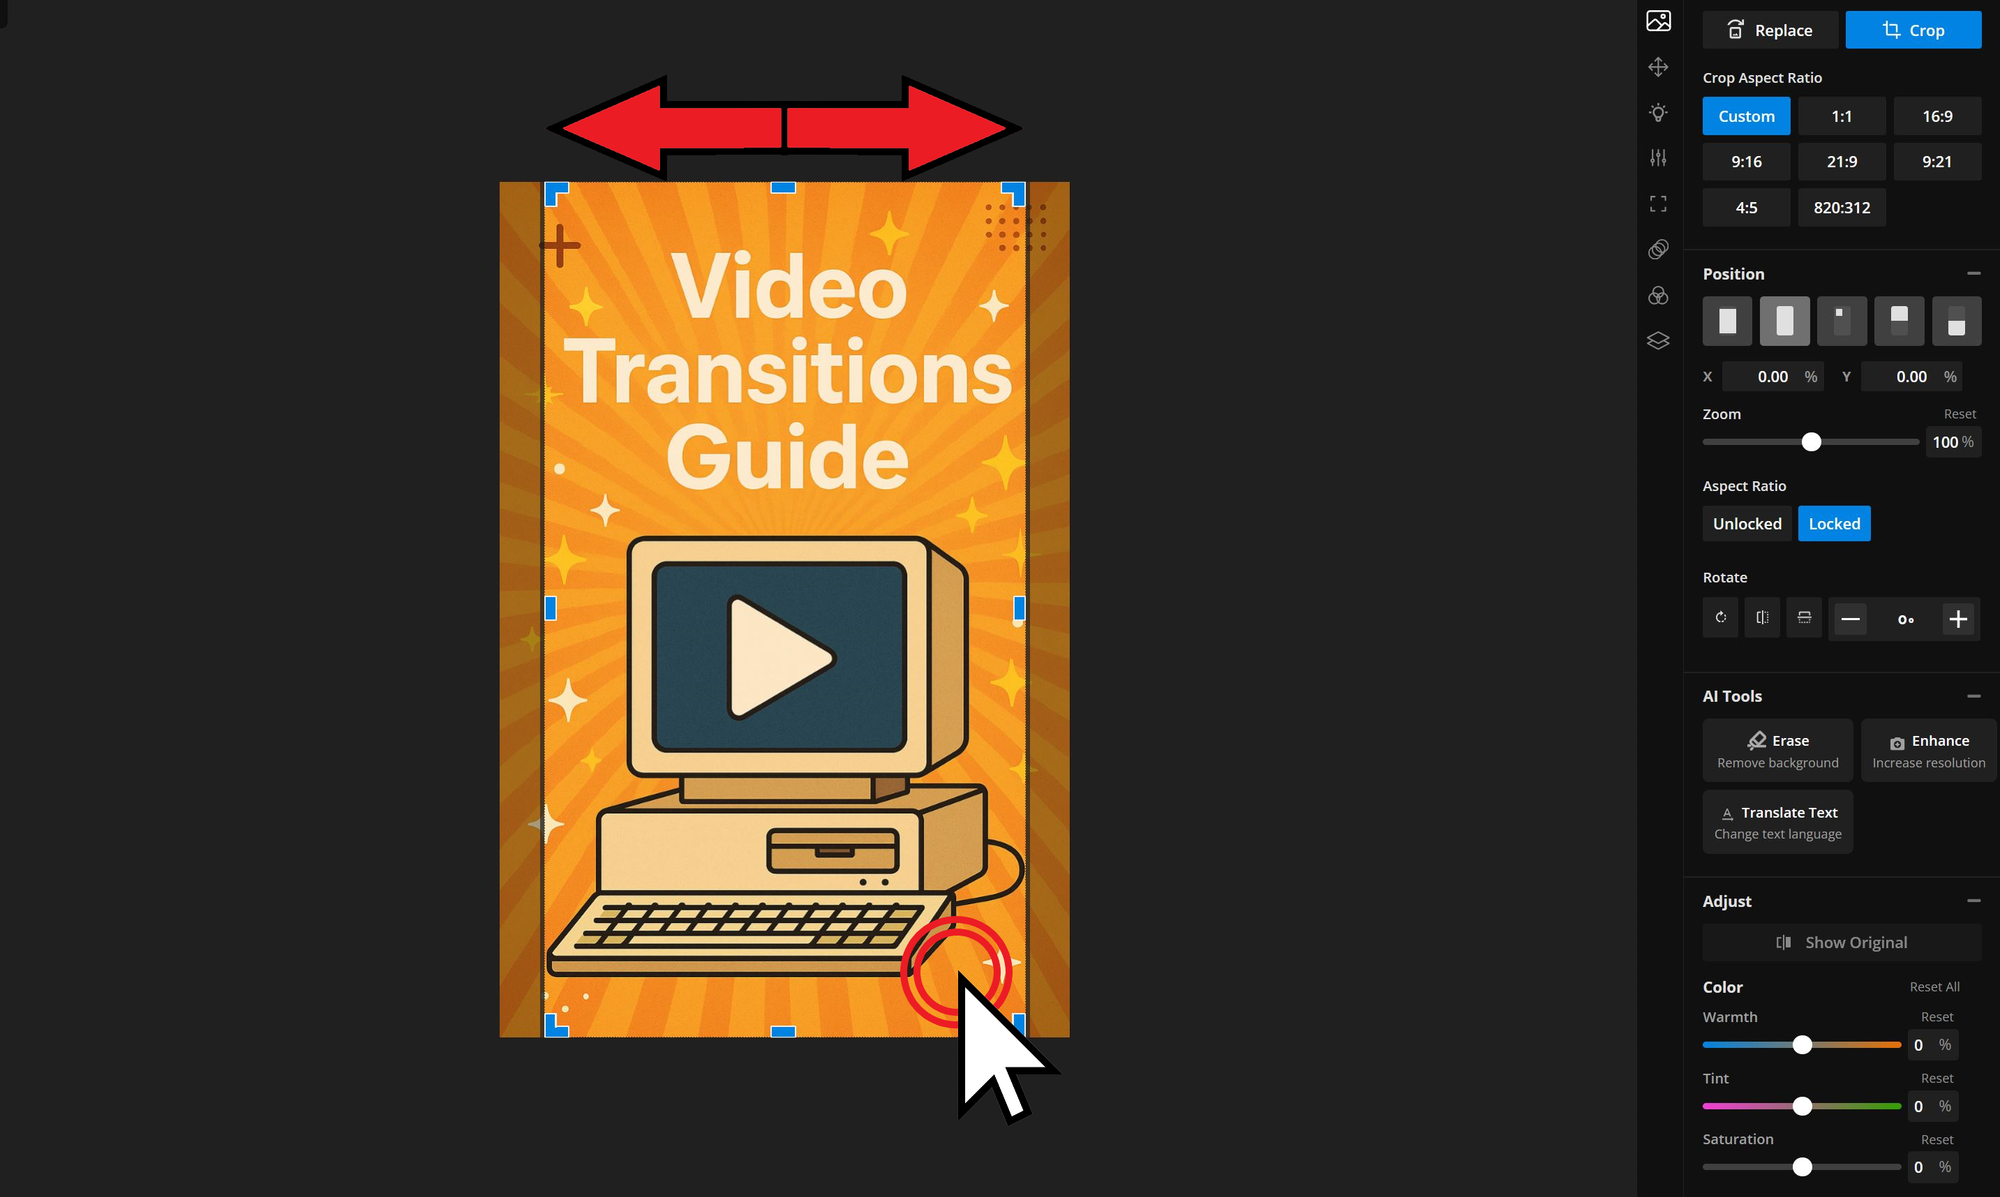
Once resized, you can adjust the framing of your image to ensure all important details are visible. To do this, double-click the image to open the crop tool, then drag the frame to the desired position.
Finally, you can add finishing touches such as your brand or channel logo by positioning it on the image and lowering the opacity to about 50 percent so it blends naturally with the background.
This process is one of the fastest ways to create a compelling thumbnail for your video. However, there’s still another method that can generate a more personalized result while maintaining the same level of efficiency.
Social Media Thumbnail Size Guide
While taking the time to create a strong thumbnail is important, it’s just as essential to ensure your thumbnail is optimized for the platform where it will be displayed.
Each platform has its own ideal dimensions, supported file types, and display limitations. Knowing these details in advance helps you avoid formatting issues and ensures your thumbnail looks professional the moment it goes live.
YouTube
- Aspect Ratio: 16:9 (horizontal)
- Resolution: 1280 × 720 pixels (minimum 640 px wide)
- File Types: JPG, PNG, GIF
- File Size Limit: 2 MB
- Visual Tips: Use bold text, expressive faces, and high contrast for better visibility in the feed
YouTube Shorts
- Aspect Ratio: 9:16 (vertical)
- Resolution: 1080 × 1920 pixels
- File Types: JPG, PNG, GIF
- File Size Limit: 2 MB
- Visual Tips: Keep text large and elements centered to display well in vertical scroll; YouTube Shorts uses the first frame or a manually selected still as the thumbnail (no custom uploads via mobile)
Instagram Reels
- Aspect Ratio: 9:16 for Reels cover, 1:1 crop for feed preview
- Resolution: 1080 × 1920 pixels
- File Types: JPG, PNG
- Visual Tips: Keep important elements centered to prevent cropping, use vertical layout optimized for mobile
Facebook Reels
- Aspect Ratio: 9:16 (vertical)
- Resolution: 1080 × 1920 pixels
- File Types: JPG, PNG
- Visual Tips: Similar to Instagram, with thumbnails pulled from the video; keep visuals centered and high-contrast for mobile viewing
Vimeo
- Aspect Ratio: 16:9 (horizontal)
- Resolution: 1280 × 720 pixels (custom sizes supported)
- File Types: JPG, PNG
- Visual Tips: Aim for a clean, cinematic look with minimal text or clutter
LinkedIn Video Posts
- Aspect Ratio: 1:1 or 16:9 depending on how the video is uploaded
- Resolution: 1080 × 1080 (square) or 1280 × 720 (horizontal)
- File Types: JPG, PNG
- Visual Tips: Keep text minimal and professional; use brand colors or headshots for a more polished look


