Online Wanted Poster Maker – Layouts, Custom Text, Effects
Back in the Wild West days, wanted posters were used to inform the public of an outlaw on the run. Nowadays, friends use these posters to poke fun at one another, find a lost pet or to post a quirky job ad. In this article, you'll learn how to make one for yourself using a free tool called Kapwing.
Back in the Wild West days, wanted posters were used to inform the public of an outlaw on the run. Nowadays, the FBI and other government agencies mostly use digital billboards to spread the word. However, wanted posters still exist, but they’re typically used between friends who want to poke fun at one another.
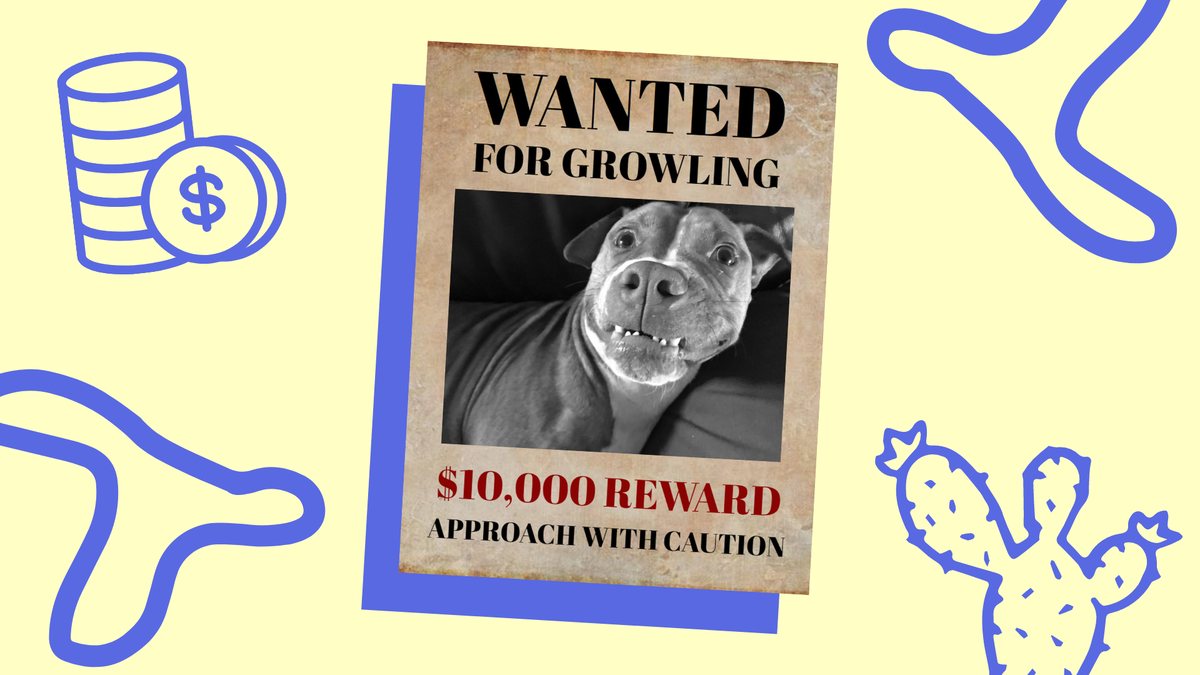
If you fall into that category, you’re probably wondering how to make a wanted poster so you can troll your buddies. Not to mention, wanted posters are useful for non-criminal activity like finding a lost pet or creating a positive wanted poster about a good thing someone does.
No matter the cause, it’s easy to make a wanted poster inside the free editor called Kapwing. With this tool, you can customize the layout, text and effects for free and without leaving the browser. If you’re ready to learn, keep reading and I’ll show you how.
Layouts
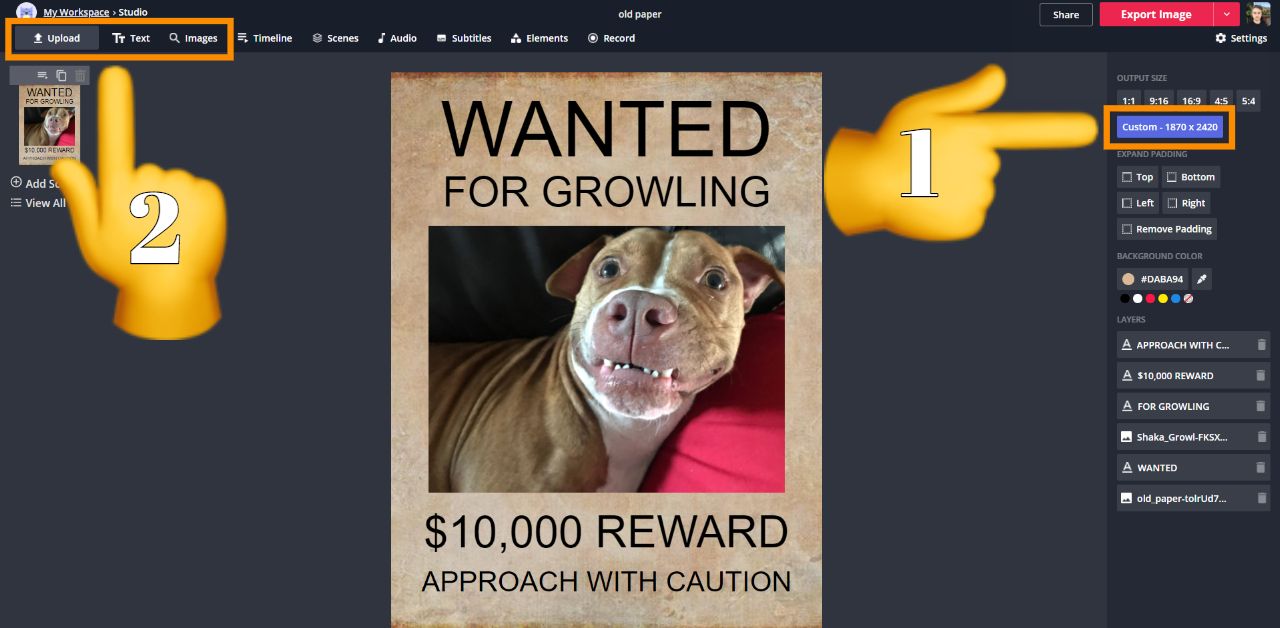
First, choose a layout that best suits the style poster you want. To make these layouts easy to print, each one has a 8.5:11 aspect ratio (the size of paper) which is 1870px wide by 2420px high inside the Kapwing studio. Check out the different layouts and choose the one that closest aligns with your poster’s goal -- whether that’s to find a criminal or just to have a laugh with friends.
Classic Look
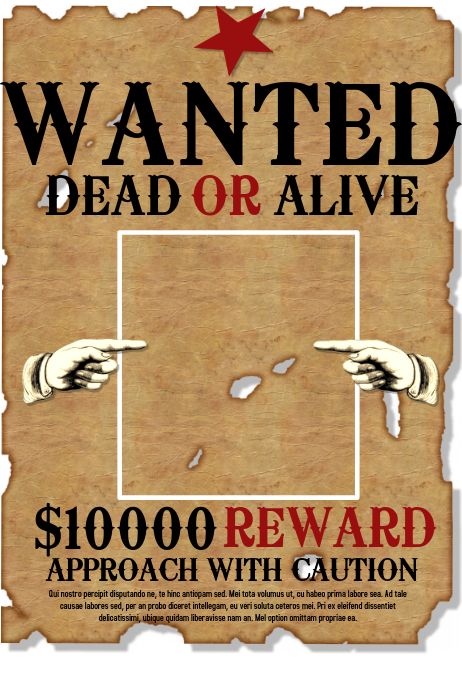
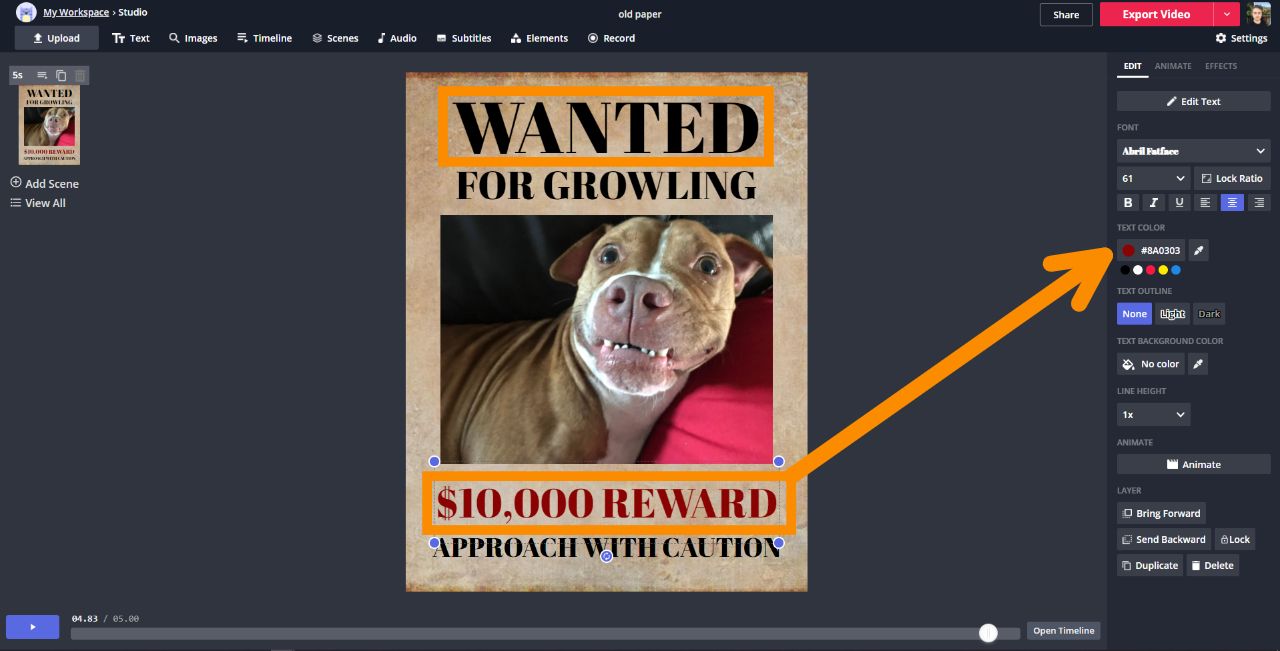
This layout pays homage to the old wanted posters from the Wild West. In particular, there’s a huge “wanted” text at the top, picture in the middle and the reward at the bottom. Typically, this style features a serious criminal, their crime and whether they’re wanted “dead or alive.”
Full Portrait
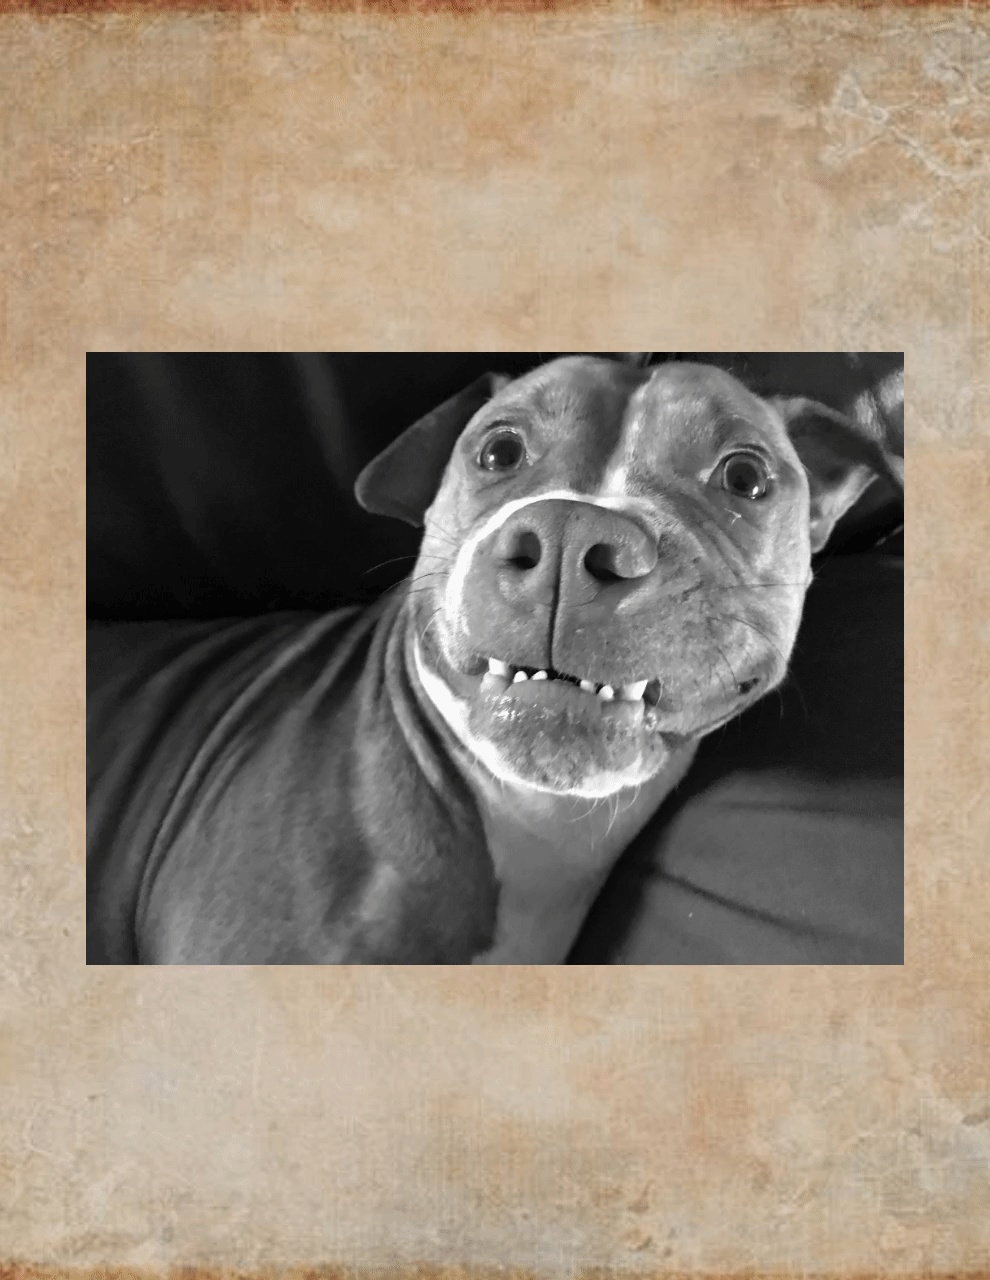
The portrait layout is a bit more modern. It features a portrait photo that covers the full canvas with text overlaid to give the reader more information. Since this layout focuses on the wanted person’s looks, information like what they’re wanted for and the reward are placed where the text doesn’t obstruct the face.
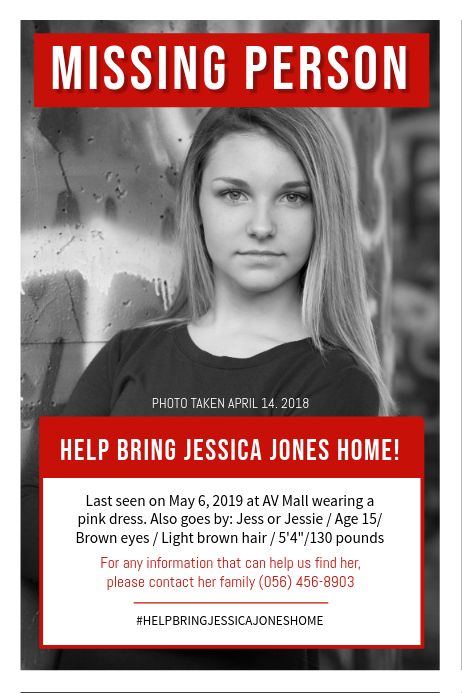
Description
If your wanted subject has distinct physical qualities, a description layout is the way to go. Usually, this layout features a small portrait of the wanted individual next to a description listing things like height, hair style, eye color, where they were last seen, etc.
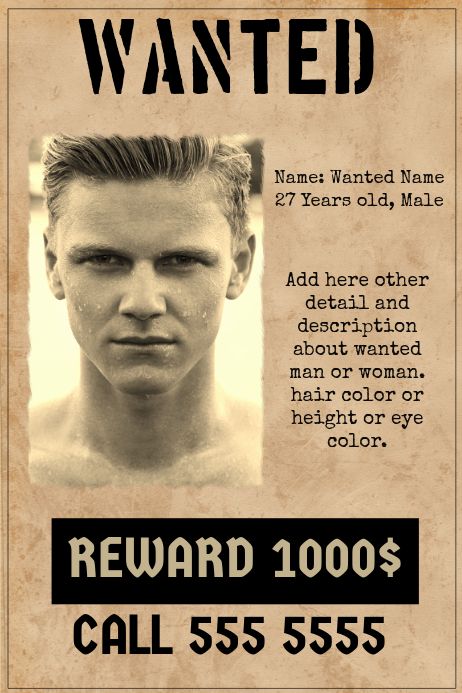
With all the layouts, it’s important to list the following information: what they’re wanted for, the reward and how to contact the person issuing the wanted posters. As for the contact information, you can include a phone number, physical location, email or a QR code.
To make your own layout, open the Kapwing studio and click ‘Start with a blank canvas.’ From there, change the dimensions to 1870px wide by 2420px as stated above. Then, add ‘Text’ and ‘Image’ elements using the top toolbar and arrange things to match the layout you want.
For the background, you can change the color or add an image. In the example below, I uploaded an "old paper" photo I found on Google and changed the dimensions to fit my 8.5:11 canvas.
Custom Text
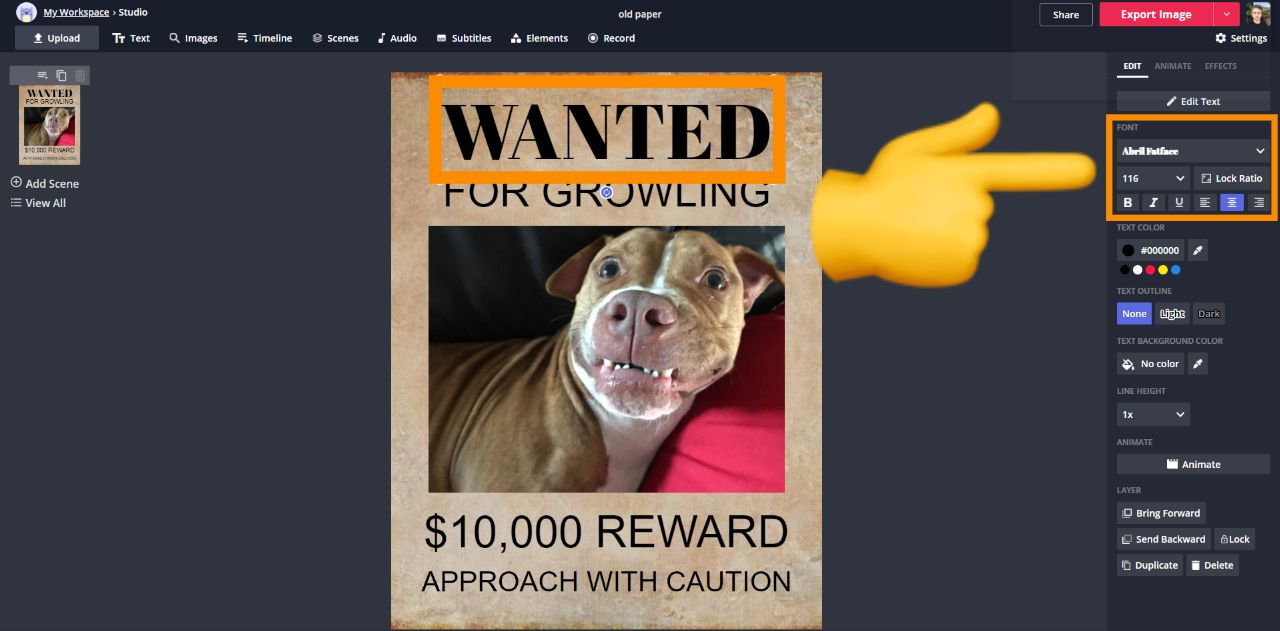
Now, you can customize the text and drag the boxes around where you like. To give you an example, I’ll recreate the classic look outlined in the previous section. First, select the text and change the font with the menu on the right side. In this example, I’m using the free font called “Abril Fatface” to give it that classic Wild West look.
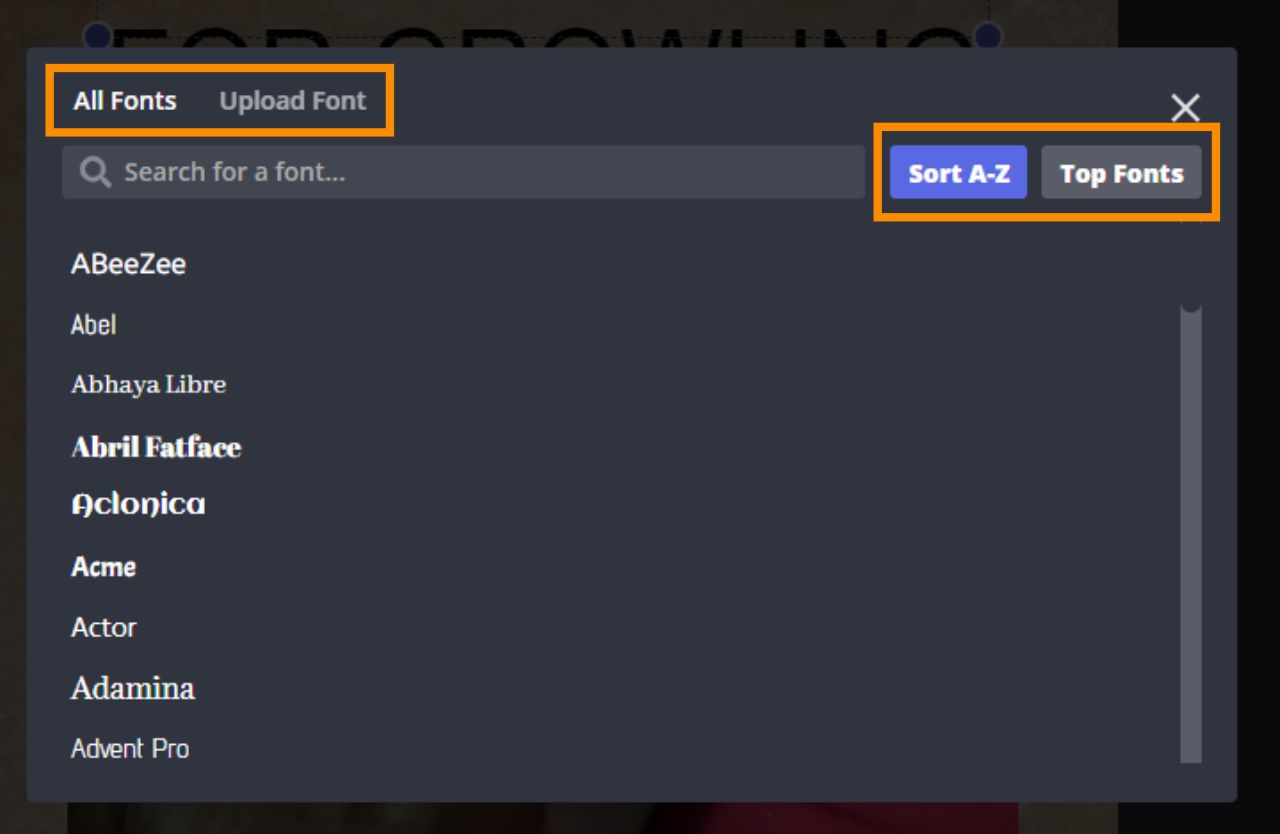
If you want more options, click ‘More Fonts’ in the font drop menu to search every font on Kapwing and sort from A-Z. There’s tons of great fonts to choose from that make it easy to read on a poster like “Helvetica,” “Raleway” or even “Permanent Marker.”
If none of those fonts satisfy, no worries. Kapwing gives Pro users the option to upload a custom font via a .ttf or .otf file. DaFont is a great website to find wanted poster fonts for free and they have thousands to choose from. Just download your favorite one and upload to Kapwing. To learn more about going Pro, check out the FAQ for Kapwing’s Pro subscription.
Once you’ve got the perfect font, start editing the text format, color, outline and background with the right side menu. The design is totally up to you but remember to use big text and bold colors that’ll stand out once they’re posted. In particular, you might want the “wanted” text to be the biggest font and the “reward” to have a high contrast color to draw attention once the reader takes a glance.
Effects
If you plan to use the poster online, adding effects will give you an edge that physical posters don’t have. To do this, click a text box or image and open the animate tab from the top right of the menu. Inside, you’ll see several options like flicker, fade and hue rotate to make your image or text come alive and demand attention.
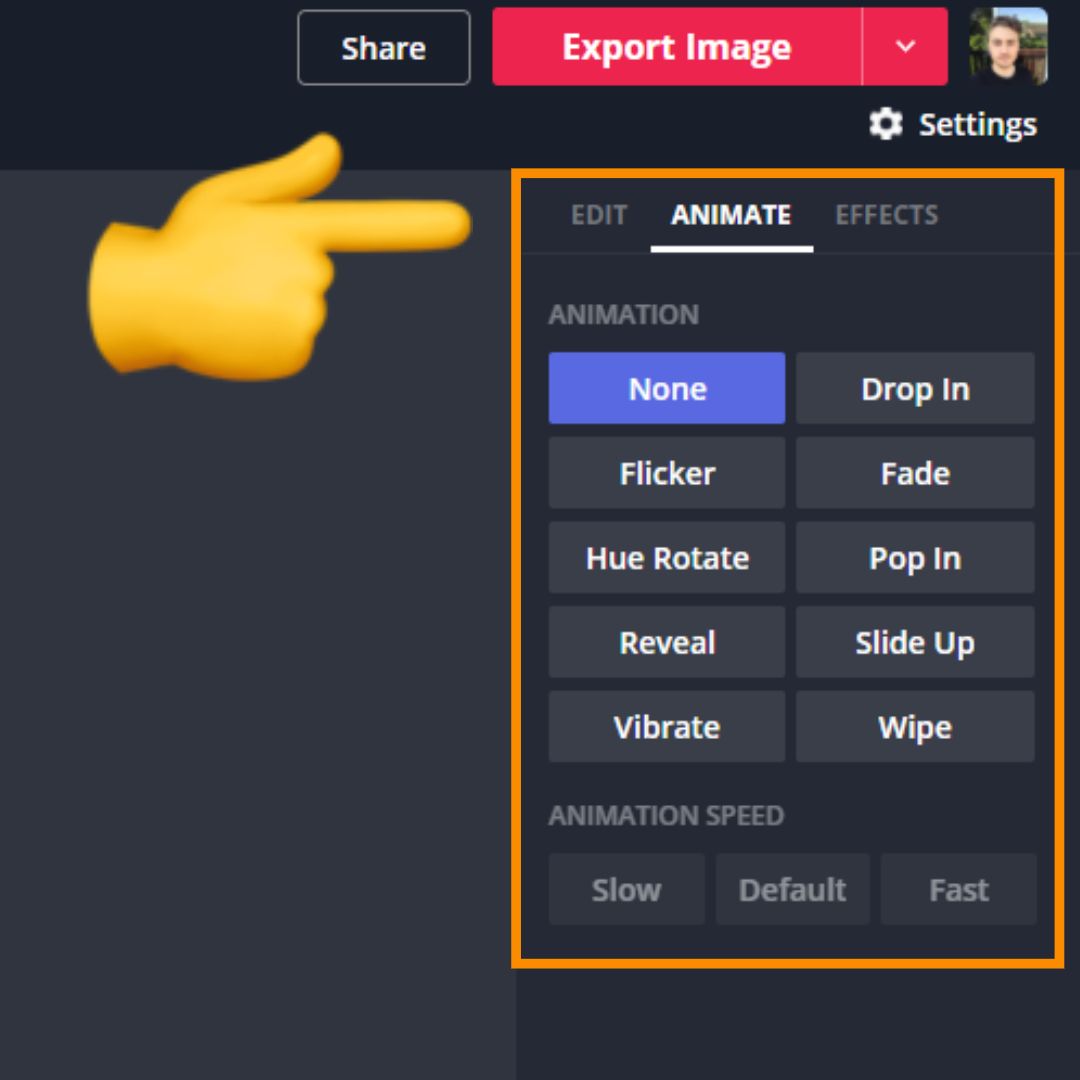
When you add multiple animations, you might want to adjust the timing so they don’t start at the same time. Open the ‘Timeline’ form the top toolbar to see each element as its own “track.” To adjust the timing, select each element and drag the ends to the time you want it to appear. That way, the viewer will see things appear in an order that gets them to take action. If you need additional help, watch this video about how to use the timeline.

After you’re done timing everything, click 'Done' in the top right. If you're satisfied with the design, click ‘Export Image’ from the top right and download the finalized poster. At this point, print out the poster to post around town, or post the image online to spread the word.
Now you know how to make a wanted poster with the perfect layout, custom text and effect. If this guide helped you make a poster, be sure to subscribe to the Kapwing Resources page for new tutorials. And, check out the related articles to keep learning:
Related Articles:
- How to Make an Animated Poster Online
- Create Advertisement Posters from Scratch Online
- Make Your Own Motivational Poster Online
- Postering San Francisco: Lessons from a scrappy growth marketing experiment