How to Remove Silences from Podcast Audio with AI
Getting professional sounding podcast audio without spending all your time and money editing is possible with the help of artificial intelligence. In this article, I'll show you how to remove silences from your podcast audio using the power of AI and just a few clicks.
Editing your podcast's audio can be one of the biggest hurdles to overcome when starting your own podcast. Even with modern digital tools and sound engineering software available, there's nothing more tedious than having to manually cut out all of the boring pauses and silences that are inevitable part of any podcast recording.
It takes time, patience, and precise audio editing skills to make sure your podcast audio is ready to go out into the world... unless you use Artificial Intelligence to help clean up your audio. Then all it takes is a few clicks.
In this article, I'll show you how to remove silences from your podcast audio using an AI tool.
For this tutorial, I will be using the Smart Cut tool in Kapwing, an online video and audio editor. Since it's browser-based, you don't need to download any new software.
Step 1) Upload Your Audio File to the Editor
Head to Kapwing.com and click Get Started.

You'll be prompted to sign into your account if you're not already and from there will be able to create a new project. When you open a new project, you'll see the upload tools.
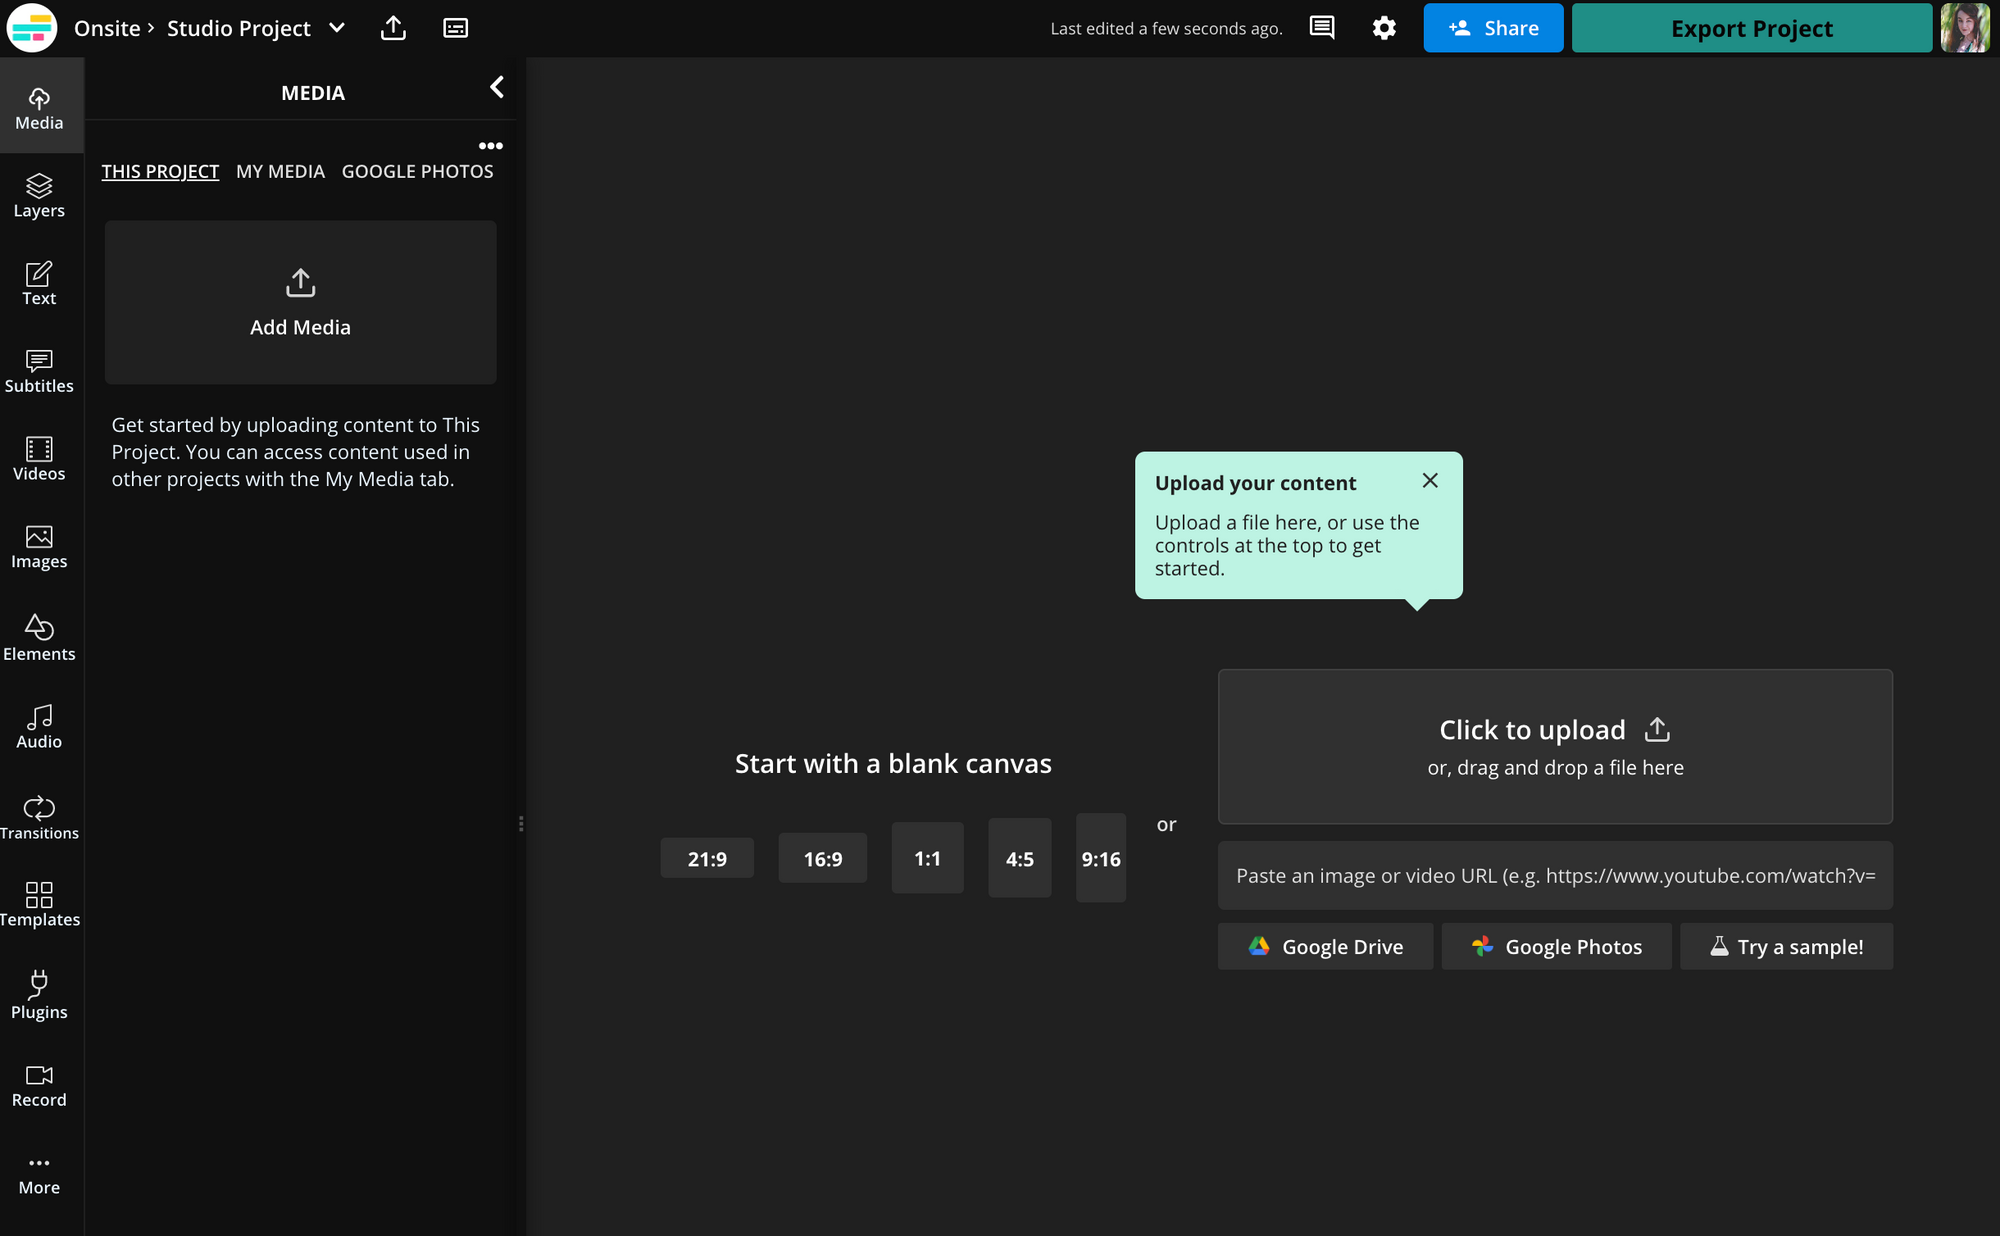
You have the option to drag and drop the podcast audio file from your device, upload from Google Drive or Photos, or paste a link if your file is stored elsewhere online.
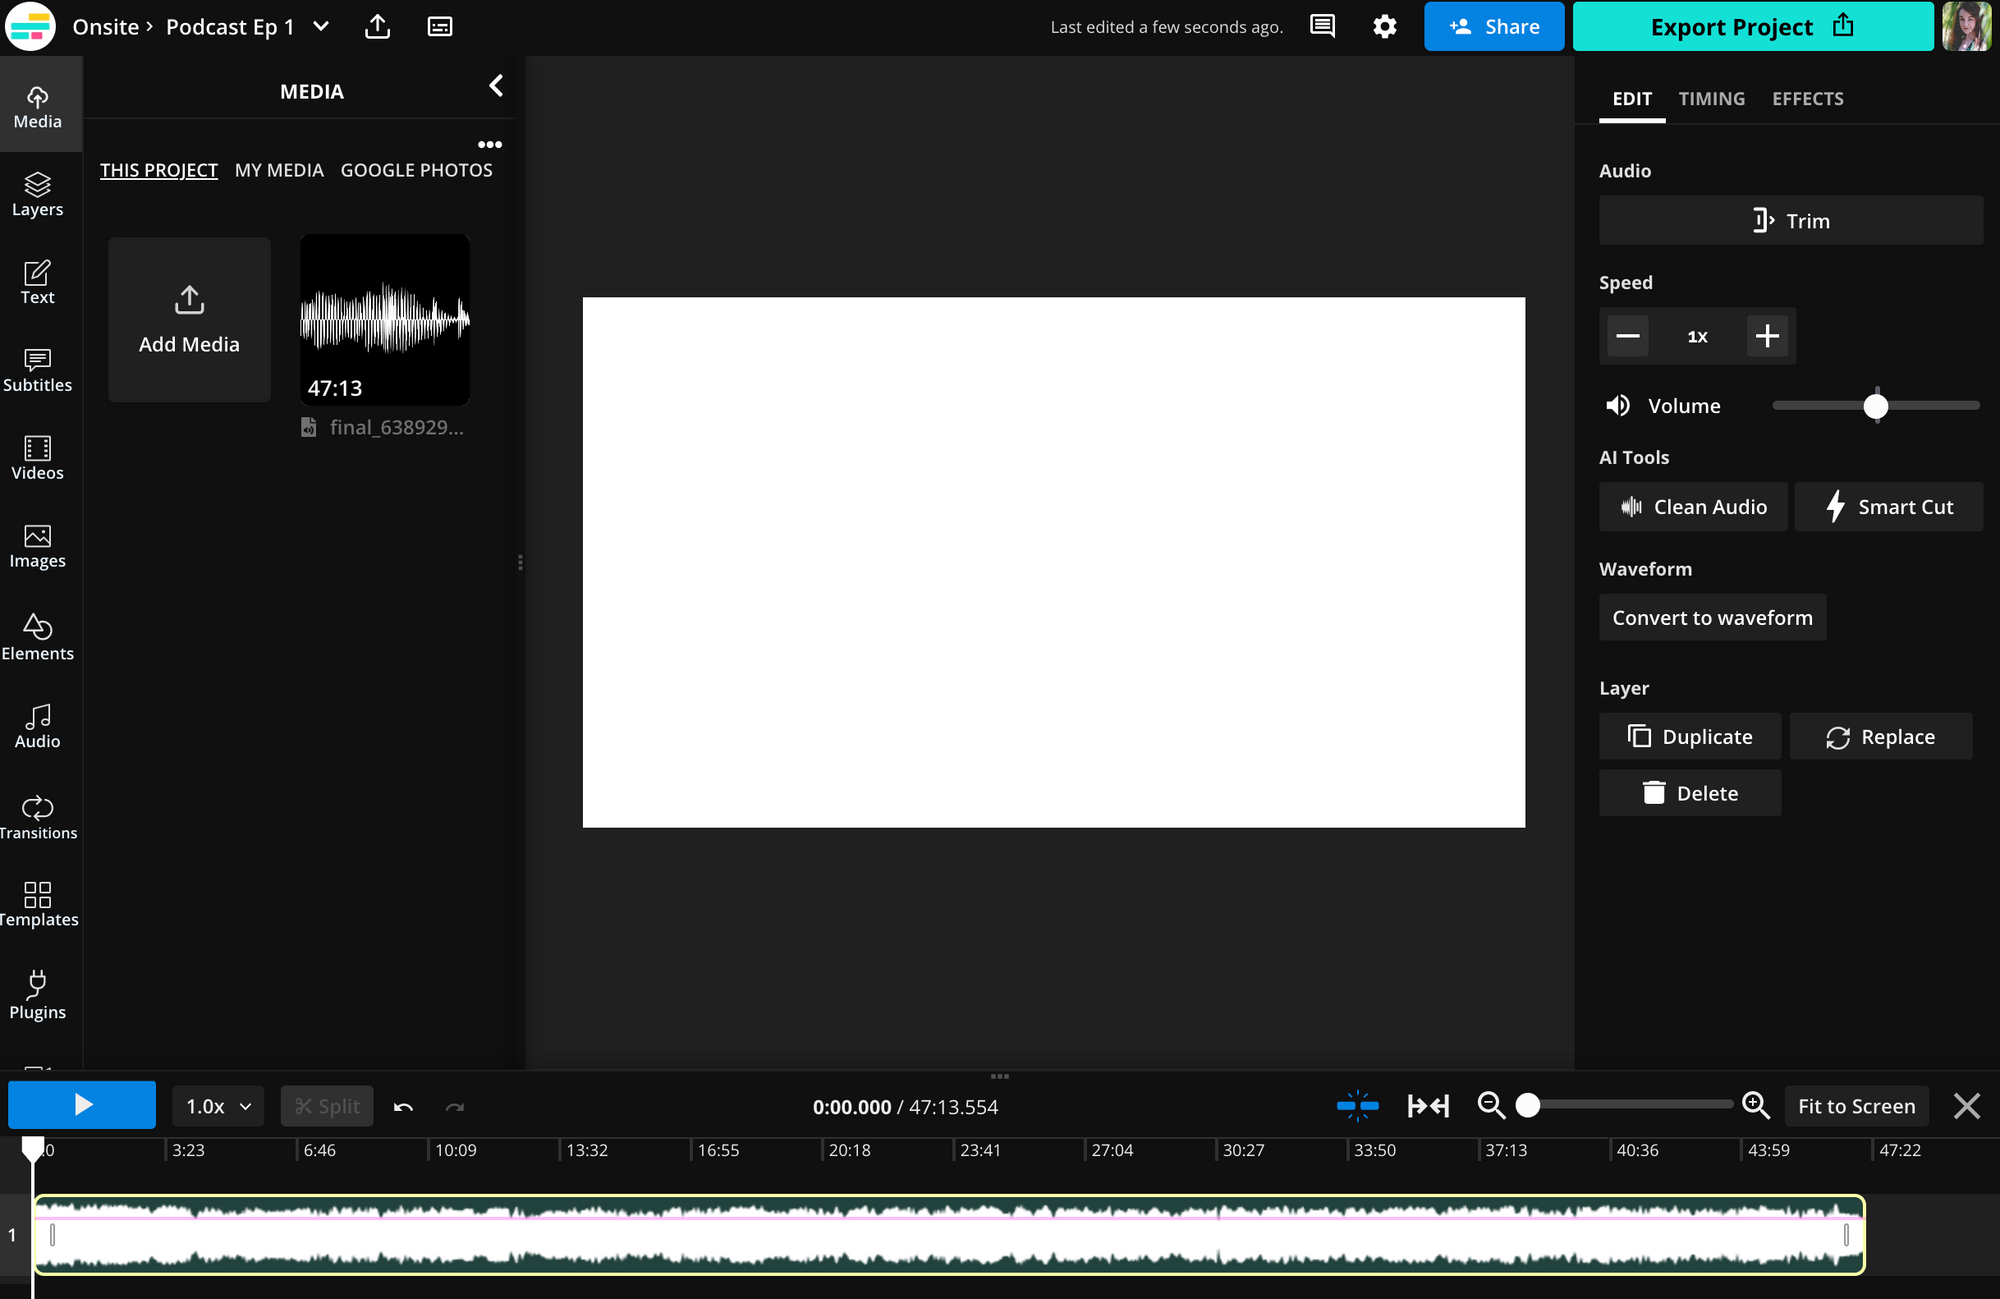
Once the audio is uploaded, you should see it as a waveform on the timeline. Click on the audio layer in the timeline to access the audio editing tools for the next step.
Step 2) Adjust Audio Levels and Reduce Background Noise
This step is optional but I do recommend it. Adjusting your audio levels will help ensure a consistent sound throughout the episode. If the levels aren't consistent, it might be difficult for the listener to hear everything that is being said, especially if you have two speakers using different microphones that could be picking up sound differently.
The same is true of background noise. While you should always try and eliminate as much background noise as possible before recording, sometimes there are things that the microphone picks up that your ears didn't that you'll want to remove in post.
If you do decide to adjust levels and mitigate background noise, you'll want to do this step first before cutting out the silences and pauses. Here's how:
With the audio track selected in the timeline, find the AI Tools in the Edit menu on the right side of the editor. There are two options — Clean Audio and Smart Cut. Click on Clean Audio.
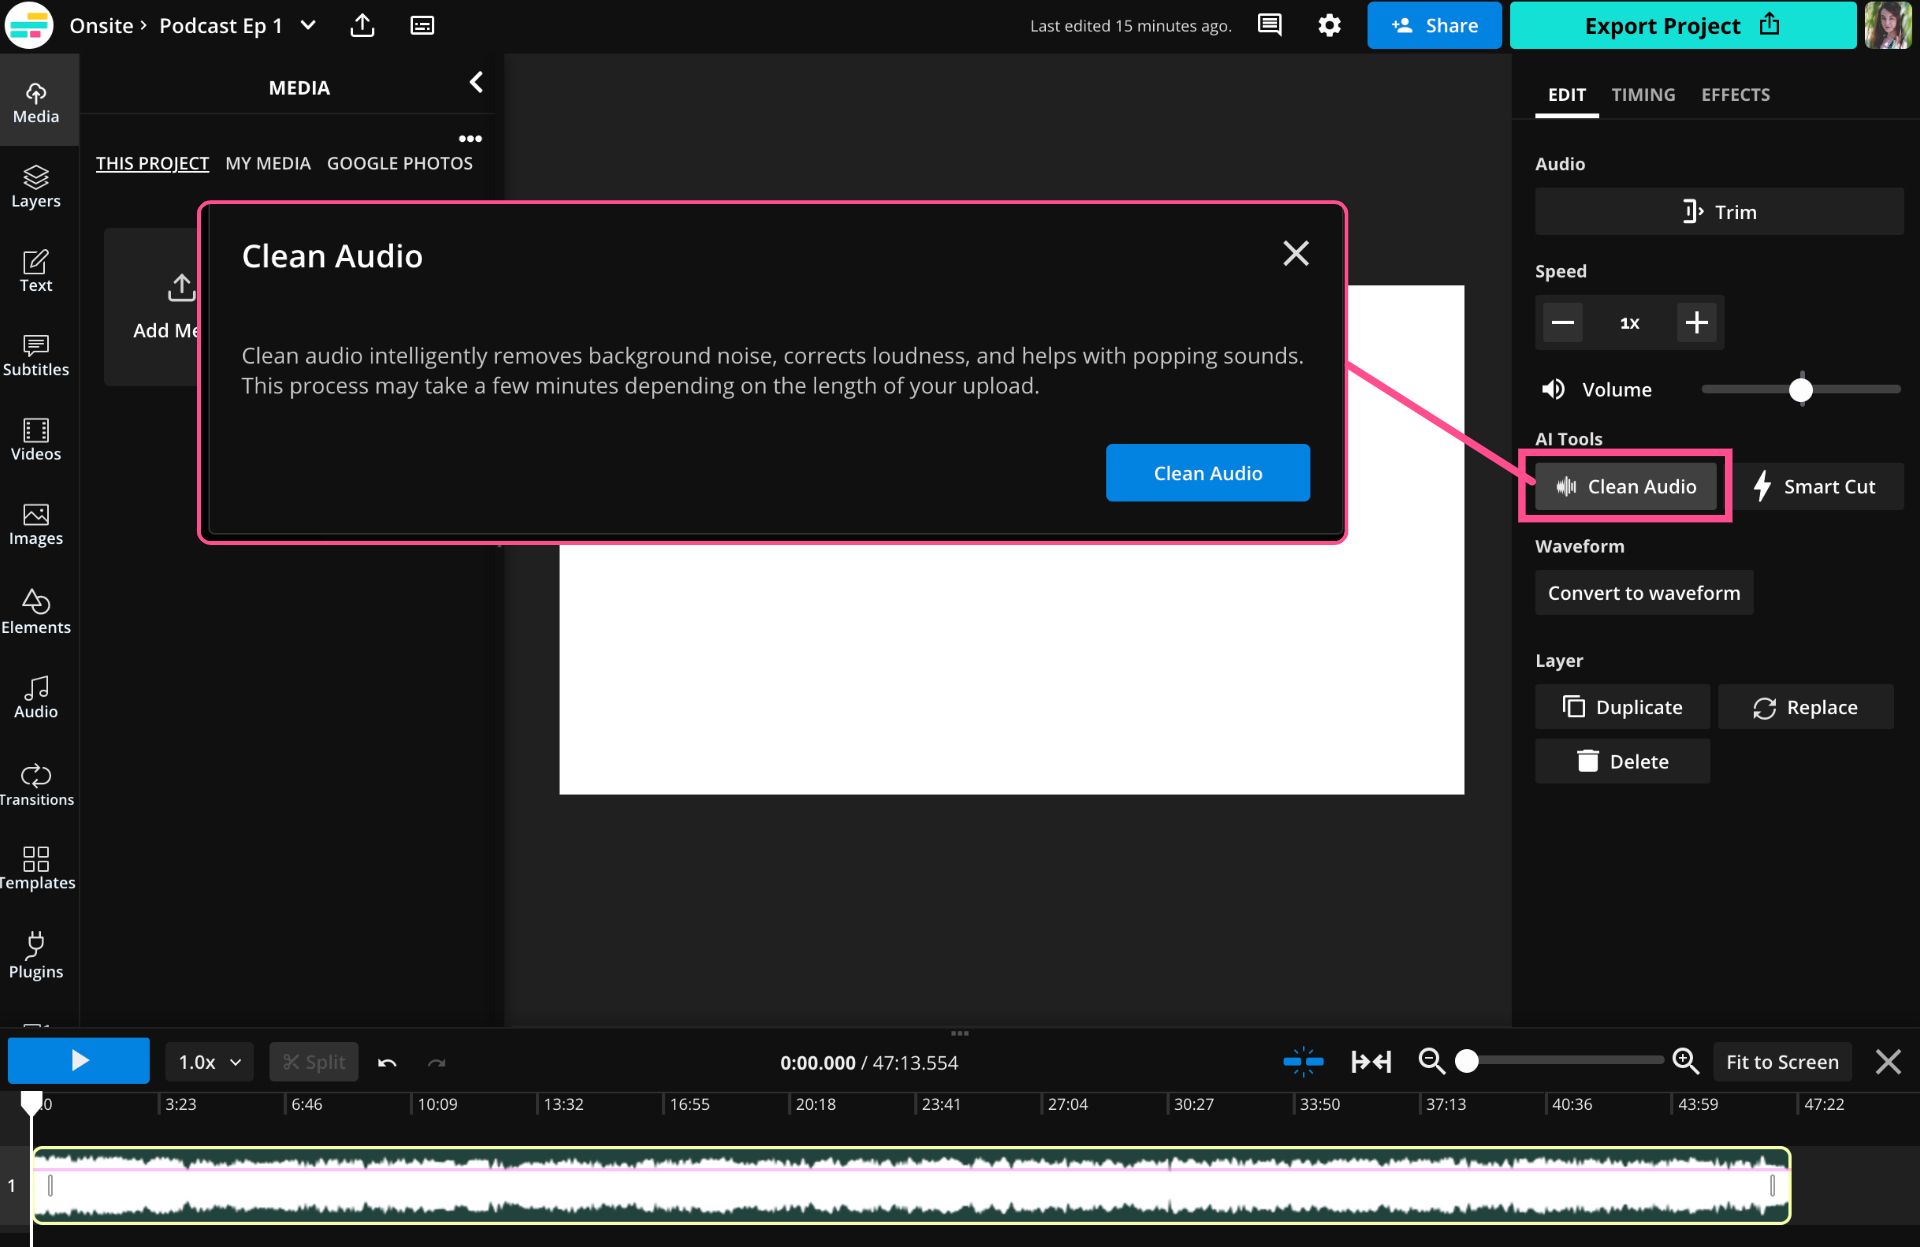
The Clean Audio tool will remove background noise from audio, adjust audio levels, and mitigate any popping sounds in the recording. Click on Clean Audio inside the pop-up modal and let it run.
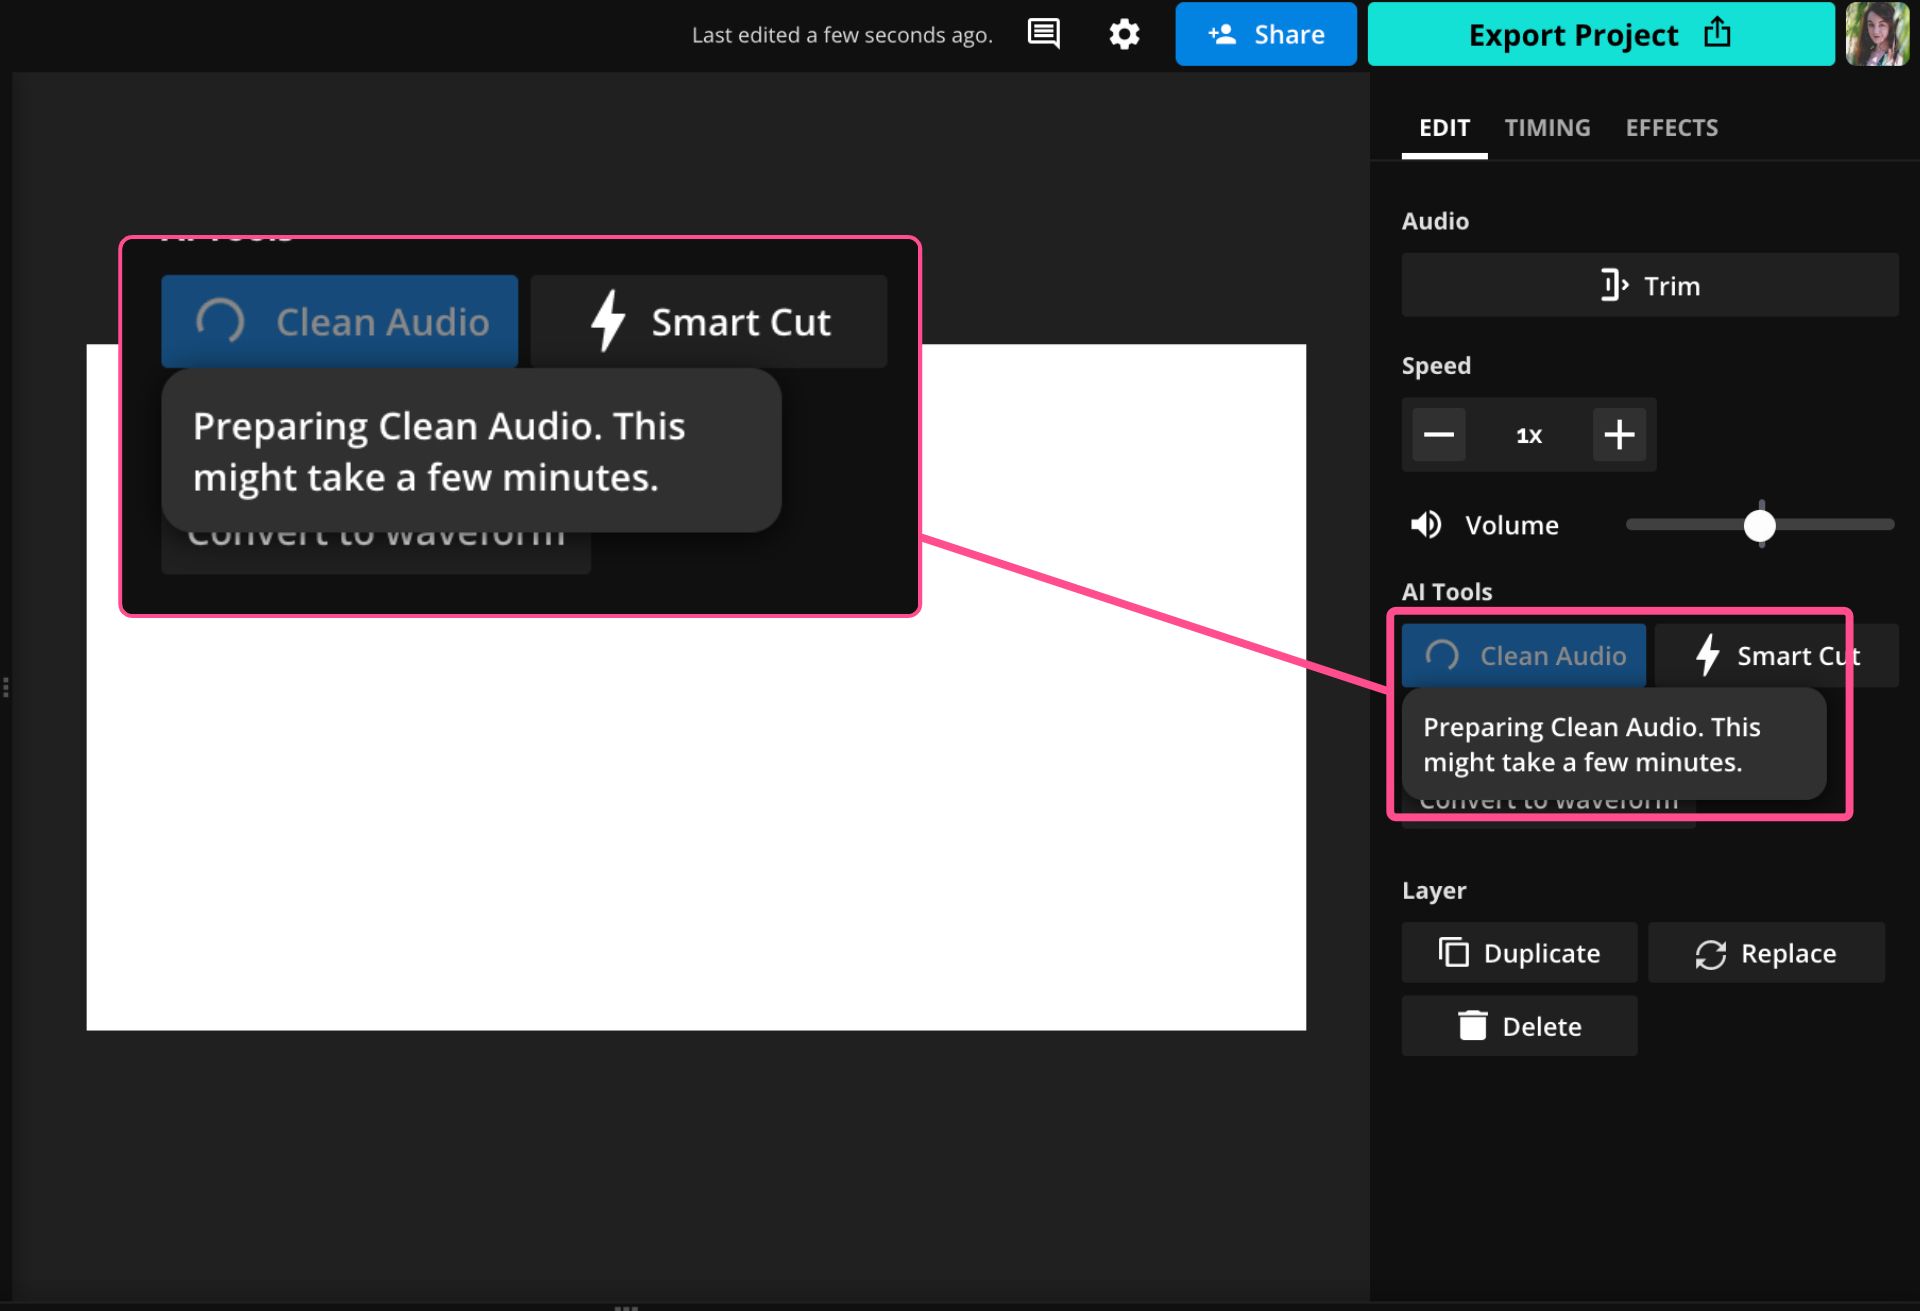
While the tool is running, you'll see a spinning wheel on the Clean Audio button and the message "Preparing Clean Audio. This might take a few minutes." The processing time will vary, depending on the length of your audio file.
You'll know the Clean Audio tool has been applied when the loading wheel returns to the waveform icon but the button stays blue.
Step 3) Remove Silences from Your Podcast with Smart Cut
Now that your audio is cleaned up, it's time to remove all those silences and make your episode listener-ready.

To do that, head back over to the AI Tools in the Edit menu and click on Smart Cut. This will open the Smart Cut window, where you can adjust settings and make changes.
Smart Cut uses Artificial Intelligence to detect and remove silences from your audio, using a specific threshold to determine what counts as a silence. You can adjust that threshold with the Silence Sensitivity slider.
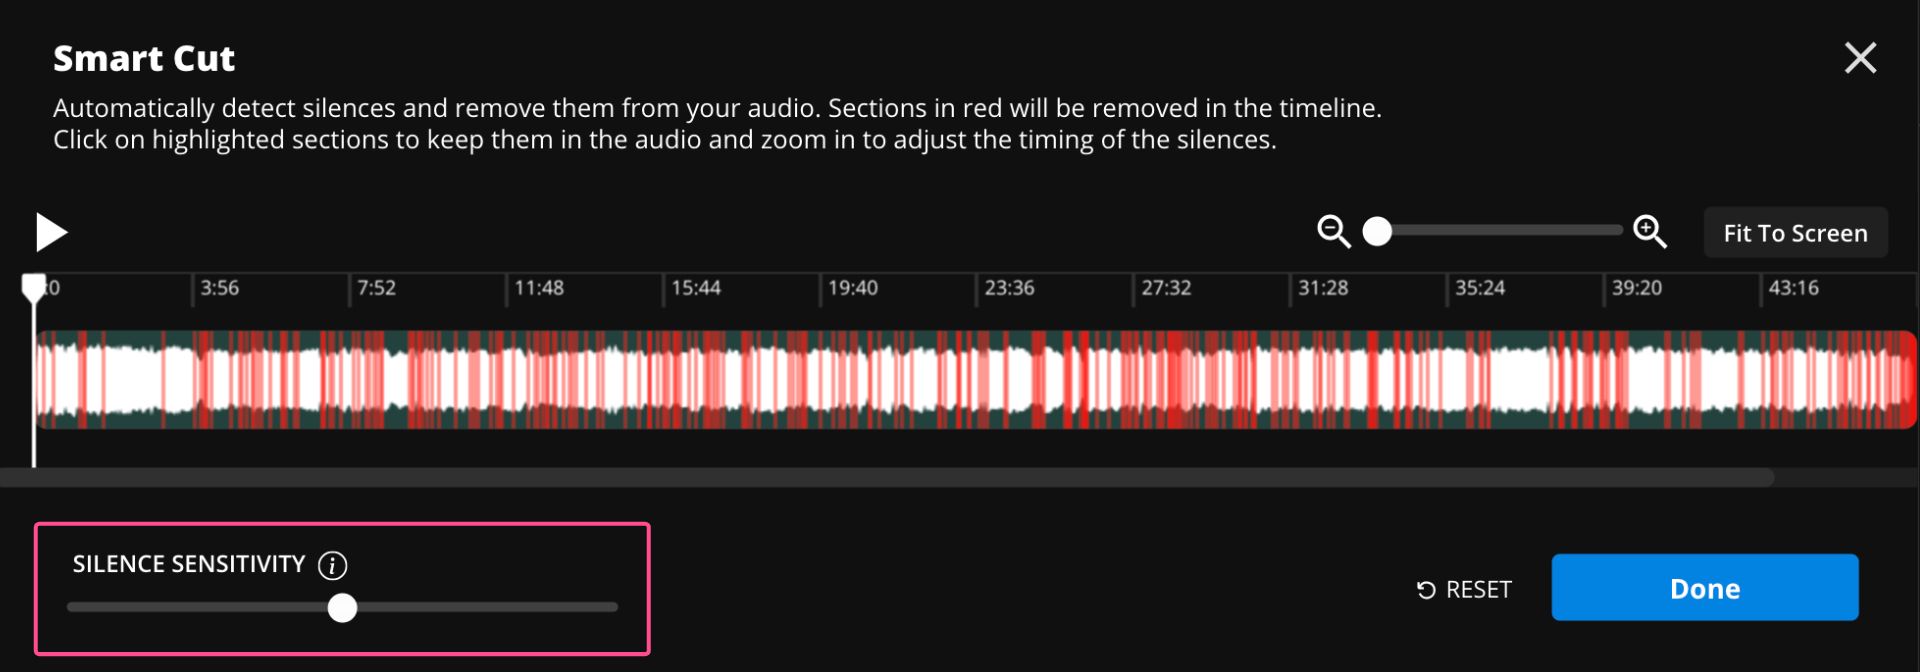
The higher the slider is set, the more silences will be detected and cut out of your audio. For something like a podcast, you may want to set the sensitivity lower. Cutting out all the breaths between words could sound strange and unnatural to the listener.
To determine the right level for your specific audio, you might need to scrub through and listen to a few of the different spots that are being identified as silences. You can zoom in and out on the timeline in the Smart Cut window using the plus/minus buttons and slider above it. Use your mouse or arrow keys to scroll left and right in the timeline.
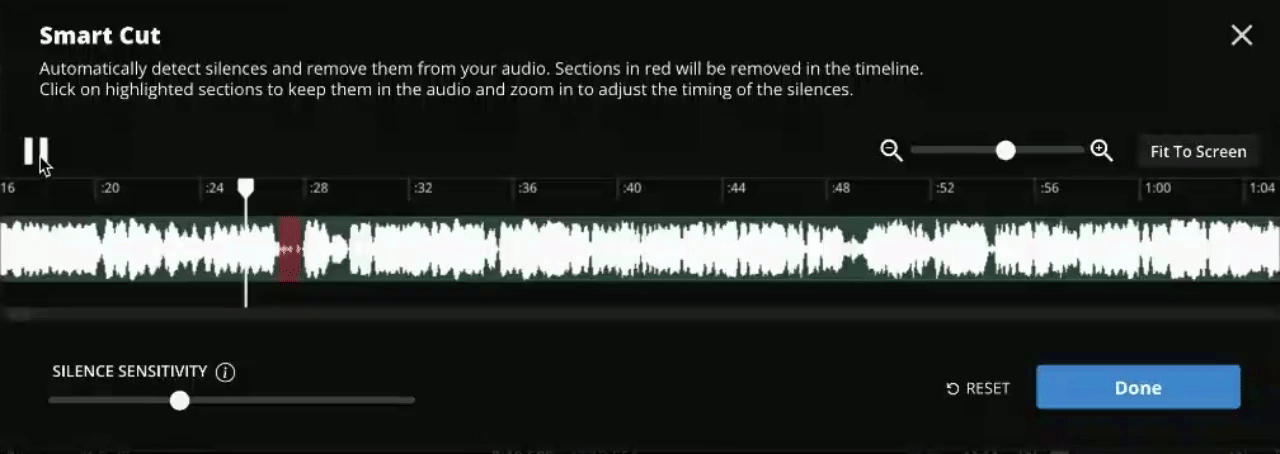
When you find a "silence" that has been removed, it will be highlighted in red. Click on it to manually deselect the silence and add the audio back into the track. I recommend listening to those sections of the audio with the silence removed and without to see if you need to adjust the sensitivity up or down.
Once you're happy with the sensitivity, click Done to save your changes and remove all silences identified by Smart Cut.
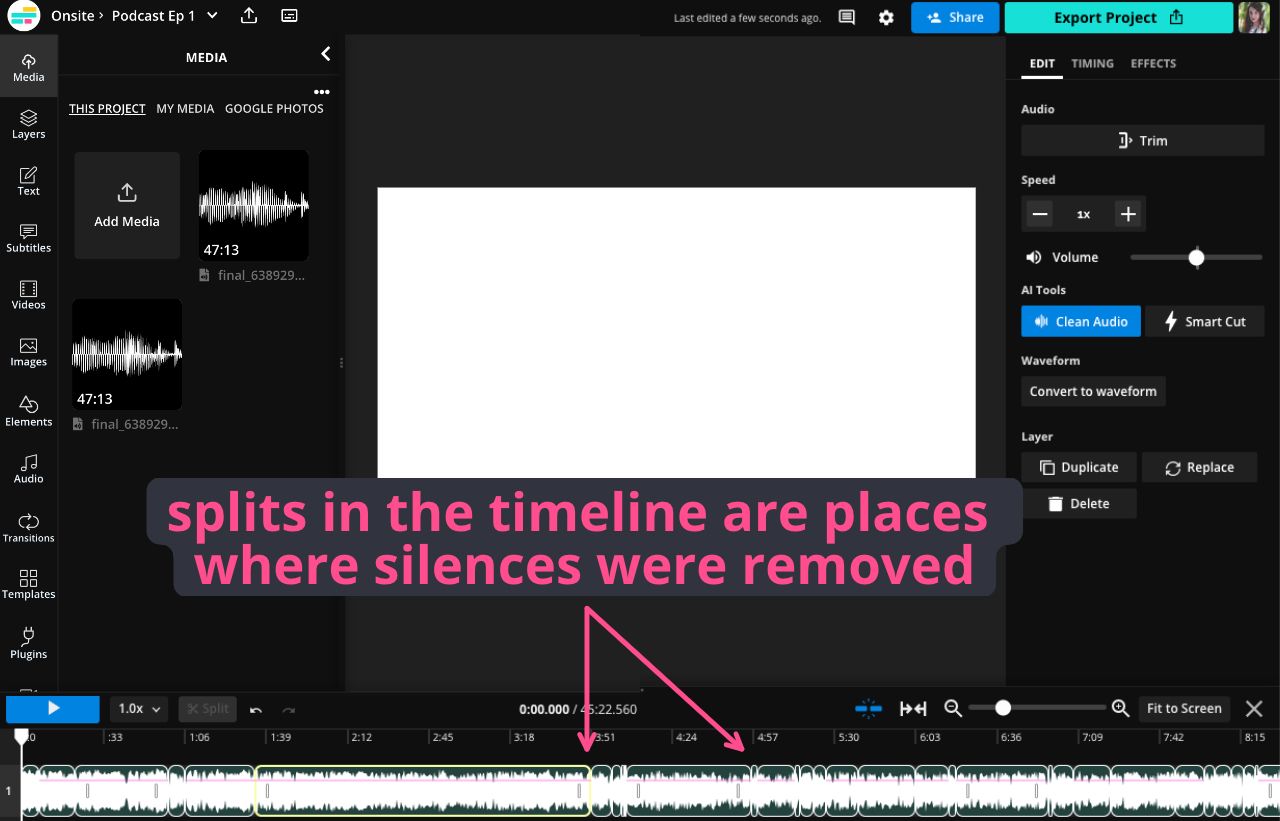
Instead of one long track, the audio layer will now be multiple clips, split at each point where Smart Cut calculated and deleted a silence. It will still play as one unbroken audio track, though.
All that's left is to add any intro or outro tracks you may need. To do so, use the add media button to upload any additional audio files to the project. From there, simply drag and drop onto the timeline.
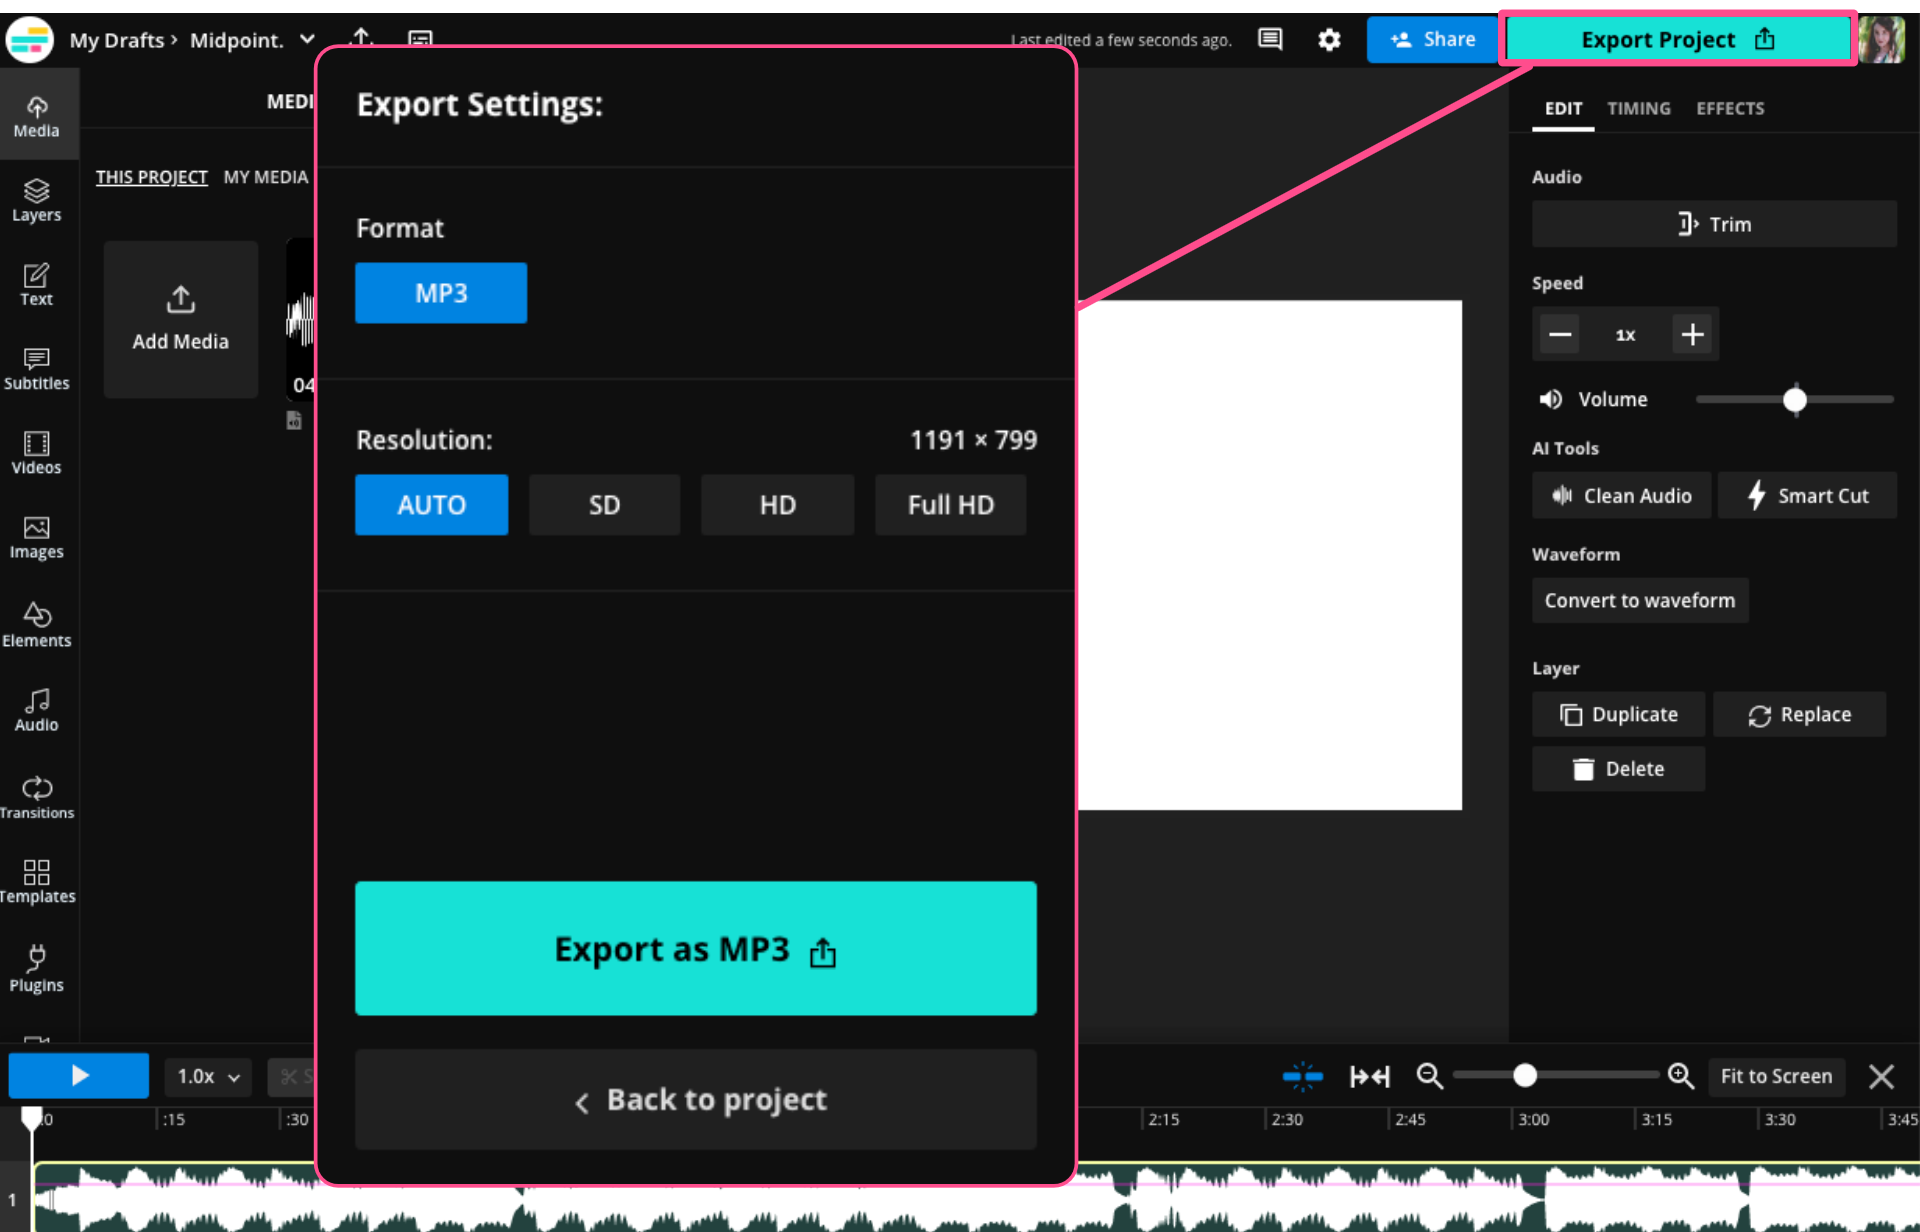
Hit the Export Project button and choose MP3 as the format in the export settings window. Now your podcast episode is ready for Spotify, Apple podcasts, or wherever you host your show — no more awkward silences or pauses!
Pro Tip: This method works for audio-only podcasts and video podcasts!
For more creator tips and resources like this, visit our Resources Library or check out our YouTube Channel.