How to Make a Full AI Video from a Storyboard (Seedance 2.5)
Turn a storyboard into a cohesive AI video with consistent characters, scenes, and style.
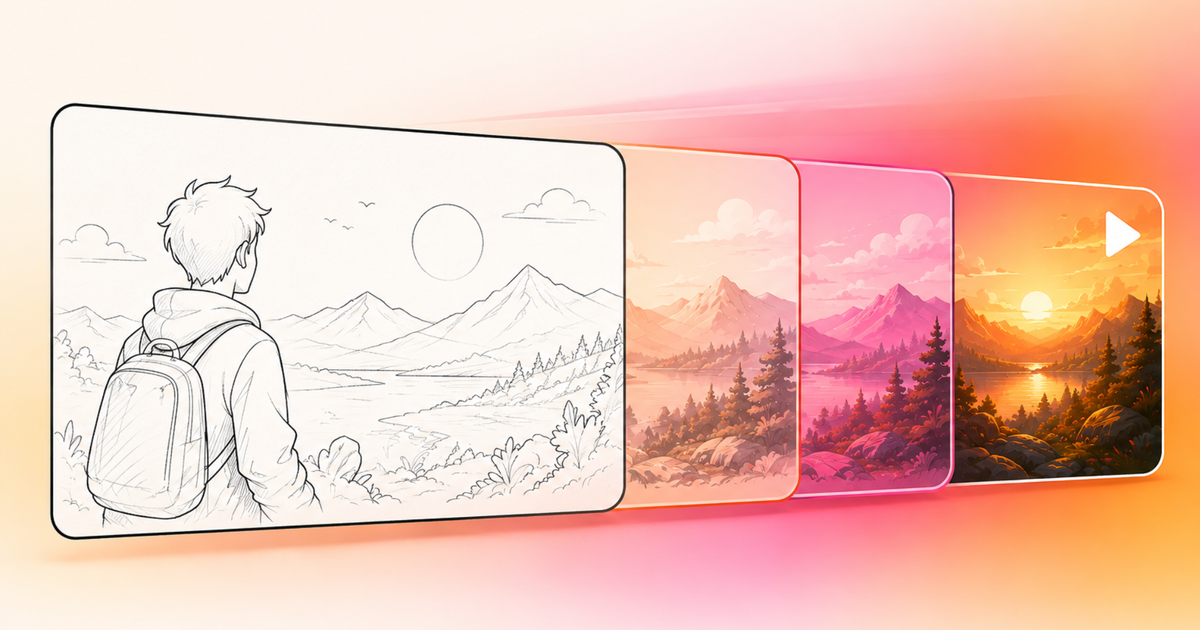
Generating a single AI video clip is easy. Creating a full AI video with consistent characters, multiple camera angles, and a story that actually holds together is much harder. The more shots you add, the more likely you are to run into character drift, visual inconsistencies, or scenes that feel disconnected.
Seedance 2.5 makes that process significantly easier. Instead of generating every shot individually and stitching everything together by hand, you can use a single storyboard as the blueprint for a 30-second AI video. That gives the model a much clearer sense of your characters, pacing, composition, and overall visual direction.
In this tutorial, I'll show you the exact workflow I used to go from a character reference to a 15-panel storyboard and finally to a complete AI video using GPT Image 2 and Seedance 2.5 inside Kapwing AI. The entire process takes three steps: create a consistent character sheet, turn your idea into a storyboard, then use that storyboard as the visual reference for Seedance 2.5.
Table of Contents
- How to Turn a Storyboard into an AI Video
- Best Practices for Storyboard-to-Video
- Frequently Asked Questions
How to Turn a Storyboard into an AI Video
The key to creating a AI video isn’t necessarily writing a more detailed video prompt. It’s giving the model enough visual context before you generate.
The workflow comes down to three assets: a character sheet to keep your character consistent, a storyboard to map out the full sequence, and a video prompt. I used GPT Image 2 to create the character sheet and storyboard, then Seedance 2.5 to turn that storyboard into a AI video.
Step 1: Build a Character Sheet
Start with your AI character. This is an easy step to skip, but it makes a noticeable difference once you start generating multiple shots. Without a strong reference image, details like facial features, clothing, hair, and proportions can drift.
Head to Kai, click attach media, and upload a clear photo of whoever your character will be. Then paste the prompt below, open the settings toggle, select GPT Image 2, and generate.
Almost all of this prompt is a fixed framework you never touch. The only part you change is the last line, where you set the style.
AI Character Turnaround Sheet Prompt
Show the same [SUBJECT: age, hair, facial hair, build] wearing [FULL WARDROBE: every garment with colour and material]. Character reference sheet — four views on a neutral grey background:
[VIEW 1 — FULL BODY, FRONT] Full-body front-facing three-quarter view of this character, full body visible head to feet.
[VIEW 2 — FULL BODY, REAR] Full-body rear view of the same character, directly from behind. Full body visible head to feet.
[VIEW 3 — FRONT CLOSE-UP] Head and shoulders close-up, straight-on front view. Sharp detail on skin texture, accessories, and costume surface detail. Chest and shoulder armour/clothing visible at the bottom of frame.
[VIEW 4 — PROFILE CLOSE-UP] Head and shoulders close-up, 90-degree left profile view. Neck and upper shoulder visible.
Lighting & presentation: Clean studio lighting — soft key light upper left, gentle fill from the right. Consistent character identity, proportions, and costume details across all four views. No text, no watermarks, no extra figures, no background environment.
In the below style... [YOUR STYLE LINE]
You get back a four-view sheet: front, back, close-up and side profile. That is everything Seedance 2.5 needs later to keep your character identical.
The character sheet is where you can start defining the visual style of your video. The same character and basic layout can be adapted to completely different aesthetics, from photorealistic and cinematic to illustrated, animated, or stylized.
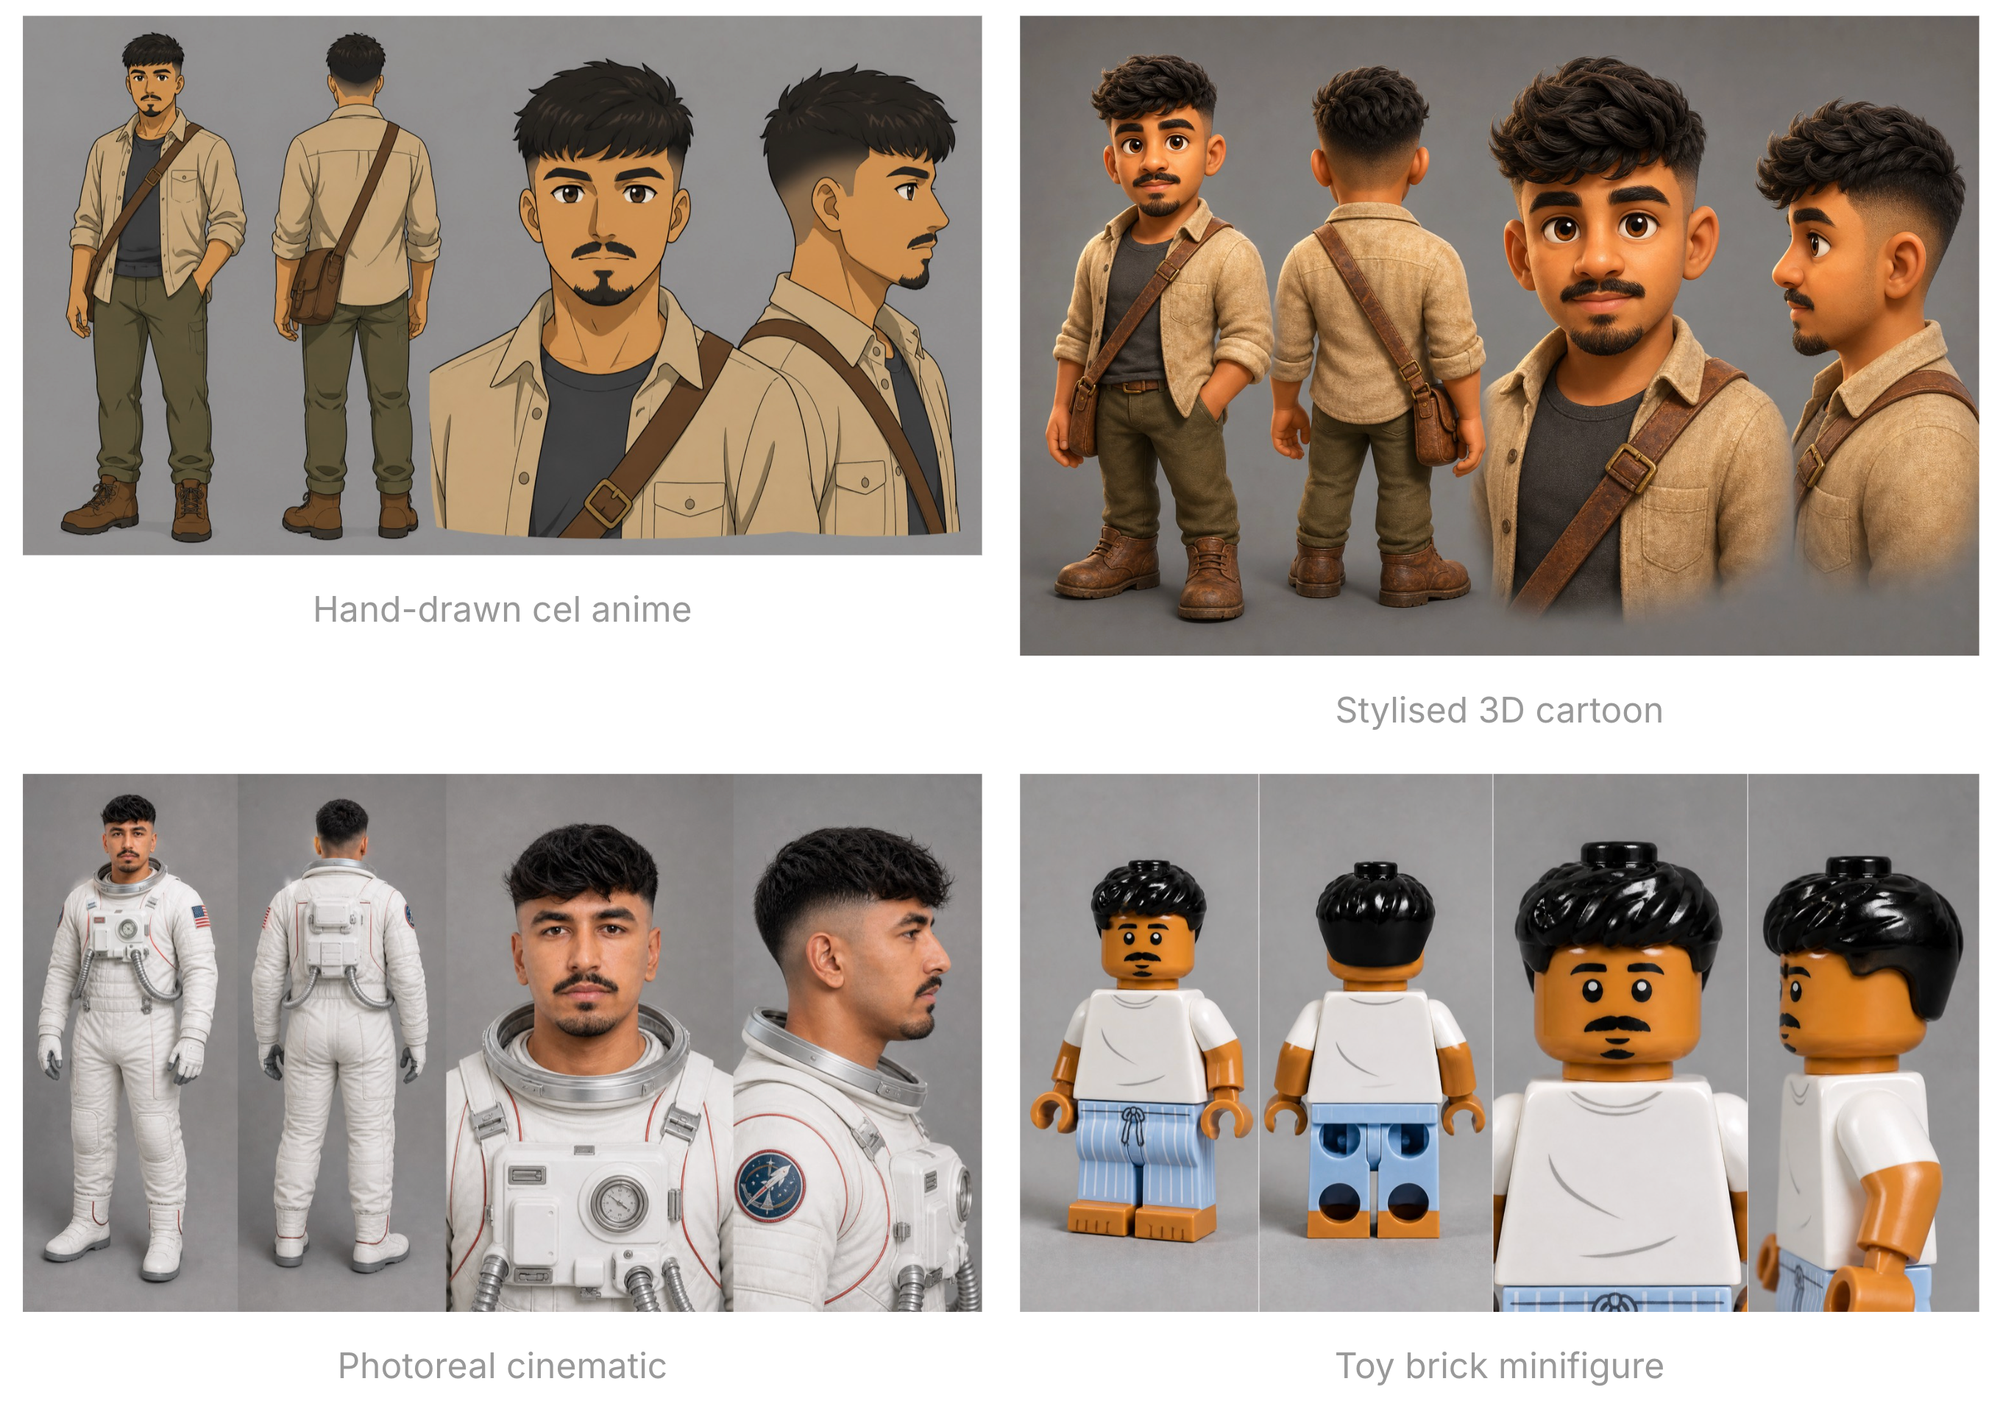
Below, I've included a few character sheet prompt variations for different visual styles. Choose the one that best matches the look you're going for, then customize the details to fit your character.
Tip: Found a look you love but cannot describe it? Screenshot it, drop it into Claude or ChatGPT, and ask it to describe the style in technical terms.
Hand-Drawn Cel Anime Style Prompt
Traditional Japanese hand-drawn cel animation from a 1990s animated feature film. Thin uniform dark brown ink outlines of even weight. Completely flat colour fills with simple two-tone cel shading, hard-edged shadow shapes, no gradients and no texture anywhere on the character. Simplified face with a small simple nose, small simple mouth, soft rounded jaw and large gentle rounded eyes with a plain iris and a single white highlight. Hair drawn as a few clean clumped shapes in flat colour with one solid highlight band, never individual strands. Warm natural inviting palette. Animation cel artwork, not a painting, not a digital painting, not a graphic novel illustration, no cross-hatching, no scratchy ink shading, no brush texture on the character, no photorealistic rendering.
Stylized 3D Cartoon Prompt
Stylized 3D cartoon animation, exaggerated caricature proportions with a large upper body and small lower body, oversized rounded forms, soft bulbous shapes with almost no hard angles, large expressive eyes with visible sclera and small dark pupils, chunky simplified hands and feet, detailed soft hair and fabric texture, warm saturated palette, soft global illumination, glossy appealing surfacing.
Toy Brick Mini-figure Prompt
Plastic toy brick mini-figure made of glossy injection-moulded ABS plastic. Short chunky toy proportions roughly four bricks tall. Cylindrical head with a small round stud on top, a simple printed face with two small dark dot eyes, thin printed eyebrows. Solid moulded glossy plastic hairpiece formed as one smooth shape with no individual strands. Trapezoidal torso with all clothing detail printed flat onto the plastic surface. Fixed bent arms, C-shaped cylindrical claw hands, two rectangular legs on a single hip piece with no knees. Visible moulding seams, sparse stud detail, subtle plastic sheen. Clean studio product photography of a physical toy on a plain backdrop. No human skin texture, no real fabric, no cloth folds, no realistic hair, no organic anatomy, no articulated fingers.
Step 2: Build the Storyboard Sheet
Next, turn your video idea into a storyboard. This is the most important reference for Seedance 2.5 because it lays out the sequence of shots you want to follow.
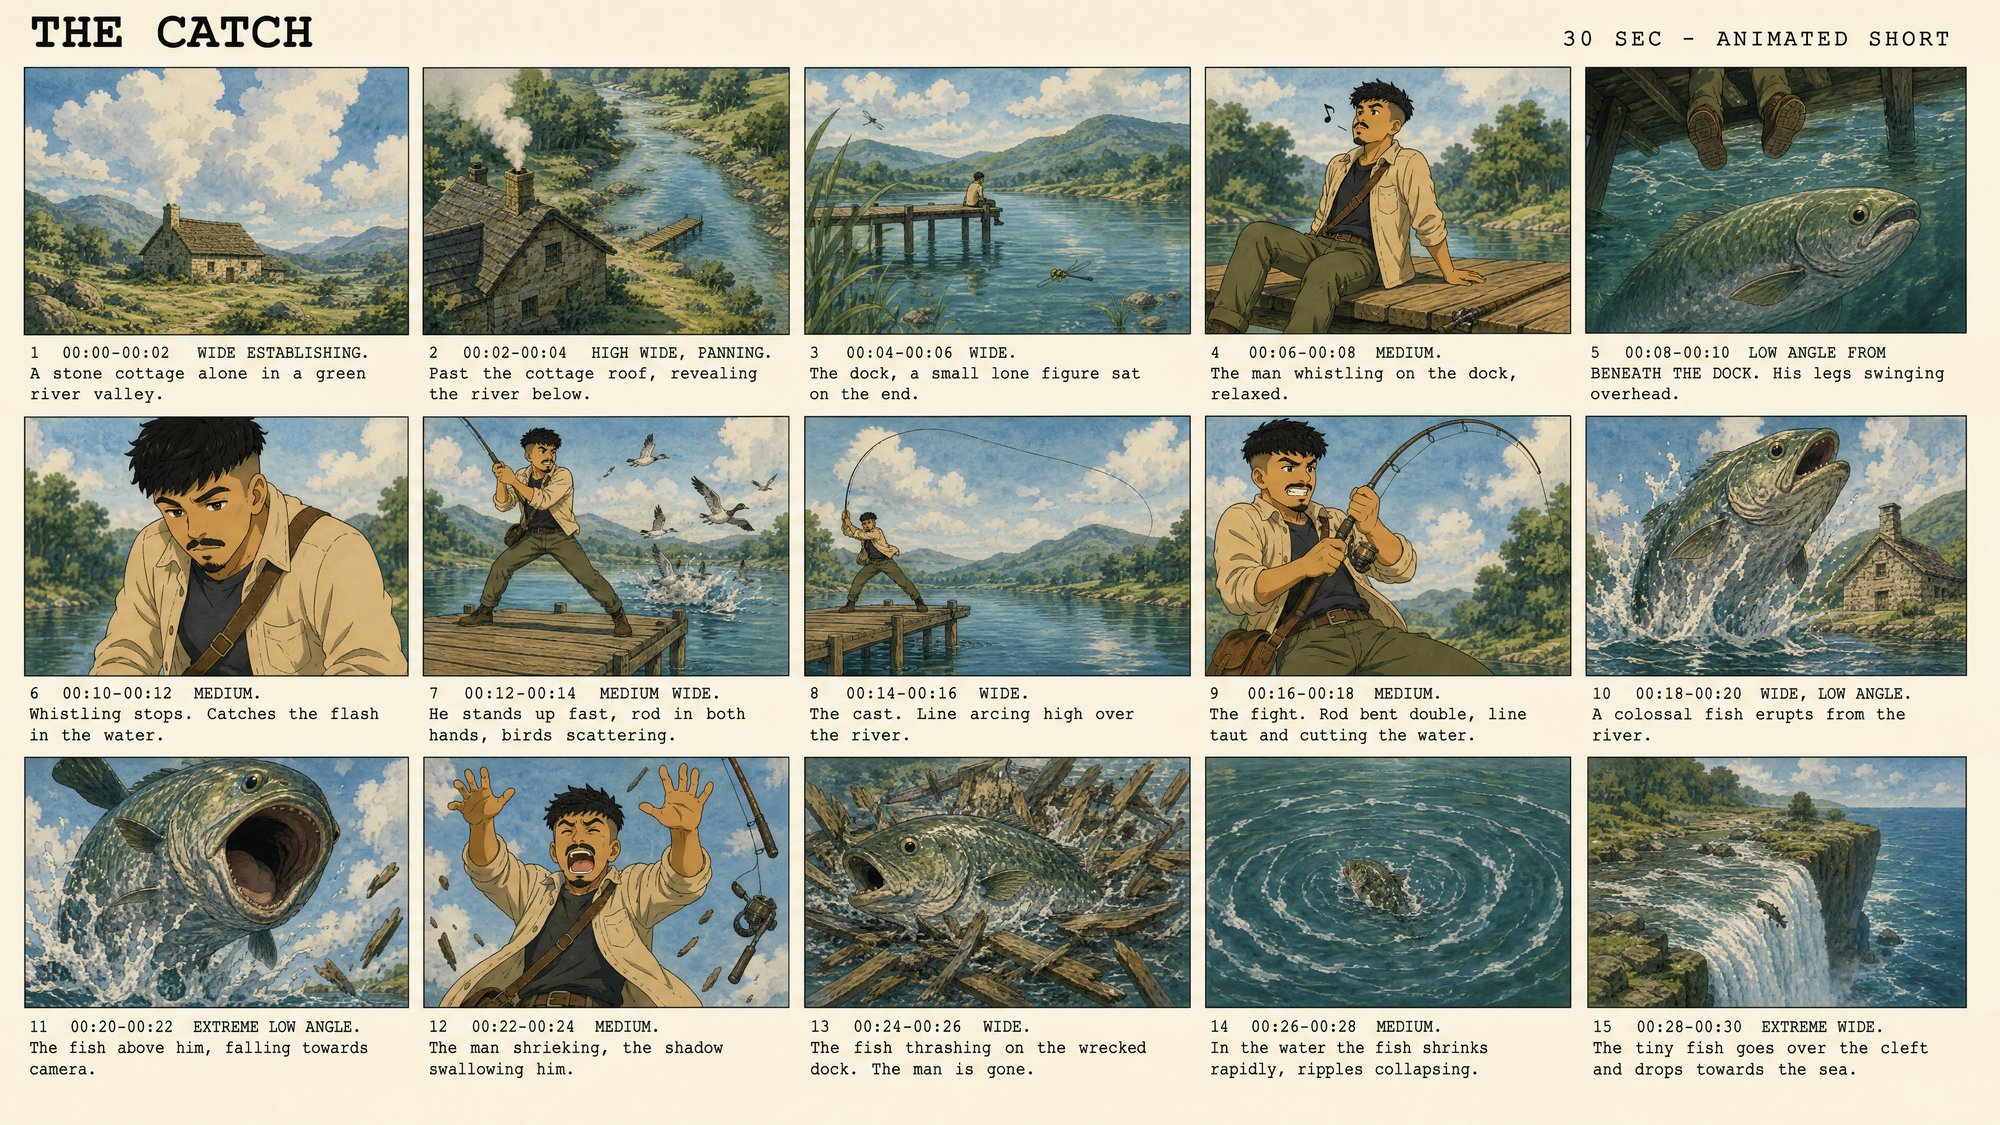
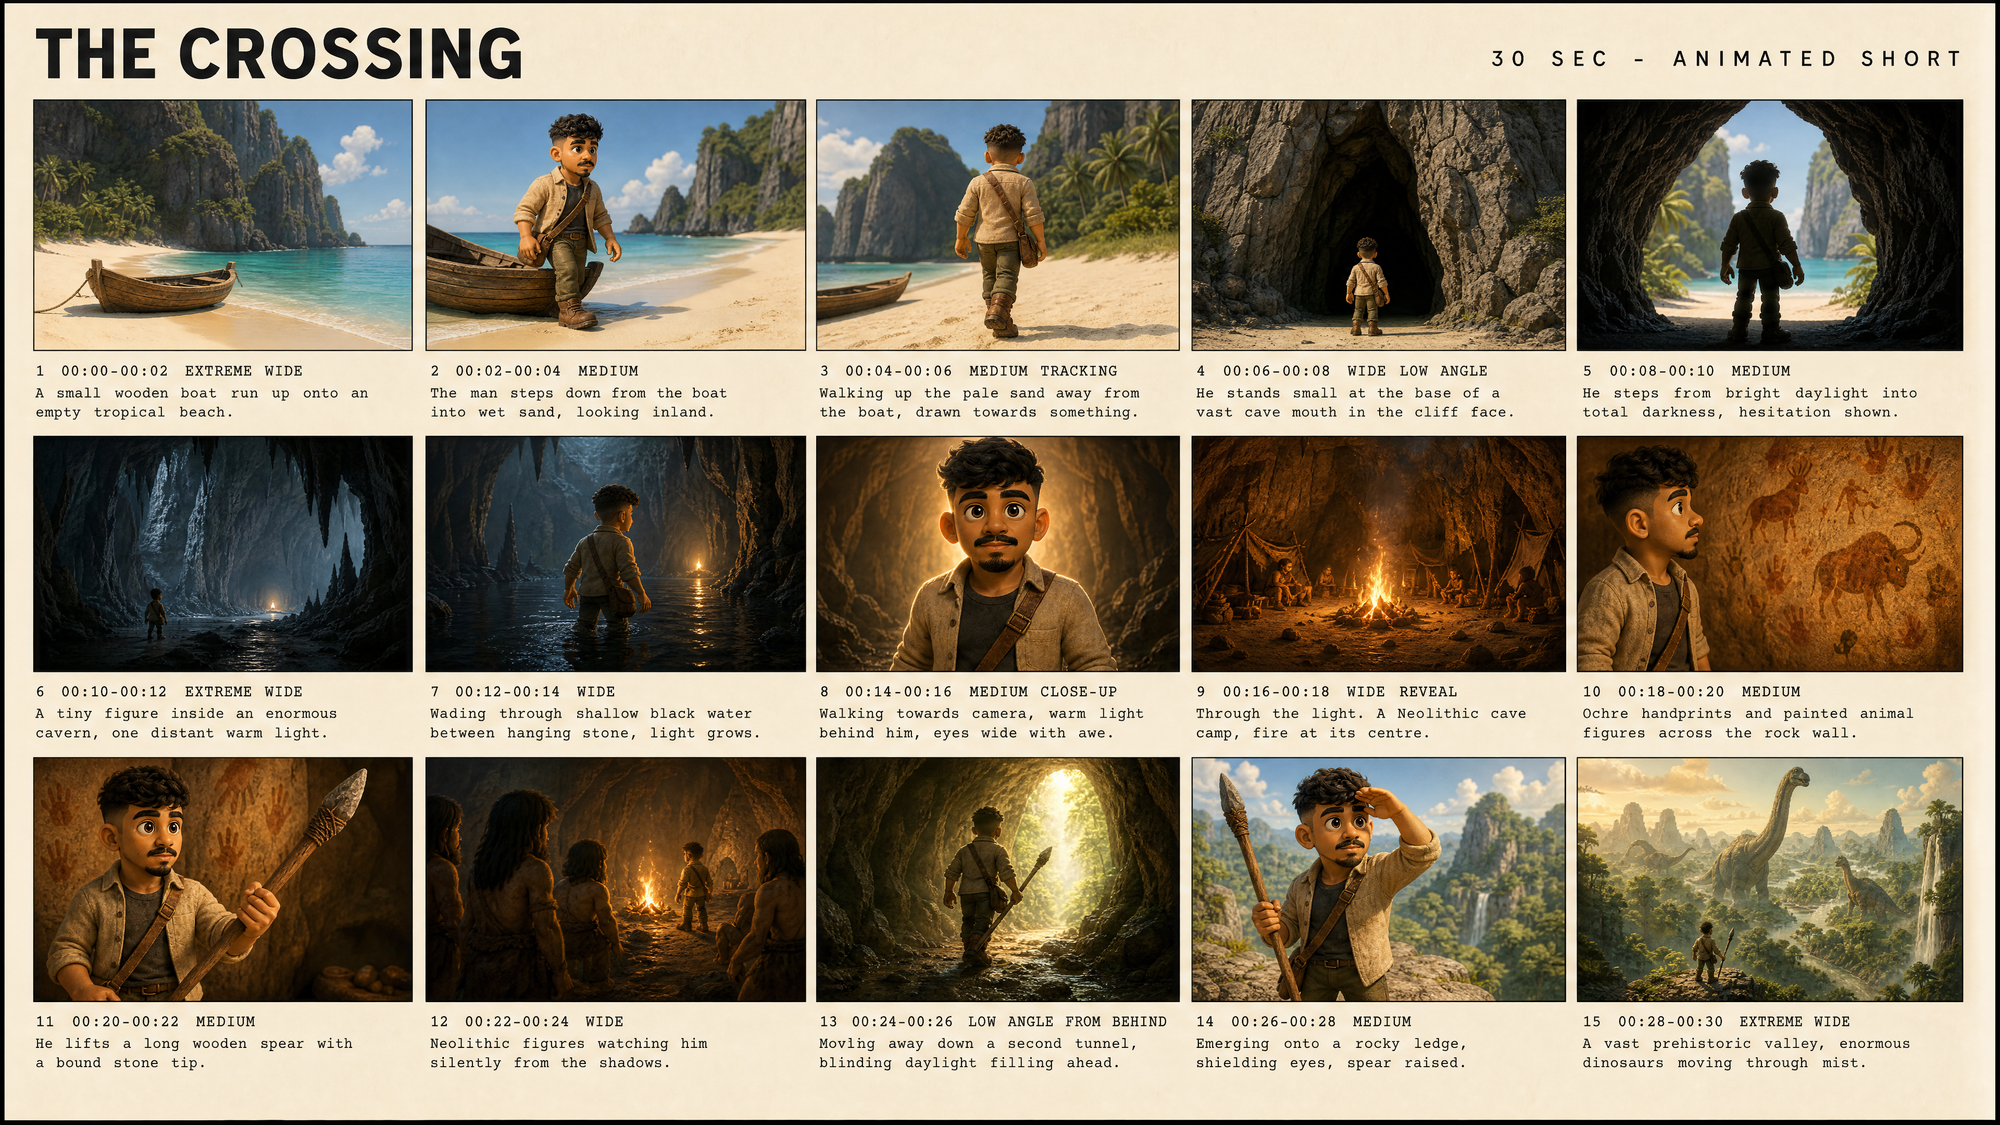
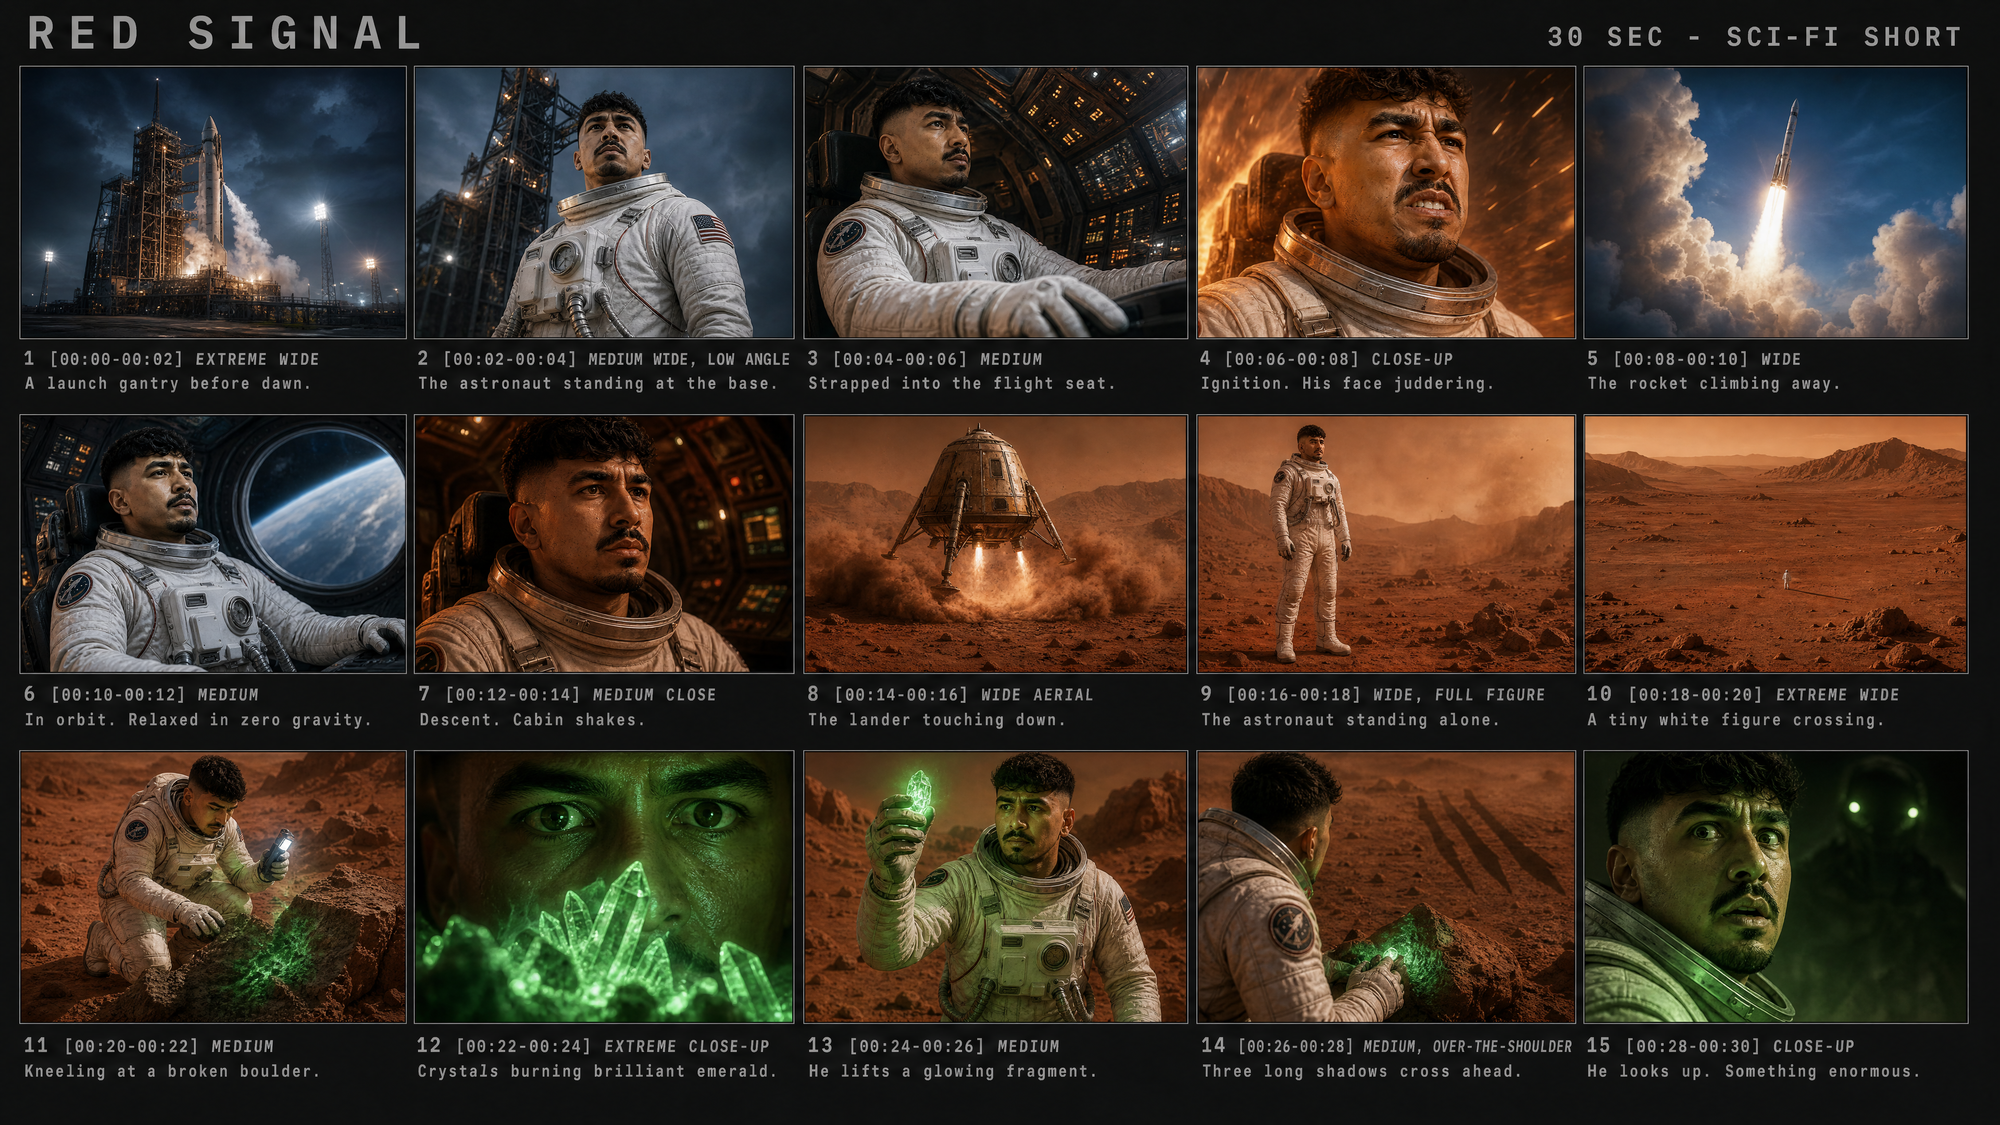
For a 30-second video, I used a 15-panel storyboard with roughly two seconds per panel. Each panel represents a new beat in the sequence, including changes in action, framing, camera angle, or setting.
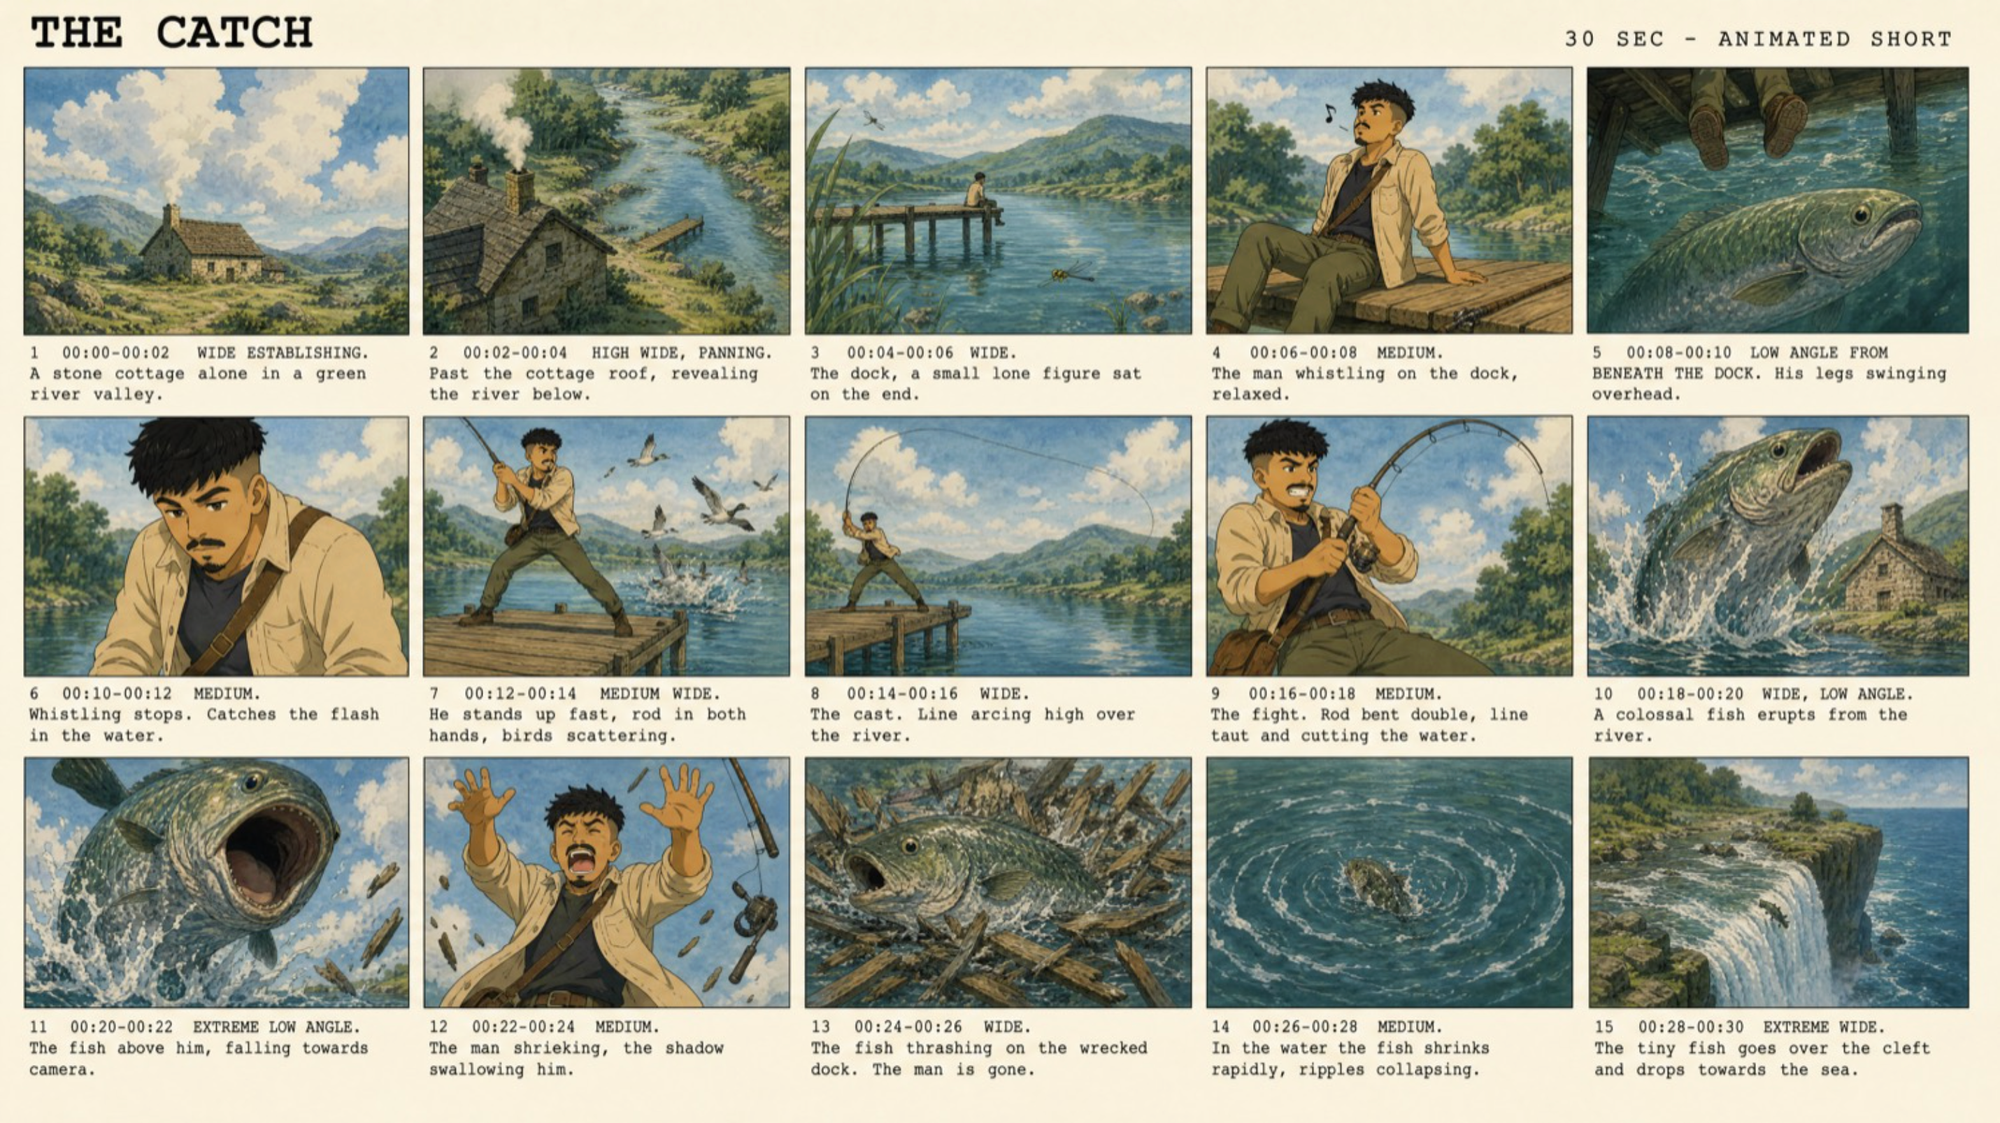
Writing a detailed 15-panel storyboard prompt manually can get complicated pretty quickly. Instead, you can use the storyboard skill to turn a simple description of your idea into a structured prompt.
Download the storyboard skill, upload it to Claude alongside your character sheet, and describe your scene in plain English. Claude writes the entire prompt for you.
Once you have the prompt, bring it into Kai, select GPT Image 2, and generate your storyboard.
Generate this at the highest resolution you can. This is the one place not to cut corners. The fidelity of the sheet directly drives the quality of the finished video.
Step 3: Turn the Storyboard into Video
Start a new generation and upload your storyboard sheet. You can also attach your character sheet alongside it. It isn’t required, but giving Seedance 2.5 another reference for the character can help reinforce their appearance across the video.
Then add the following video prompt, select Seedance 2.5, and generate.
Storyboard to AI Video Prompt
Use the reference storyboard to make a full 30 second animation movie. Work through all fifteen panels in order, giving each panel roughly two seconds of screen time so the story plays out at a steady, unhurried pace across the whole thirty seconds. Do not rush the beats and do not finish early.
Do not render any text, numbers, letters, timecodes, panel numbers, captions, watermarks or on-screen graphics of any kind. Clean frames only.
Audio: Diegetic sound only — natural ambience, environmental foley, and subject-driven sound.
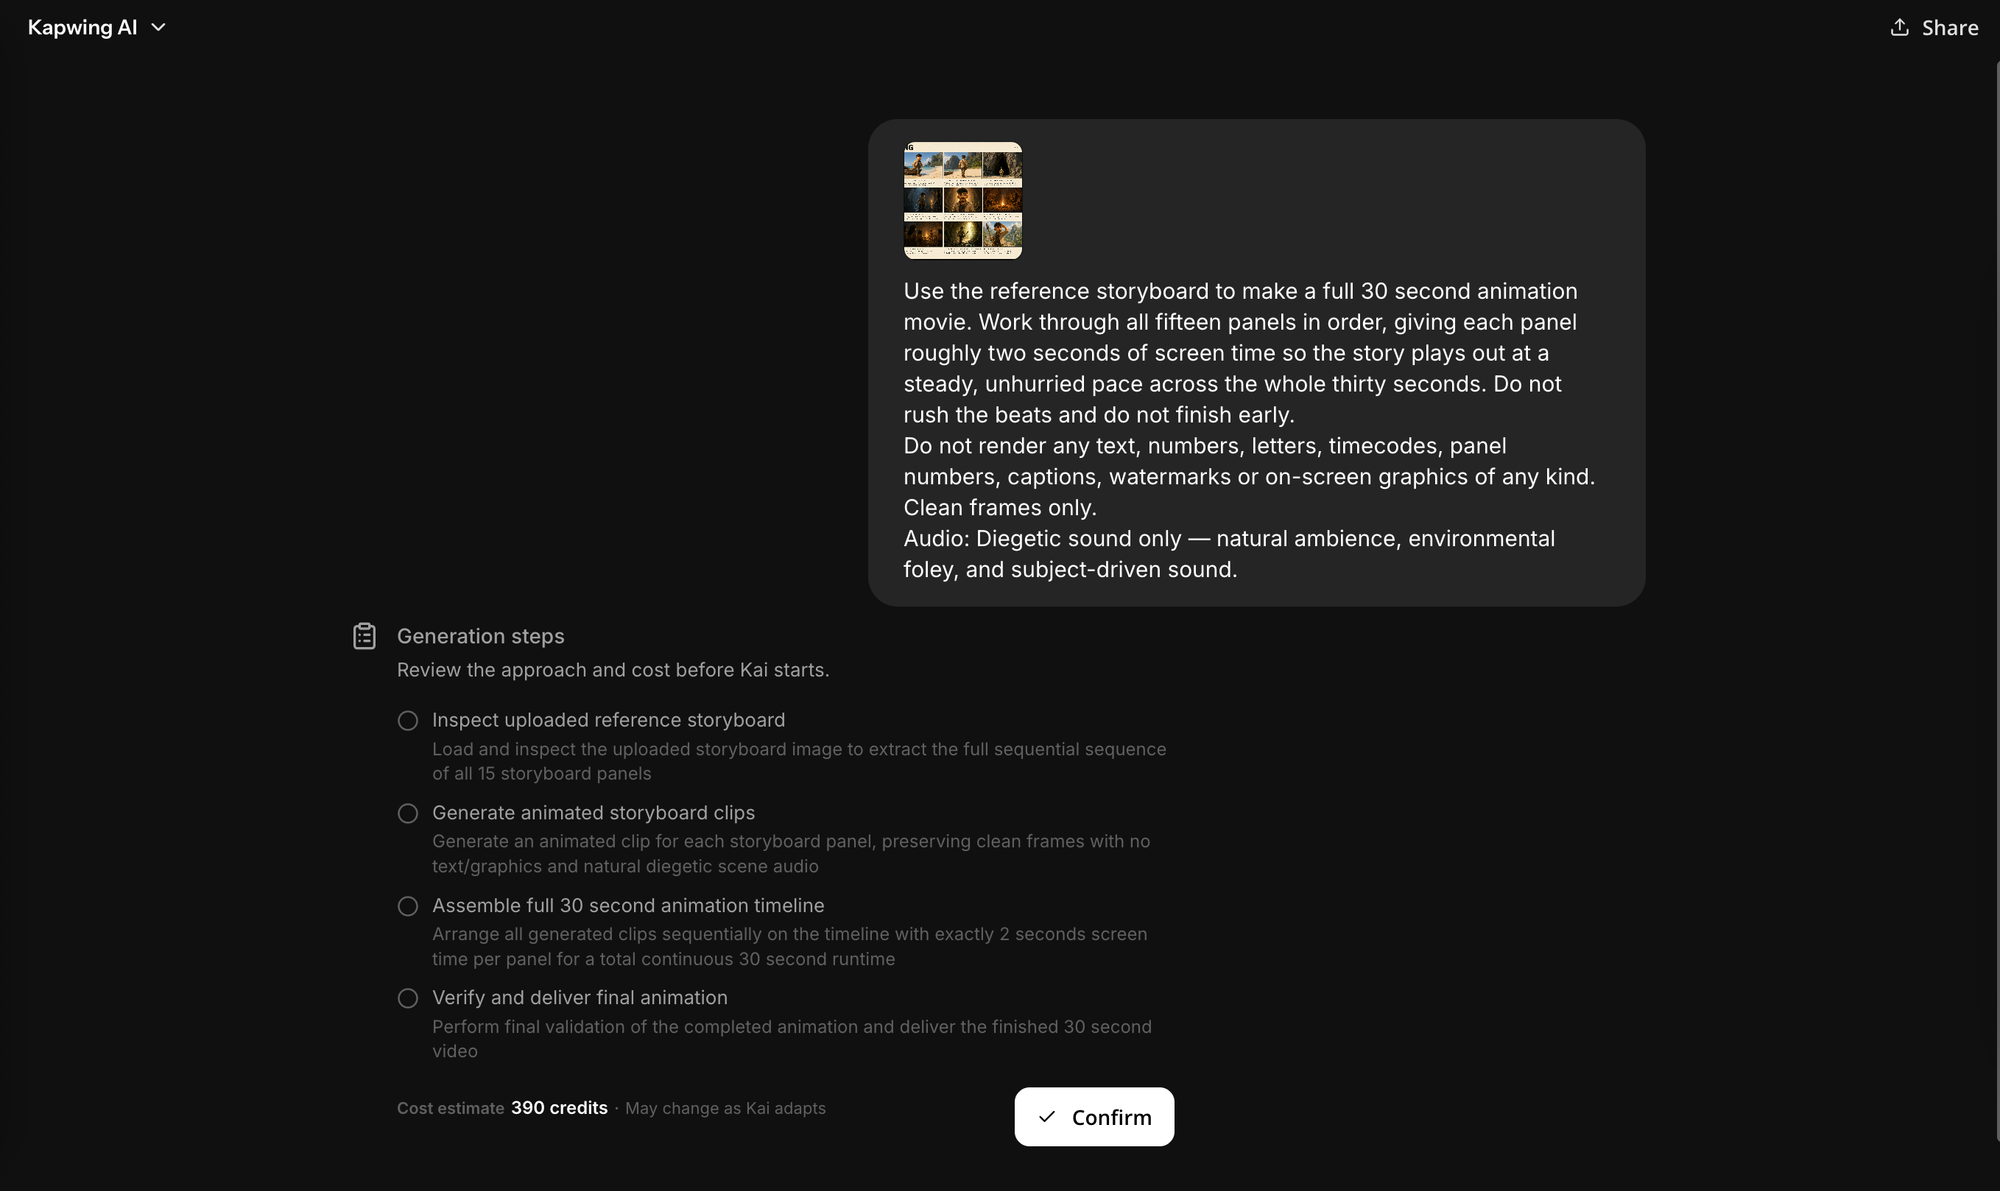
The result won’t necessarily be a frame-for-frame recreation of all 15 panels.
Seedance treats the storyboard more like a sequence of visual beats, connecting them into a continuous video rather than simply animating each image.
Settings At A Glance
| Stage | Model | Resolution | Notes |
|---|---|---|---|
| Character sheet | GPT Image 2 | 2K | 16:9, generate a batch of 2 and compare |
| Storyboard sheet | GPT Image 2 | 4K | 16:9, attach the character sheet |
| Video | Seedance 2.5 | 720p or 1080p | 30s, 16:9, attach storyboard and character sheet |
Storyboard-to-Video Examples with Seedance 2.5
Studio Ghibli Anime Cartoon Style
Pixar 3D Cartoon Style
Cinematic Movie Style
Lego Stop-motion Style
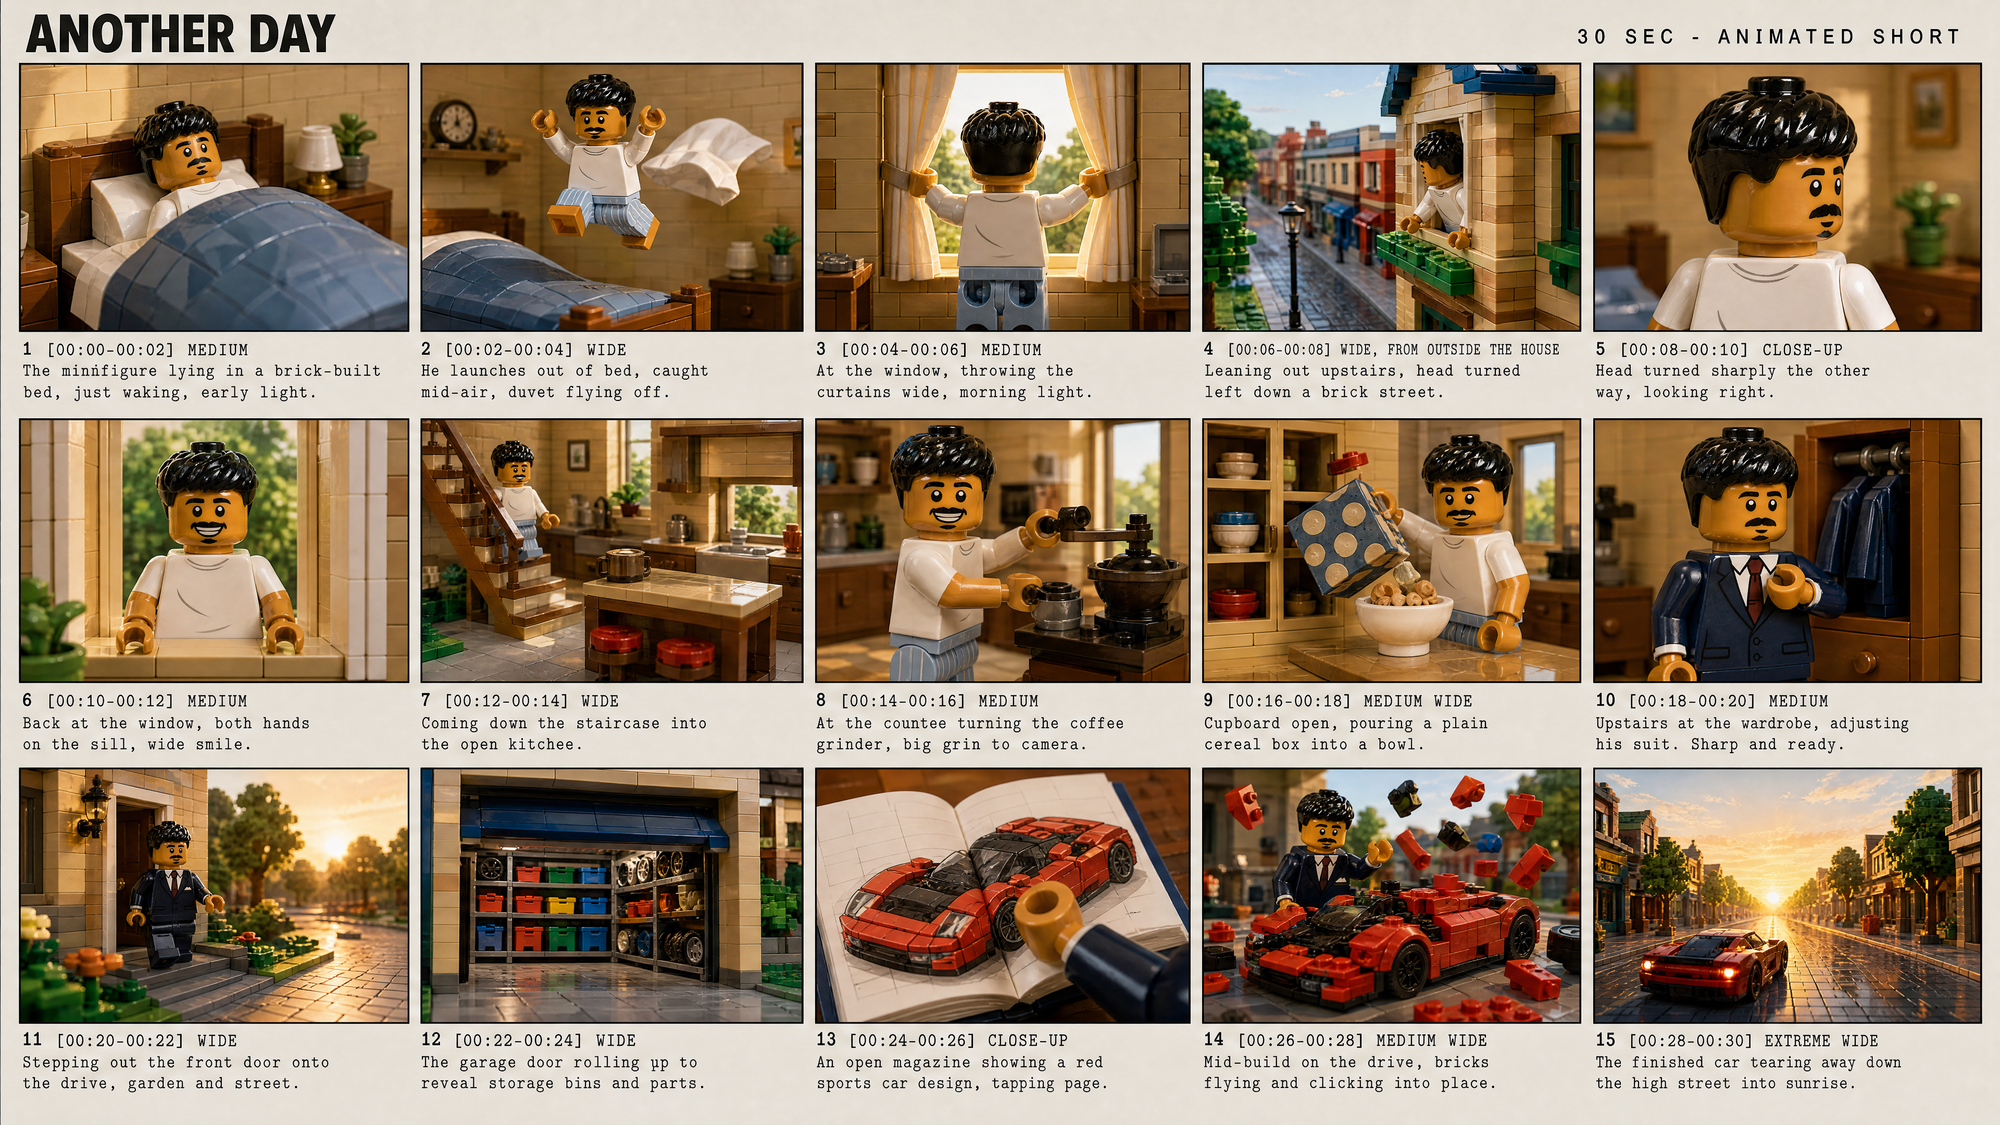
Best Practices for Storyboard-to-Video
Treat the Storyboard as Beats, Not Frames
This is not a frame-for-frame copy. Seedance treats the storyboard as inspiration and hits the major beats of your story, but it will not recreate every panel exactly as drawn. What does carry through strongly is style: the look, the colors, the character and the overall feel stay locked in.
Generate the Same Prompt Two or Three Times
Because the workflow is so fast, run the same prompt repeatedly. You get slightly different takes each time. Cherry-pick the best moments from each and edit them together into your final sequence.
Generate Specific Shots Separately
The trade-off here is speed against precision. If you need one very particular shot framed a very particular way, generate that single shot on its own and drop it into your edit rather than fighting the storyboard for it.
Keep Lettering Out of Your Panels
Text inside a panel comes back garbled. If your scene has packaging, signage or a shop front, describe it as carrying a printed pattern with no lettering. Otherwise the model attempts the letters and mangles them.
Expect Photorealistic Faces to Be Stricter
Video models run privacy filters on reference images, and a clean studio portrait of a real-looking person is the most likely thing to be rejected. Stylized characters go through without issue, so if a photorealistic generation is refused, try running it from the storyboard alone.
Frequently Asked Questions
Can Seedance 2.5 turn a storyboard into a video?
Yes. You can upload a storyboard as a reference image and use Seedance 2.5 to interpret the panels as a sequence of visual beats. It won’t recreate every panel frame-for-frame, but it can use the storyboard to guide the characters, action, camera angles, and overall progression of the video.
Do I need a character sheet for Seedance 2.5?
Not necessarily, but I recommend using one if your video follows the same character across multiple shots. A character sheet gives the models a consistent reference for details like facial features, hair, clothing, and proportions, which can help reduce character drift.
How many panels should an AI video storyboard have?
For the 30-second workflow in this tutorial, I use 15 storyboard panels at roughly two seconds per panel. This gives you enough room to establish different shots and story beats without trying to pack too much into a single storyboard.
Why is my AI storyboard generating as one large image instead of a grid?
This usually comes down to how the prompt is structured. Describe the grid layout and number of panels first, then add your character, scene, and visual style instructions. This makes it clearer that you want a storyboard sheet rather than one continuous illustration.
Why are storyboard numbers or text appearing in my AI video?
Seedance 2.5 can interpret anything inside the storyboard panels as part of the scene. If panel numbers, timestamps, labels, or other text appear inside the frame, they may show up in the generated video. Keep that information outside the individual panel images whenever possible.
Can I create AI videos longer than 30 seconds with this workflow?
For a longer video, break your story into multiple storyboard sequences and generate each section separately. You can then combine the resulting clips in the studio to create a longer, continuous video.
Can I use different visual styles with this workflow?
Yes. The same workflow can be used for photorealistic, cinematic, illustrated, animated, and other stylized videos. Define the look in your character sheet first, then carry that visual direction into the storyboard so Seedance 2.5 has consistent references to work from.