How to Make a Custom Text Tone for iPhone
Custom text tones are an easy way to make your alerts stand out from the rest. Learn how to make and upload custom text tones for free.
The popularity of Apple's text audio makes distinguishing alerts in a room full of iPhones difficult. A custom text tone is a simple way to resolve this issue, and senders will be relieved to see prompt replies.
With an online video editor, you can get as creative as you want with the audio or keep your text tone simple and sweet. Scary sound effects, cartoon notifications, and video game sounds are unique options, while bells, clicks, and whistle tones are more common. In this article, I'll show you how to make a custom text tone to make your alerts pop!
- Upload audio to Kapwing Studio
- Trim audio
- Export and save text tone
- Upload to the music app and convert to M4R
- Add text tone to iPhone
Step One: Upload Audio to Kapwing Studio
I'm using Kapwing, a free video editor for modern creators, to make a custom text tone for my iPhone. You can use Kapwing on any device with a browser including iPhones, Androids, PCs, and tablets. For this tutorial, I recommend using a computer since several steps require access to a PC.
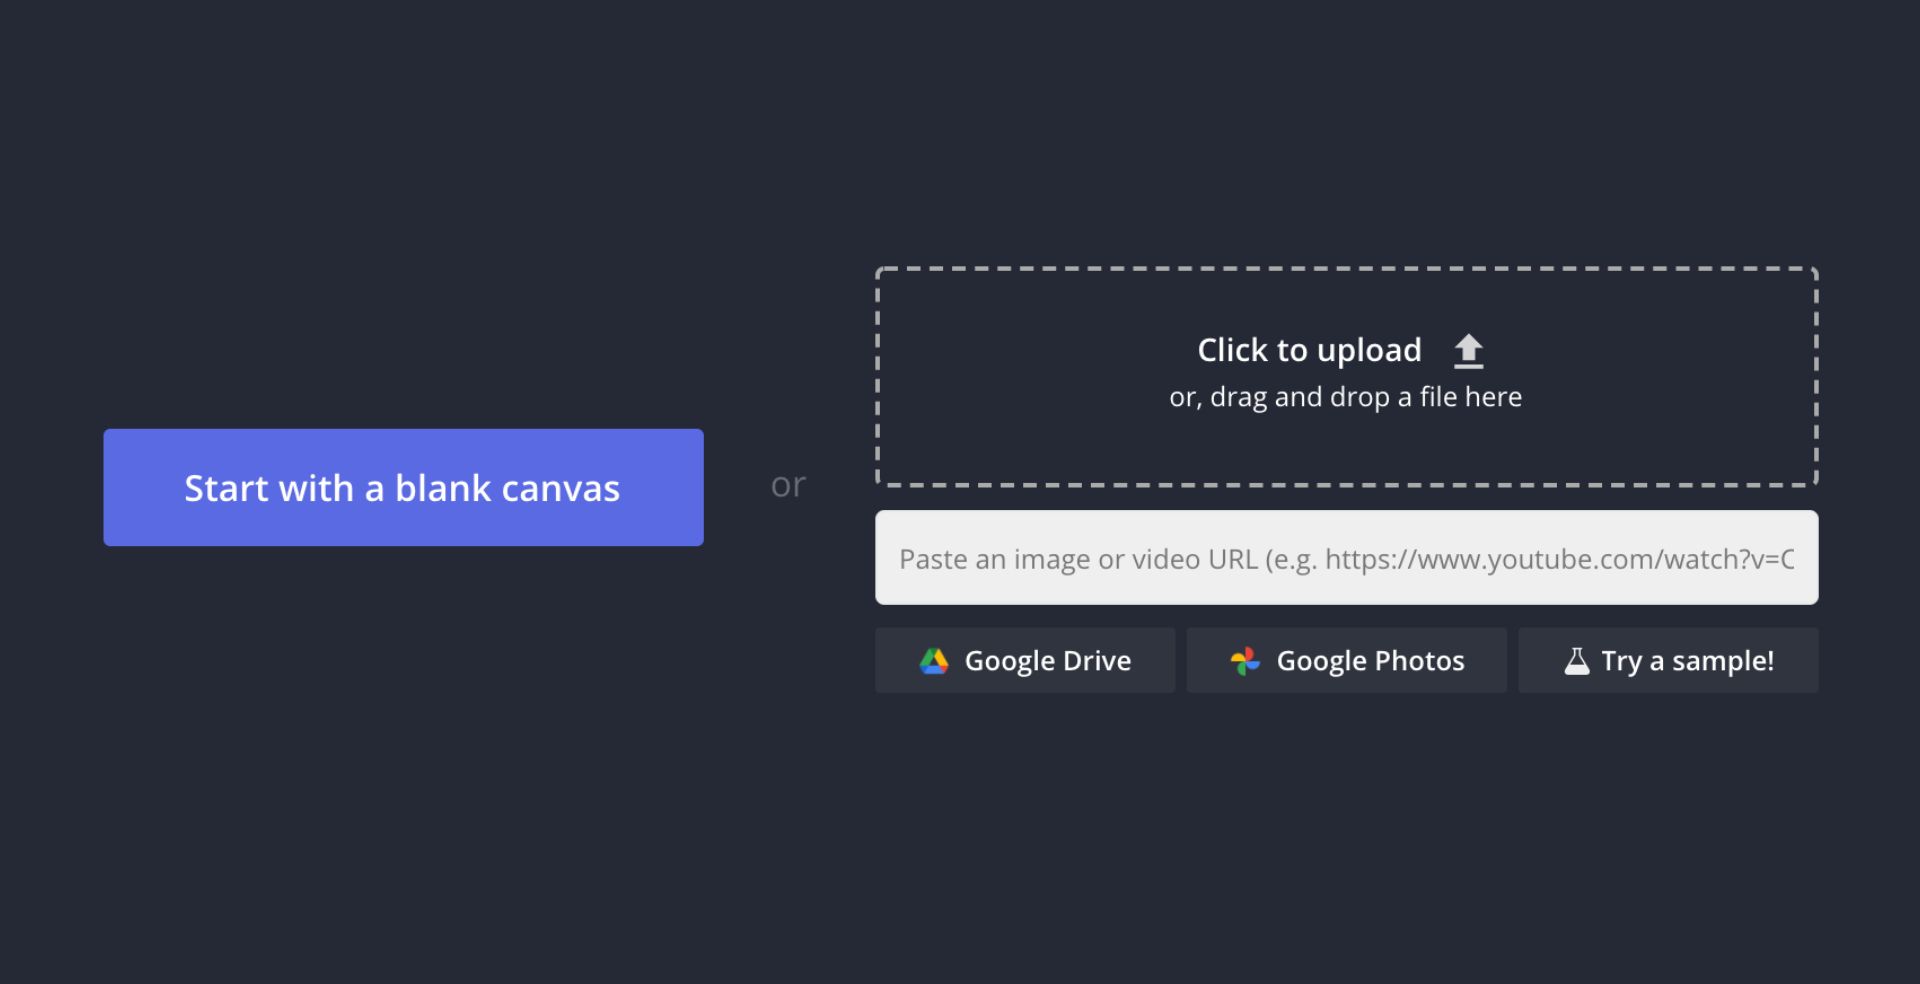
Visit Kapwing on your PC and click Start Editing or Create a Workspace. I suggest creating a workspace if you plan on using Kapwing to make more text tones, ringtones, and anything else your heart desires. All you need is an email address to sign up. If not, click Start Editing to be taken directly to the Studio.
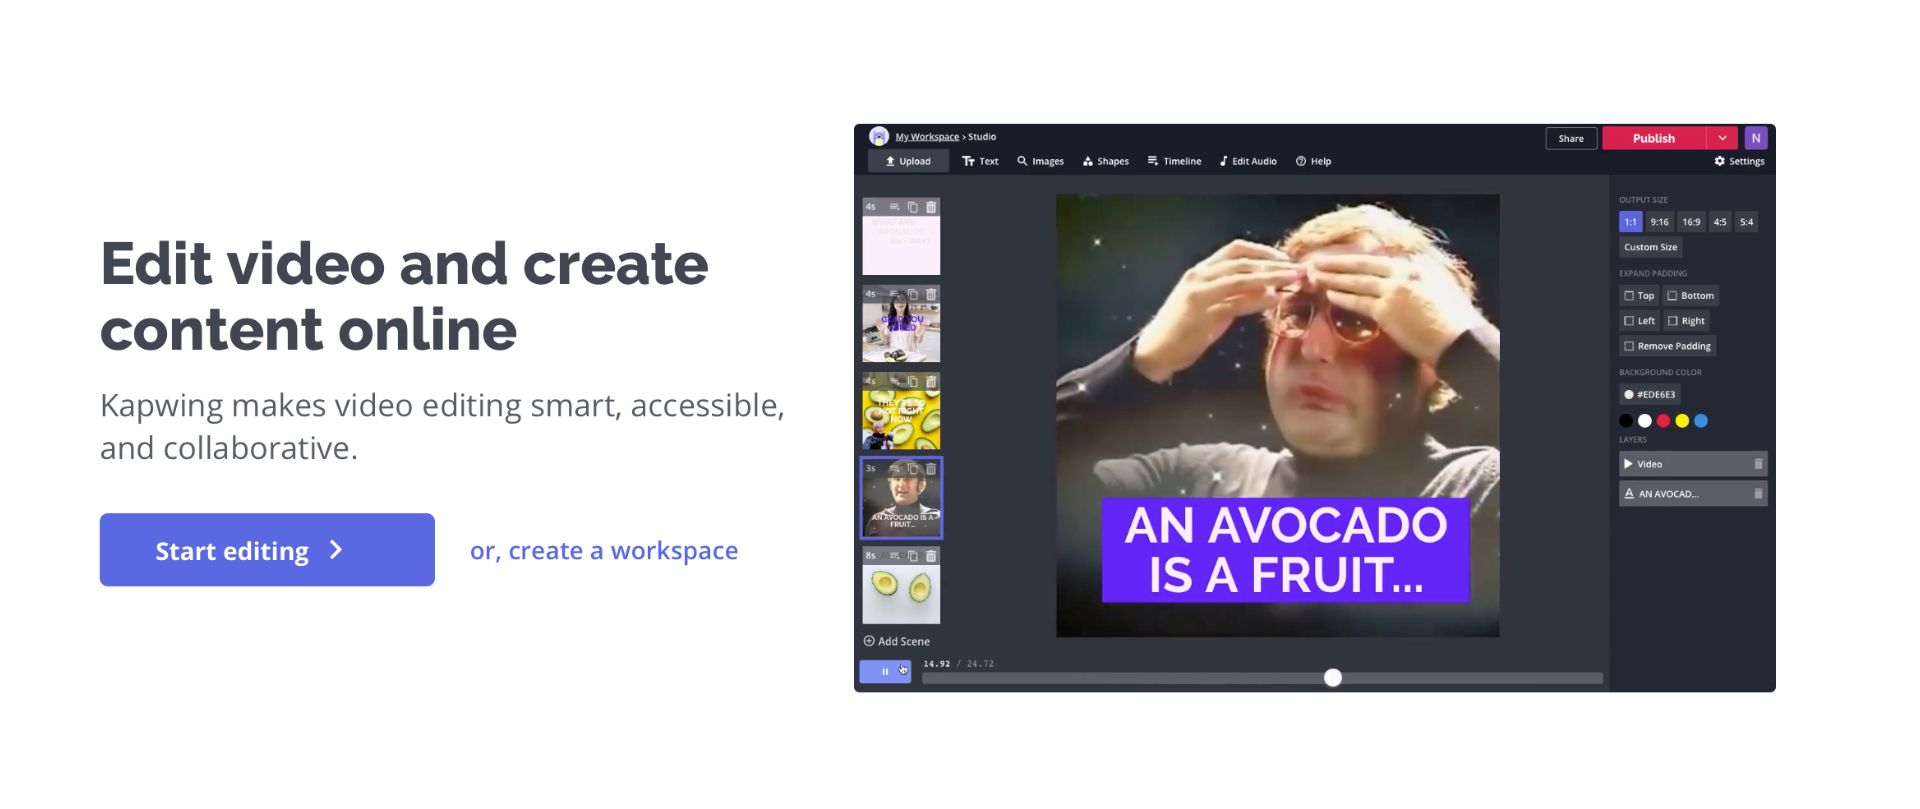
Here, you have a few options for uploading your audio. You can drag and drop an audio file into the Studio, paste a URL, or click Upload to find your audio within the file browser. Your audio will appear as a layer on the timeline at the bottom of the Studio. If you need a text tone, I recommending searching for sounds on YouTube. I found my text tone in a compilation video of fun sound effects.
Step Two: Trim Audio
While text tones can be up to 40 seconds long, I recommend significantly trimming your audio so the duration is between 1-3 seconds. Long text tones could be distracting, especially in public spaces, and confusing if your text sound is similar to your ringtone.
Drag the ends of the layer to begin trimming and use the "S" key or split button above the timeline to make cuts. For precise trims, click Timing then enter a start and end time. You can turn Ripple Mode on above the timeline if you do not want a gap between layers after splitting and removing sections.
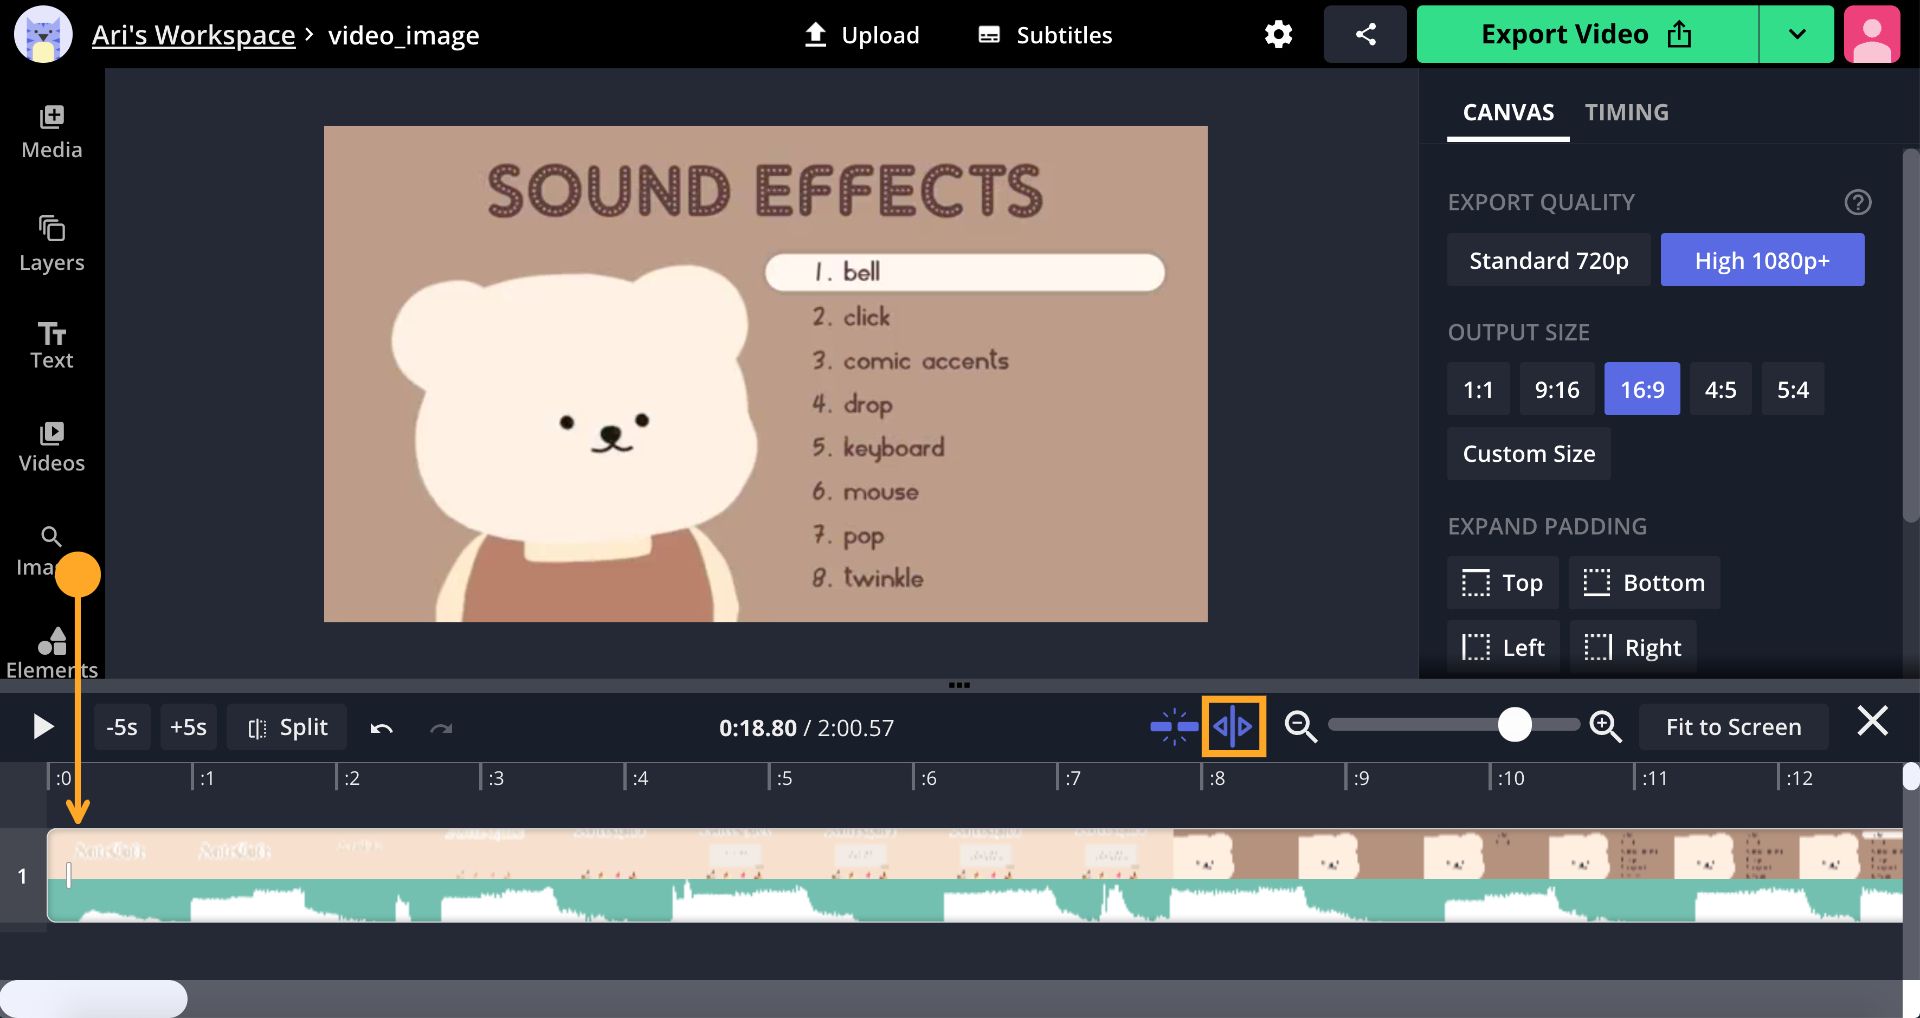
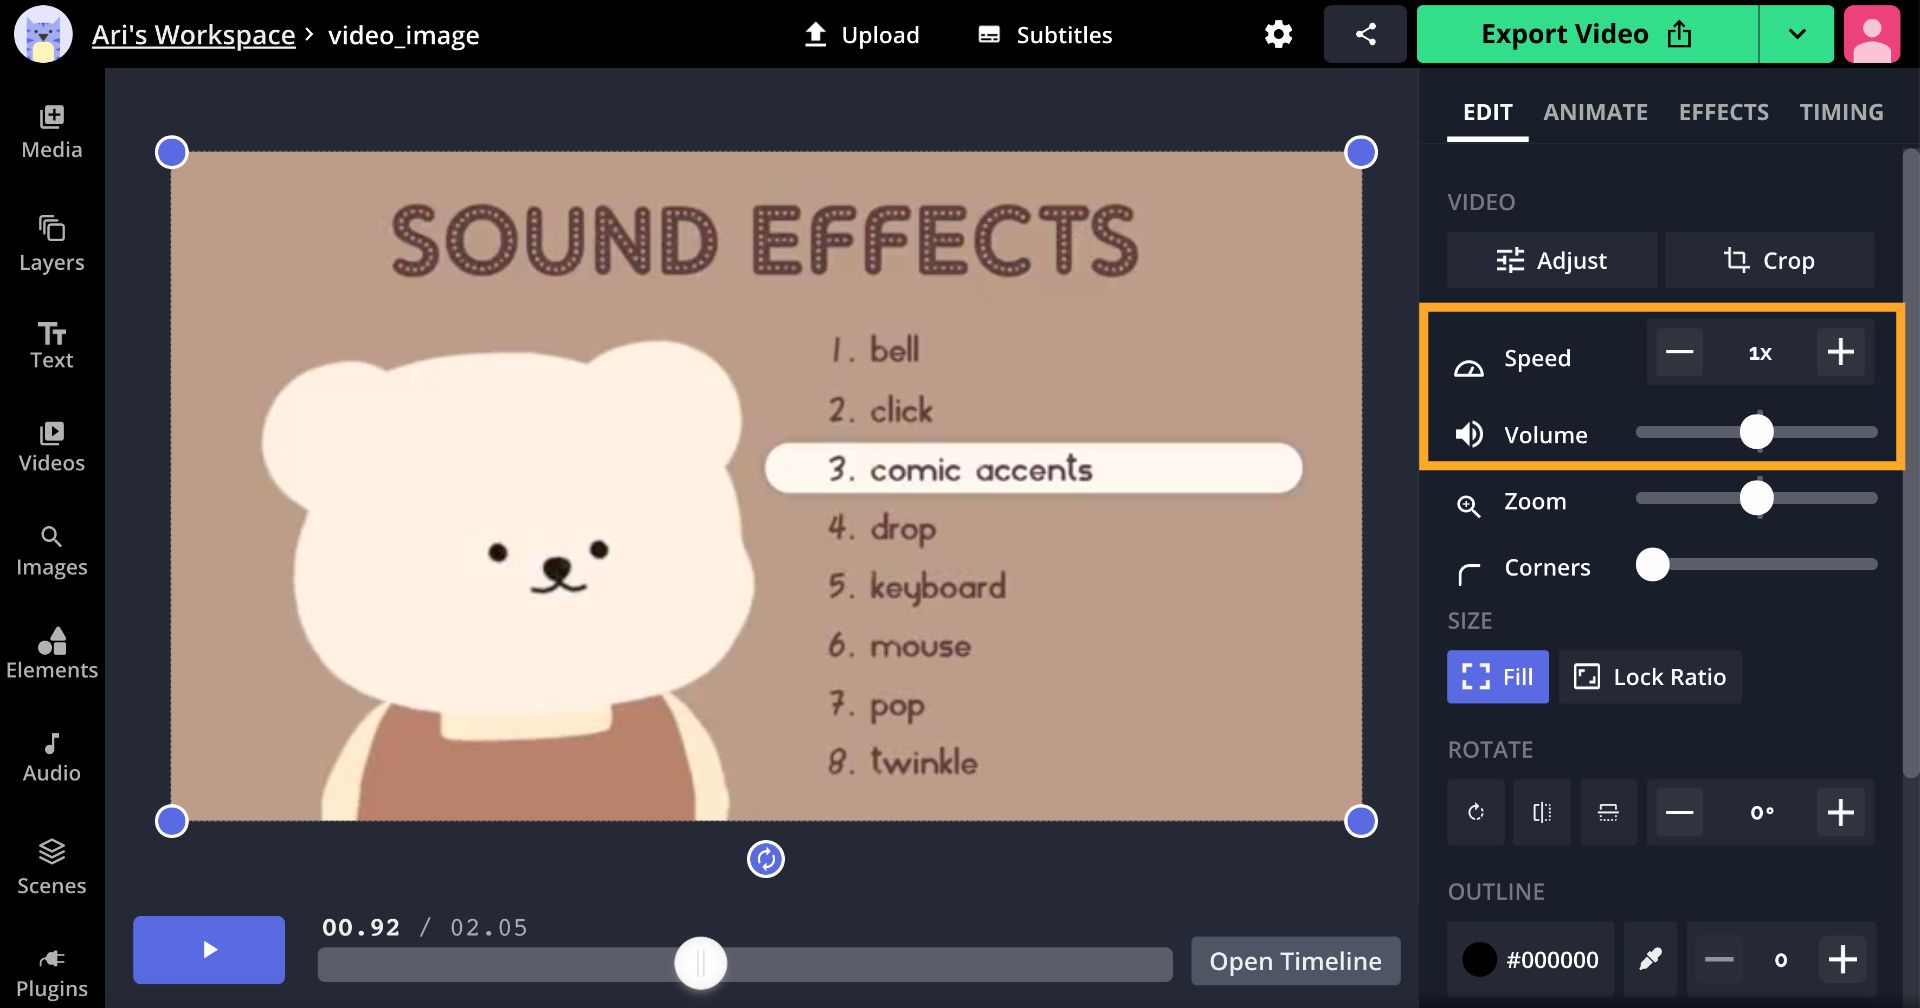
This is optional, but you can fine-tune your text tone by adjusting the volume and changing its speed until you're happy with the output. You can also insert additional clips to create a one-of-a-kind sound. Simply drag and drop your audio into the studio, or click Audio on the left side of the Studio to paste another link.
Step Three: Export and Save Text Tone
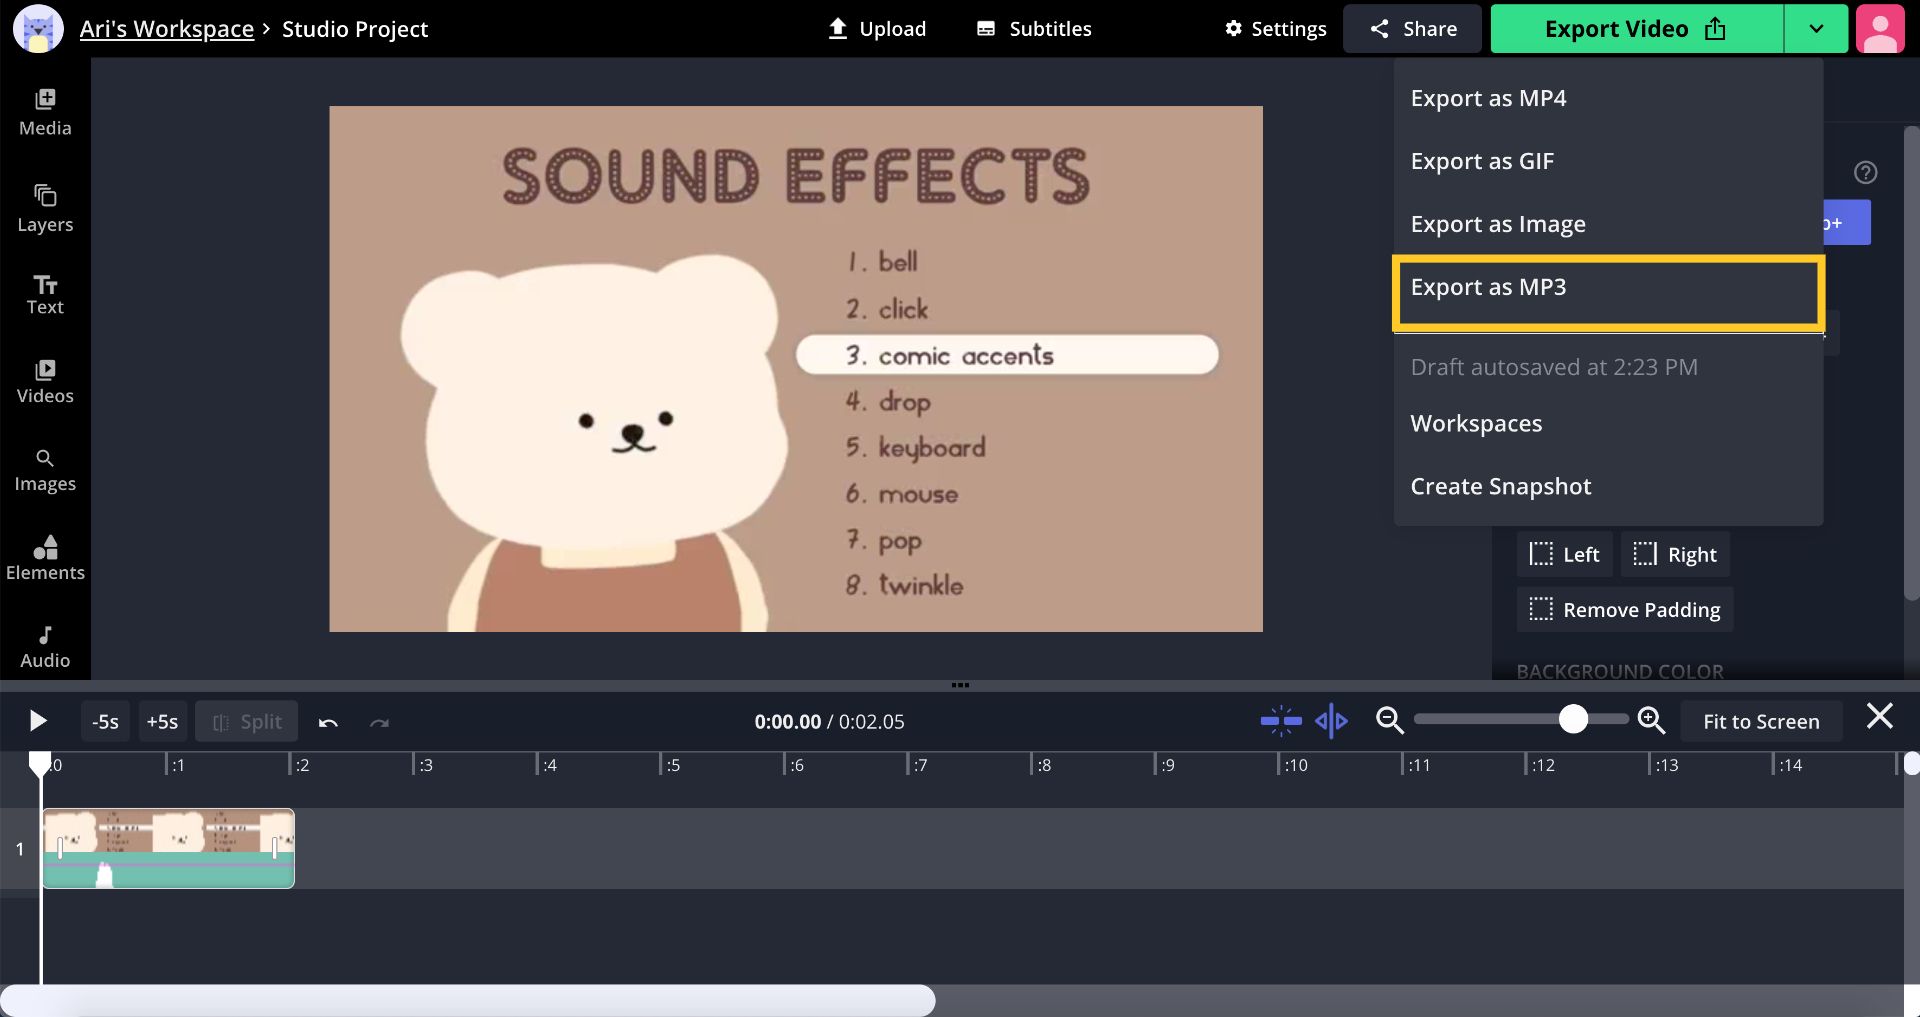
When your text tone is ready, click Export as MP3 at the top of the Studio. Once the MP3 is processed, click Download to save it to your computer. I recommend renaming your text tone to something you can easily find for the upcoming steps.
Step Four: Upload to the Music App and Convert to M4R
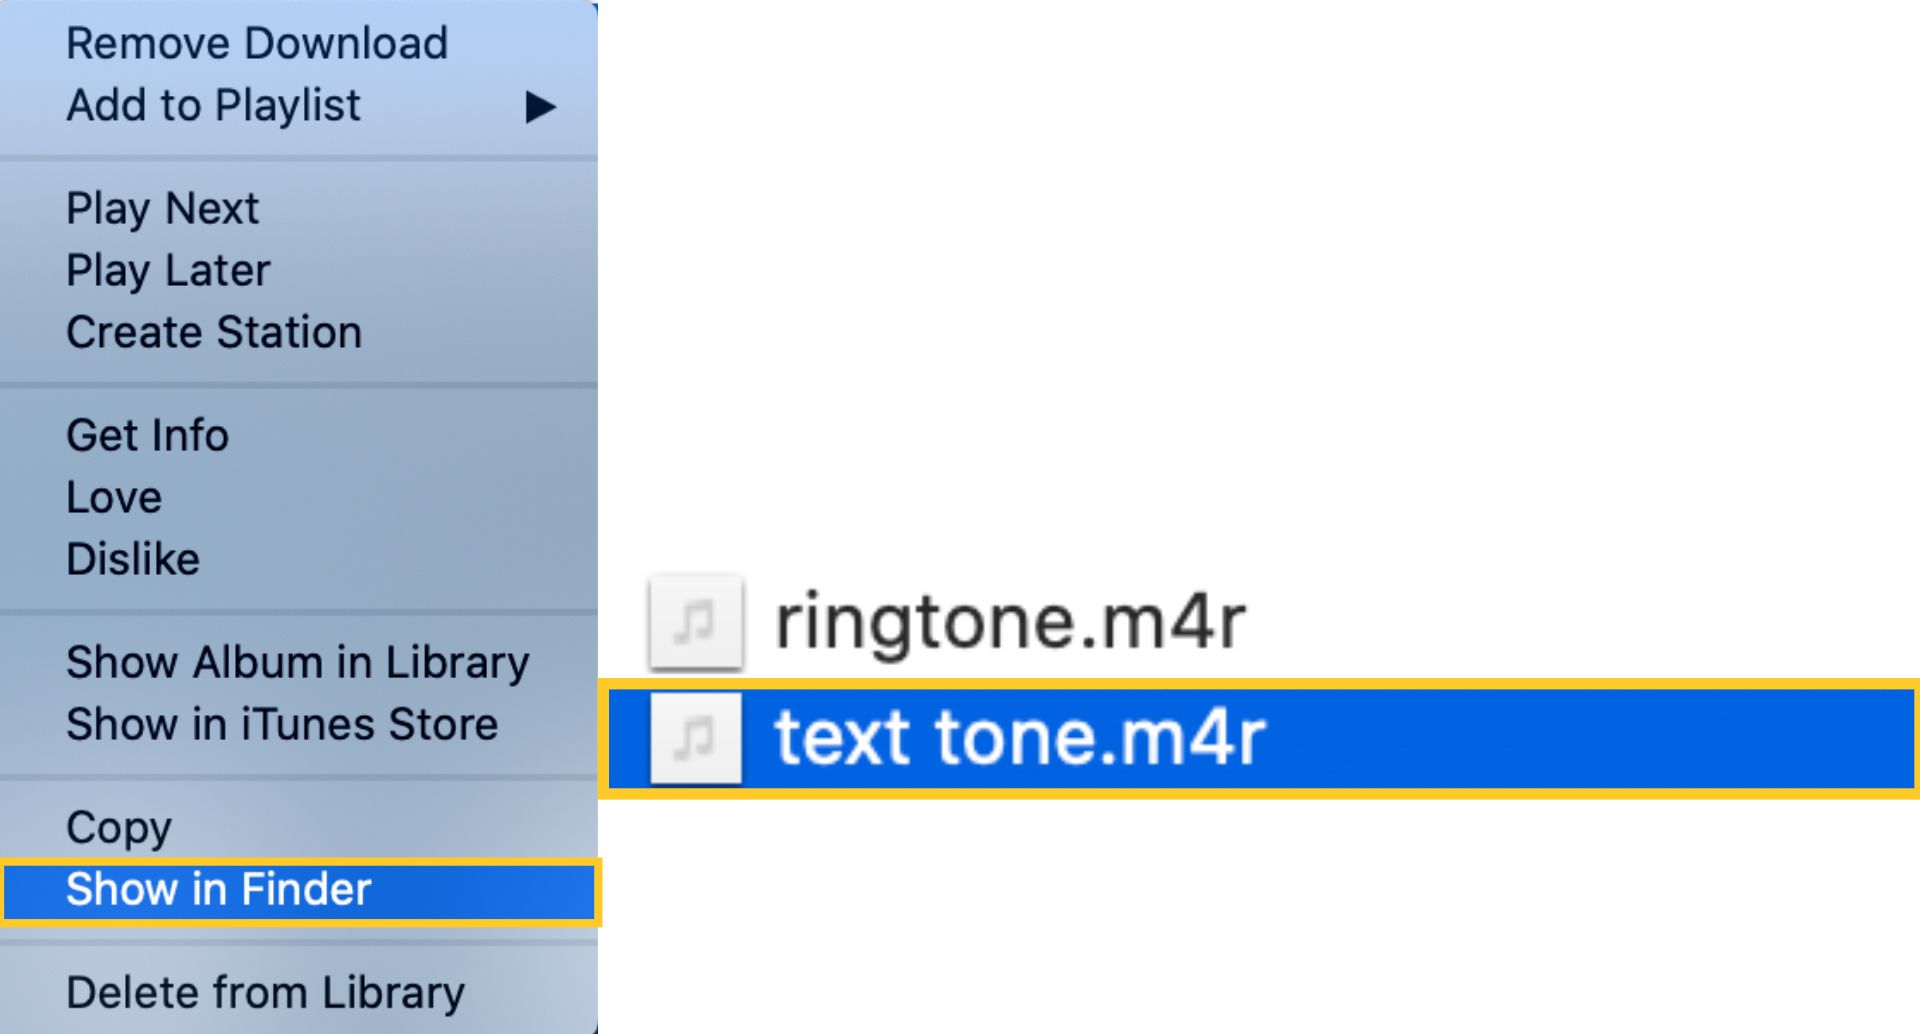
Open the music app, then drag and drop your text tone into the library. Then click File, Convert, and finally, Create AAC Version. You'll see another version of your ringtone in the music library.

Right-click the new version of your text and select Show in Finder and change the file extension to M4A. All you have to do is double-click on the file name and replace M4A with M4R. You can delete the other version from your library.
Step Five: Add Text Tone to iPhone
Connect your iPhone to your computer, then drag and drop the M4R from the viewfinder to your phone in the sidebar of the music library. Open the settings app on your iPhone, then tap Sounds and Haptics and select Text Tone. Scroll down to ringtones and select the name of your text tone to make it your new sound. Now, you're all set up with a custom text tone!
Check out the related articles below for more customization tips for your iPhone and subscribe to our YouTube channel for trendy tutorials. You can follow us on Instagram to stay up to date on our journey towards and tweet us if you have suggestions for articles or the product!
Related Articles