How to Change Instagram Story Background Colors
500 million Instagram accounts post Stories every day — learn how to make yours stand out.

Instagram stories aren't what they used to be. Nowadays, stories can include interactive stickers and graphics, links to external sites or other Instagram pages, or be turned into content-rich collages that showcase multiple photos. As a result, the demand for advanced editing tools has grown alongside the feature’s rising popularity.
One tool many users overlook is the background color changer. It allows you to set a solid color as a base for your content, making it easier to create attractive layouts or emphasize specific elements. Despite its usefulness, the feature is somewhat hidden, and it comes with a few limitations.
In this article, we’ll cover how to change the background color of an Instagram story and explore how to create more artistic and functional designs using tools not currently available within the app.
How to Change Instagram Story Background Color
There are several ways to customize the background of your Instagram Story—from using a solid color to layering images over more polished, professional designs.
Here’s a breakdown of a few styles you can try in your next Story.
Block Colors
To change the background color of your Instagram story, start by creating a new story. Although Instagram's interface has recently changed, the easiest method is still to tap the blue + icon above the Your story text at the top of the home screen.
Next, select at least one photo or video from your camera roll. For this example, we’ll use a single photo, since we’re building a collage-style layout where the background color will play a key role.

Once your image is selected, use pinch and zoom gestures to reposition it on the canvas. Don’t worry too much about exact placement, as you’ll need to repeat this step after changing the background color.
To change the background color, tap the three-dot icon in the top-right corner to open a menu. From there, select Draw at the top of the list.
A color palette will appear along the bottom of the screen. Swipe through the options, choose a color, then tap and hold anywhere on the background to fill the canvas with that color.
Open the Draw menu. Then, tap and hold anywhere on the background to change the color.
When you do this, you’ll notice that the background color changes, but the image you initially placed gets masked by the new color. Fortunately, there’s a simple workaround to bring the image back (or add it again manually).
Tap the sticker icon in the toolbar at the top of the screen. Then select the Photo option from the list of available media types.
This will return you to your camera roll, where you can select the same image or choose a different one to add to your story.
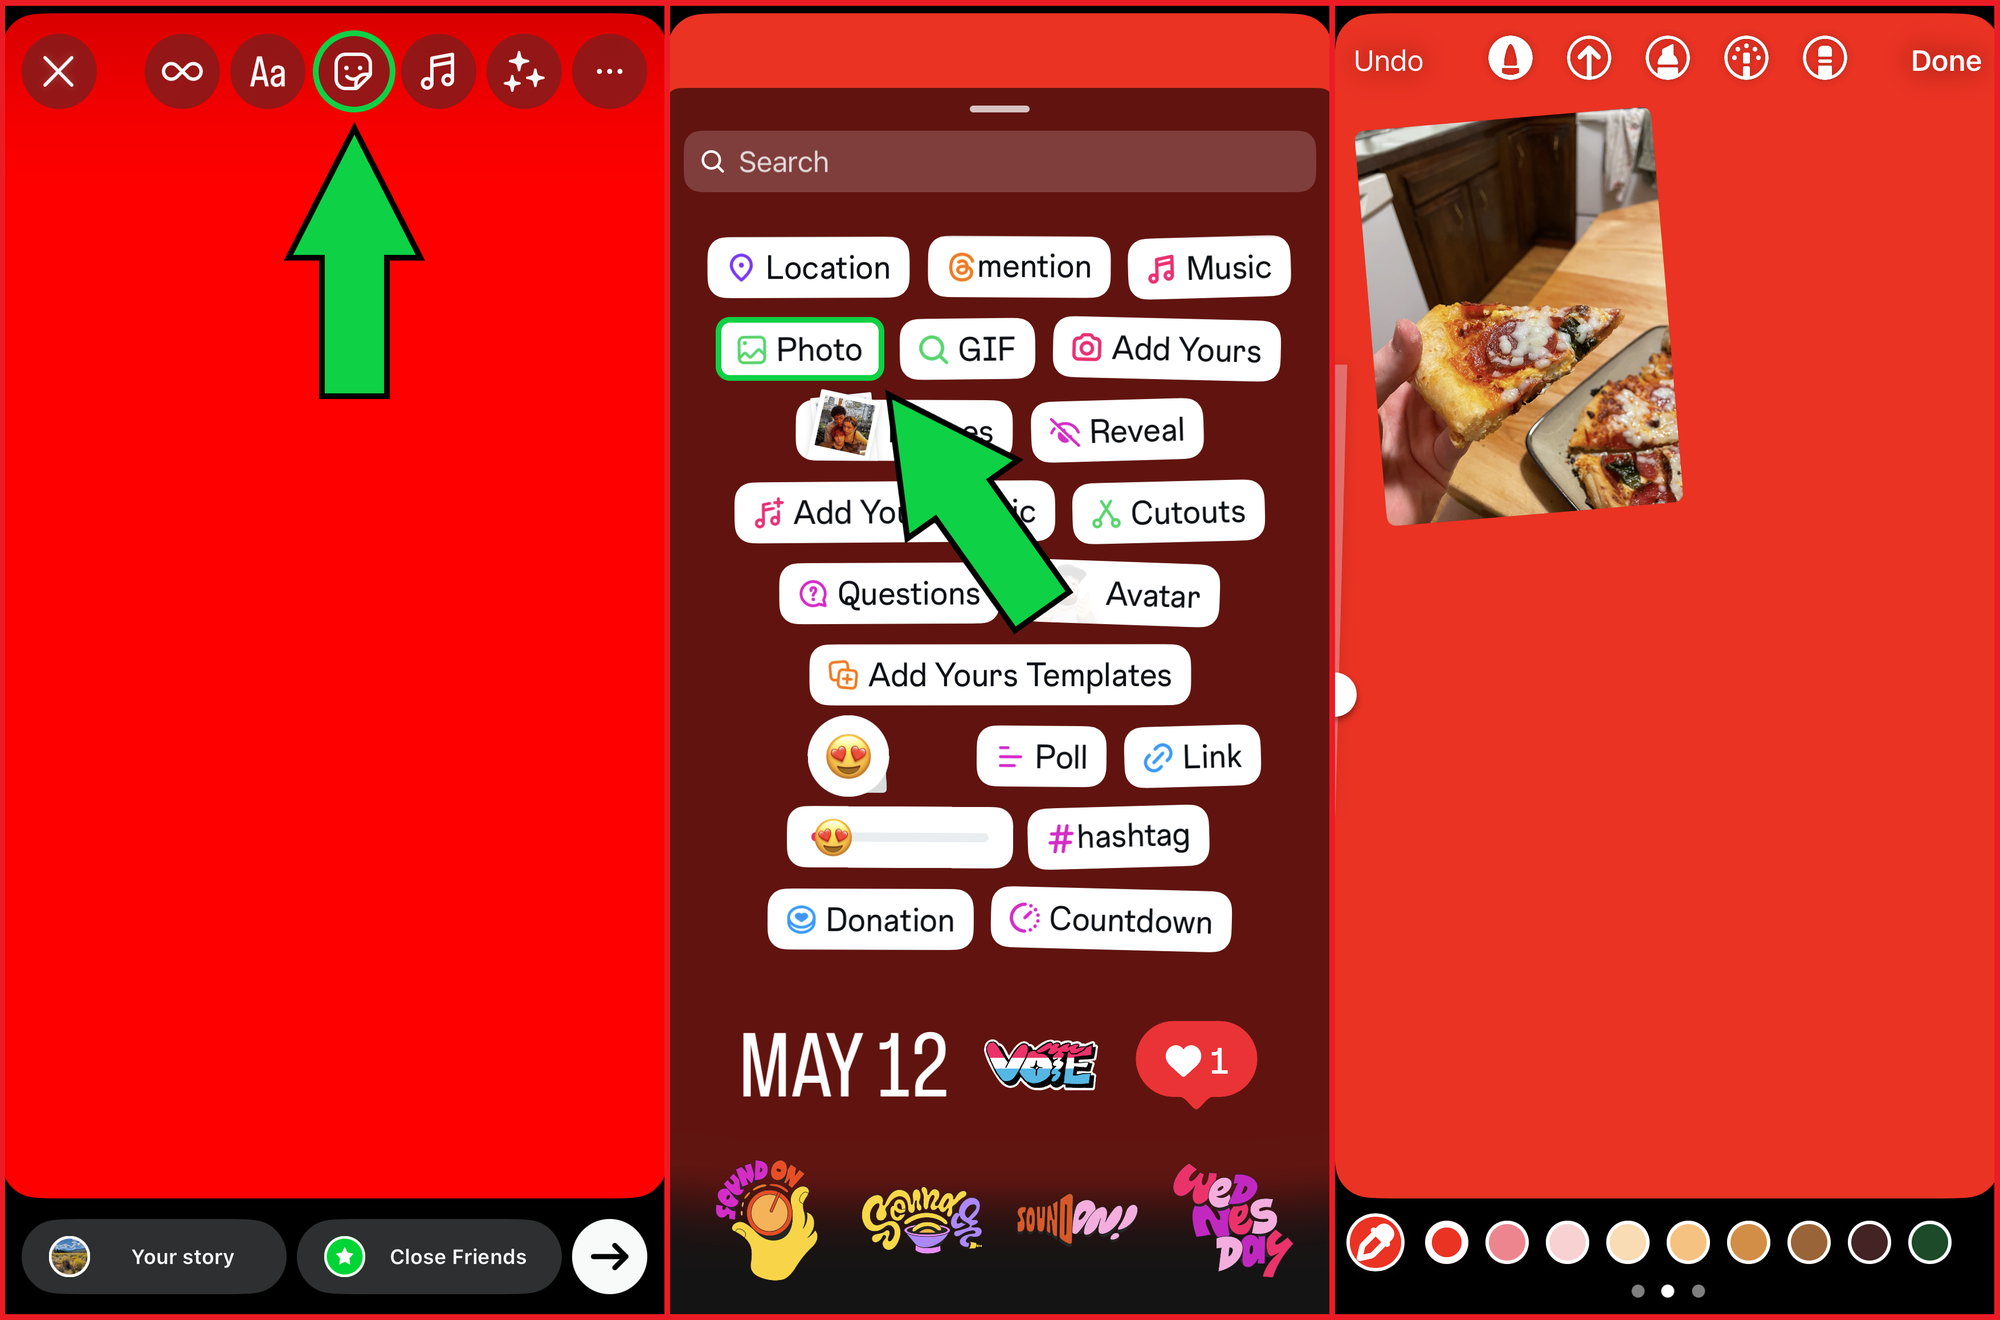
If you need to update the background color again, don’t worry. Once an image is added through the sticker tool, it will remain on the canvas even if the background is updated.
Color Matching
Changing your Instagram Story background to a preset color can add a touch of personality, but for more cohesive visuals, the built-in color sampler is a handy way to match your background to a specific element in your image.
To use the color sampler, tap the dropper icon in the bottom-left corner of the screen. Then, drag the selector tool anywhere on the canvas to sample a color. When hovering over an image, make sure the small selector circle is directly on the color you want. A preview droplet will appear above the selector to show what color is being picked.
Once you’ve selected your color, use the same tap-and-hold method as before to apply it to the background. This allows you to quickly match your Story background to a color already present in your photo or video.

For casual or mobile-only content, the built-in color sampler does an okay job. But since the selector sits under your finger, it can be hard to see the exact color you’re picking. This makes it easy to misselect, especially when working with detailed visuals or precise brand colors.
If you're creating Stories for a business or marketing campaign, using a dedicated editor can provide a far more professional finish.
Kapwing is a great solution for this. As a precise design tool, it gives you full control over hex codes and ensures consistent, accurate branding across all your content, with a color sampler that picks the exact shade every time.
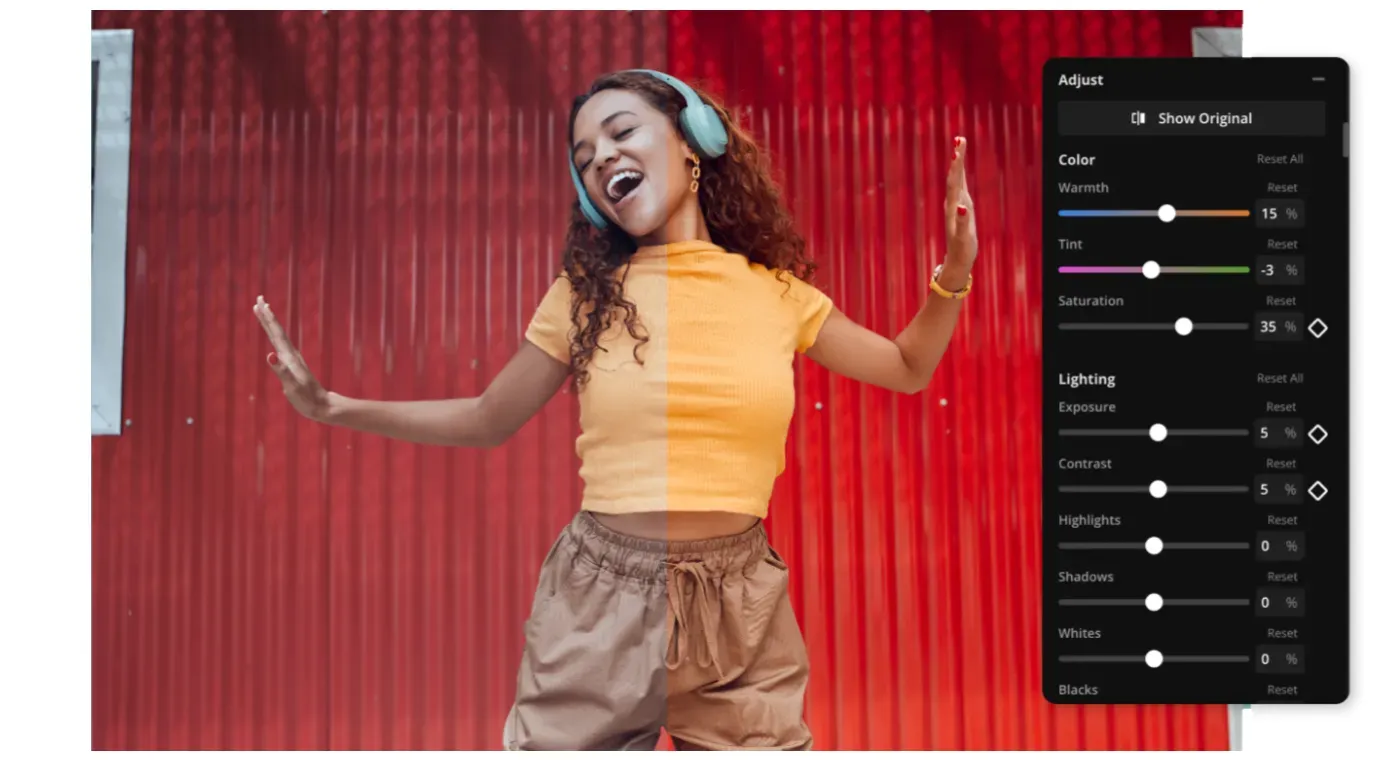
Image Within an Image
To build a more professional-looking Instagram Story, one method is to use a picture-in-picture style layout. This technique helps create a cohesive, full-screen design while ensuring your content is correctly sized for Instagram’s 9:16 Story aspect ratio.
Let’s say you have a high-quality product photo you want to use in an Instagram Story to promote an upcoming release. Here’s a step-by-step process for combining your image with a professional background before posting.
To begin, you can either upload your own media to a new project or browse available stock photos. Using a stock image as your background is a great way to save time when designing Instagram Stories.
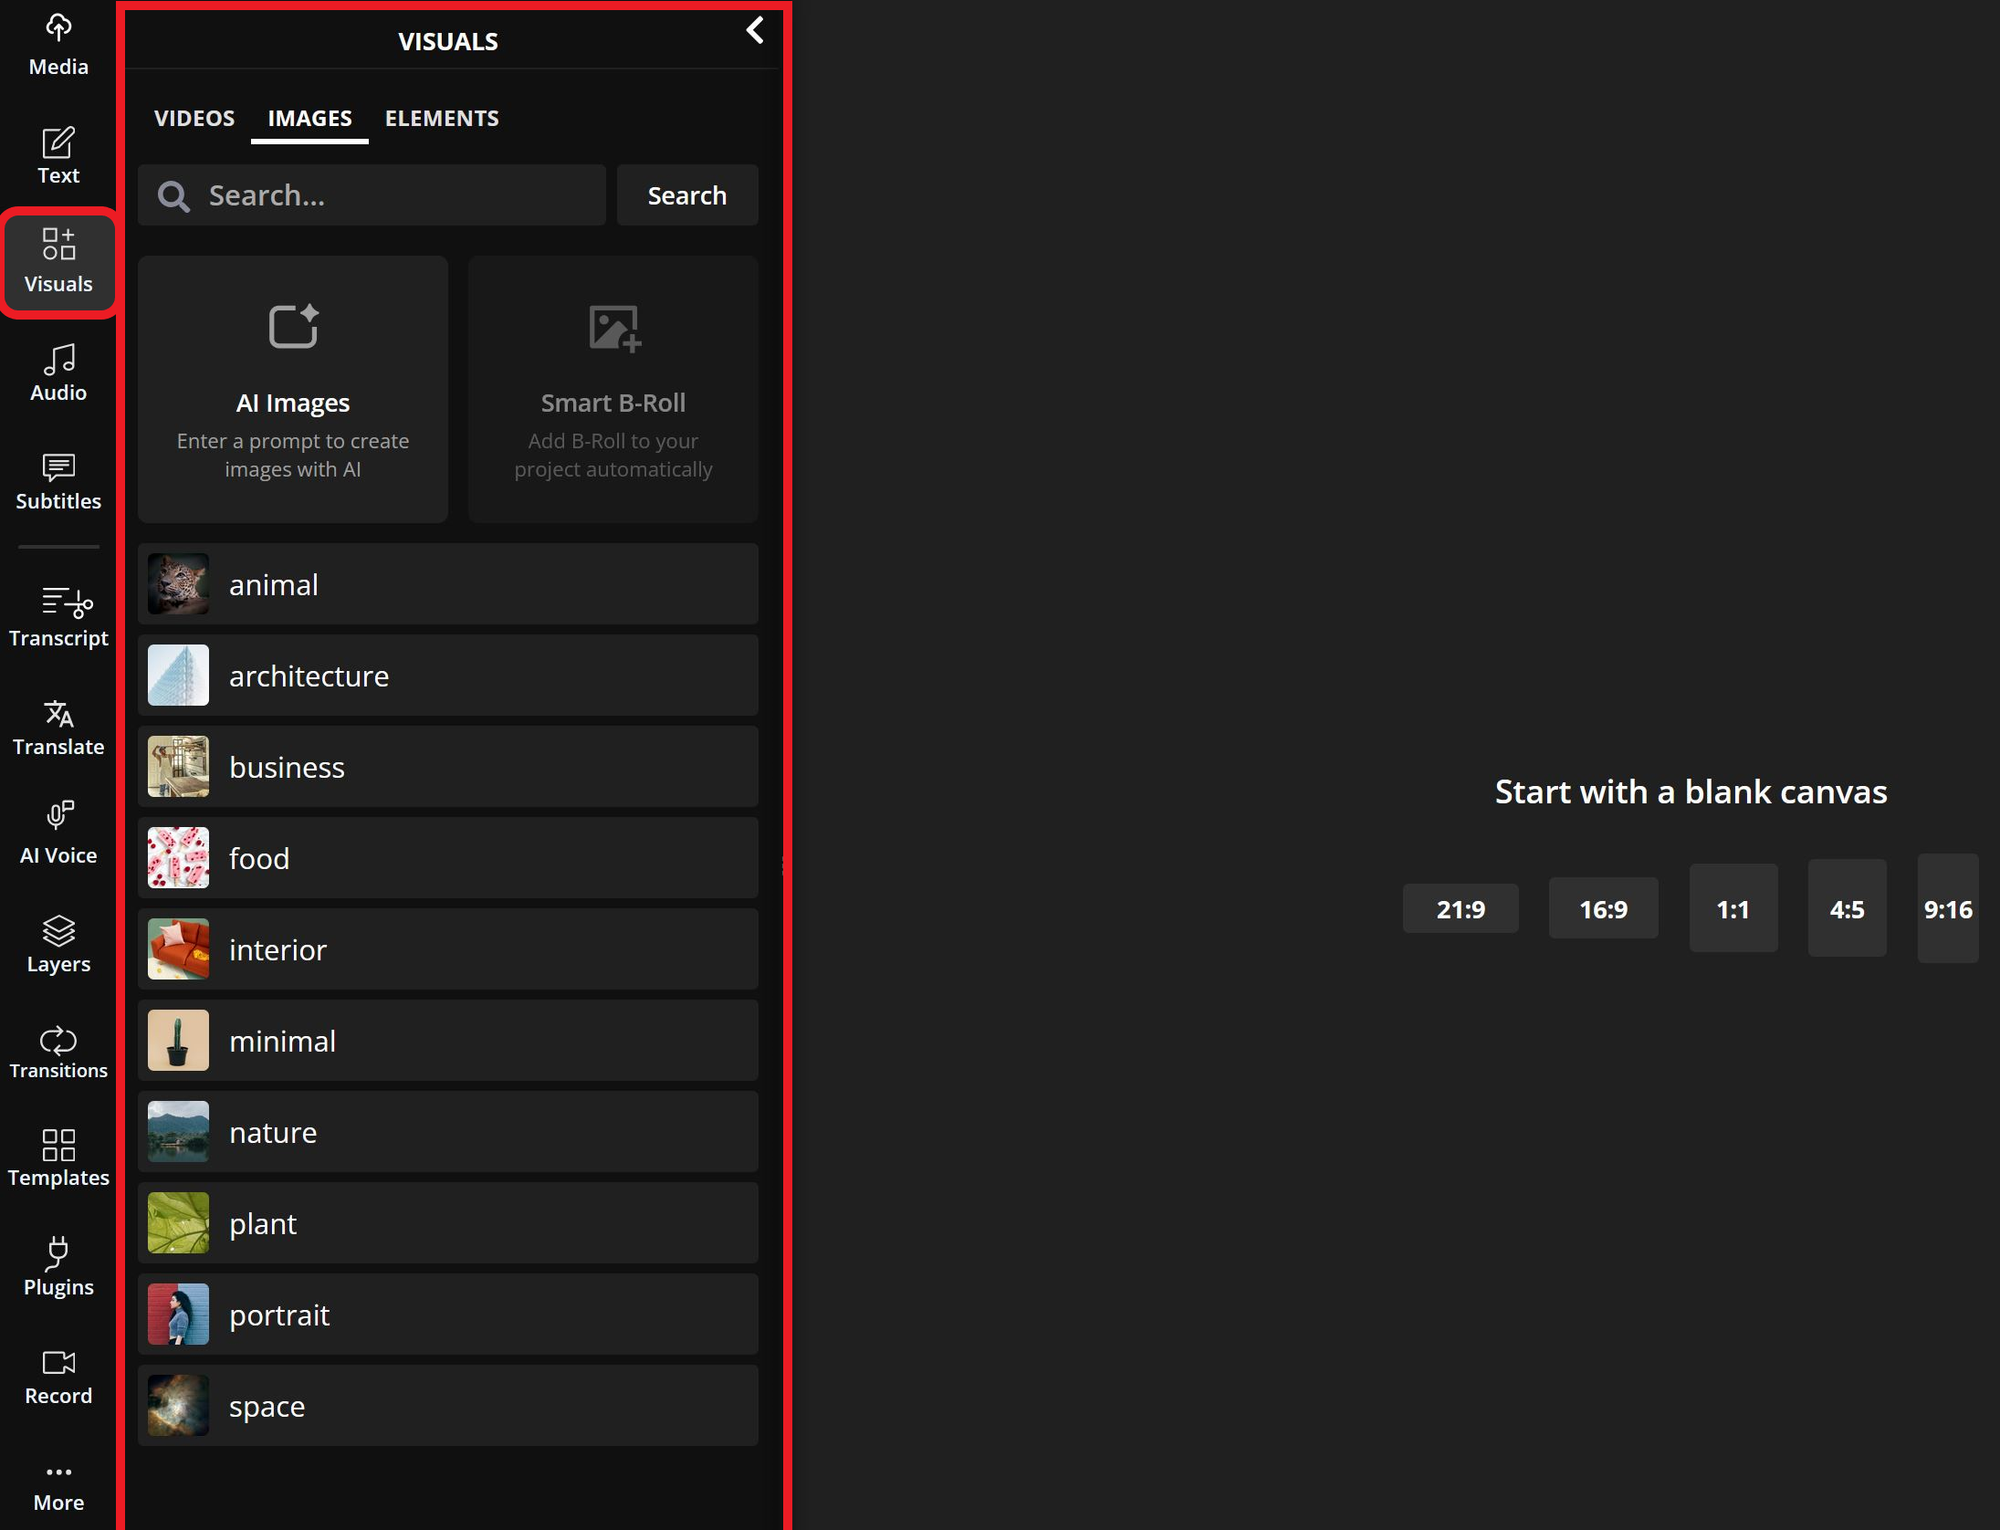
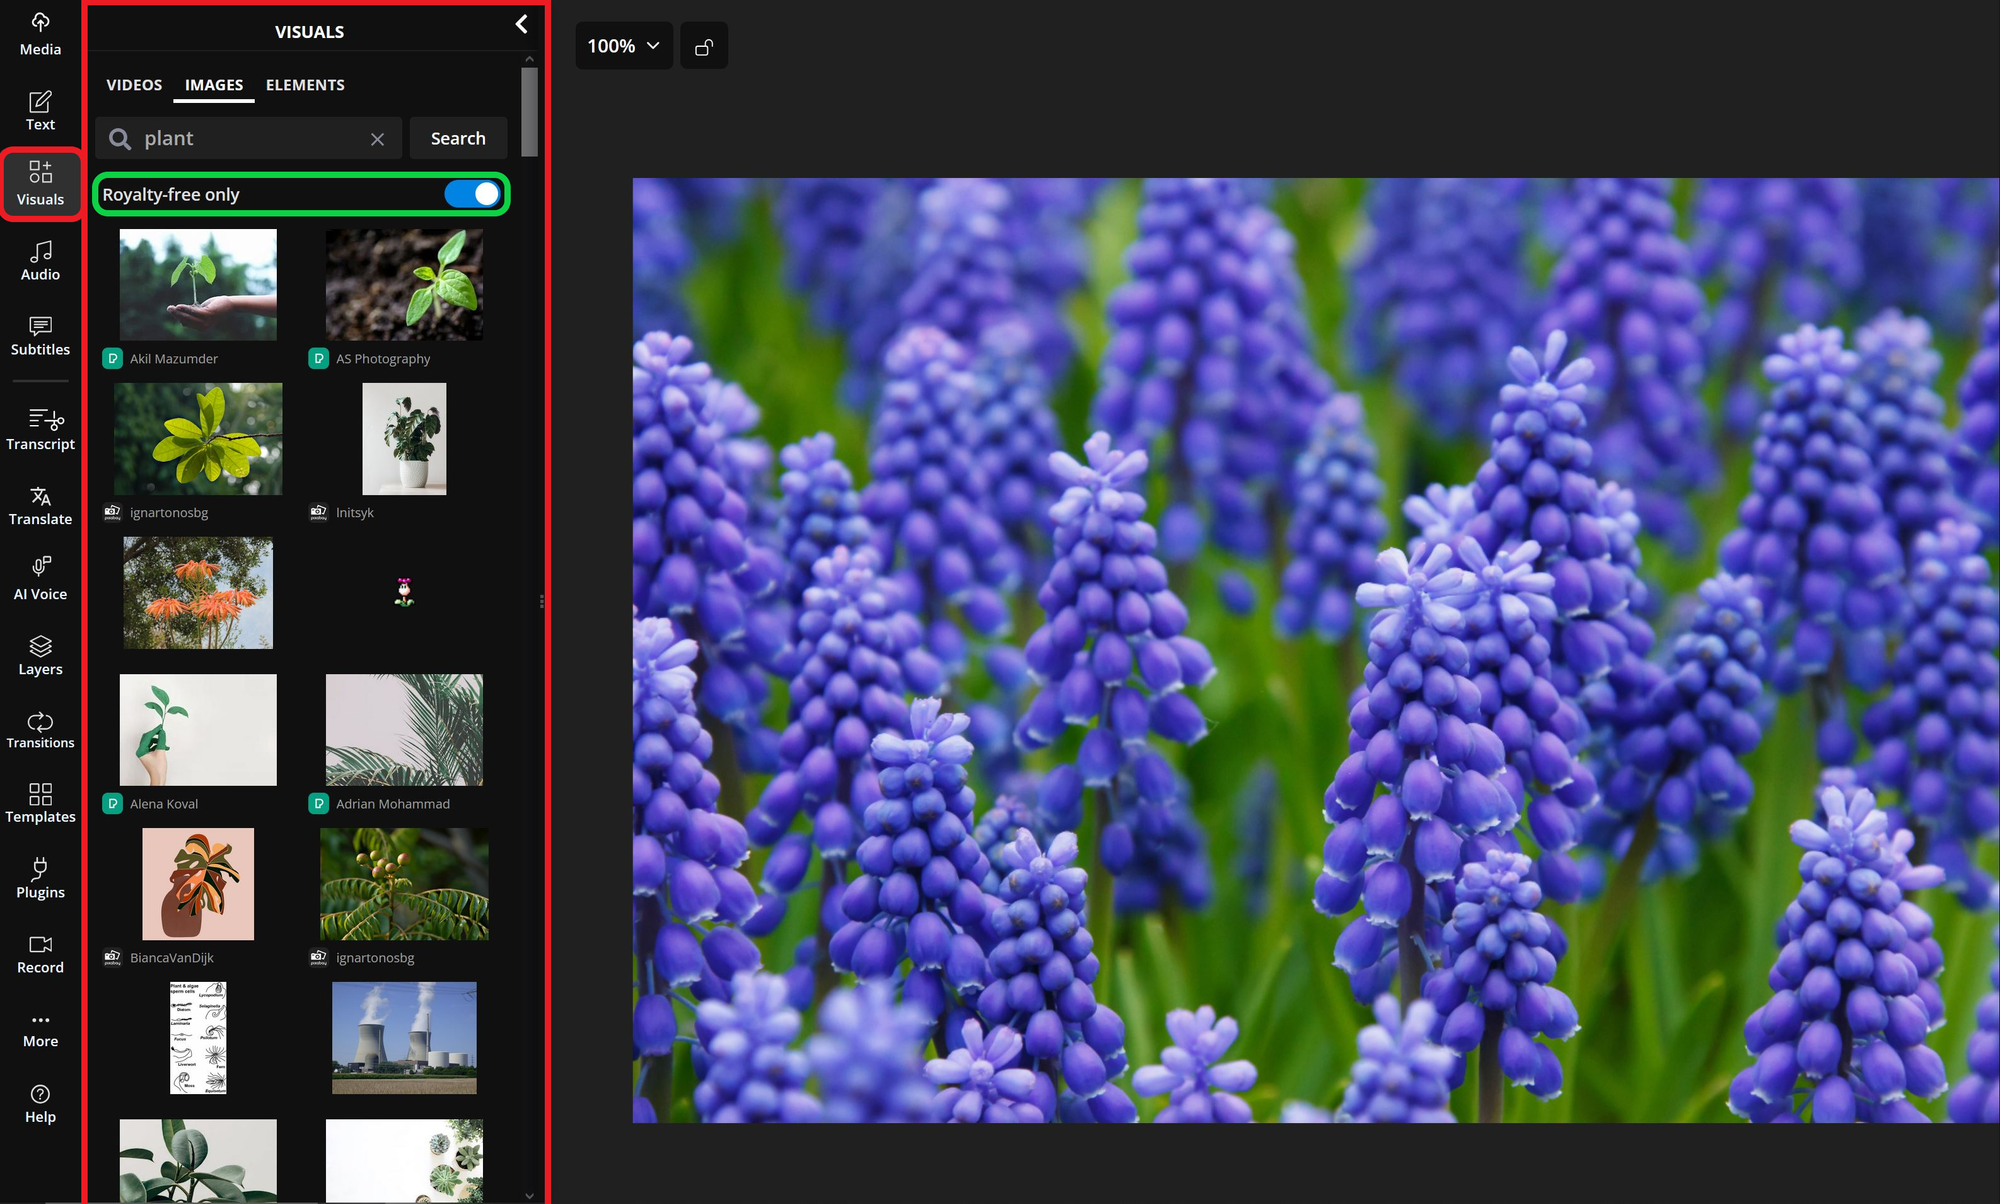
For business or commercial use, you can toggle between royalty-free images to ensure they’re cleared for distribution.
Once you’ve selected a background image, click to add it to your project.
Since Instagram Stories are best displayed in a 9:16 aspect ratio, you may need to resize your background — this also applies if you're using your own photos.
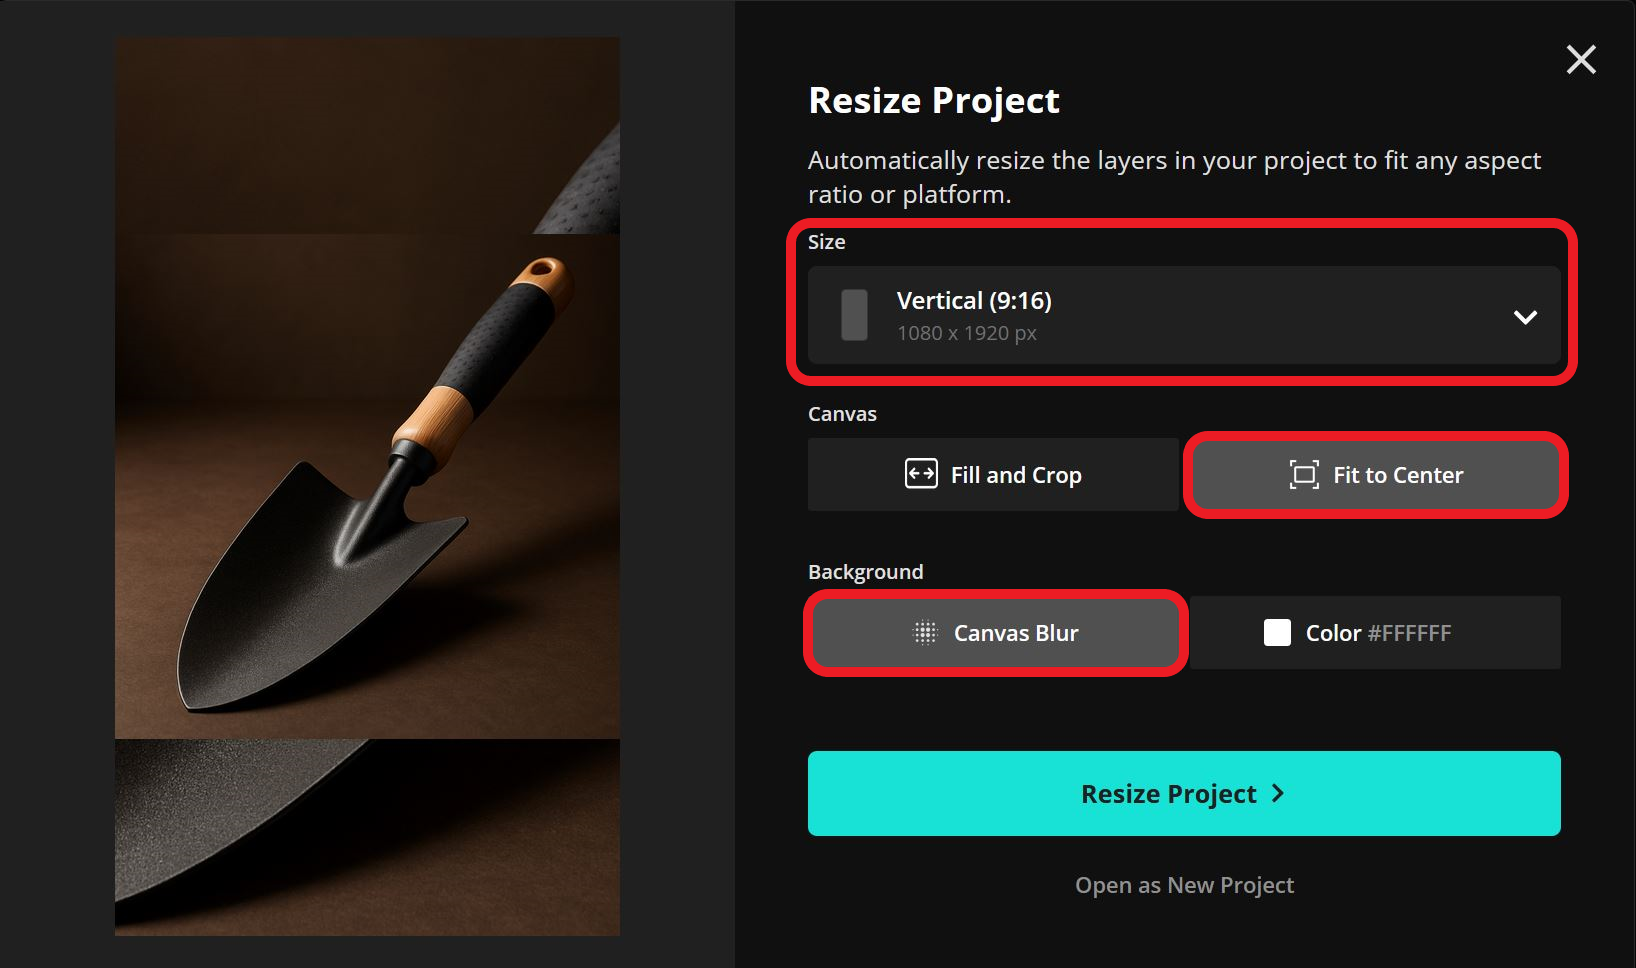
To resize, select the background of your project to open the Resize Project tool on the right-hand side of the editor.
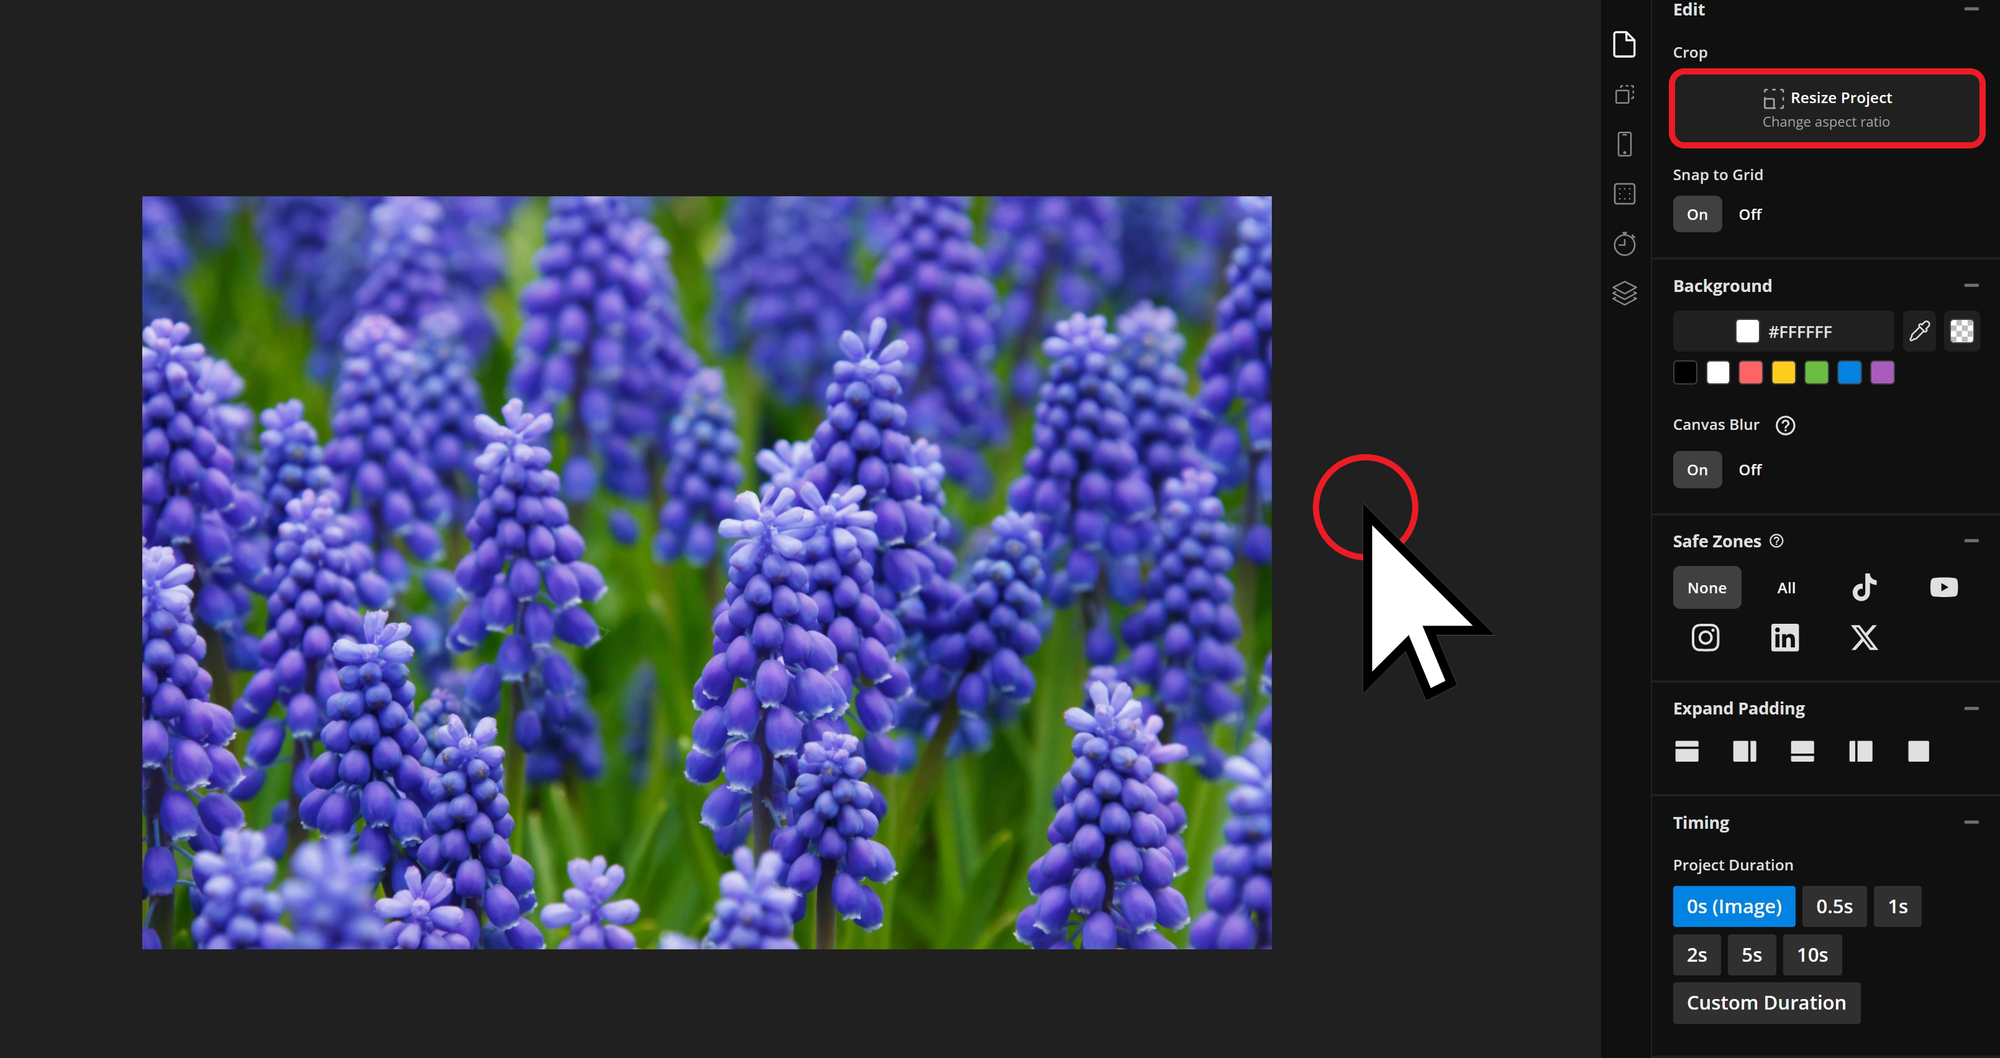
Open the Size dropdown and choose the 9:16 aspect ratio preset.
Then, click the Resize Project button at the bottom of the menu to apply the change.

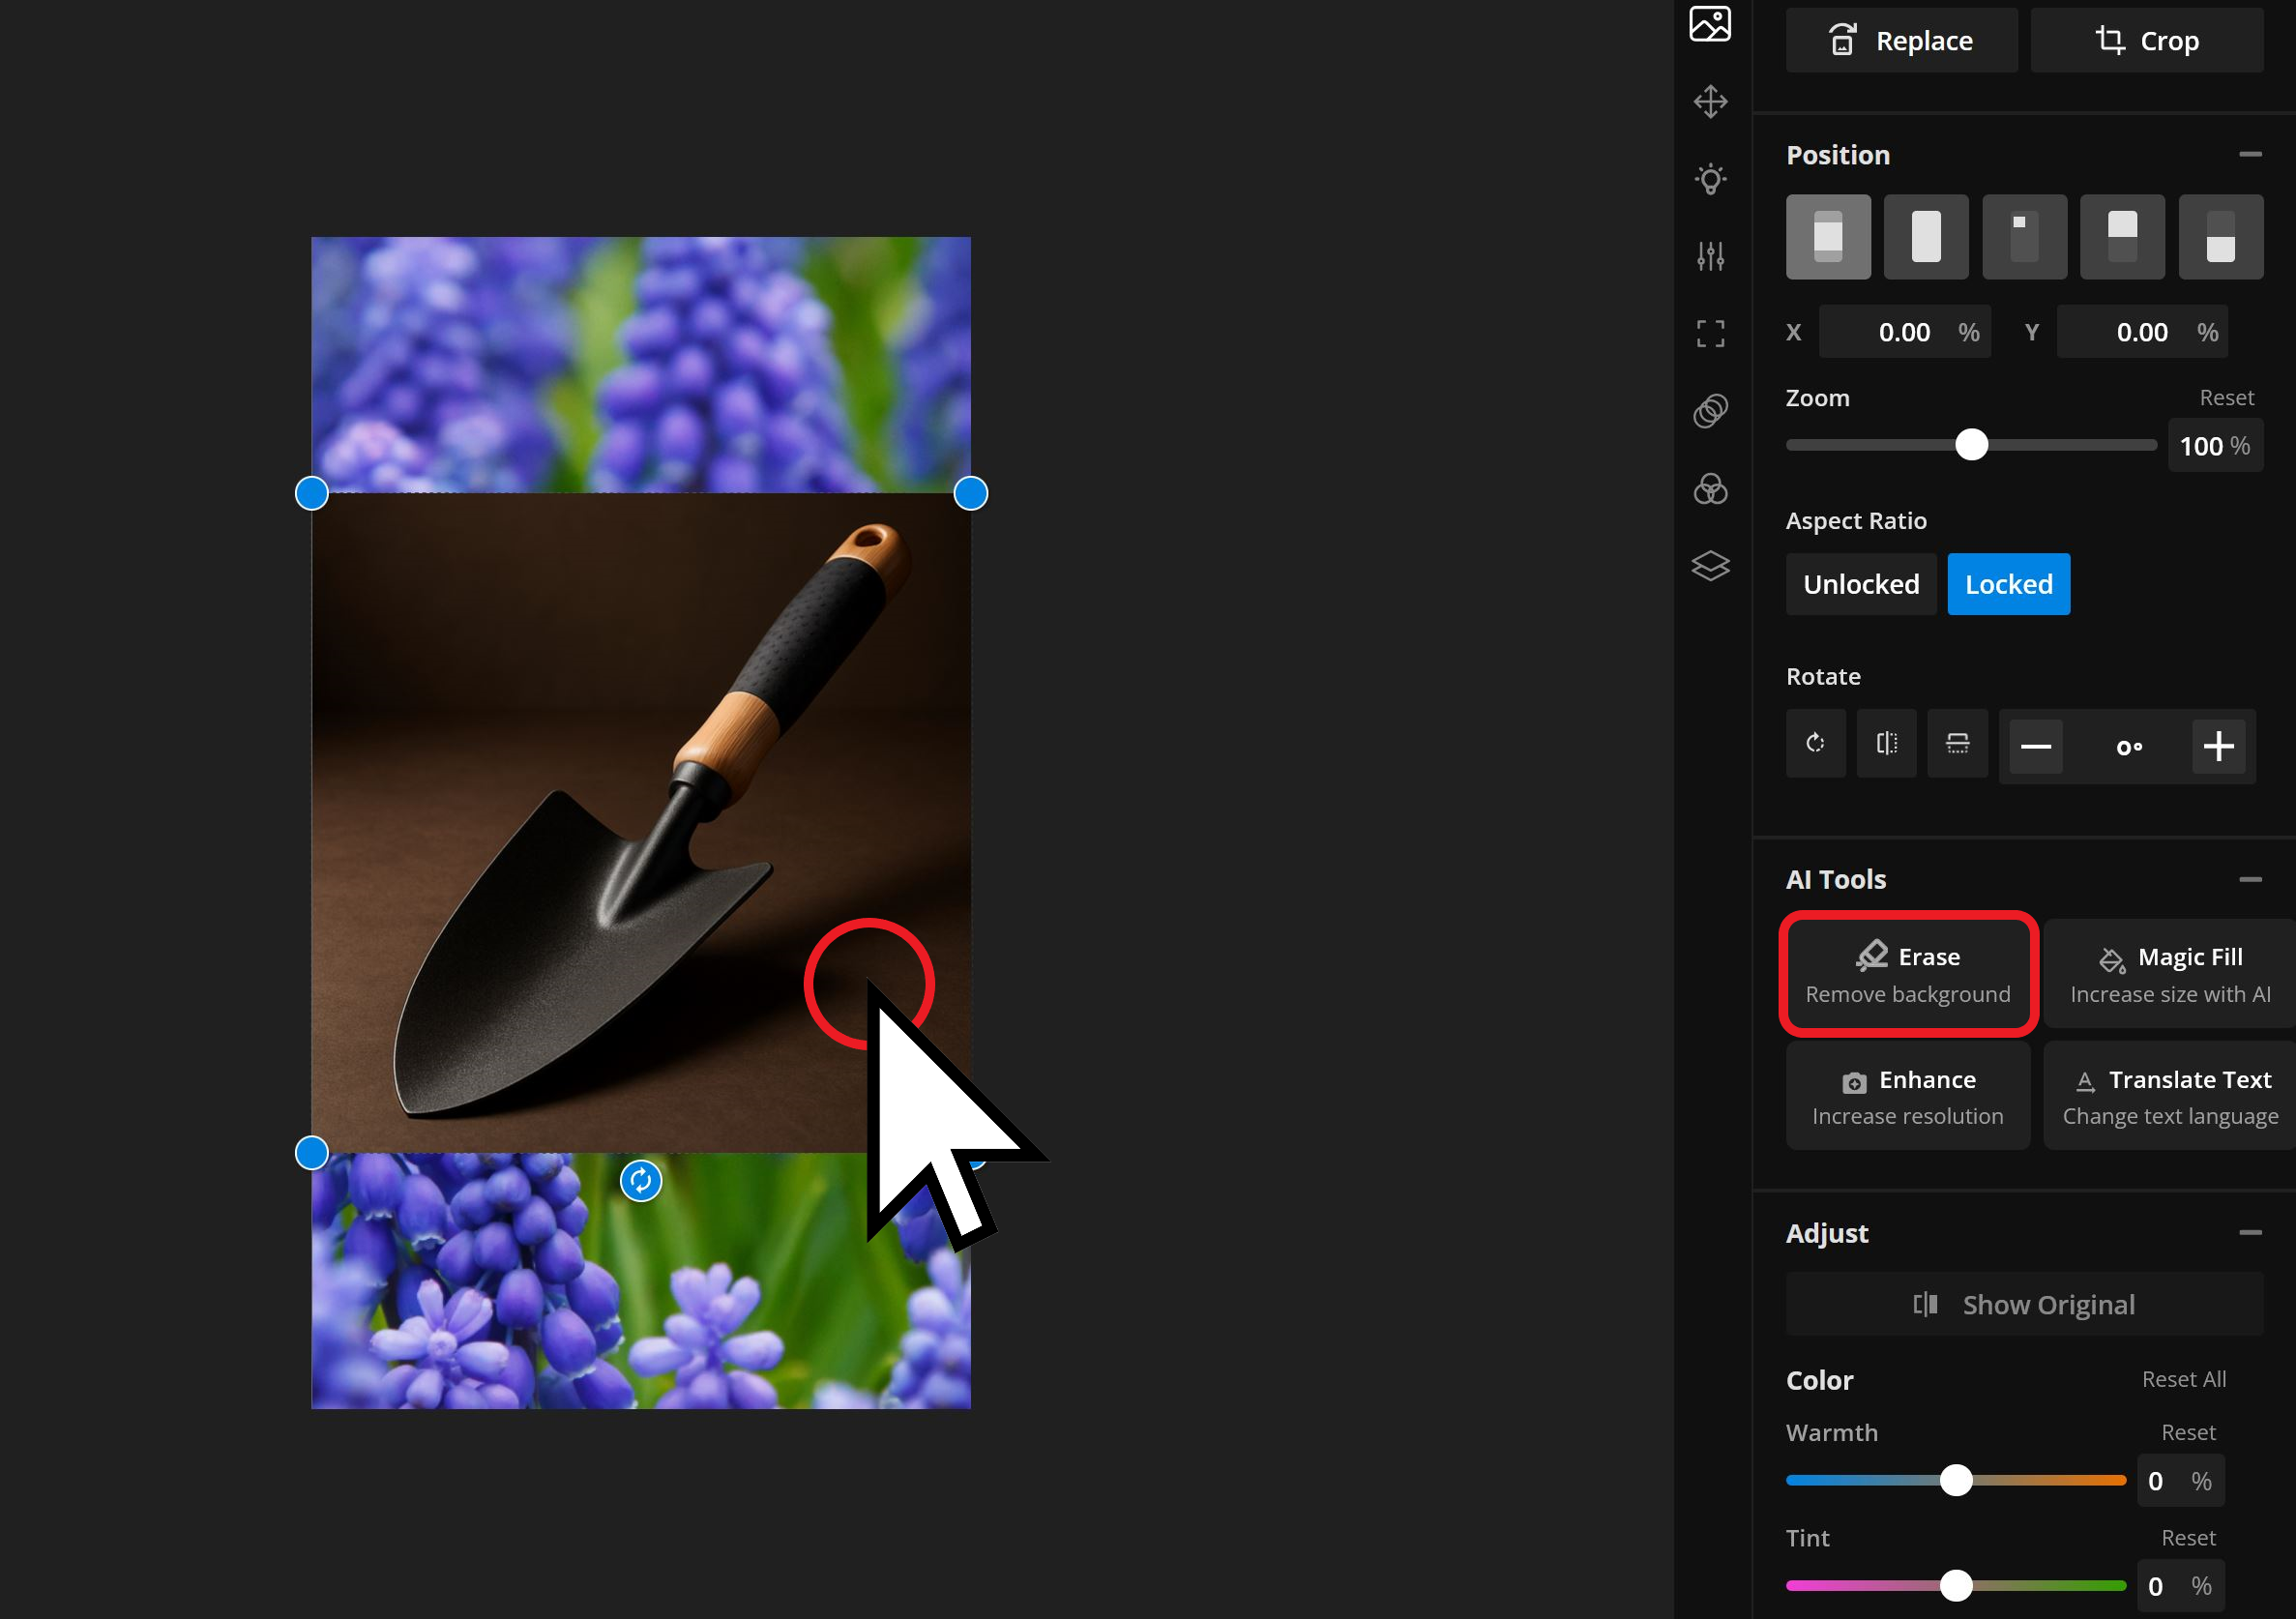
Now that your background image is resized, you can add the photo you want to feature most prominently. For this example, let’s say we’re showcasing a garden trowel for a marketing post.
To create a cohesive layout, use the automatic background remover to blend your image into the design. Select your image and click the Erase button on the right-hand side of the editor.
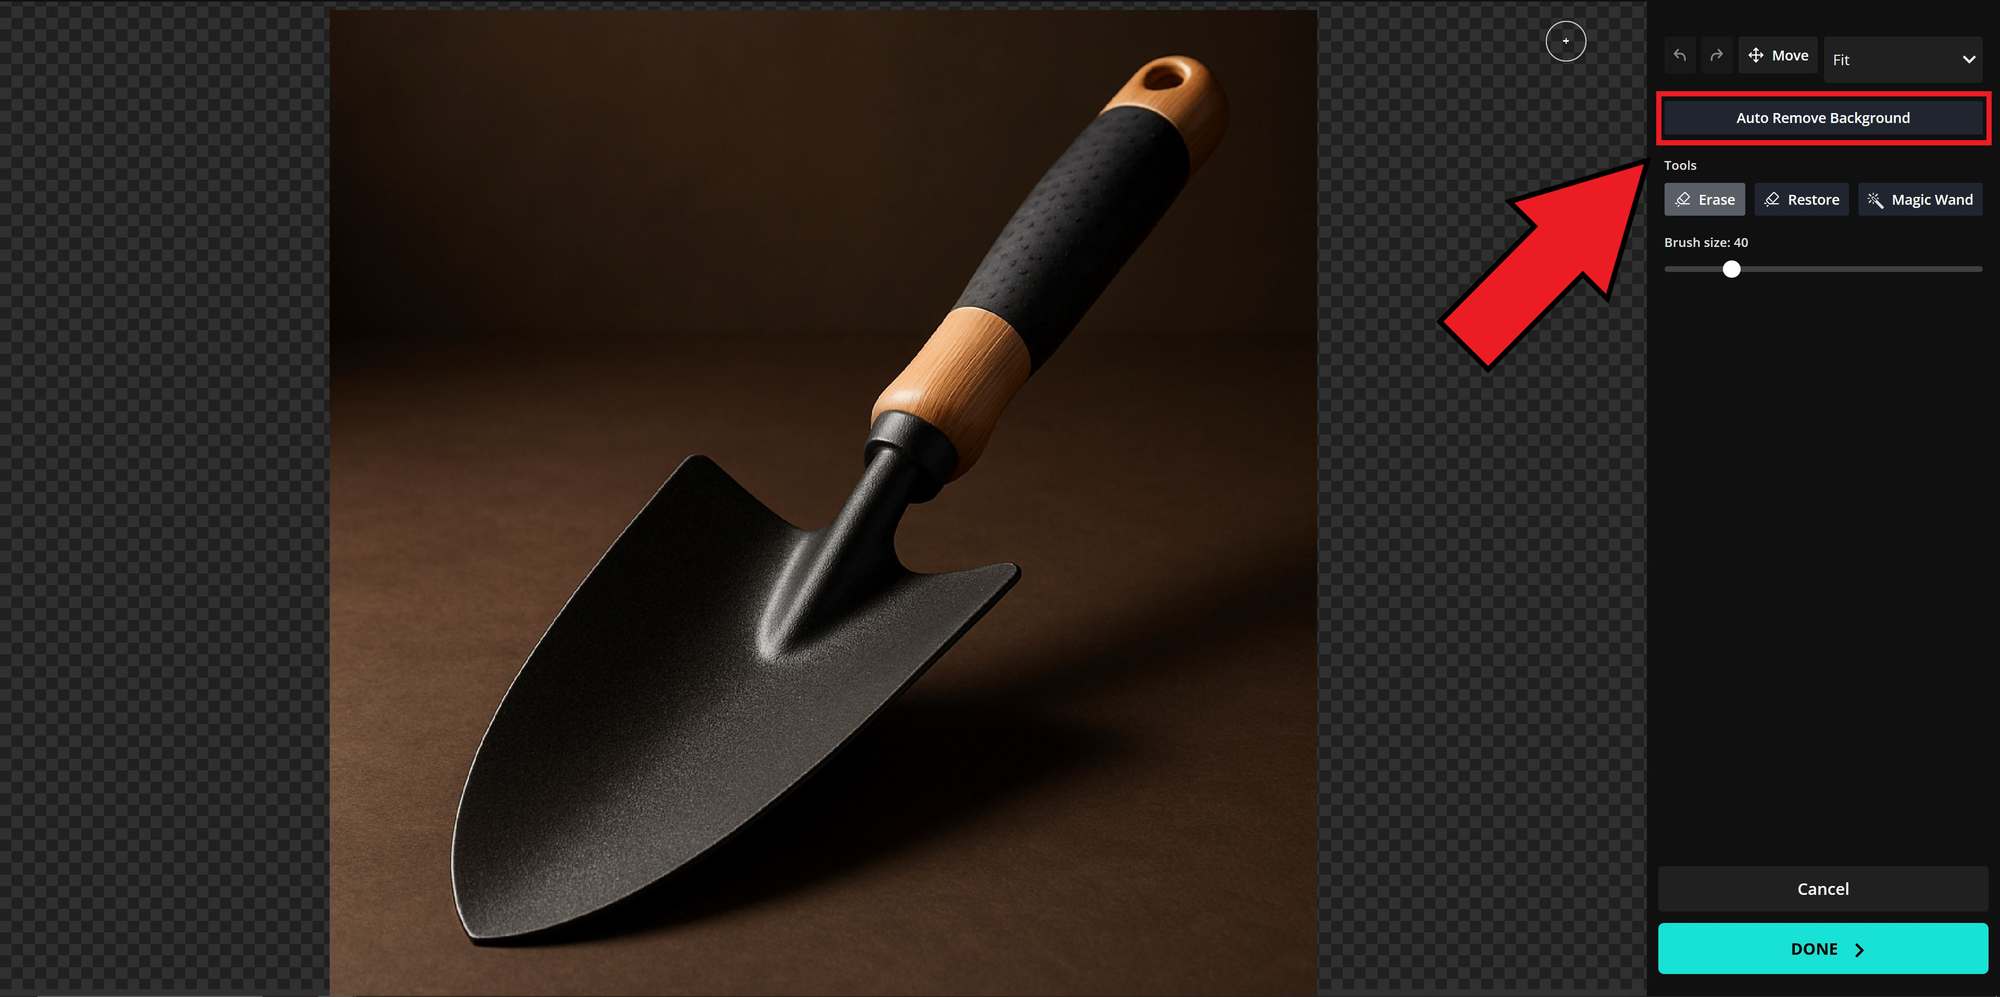
For well-lit photos, choosing Auto Remove Background usually removes the background cleanly. If needed, you can manually refine the edges using the tools just below.
Click DONE to return your edited image to the project.
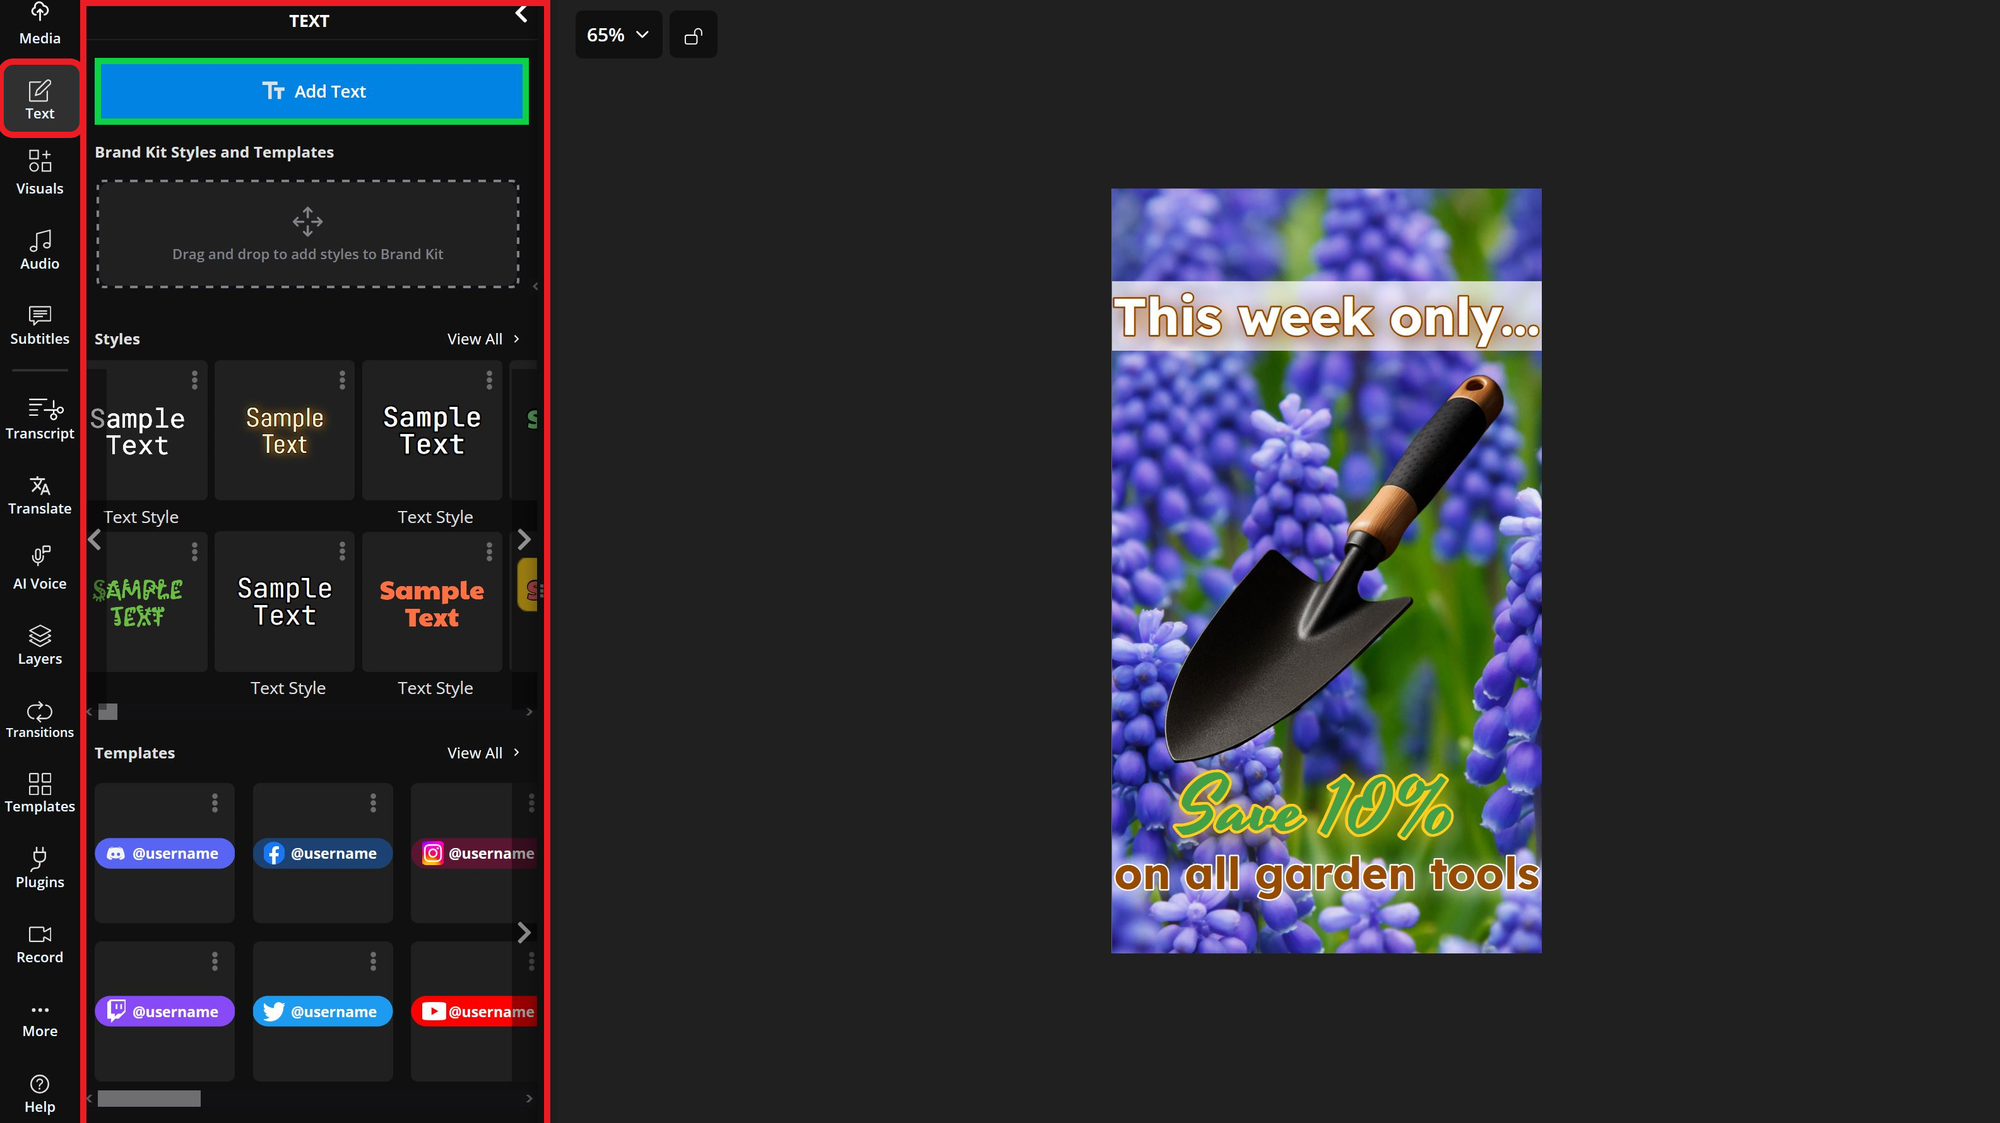
Once your featured image is placed on top of the background, you can freely add text, logos, or other branding elements to complete your design.
Adding these elements outside of Instagram provides more editing flexibility and an easier workflow as opposed to creating content within the app.
This process ensures your Story is properly sized and visually polished, and only takes a few minutes.
Blurred Image Background
Another variation is to duplicate your main image and use it as a blurred background. This technique keeps your Story correctly sized while naturally incorporating colors from your original image, without needing to sample anything.
Here's how to do it. In the same Resize Project menu as before, make sure the following options are selected:
- Size: 9:16 to fit Instagram Stories
- Canvas: Fit to Center
- Background: Canvas Blur
Once applied, the final result will feature a clean, focused image over a softly blurred background that complements your content.
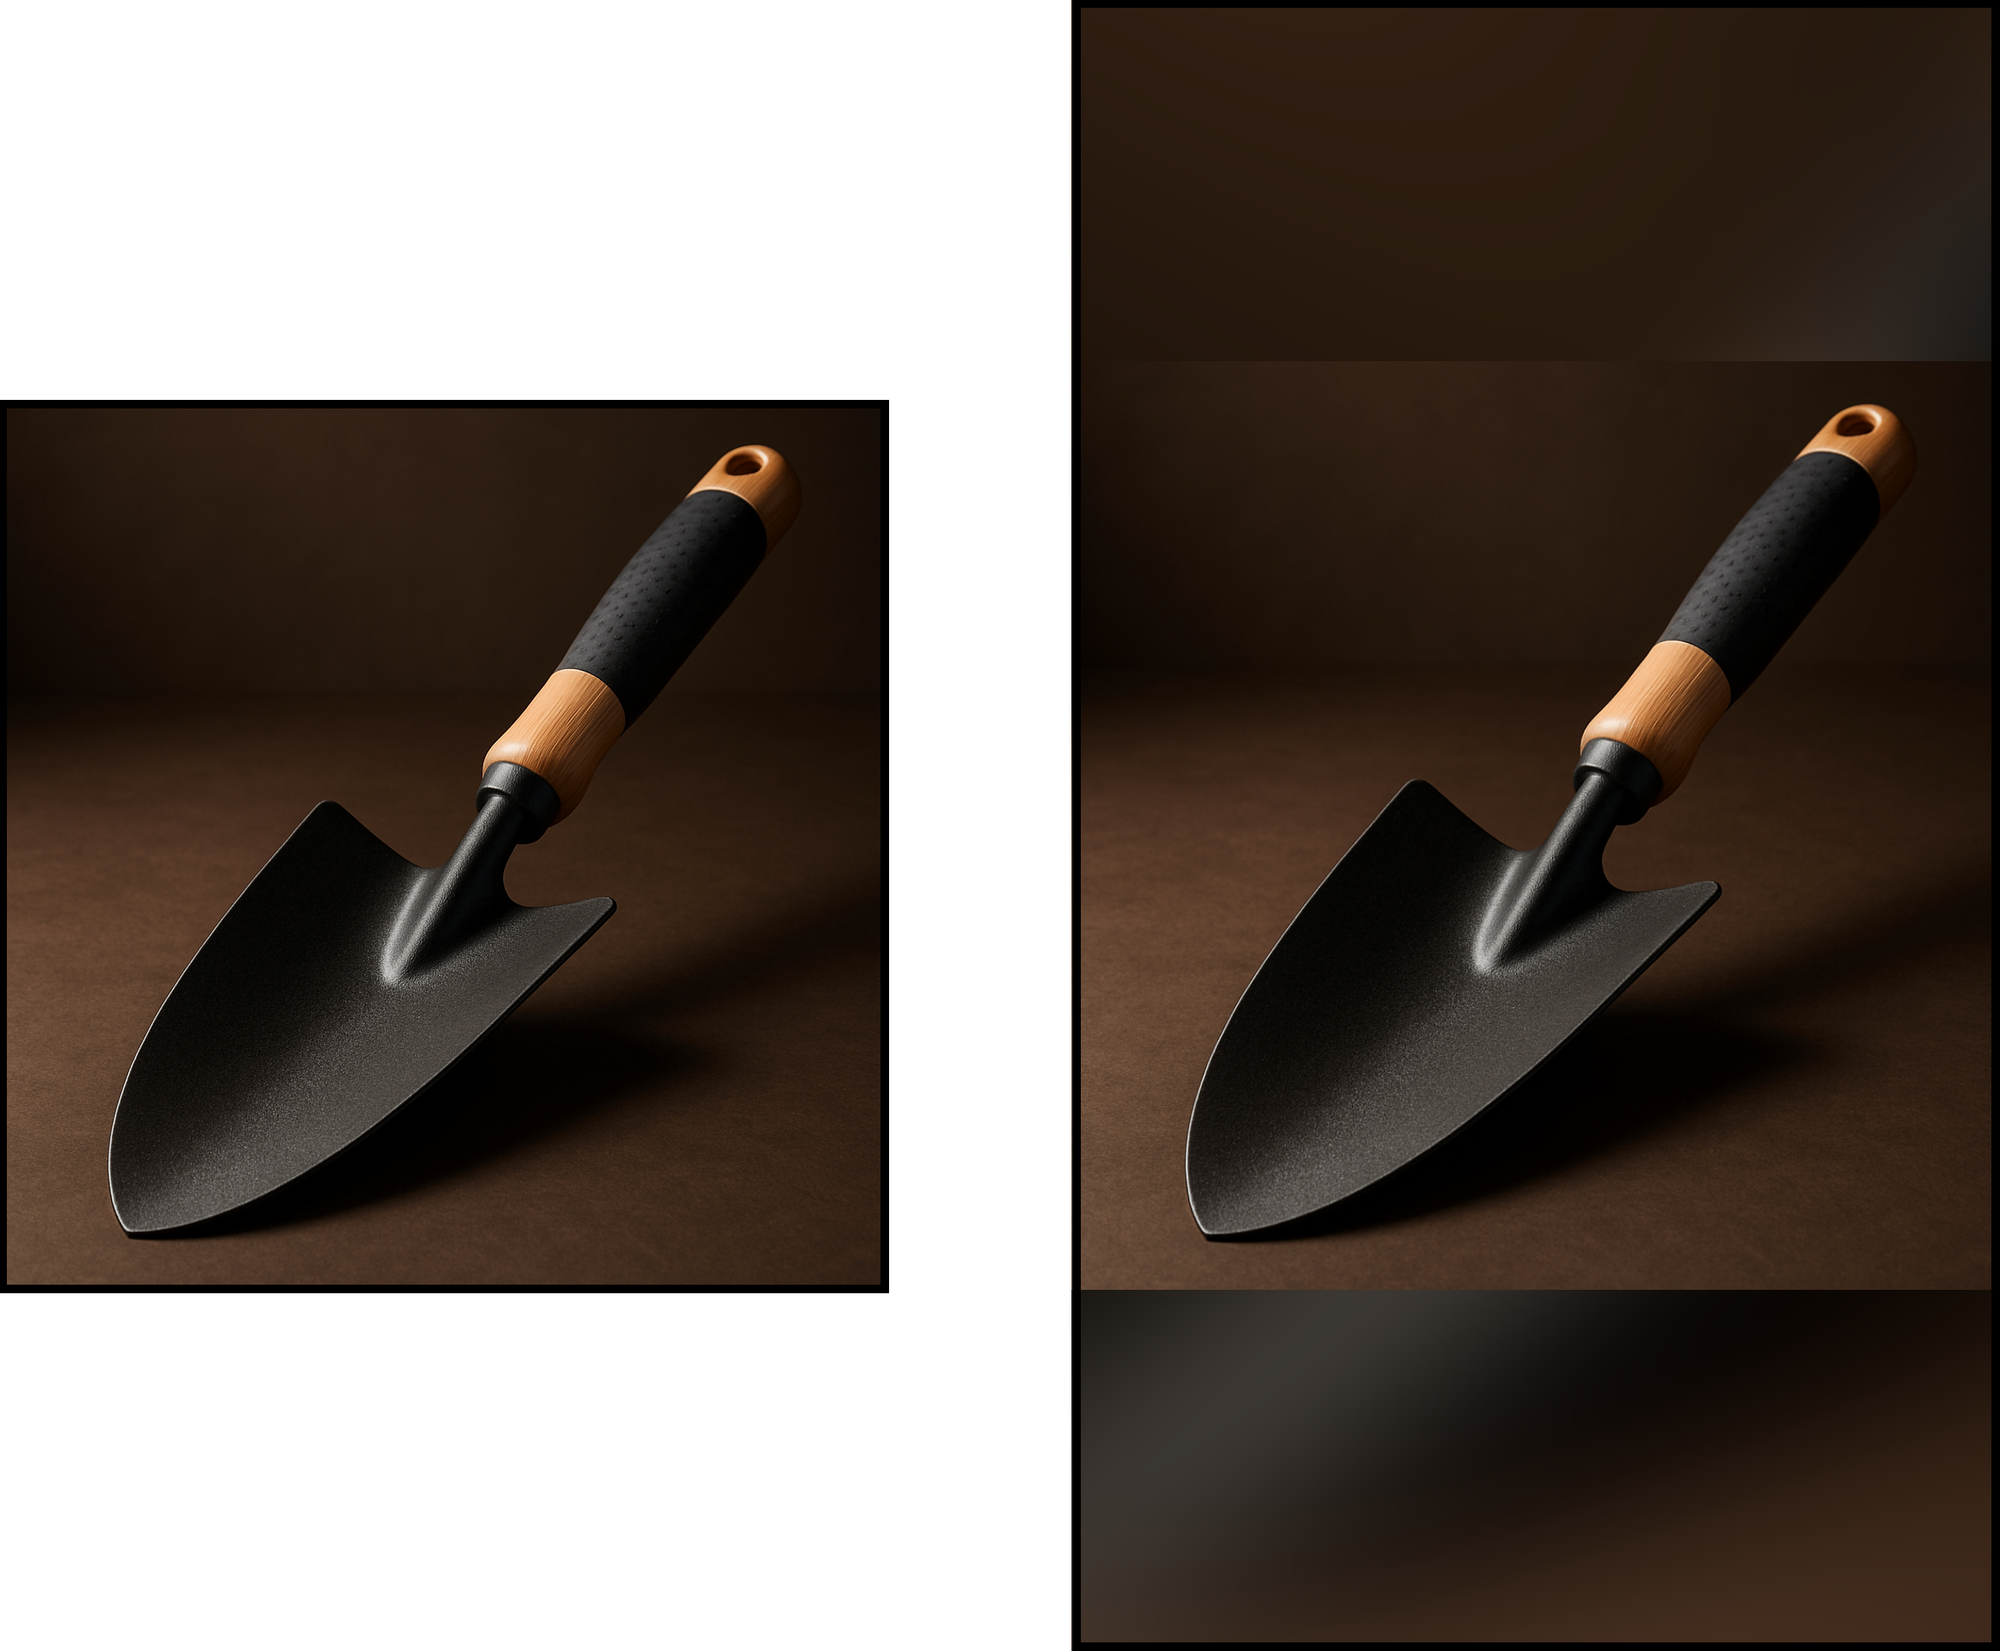
Note: For clarity, the background blur effect may not appear in the editor preview. Export your project to see all edits in their final form.
Image Borders
Sometimes your Story background looks fine, but the image itself needs a subtle upgrade. One way to improve visual contrast and add polish is by applying an image border.
Instagram’s app doesn’t offer a built-in border option, but the Kapwing editor does. To add a border, locate the Border tools within the right-hand editing menu.
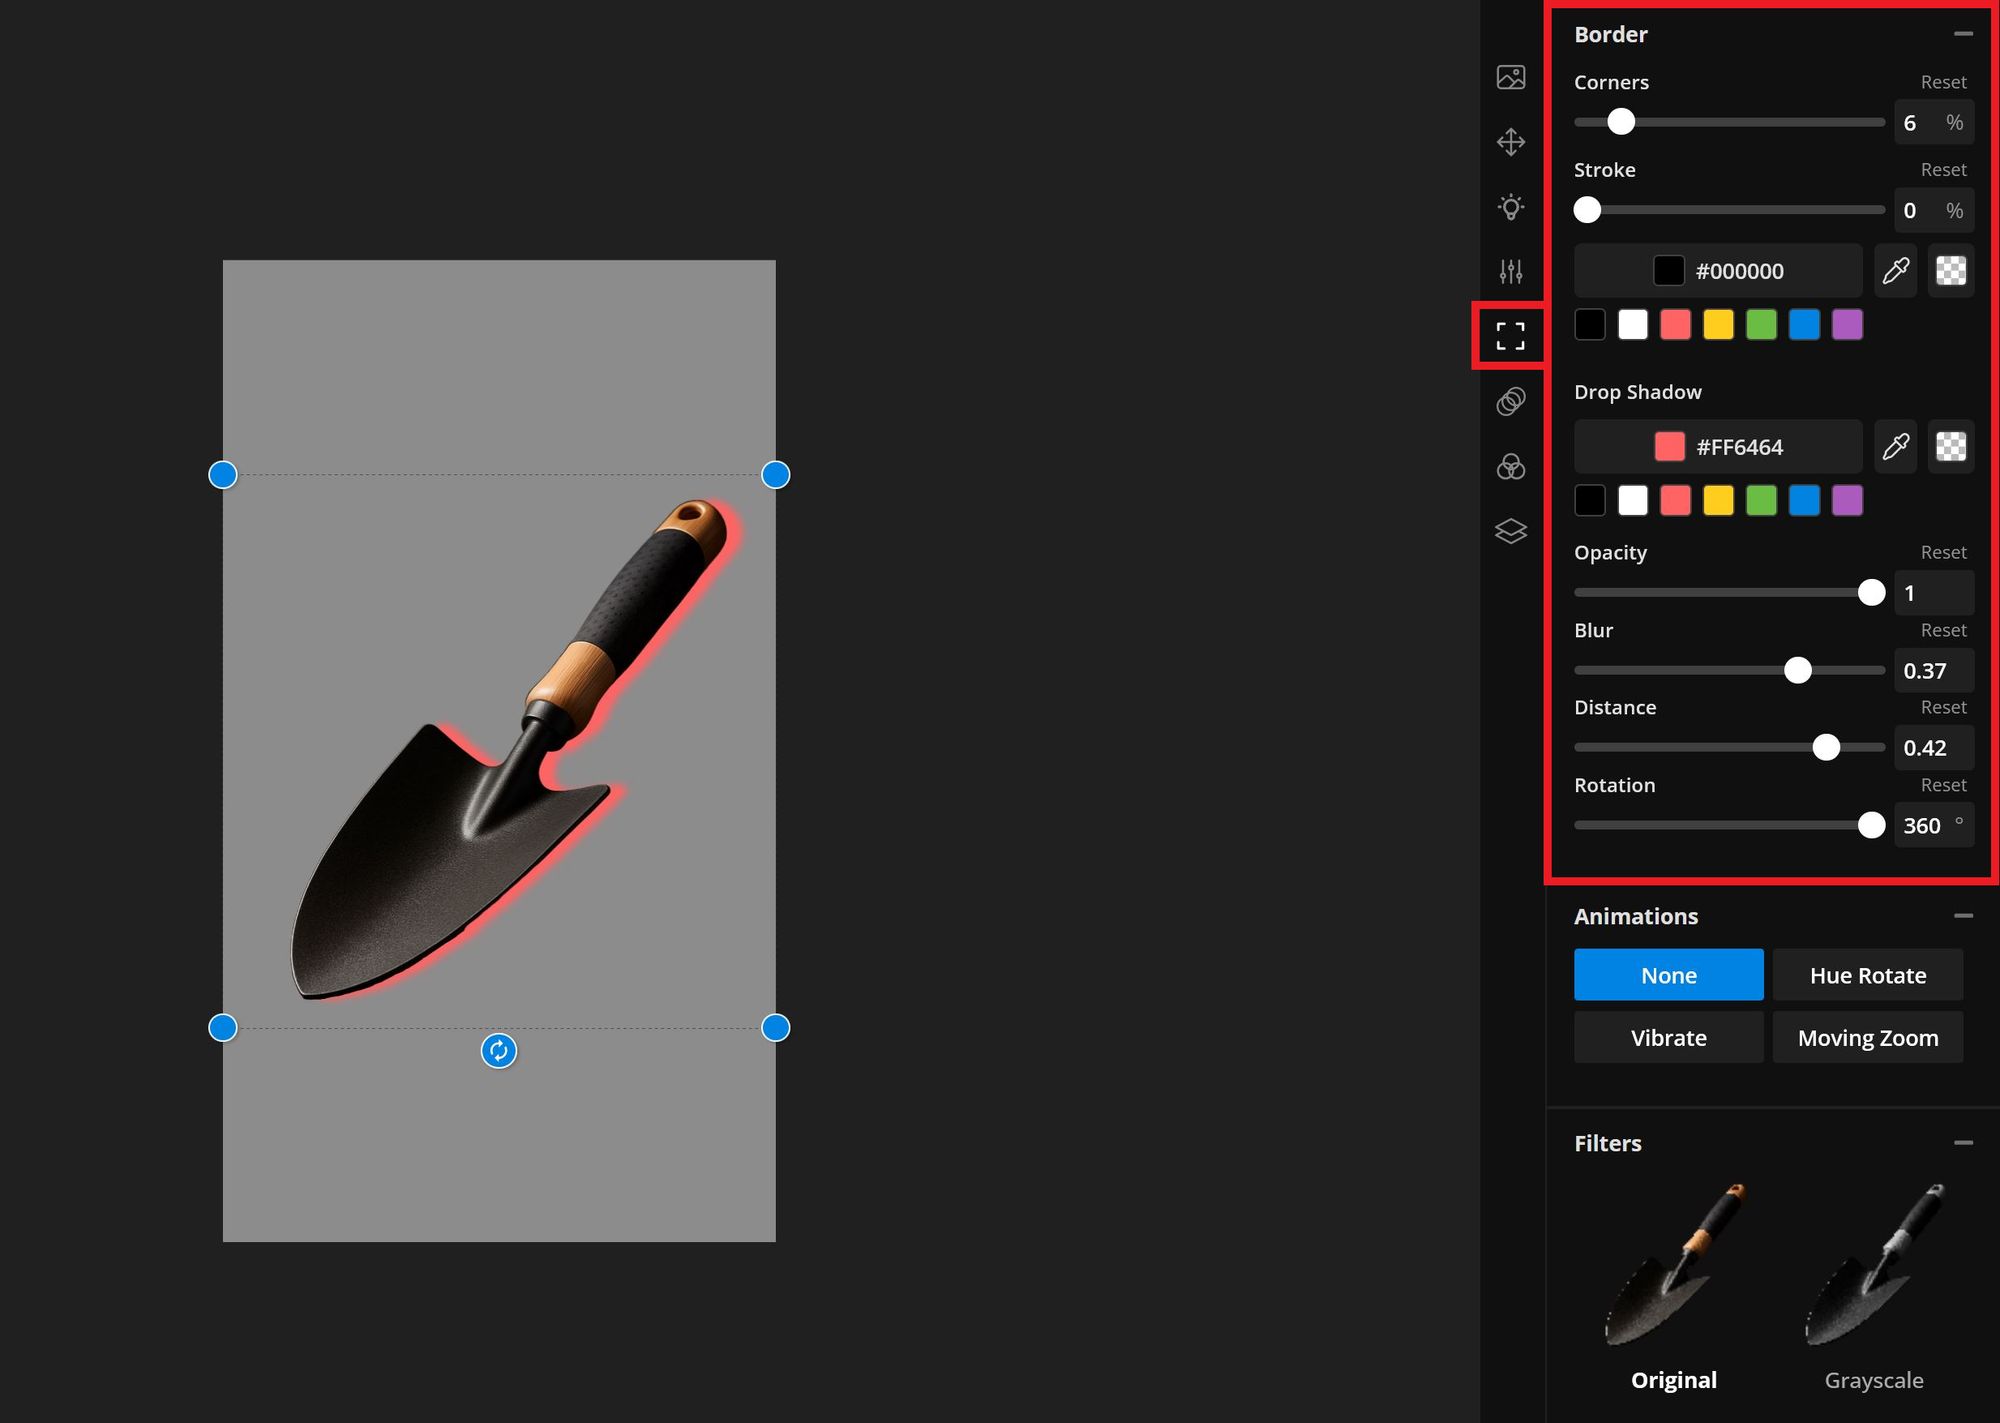
When combined with techniques like background removal, adding a border can make your content stand out and help establish a more professional, branded look.
Any of these methods can help you create higher-quality Instagram Stories. Used individually or combined, they can help turn your visuals into polished, on-brand content in just a few minutes.