
How to use Midjourney: Step-by Guide to AI-Generated Images
In this article, I'll walk you through creating an AI-generated piece of art using Midjourney.
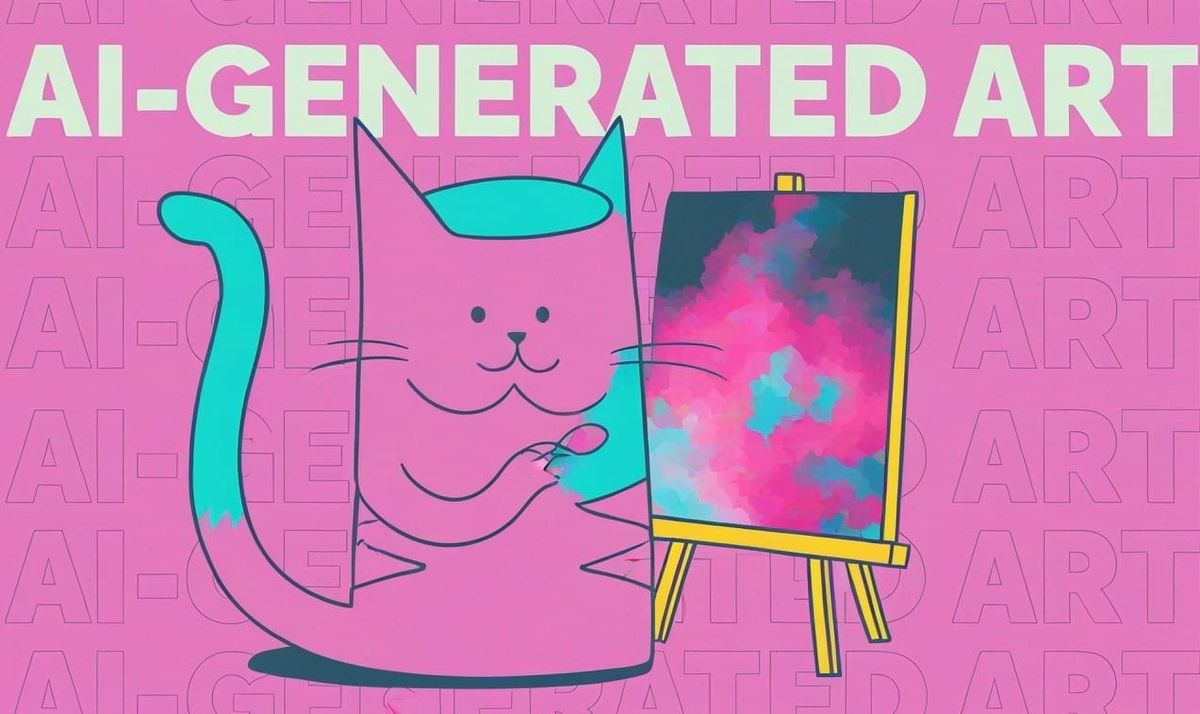
If you're fascinated by AI-generated art and want to know how to make your own, you've come to the right place. While there are several AI image generators available to the general public, in this article we will be focusing on how to use Midjourney.
- What Is Midjourney?
- Is Midjourney Free to Use?
- How to Use Midjourney: Sign Up
- How to Use Midjourney: Create Images
- How to Use Midjourney: Download Images
- How to Write a Prompt on Midjourney
- Can Images Made by Midjourney be Used For Commercial Use?
- Kapwing's AI Generator Alternative
What is Midjourney?
Midjourney is an AI-powered generator that transforms text prompts into images. In beta since 2022, the platform continues to evolve with over 30 million monthly users. The latest available version in Midjourney v6.
Is Midjourney Free to Use?
No, Midjourney has discontinued its free trial in 2023. While there may occasionally be special trials for new model or feature releases, access is generally limited to paid subscriptions. Subscription plans start at $10 per month or $96 per year for the basic plan. All subscriptions provide access to the Midjourney member gallery and Discord community.
How to Use Midjourney: Sign up
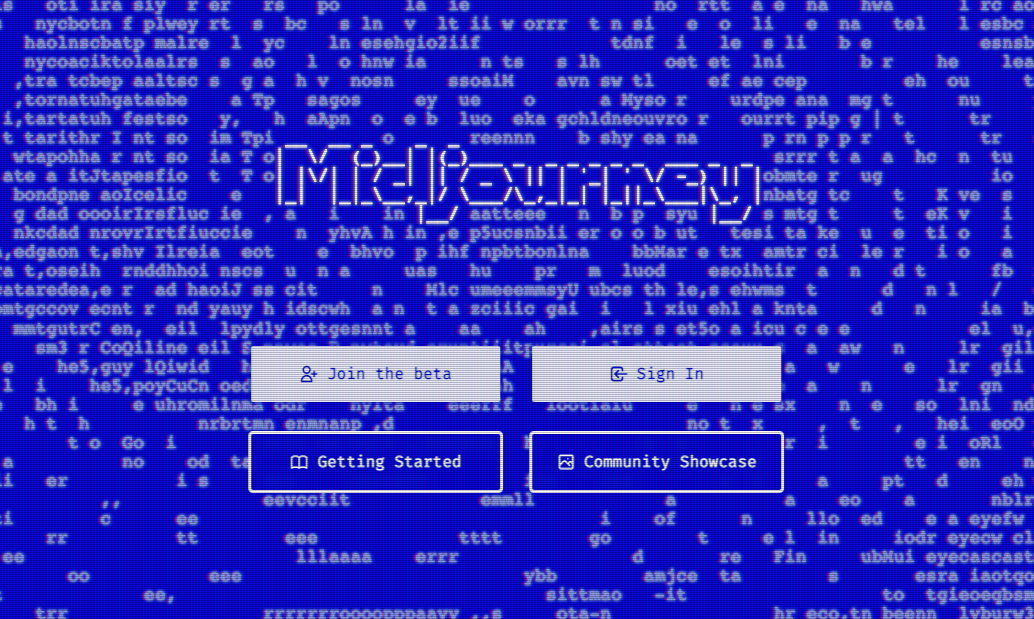
Step 1: Join Midjourney's Discord Server
Head to the Midjourney homepage and click "Join the beta" or "Sign in".
If you are new to Midjourney then you will be asked to sign-up to Discord, as that is where the Midjourney server is hosted.
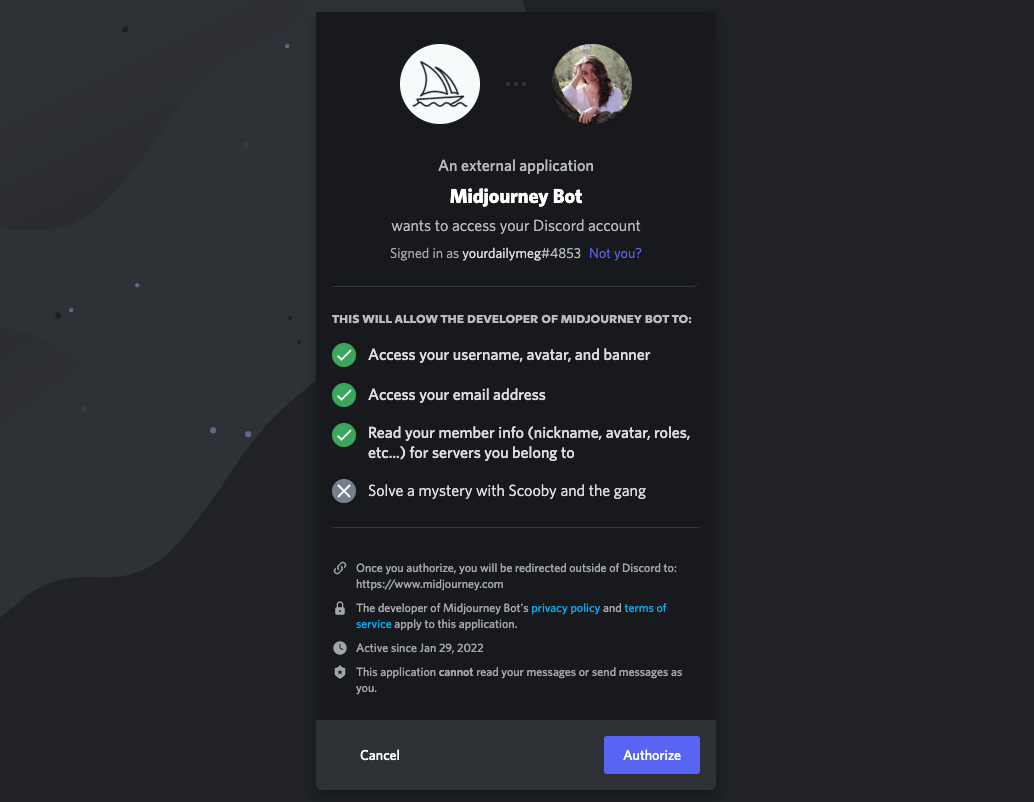
Step 2: Review and Accept the Terms of Service
Once you're in the server, head to either the 'Getting Started' channel or the 'Rules' channel for a rundown of the community guidelines and how the server works.
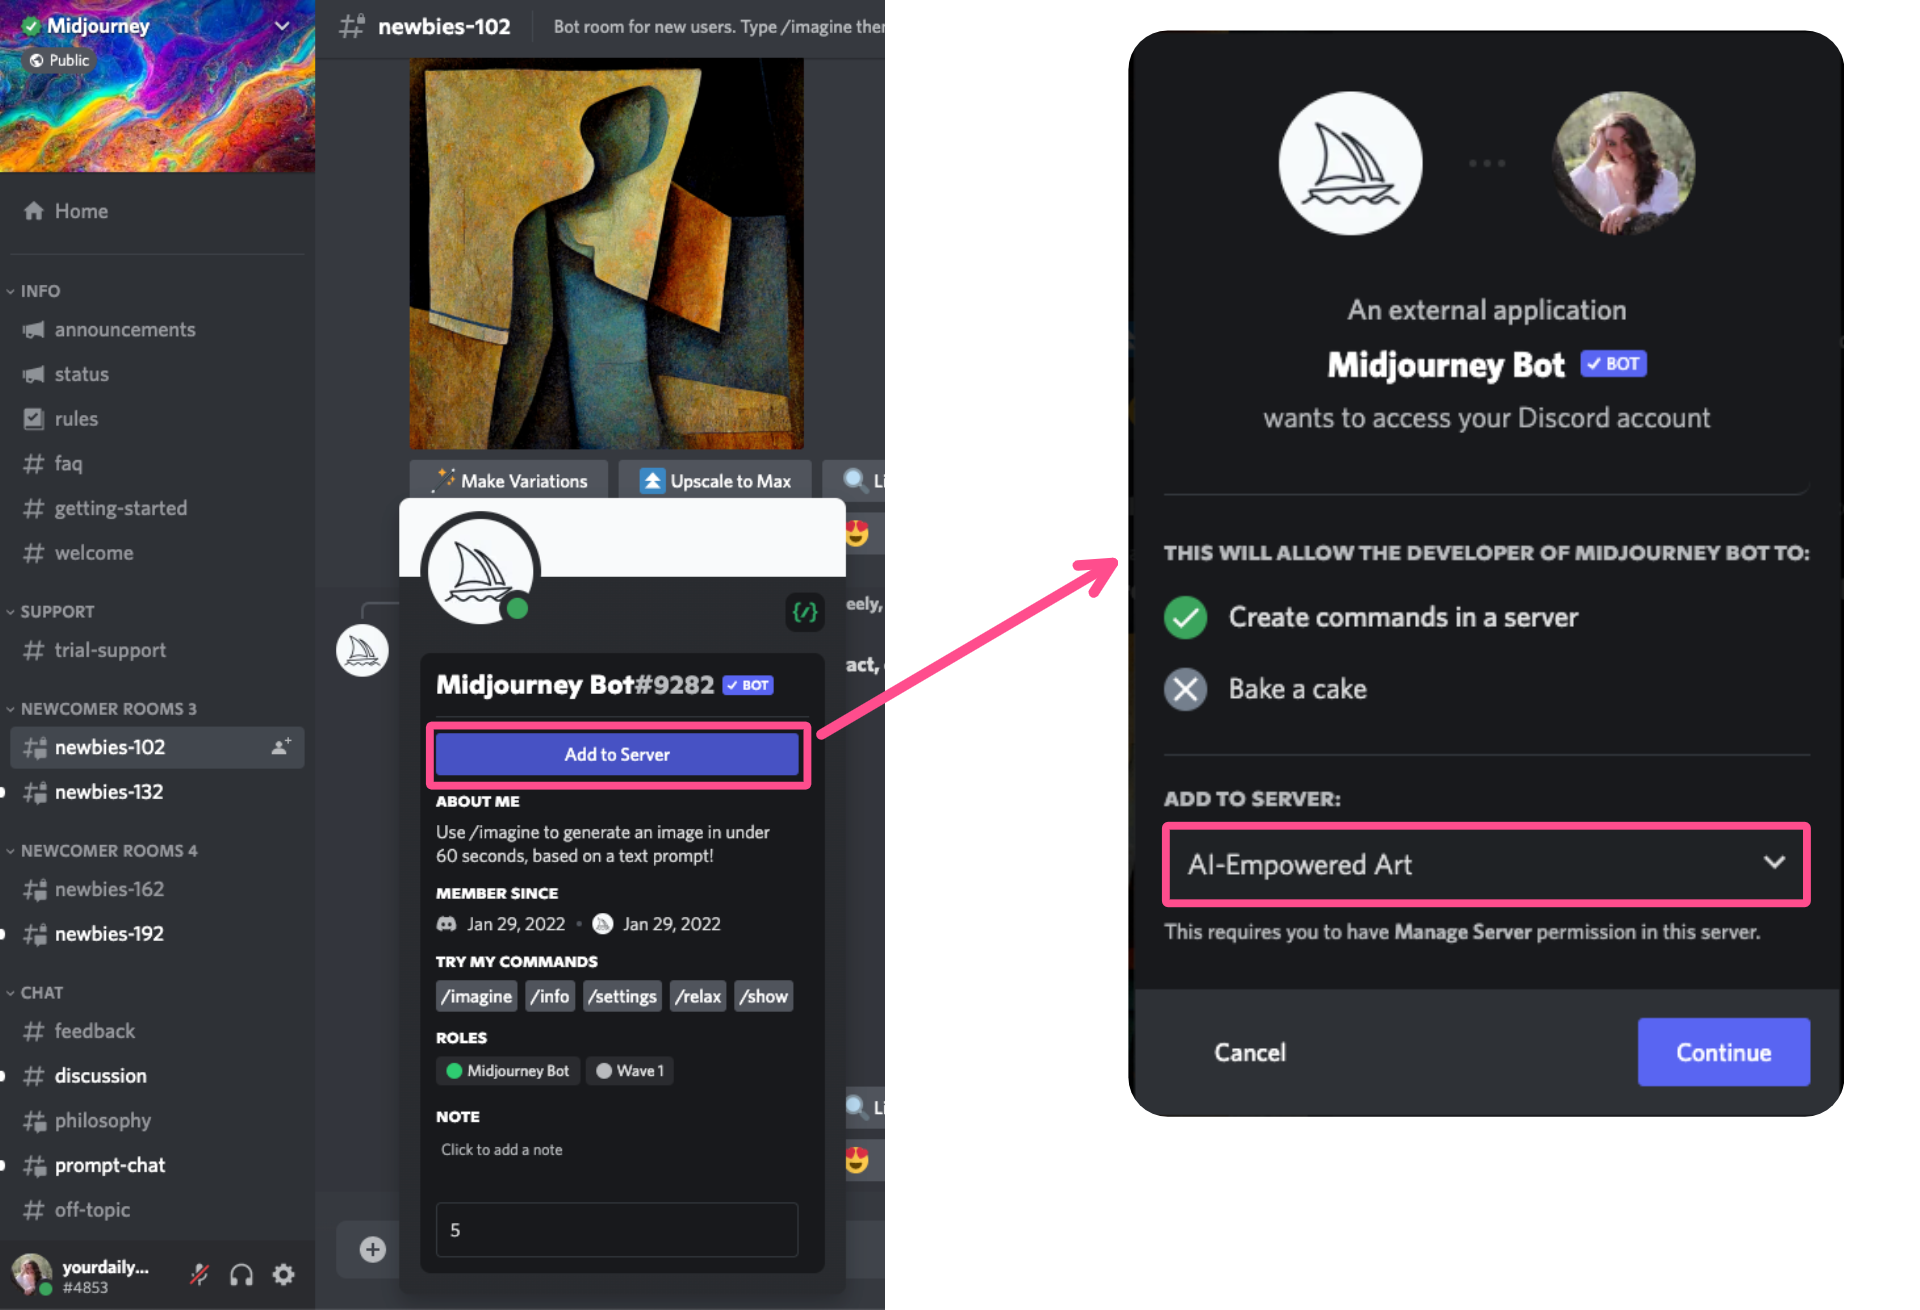
Step 3: Add the Midjourney Bot to Your Server (Optional)
If you’re working with a team or prefer a quieter, more organized space than the busy Midjourney server, you can add the Midjourney bot to your own Discord server.
To add the Midjourney bot, click on its profile picture in an active channel — for example, one of the Newbie channels. Following this, you’ll see a summary of the bot commands and a button labeled "Add to Server."
Click the button and allow the Midjourney Bot access to your server. Choose the server you want to add the bot to from the drop-down menu, then hit Continue.
How to Use Midjourney: Create Images
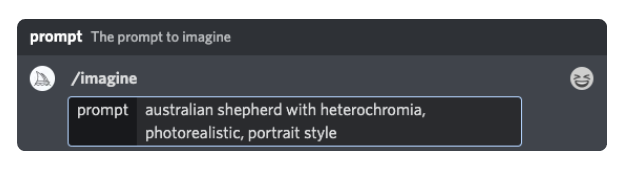
Step 4: Write Your Descriptive Prompt
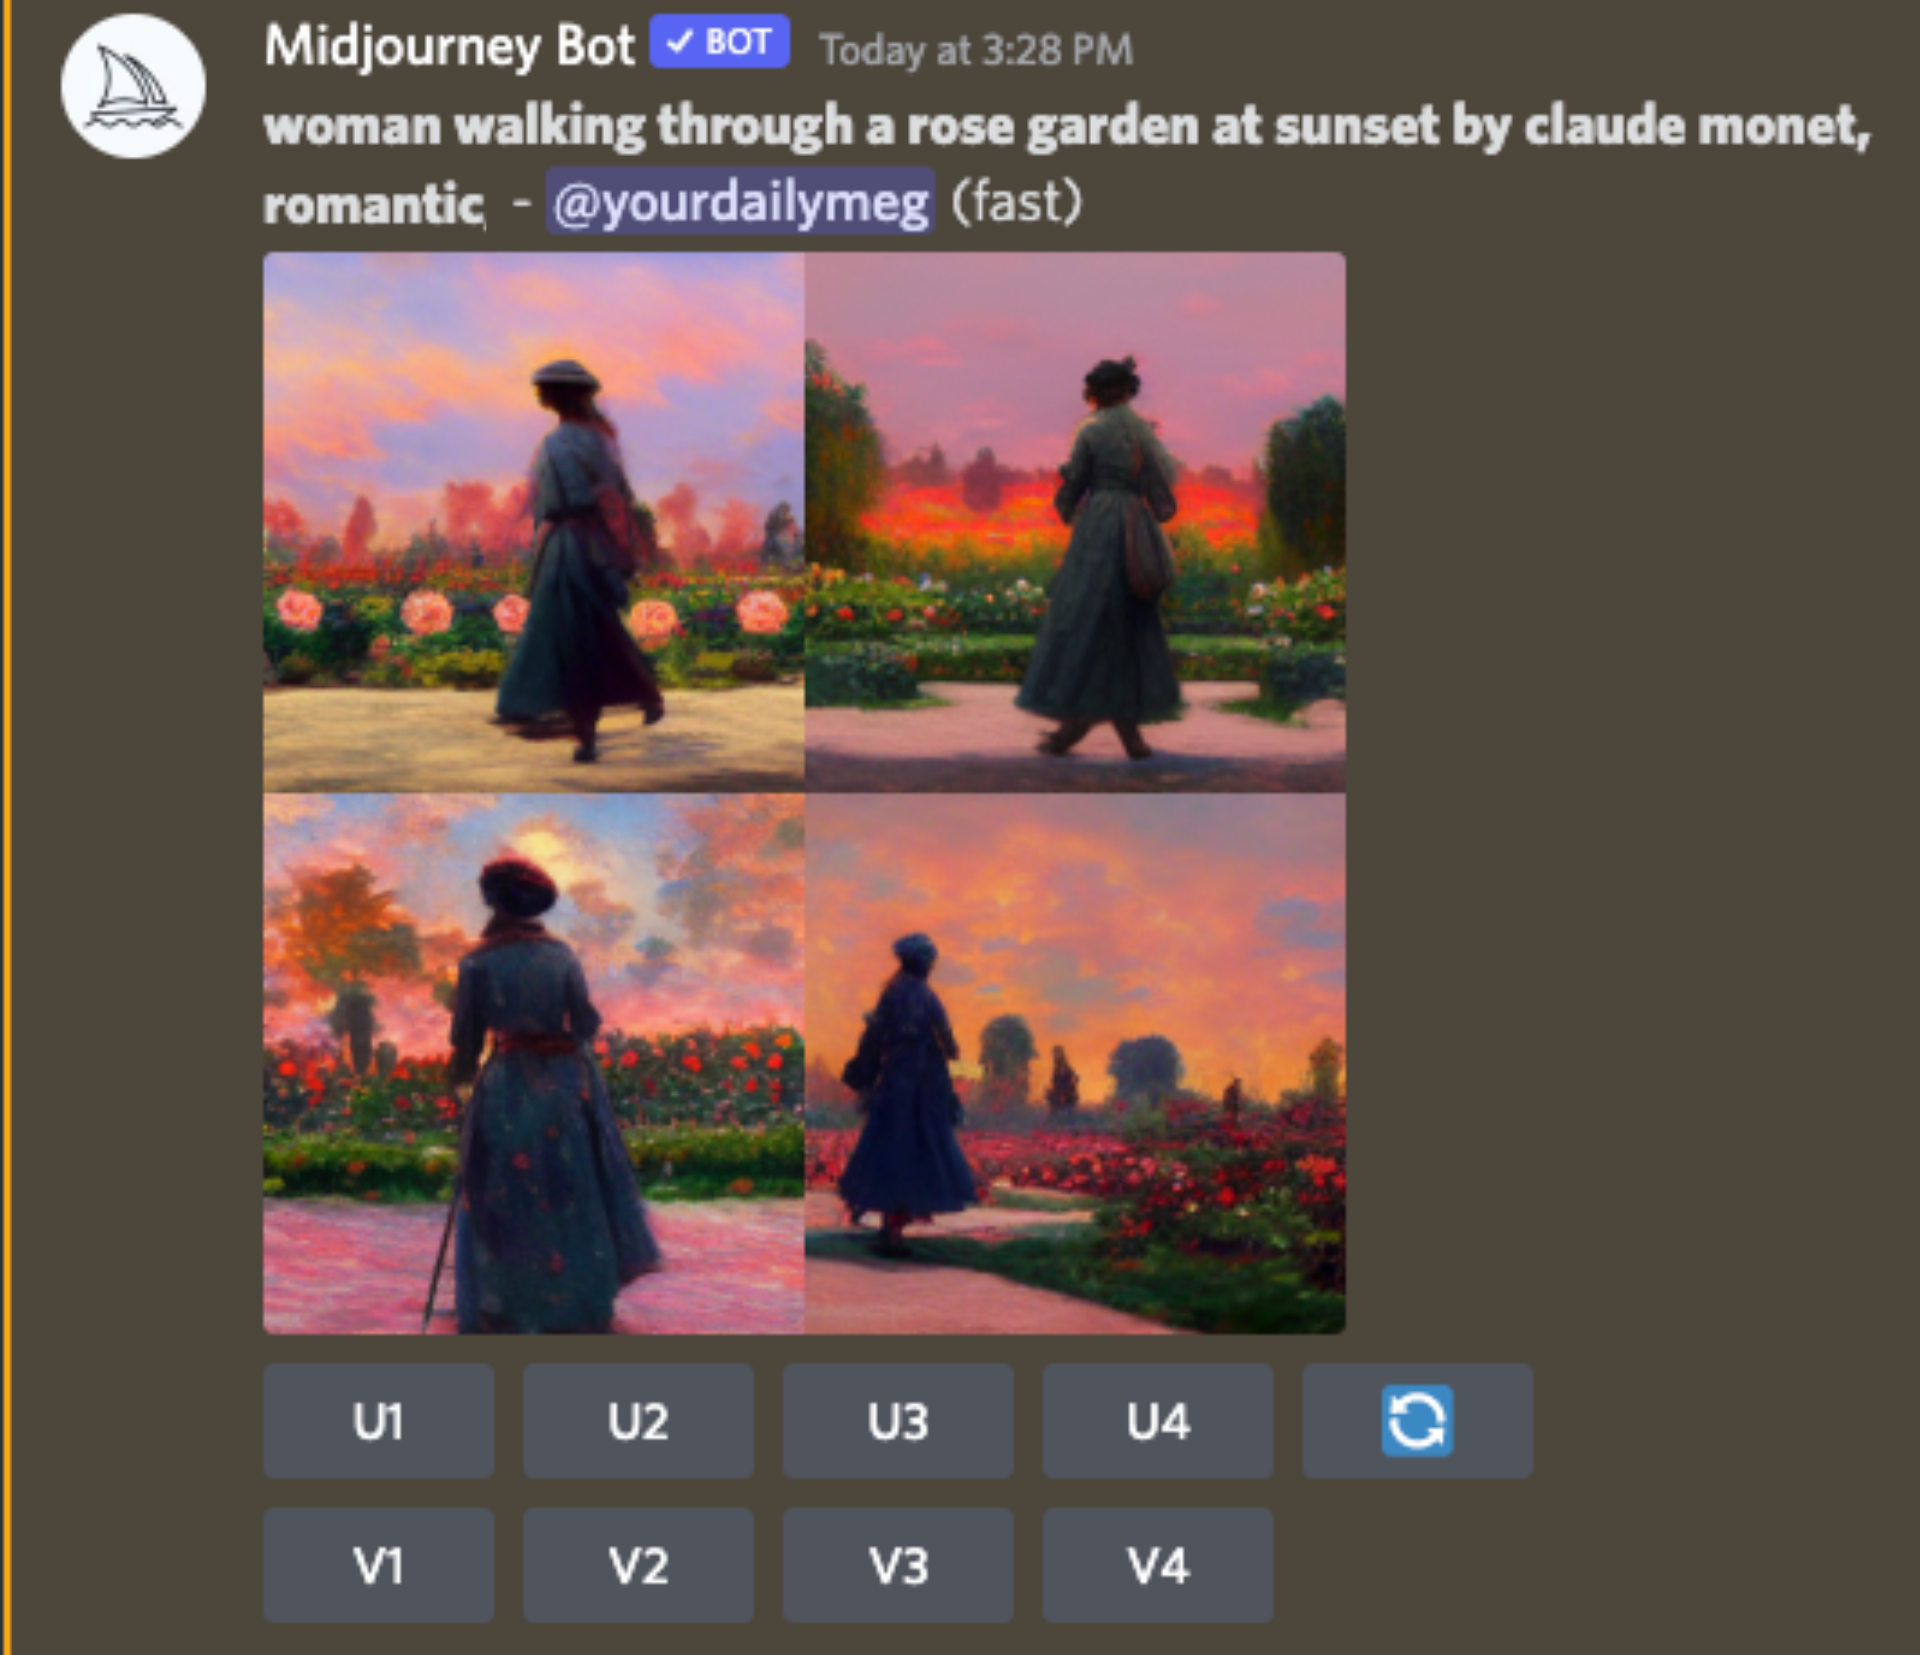
To create an image, you'll need to use the command /imagine.
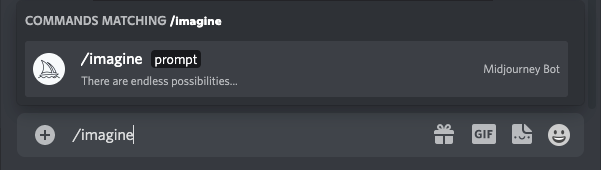
In the editable text box to the right of the word "prompt," you can enter your query for the bot. If you've properly initiated the command, it will look like this:
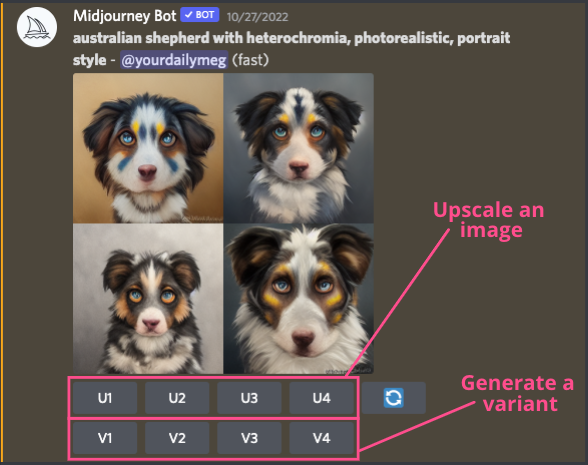
The more detail you give the bot, the closer the results should be to what you're looking for. Midjourney will then generate four results based on your prompt.
Step 5: Choose to Upscale or Add Variants (Optional)
Underneath the results, you have the option to request an upscale or variant.
Upscaling will give you a higher-resolution version of the same image. The variant button will give you four variations of the same image.
How to Use Midjourney: Download Images
Step 5: Download Your Image
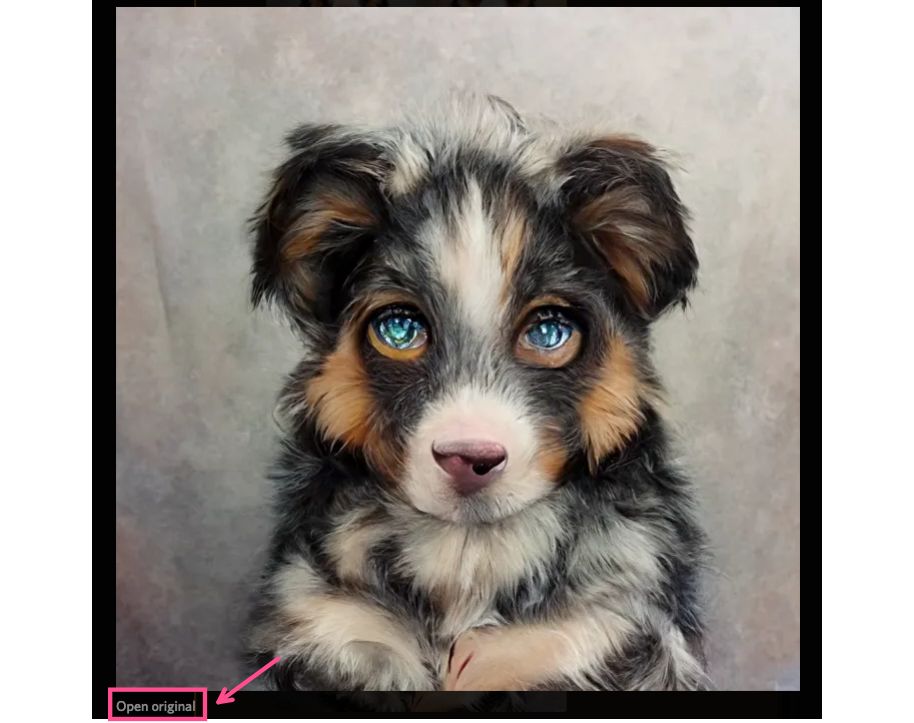
When you're happy with the resolution and variation you can download your image.
To download the image straight from your Discord feed, click on the variant you want to download and then click on the "Open original" text in the bottom left corner.
This will open the image in a tab on your web browser where you'll have the option to save it as a high-resolution, lossless .webp file. If you want to download the image as a PNG instead, there's an option for that, too.
Alternatively, download the image from your Midjourney profile by navigating to your homepage.
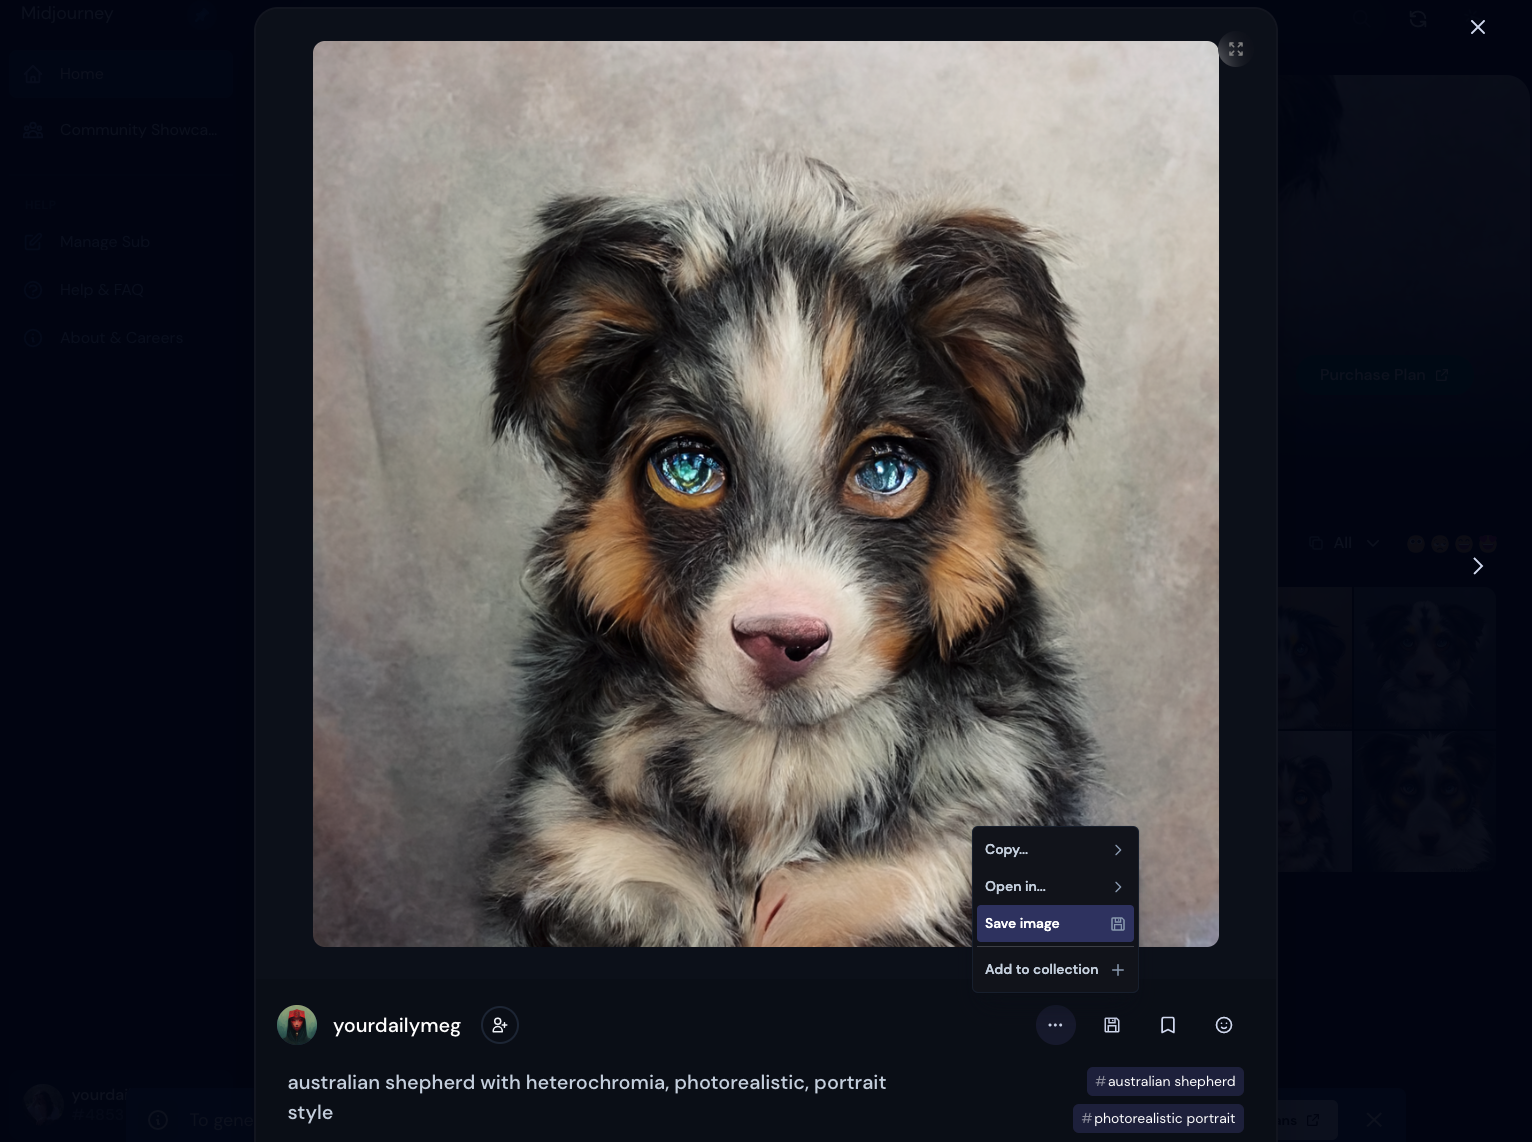
Here, you'll view every image you've generated. When you click on an image, you can see the query, associated tags, resolution details, parent image, and options for sharing and downloading.
Click on the three-dot menu underneath the image to access the "Save image" option.

How to Write a Prompt on Midjourney
AI-generated art is a collaboration between artificial intelligence and the querier.
Midjourney has a helpful Tips for Text Prompts article that we recommend reviewing as a first place to start. However, here is some best practice advice from our own experience using Midjourney.
Define size parameters
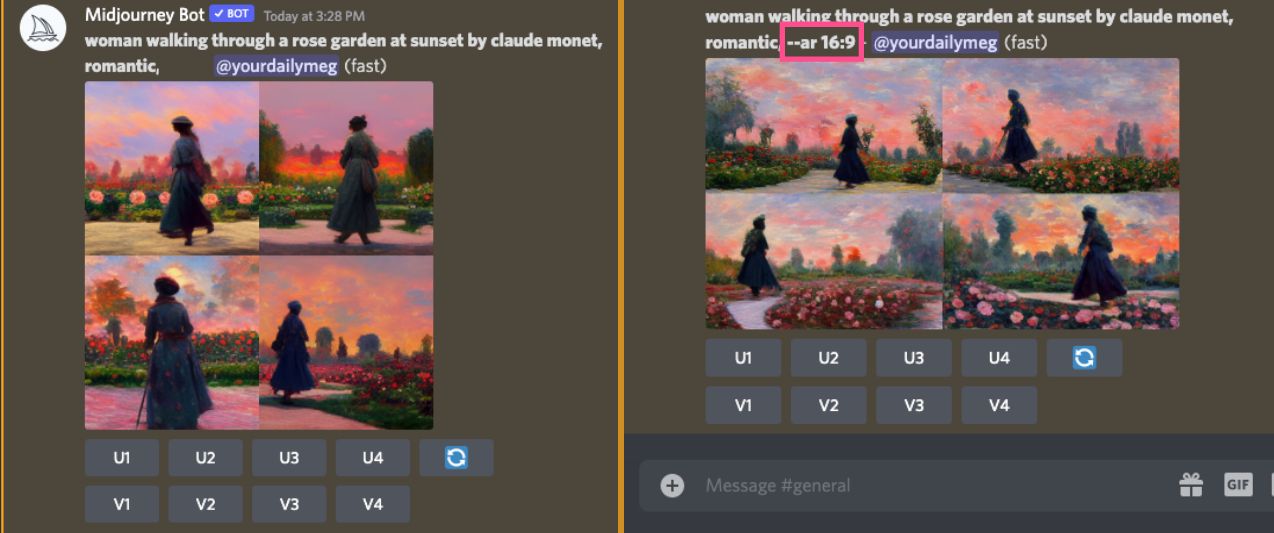
Midjourney defaults all images to a 1:1 aspect ratio (aka, a square). If you need a different size and don't want to crop or resize your image, you'll need to specify that to the bot in a language the bot understands.
To create different image sizes in Midjourney, use the --ar tag followed by the aspect ratio you want. For example, --ar 16:9 creates a wide image, while --ar 1:1 creates a square.
You can also specify specific pixel widths and heights using the --w and --h tags.
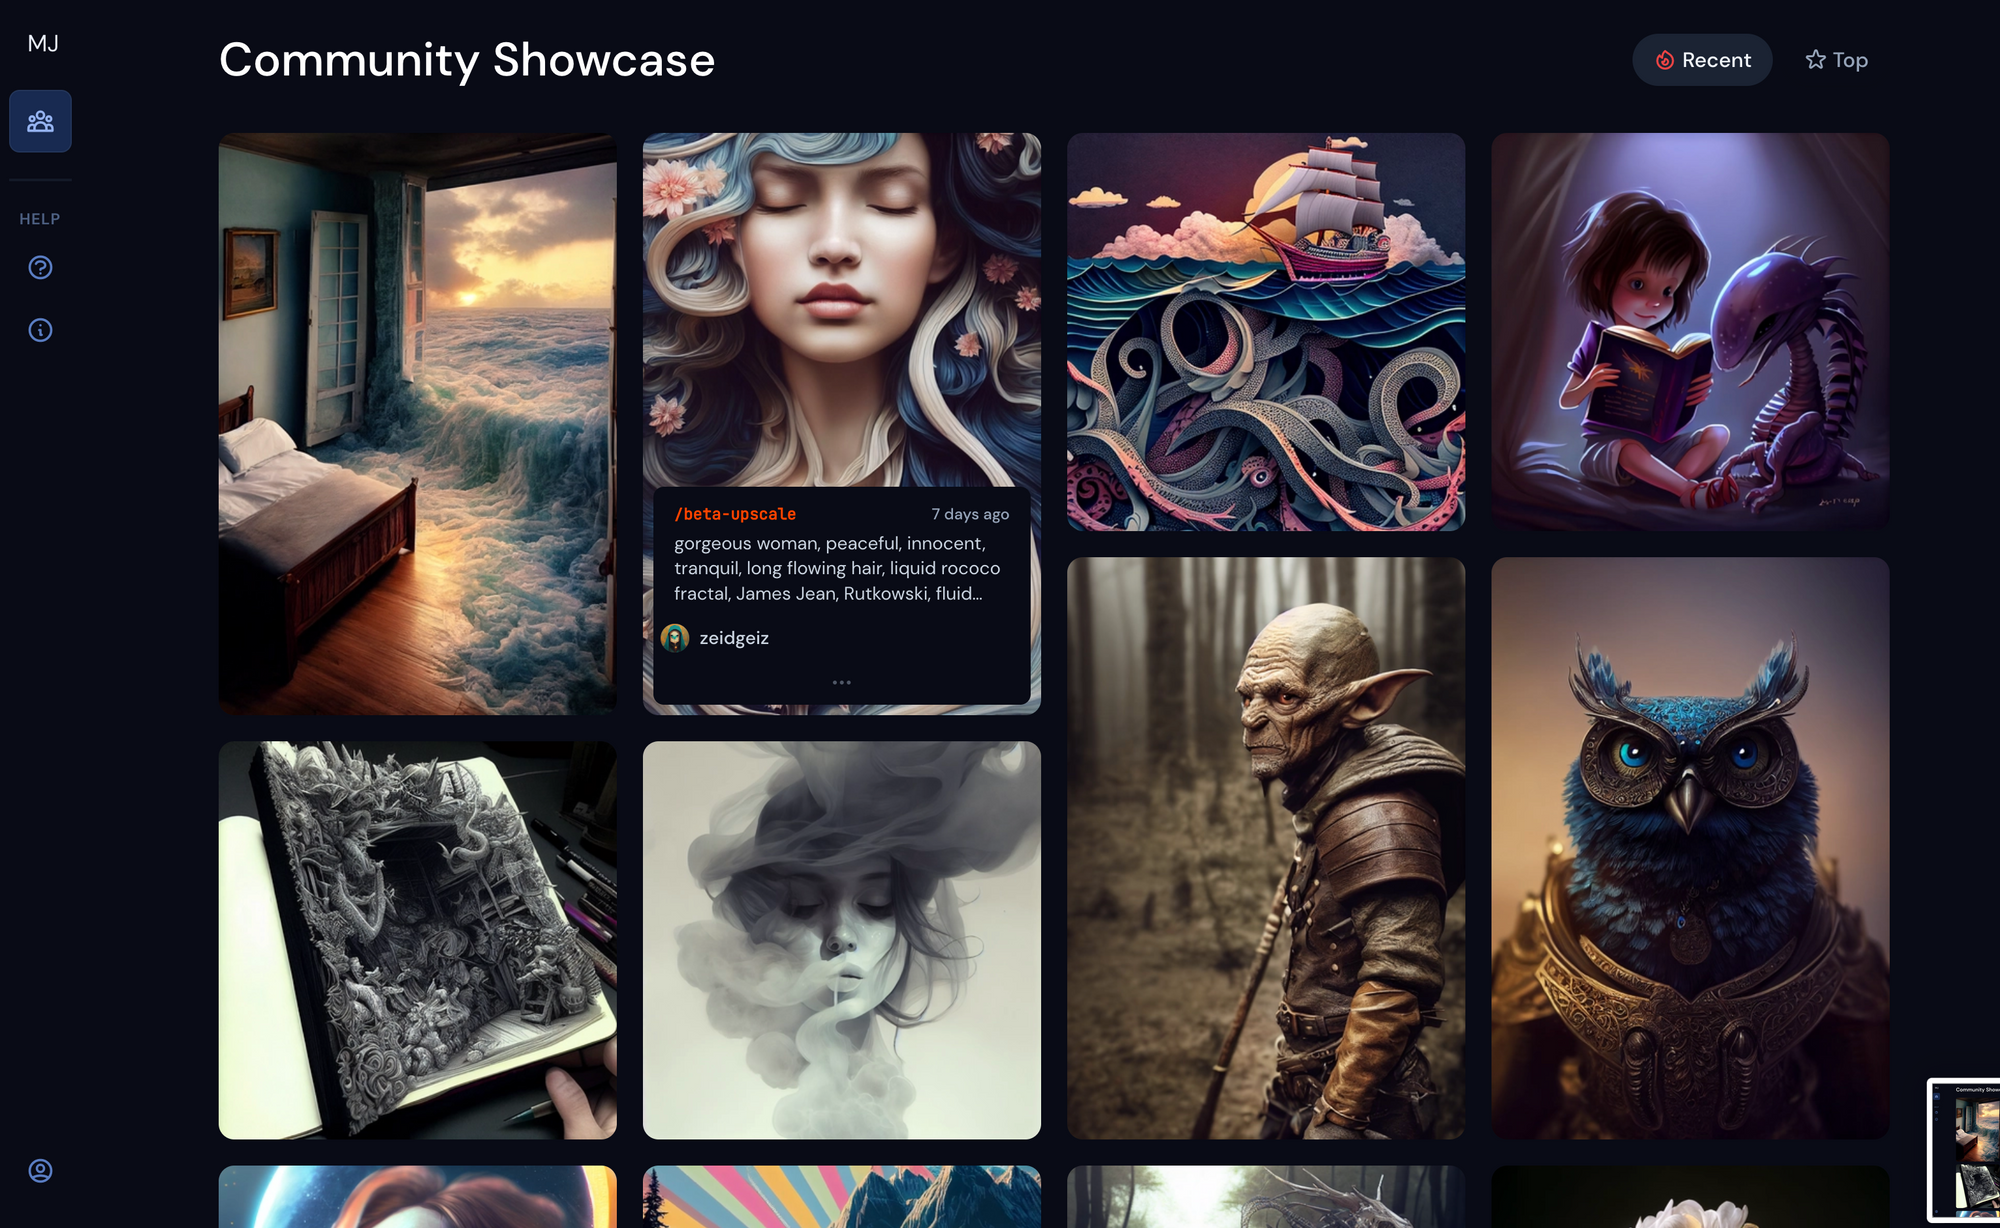
Study the Community Showcase
The Community Showcase on Midjourney is a great place to go for inspiration. Hover over any of the images in the showcase to see what the user wrote for their prompt.
We recommend finding images you like with elements you want to replicate in your results and then reading through the queries and taking notes on how different users arrived at those results.
Name specific artists and/or art styles
If you have a specific style in mind, think about which words are used to describe that art style, such as modern, detailed, surreal, photorealistic, etc.
If you want the art to emulate a certain artist, add "by Artist Name" to your query.
Use common words and phrases
Midjourney's bot learns by associating specific words and phrases with images it was exposed to during training. To get better results, it's important to use terms in your prompts that are visually clear and well-represented online. In general, the more often an image appears in a Google search, the better Midjourney will understand your request.
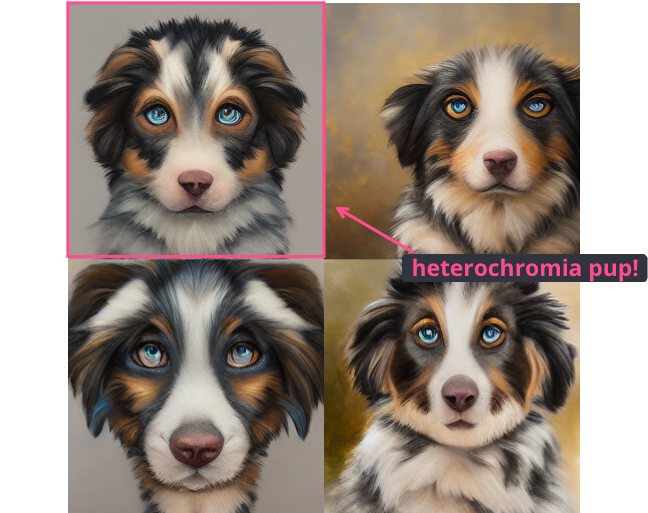
For example, I used the prompt: "Australian shepherd with heterochromia, photorealistic, portrait style." However, none of the generated images showed a dog with heterochromia, a condition where an animal or person has two different-colored eyes. This could be because the term "heterochromia" isn't visually distinct enough, or there aren't enough clear images online for Midjourney to draw from.
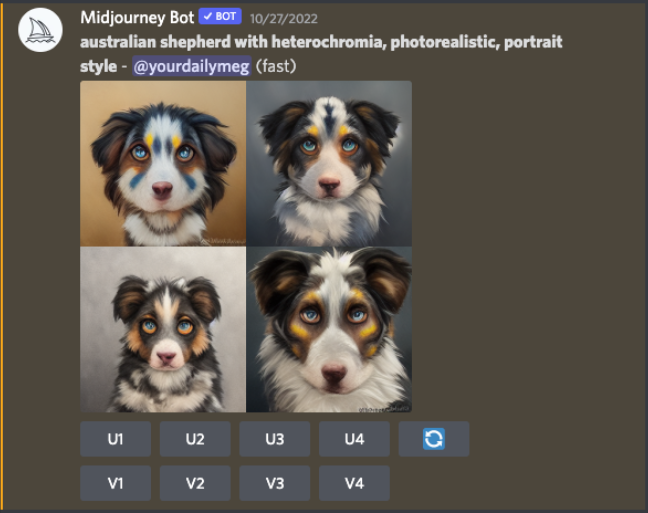
To work around this, I revised my prompt to: "Australian shepherd with different colored eyes, photorealistic, portrait style."
Describing the concept instead of using a less common or visually ambiguous term can help improve results.
Can Images Made by Midjourney be Used For Commercial Use?
Midjourney offers three tiers of licensing available for assets created with their bot.
1) Licensing available to free users
For non-paid members (trial users fall under this category), Midjourney grants the user rights under the Creative Commons Noncommercial 4.0 Attribution International License.
This license only covers noncommercial reproduction, sharing, and adaptation of the assets created with Midjourney. According to the Creative Commons, "noncommercial" is defined as "not primarily intended for or directed towards commercial advantage or monetary compensation."
That means that if you intend to use Midjourney to create images for your website or an ad campaign, you cannot use any images you created during your free trial until and unless you pay for a membership.
2) Licensing available to paid members
There are three paid Midjourney plans that you can subscribe to: Basic, Standard, and Corporate.
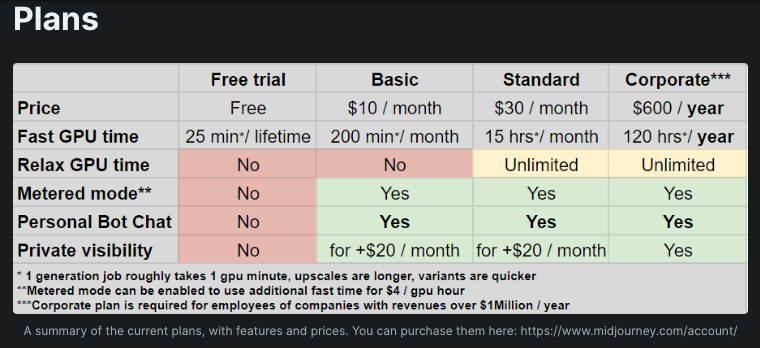
Both the Basic and the Standard plans include restricted commercial use rights for assets created in Midjourney. These are good options if you plan to use your AI artwork for your business or personal brand.
3) Licensing available to corporate users
The final licensing option Midjourney offers is a commercial use license for their Corporate subscription holders. If a user is the owner or employee of a company that grosses over $1MM a year (and they intend to use their Midjourney plan to make commercial assets for said company), they must purchase a Corporate plan.
Most individuals and many brands will be covered with commercial licensing under either the Basic or Standard plans.
Kapwing's AI Generator Alternative
Similar to Midjourney, Kapwing officially entered the AI space with its very own AI Image Generator.
The generator lets you create unique images with a single click and helps content creators skip past expensive graphic designers and animators. Cinematic action shots, hyper-realistic human avatars, and vibrant cartoons are waiting at the push of one button. Each prompt generates four image options, and you can adjust the text to regenerate them at any time.
Alternatively, designed for both image and video-based projects is our 'Imaginary Scene' feature. Powered by the AI video model Pika, 'Imaginary Scene' lets you generate stunning 3-second visuals simply by entering descriptive prompts. These creations can be exported as video clips, GIFs, or even JPEG images.
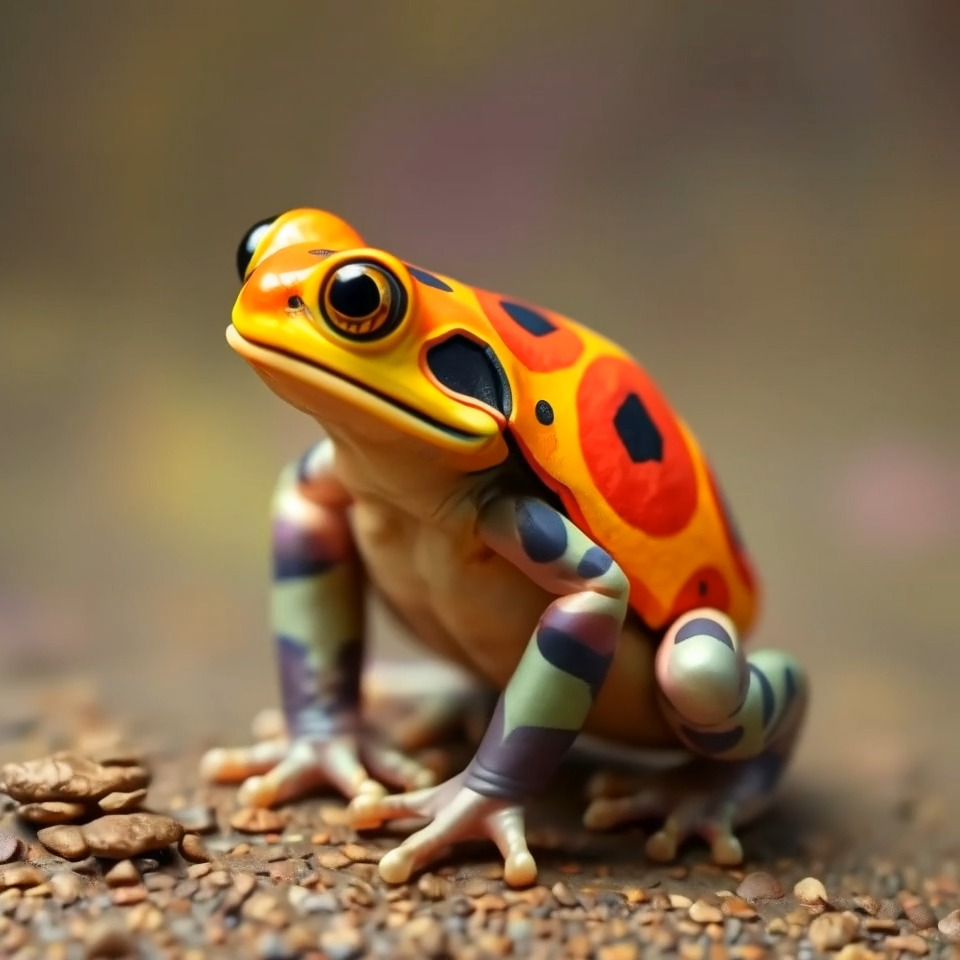
Check out this HD frog, created by Kapwing's AI Generator using the prompt 'psychedelic style, dolly in shot of a toad' under the 'Imaginary scene' tab. The 3-second scene was then converted into an easily shareable JPEG.
Best of all, you own full commercial rights to every image you create using Kapwing's AI tools.
For more resources made by creators for creators, visit our Resources Library for more articles like this one, or check out our YouTube channel.
Related Articles:


