How to Compress a Video and Reduce File Size (Without Sacrificing Quality)
Need to make your videos smaller? Here are the easiest, fastest ways to compress videos without reducing their quality.

Do you need to compress a video, but don't want the footage looking like it was recorded on an old flip phone? You're in the right place.
In this guide, I'll share step-by-step tutorials on how to compress a video online, or on your device, and share how you can reduce the file size without sacrificing the quality of the video. Whether you want to publish the final video, share it over email, or send the file on Discord, we've got you covered.
Watch the video tutorial below or keep scrolling to find instructions and screenshots that walk you through all the best ways to compress a video file.
✂️ Shortcuts: How do I reduce the file size of a video?
- Compress videos with a free online tool
- Compress videos with desktop software
- Compress video files into a .zip
- Reduce video sizes by trimming footage
How to compress a video online (without losing quality)
Let's start with the fastest and easiest approach: compressing a video automatically with a free online tool. We won't need to download any software and we'll be done in a few clicks.
Step 1: Upload your video file
Head over to our Video Compressor tool or jump into the Kapwing editor directly to get started. Then, select the "Click to upload" button to upload a file from your device, or paste in a live video URL to import that video into the Kapwing editor. Easy, right?

Step 2: Compress your video file
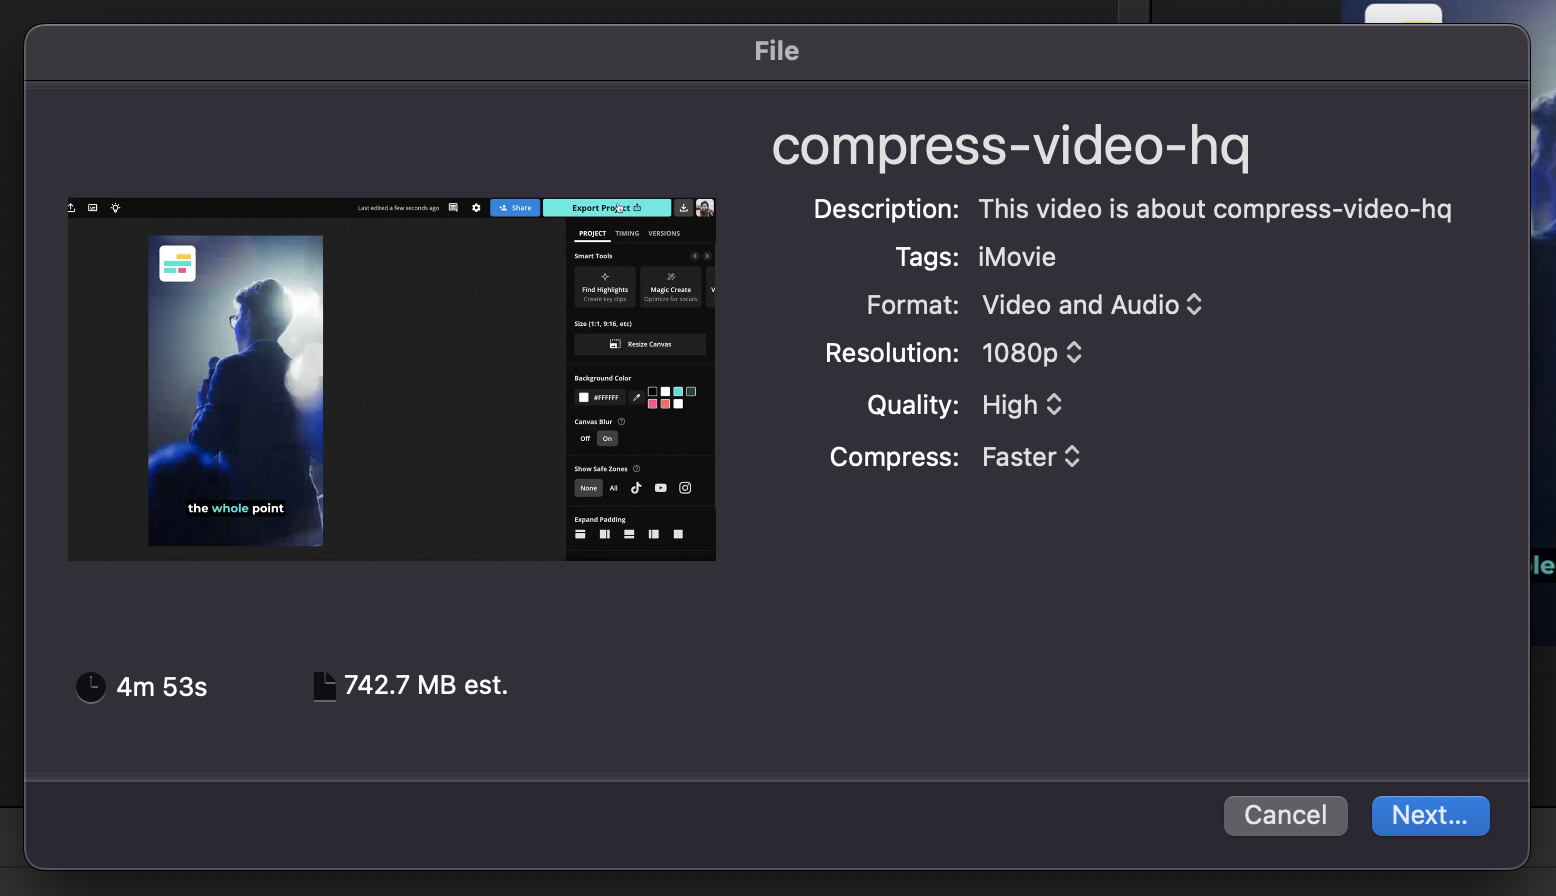
If you don't want to make any changes to your video's duration or aspect ratio, you can compress the video in this step—we'll cover the other options in just a second. To compress your video, click on "Export project" and then adjust the compression level by using the slider in the right sidebar.
Your video will be automatically compressed without losing quality or changing its resolution. Kapwing exports all video files as an MP4 as a default since this is the file type with the best tradeoff between quality and size.

Step 3: Edit your video file
This step is optional. There's more you can do to reduce the file size of your video beyond just compressing the file, though it may require you to edit aspects of the video like its length, dimensions, or the file type of the video. If you're OK with those changes, consider these options below:
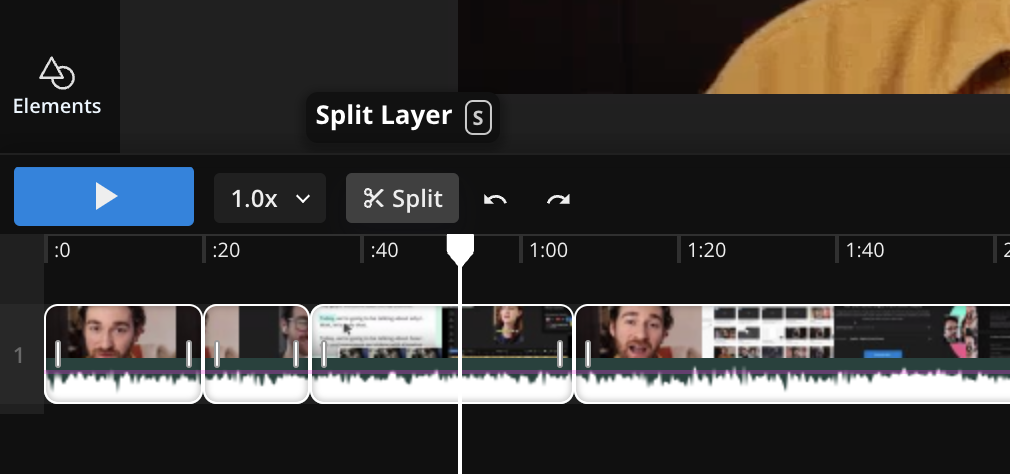
Trim the video footage: As you'd expect, 30 minutes of video footage will result in a much larger video file than 10 minutes of footage. So one of the other ways you can "compress" or reduce the size of a video file is to shorten the amount of footage. Using Kapwing's Video Trimmer, you can drag the [name] to remove portions of your video, or split the video into sections and then trim down those segments.
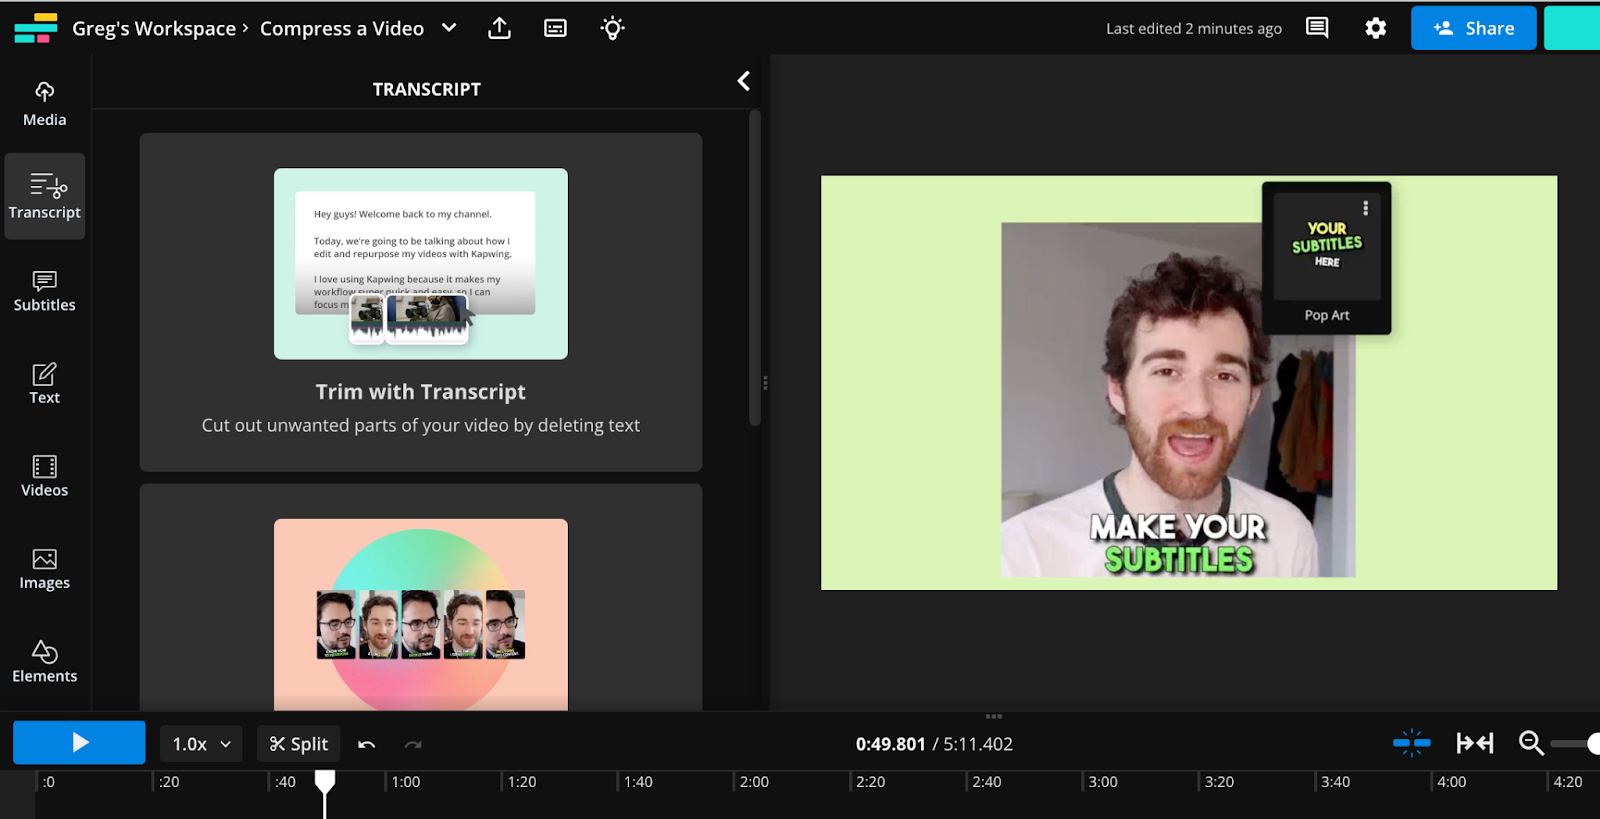
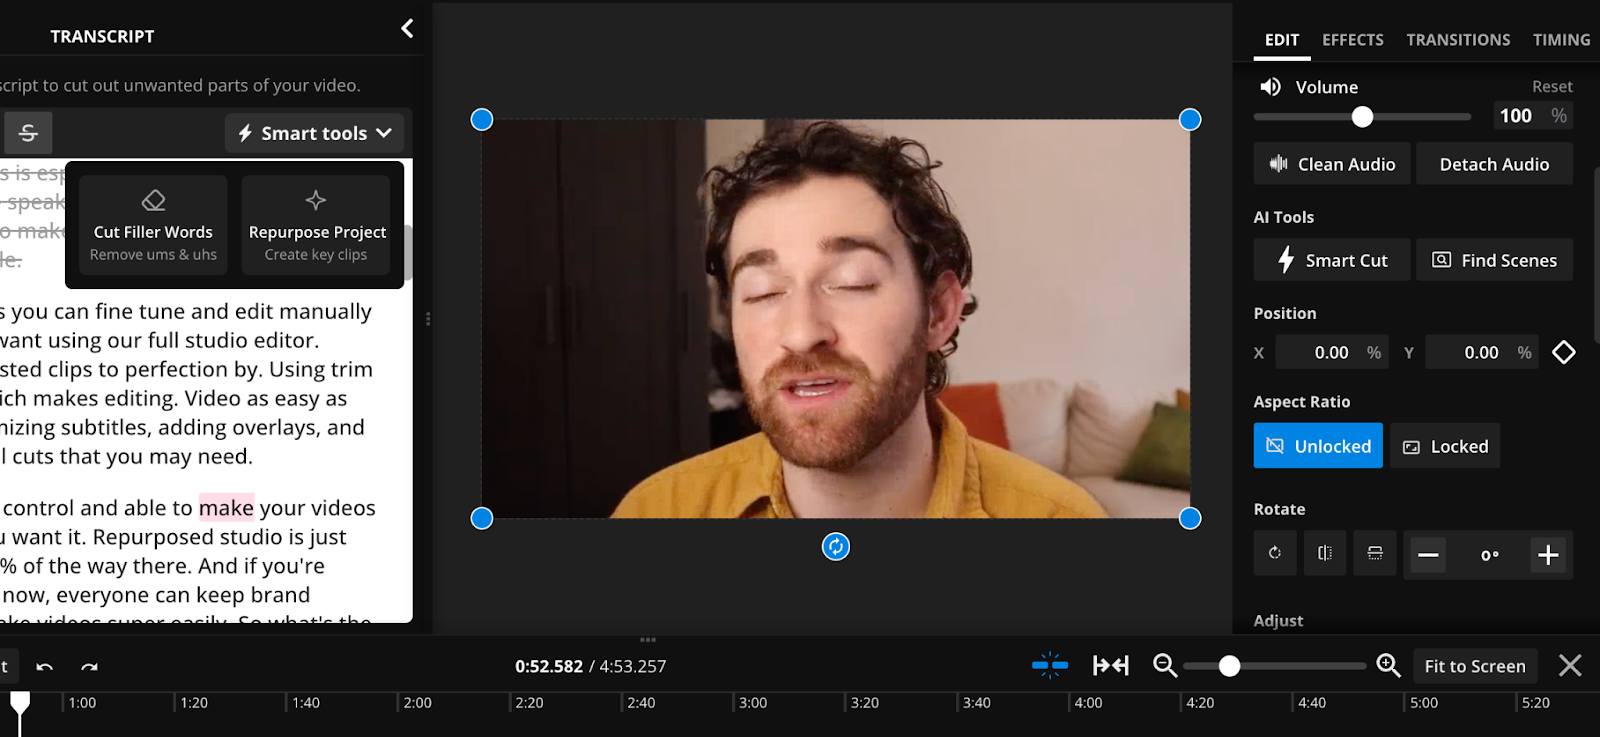
Kapwing also features Trim with Transcript, which lets you edit a video just like a text doc. This text-based style of editing is usually much faster for trimming video and making quick rough cuts. To try Trim with Transcript, select the "Transcript" option from the left sidebar in the Kapwing editor, then click on "Trim with Transcript". This will automatically generate an editable transcript for your video in your chosen language.
From here, you can find sections in your transcript that you'd like to shorten or remove entirely. You can also speed up this step with Remove Filler Words, a feature within Trim with Transcript that automatically removes "ums, uhs" and other filler words. Just click on Smart tools → Cut filler words to get started.
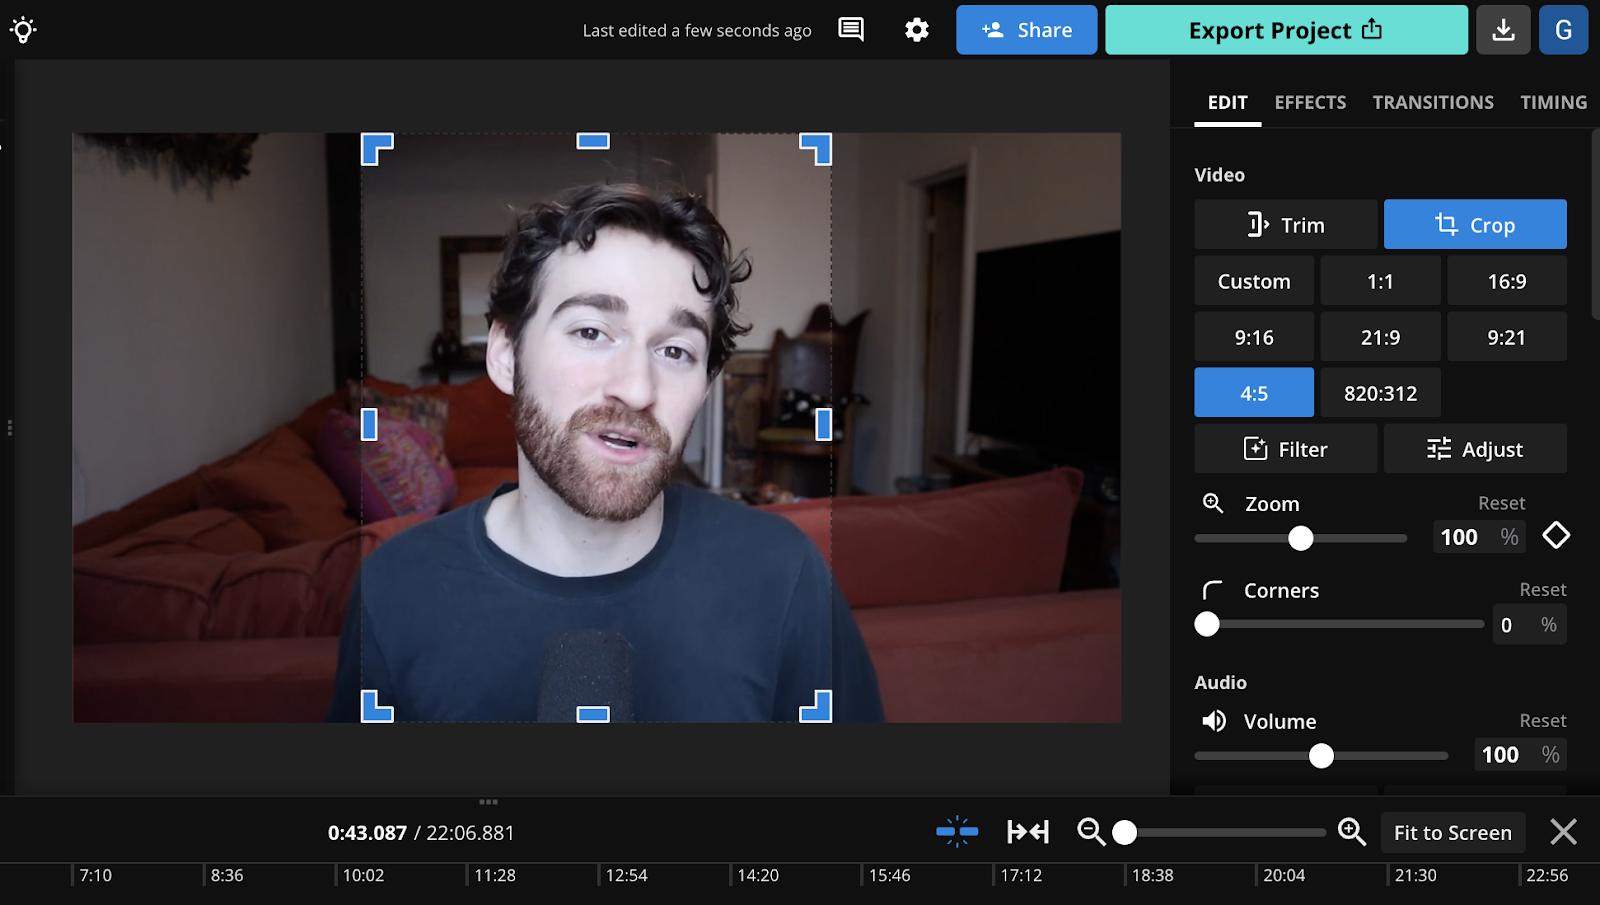
Resize the video: If you're flexible on the aspect ratio of your final video, another option available is to use a Video Resizer to adjust the dimensions of the video; smaller dimensions will result in a smaller overall video file.
To edit your video this way, head over to the Kapwing editor and select the "Crop" tool. You'll be able to choose from common aspect ratios on social media or drag and drop to find the perfect size for your video. Try to keep all of your footage in frame while removing any padding on the top and sides; this is an especially useful approach if you're sending a video internally or to someone you know.
Change the file type or resolution: Two final ways to reduce the size of a video without changing its contents are to convert the file type or change the resolution. As we shared above, you can use Kapwing's built-in Video Converter when you're exporting a project to change it into an MP4, which strikes a good balance between quality and compression levels.
You can also change the resolution, which is just as easy to do but takes a little more thinking. The right way to decide which is the best resolution for your video depends on the following:
4. Export and share your video
Once you've finished making any necessary edits to your video, now you can click "Export Project" and select the compression level for your video, along with the video format and resolution.
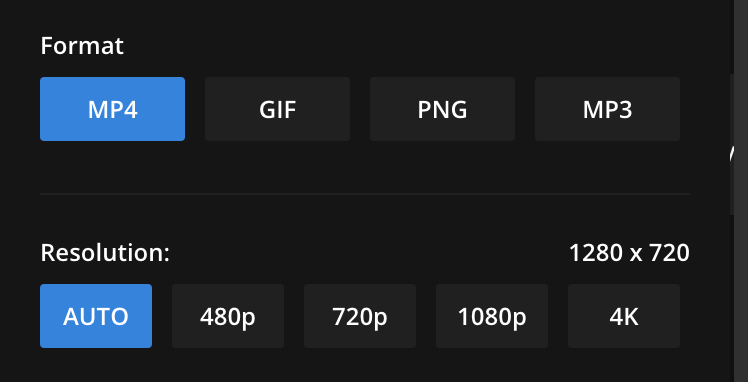
If you want lossless compression, simply adjust the compression level slider. If you're OK with a slight loss in quality in order to reduce the file size, then select a new resolution (i.e., one lower than your original footage) and you'll reduce the file size even further.
How to compress a video on desktop
Now, let's walk through the popular video compression options for Mac and PC, then we'll look at how you can use these tools to create a .zip file for your video if that's what you need.
How to compress a video on Mac
There are three quick options to compress a video on Mac: QuickTime, iMovie, and Mac's built-in compression tool which turns files into a .zip. We'll cover the first two now and the .zip option in the next section.
How to compress a video with QuickTime
The simplest way to compress video footage on a Mac is to use QuickTime, which comes installed with every Mac device. Here's how to compress videos with QuickTime:
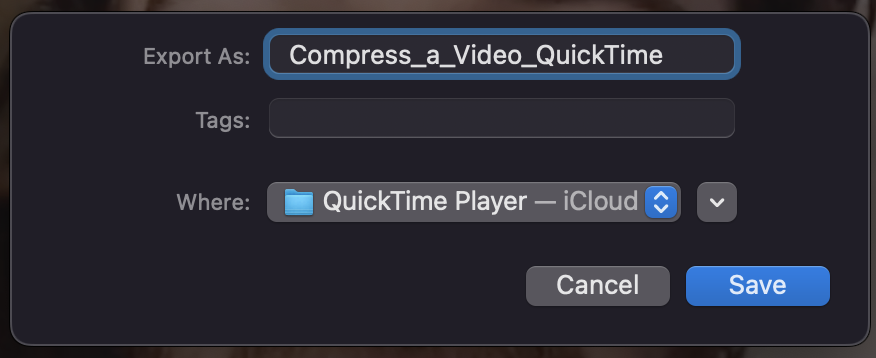
- Step 1: Open up the video file in QuickTime.
- Step 2: Click on File → Export As in the Mac menu at the top left of the screen
- Step 3: Select the resolution/video quality you need. (When compressing videos to 1080p quality and higher, make sure to select "Smaller File Size" before you save.)
- Step 4: Hit save to export your video in the new resolution.
QuickTime is fast and simple but it doesn't let you select many options outside of the resolution. If you need to tweak additional settings, iMovie may be a better option.
How to compress a video with iMovie
Try these steps to compress video files on Mac with iMovie:
- Step 1: Open your video file in iMovie and add it to the timeline.
- Step 2: Select File → Share → File from the Mac menu in the top left.
- Step 3: Choose your video compression settings and then export and save your video file.
How to compress a video on Windows 10 for PC
There are a number of software options to compress video files on Windows 10. The fastest way is to use the built-in Photos app. Here's how to compress video files on Windows with the Photos app.
How to compress a video with Photos for Windows
Using the Photos app is quick and painless. Here's how to compress video files on Windows with the Photos app:
- Step 1: Open the Photos app by searching for it in the start menu.
- Step 2: Start a new project by clicking Video Projects → New Video Project.
- Step 3: Add Your Video: Drag and drop the video into the project.
- Step 4: Make any edits you need to the video—or skip this step.
- Step 5: Click on Finish Video and then choose a lower video quality to compress.
How to compress a video with VLC for Windows
Need more options? VLC is a free and open-source media player that includes a few built-in options to compress video files. To compress a video file using VLC Media Player on Windows:
- Step 1: Download the VLC media player if you haven't already; the link is here.
- Step 2: Open VLC and click on Media in the top menu, then select Convert / Save.
- Step 3: Select Add and then browse your desktop and locate your video.
- Step 4: After adding your video to the player, click Convert / Save once more.
- Step 5: Select the Profile dropdown and then choose a format. To adjust the compression settings, click on the wrench icon (🔧) to adjust the bitrate, codec, frame rate, etc.
- Step 6: Click Browse to choose where to save the file. the compressed file and name it.
- Step 7: Finally, select Start to begin the compression process. The video file will be compressed based on the settings you previously chose.
How to compress a video into a .zip file
If you need to send a video file but don't need to publish it, then editing the footage or other high-effort tasks won't be worth the time. The best approach for you is likely to turn the file into a compressed .zip that can more easily be sent over email or messaging platforms like Slack and Discord. Here's how to do exactly that.
Compress videos into a .zip on Mac
It's simple to compress a video on Mac: just right-click on the video and select "Compress [file name]."
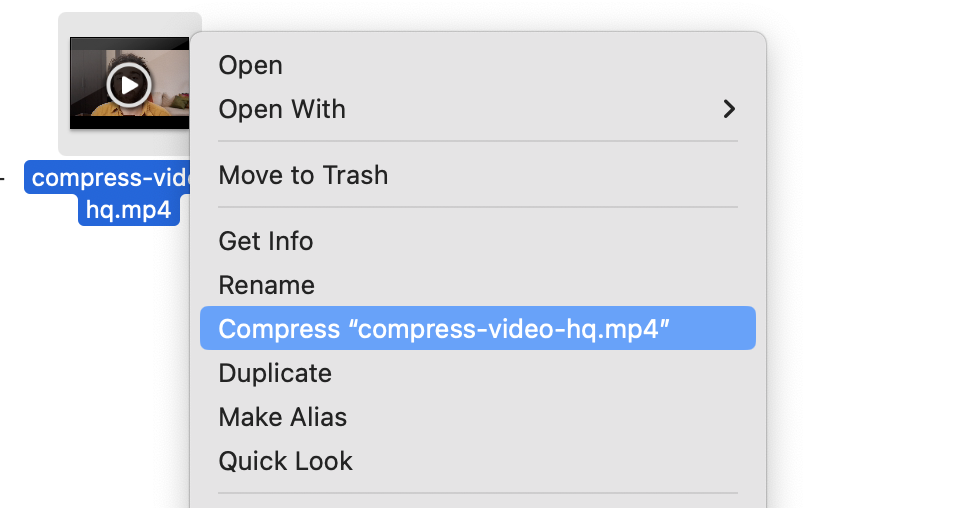
That's it! Note that this simply turns the video into a compressed .zip file which can be sent over email or other online services—it won't compress the footage itself. For that, look at the sections above.
Compress videos into a .zip on Windows
All you have to do to convert videos into a .zip on Windows is select the video file, right-click, then select Send to → Compressed (zipped) folder from the menu that appears.
You'll need to name the file during this process so choose a name that best represents the file or clearly captures what footage you're sending to someone.
How to compress a video by trimming the footage
Compressing your video and converting it to an efficient file type and codec are the first steps to try when reducing a video's file size. But if those options aren't enough, the next best thing to do is trim footage from your video to shorten its overall length. Here's how to do that:
Step 1: Open up the Kapwing editor and upload your video. Your footage will load into Kapwing's editing studio.
Step 2: You have two options to trim your video: (1) Edit the video with Kapwing's traditional timeline video editor by using the Split Video feature and the drag-and-drop timeline markers, or (2) Create a transcript automatically and use Trim with Transcript to edit the video like a text document.
Of course, you can also use both options! Trim with Transcript is useful for making a quick rough cut while the timeline editor is great for making more precise edits or clipping specific bits of audio.
You can also use our automatic video editing tools to remove awkward silences or filler words ("uh, um") to cut down on your video's file size in just a few clicks. When you have the video footage selected, just click on Smart Cut on the right-hand sidebar to delete silent portions of your video; or, open up the transcript and choose "Remove filler words" to eliminate filler words.
Step 3: Export and save your video once you're happy with the final edit. If you haven't yet compressed the video or converted it to MP4, you can check off those tasks at this step, too.
📚 Learn more: How to Trim or Clip a Video Quickly & Easily
Video Compression FAQ
How do I compress a video without losing quality?
Use a free video compressor like Kapwing to convert a video file to a compressed format like MP4, or compress the footage itself without sacrificing quality. Just upload a video to the Kapwing editor, then click "Export Project" and select the compression level for your video. Don't worry, the resolution and quality won't be changed.
What is video compression, exactly?
Compression is a video editing technique that reduces the size of a video file by optimizing the codecs and removing redundant data. There are two types of compression: lossless, which reduces size without quality loss, and lossy, which significantly reduces size but results in poorer video quality. The reason video creators compress video files is to make them easier to store, manage, stream, and share—with the main goal of compression being balancing file size with quality.
How can you reduce the size of a video file?
There are five reliable ways to reduce the size of a video file:
- Compress the video to lossy or lossless quality to reduce the bitrate.
- Convert the video file to a more compressed format like MP4.
- Trim the video to make it shorter in length.
- Resize the video to change its size/aspect ratio.
- Create a .zip of the video files to send to someone you know.
Compressing and converting the video file are your best choices if you don't want to edit or remove footage from the video. The other options are available for when you need to get the video file even smaller—and you try all of these options in the Kapwing editor.
How should I compress a video for email?
The simplest way to compress a video for email is to turn the video file into a compressed .zip file. You can turn a file into a .zip on Mac by right-clicking the file and selecting "Compress [file name]." You can turn a file into a .zip on Windows by right-clicking the file and then selecting Send to → Compressed (zipped) folder from the menu that pops up.
What's the best file type for video compression?
The overall best file type for video compression is MP4, which offers the best balance between quality, size, and compatibility. MP4 works well on the vast majority of devices and is great for streaming.
What increases the file size of a video?
The main things that increase the size of a video file are:
- Resolution: Higher resolutions (e.g., 4k) require more pixels which leads to larger files.
- Length: The longer the video footage, the bigger the file.
- Bitrate: Higher bitrate means more data is processed per second, increasing size.
- Frame rate: Footage with more frames per second results (e.g., 60fps) in larger video files.
- File type: Inefficient file types (or compression codecs) will produce larger files—most video creators should stick with MP4 with the H.264 or H.265 codecs.
What’s the difference between lossy and lossless codecs?
The main difference between lossy and lossless codecs is how they compress data
- Lossy codecs reduce file size by permanently eliminating portions of data. This results in significantly smaller file sizes but with the tradeoff of a noticeable loss in quality.
- Lossless codecs compress data without losing any information, which allows the original data to be perfectly reconstructed when decompressed. However, the file size isn't as significant as lossy compression.
Lossy is most often used for streaming and one-off published videos while lossless is standard when archiving videos or when pristine quality is essential.