
How to Make Videos with Gemini Notebook (NotebookLM)
Gemini can now turn your research into a video.
Google’s Gemini Notebook (formerly NotebookLM) has evolved from a research assistant into a video creation tool. It can take the source material inside a notebook — including PDFs, websites, Google Docs, and presentations — and transform it into an educational video with generated visuals by Veo.
With tools like Veo, you describe a specific shot and the model generates it, whereas with Gemini Notebook you provide a body of source material and the model determines how that information should be translated into a narrative. This makes it effective for consolidating multiple sources into a YouTube video, converting course or educational material into lessons, or repurposing written articles into video.
In this guide, I'll walk through the complete Gemini Notebook video workflow, including how Video Overviews work, how to prepare sources for better generations, and how Explainer, Short, and Cinematic modes differ. I'll also cover where I would stop relying on NotebookLM and move into other video editing assistants for tighter editing, captions, and distribution.
Table of Contents
- What Is Gemini Notebook Video Overview?
- How to Make a Video With Gemini Notebook
- Best Gemini Notebook Video Workflows
- Frequently Asked Questions
What Is Gemini Notebook Video Overview?
Gemini Notebook is the current version of the product previously known as NotebookLM. At its core, it is still a source-grounded AI workspace: you create a notebook, populate it with reference material, and use Gemini to analyze, question, summarize, and transform those sources.
Video Overview is one of those transformations. Instead of returning another text summary, it creates a video based on the sources you've selected. NotebookLM determines which information to include, organizes that information into a narrative, writes the narration, and generates images or videos to accompany it.
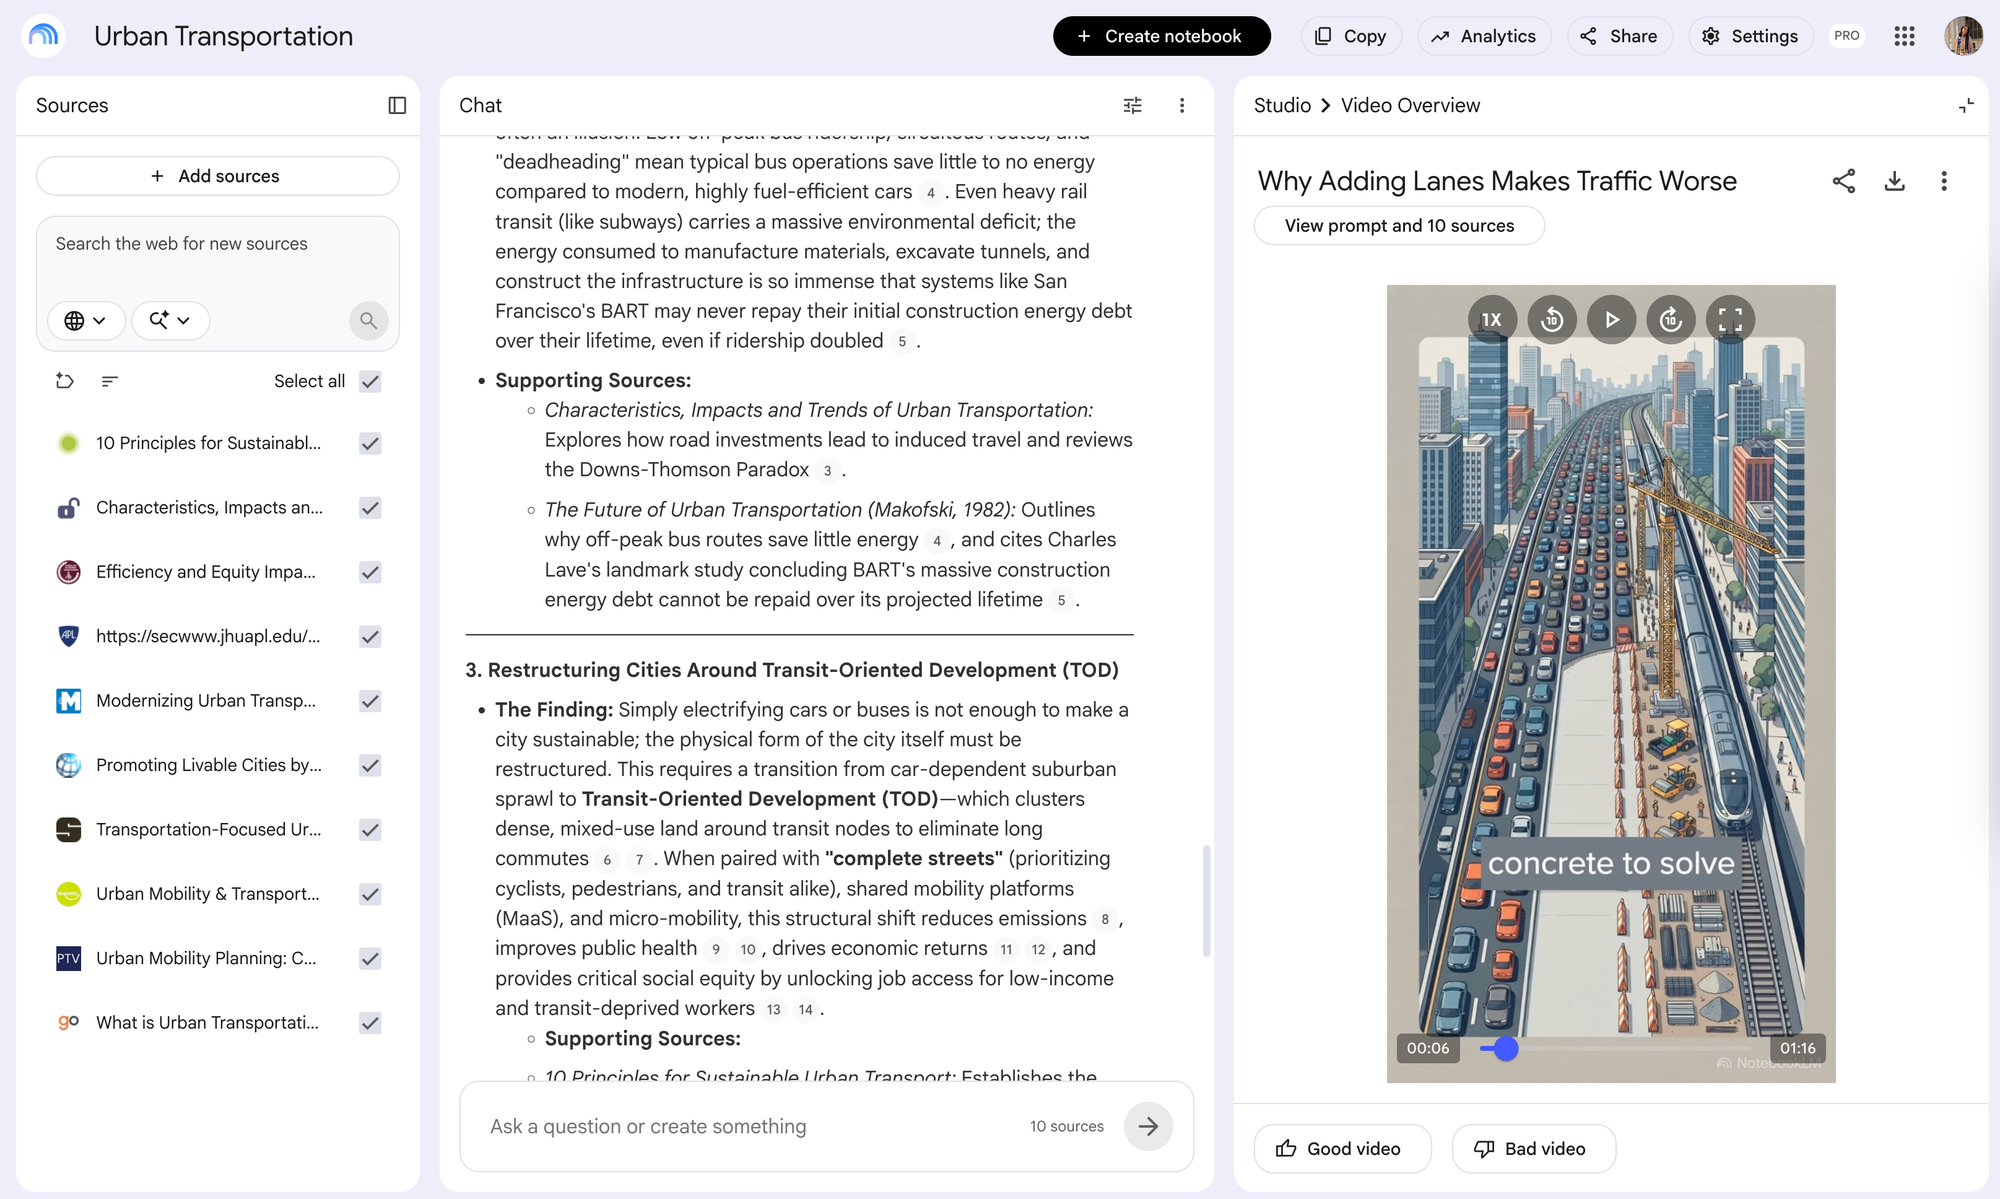
The main value of Gemini Notebook (formerly NotebookLM) is that instead of generating information from scratch, it works inside a defined knowledge set—PDFs, articles, research papers, documentation, and YouTube videos—and uses that material to produce a Video Overview.
This makes it especially useful for informational and SEO-driven content, where accuracy, structure, and topical relevance matter more than creative variation. This is most effective in workflows like:
- SEO-focused YouTube explainer videos targeting specific search queries
- Blog-to-video repurposing for content marketing and organic traffic
- Educational content designed around informational intent
- Research synthesis for long-form articles or video scripts
- Internal training and documentation explainers
How to Make a Video With Gemini Notebook
Making a Video Overview in Gemini Notebook is technically simple: add your sources, open the Video Overview tool, choose a format, and generate. Getting a good video requires more preparation. Unlike a conventional AI video generator, NotebookLM is working from defined source material, so the quality and scope of that context have a direct effect on what makes it into the video.
The workflow I recommend is to treat the notebook as a research environment first and a video generator second. Build the source set, use NotebookLM to understand what's actually in it, narrow that material, and only then configure the video.
Step 1: Create a Notebook
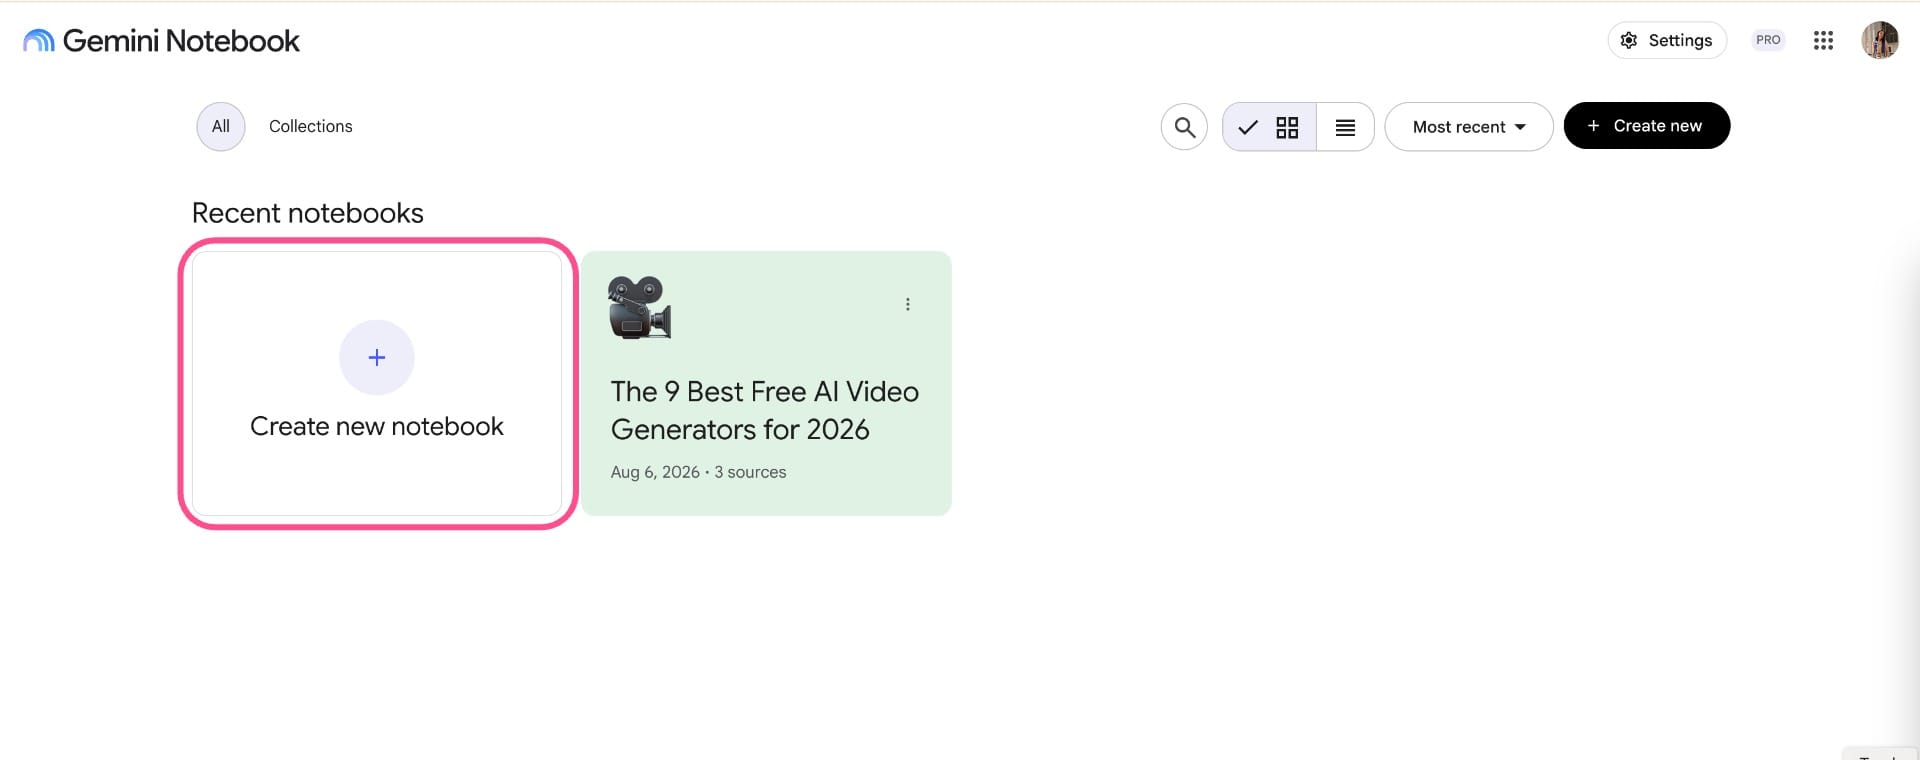
Start by creating a new notebook in Gemini Notebook.
You can think of a notebook like a folder that doesn’t just store files, but also lets you talk to them, analyze them, and turn them into outputs like videos.
Step 2: Add and Organize Your Sources
On the left side of Gemini Notebook, you'll see the Sources panel.
This is where you build the body of material that NotebookLM can use for research and, later, for Video Overview generation.
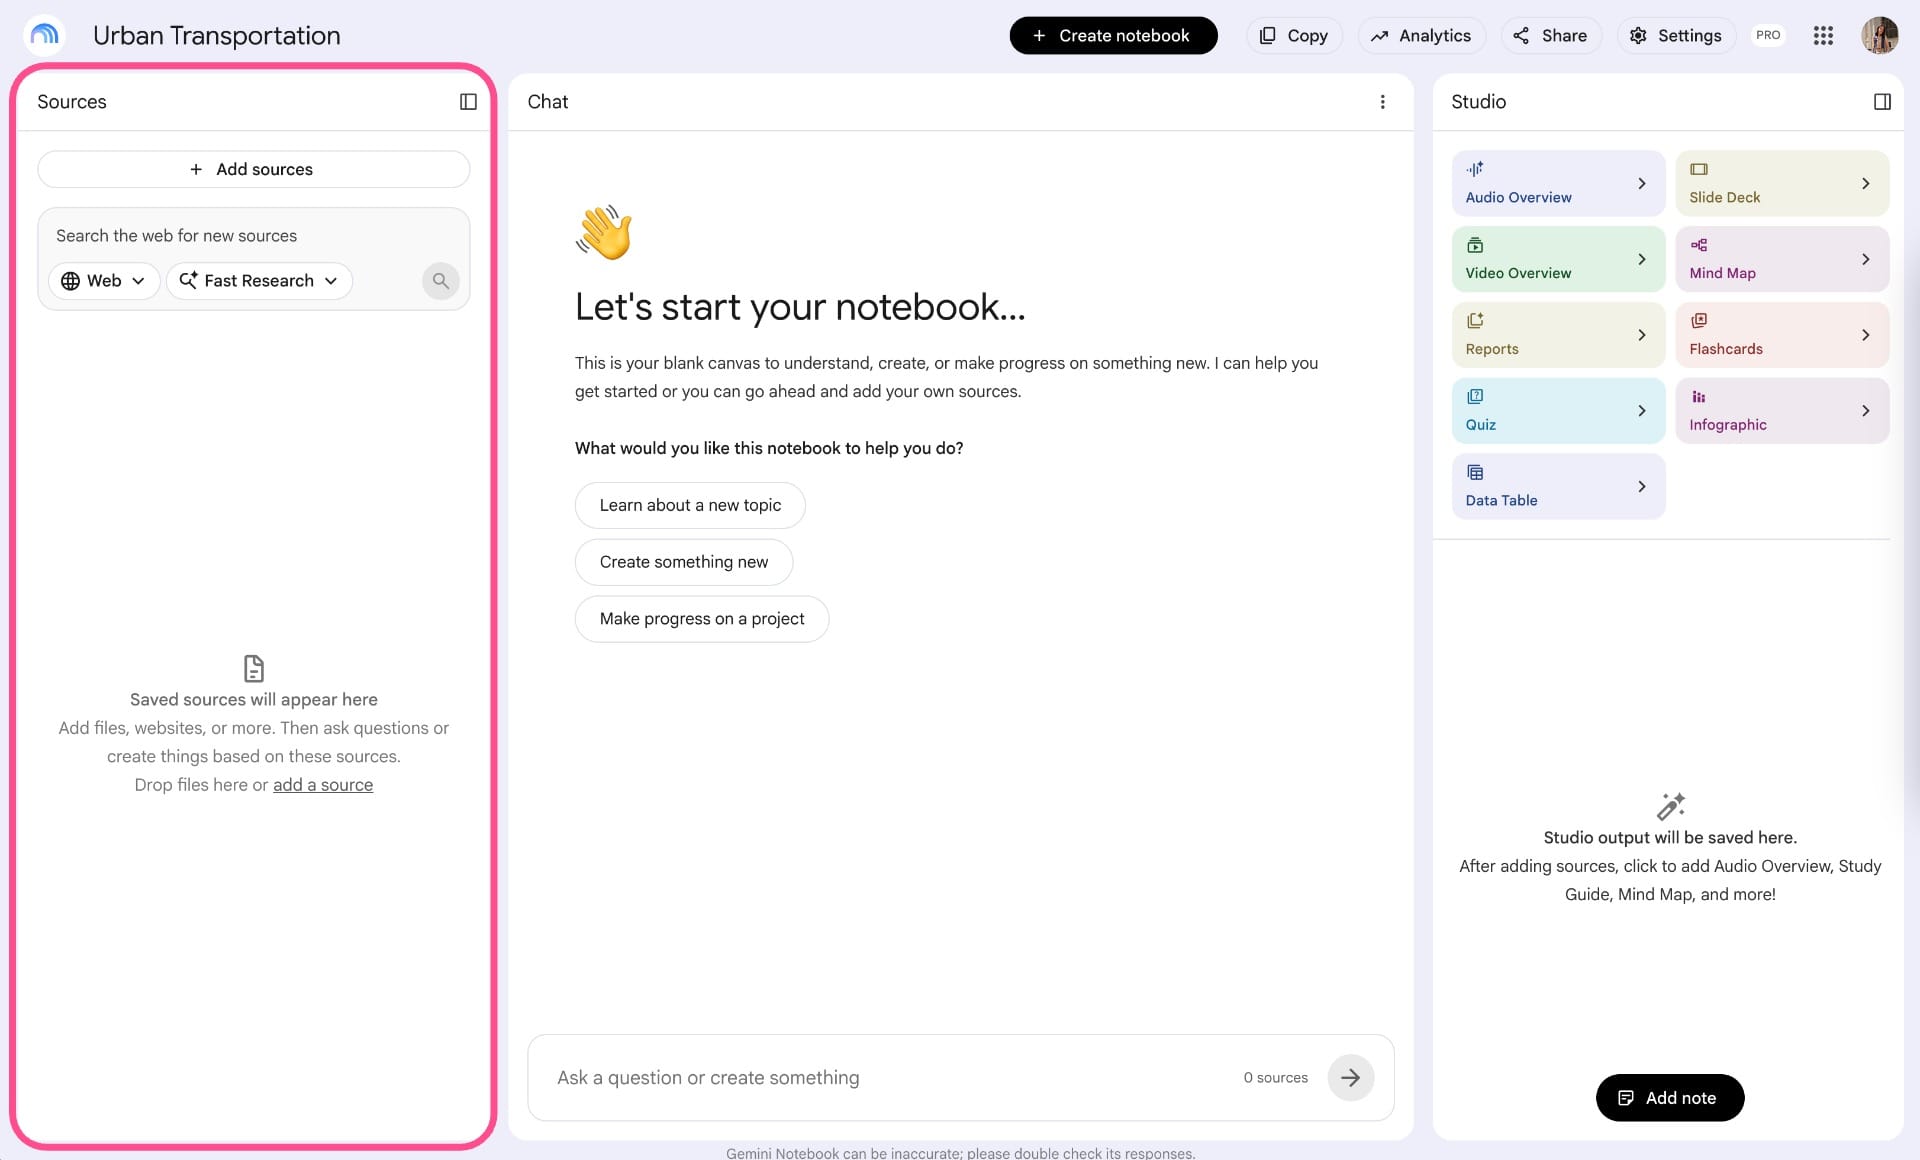
There are two main ways to add material. You can paste in a URL, which is useful for websites and public YouTube videos, or you can upload files directly from your computer.
For a research-heavy project, you'll usually end up using a mix of both.
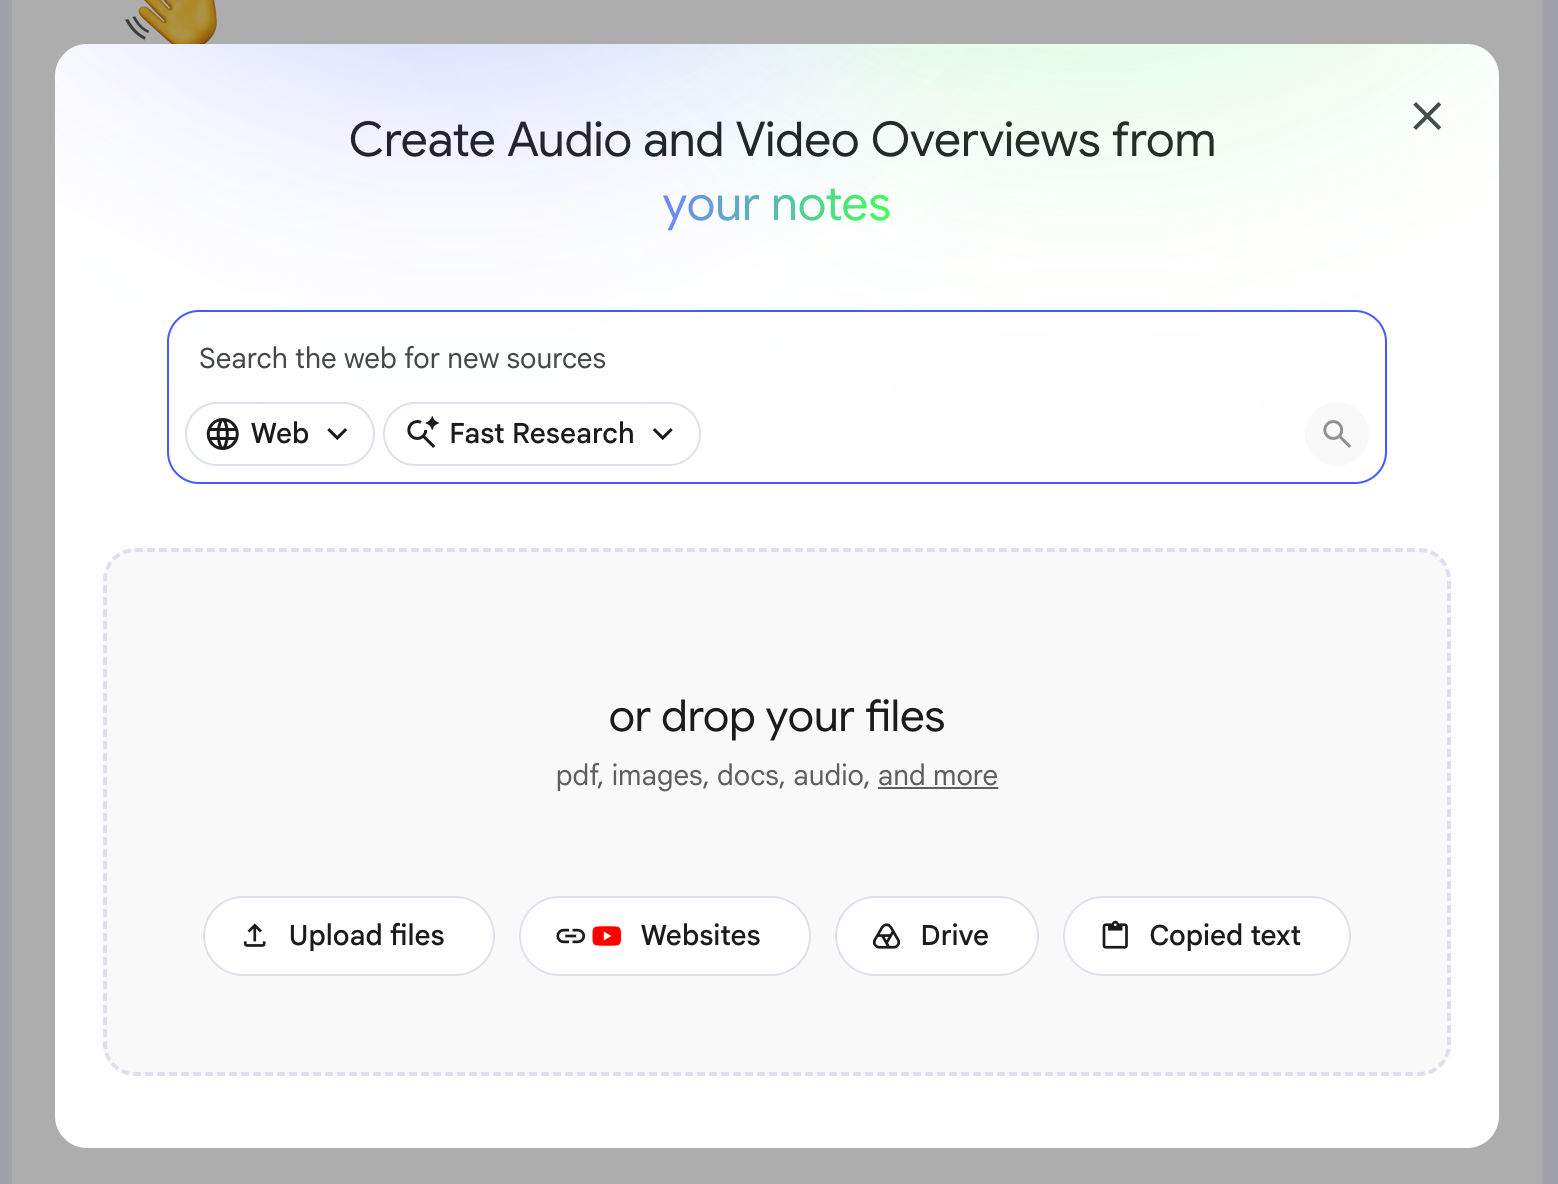
For a one-off video based on a single report, the notebook may only contain the sources necessary for that one video. For ongoing research, it can be much broader. For example, a notebook about urban transportation systems could eventually support separate videos about how subway networks are designed, how bus routes are optimized, how commuting patterns change as cities grow, etc.
That second approach becomes useful once you start using NotebookLM regularly because you don't need to rebuild the research base for every video. The notebook can function as a persistent source library, while individual Video Overviews use different subsets of those sources.
Step 3: Research and Interrogate Your Sources
Before opening Video Overview, use NotebookLM's chat to interrogate the source set. This is one of the biggest advantages of making a video inside a research tool rather than going directly from a prompt to generation, because it lets you identify narrative structure, evidentiary strength, and missing context.
A simple summary is only useful for verifying that NotebookLM has correctly understood the material. For video production, you can go further and interrogate how the information can be turned into a story. That means asking questions that surface editorial angles rather than just restating content. For example:
What are the three most consequential findings across these sources, and which sources support each one?
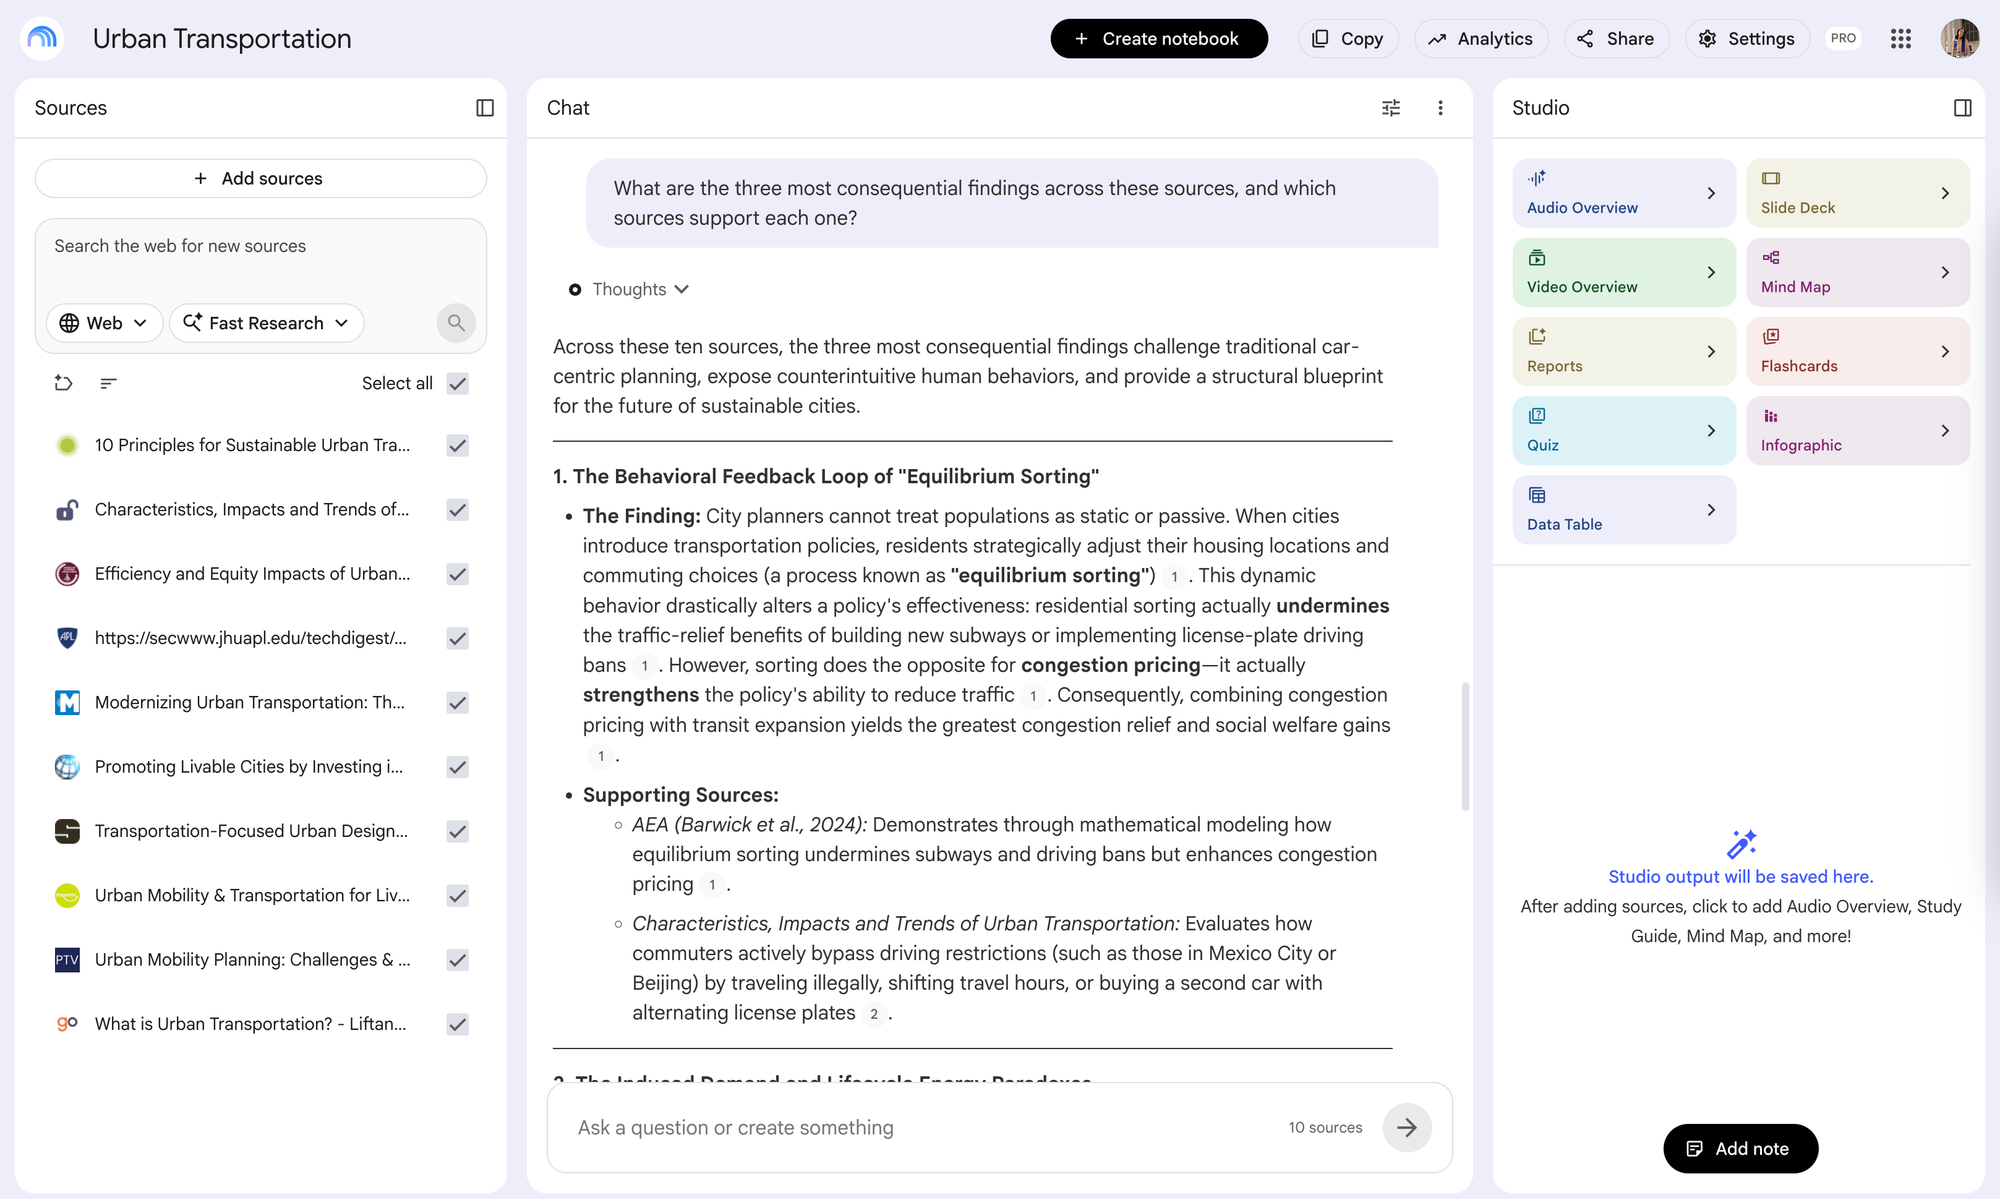
You can also ask NotebookLM to identify disagreement:
Where do these sources disagree, and what evidence does each side provide?
Or look for gaps in the eventual explanation:
Which concepts in these sources would be difficult for someone with no background in this subject to understand?
For a more narrative-oriented project, try:
Identify the most surprising or counterintuitive findings in these sources that could work as the opening of an explainer video.
Step 4: Select Which Sources to Include in the Video
Once you've decided what the video is actually about, open Video Overview in the Studio panel.
During video creation, NotebookLM lets you select which sources from the notebook should be included in that specific Video Overview.
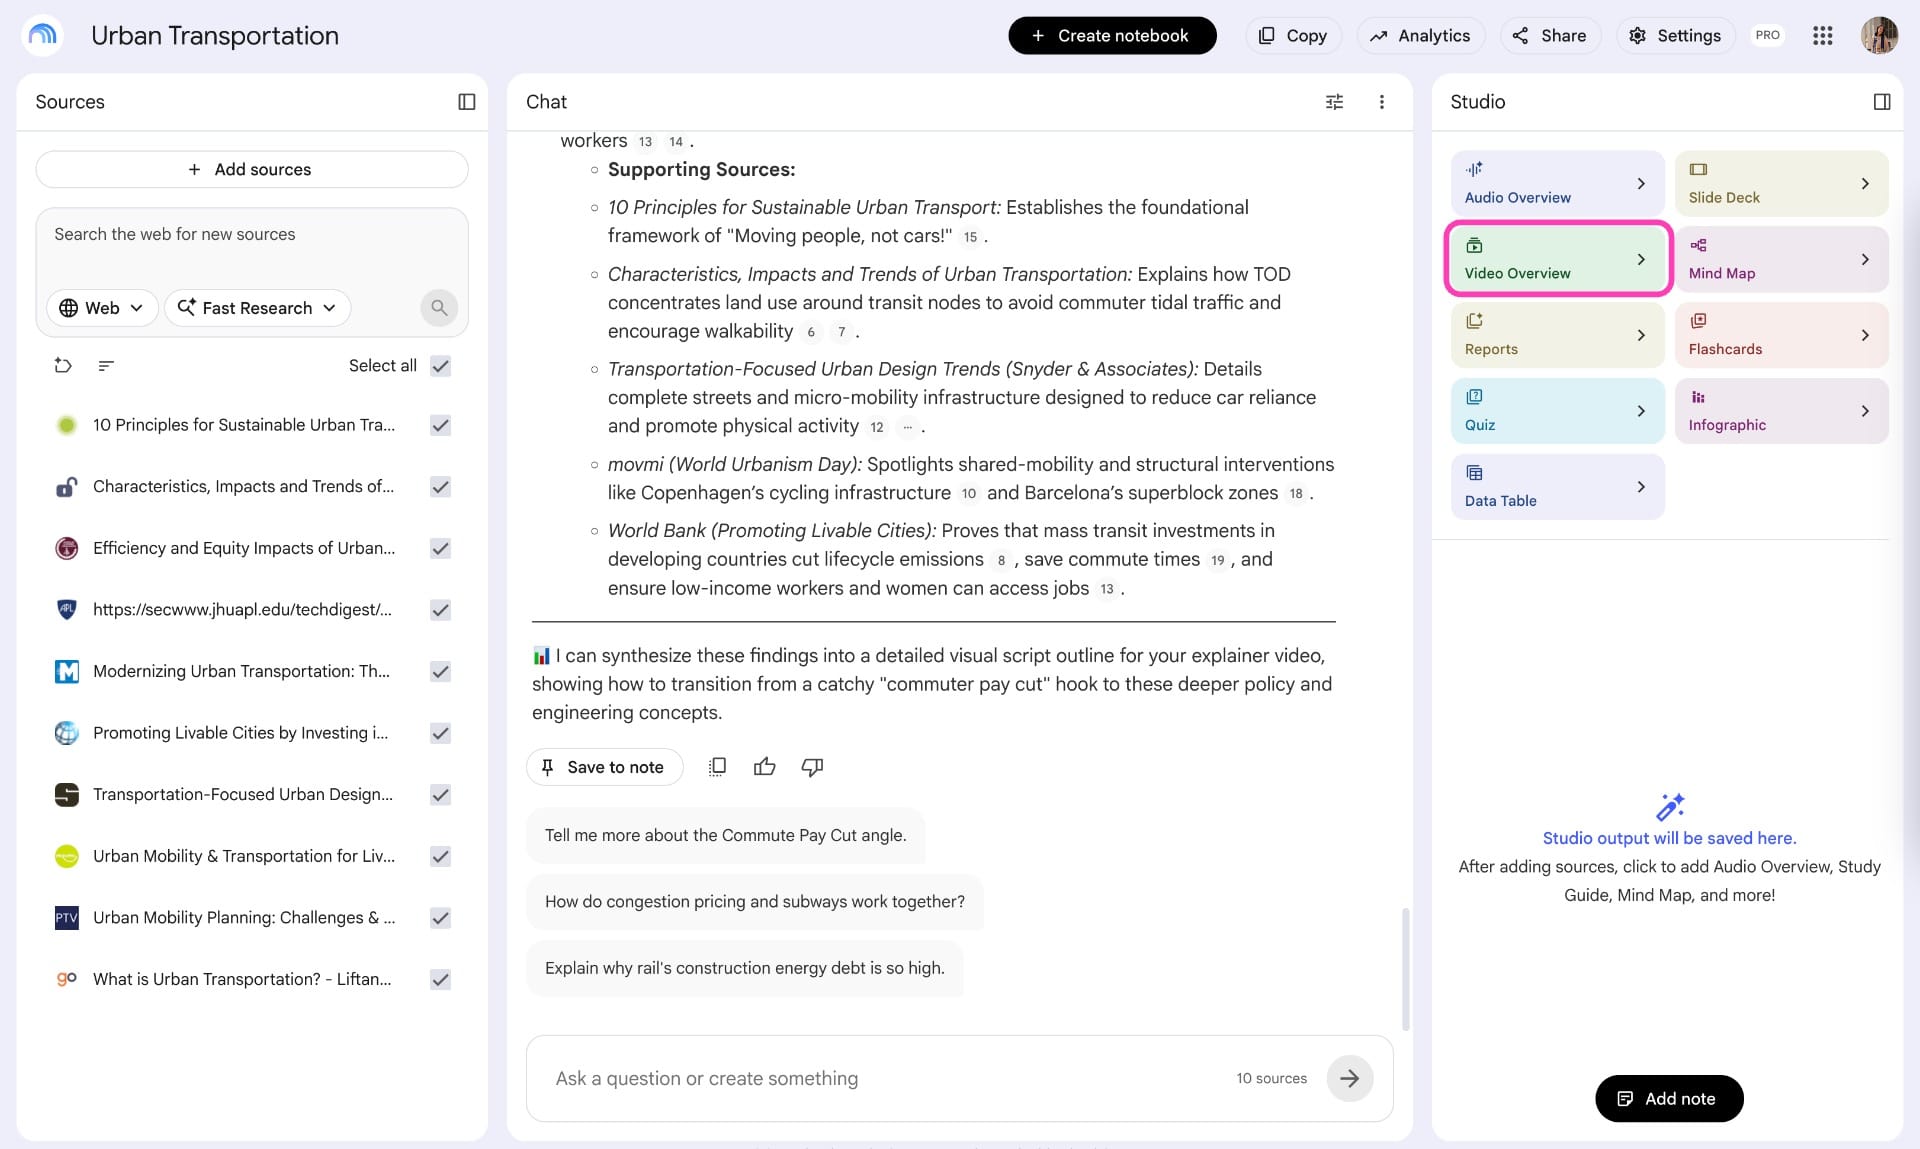
This is an important control, particularly if you're using one notebook as an ongoing research library.
Source selection also gives you a useful diagnostic when a generation goes wrong. If the video keeps introducing irrelevant information, first check which sources were selected.
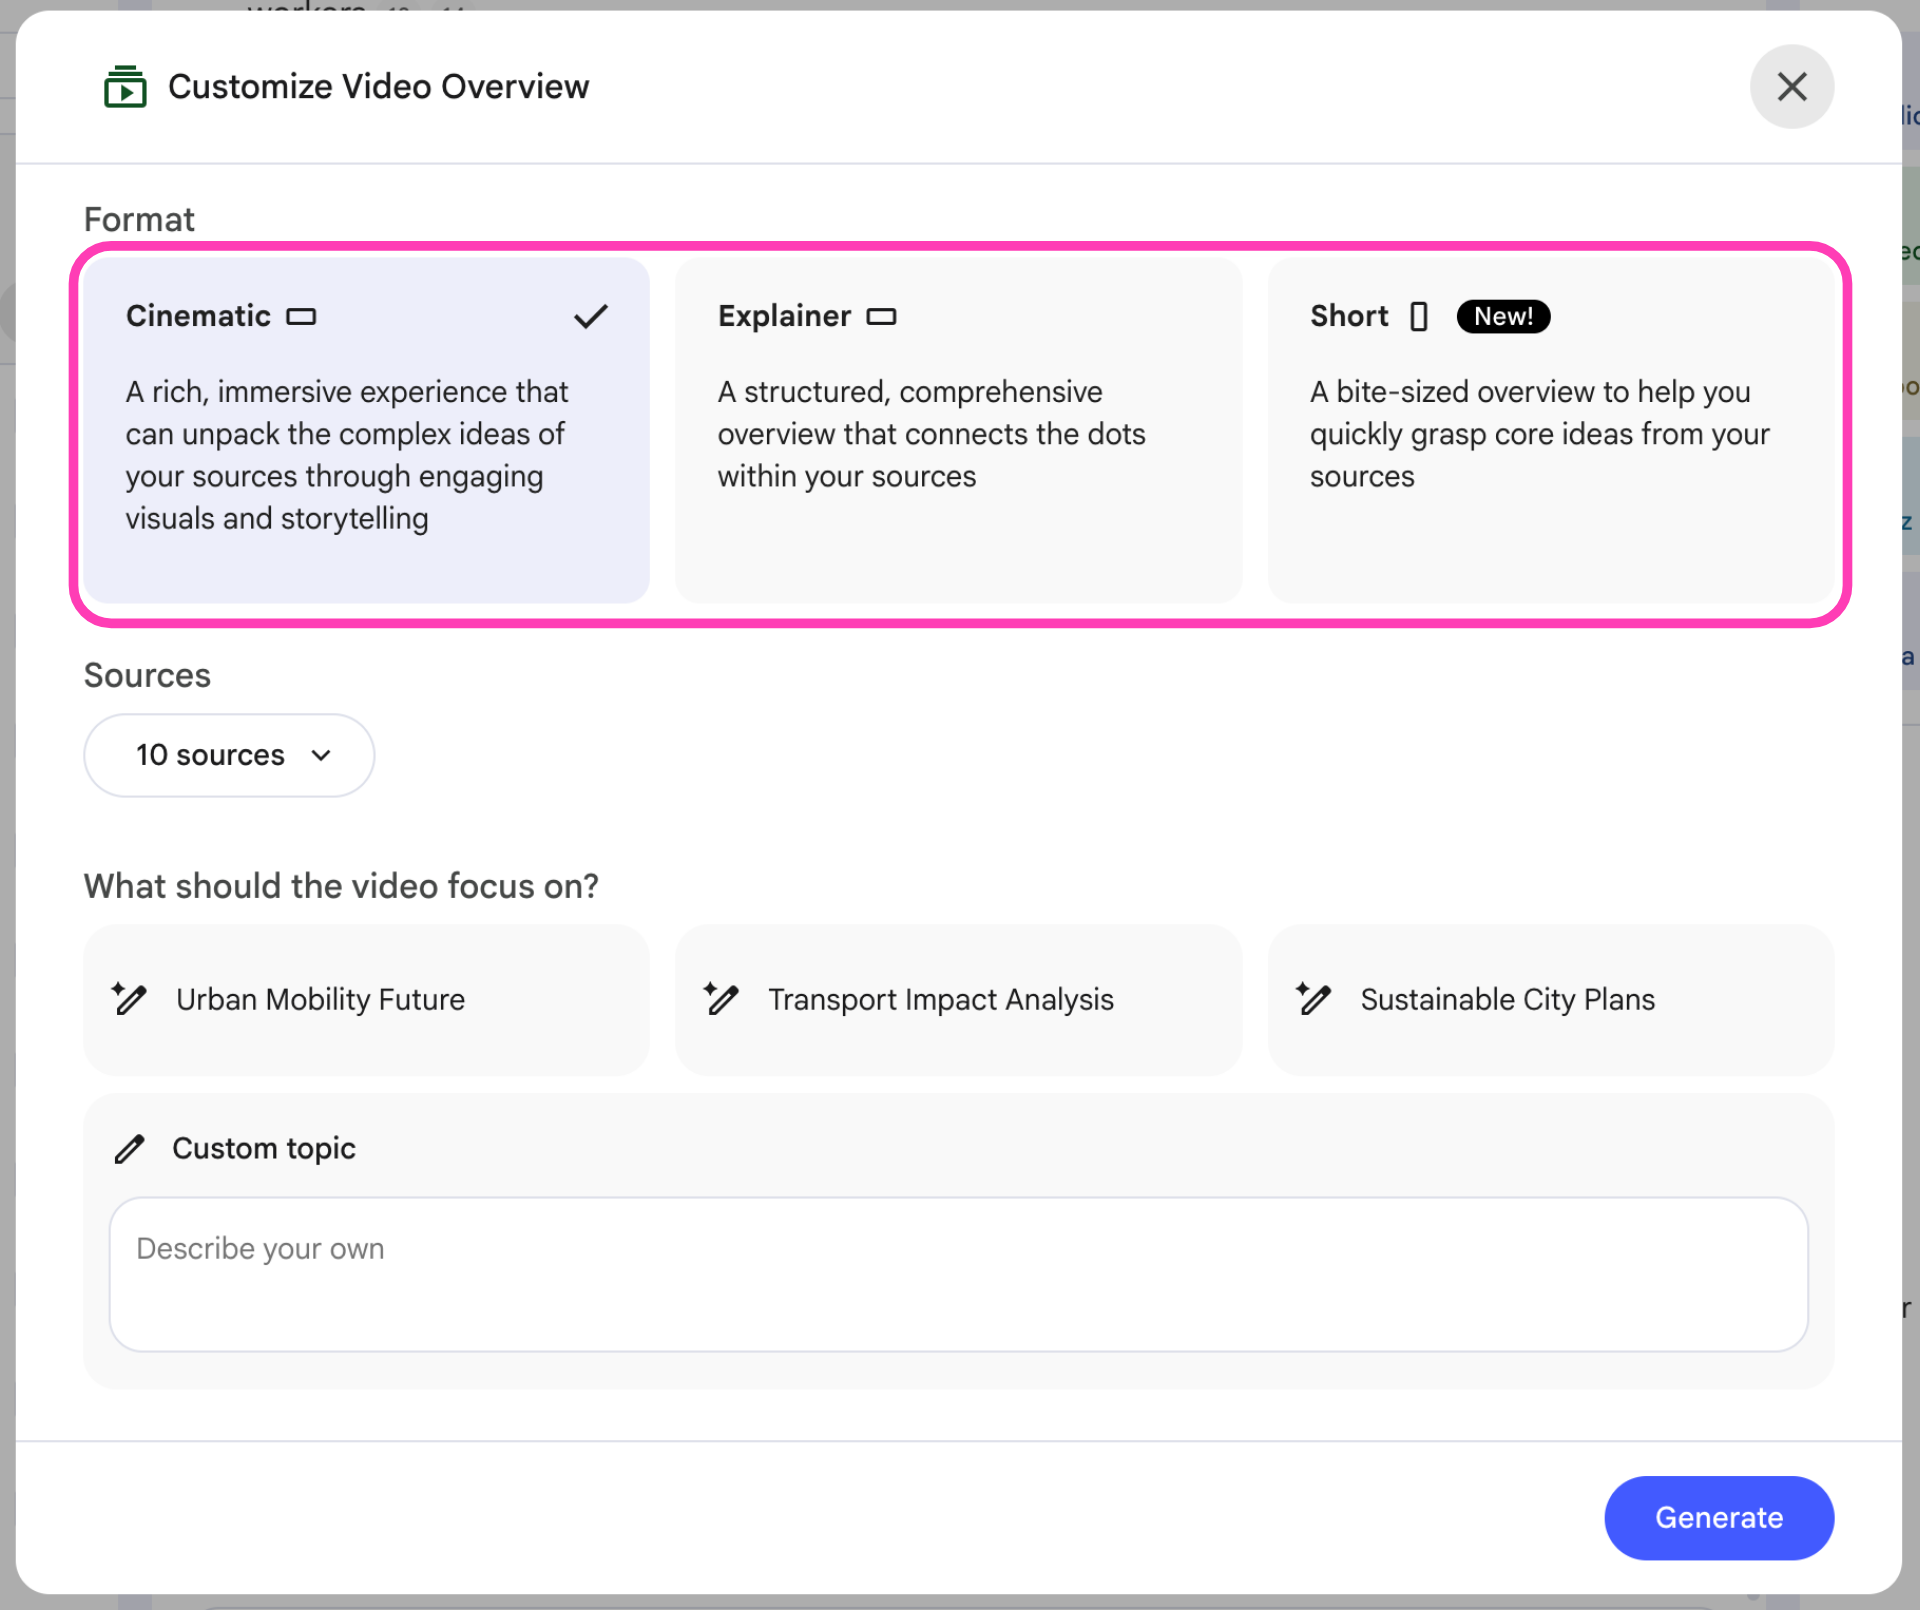
Step 5: Choose Explainer, Short, or Cinematic
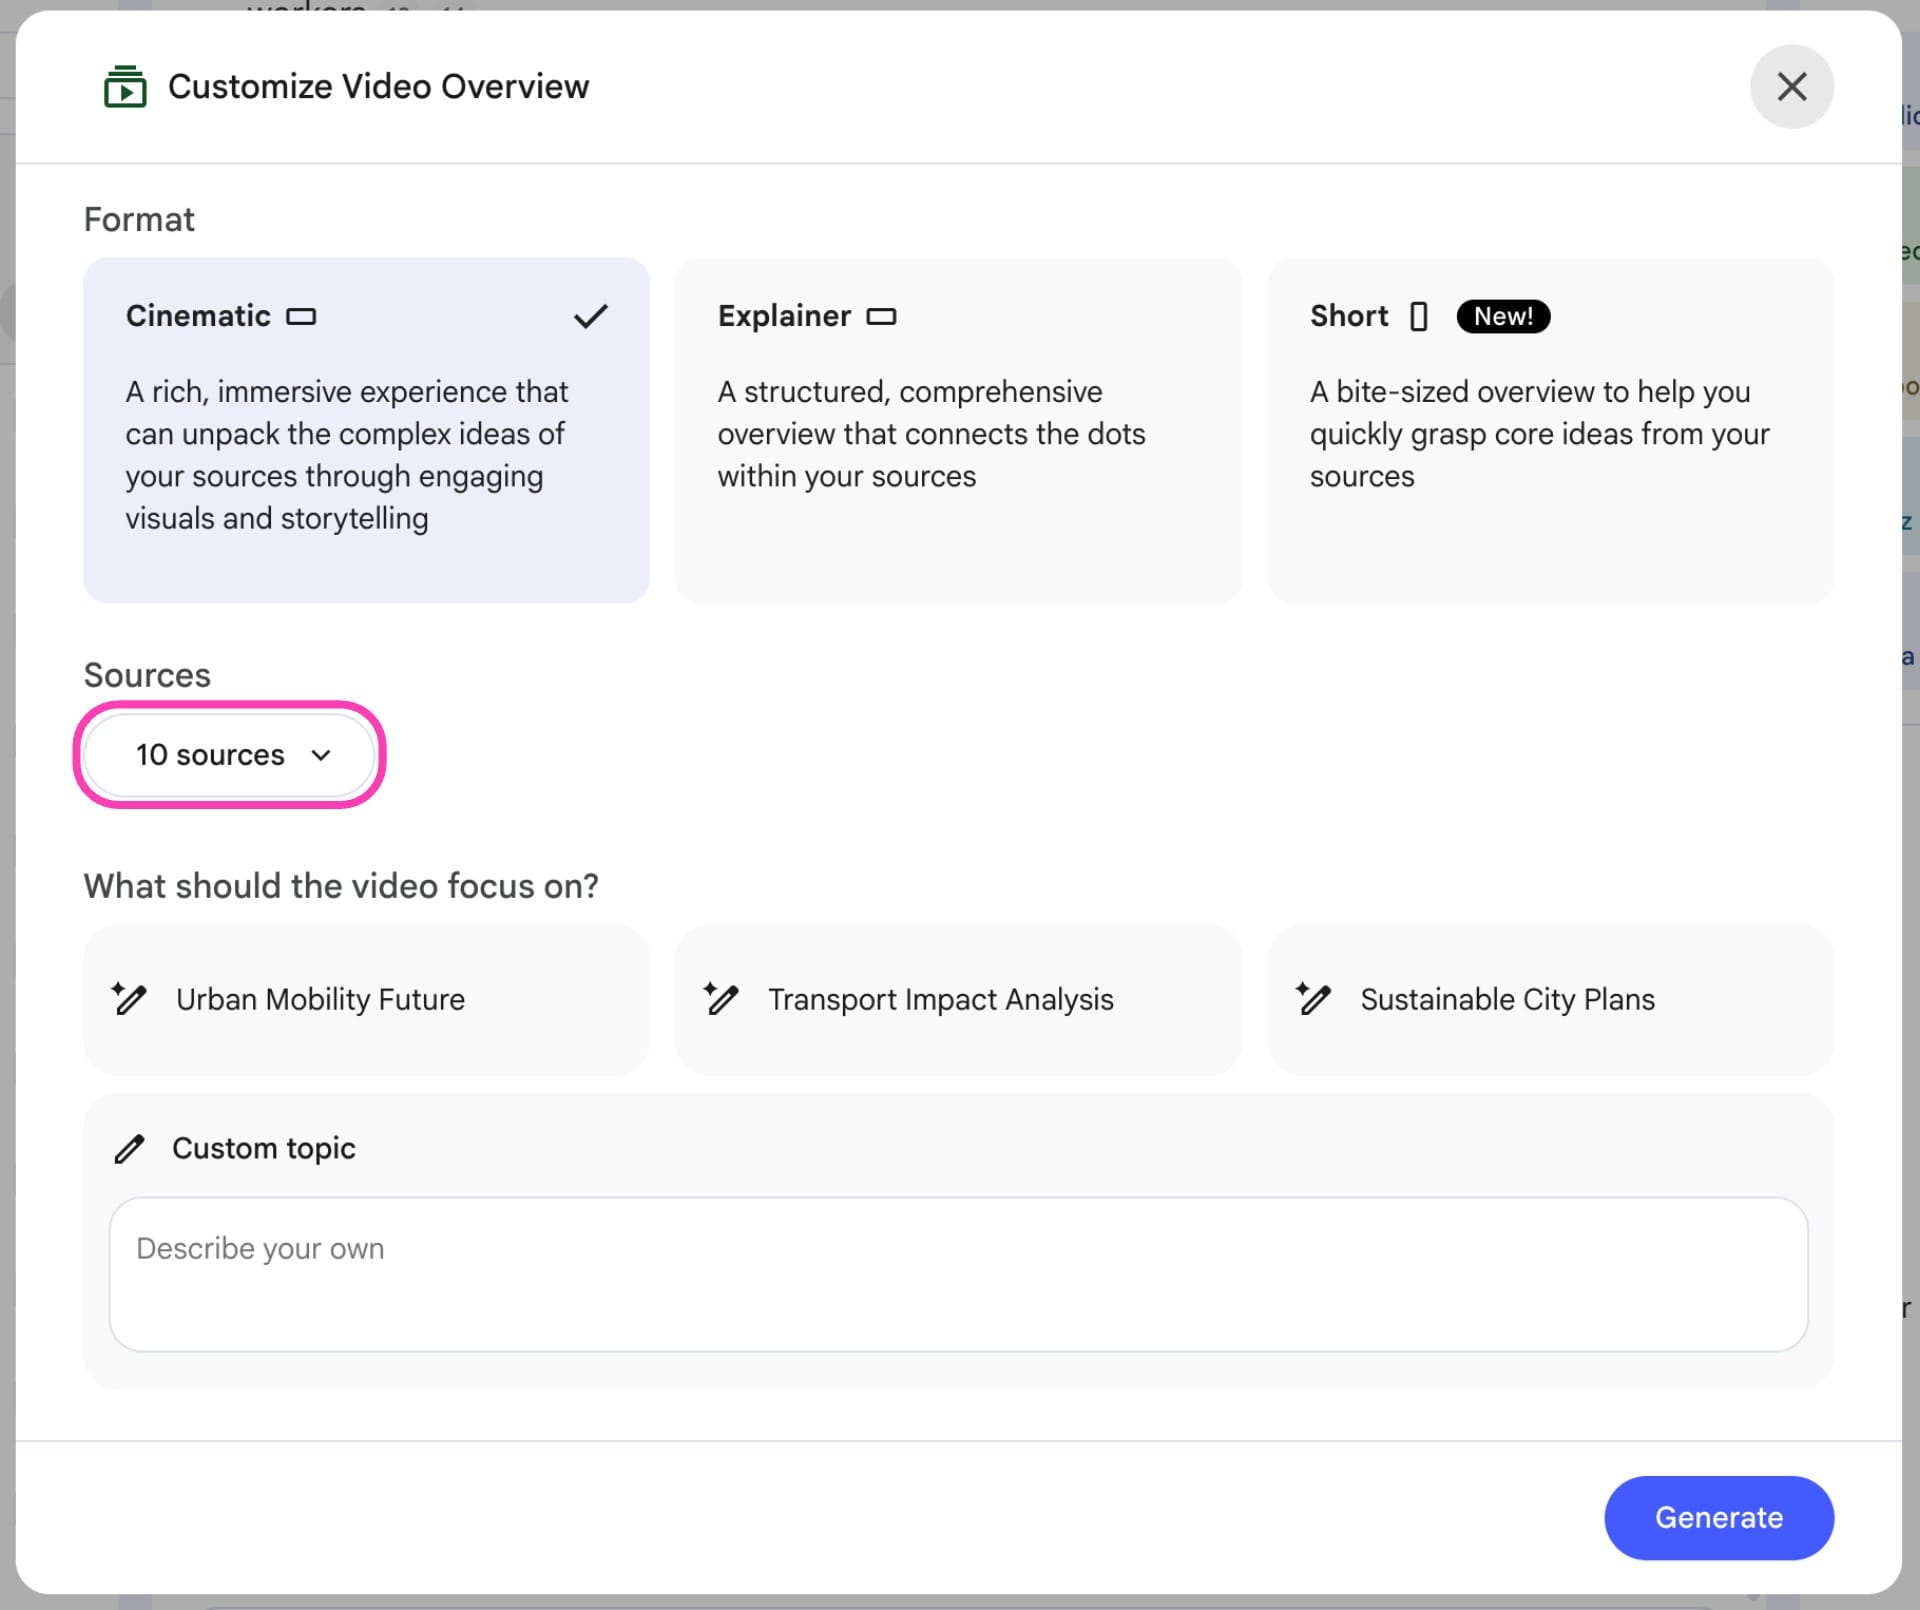
Next, choose which type of Video Overview you want to generate. NotebookLM currently offers different video formats, and the right choice depends on what the source material needs to accomplish.
There are currently three Video Overview formats:
- Explainer is the general-purpose format and the one I'd recommend for most educational, research, and YouTube workflows. It creates a relatively comprehensive explanation of the selected material and gives NotebookLM enough runtime to establish context and connect ideas across multiple sources.
- Short compresses the material into a video of roughly a minute. The tighter format forces the model to make much more aggressive decisions about what information deserves to survive. For Instagram Reels, TikTok, or a concise executive summary, that's useful, but it also means source selection and steering instructions become more important.
- Cinematic is the more ambitious generative-video mode, which uses Google's broader generative media stack to interpret the sources as a visual narrative. This is most compelling when the subject itself benefits from visualization or atmosphere — history, science, architecture, geography, and similar topics.
Step 6: Customize the Visual Style for Explainer Videos
If you choose Explainer, NotebookLM also lets you customize the visual treatment of the Video Overview.
You can choose from NotebookLM's available visual presets rather than accepting the default treatment. The best option depends on the subject and how the visuals need to communicate information. A Whiteboard-style treatment, for example, can work naturally for processes, systems, and conceptual explanations, while a more illustrative style may make sense for historical or cultural material.
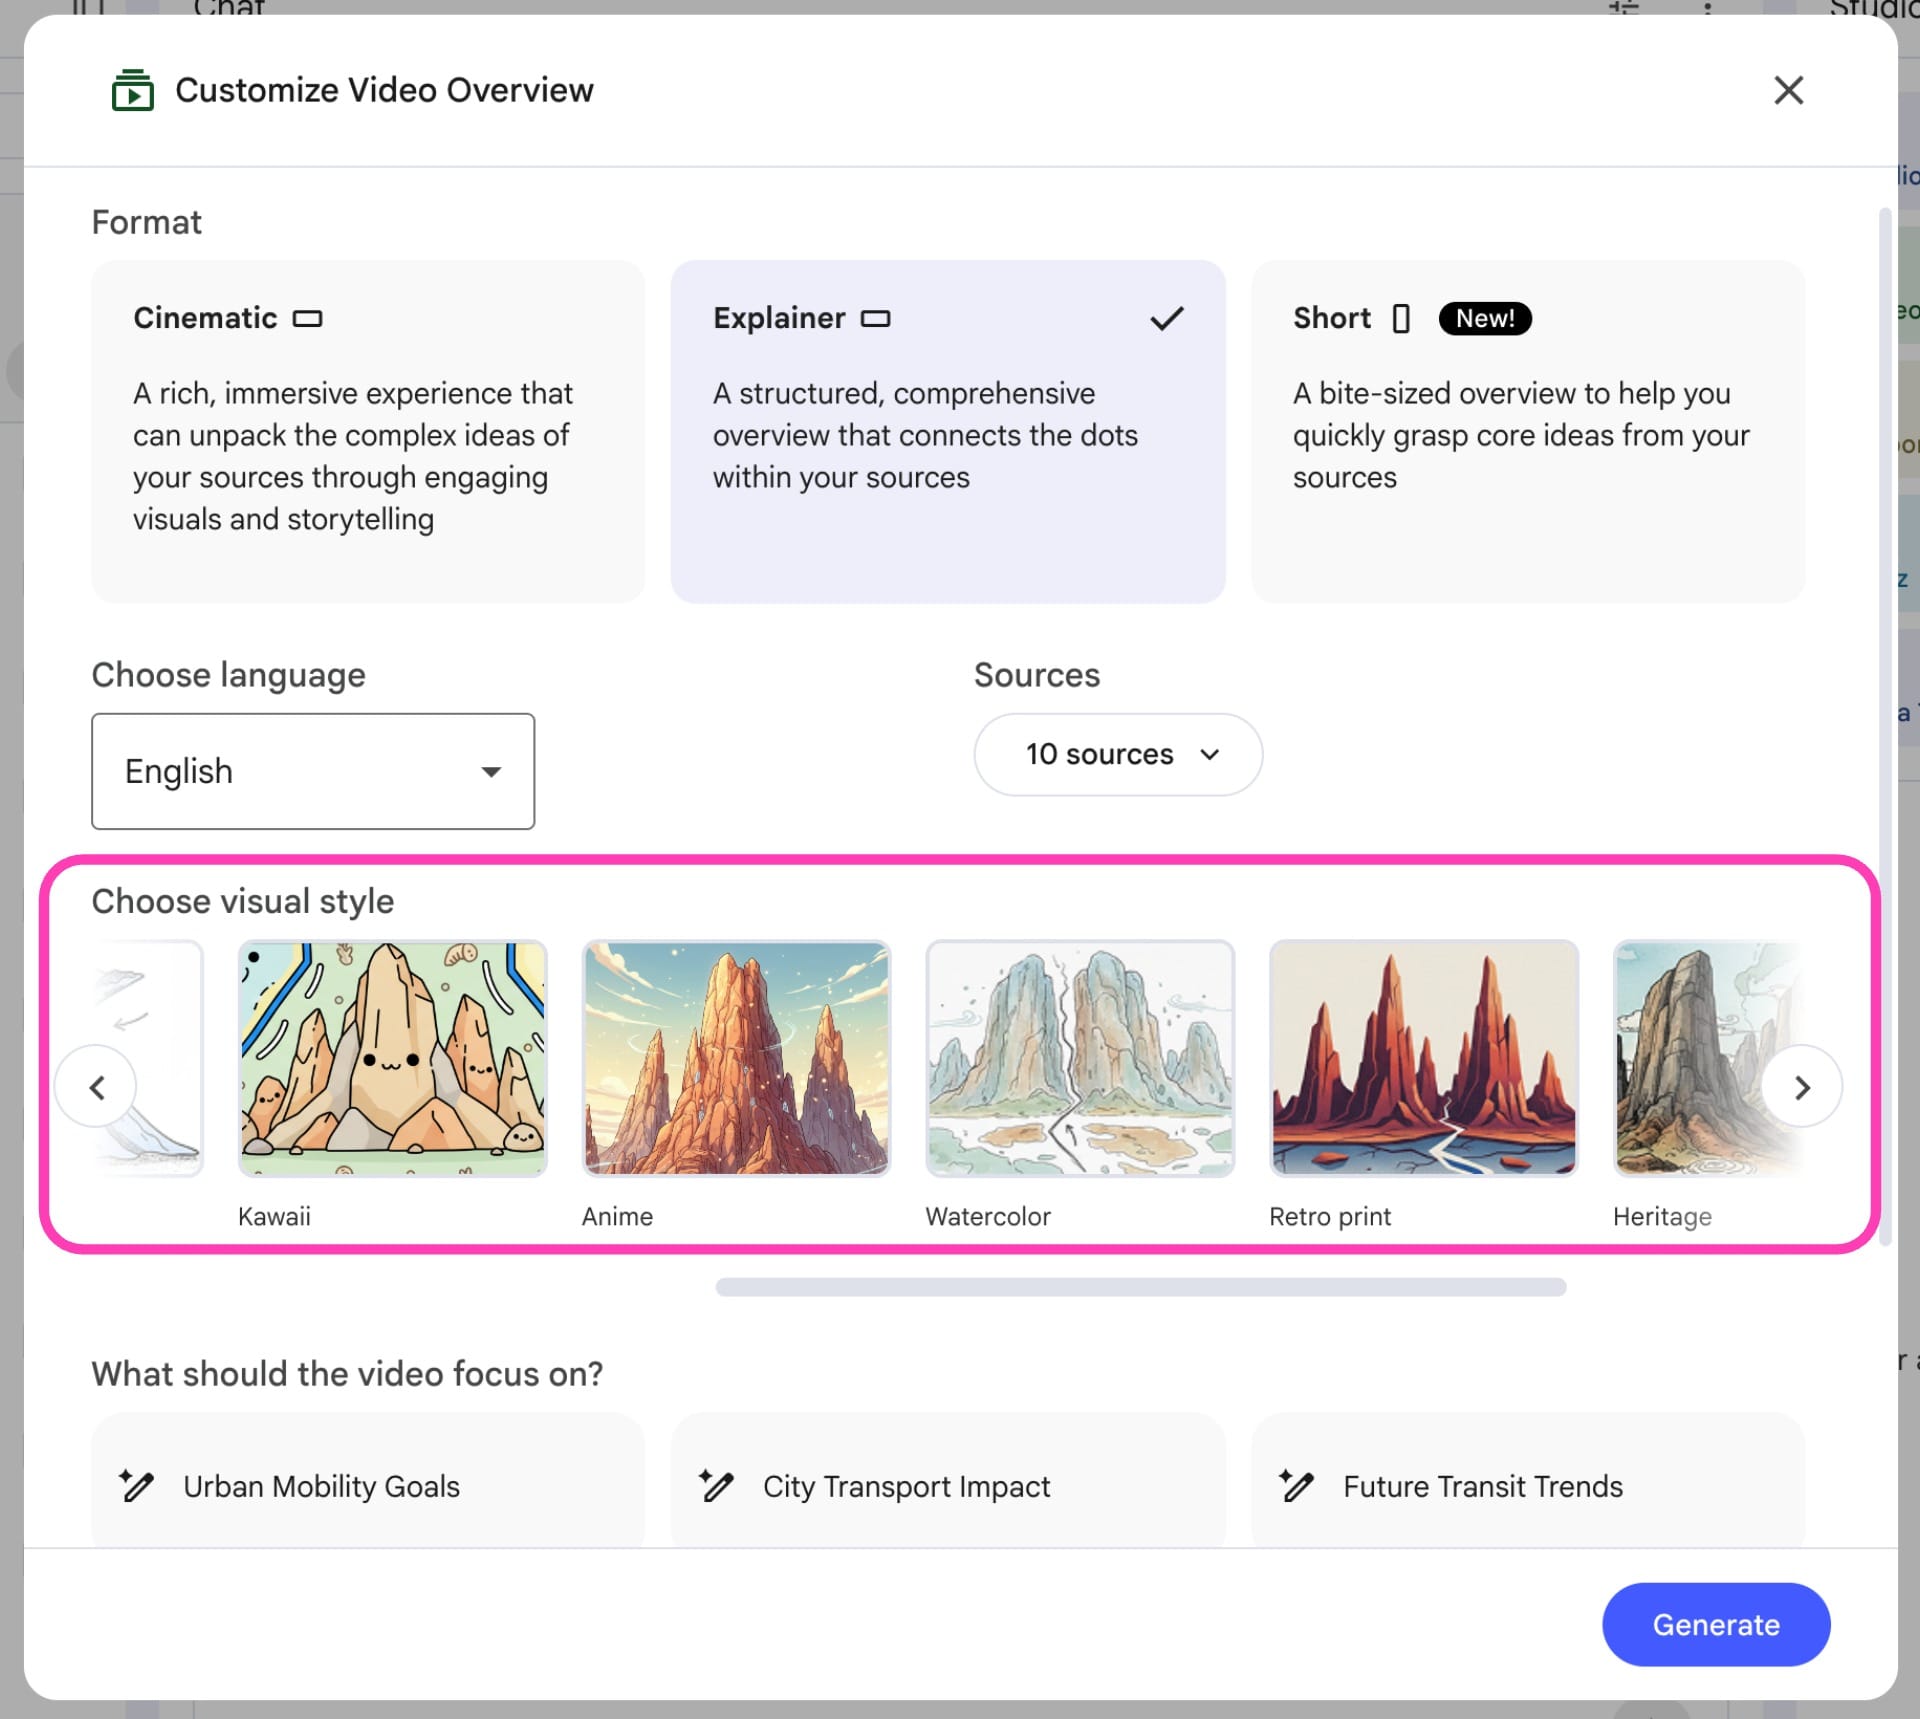
I wouldn't choose a preset solely because it looks distinctive. In an informational video, visual style should make the subject easier to understand rather than compete with it.
If you're making a Short or Cinematic Video Overview, skip this step.
Step 7: Choose What Your Video Should Focus On
After selecting your sources and video format, NotebookLM gives you three options for deciding what the Video Overview should actually cover.
You can choose one of those suggestions or describe your own topic if you already have a more specific direction in mind.
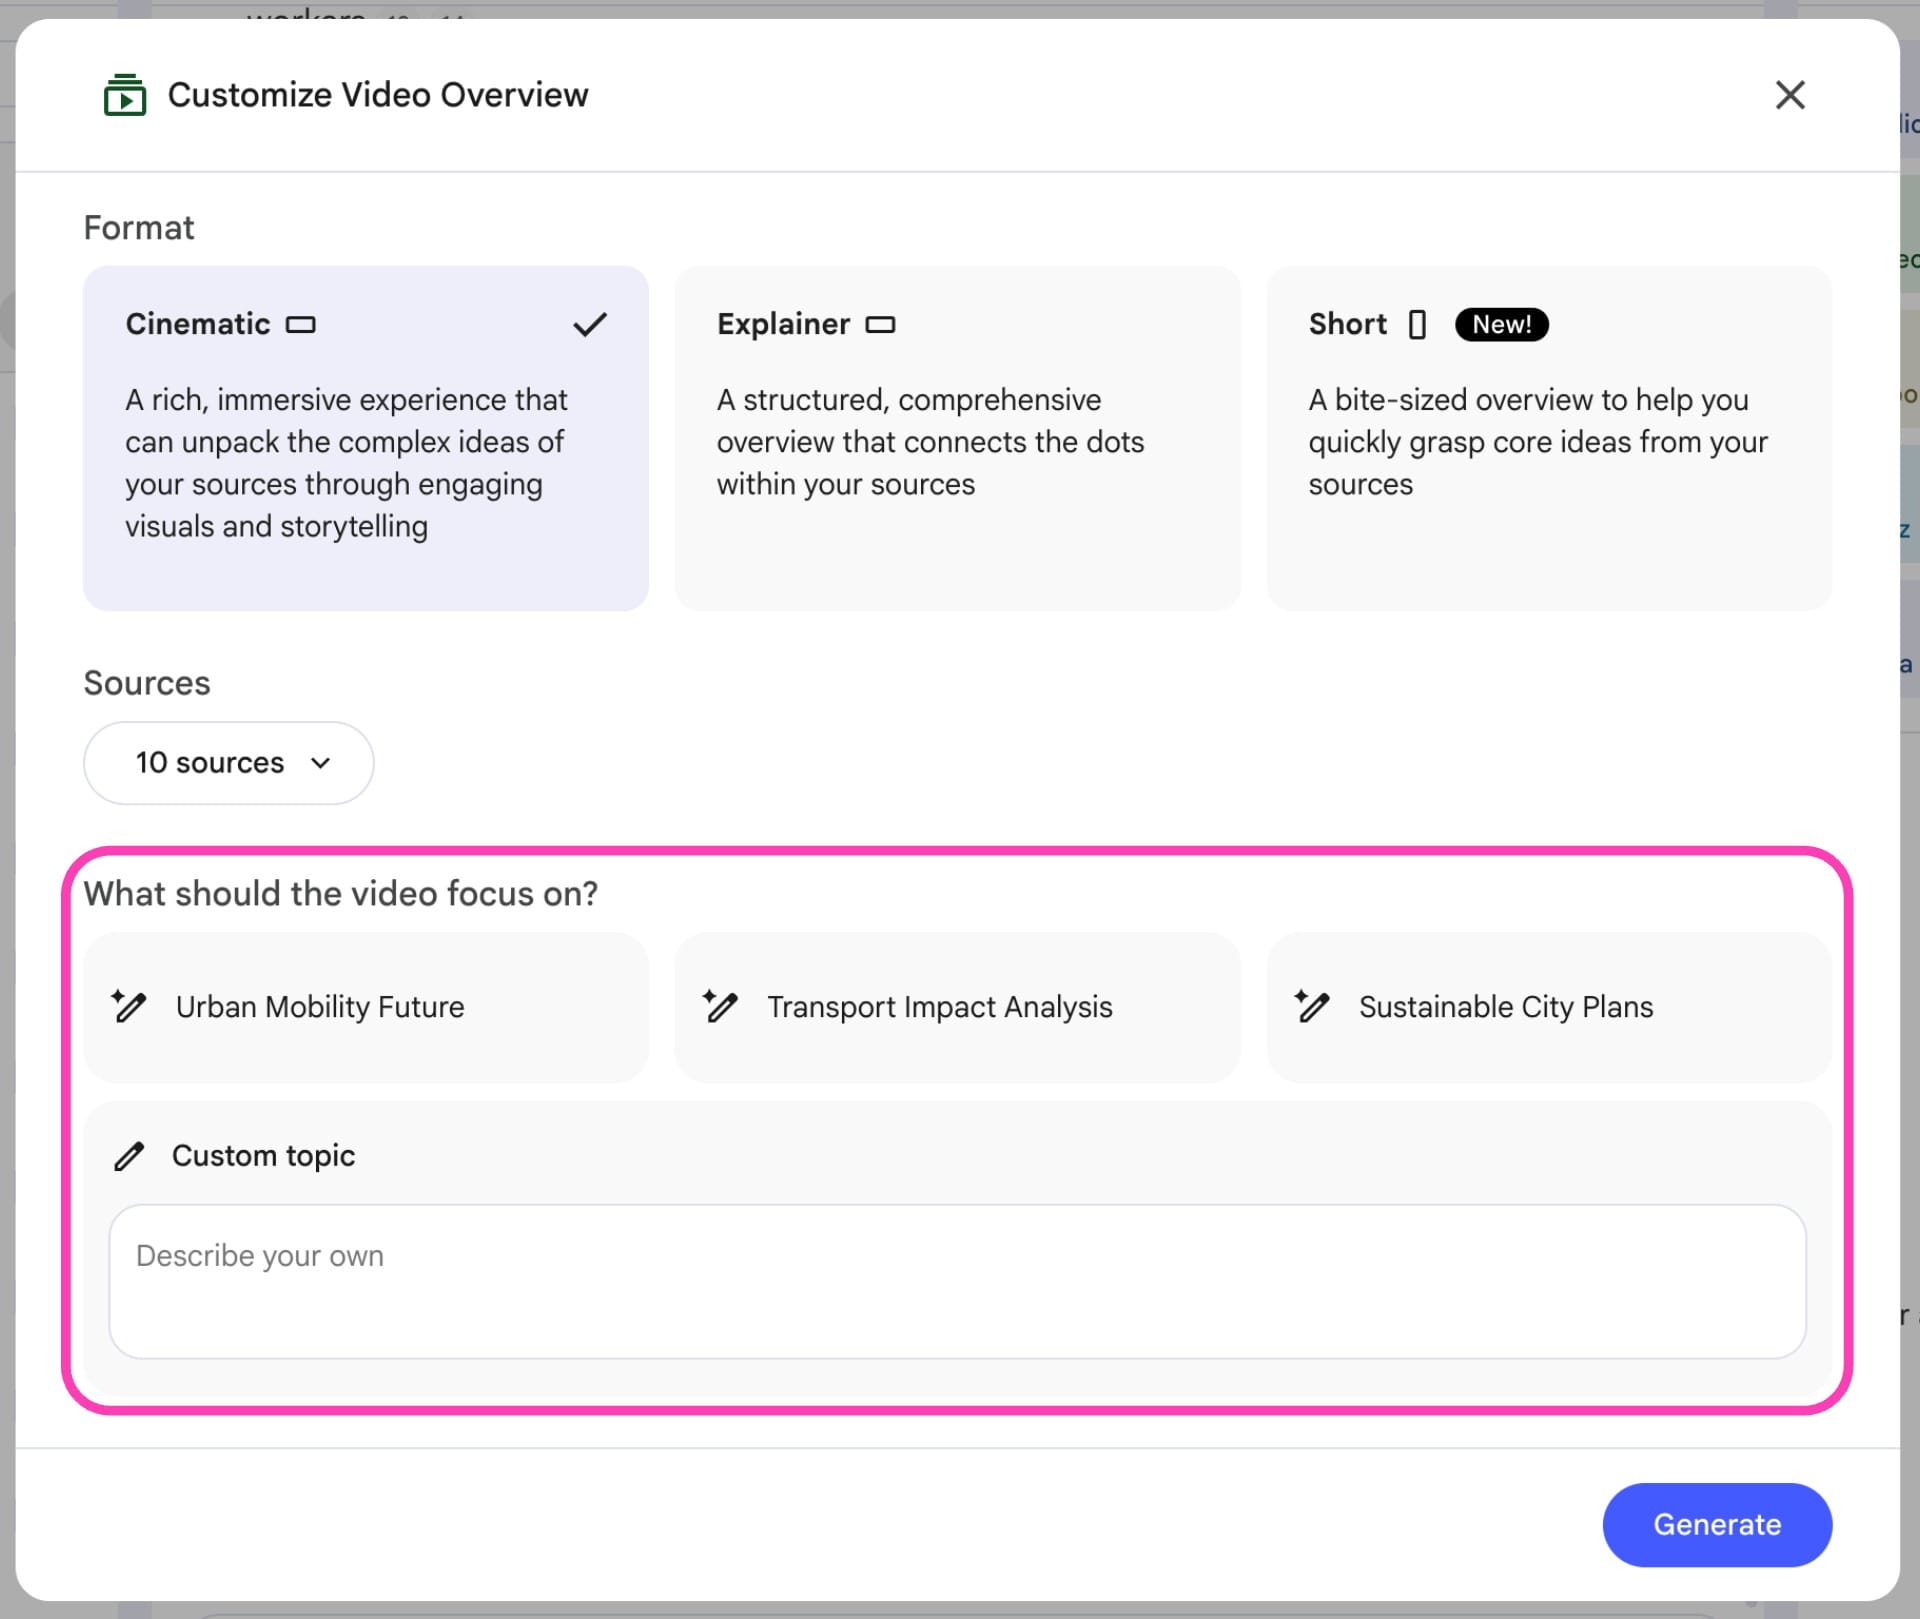
Describing your own topic gives you more editorial control. Be specific about the question, argument, or piece of the source material the video should focus on.
For example, instead of entering:
Urban transportation
use:
How subway systems decide where to build new stations and why some neighborhoods receive better transit access than others.
For Explainer videos, your topic can accommodate several connected ideas as long as they contribute to one central question. For Short videos, narrow the topic to a single claim, mechanism, finding, or question. For Cinematic videos, consider not only whether the topic is supported by the sources.
Step 8: Generate and Review the Video
Finally, generate the Video Overview. Generation can take some time, particularly for more complex videos.
When the video is ready, make sure to review it in separate passes.
- On the first pass, check the information against the original sources. Pay particular attention to numbers, dates, names, quotations, causal claims, comparisons, and places where the narration compresses a complicated finding into a simpler statement.
- On the second pass, evaluate the editorial structure. Does the opening establish a reason to keep watching? Does each section advance the argument? Is necessary context introduced before the viewer needs it?
- On the third pass, evaluate the visuals. Generated imagery deserves particular scrutiny when it depicts historical events, technical processes, products, places, people, or other subjects where viewers could interpret the image as factual.
At that point, decide whether the problem requires regeneration or editing. If NotebookLM chose the wrong story, change the source selection or brief and generate again.
If the overall video works but contains a slow opening, an inaccurate caption, a weak visual, or a section that runs too long, those are usually better treated as editing problems.
How to Edit a Gemini Notebook Video
Gemini Notebook can get you close to a finished explainer, but I wouldn't treat the generated Video Overview as the final edit. The more useful workflow is to treat it as a structured first cut: the research has already been synthesized, the narration exists, and the visuals have been assembled, but you still have room to improve pacing, accuracy, branding, and platform-specific formatting.
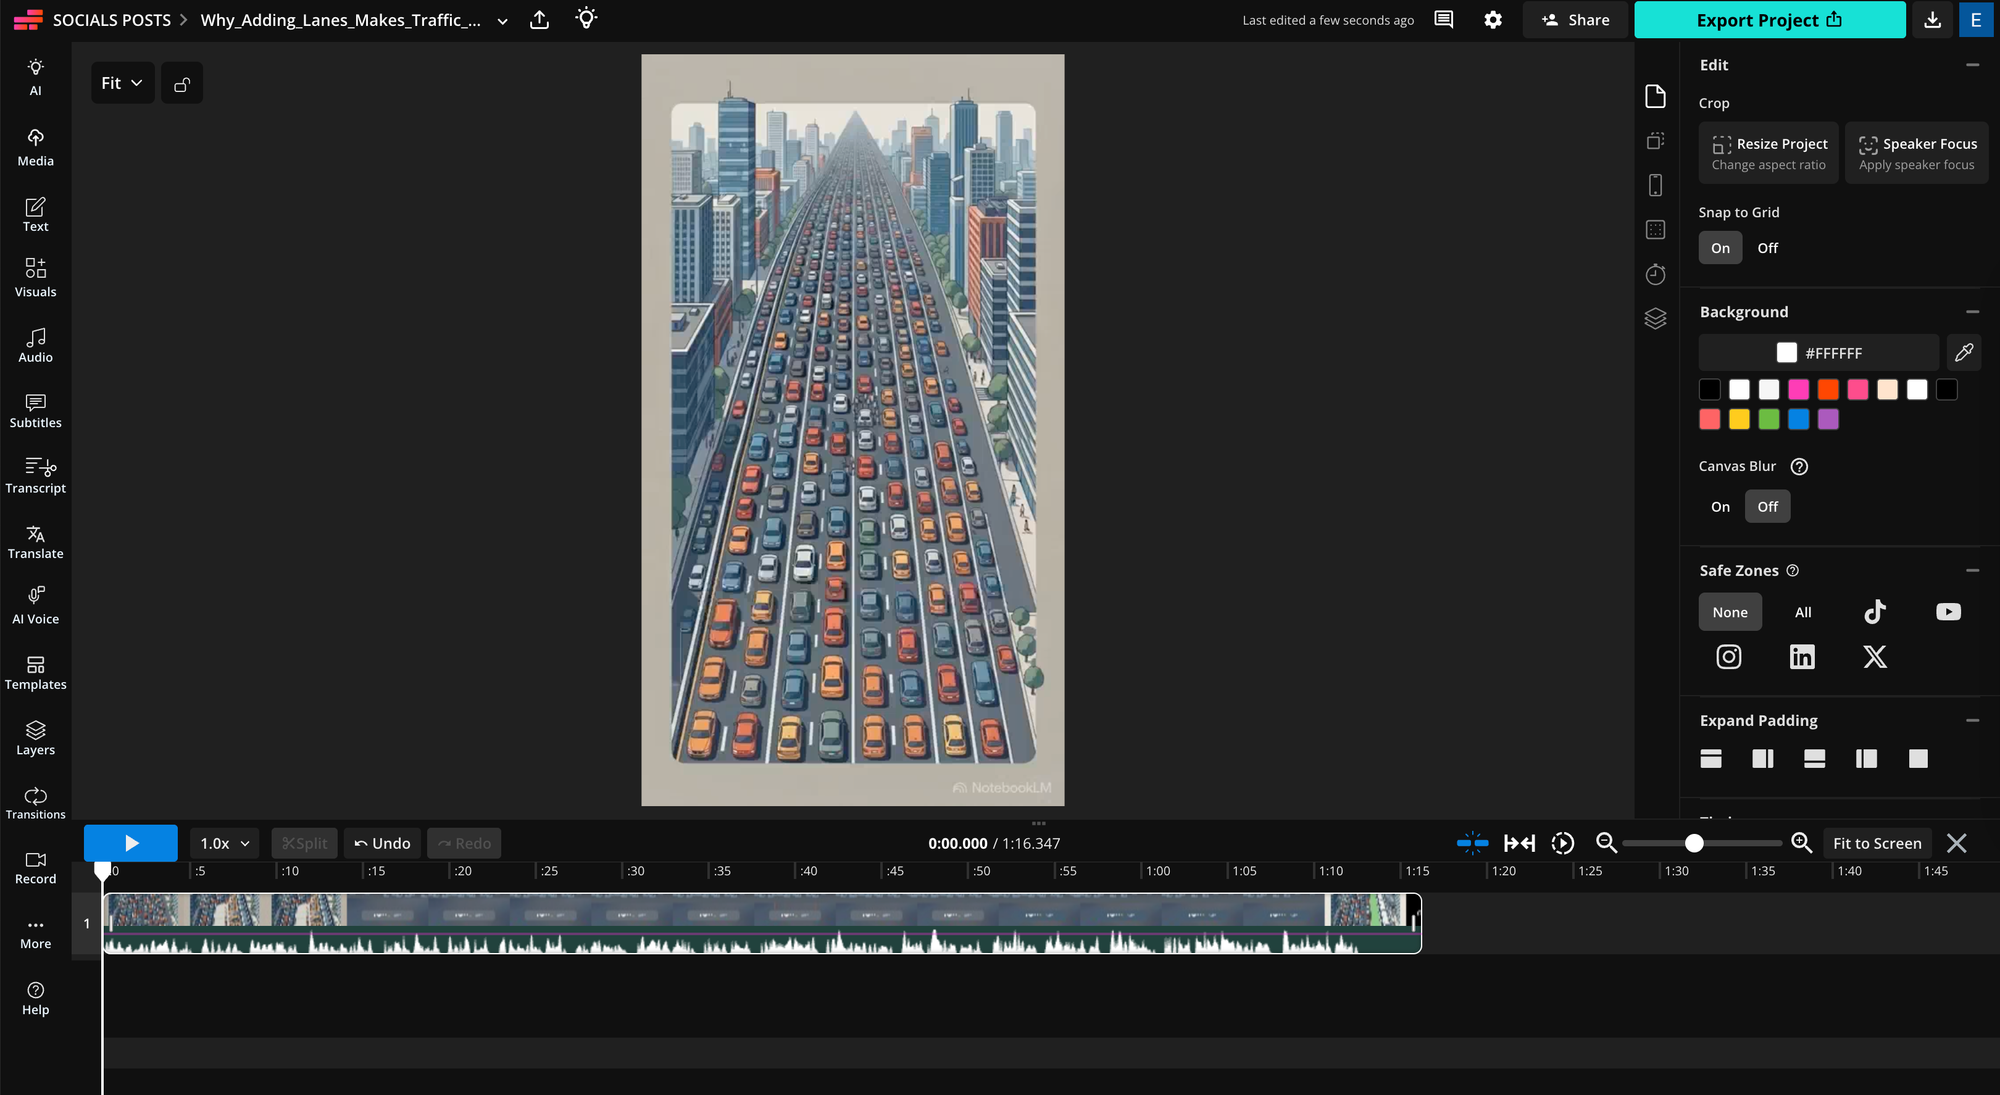
Once the Video Overview is finished, download the video from Gemini Notebook and upload it to the Kapwing studio.
1. Tighten the Narrative and Pacing
NotebookLM is generally optimizing for explaining the source material clearly, not for maximizing viewer retention. I would pay particular attention to the first 20–30 seconds. NotebookLM often needs to establish the topic before developing the argument, but a published video benefits from reaching the premise faster.
For narration-heavy videos, Kapwing's transcript-based editing is useful because you can work directly from the spoken text rather than finding every sentence manually on the timeline.
Click Transcript in the left-hand menu, then select Trim with Transcript. Choose the language used in your Video Overview and click Generate Transcript.
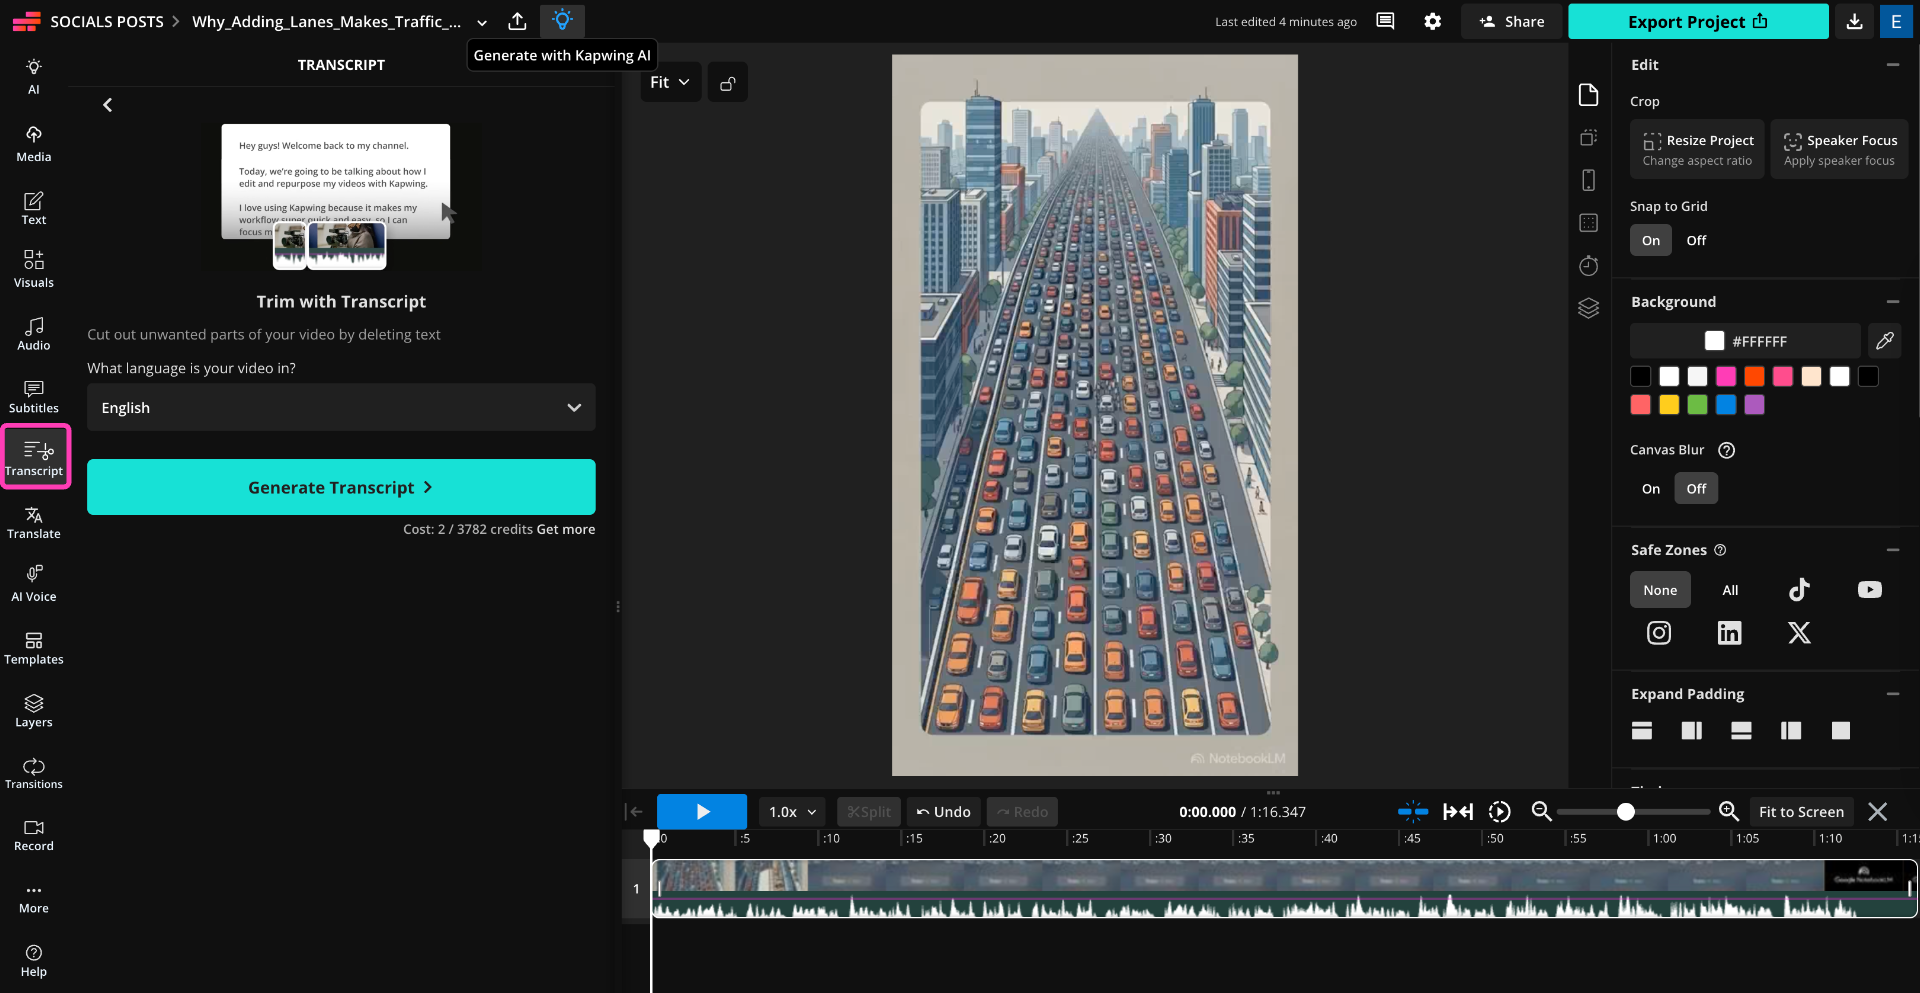
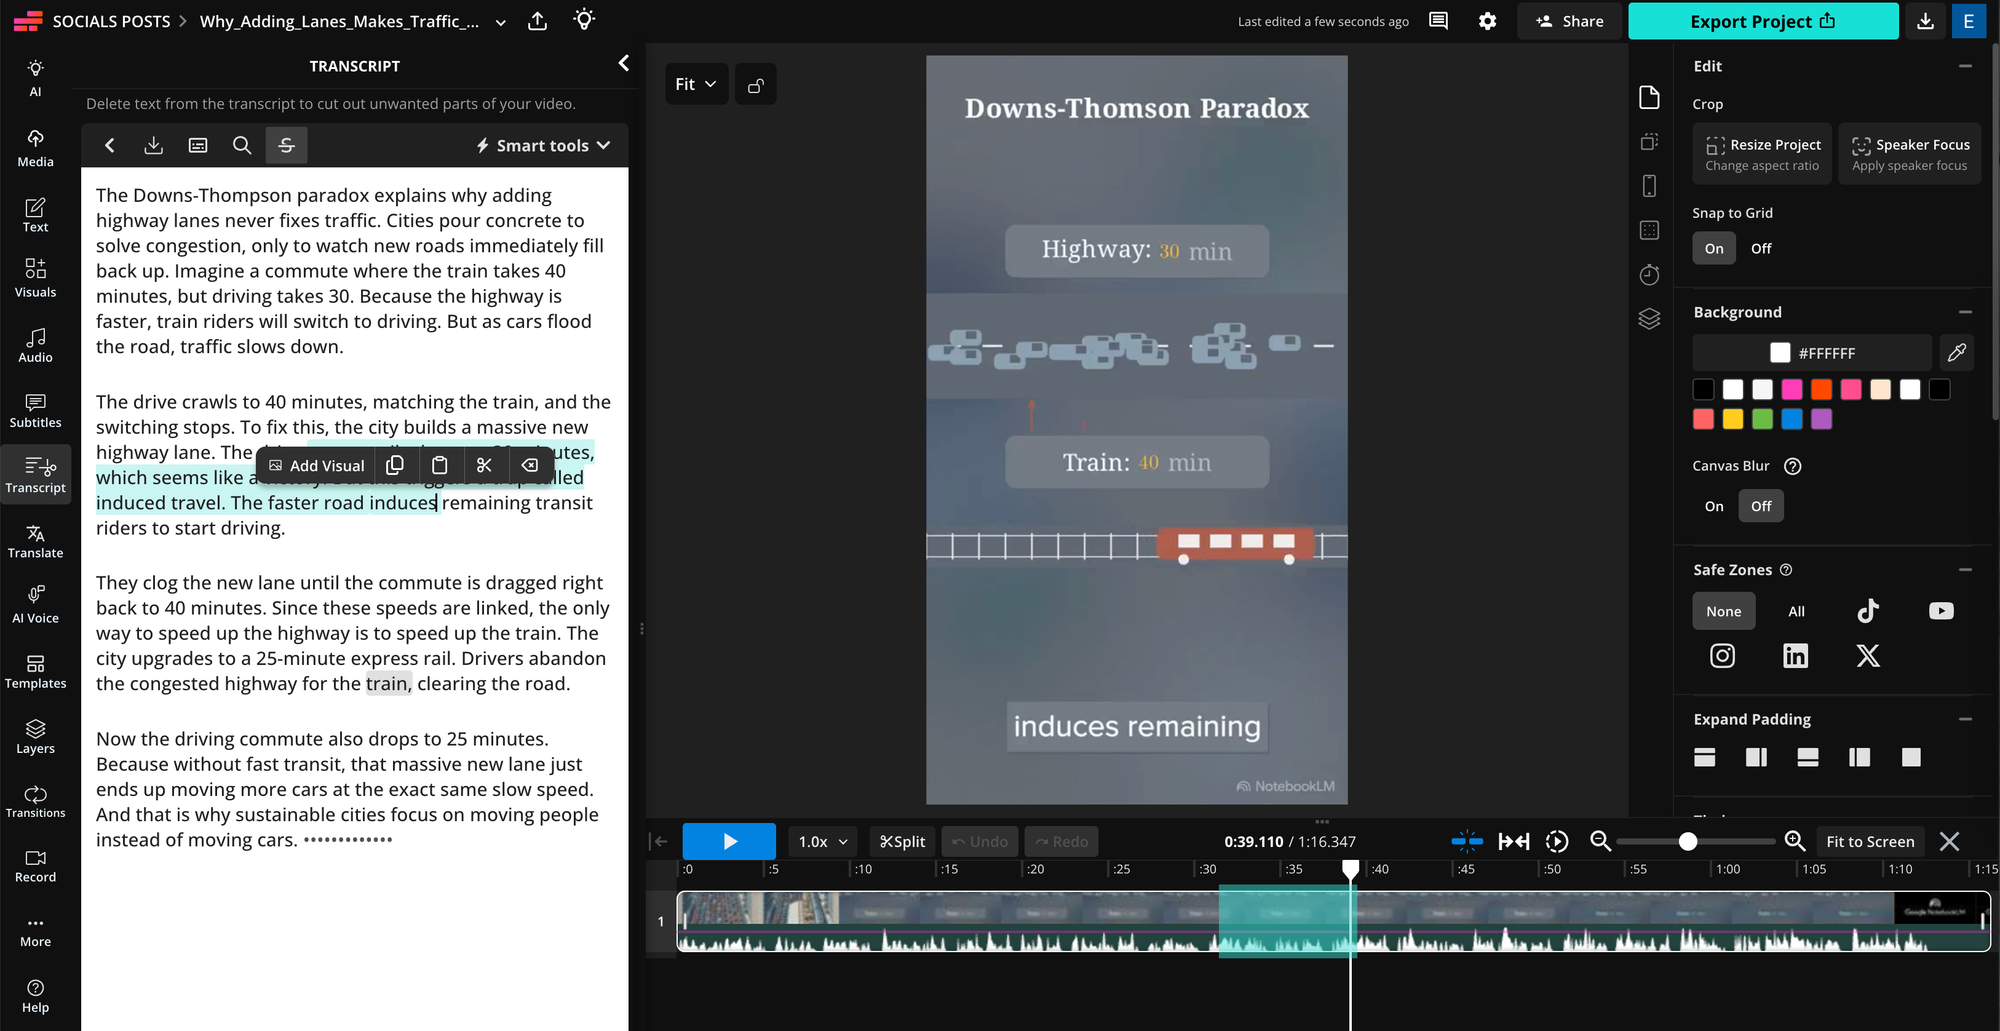
Once the transcript is generated, you can edit the video by editing its text.
When you delete part of the transcript, Kapwing removes the corresponding section from the video as well.
2. Replace Weak or Misleading AI Visuals
A generated visual can look polished while being the wrong visual for the information being explained. NotebookLM may use an illustration where a real chart would be more useful or a generic representation where an actual screenshot exists.
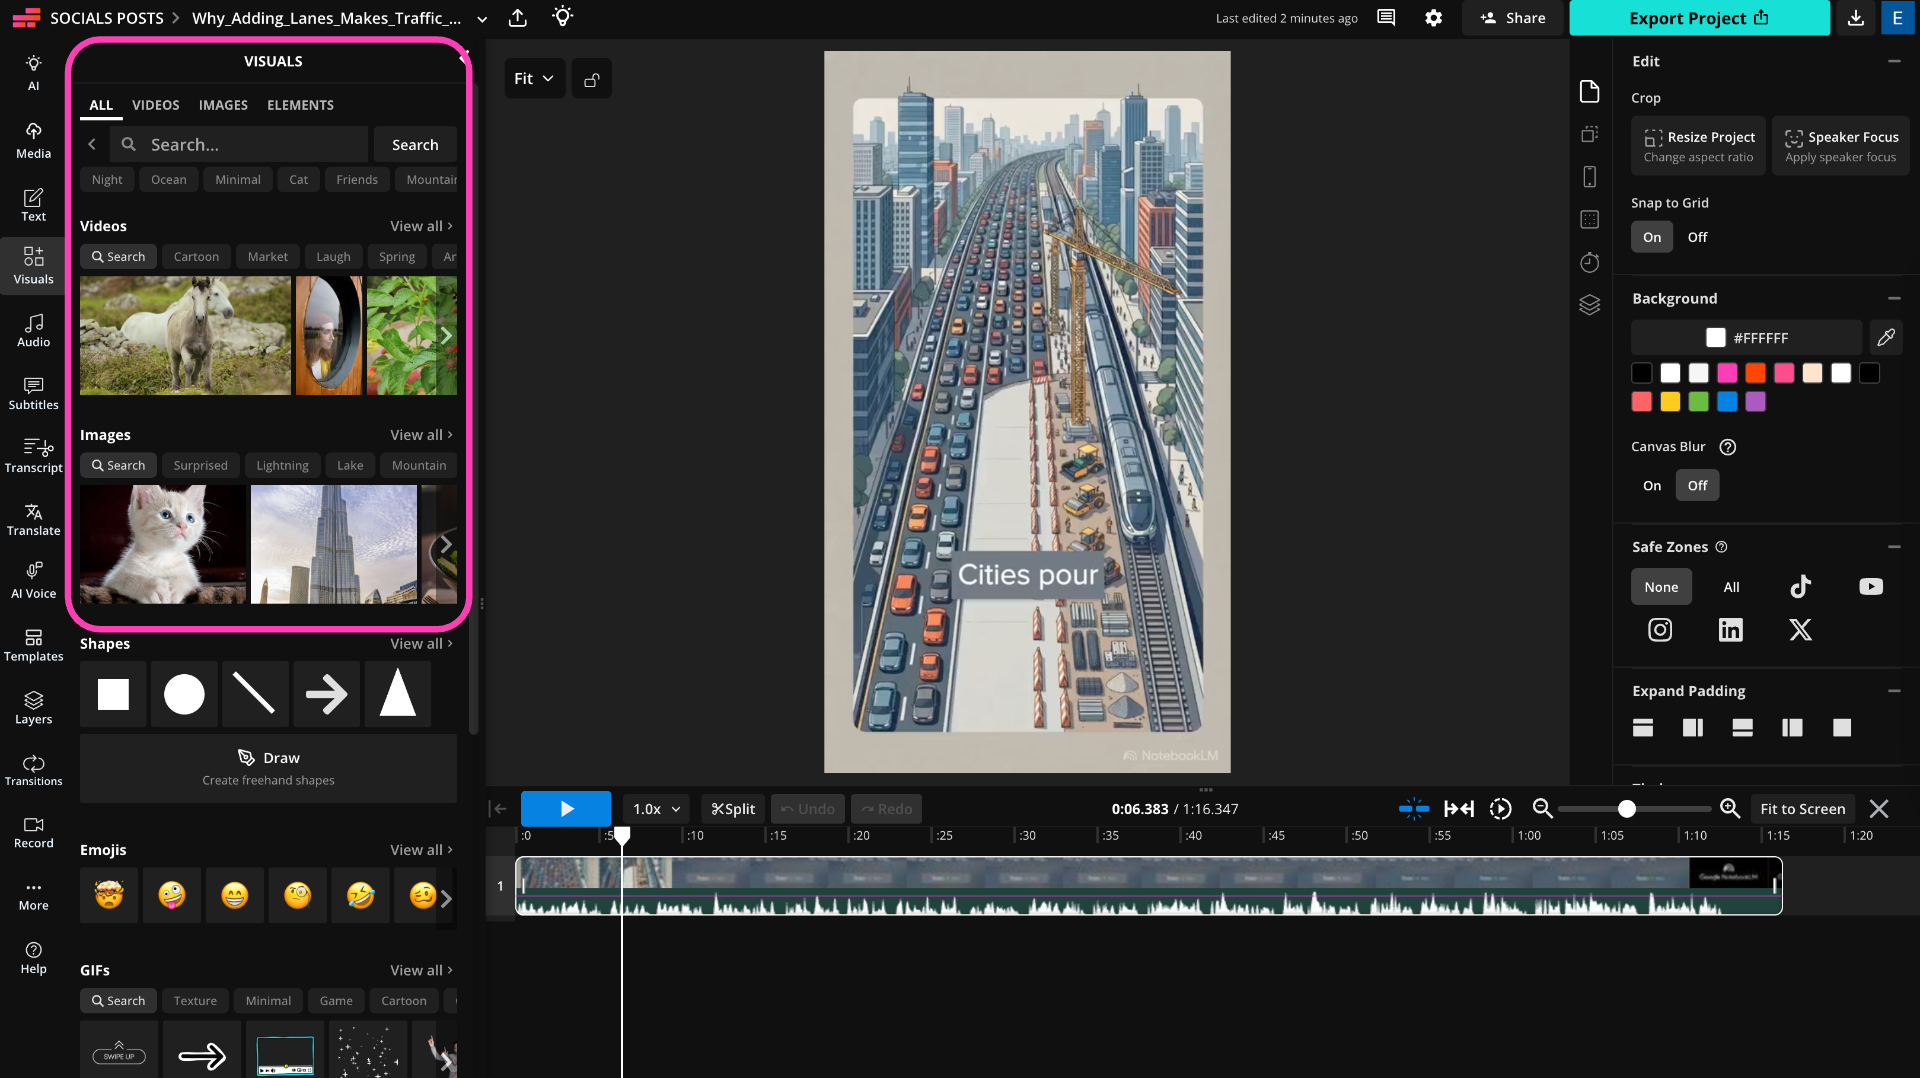
When that happens, don't regenerate the entire Video Overview just to fix one section. Replace the visual in the edit by uploading or generating your own replacement footage, or opening the Visuals panel and swapping in B-roll.
3. Add Your Own Visual System
NotebookLM's generated style can give the video a coherent first pass, but it doesn't know the visual system of your channel, company, or publication.
This is where I would add the elements that make the video feel like it belongs to you: fonts, colors, logos, lower thirds, title cards, transitions, recurring graphics, and other branded assets.
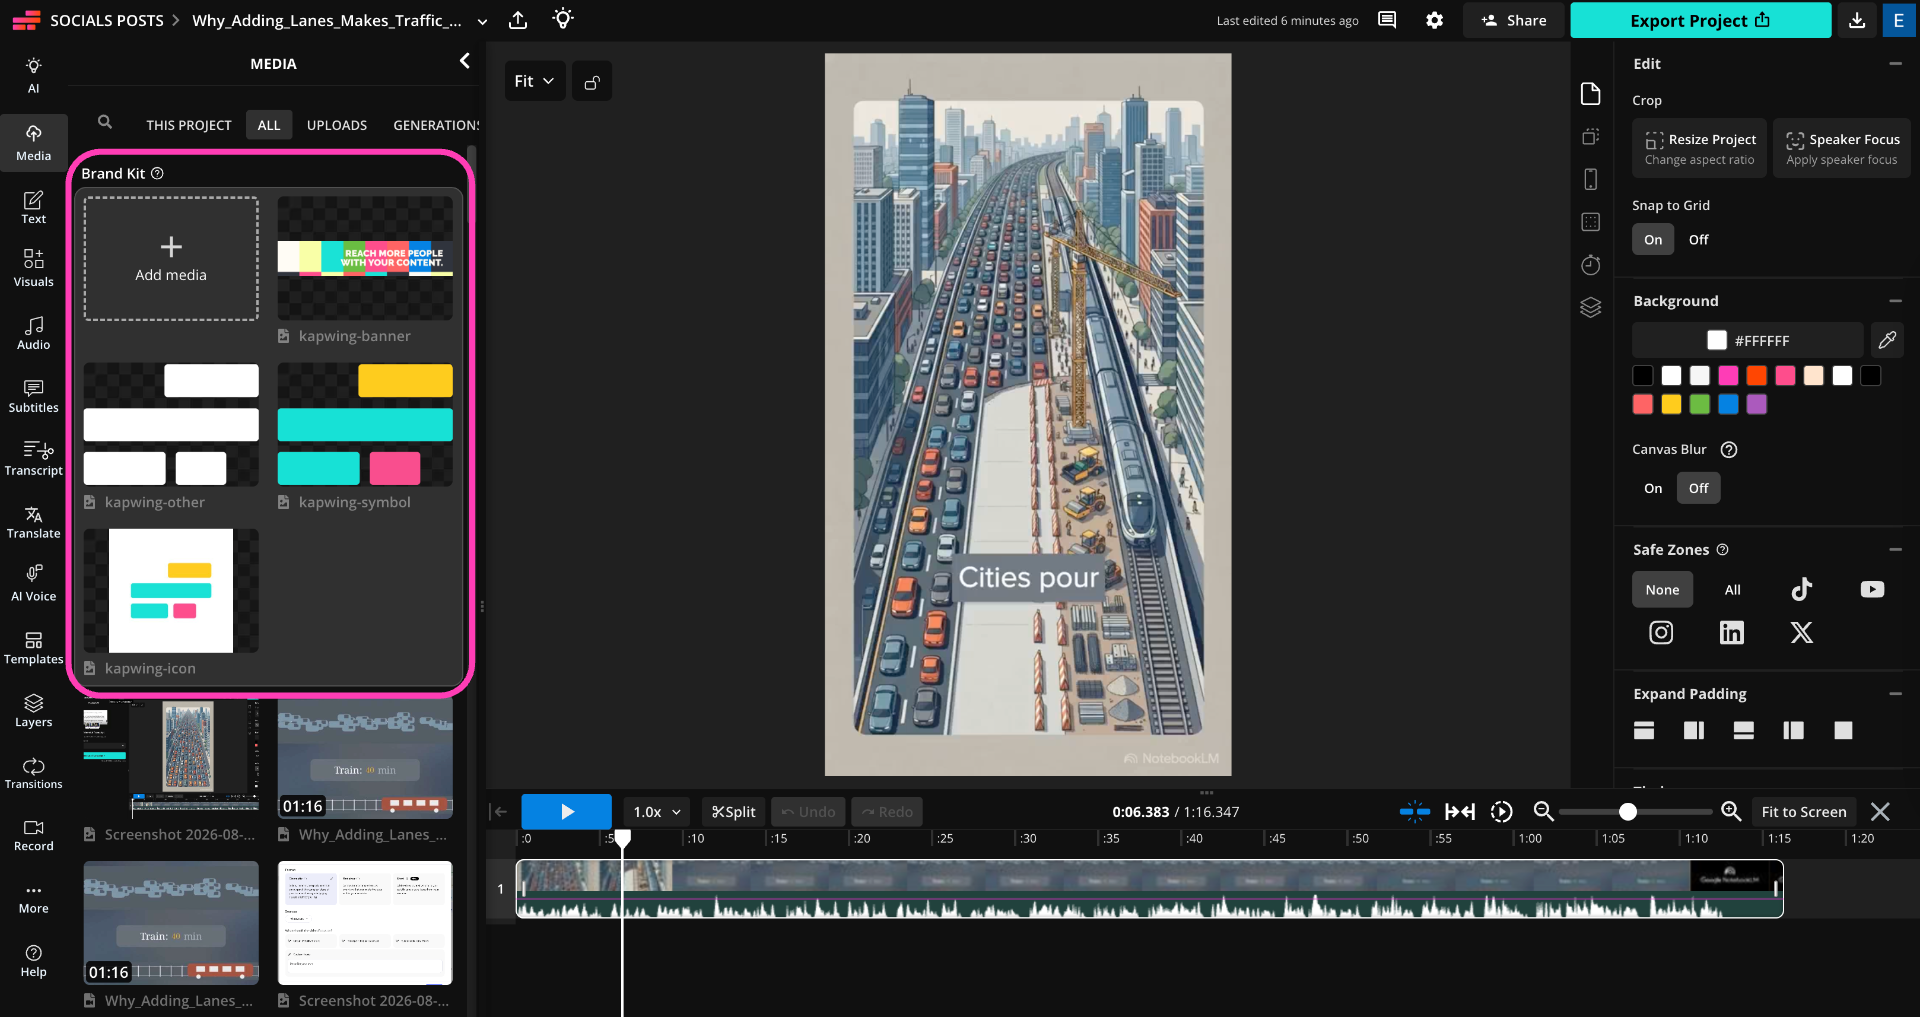
For teams producing multiple videos, reusable brand assets become especially useful because the NotebookLM generation can change from project to project while the final presentation stays consistent.
Best Gemini Notebook Video Workflows
The basic Video Overview process stays relatively consistent, but the way you build the notebook should change depending on what you're starting with. A single research paper requires a different approach from a notebook containing 30 sources, and a Short needs a much narrower source set than a long-form explainer.
Here are the workflows I think Gemini Notebook is best suited for.
Which Gemini Notebook workflow should you use?
Start with the PDF workflow
Use the article-to-video workflow
Build a multi-source notebook
Turn a PDF or Research Report Into a Video
PDF-to-video is one of the most straightforward Gemini Notebook workflows because the source already contains most of the information the video needs. Upload the PDF to a new notebook, then use NotebookLM's chat to identify its central argument, strongest findings, supporting evidence, and any concepts that need additional context.
If the PDF is relatively self-contained, use it as the only source. If it assumes significant background knowledge or references important external evidence, add those materials as supporting sources.
Turn a Blog Article Into a YouTube Video
A published article presents a slightly different problem because someone has already made editorial decisions about the information. Instead of asking NotebookLM to summarize the article, use it to determine how that information should change when moving from written content to video.
Add the article as your primary source, along with any important original research or first-party sources cited in it. Then use NotebookLM to identify potential video angles rather than simply asking for the article's main points.
Build a Multi-Source Research Video
This is where Gemini Notebook becomes more useful than a basic document-to-video converter. Instead of starting with one authoritative source, you can build a notebook containing primary research, reporting, documentation, transcripts, websites, and public YouTube videos, then use NotebookLM to reason across the collection before creating the video.
Source quality matters more as the notebook gets larger. Twenty sources don't necessarily provide stronger grounding than five; they can simply introduce more duplicated, outdated, or low-quality information. A large notebook should give you a broader research environment, not an excuse to select everything when generating the video.
Frequently Asked Questions
Can Gemini Notebook turn a PDF into a video?
Yes. Upload the PDF as a source in your notebook, then create a Video Overview using that source. Before generating, I recommend using NotebookLM's chat to identify the document's most important findings and decide what the video should focus on. For complex reports or academic papers, you can also add supporting sources to provide context that isn't contained in the original PDF.
Can NotebookLM turn an article or website into a video?
Yes. You can add supported websites as sources and use them to generate a Video Overview. If you're repurposing your own article, consider adding the primary sources behind it as well. This gives NotebookLM access to both the article's editorial framing and the underlying evidence rather than simply asking it to reproduce the article in video form.
Can NotebookLM use YouTube videos as sources?
Yes, NotebookLM supports public YouTube URLs as sources. This can be particularly useful when you're researching a topic across interviews, presentations, lectures, or other video material.
Using a YouTube video as a source doesn't give you ownership of the original video's footage, however. Treat it as research material and make sure you have the appropriate rights for any copyrighted media you ultimately use in your own published video.
Can I choose which NotebookLM sources are used in a Video Overview?
Yes. When creating the Video Overview, you can select which sources from your notebook should be included in that generation. This means a single notebook can contain a broader research library while individual videos use only the subset of sources relevant to their topic.
This is particularly useful if you plan to create multiple videos from the same notebook. Instead of duplicating the notebook, change the selected sources and topic for each generation.
Can I choose what a Gemini Notebook video is about?
Yes. During Video Overview creation, NotebookLM suggests three topics based on your selected sources, but you can also describe your own topic.
I generally prefer defining my own topic when the video is intended for publication because it gives you tighter control over the editorial angle. Rather than entering a broad subject like "urban transportation," describe the specific question or argument you want the video to explore.
Can you customize the visual style of a NotebookLM video?
For Explainer Video Overviews, you can choose from visual-style presets. Those visual presets aren't available in the same way for Short and Cinematic Video Overviews, so don't assume all three formats have identical customization controls.
The best visual style depends on the material. For technical and research-heavy explainers, prioritize clarity over novelty; the visual treatment should make the information easier to understand rather than simply making the generation look more stylized.
Can you make YouTube Shorts with NotebookLM?
Yes. NotebookLM's Short Video Overview format can generate short-form videos from selected sources. The strongest results usually come from narrowing the generation to one question, finding, or idea instead of asking it to summarize an entire research topic.
You can also create short-form content by generating a longer Explainer first and cutting its strongest sections into vertical clips in Kapwing. Which workflow is better depends on whether the Short needs its own narrative or is simply a condensed version of the longer video.
Can you edit a Gemini Notebook Video Overview?
Yes. Once the Video Overview is generated, you can download it and edit the video in Kapwing. This is useful for tightening pacing, replacing weak AI visuals, adding B-roll, applying your brand system, and adapting the video to different platforms.
I generally treat NotebookLM's output as a strong first cut rather than a locked final video. That preserves the speed of source-to-video generation without giving up editorial control over the finished piece.
Is Gemini Notebook free?
Gemini Notebook offers free access, but usage limits and access to particular features can vary by Google AI plan. More advanced or compute-intensive features may have different availability, so check the current limits on your Google account if a Video Overview option discussed in this guide doesn't appear.