How to Make a GIF of Yourself
Learn how to make a GIF of yourself with a free online video editor in this step-by-step tutorial.
GIFs add a powerful punch to messaging, and brands regularly share these snappy visuals to promote products and services across social channels. Now, casual content creators and growing influencers are following their lead.
Thanks to online video editors, anyone can remix their content into a compelling GIF without prior editing experience. In minutes, funny accidents, eye-catching dance moves, and popular hand gestures can become looping image files that draw viewers searching for original and exciting content. In this article, we're sharing how to make a GIF of yourself so you can be the star of your content!
- Record or find a video
- Upload video to GIF maker
- Edit video
- Export and download
Step One: Record or Find a Video
The first step to creating a GIF of yourself is to record a short video or find an existing clip with an eye-catching moment. A video with quick motion such as pointing, dancing, and laughing is easy to create and a popular GIF idea. Below are a few ideas to potentially emulate.
Step Two: Upload Video to GIF Maker
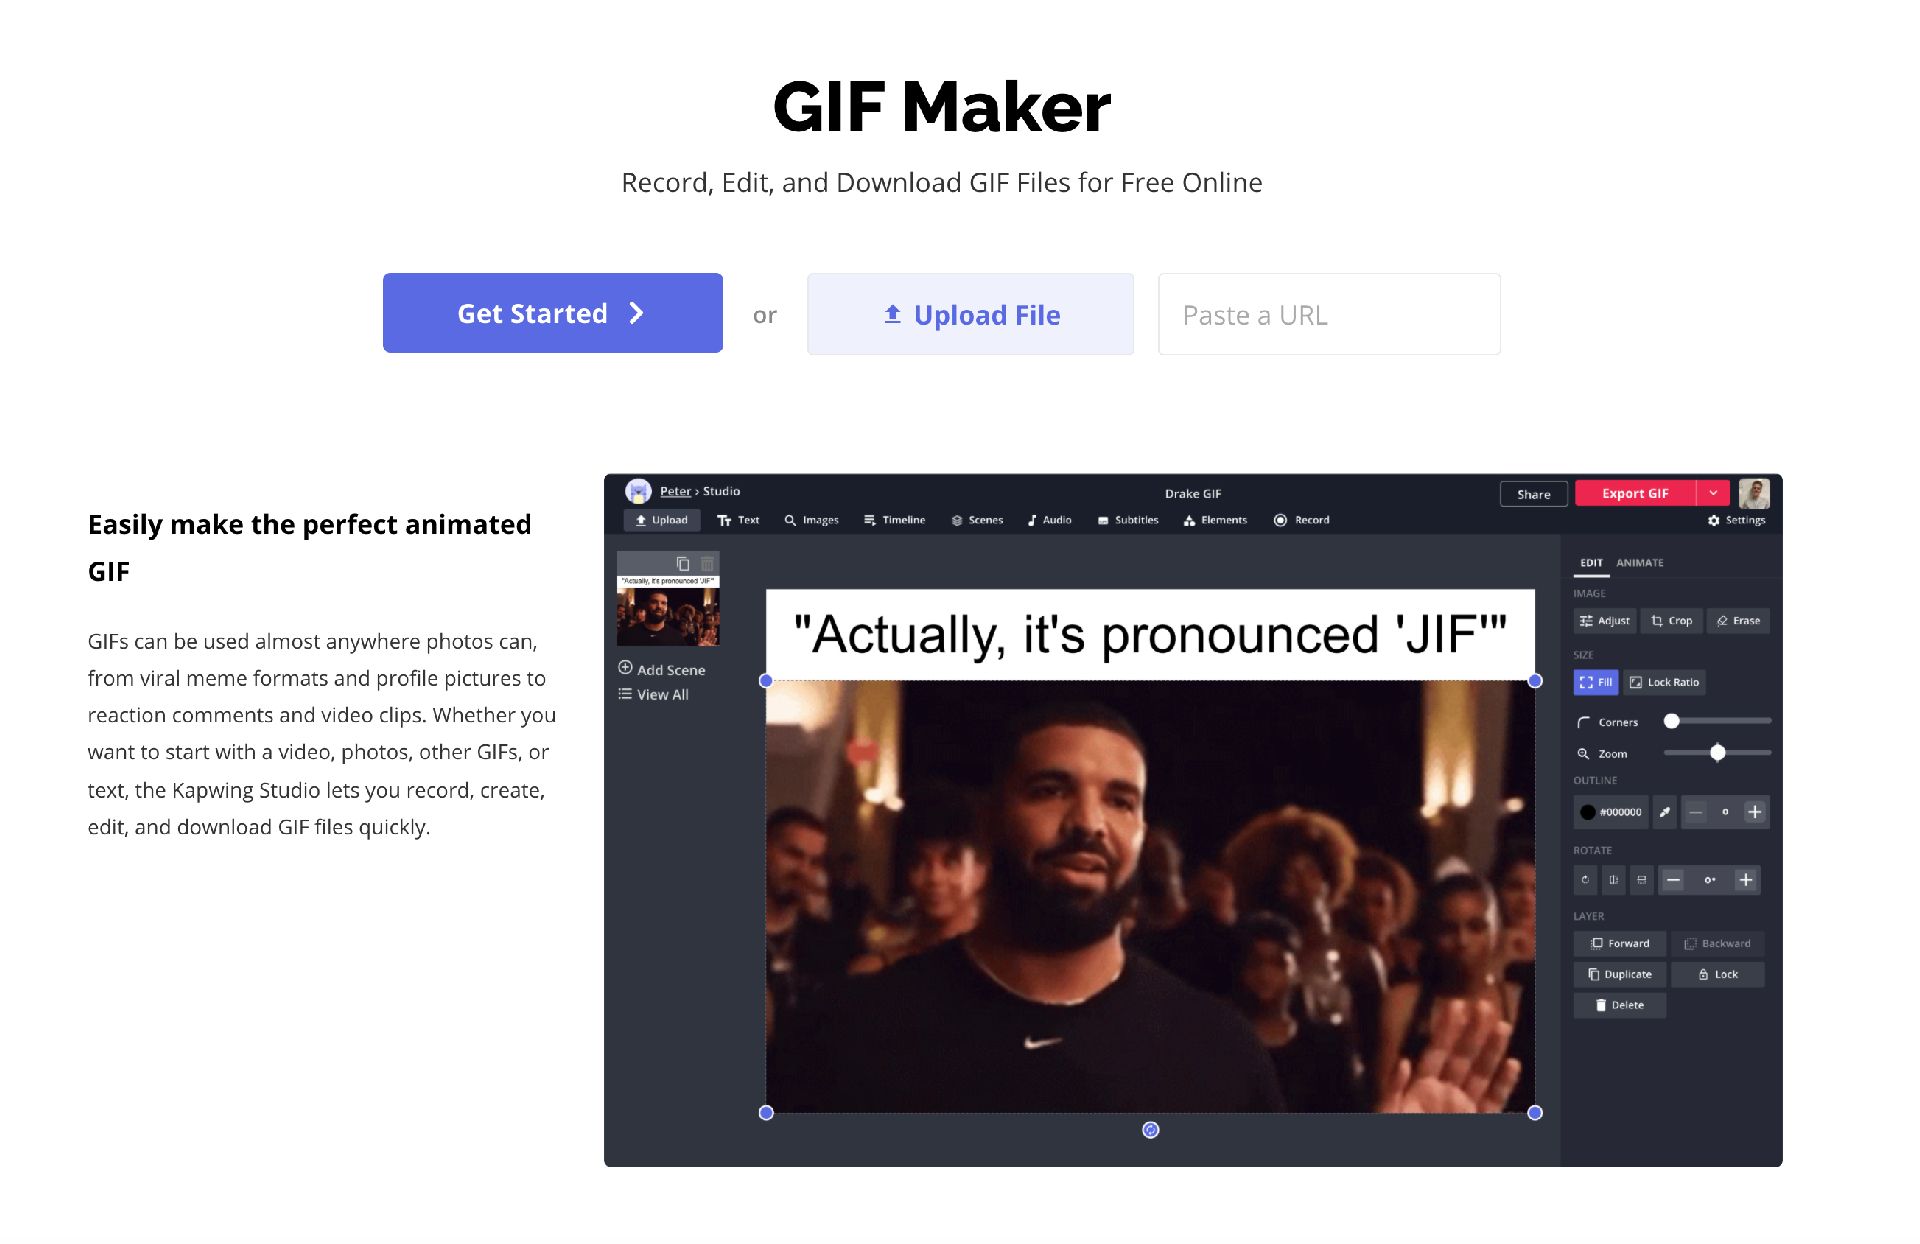
Get started by opening the GIF maker tool in your browser with any device. With this free tool, you can split and trim videos, add animations, striking text, music, filters, and more to stylize your GIF to perfection.
There are several options for uploading your video to the editor. You can click the upload file button to add a video from your device, paste a video link, or click Get Started to open the tool. The first option is the quickest way to upload your content then you’ll see your video on the canvas and the video layer on the timeline. You can also upload photos to use in your GIF.
Step Three: Edit Video
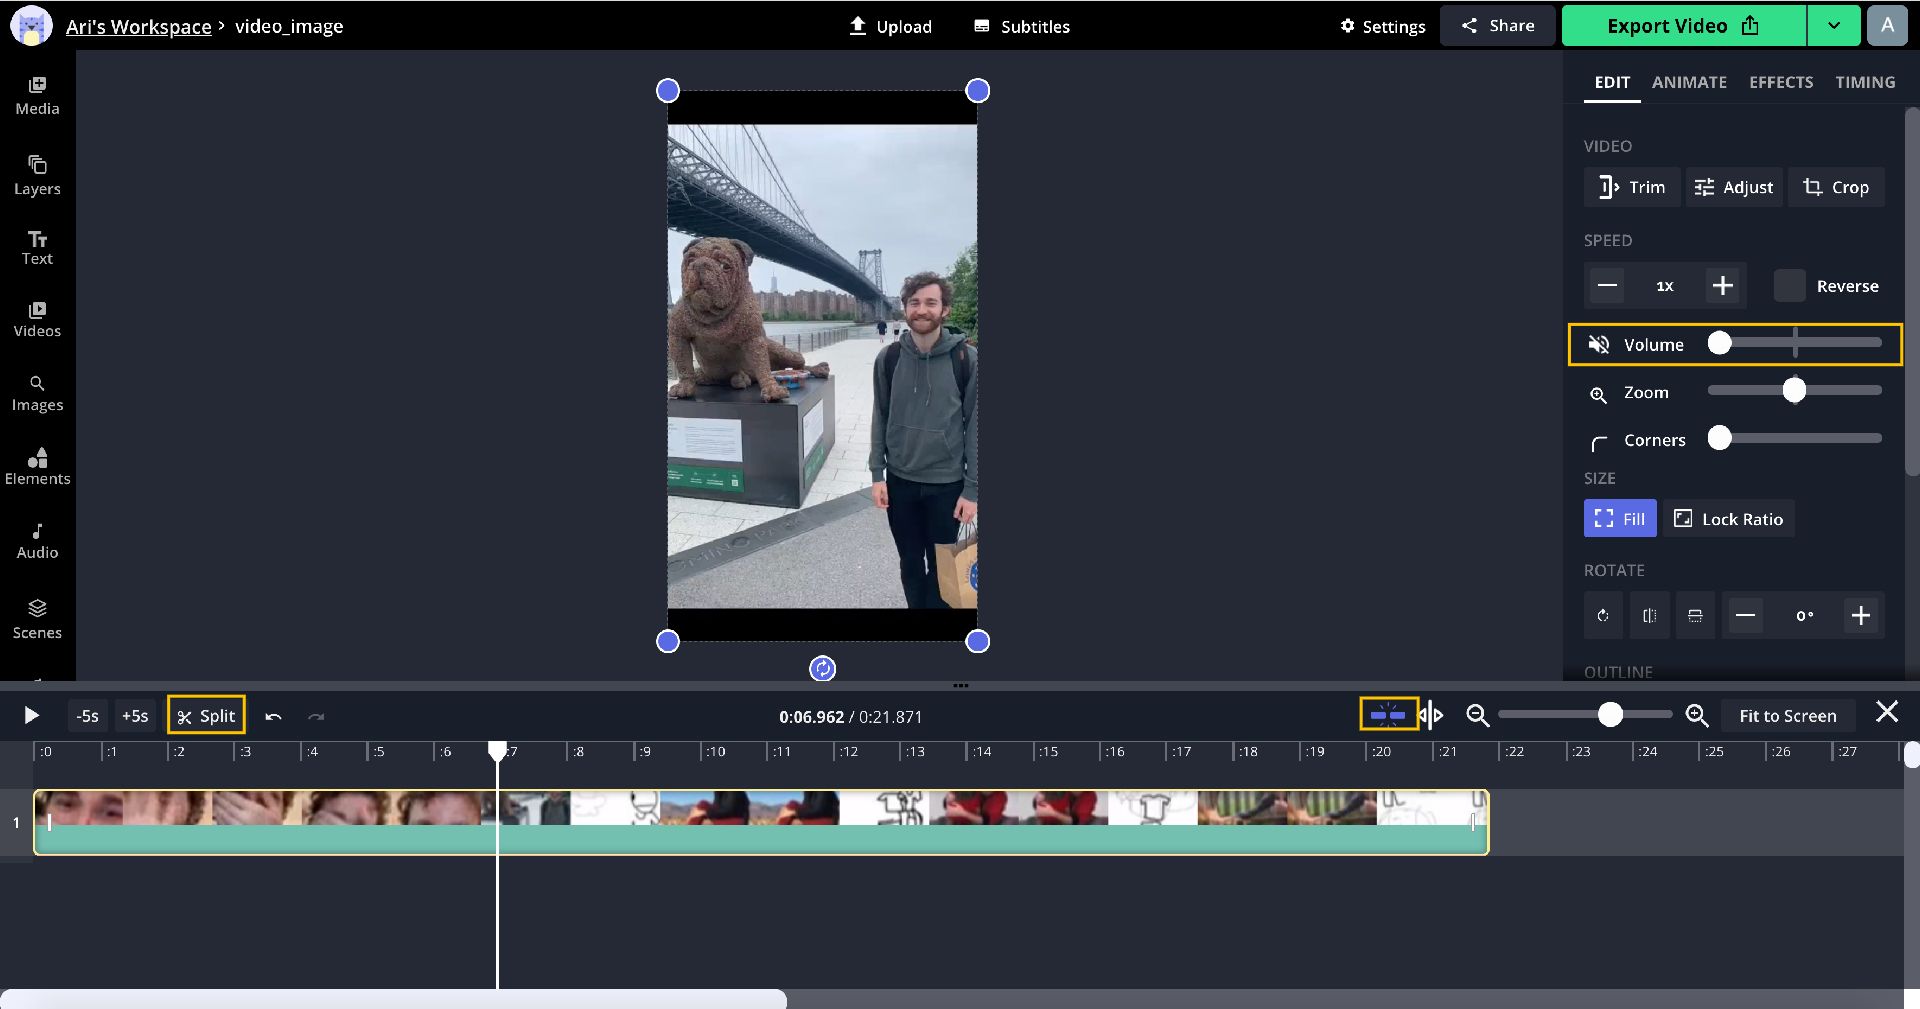
You can adjust the settings above the timeline to optimize your screen for comfortable editing. Click Fit to Screen to view the entire video layer/s without scrolling and use the snap function to automatically align layers on the timeline. From here, drag the ends of a layer to begin trimming the length. GIFs are snappy and eye-catching, so try to keep the duration no longer than ten seconds
You can use the split tool above the timeline to remove sections in the middle or tap the S key to activate the split tool shortcut. Drag the circle under Volume all the way to the left if your prefer to edit the GIF without sound.
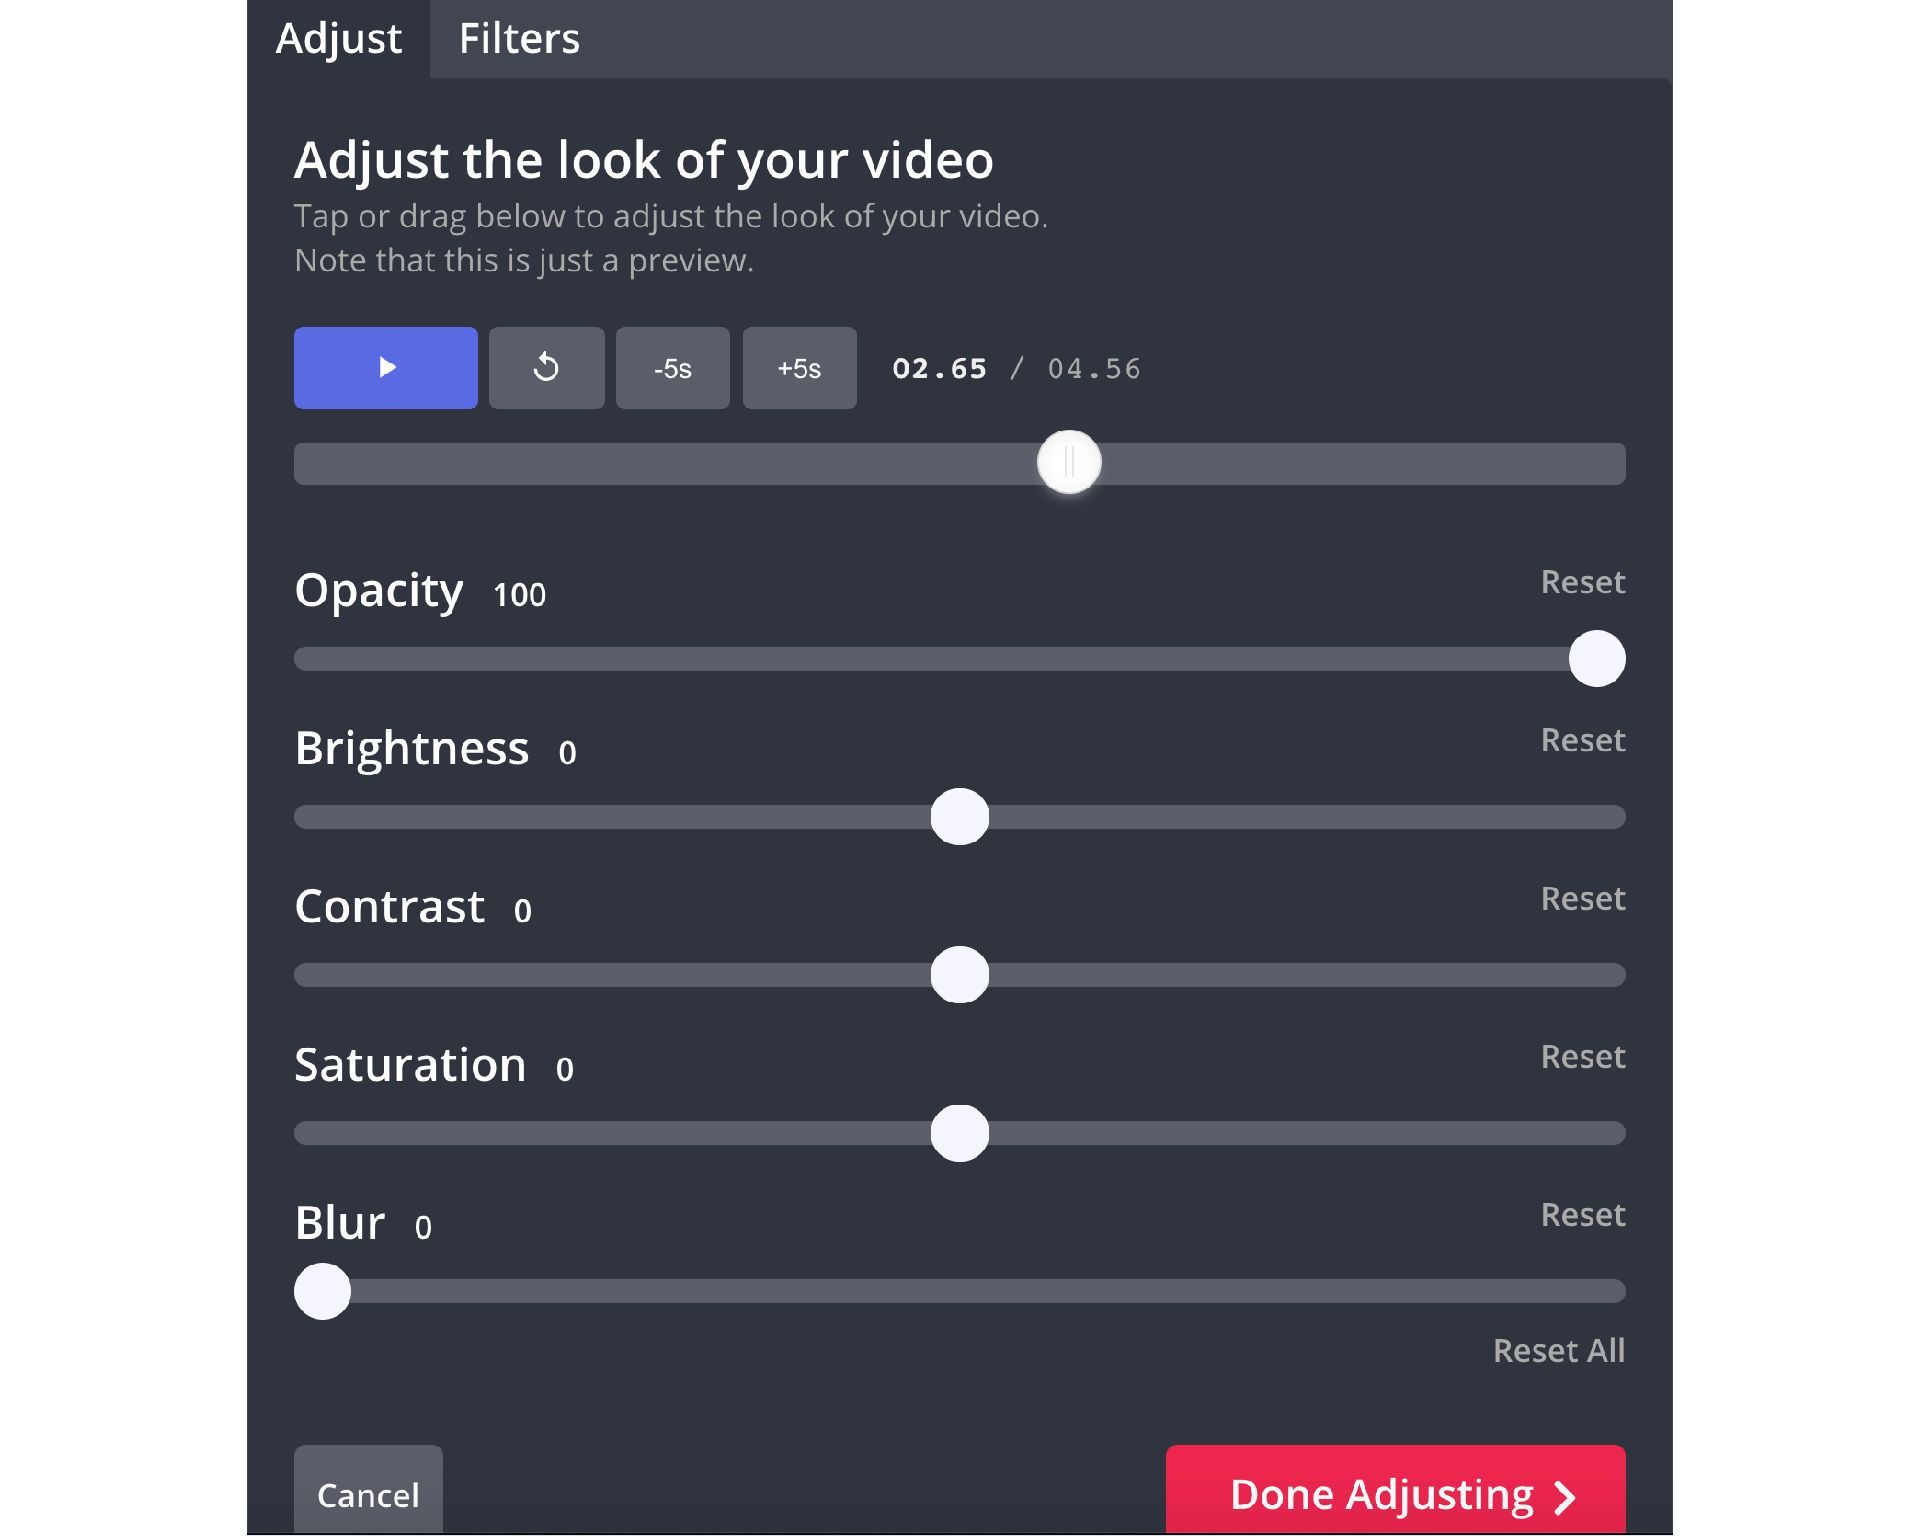
To touch up the video, click Adjust, then drag the circle under each setting to change the intensity. You can reset your adjustments to the default settings if you prefer the original and click Filters to change the appearance of the video.
You can also use the crop tool to highlight a portion of the video as the GIF. To make your GIF pop, click Animate, and explore the options. With a few clicks, you can watch your GIF change colors, flicker, and slide. Afterwards, you can change the animation speed and apply to the intro, outro, or both.
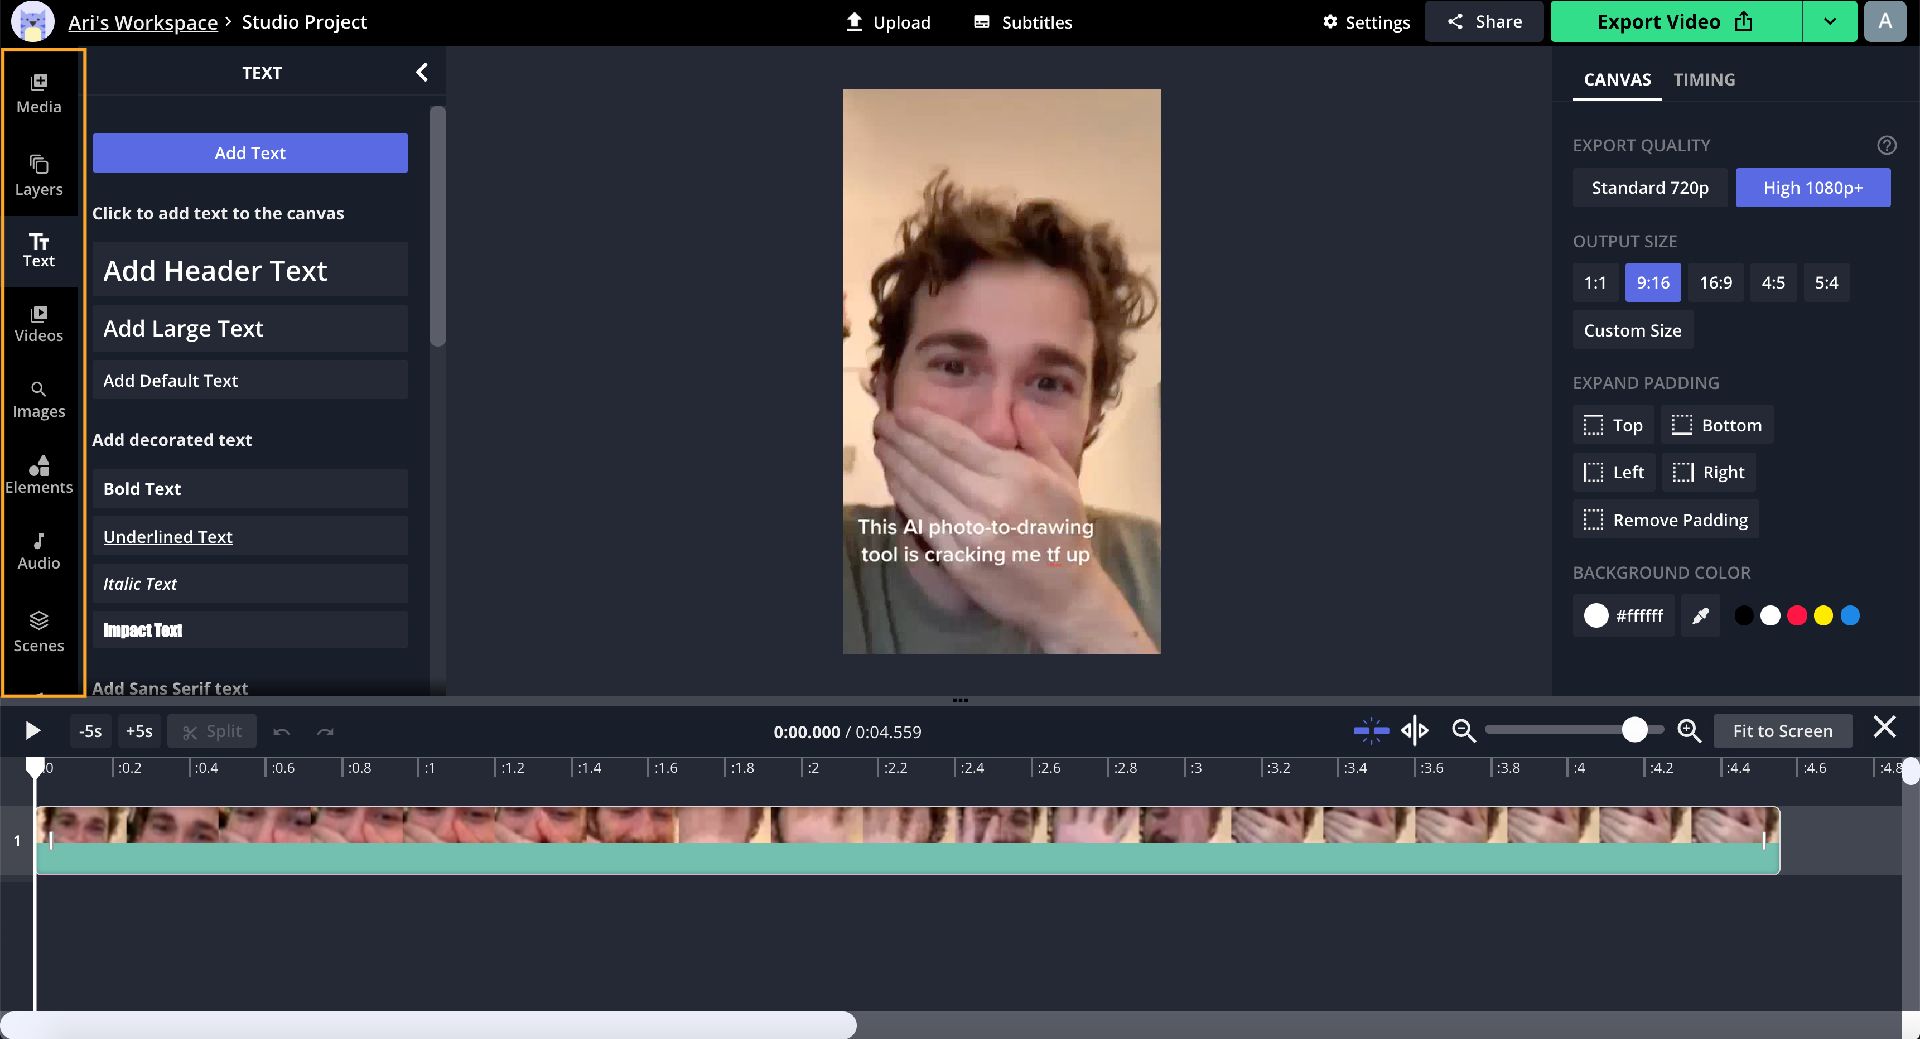
The toolbar on the left side of the Studio is where you can find additional intuitive graphic design tools for easy content creation. The text tool support hundreds of unique fonts and the option to change the size, color, and background color. The elements tool is where you can find a variety of shapes, search for emojis, and add decorative objects.
Step Four: Export and Download
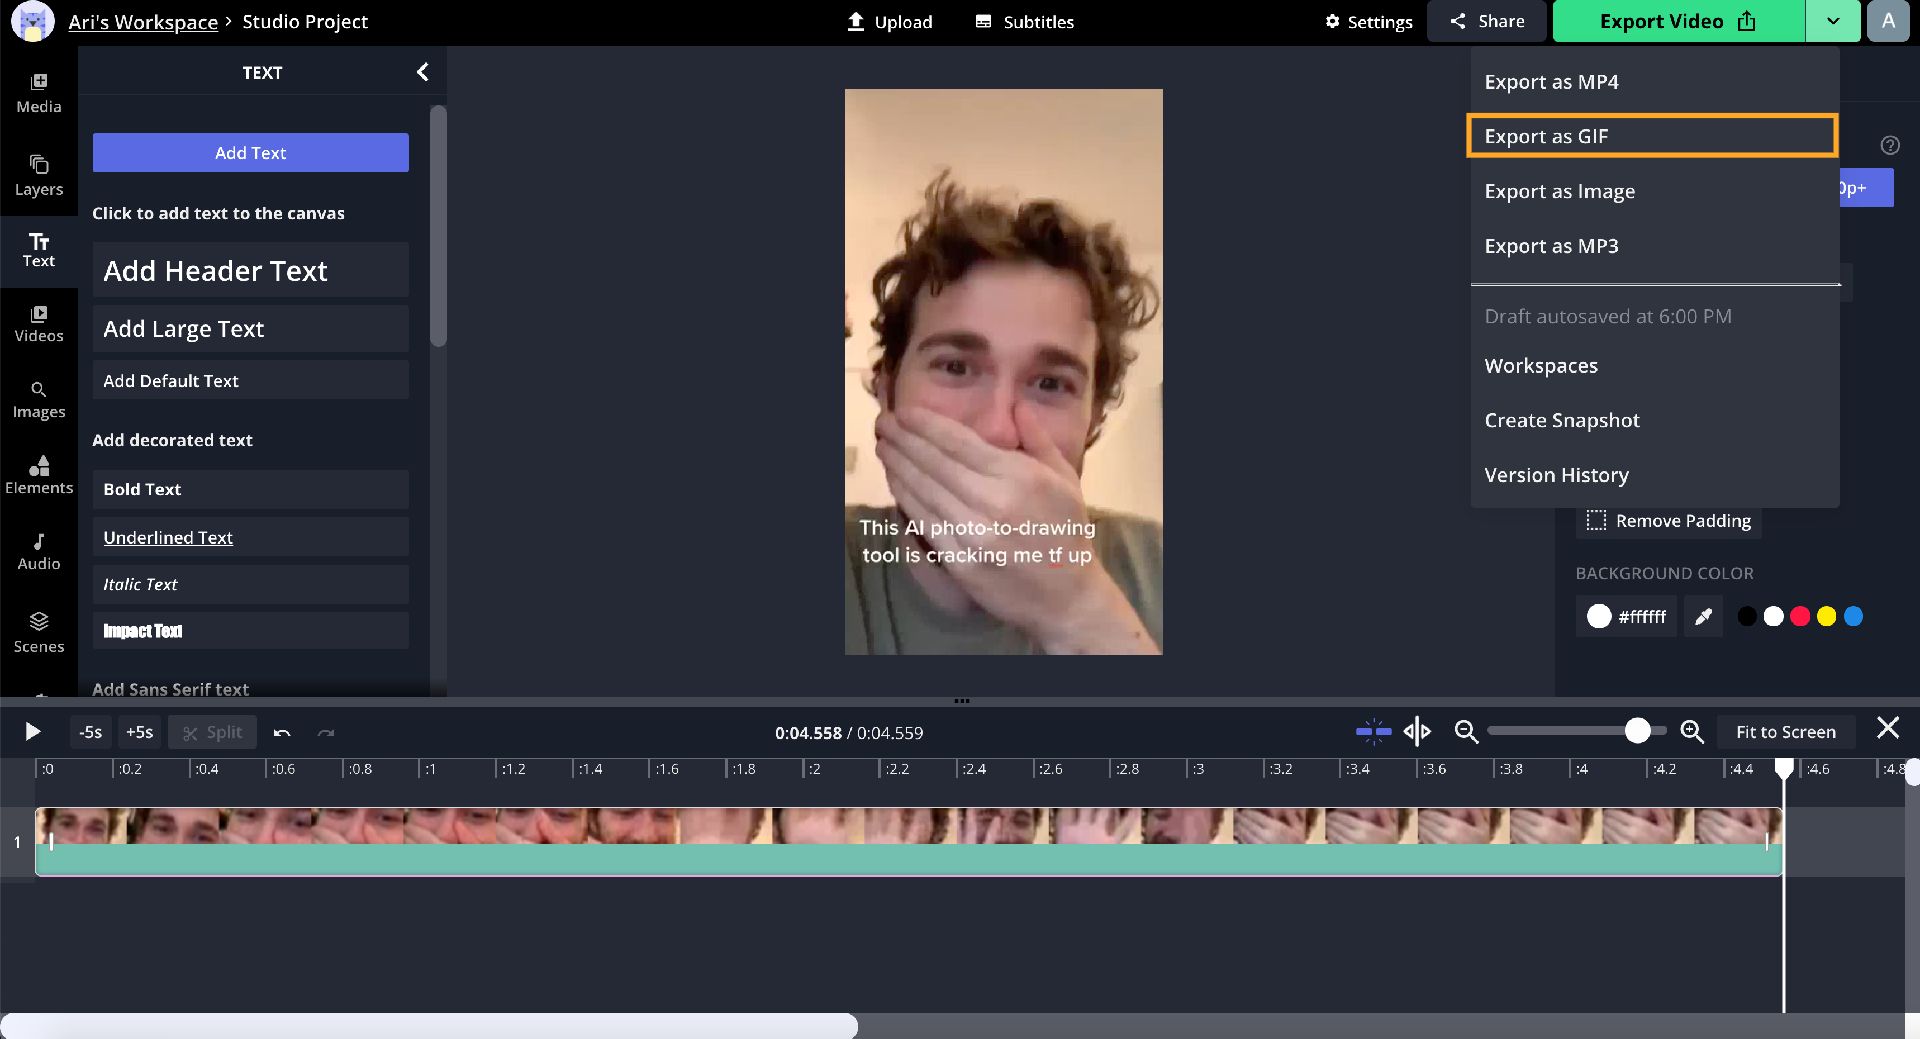
Replay your video a few times to ensure it’s ready, then click the arrow next to Export Video at the top of the Studio. Click Export as GIF to begin converting the video to the new format. When it has processed, click Download to save the GIF to your device.
Explore the related articles below to improve your GIF editing skills, and please reach out on Instagram and Twitter with suggestions for future tutorials! We're happy to hear from our creators. Subscribe to our YouTube channel for modern video editing tutorials to help you create and share your story.
Related Articles
- How to Make High Quality GIFs for Free
- How to Make Aesthetic GIFs for Photo and Video Edits
- How to Add Music to a GIF
- How to Make a Color Changing GIF Online