
AI Eye Zoom Trend Tutorial (Lost in Your Iris)
A new AI video trend has landed — make your video today to stay ahead of it.
AI-powered video effects are becoming a major force on TikTok and Instagram, with creators using them to produce surreal, cinematic trends that grab attention instantly. One of the latest to go viral is the AI Eye Zoom trend, also known as the Lost in Your Iris trend. This visual starts with a close-up of your eye and gradually zooms inward, creating the illusion of getting lost inside the iris.
The effect is made using Higgsfield AI, a tool that generates high-quality, cinematic videos from scratch or from a reference image. While Higgsfield handles most of the process, you’ll need to take a couple of extra steps to complete the trend.
In this tutorial, we’ll walk you through the two steps needed to make an AI Eye Zoom video from start to finish. You’ll learn how to generate the effect, edit it with a looping effect, and add trending audio.
Table of Contents
- Step 1: Generate Eye Zoom Effect (Higgsfield)
- Step 2: Edit and Publish Lost in Iris Video (Kapwing)
- Frequently Asked Questions
AI Eye Zoom Trend Tutorial (Lost in Your Iris)
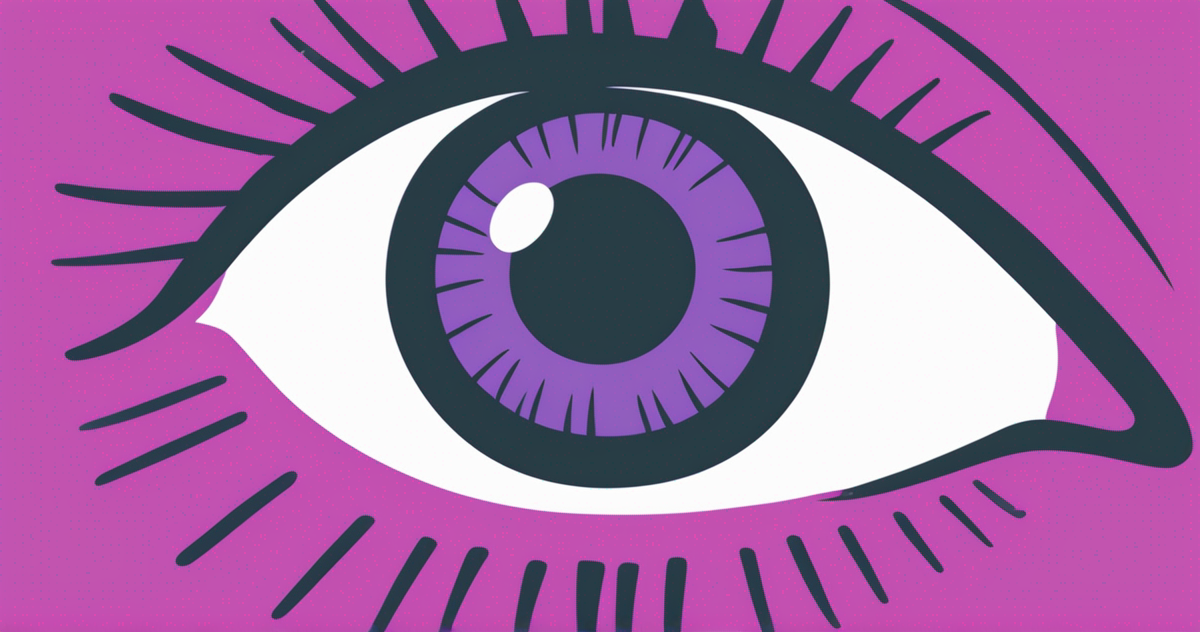
This trend is not only visually striking, it’s also quick to recreate. In just a few minutes, I was able to generate this version.
Example 'Lost in Your Iris' video created using Higgsfield and Kapwing.
By experimenting with different video generation prompts, you can create personalized variations that reflect your own content style. Here’s how to get started.
Step 1: Generate Eye Zoom Effect (Higgsfield)
To generate the desired effect for the video trend, start by navigating to Higgsfield.ai. For beginners, it may be helpful to visit our complete guide on how to use the Higgsfield AI video generator.
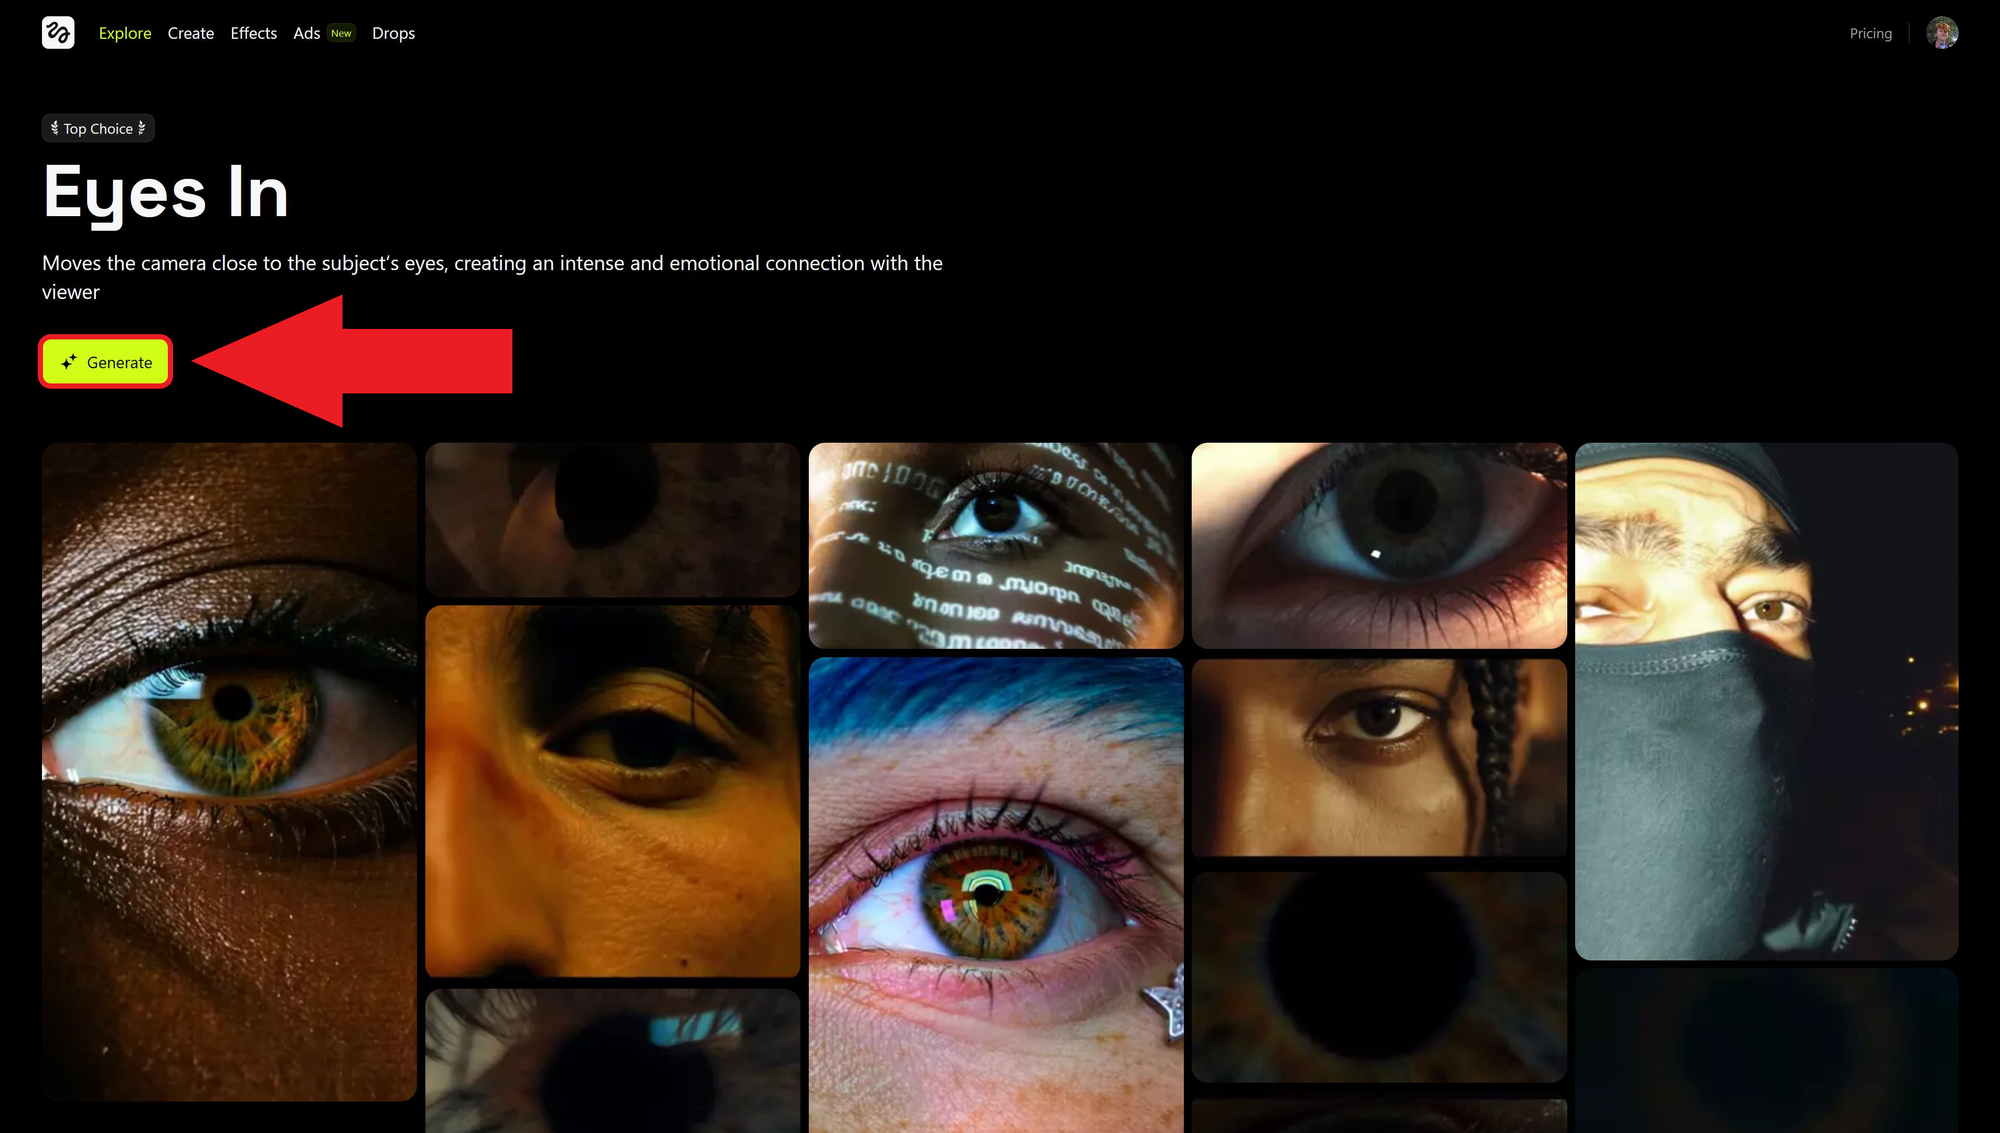
The landing page on the website will feature a list of cinematic motion controls that you can use in any AI video generation. Currently, the "Eyes In" effect is featured as a top choice on the site. This is the effect we'll want to use for the AI eye zoom trend.
If you don't see the video effect you're looking for in one of the featured clips, you can instead select it from the written list above.
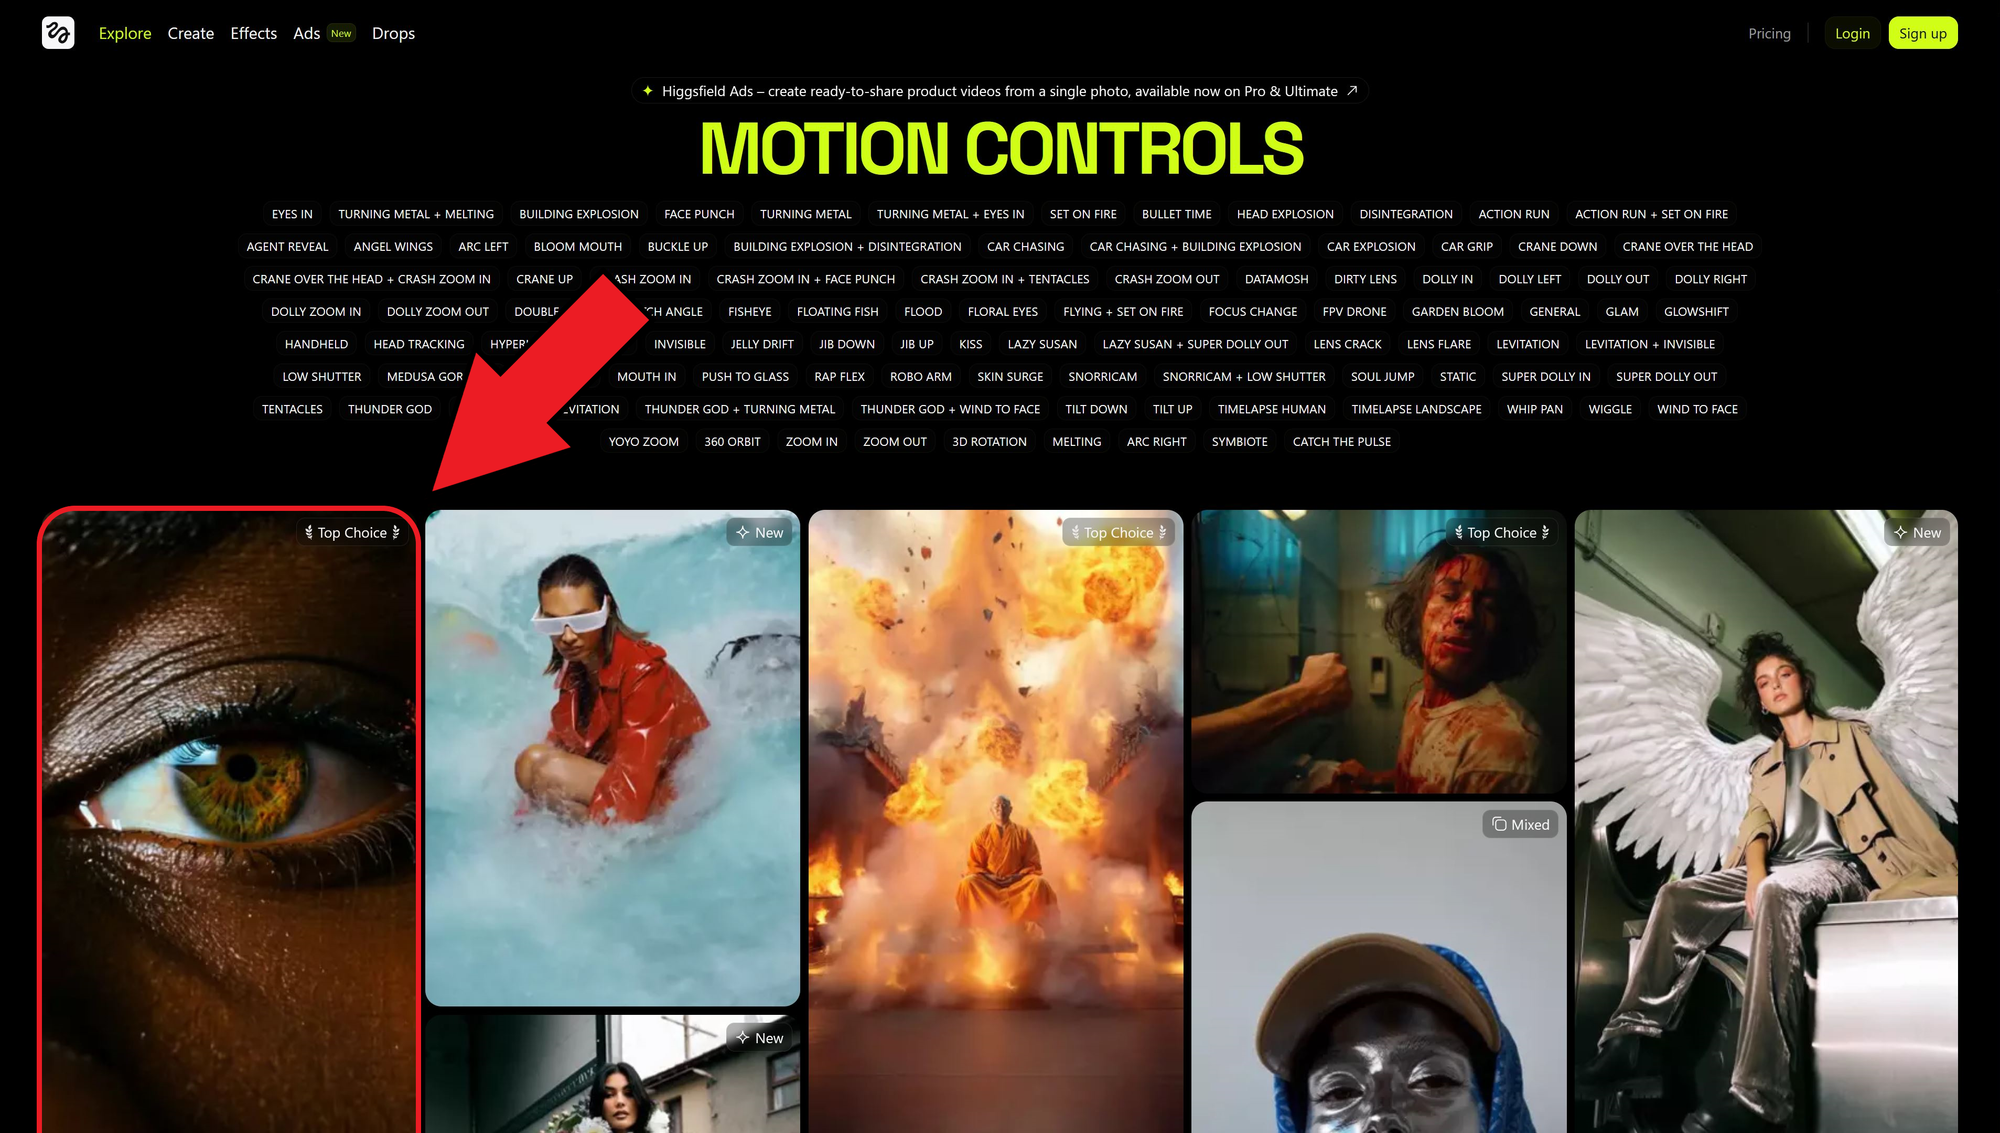
After selecting the effect, click the Generate button to enter the generation studio.
Here, a short image guide will provide a basic rundown on how to create a video. To the left is the generation input area, where we will focus our attention next.
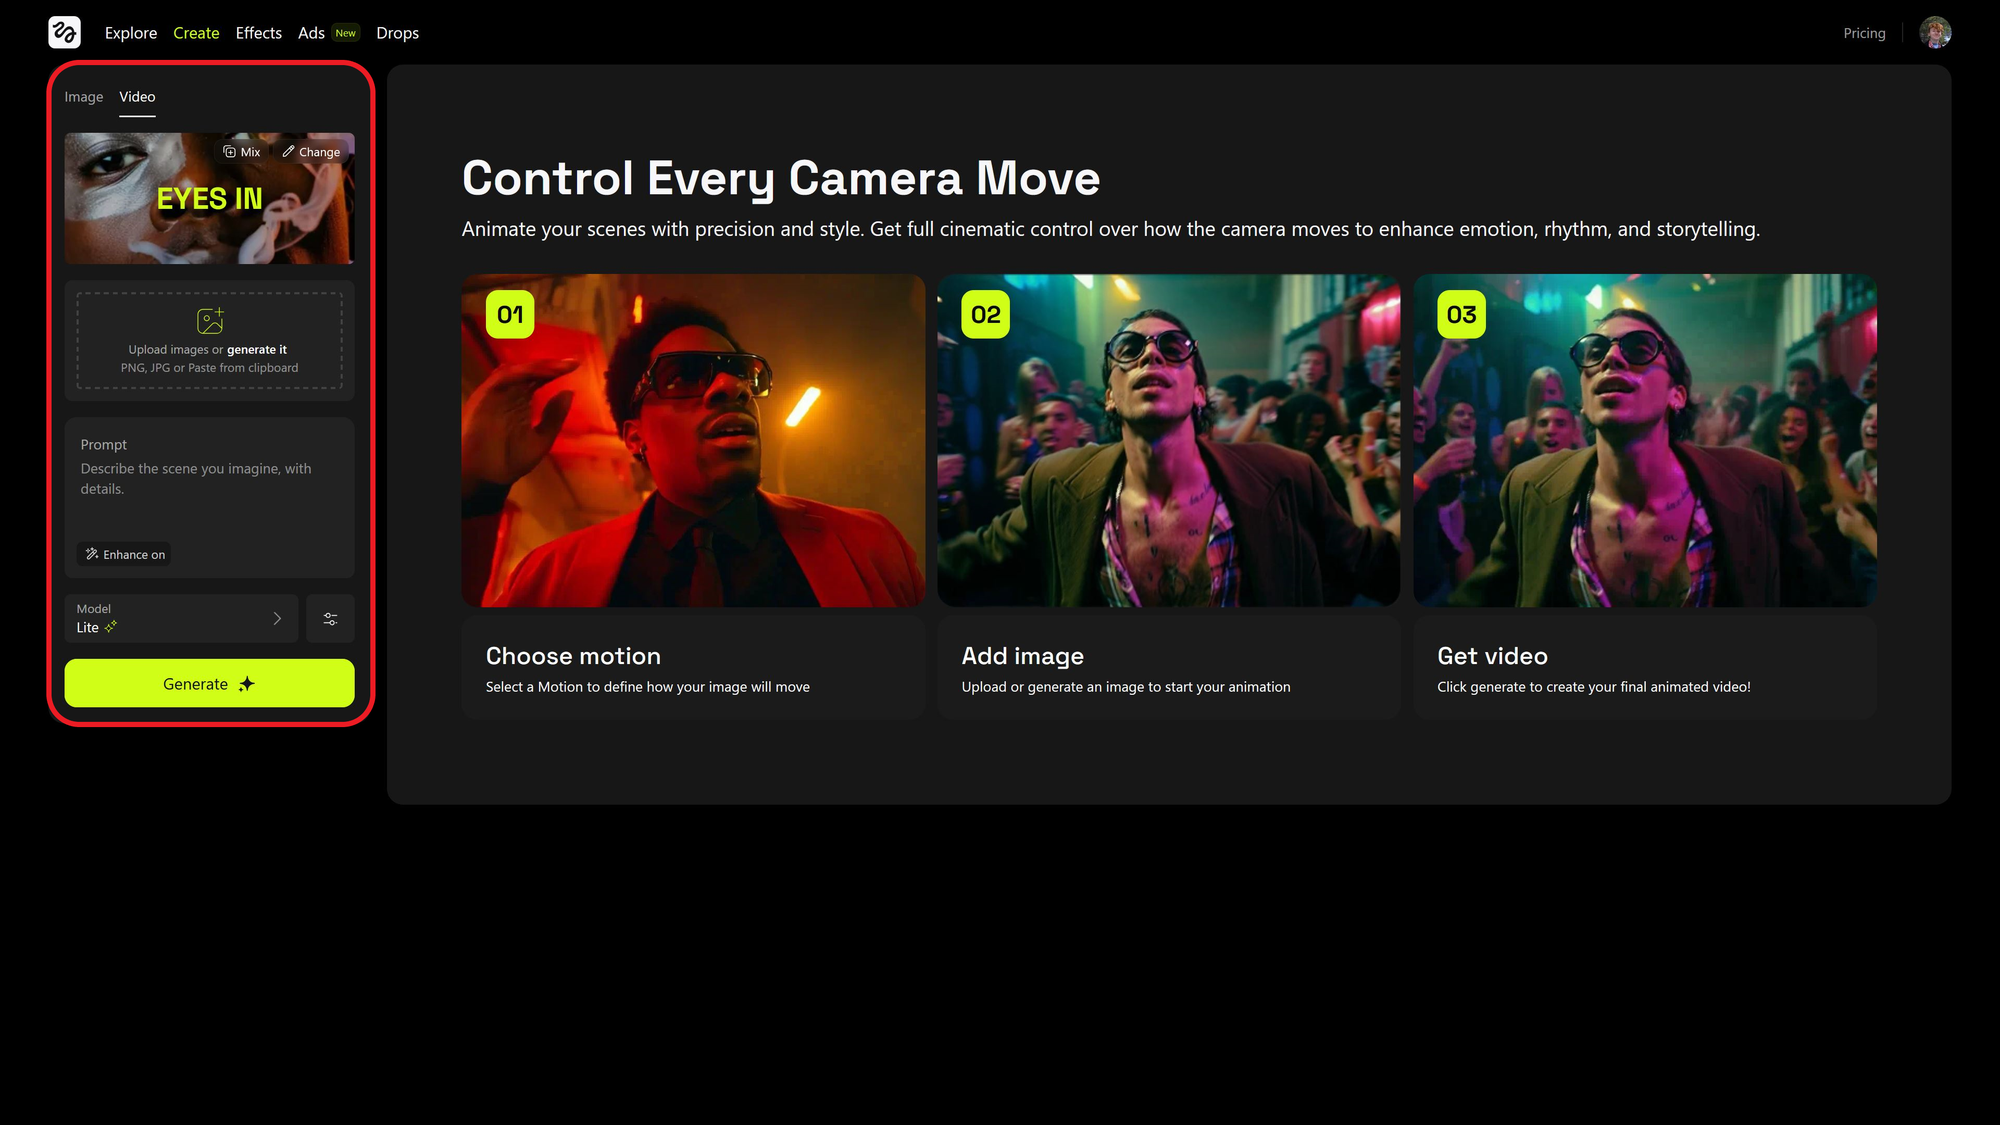
Prompt Inputs
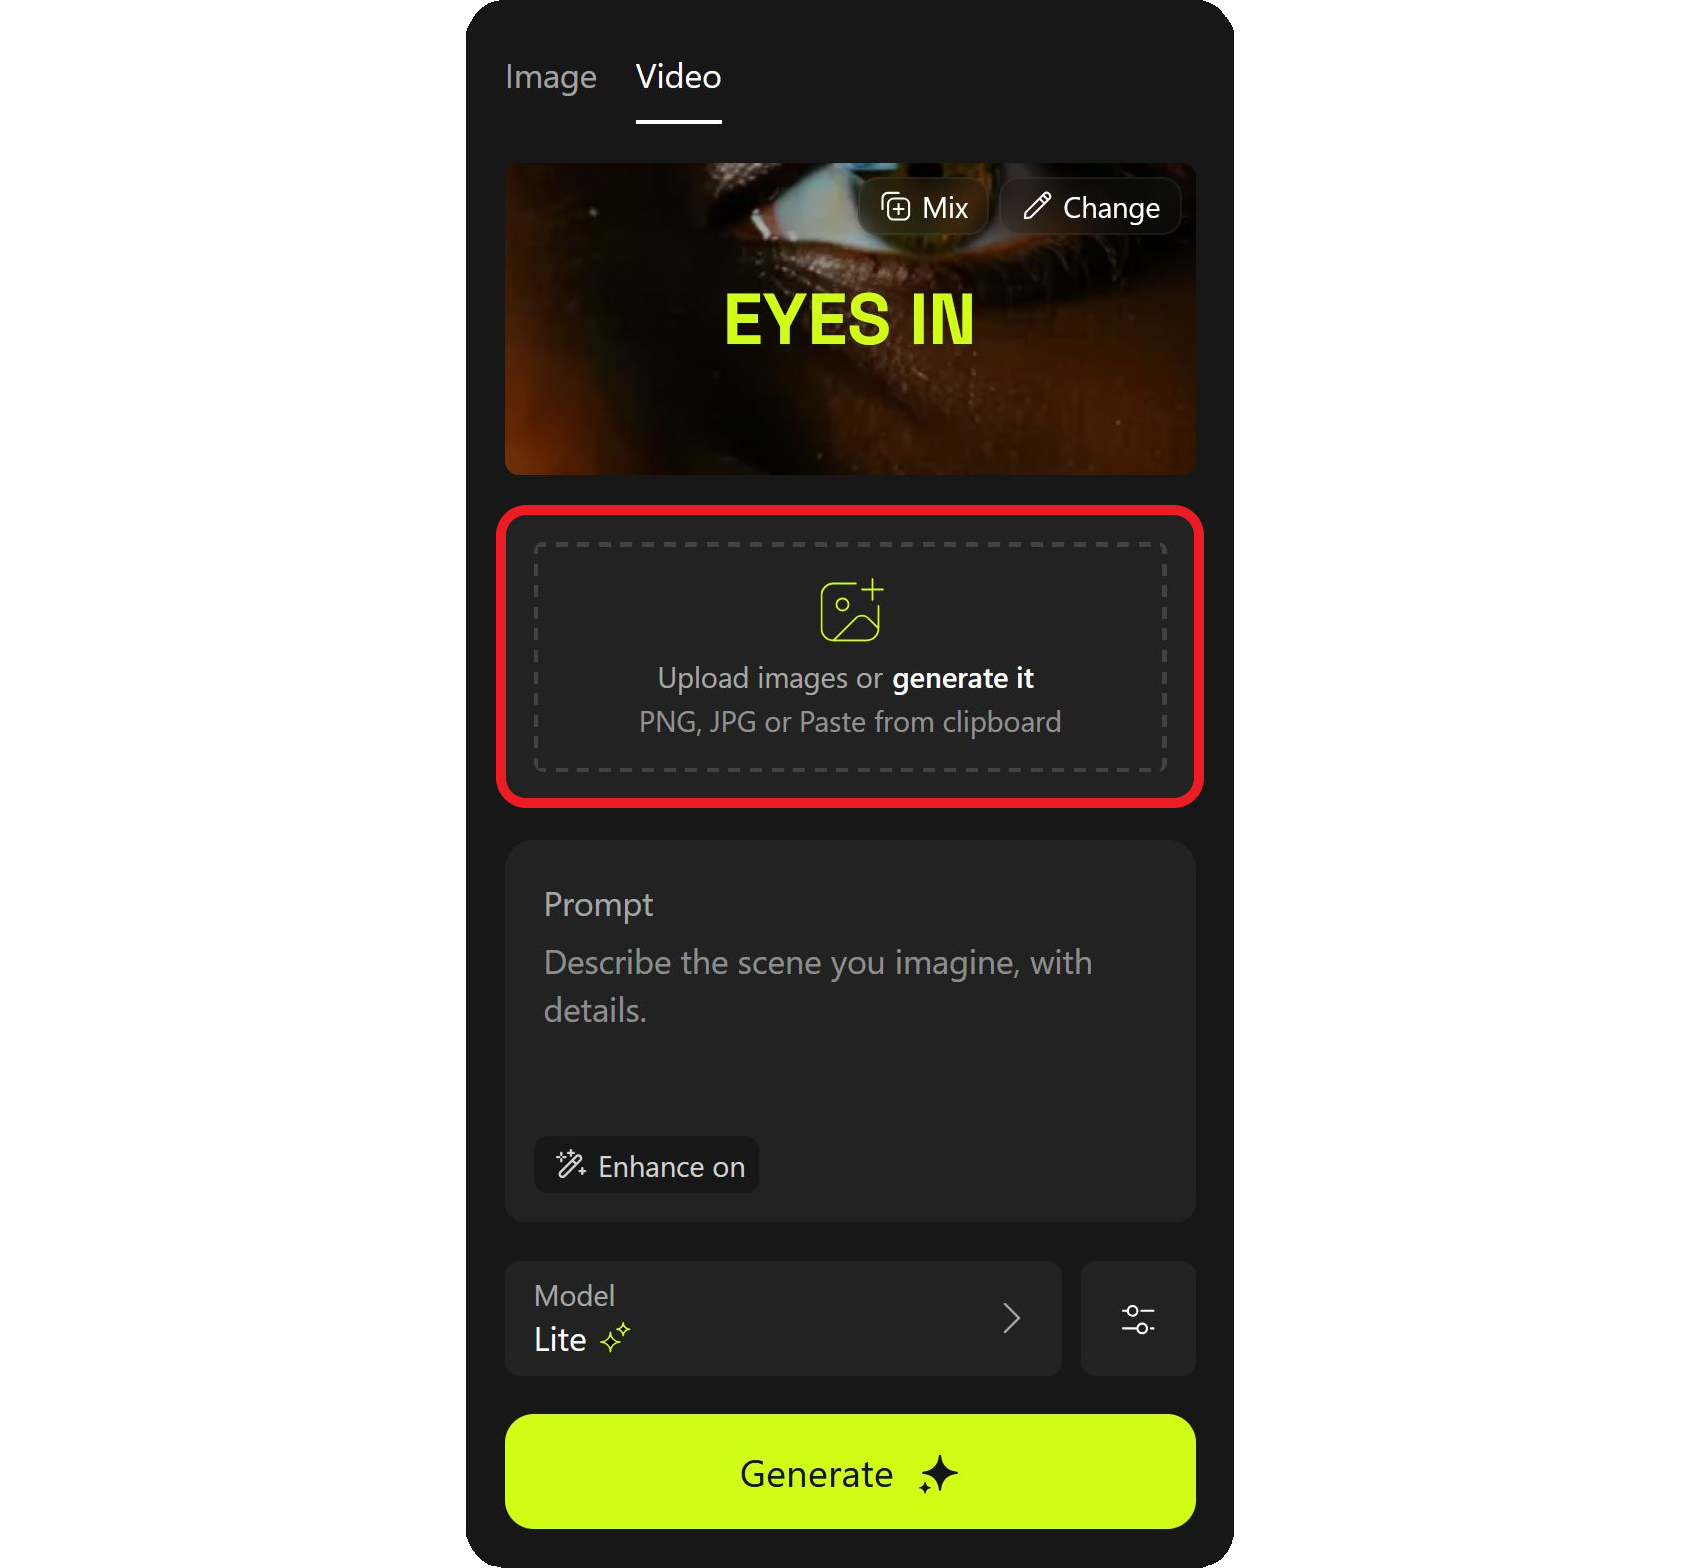
If you have the correct effect selected, it should show the text EYES IN in green at the top of this menu. If not, simply click the Change button to adjust your selected video effect.
Next, attach a reference image by either uploading a photo or generating one using the in-platform tools.
For this trend, it is more common to use your own photo rather than an AI-generated one, but there are a few criteria your image should meet to ensure a successful video generation:
- High image clarity with no blurriness or distortion
- Close-up framing so your eye is clearly visible
- Even front-facing lighting to avoid shadows or overexposure
Meeting these conditions will result in a more usable image for Higgsfield to convert into a video.
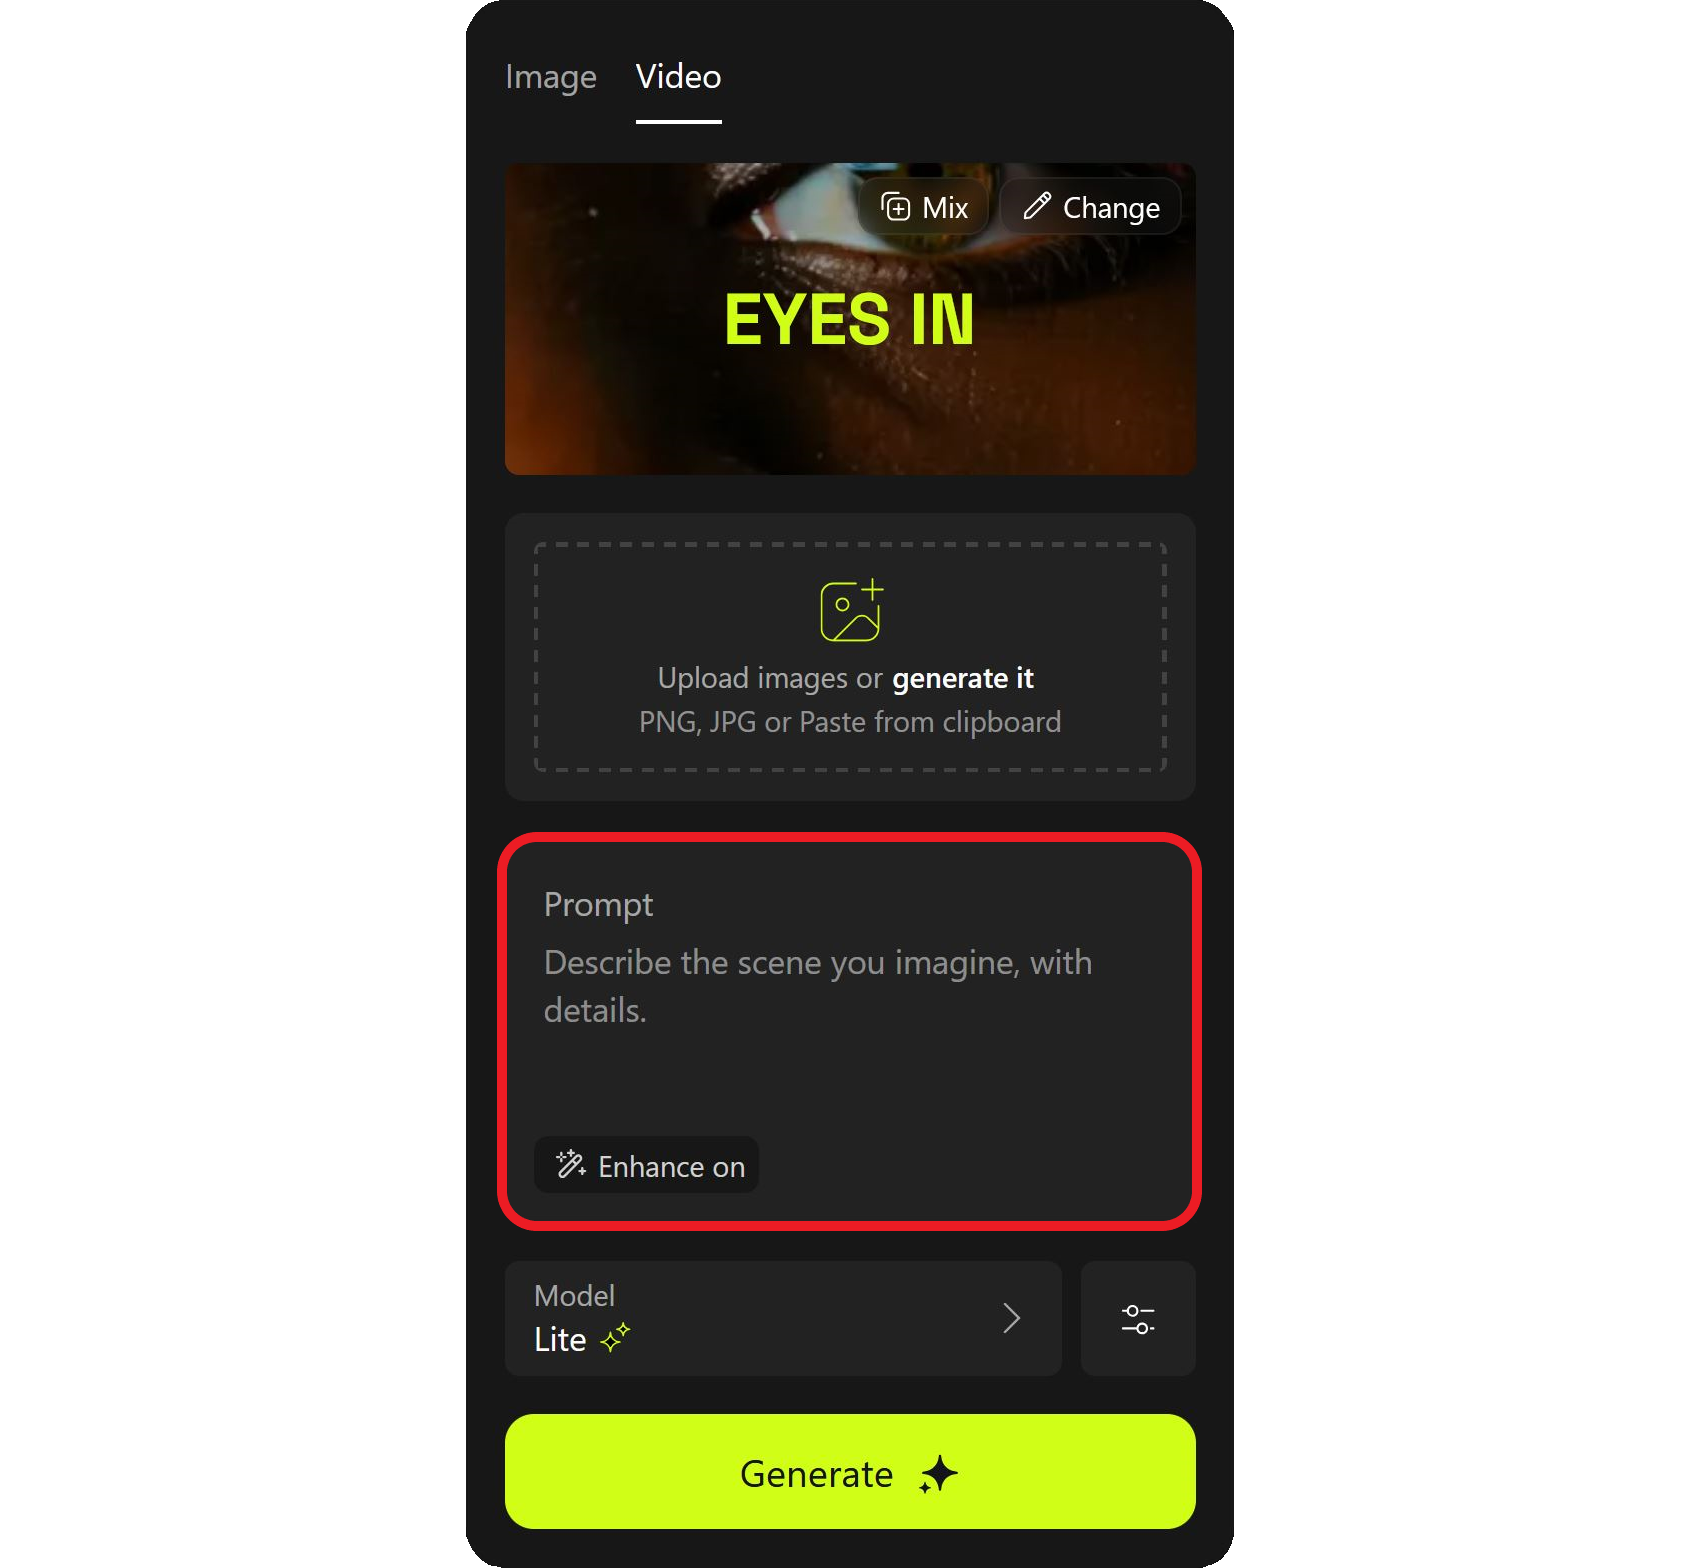
Next, enter a video prompt to guide the generation. This part allows for creativity and can be steered in any direction you'd like.
For example, using a prompt like "a moody reflective scene where the main character stands still and reflects upon past experiences" will lead to a different outcome than "the reflections of colorful light appear on the face of the subject as a subtle smile cracks across their face."
Higgsfield includes a prompt enhancer by default, so any text you enter will be automatically expanded using AI. To disable this, just tap the Enhance on button at the bottom of the prompt box.
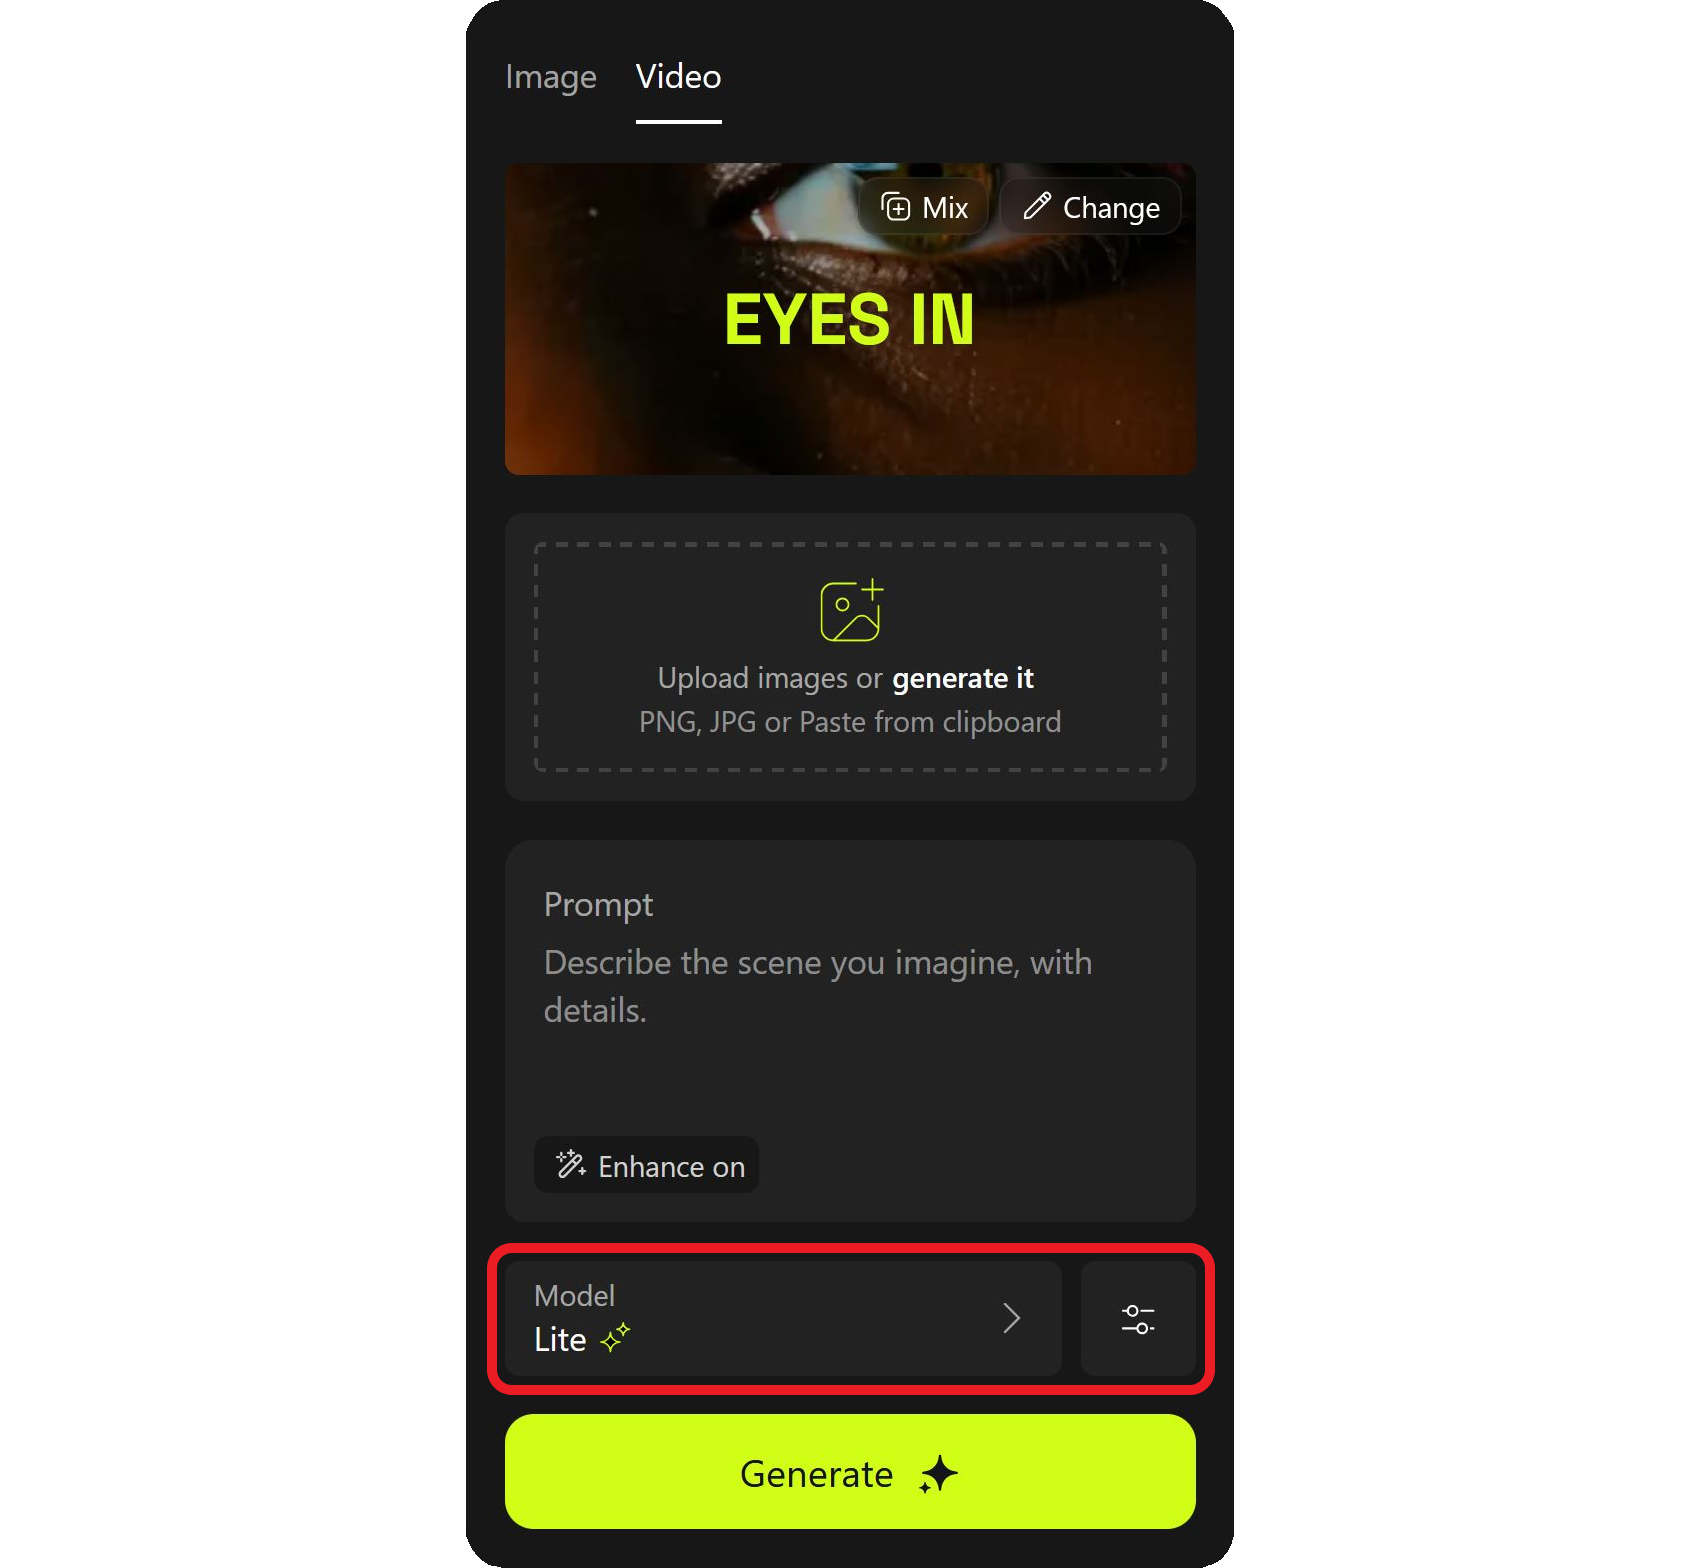
Finally, you can access advanced generation settings using the buttons at the bottom of this menu. Free users only have access to the Lite model, which has a slower generation time, longer queues, and basic video quality. Paid users can optionally select the Standard or Turbo models for faster processing and higher-quality outputs.
To the right of the model selector is a button with two slider icons. Clicking this opens a menu where you can adjust video length (3 or 5 seconds), set a generation seed, and modify inference steps.
None of these advanced settings are required for generating your eye zoom video.
Once everything is set, click the Generate button to begin processing your video.
After the video finishes rendering, download it by selecting the download icon on the final screen. Since Higgsfield does not include integrated editing tools, we’ll now take this clip to a dedicated video editor to assemble the final version.

Step 2: Edit and Publish Lost in Iris Video (Kapwing)
To turn your AI-generated eye zoom into a video for social media, begin by resizing it. Higgsfield's AI video generator will automatically create your video using the same aspect ratio as your reference image, which is rarely the correct size for video posts.
To resize your video, select the background to access the Resize Project button on the right-hand side.
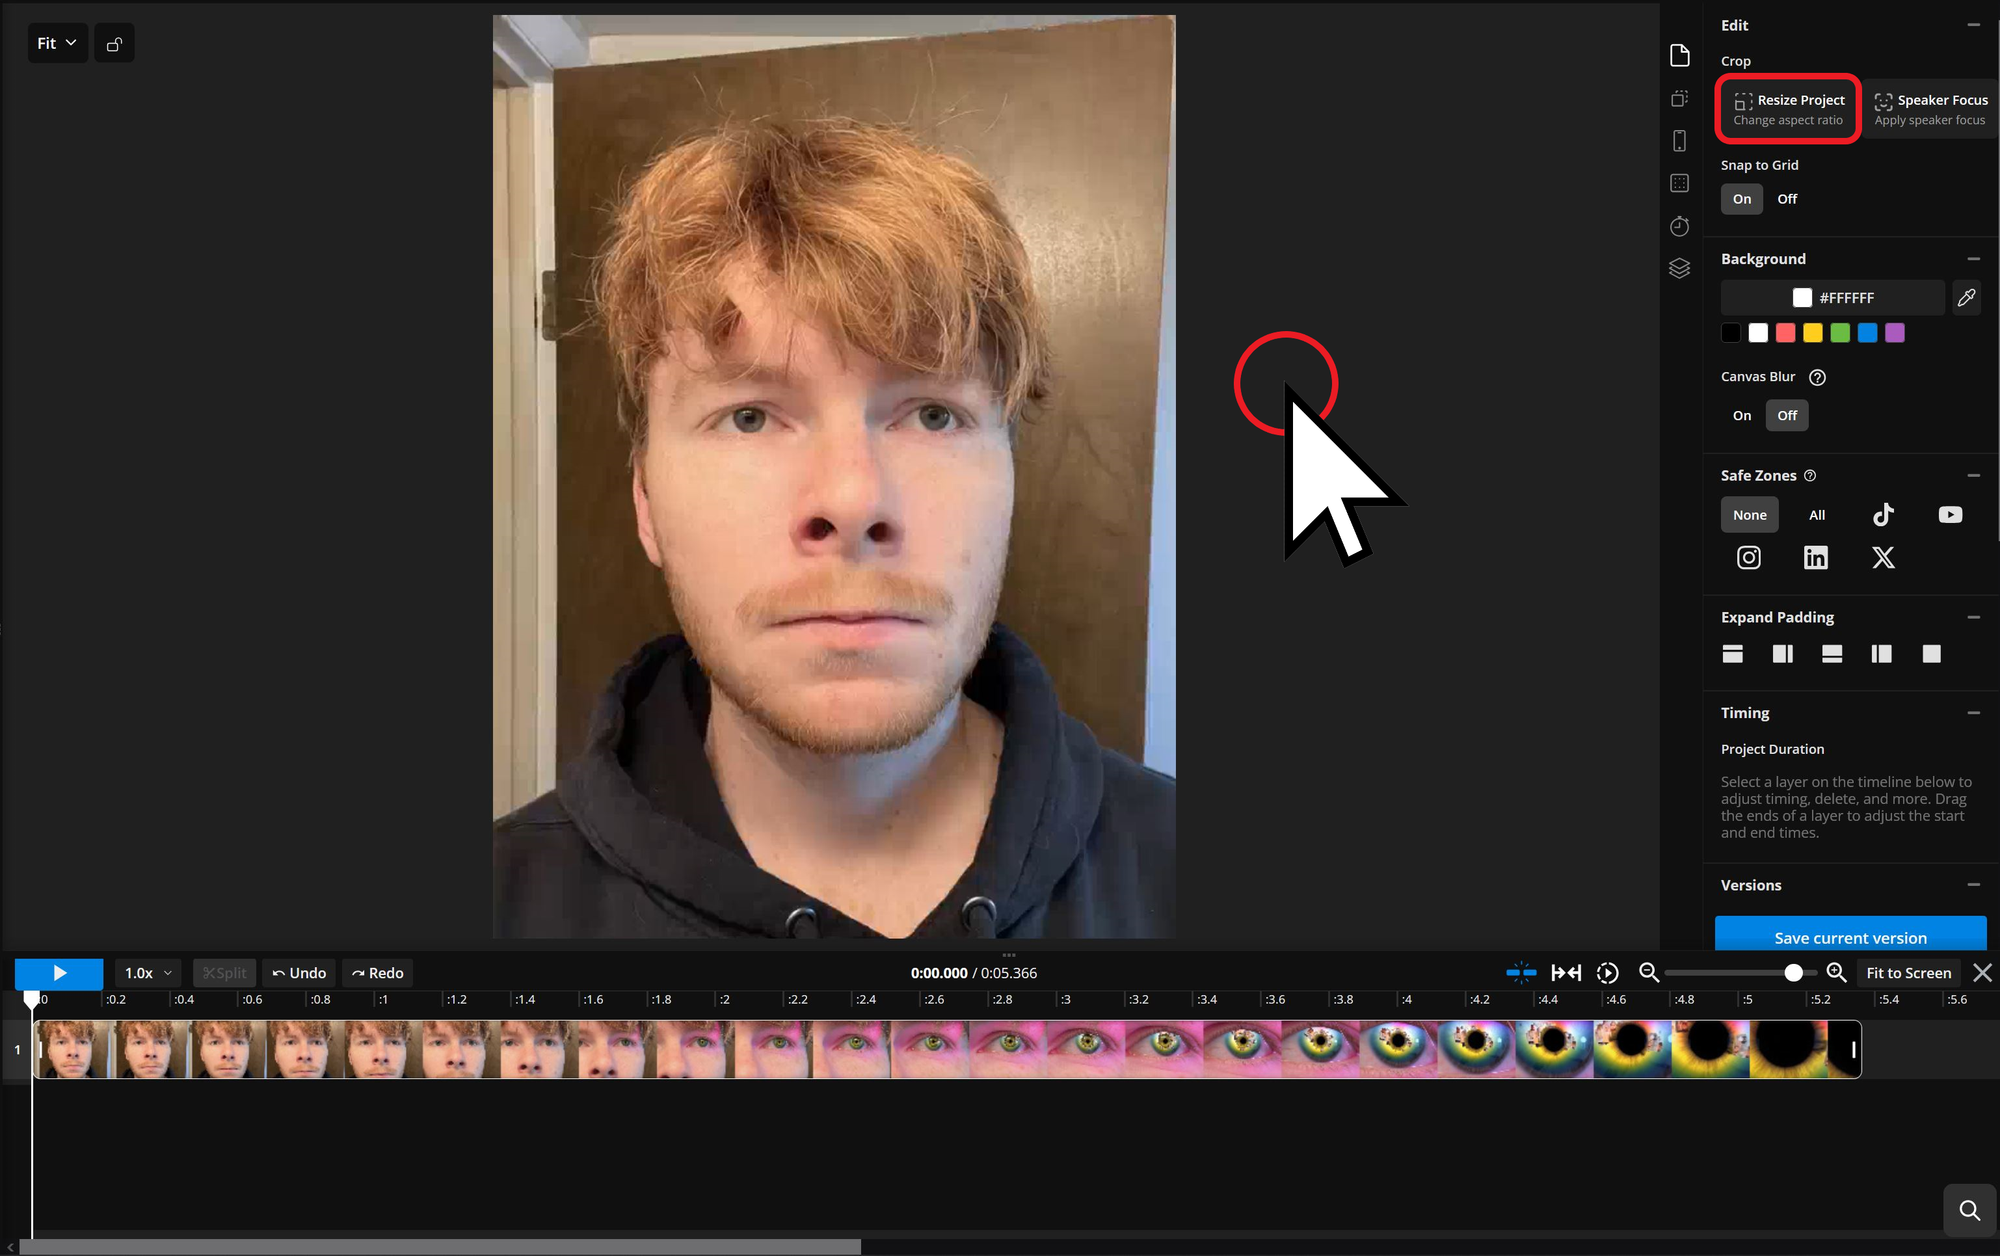
Then, select the 9:16 aspect ratio preset from the Size dropdown. This ensures your video is optimized for mobile display across platforms like TikTok and Instagram.
To confirm your changes, select the Resize Project button.

Now, you'll want to duplicate your video track to create the looped video style that is popular with this trend.
To do this, copy and paste your video tracks. On desktop, copy a track by right-clicking and selecting Copy. On mobile, tap and hold the track, then select the Copy option.
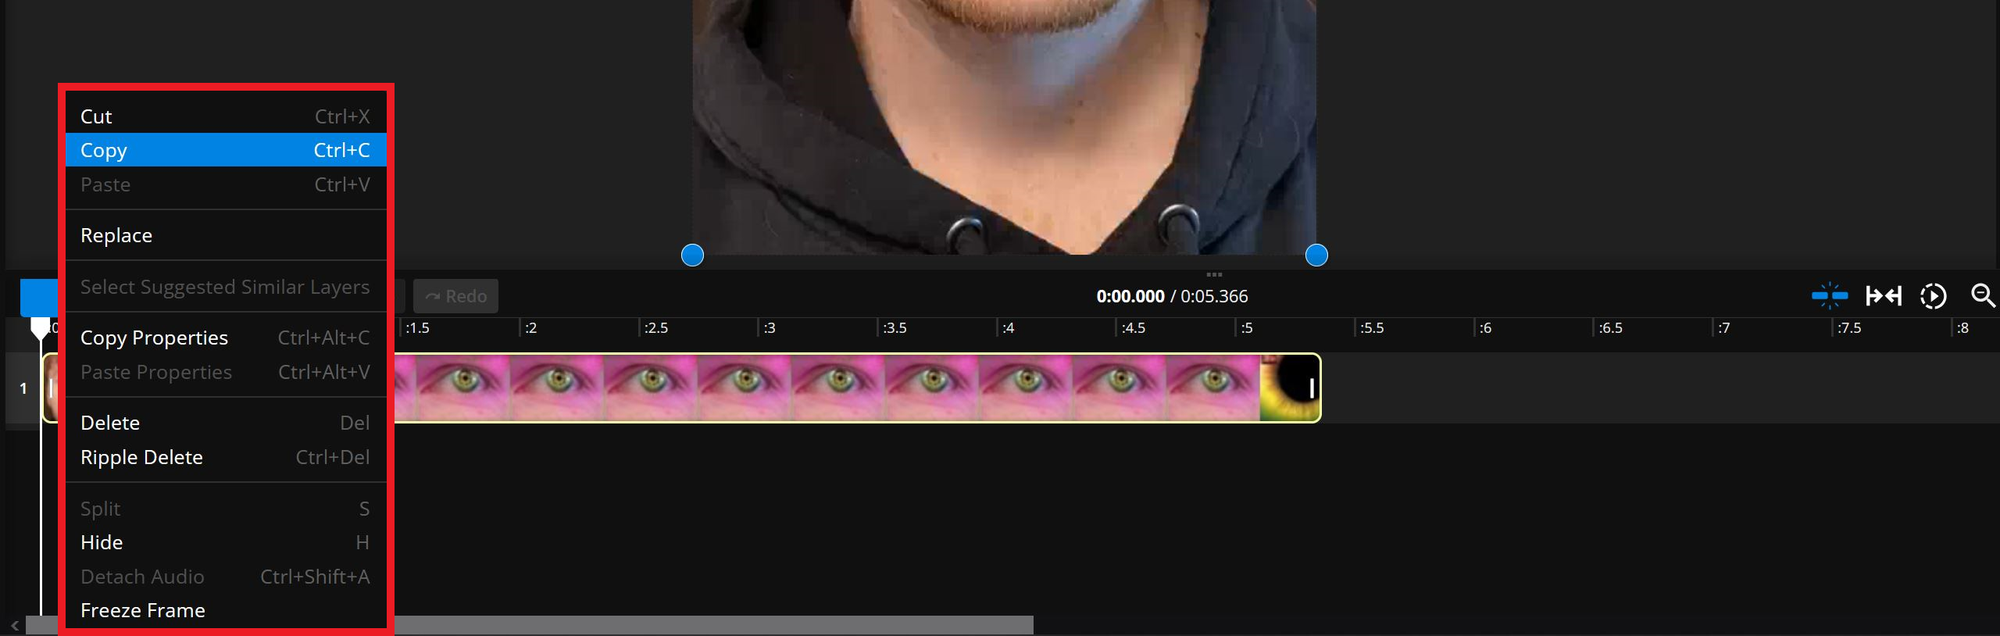
Then, paste your track using the same process, but select the Paste option from the menu.
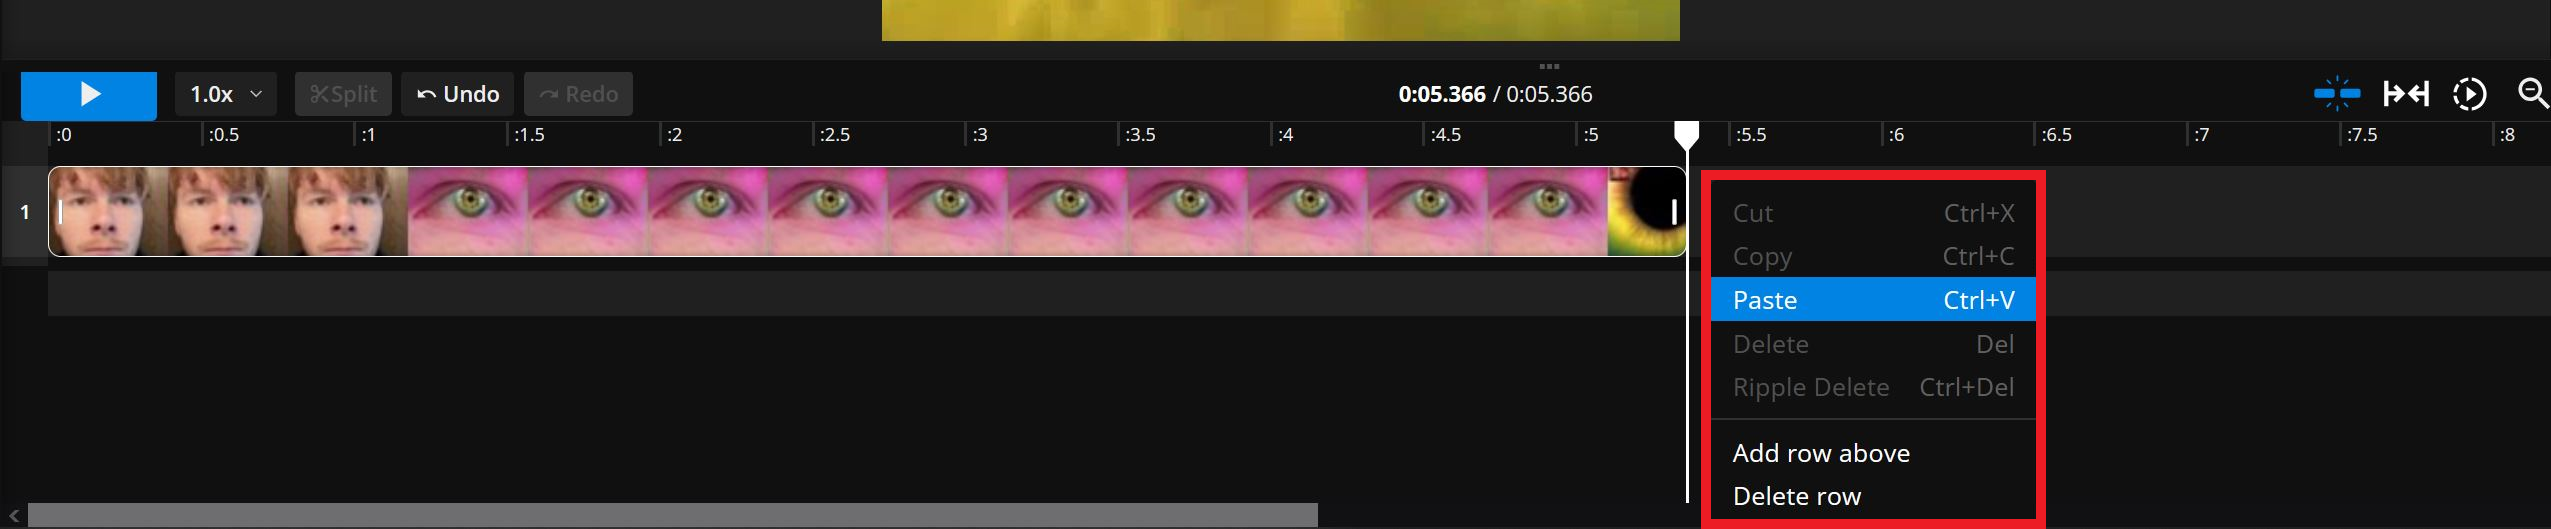
Your project will now include the same clip placed back-to-back in the timeline. To create the final effect, reverse the second video clip.
To do this, select the clip and find the Reverse video toggle in the editing tools.
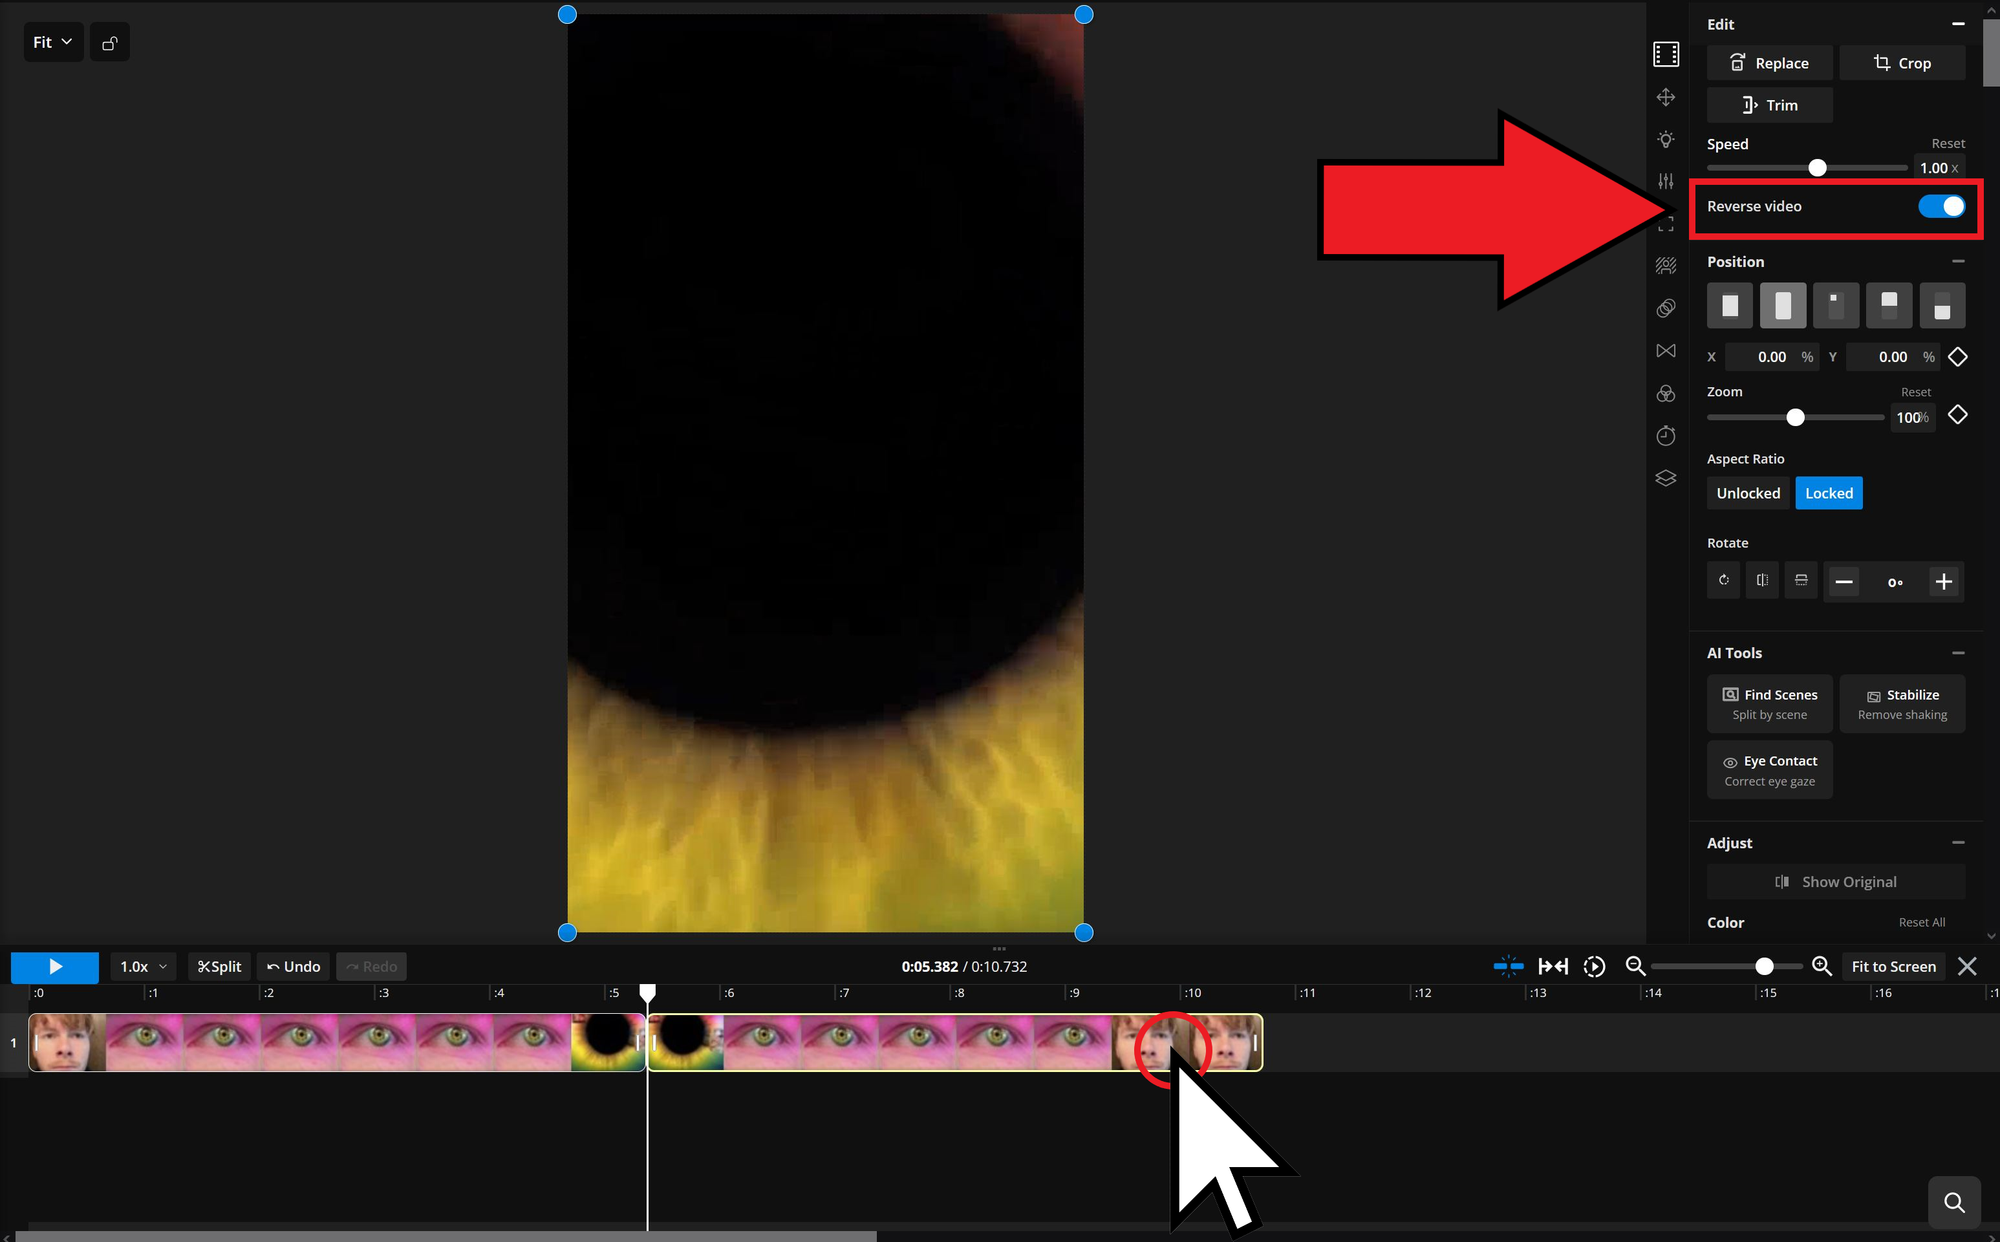
This creates a looping effect by merging your two clips together into one cohesive video.
A loop effect will be created by reversing the second clip in your project timeline.
The rest of the editing process is up to you. While no single audio track has become dominant across videos using this trend, the song Iris by Pastel Ghost is a recurring choice. Its lyrical reference and ambient vibe pair well with the visual style.
To add trending audio or custom sound effects, use the Audio menu in the left-hand sidebar. For sounds not already available in the Kapwing music library, you can paste a link from sites like YouTube or Vimeo to instantly upload them into your project.
Add music directly within the Audio menu or import it from sites like YouTube.
Note: You can create a longer video loop by duplicating both of your video tracks and arranging them sequentially in the timeline. This allows you to use a longer song snippet rather than being limited to 10 seconds.
Frequently Asked Questions
Is Higgsfield AI Free?
Higgsfield AI is available with both free and paid plans. However, some cinematic effects, including Eyes In, are only accessible through a premium subscription.
Is the 'Eyes In' AI Effect Free?
No. The Eyes In effect used in the AI eye zoom or Lost in Your Iris trend is only available to paid Higgsfield users.
How Much Does the 'Eyes In' AI Video Effect Cost?
Access to Eyes In and other premium effects starts with Higgsfield's subscription plans, which begin at $9 per month.
What is the song used in the Lost in Your Iris trend?
The most commonly used song for this trend is “Iris” by Pastel Ghost, known for its dreamy, ambient sound that matches the visual tone of the effect.
Can I create the AI eye zoom effect without using my own photo?
Yes. You can use Higgsfield or any other AI image generator to create a custom character to use in the Lost in Your Iris Trend.


