How to Shoot and Edit Great B-Roll Footage
You don't need to spend a fortune on a film degree or editing software to get good b-roll. In this article, I'll share some of our best tips for shooting and editing better b-roll footage for creators at any experience level.

Shooting and editing b-roll content can be a time-consuming process. But it's also an important part of the video production process, which makes it worth the effort. Good b-roll adds visual interest to your content and helps keep your audience engaged.
Here are some best practices for shooting and editing b-roll content to help you streamline the process and get the most out of your footage:
How to Prepare Before Shooting B-Roll
To make the filming and editing processes easier, there are some steps you can take before you ever pick up your camera.
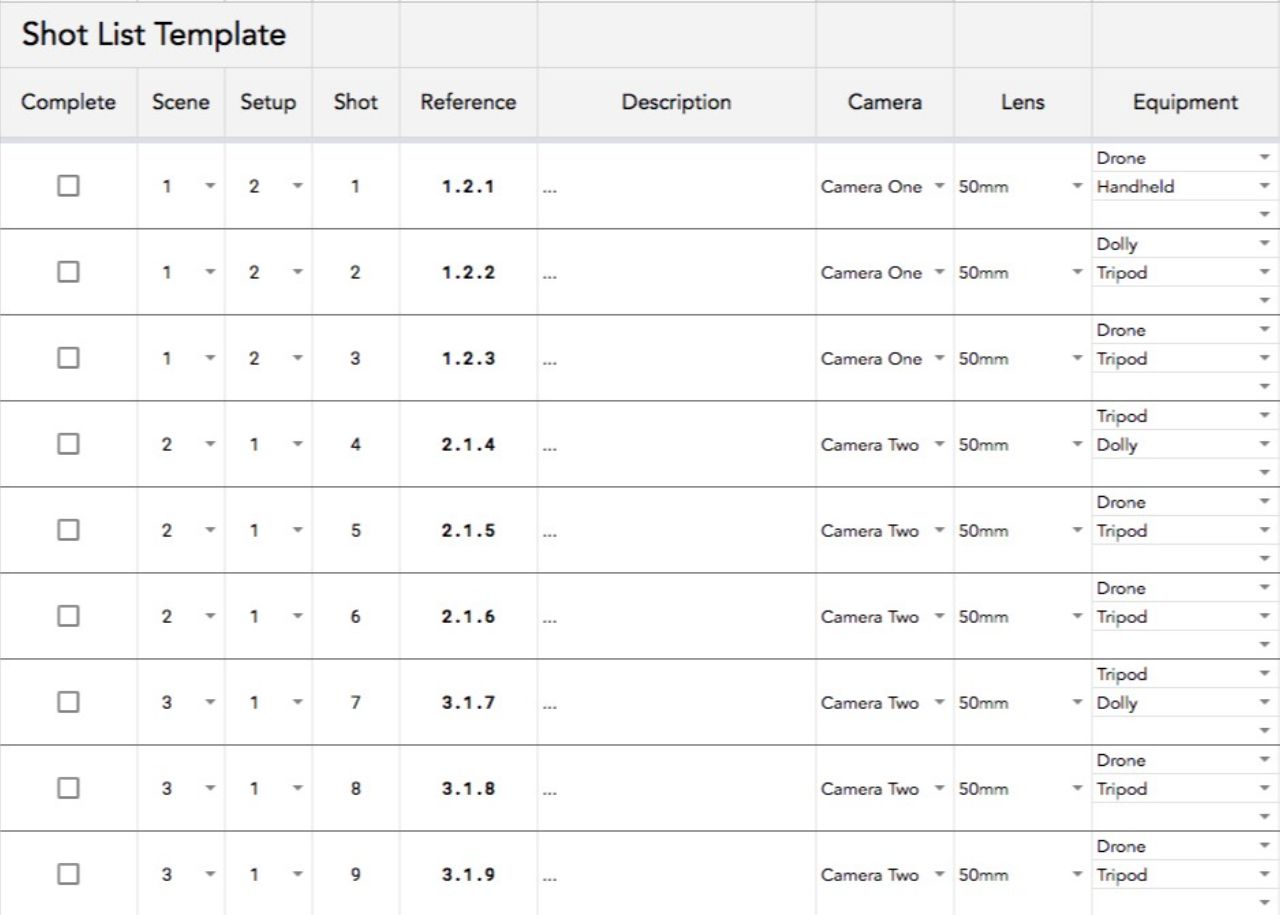
1. Put together a shot list
Before you start shooting, it’s important to plan ahead and create a shot list. A shot list is an essential tool for longer form content creators because it helps you plan out your video ahead of time. It also helps with budgeting and scheduling, as you’ll be able to estimate how much time will be required for each scene.
To put together your own shot list, consider the camera angles, subjects, and effects you want to capture. For example, if you’re making a video about a specific place or event that you’re attending, you might want to get some wide-angle shots as you walk through a crowd.
I recommend sitting down and brainstorming with an old-fashioned pen and paper. Once you have all your ideas down, choose the ones that best suit your vision for the video you’ll be making and compile them somewhere that makes sense — the Notes app on your phone or a shared Google Doc if you’re working with a team and want them to have access, too.
2. Organize your shot list
Now that you’ve got your shot list, it’s time to organize it. There are a few ways to do this:
Organize by location
Will you be filming in multiple locations? Add those locations to your shot list and nest the relevant shots under those headers. You wouldn’t want to wrap filming at a location only to realize you’ve forgotten to get one or two crucial shots because they were at the bottom of your shot list.
Organize by timeline
Continuity is usually more important for the main footage than for b-roll, but that doesn’t mean you shouldn’t take it into consideration when planning out your shots! If you need a shot during golden hour but you shoot out of sequence, you’ll have to wait until the next day, do some impressive post-processing, or opt not to include the shot.
Time of day isn’t the only thing that can mess up your shot continuity, either.

There are plenty of types of content that have to be filmed in the right order, like cooking or baking content. You can’t undrizzle caramel on top of that apple pie if you didn’t get the shot you needed.
Organize by shot type
Whether you’re using a special lens, unique angle, or camera settings, it can be easier to group all of your like shots together. If you know in advance that you’ll need a wide-angle lens for a handful of shots, put them together on the shot list to reduce time spent fiddling with the camera between shots.
Within the shot prioritization hierarchy, this is last on the list as it only works if these shots are all in the same location and don’t break filming continuity.
How to Shoot Better B-Roll Footage
1. Take advantage of natural light
Natural light can make a huge difference in the quality of your b-roll footage. When possible, take advantage of the available sunlight and use it to create interesting lighting effects.

One of the best times to film using natural light is early in the morning or later in the evening, when the sun is lower in the sky. This creates softer, more flattering light that will make your shots look more professional and polished and reduce the need for post-processing. If you can't shoot during those times, try filming on a day when the sky is cloudy or overcast. This will create a similar, diffuse lighting that is flattering and easy to edit.
2. Get creative with your camera angles
One of the best ways to add visual interest to your b-roll footage is by using creative camera angles. Angles can make a shot more dynamic and interesting, and can help you capture different aspects of your scene.
When filming b-roll, try experimenting with different angles and see what works best for the particular shot you’re trying to capture. You might want to use a high angle shot to give viewers a bird’s eye view of the scene, or a low angle shot to create a more dramatic effect. Be creative and have fun with it!
3. Stay organized while filming
It can be easy to become overwhelmed while filming b-roll footage, especially if you're trying to capture multiple shots in a short period of time. To stay organized and efficient, it's important to stick to the shot list you created earlier. Not only will it make it easier to film in the correct order and ensure you don't miss any shots, having your shot list handy to cross-reference when you start editing will save you time otherwise spent sifting through your camera files, trying to remember which shot goes where in the lineup.
Additionally, try to keep your camera equipment and any props or products organized and ready to go. This will save time and hassle during the filming process.
How to Edit Your B-Roll for Best Results
1. Start by sorting your footage
When you start editing your footage, the first thing you'll need to do is sort through all of the clips and decide which ones to use. This can be a time consuming process, but it's important to take the time to do it right so that your final video looks cohesive and professional.
If you stuck to your shot list and have it available to reference, that should help make the process go faster. Once you identified the b-roll clips you want to use in your final video, consider naming your files so you can easily organize them within your video editor.
You can use any file naming convention that you prefer, but I recommend keeping the file names consistent with what you wrote on the shot list to make it easier on yourself.
2. Create a rough cut
Before you add any edits to the clips, you'll want to create a rough cut of your video first. This will help you get an idea of what the final video will look like and make it easier to edit later on.
Don't be intimidated by this step!
You don't need to have expertise in video editing to put together all of your b-roll footage into something amazing. You don't even need a fancy, expensive video editor. You can do all of this in an online editor like Kapwing.
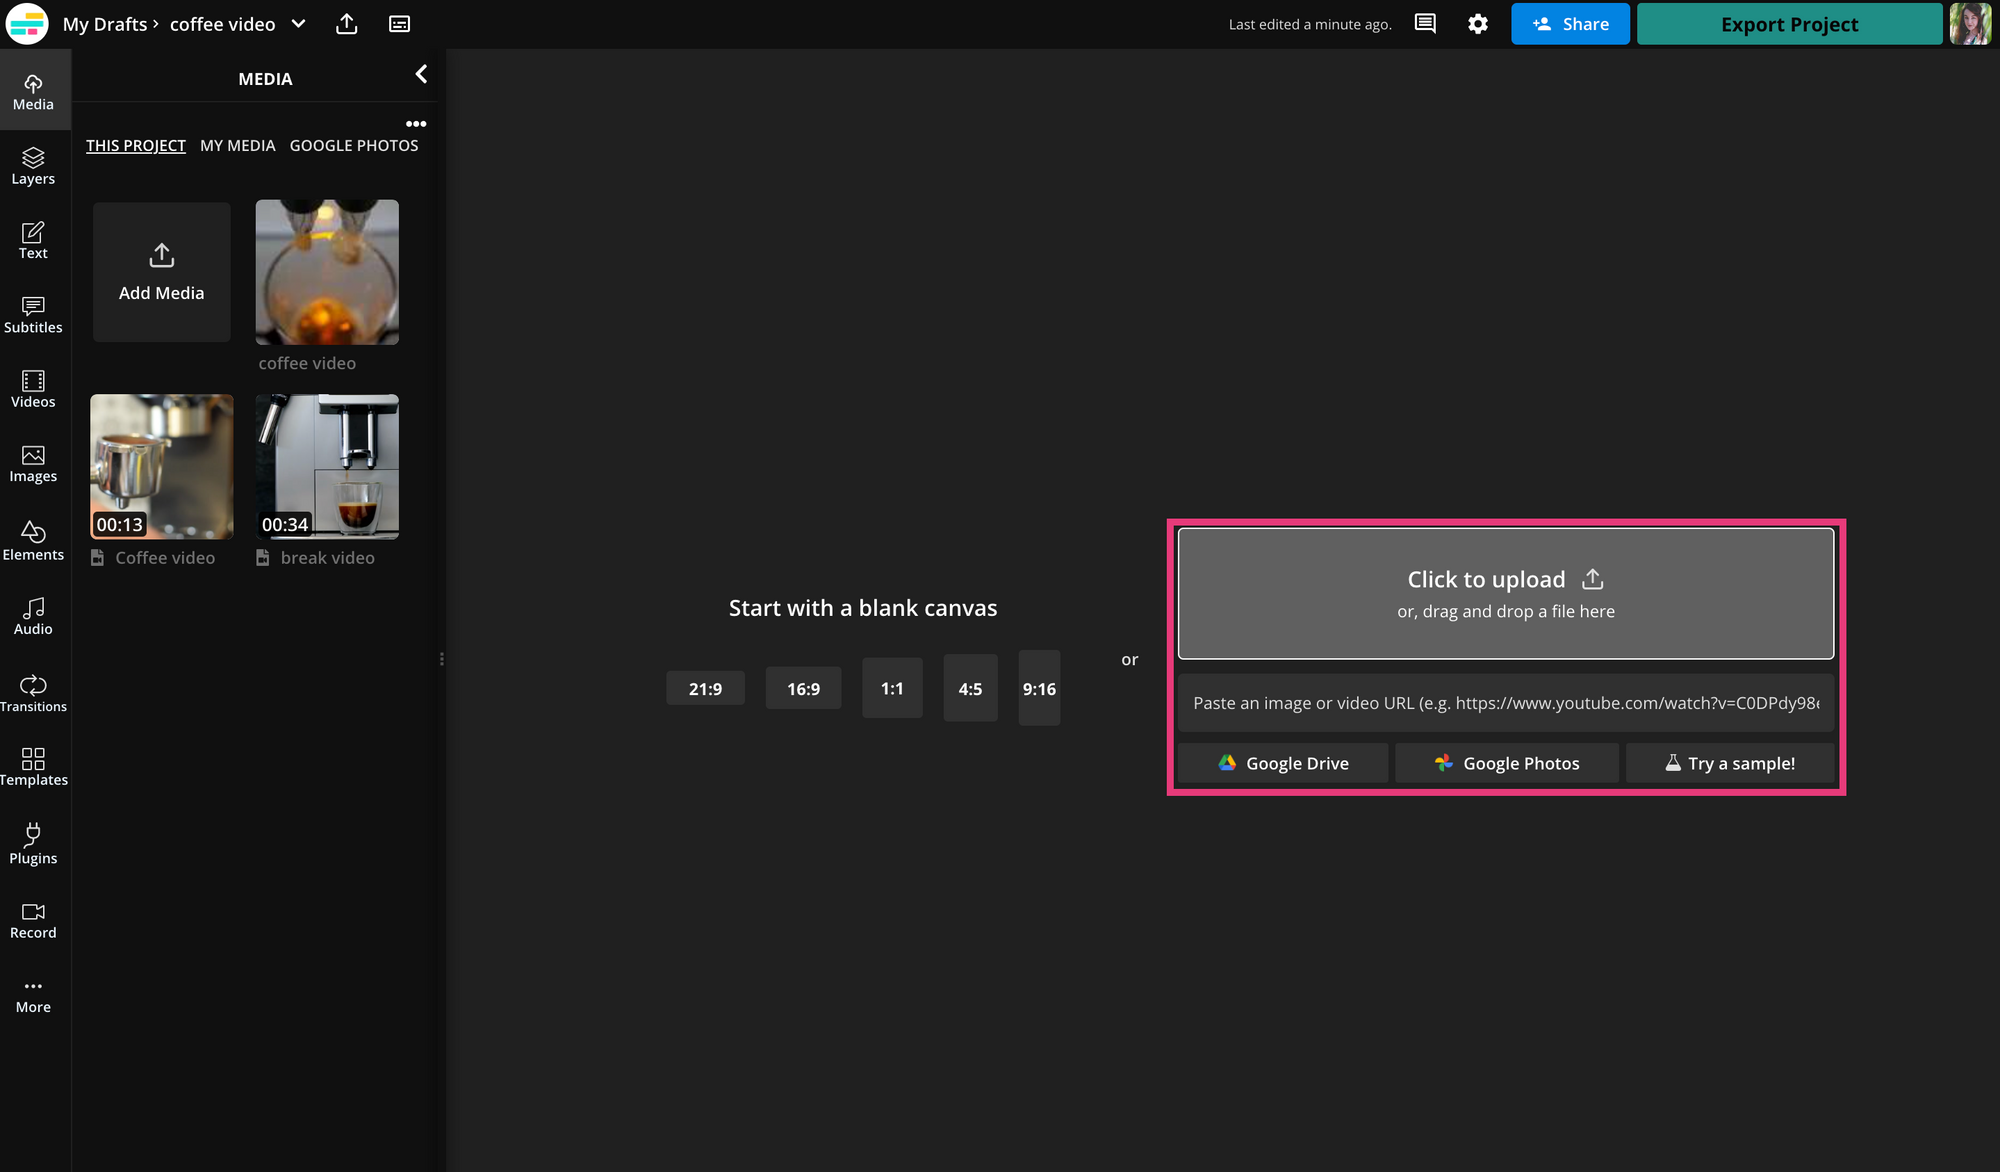
To create a rough cut, simply import all of your b-roll footage into Kapwing's video editor and start arranging it in the order that you want it to appear in the final video.
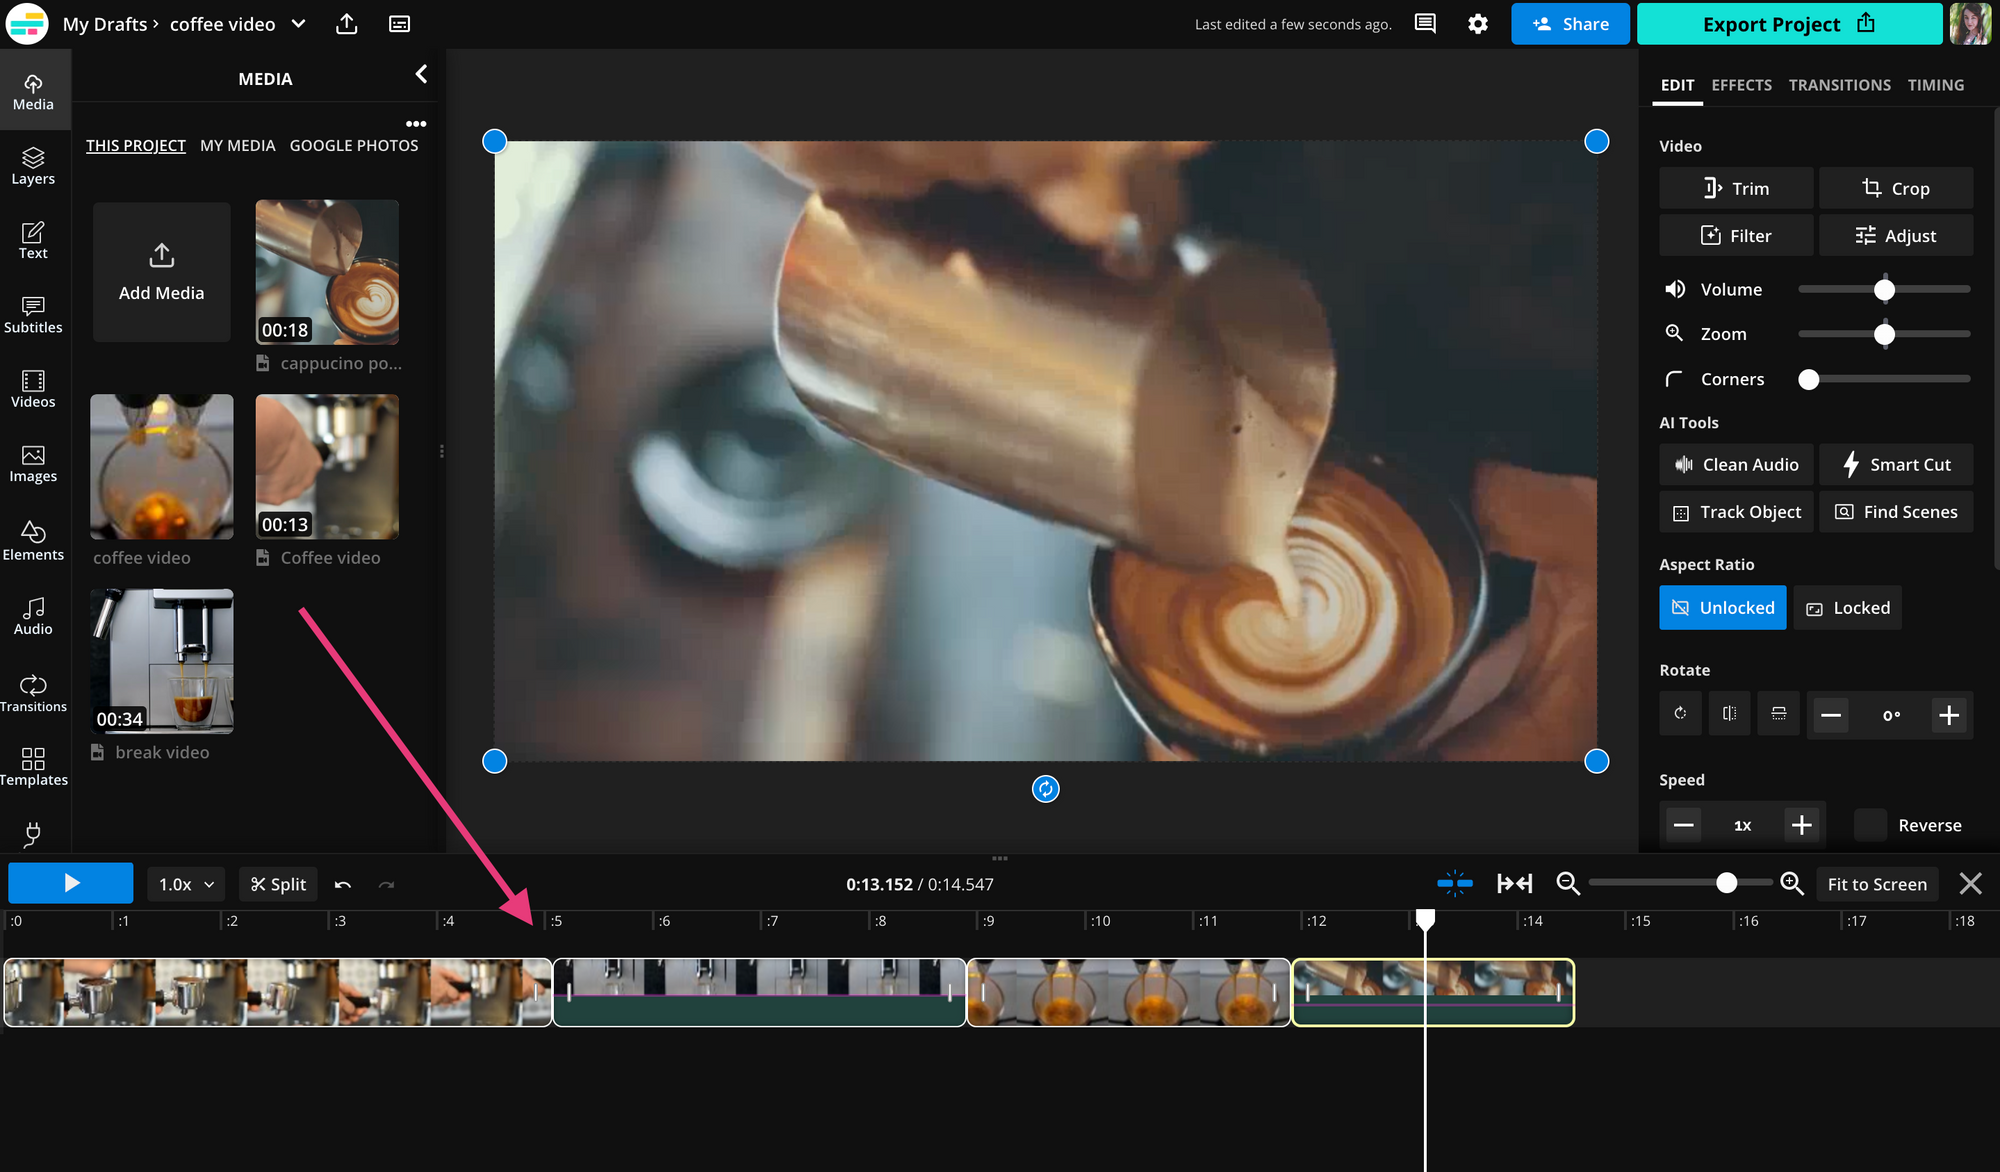
It's ok if your rough cut isn't perfect. You can always go back and make further tweaks once all of the b-roll footage is in place. Just make sure that the overall flow of the video is cohesive and makes sense.
3. Fine-tune your edits
Once you have a rough cut of your video that you're happy with, it's time to start fine-tuning your edits. This includes adding more advanced edits like color correction, audio adjustments, animations, and title graphics.
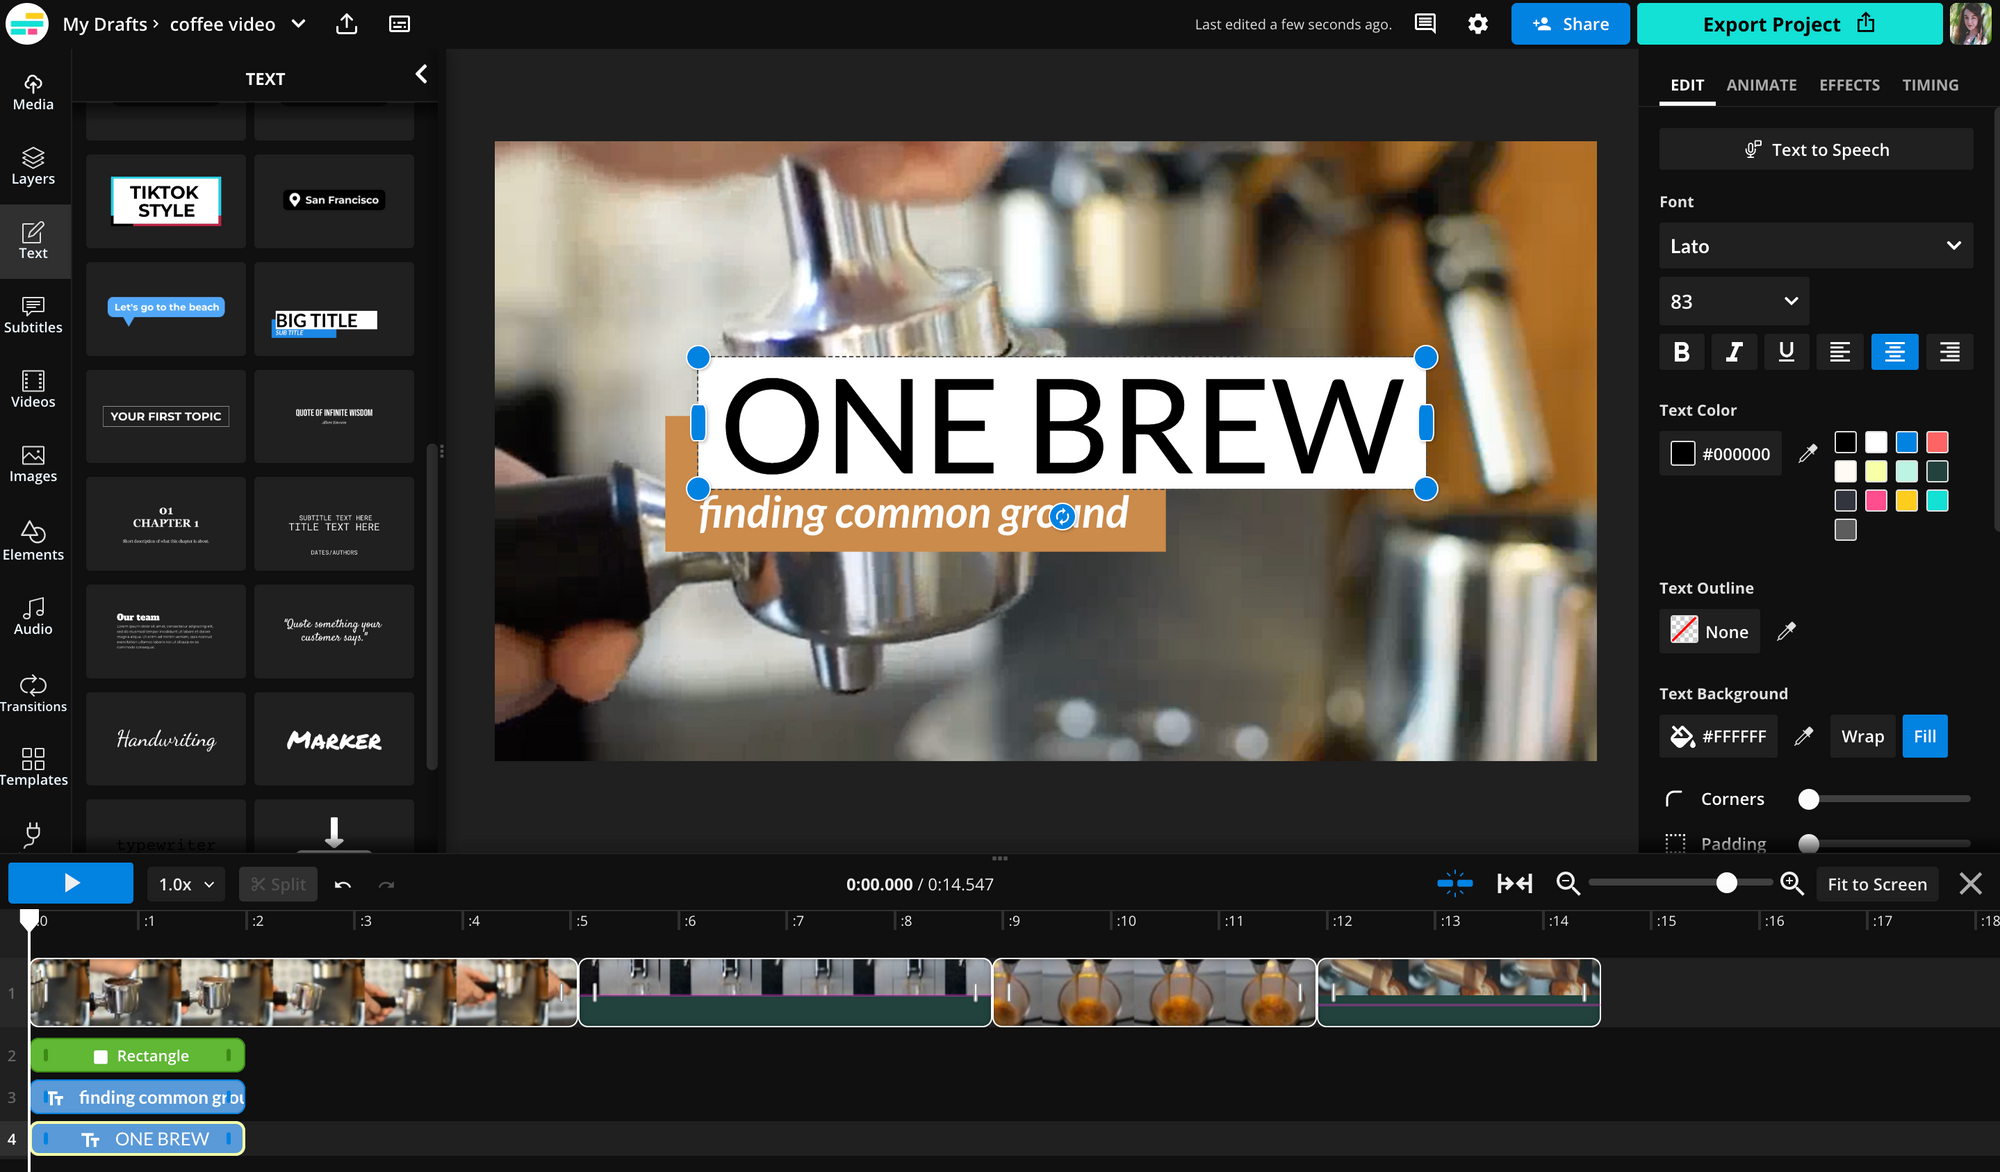
Take your time with this step and make sure that everything looks polished and professional. The better the quality of your b-roll footage and edits, the more impressive your final video will be.
4. "We can fix that in post"
Is fixing it in post a meme and the bane of many a video editor's existence? Maybe. But mistakes happen and they're not the end of the world — especially when you have modern technology on your side. You can add in effects like slow-mo after the fact with just a few clicks in an editor like Kapwing.

And what if you forgot to film a shot entirely?
One of the great things about b-roll footage is that you can often find stock footage to use if you missed a shot while filming. This can be a lifesaver if you're running short on time, if you didn't plan for something specific in your scene, or if you just weren't able to get the shot. Wanted to add b-roll of a majestic mountain range but you live in Iowa? That's what stock footage is for.
You can grab the stock footage you need directly from a stock video site. Most stock websites offer a variety of free and paid footage, so you can find exactly what you need without spending a fortune. If you're using Kapwing's video editor, there's an extensive built in stock video library to pull from.
It's powered by Pexels and Pixabay, so you'll find the same, high quality video footage as you would on those sites conveniently within the editor. Simply search for the type of clip you need and add it directly to your project.
Filming and editing b-roll footage can seem like a daunting task, but if you take it one step at a time it's definitely doable. By following these steps, you'll be able to create a cohesive and professional final video without spending too much time or money. And if you run into any problems along the way, don't worry! There are plenty of ways to fix mistakes in post if you've got a great video editing software up your sleeve.
For more creator tips and tools, check out our Resources Library and visit our YouTube channel.