How to Record and Edit Videos with Meta AI Glasses
Go from raw first-person clips to a polished video with a few simple editing steps.

Ray-Ban Meta glasses let you record video without ever pulling out your phone. Point your head at something interesting, tap the frame, and you've got the shot. This hands-free setup is useful for travel, events, behind-the-scenes footage, tutorials, and moments where holding a phone would get in the way.
The catch is what happens after: a folder of shaky, unedited, first-person clips that need editing before they're watchable, let alone postable. However, with the right editor, those raw clips can be trimmed, resized, captioned, and prepared for platforms like Instagram Reels, TikTok, or YouTube Shorts.
This guide covers both halves of that problem: how to record footage that's actually easy to edit, and the exact steps for turning it into a finished vertical video in an online editor, from trimming and captioning to exporting for social media.
What Types of Videos Work Best With Meta AI Glasses?
Meta AI glasses work best for videos where a first-person perspective adds something to the experience. Instead of setting up a camera or stopping to film with a phone, you can capture what you're seeing while keeping both hands free.
That makes them especially well suited for:
- Travel walks
- Coffee shop or restaurant visits
- Product demonstrations
- Behind-the-scenes clips
- Outdoor activities
- Event highlights
- Day-in-the-life content
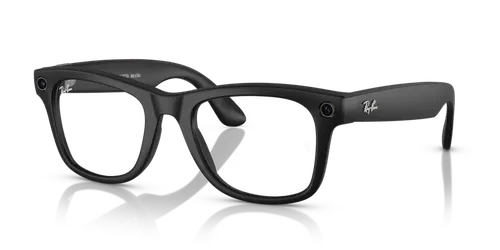
The biggest advantage is immediacy. You can capture a moment as it happens. The tradeoff is control: fast turns can feel jerky, and you have less control over composition than you would with a phone or camera.
That means Meta glasses footage tends to work best when you lean into what the format does well: short, immersive clips that feel like the viewer is experiencing the moment with you.
@robertkenon Honestly I’m about to start putting these glasses to work for the pov vibes. #raybanmeta #decor #home #roominspo #apartmenttour ♬ VIBES DON'T LIE - Leon Thomas
How Can You Record Better First-Person Footage?
The quality of a Meta glasses video depends heavily on how you record it. Editing can shorten a shaky clip or remove a bad section, but it cannot fully fix footage. A few habits make a difference:
- Keep your head steady while recording.
- Turn slowly instead of snapping from one subject to another.
- Hold your gaze on the main subject for a few seconds.
- Record in bright, even light when possible.
- Get physically closer instead of relying on a distant subject.
- Be mindful of privacy when recording people around you.
The most useful rule is to record one clear moment per clip. Instead of leaving the camera running through an entire 10-minute walk, think in shots. Record yourself approaching a location, then stop. Record one interesting detail, then stop. This gives you cleaner footage and makes the final edit much easier to shape.
@retailtherapyareli Recording POVs has never been easier 🤓 Has language translation 🤩 #smartglasses #cameraglasses #aiglasses #pov #contentcreatormusthaves ♬ I Think I Like When It Rains - WILLIS
What Is an Example of a Meta Glasses Video Workflow?
Say you spend a Saturday morning walking through a busy farmers market and want a 30-second Instagram Reel out of it. The goal is not to make a cinematic film, but to create a engaging POV video that shows the atmosphere of the place.
Rather than recording the entire morning continuously, treat the outing like a short shot list. Look for a handful of distinct moments that can each contribute something different to the final video.
For example, you might capture:
- Arrival: Walking toward the market entrance
- Establishing shot: A wider look at the stalls and crowd
- Detail: A close view of flowers, fruit, pastries, or another colorful display
- Action: Food being cooked, coffee being poured, or a vendor preparing an order
- POV moment: Moving through a busy walkway or picking something up
- Ending: Walking away with a purchase or taking one final look at the market
How Should You Organize Meta Glasses Footage Before Editing?
Before you start editing, do a quick pass through your Meta glasses footage and remove anything you already know you won't use. POV recording makes it easy to accumulate clips, so this step prevents you from spending time editing footage that was shaky, poorly framed, or simply didn't capture anything interesting.
For the farmers market example, you could narrow the footage down to the six clips from your shot list:
- 01-market-entrance
- 02-stalls
- 03-food-closeup
- 04-crowd-walkway
- 05-interesting-detail
- 06-exit-shot
This is also a good time to decide where you're posting. If the farmers market video is going to Instagram Reels, for example, you already know you're building a short edit. That decision will affect how you crop, pace, and caption the footage later.
Why Is Editing Meta Glasses Footage Important?
Meta glasses make capturing POV footage easy, but they don't give you the same control you'd have when framing every shot with a phone or camera. You might look away halfway through a clip, turn your head too quickly, or end up with multiple clips that show the same thing.
Editing is where that raw footage becomes intentional. You should only keep the strongest moments, remove distracting movement, and arrange the clips into a sequence that has a clear beginning, middle, and end.
For short-form videos, editing also lets you adapt the footage to how people will actually watch it. That might mean reframing for a 9:16 screen, shortening clips to keep the pace, adding captions, or adding music.
When choosing a video editor for Meta glasses footage, the most useful tools are:
- Trimming and splitting: Cut shaky starts, head turns, pauses, and other unusable moments without losing the rest of the clip.
- Timeline editing: Combine separate POV clips and control exactly how long each moment stays on screen.
- Cropping and resizing: Reframe footage for vertical platforms like Reels, TikTok, and Shorts.
- Captions and text: Add context that may not be obvious from the first-person footage alone, especially when the video includes dialogue or narration.
- Audio controls: Lower distracting wind or background noise, balance speech, and mix natural sound with music.
- Easy exporting: Create a finished file in the dimensions and format you need for the platform you're posting to.
How to Edit Videos Recorded With Meta AI Glasses
Once you've transferred and selected your best clips, you can start building the final video. We'll continue with the farmers market Reel as an example.
Step 1: Upload Your Meta Glasses Clips
Open a new project in your video editor; for this tutorial, we are using Kapwing. Upload the clips you selected earlier. For the farmers market Reel, that's the six shots covering the entrance, stalls, food, crowd, detail, and exit.
Starting with your selects keeps the timeline easier to work with.

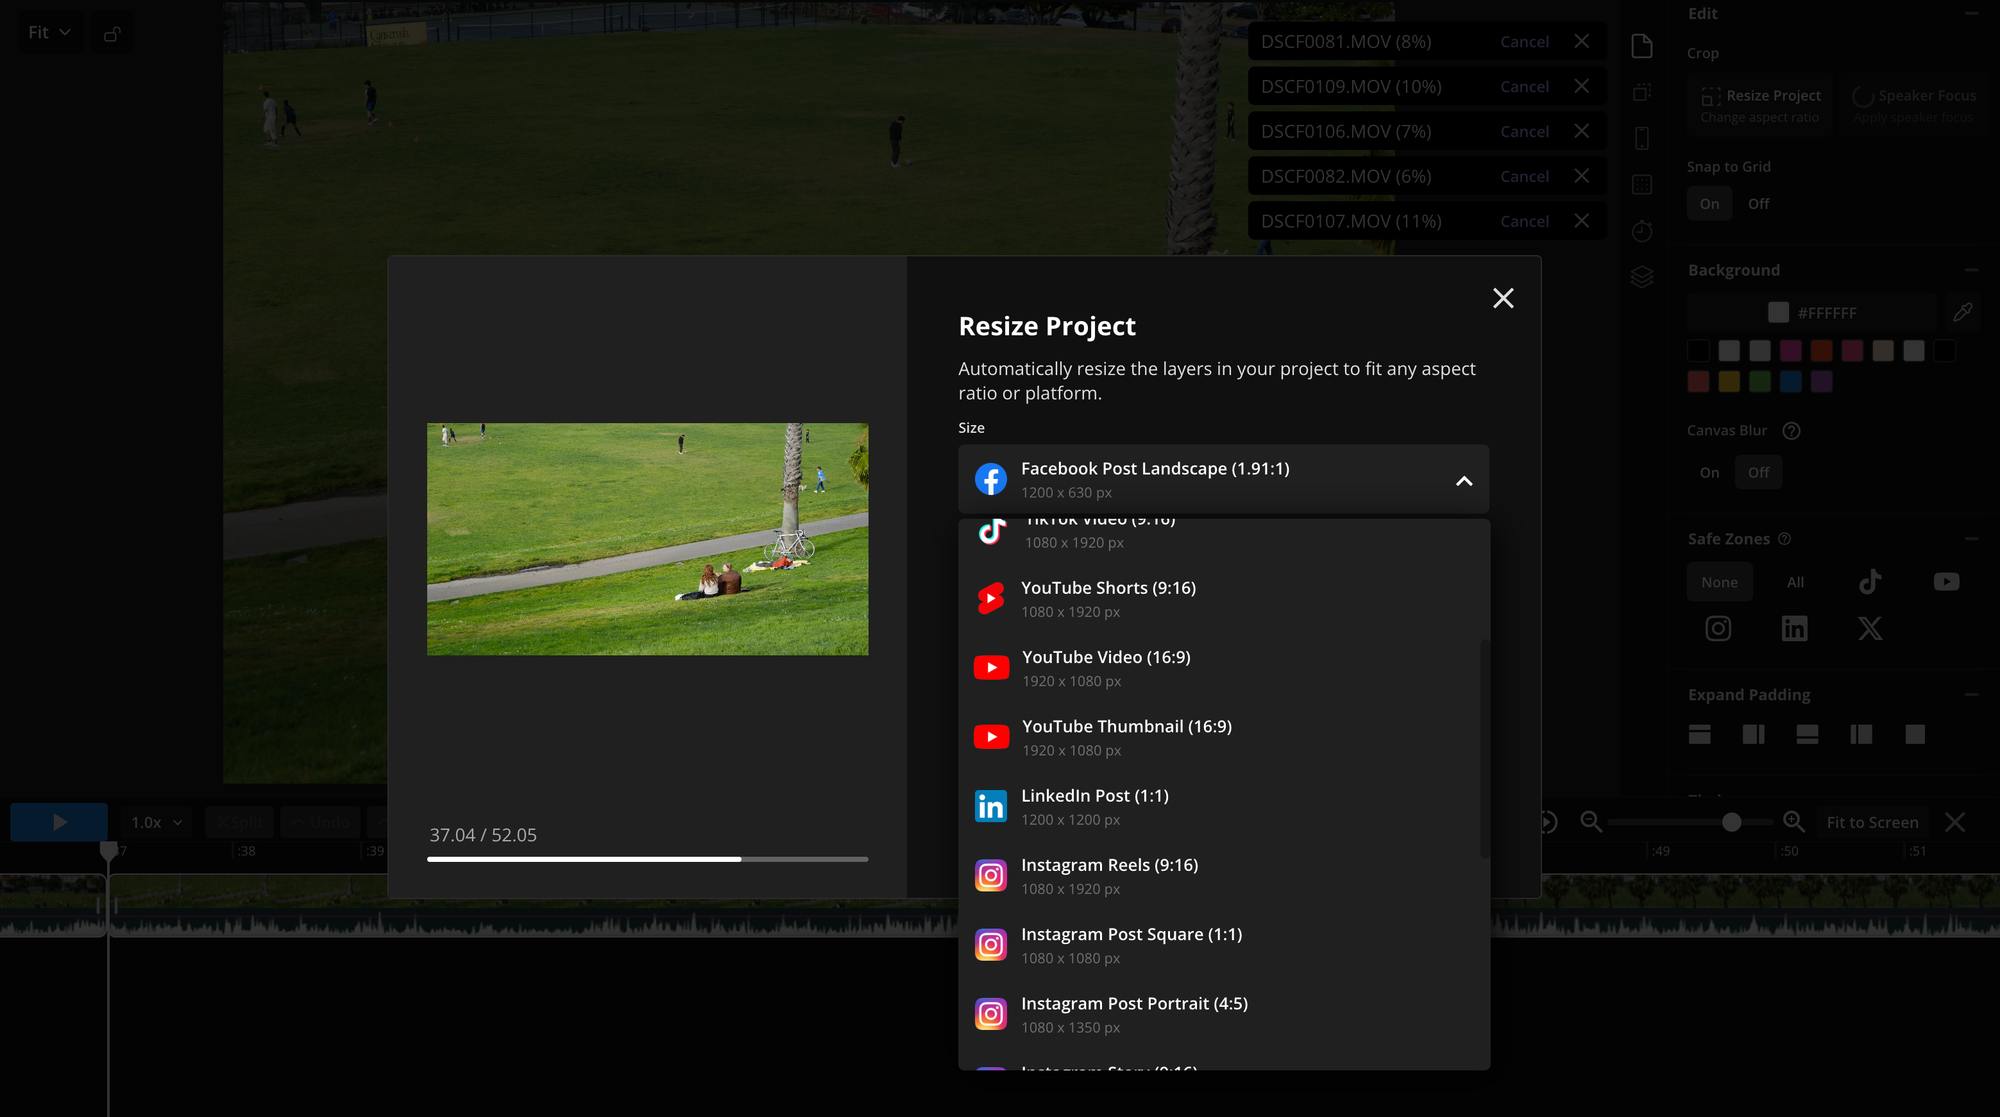
Step 2: Choose Your Aspect Ratio
Set the aspect ratio for the platform you're publishing to before you start making detailed edits.
For TikTok, Instagram Reels, and YouTube Shorts, use a vertical 9:16 canvas. For standard YouTube videos or other landscape content, 16:9 is the typical choice.
Pay attention to how your POV footage sits inside the new frame. If resizing crops out an important subject, reposition the clip rather than accepting the default crop.
Step 3: Build a Rough Cut
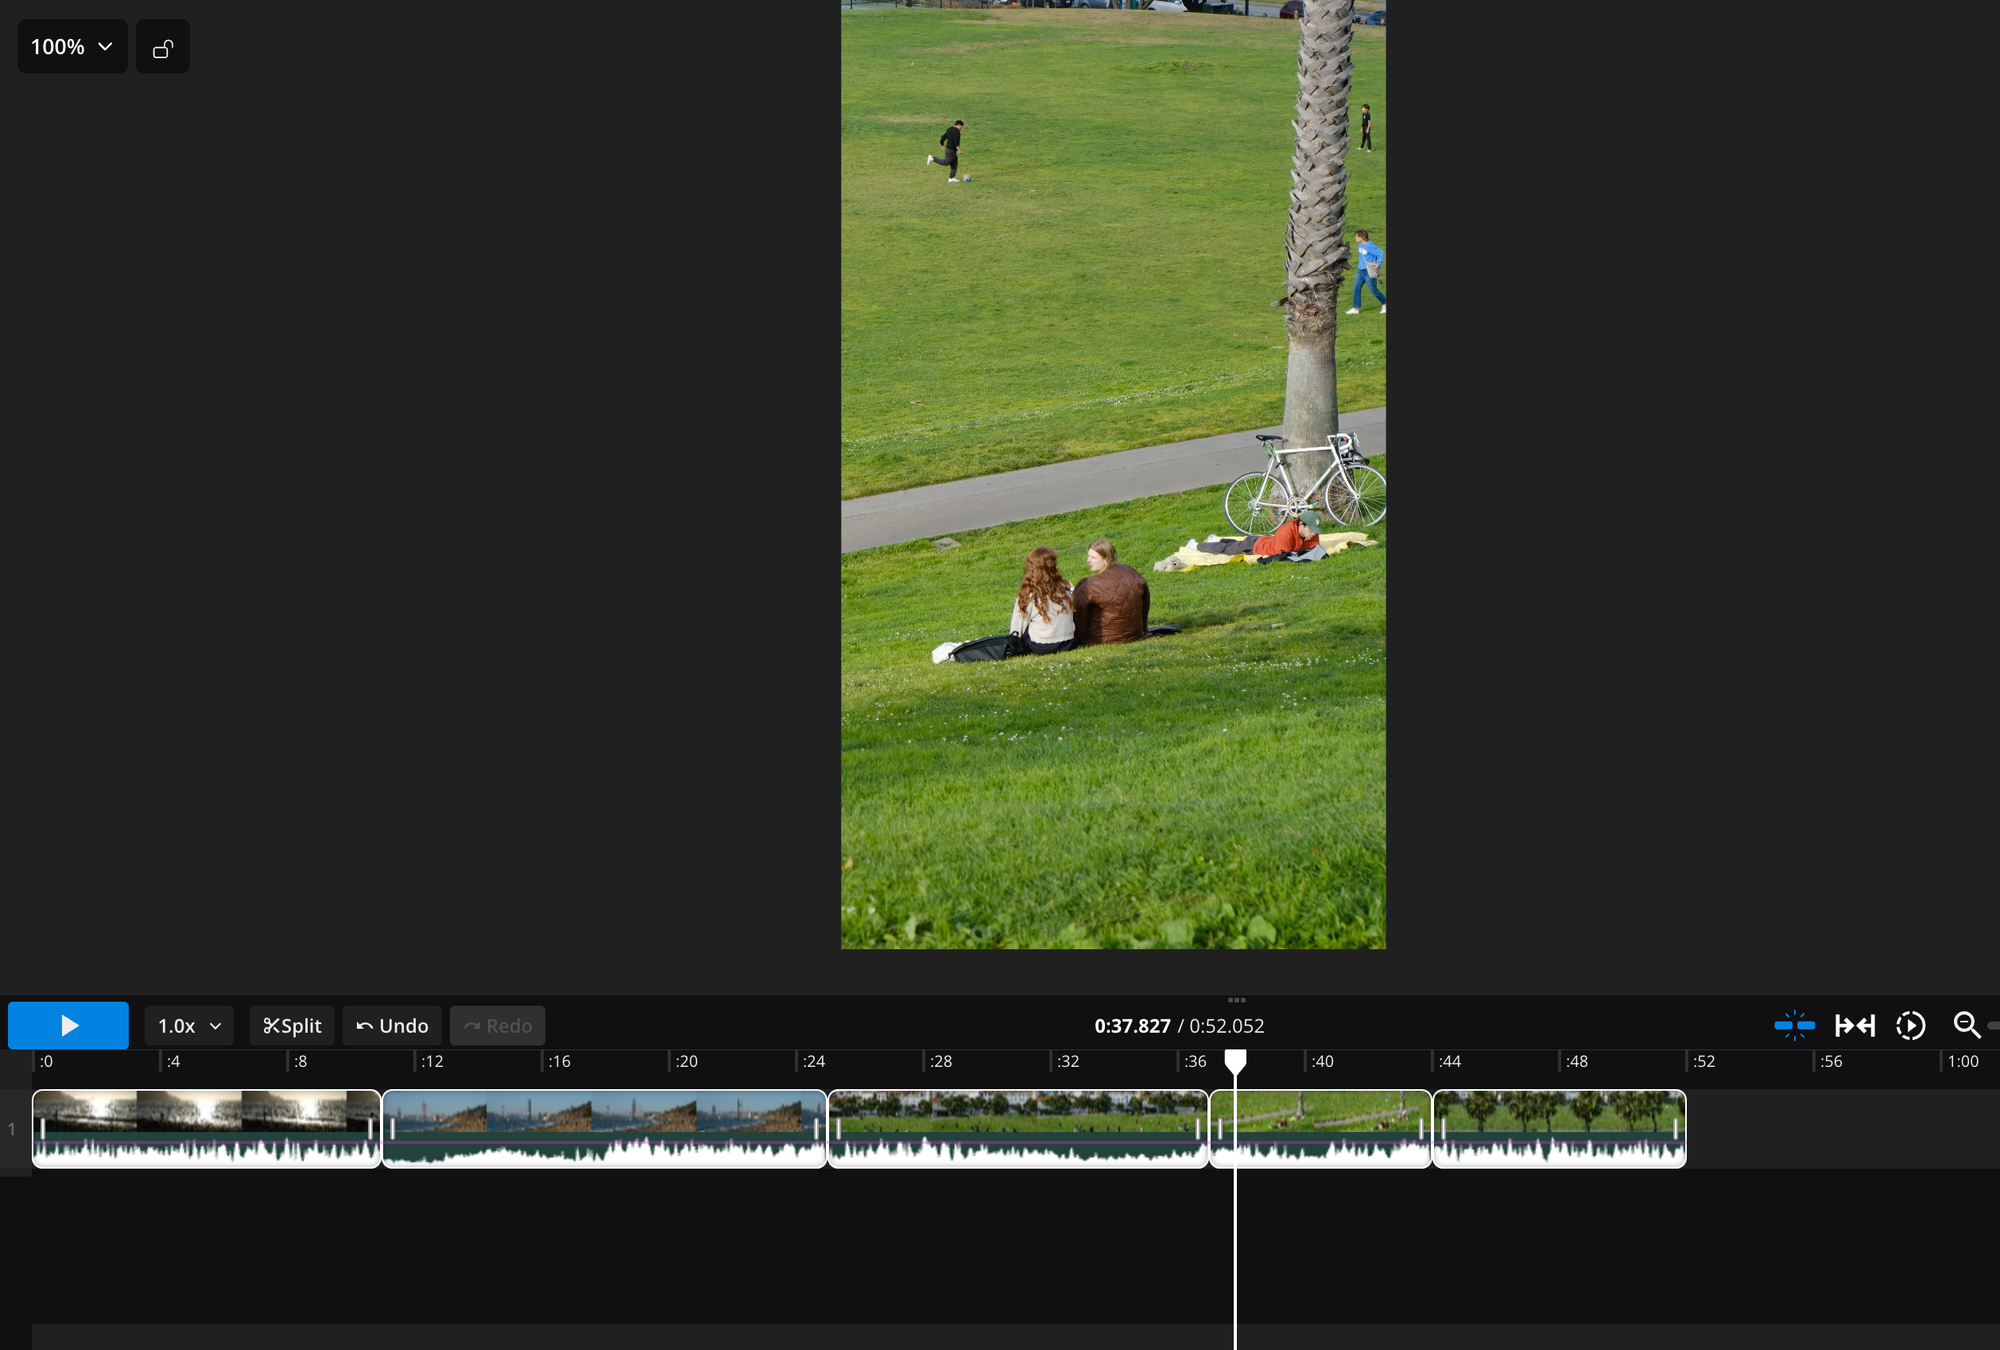
Drag your clips onto the timeline and arrange them into a basic sequence.
Don't worry about getting every cut perfect yet. First, make sure the sequence works as a story: establish where you are, move through the experience, and finish with a clear ending.
Step 4: Trim Shaky and Unnecessary Footage
Now tighten each clip. POV footage often includes a second or two where you're turning toward the subject, looking away, or reaching to stop the recording.
Trim those moments so each clip starts as close as possible to the action you actually want viewers to see.

For a shaky footage, you can use a Stabilization tool to reduce movement.
This will make your video much easier to watch.

Step 5: Add Text or Captions
POV footage doesn't always explain itself, so text can give viewers context without requiring additional footage.
For the market Reel, an opening overlay like "Saturday morning at the farmers market" immediately establishes where the viewer is and what they're watching.
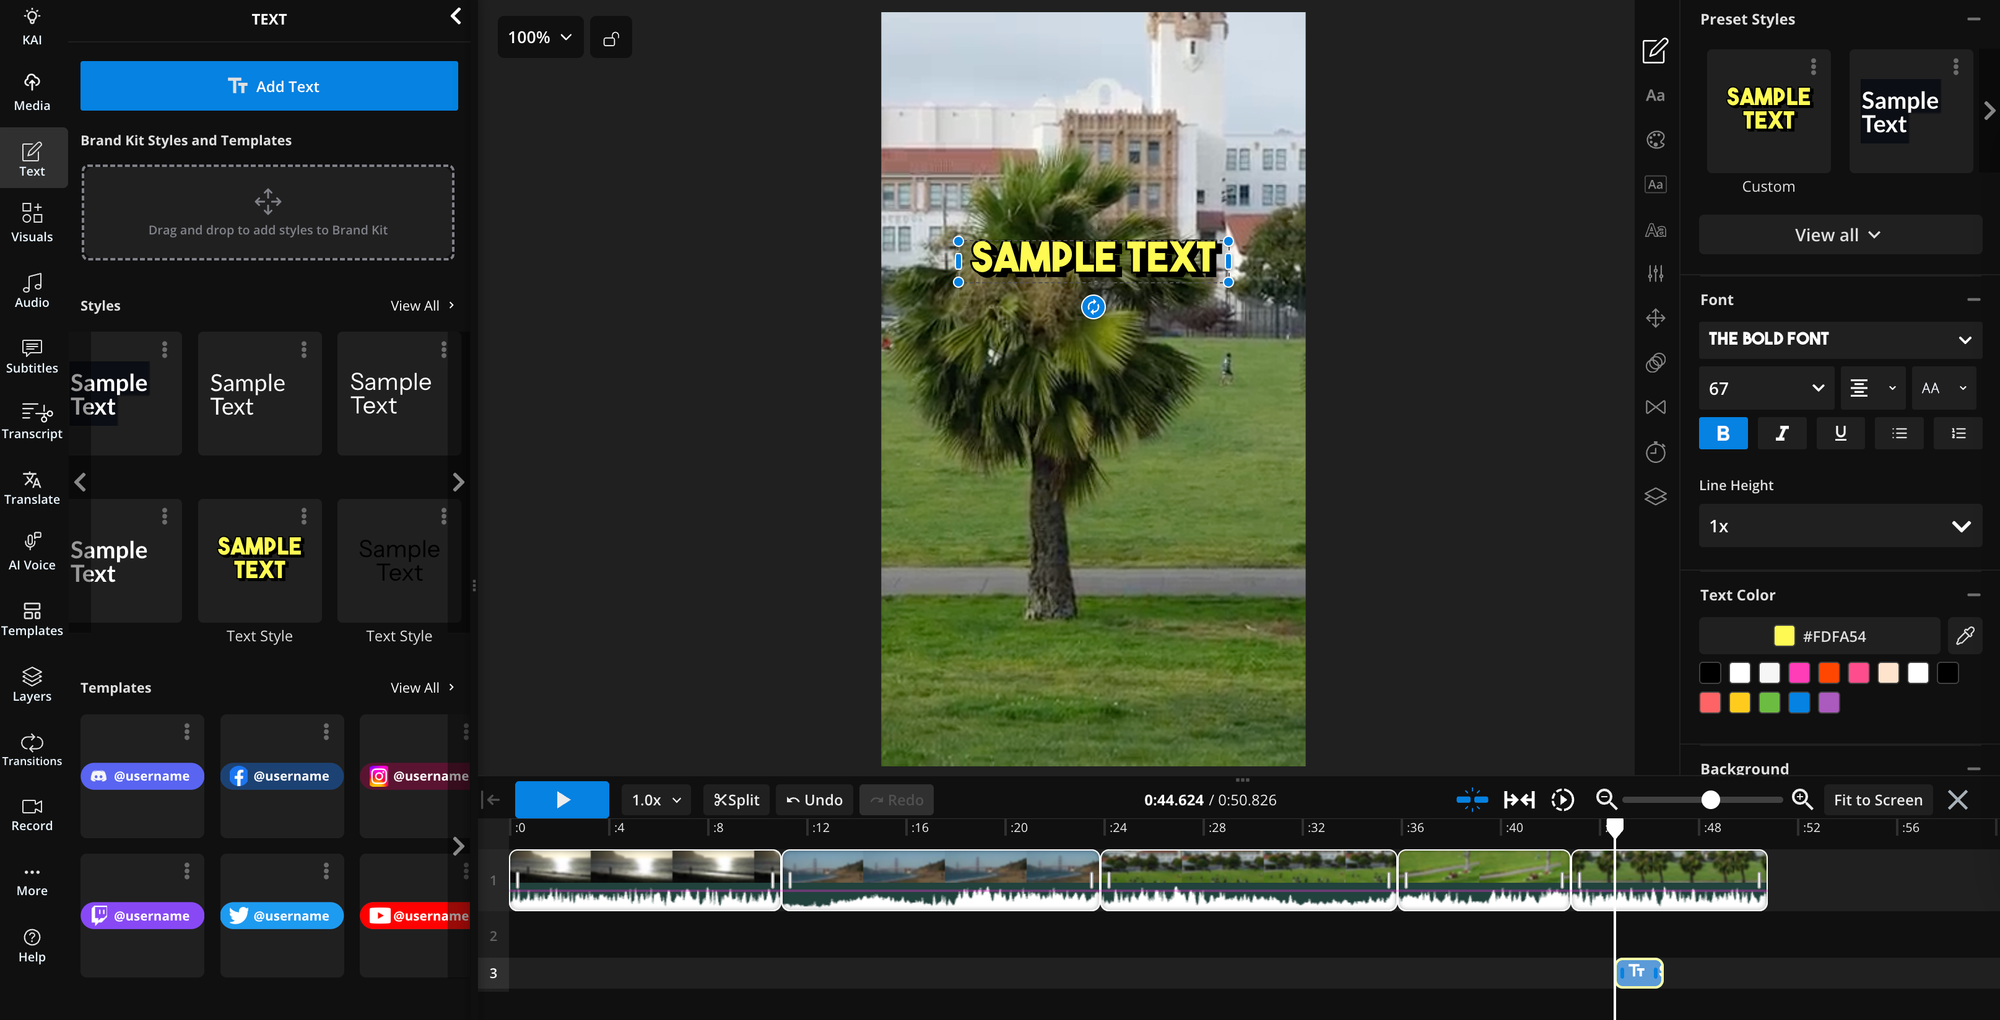
If your footage contains speech or you've added a voiceover, use a subtitle editor to generate and style captions.
Keep overlays concise and avoid covering the central part of the frame, where the action in first-person footage is most likely to happen.

Step 6: Adjust the Audio
Meta glasses capture the environment along with the video, which can be a strength, but also make the audio distracting. Listen through each clip and decide which natural sounds are worth preserving. Edit the audio of distracting clips.
If you're adding music, keep some useful ambient sound underneath it. Completely replacing the original audio can make first-person footage feel less immediate.

Step 7: Review and Export
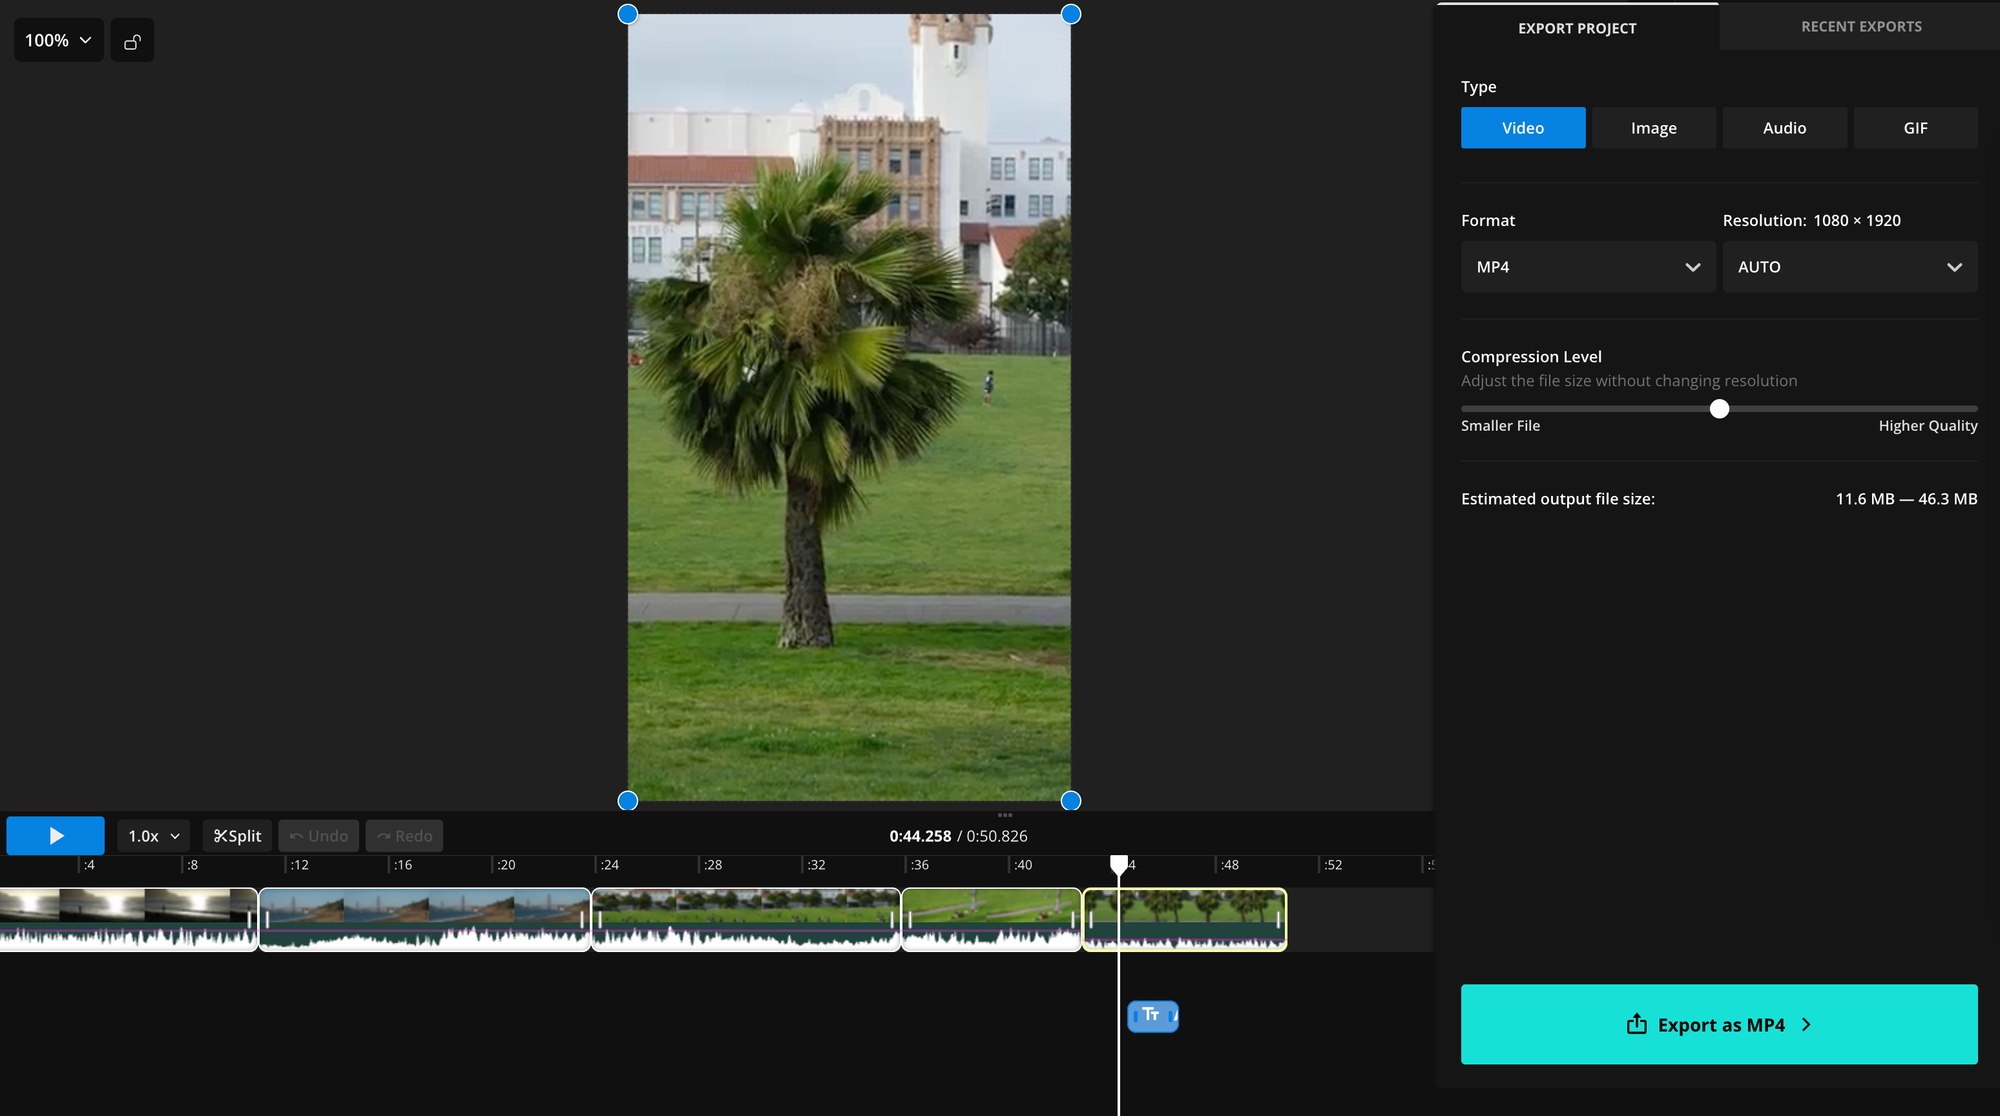
Watch the entire video once without stopping before you export. Look for cuts that drag, abrupt head movements you missed, inconsistent audio, text that's difficult to read, or clips that don't add anything to the sequence.
Once the sequence works, export it in the dimensions required by your publishing platform.
What Should You Avoid When Recording and Editing Meta Glasses Videos?
The most common mistake with Meta glasses footage is treating everything you record as something you need to keep. POV clips can feel more interesting when you were there than they do to someone watching afterward, so edit based on what the viewer actually needs.
A few things are worth watching for:
- Long, uninterrupted clips: Cut to the interesting moment.
- Sudden head movements: Quick turns are especially noticeable from a first-person perspective and can make footage uncomfortable to watch.
- Repetitive shots: Only keep the strongest clips.
- Too much text: Use overlays to add context, not narrate everything.
- No clear focus: A collection of POV clips still needs an idea holding it together, whether that's "morning at the farmers market," a tutorial, a travel recap, or a day in the life.
When Should You Use Meta Glasses for Video?
Meta glasses aren't a replacement for a phone or dedicated camera. They're most useful when being hands-free or capturing a genuine first-person perspective matters more than having precise control over the shot.
They're particularly strong for walking tours, travel, events, cooking, demonstrations, behind-the-scenes footage, and other situations where holding a camera would interrupt what you're doing.
A phone or camera is usually the better choice when you need carefully composed shots, controlled camera movement, precise framing, or a more cinematic look.
You can also combine the two. Meta glasses can provide immersive POV shots while a phone captures establishing shots, close-ups, or third-person footage. Mixing those perspectives can make the final edit feel more intentional without losing the immediacy that makes wearable footage interesting.
Final Thoughts
The best Meta glasses videos don't come from recording everything. They come from capturing a handful of moments that benefit from the first-person perspective, then being selective about what makes the final cut.
Think in short shots while you're recording: hold your gaze, move deliberately, and capture one clear moment at a time. In the edit, remove the shaky transitions, build those moments into a sequence, add context where it's needed, and adapt the video for the platform you're posting to.
The glasses make it easier to capture what you're experiencing. A good edit makes that experience worth watching.
Frequently Asked Questions
How long can Ray-Ban Meta glasses record video?
Recording limits depend on the Ray-Ban Meta model and your current settings, so check the Meta AI app for the options available on your glasses. For social content, shorter individual recordings are often easier to work with anyway: capture one moment per clip, then combine the best clips during editing.
How do you transfer videos from Meta glasses to your phone?
Recorded photos and videos can be imported through the Meta AI app on your paired phone. Once they're saved to your phone, you can upload the clips to a video editor or transfer them to a computer for editing.
What format do Meta glasses record video in?
Ray-Ban Meta glasses are designed primarily for portrait-oriented, first-person capture. That makes the footage particularly well suited to vertical platforms such as Instagram Reels, TikTok, and YouTube Shorts.
Can you edit videos recorded with Meta glasses?
Yes. Once you've imported the recordings from your glasses, they're regular video files that can be edited. You can trim shaky footage, combine clips, crop or resize the video, add music and text, generate subtitles, adjust audio, and export the finished edit.
Can you post Meta glasses videos to Instagram or TikTok?
Yes. Meta glasses footage can be used for Instagram Reels, TikTok, YouTube Shorts, Facebook, and other social platforms. Before posting, edit the footage to the appropriate aspect ratio and check that important subjects and text remain visible within the platform's interface.
Do Meta glasses record audio with video?
Yes. Meta glasses capture audio while recording video. This can make POV footage feel immersive, but outdoor recordings may also pick up wind, traffic, crowds, and other environmental sounds. Listen through the audio during editing and adjust, mute, or replace distracting sections when necessary.
Are Meta glasses good for making content?
They're particularly useful for content where a hands-free, first-person perspective adds to the video, including travel, cooking, tutorials, events, behind-the-scenes clips, and day-in-the-life content. They're less suited to situations where you need precise framing or highly controlled camera movement.