
How to do the 100x ChatGPT Image Trend
After duplicating your photo 100 times, will you still recognize yourself?
ChatGPT has recently reinforced its role as a leader in the AI space by introducing advanced image generation features and sparking new meme trends across social media. One of the latest to gain traction is the 100x ChatGPT image trend — a viral experiment that highlights both the strengths and quirks of AI-generated images.
In this trend, users generate an image with ChatGPT and then recreate it 100 times in a row. When stitched together into a time-lapse video, the subtle changes between each version reveal how the AI evolves and distorts the original concept over time.
In this guide, we’ll show you exactly how to participate in the 100x trend — from generating your first image to exporting a full video — no prior AI or video editing experience required.
Generating Your Images
To participate in this trend, you'll need to start by uploading an image to ChatGPT and asking the AI to create an exact copy. While seemingly intuitive, this process requires some specific instructions to get ChatGPT to comply. I found that phrases like "generate a copy of this image" or "create a replica of this image" do not work. Instead, the prompt "create a new image that is a replica of my uploaded image" results in a new generation.
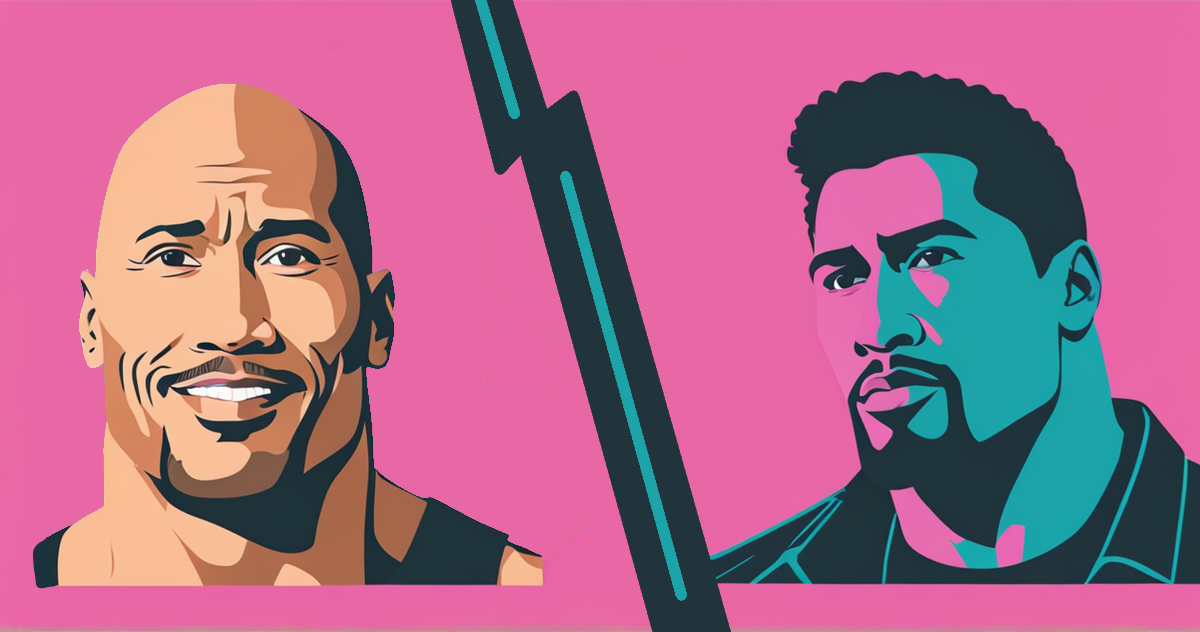
I tried the "Create the exact replica of this image, don't change a thing" 101 times, but with Dwayne Johnson 🗿
by u/Foreign_Builder_2238 in ChatGPT
The example that started it all.
Here is a step-by-step walkthrough of the process
1. Upload Your Reference Image
Start by uploading your desired reference image to a new ChatGPT conversation. To import a file, select the + icon in the bottom left corner of the prompt box.

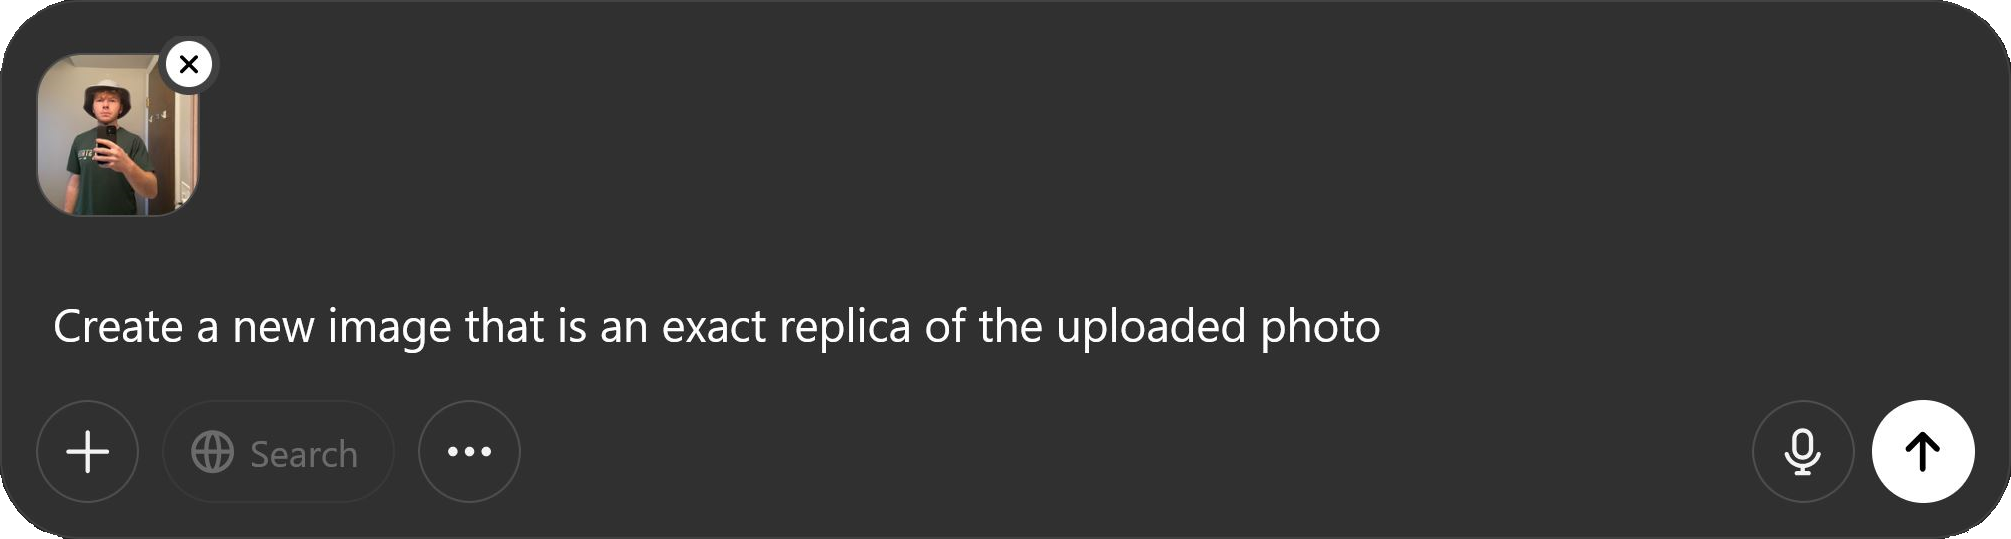
2. Add a Prompt
Once you've uploaded your image, you'll want to add a prompt that specifically guides ChatGPT to recreate your image. In testing, I had the best results with the prompt:
Create a new image that is an exact replica of the uploaded photo
3. Rinse and Repeat
From here, it’s all a battle of patience. Once ChatGPT generates your image, respond with the message:
Now create a new image that is a replica of that one
and it will begin generating new renditions. Repeat this process until you have enough images that large changes are noticeable when compared to the original. If you want to faithfully recreate the trend, you'll need to generate 99 more duplicates.
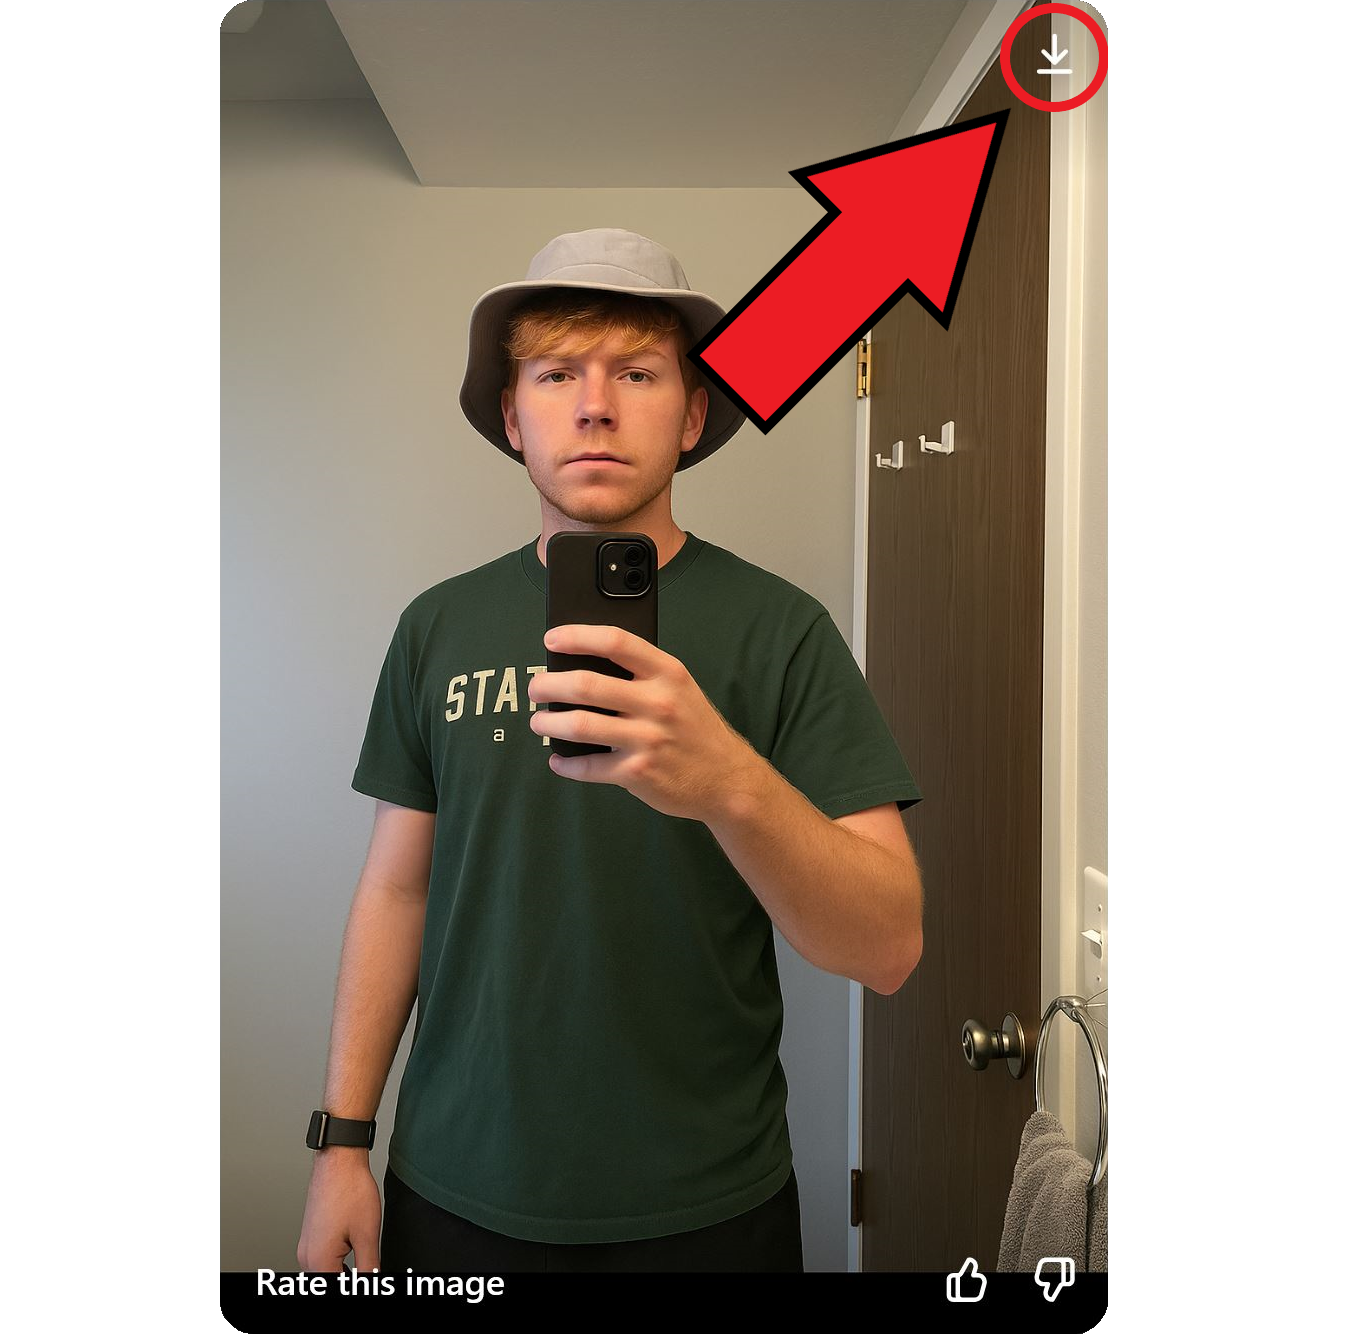
4. Save Your Images
Since you'll need to upload all of your generated images into a video editor to assemble the final product, it’s important to save them efficiently.
Start by hovering over each image and selecting the download icon from the top-right corner.
Having some sort of naming system will greatly help you out later down the line. For my images, I’m choosing to name them with sequential numbers to reduce the time it takes to label each one and to make it easier when assembling my video later.
For example, my first downloaded image will be titled “2” — since my original reference image will be number 1 in my video timeline. From there on out, my images will be titled “3”, “4”, “5”, and so on.
Assembling Your Video
After successfully generating and downloading your ChatGPT images, it’s time to assemble your video. Luckily, this half of the process requires much less waiting around than the first half. Let’s dive in.
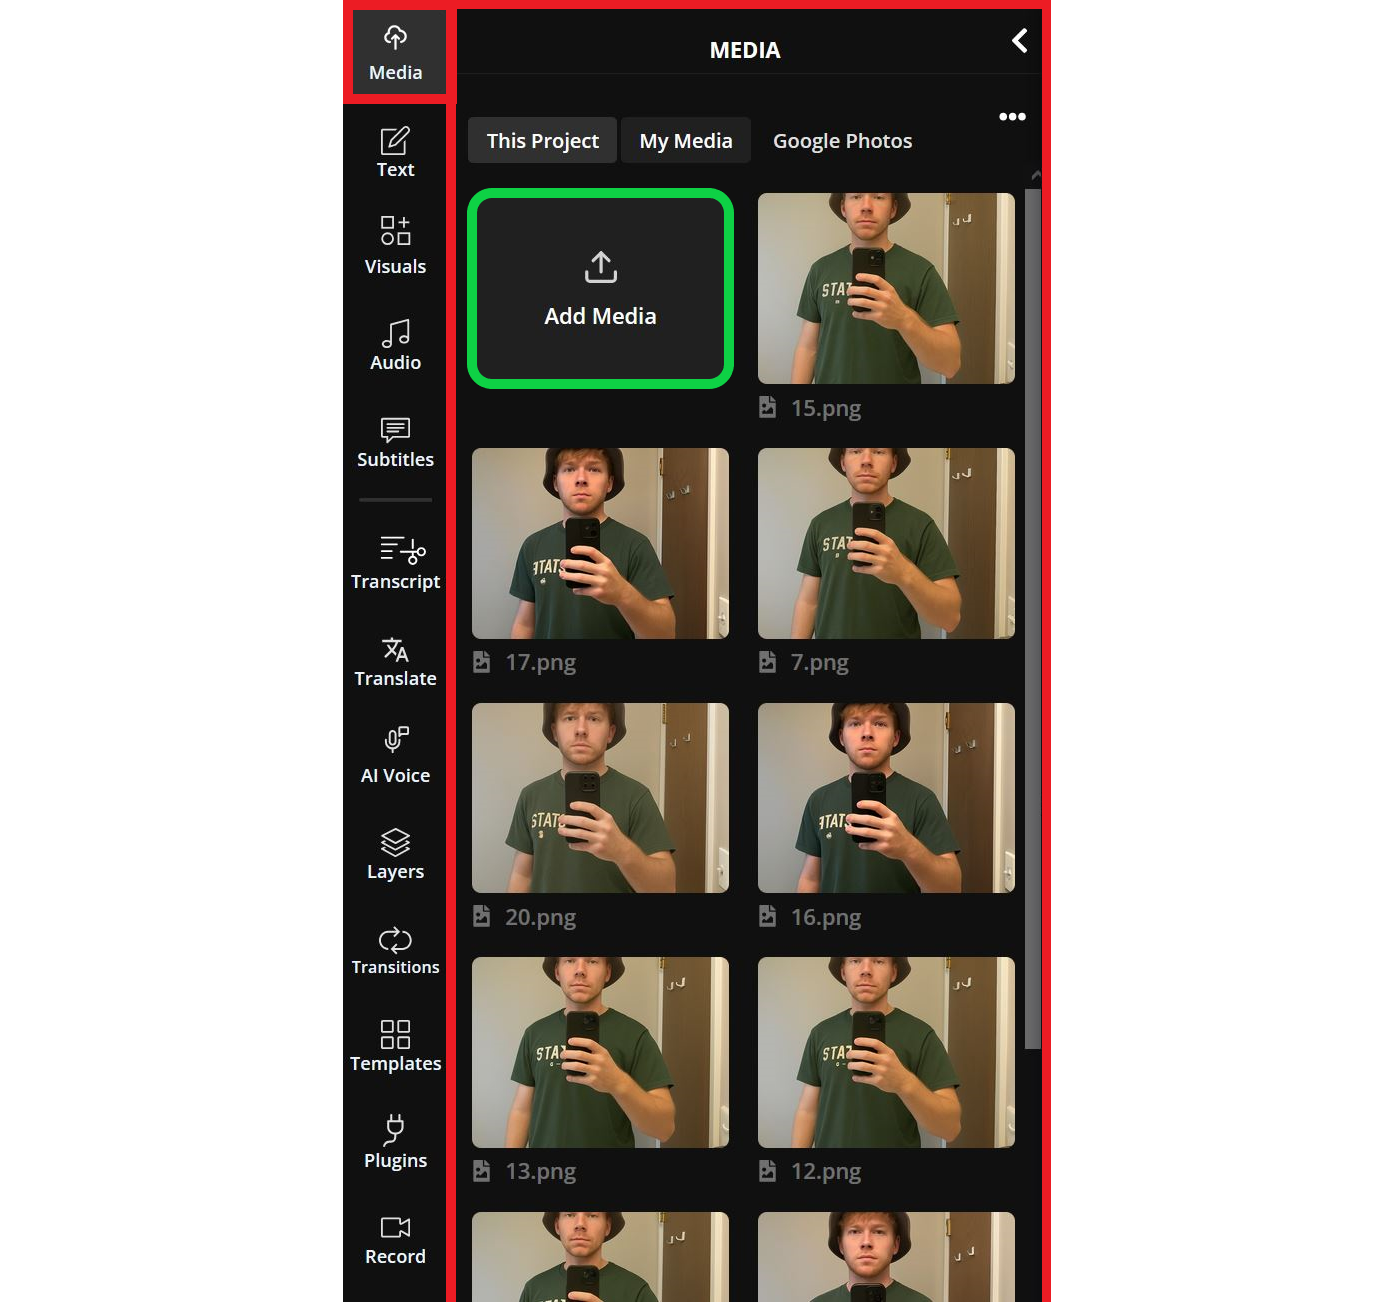
1. Upload Your Files
Begin by uploading each and every one of your images to a free online video editor. Creating a new project will automatically prompt you to upload files; however, you can upload more at any time by accessing the Media tab from the left-hand sidebar.
2. Arrange Your Clips in the Timeline
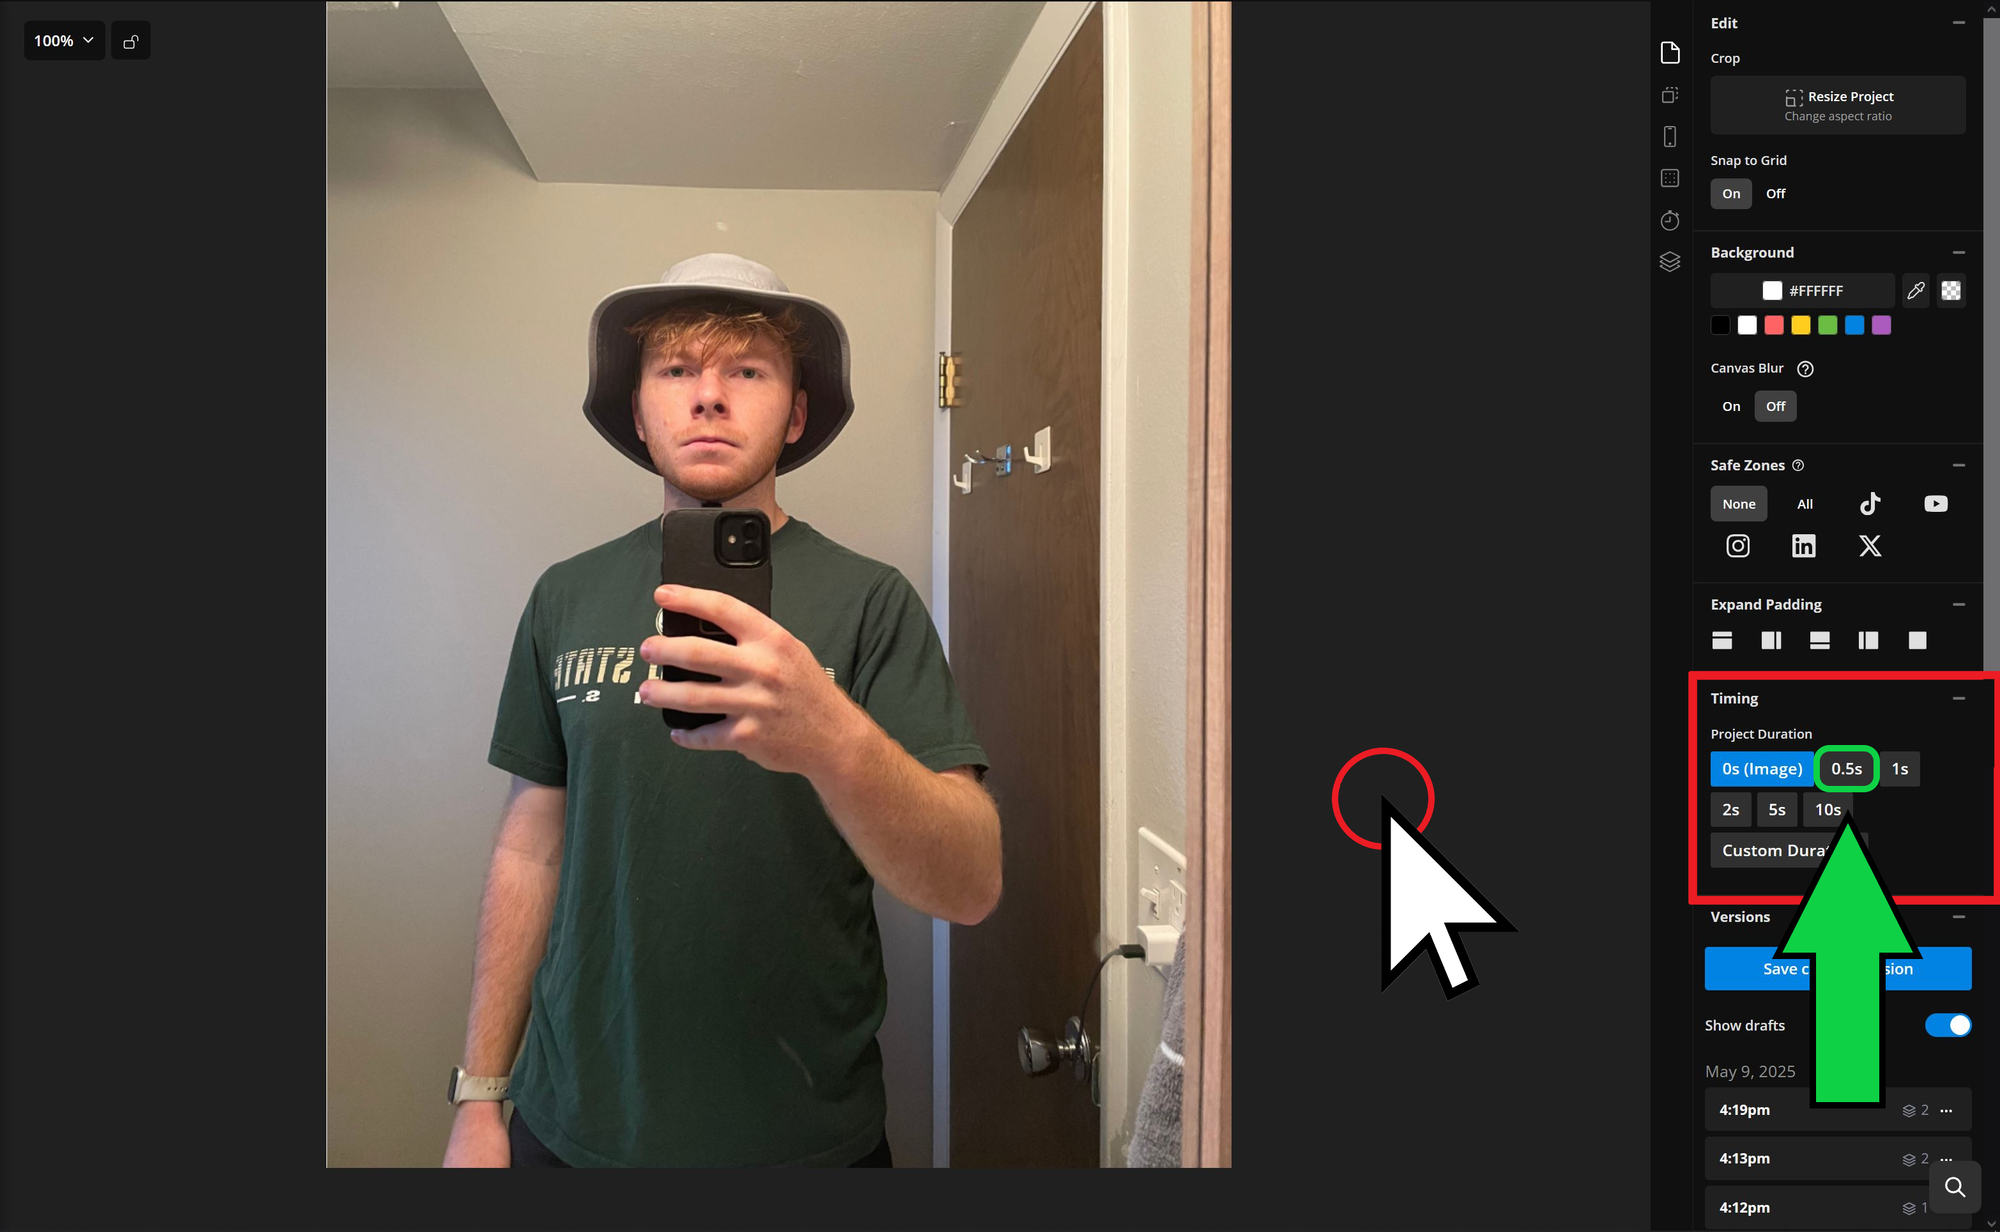
Since the goal of this trend is to create a video showing the progression of your images, you’ll need to convert your images into a video. To do this, select the background of your project and choose a clip duration under the Timing settings on the right-hand side.
I selected a 0.5-second duration to ensure my clips flow quickly.
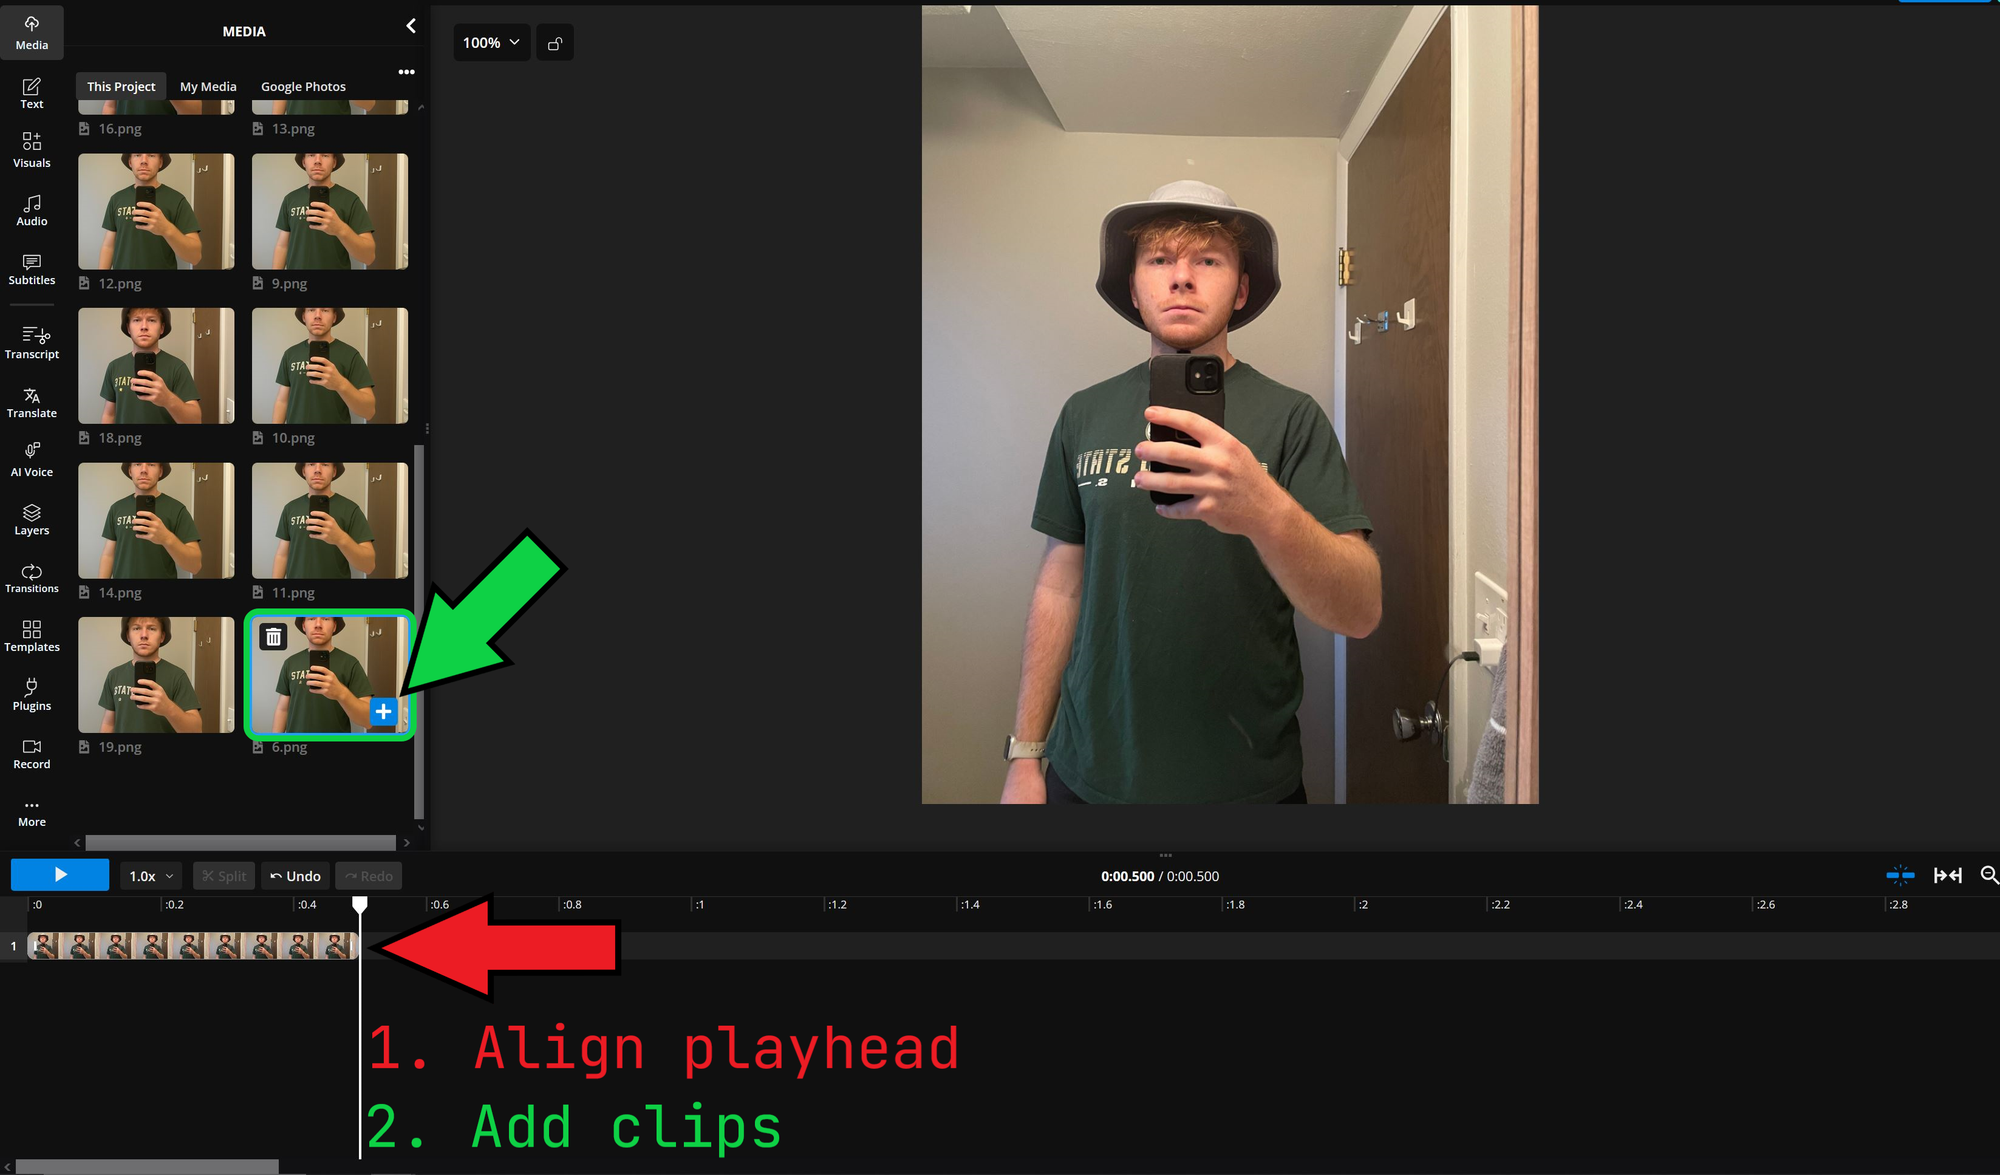
Next, add each of your images to the timeline to build your video. When doing so, follow this process:
- Align the video playhead at the end of the previous clip
- Select the + icon to add your image from the media pool
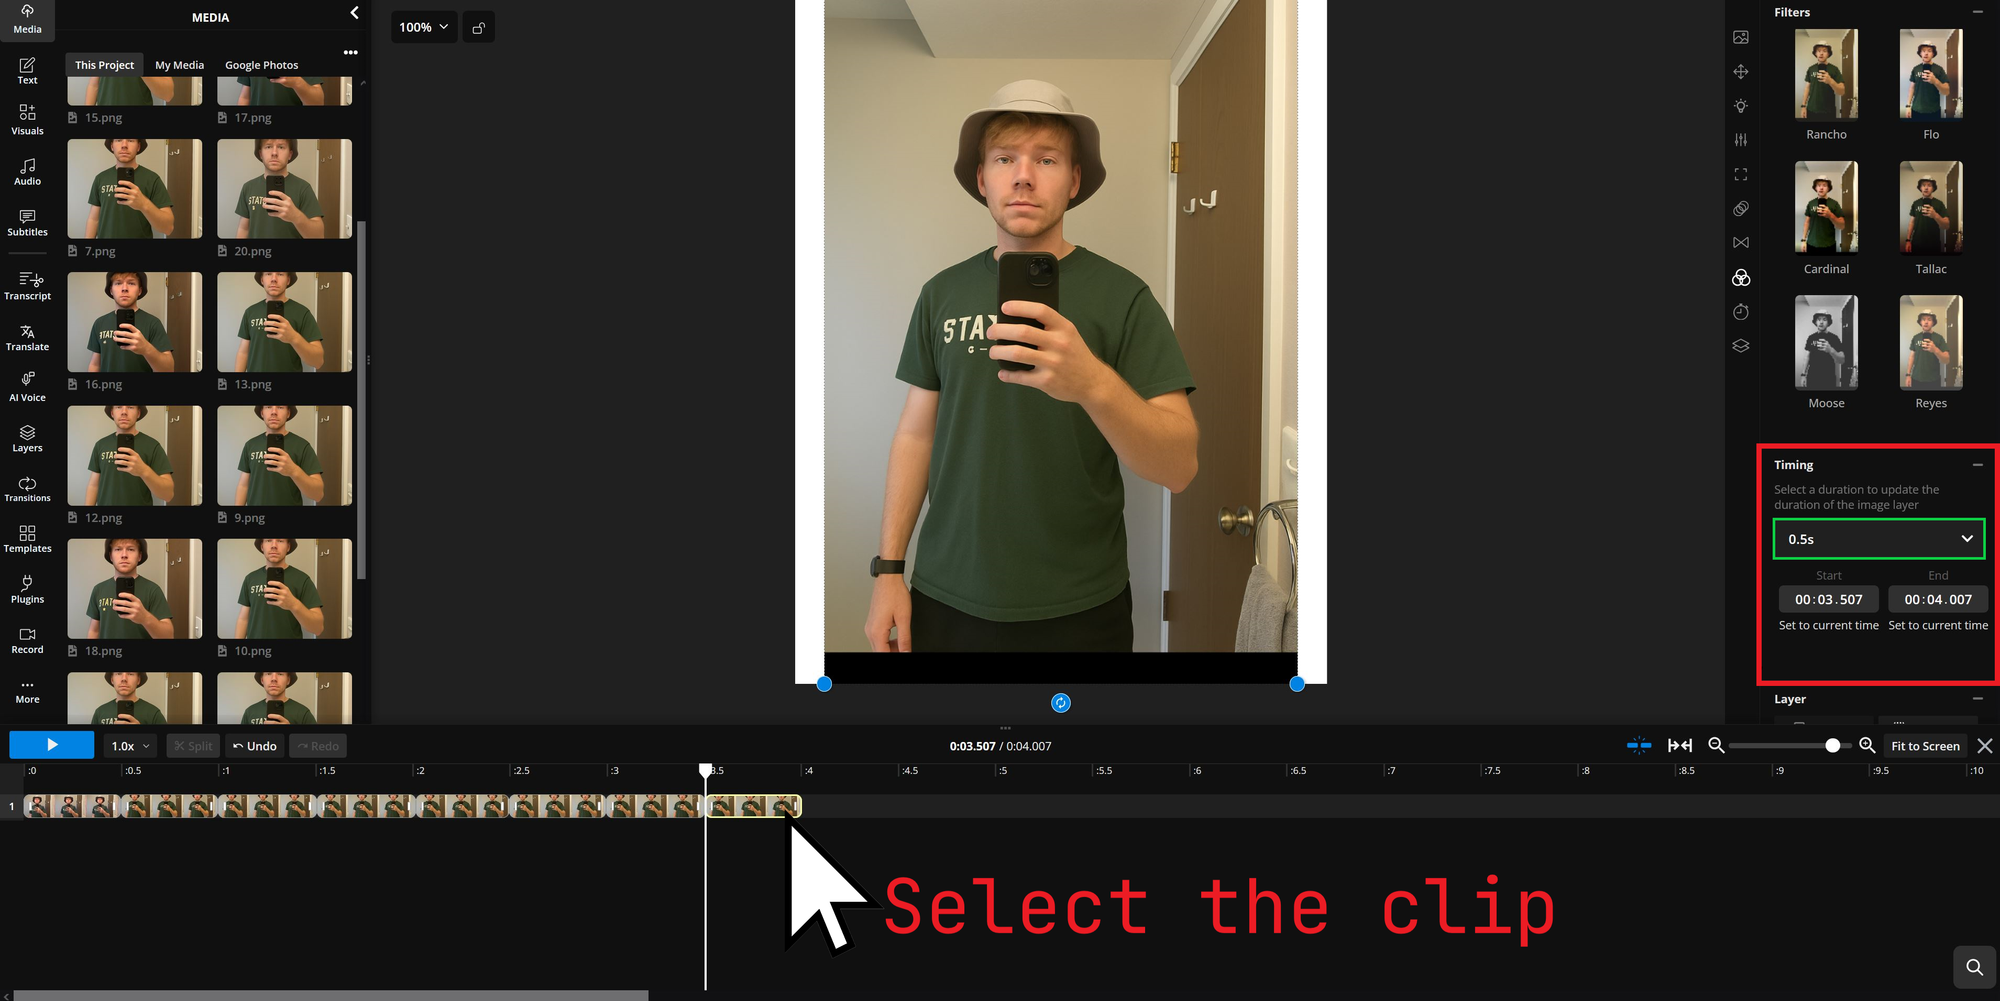
As you add each clip, you may need to shorten them to ensure they’re all the same length. The best way to do this is to select each clip and use the same Timing menu to set your desired clip duration.
Again, I set all of my clips to 0.5 seconds to maintain a fast-paced video flow.
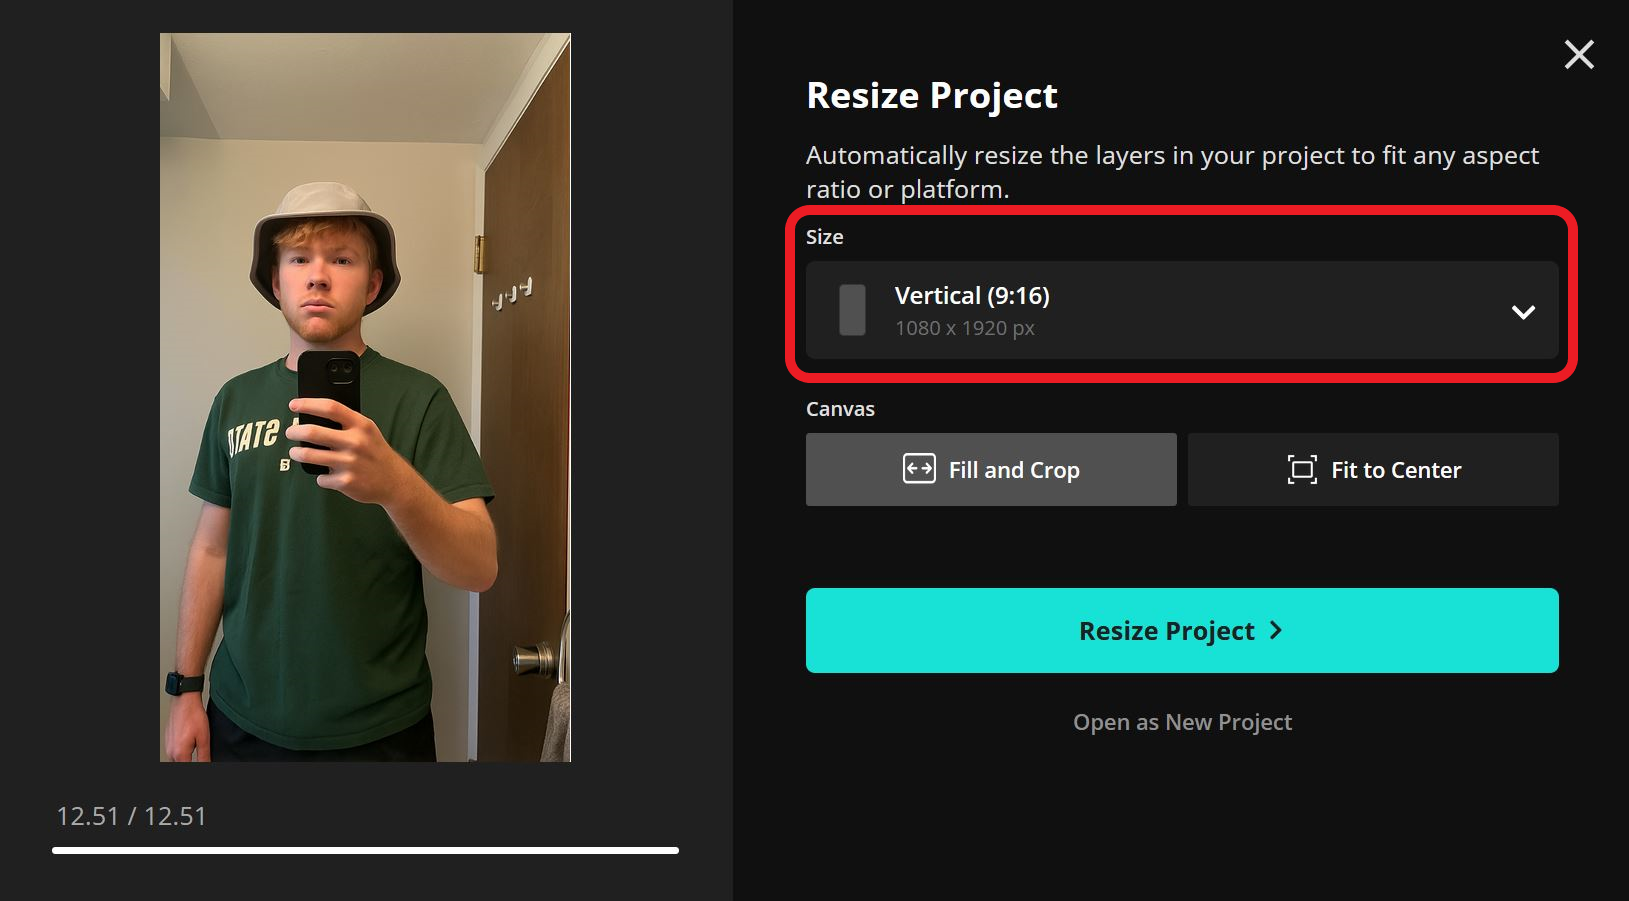
3. Resize Your Project
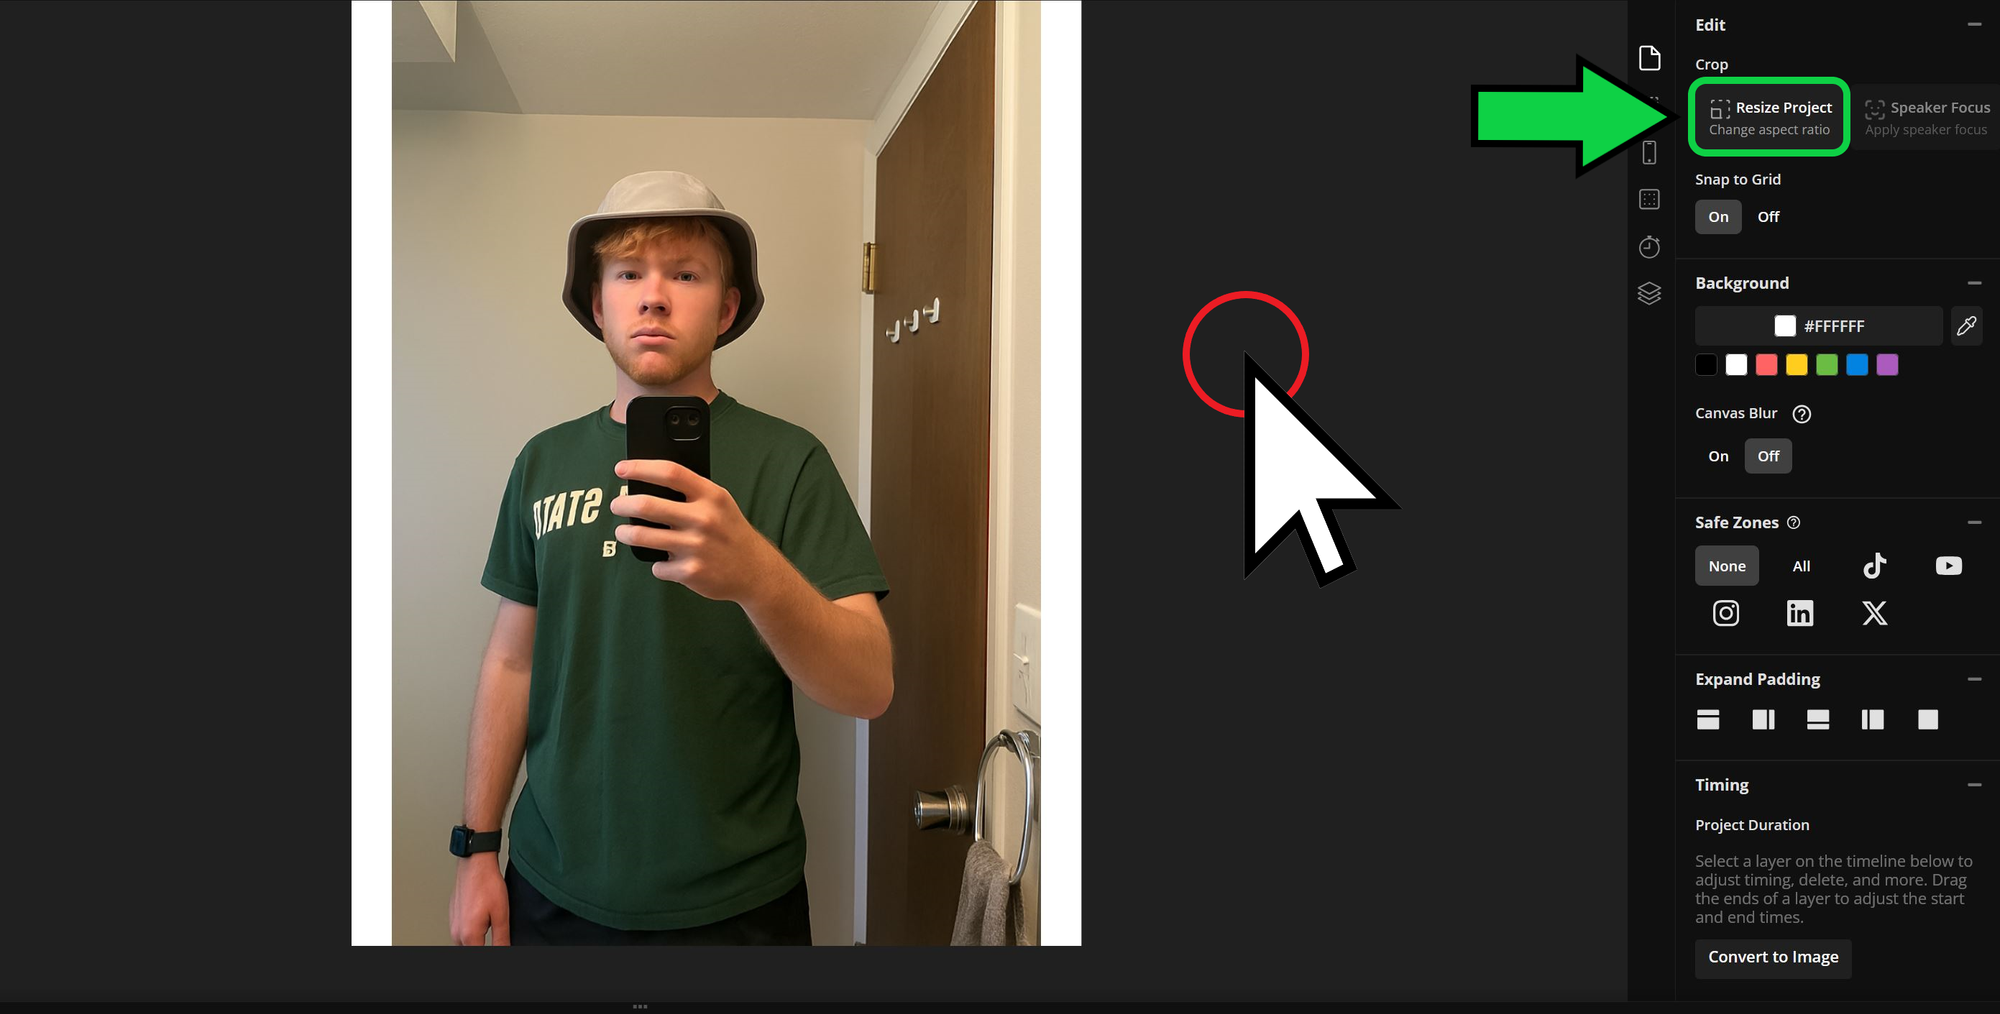
Since ChatGPT cannot generate images with specific — or consistent — resolutions, your clips may appear with uneven padding or borders. To avoid this, resize your project to apply a uniform aspect ratio.
To start, select the background of your project to access the Resize Project tool on the right-hand side.
Then, choose an aspect ratio from the Size dropdown list. I selected the 9:16 preset to ensure my video is optimized for social media and cropped to a portrait format.
4. Export
Finally, export your project by selecting the Export Project button in the top-right corner of the editor. Make sure your export settings are set to MP4 so your project is exported as a video.
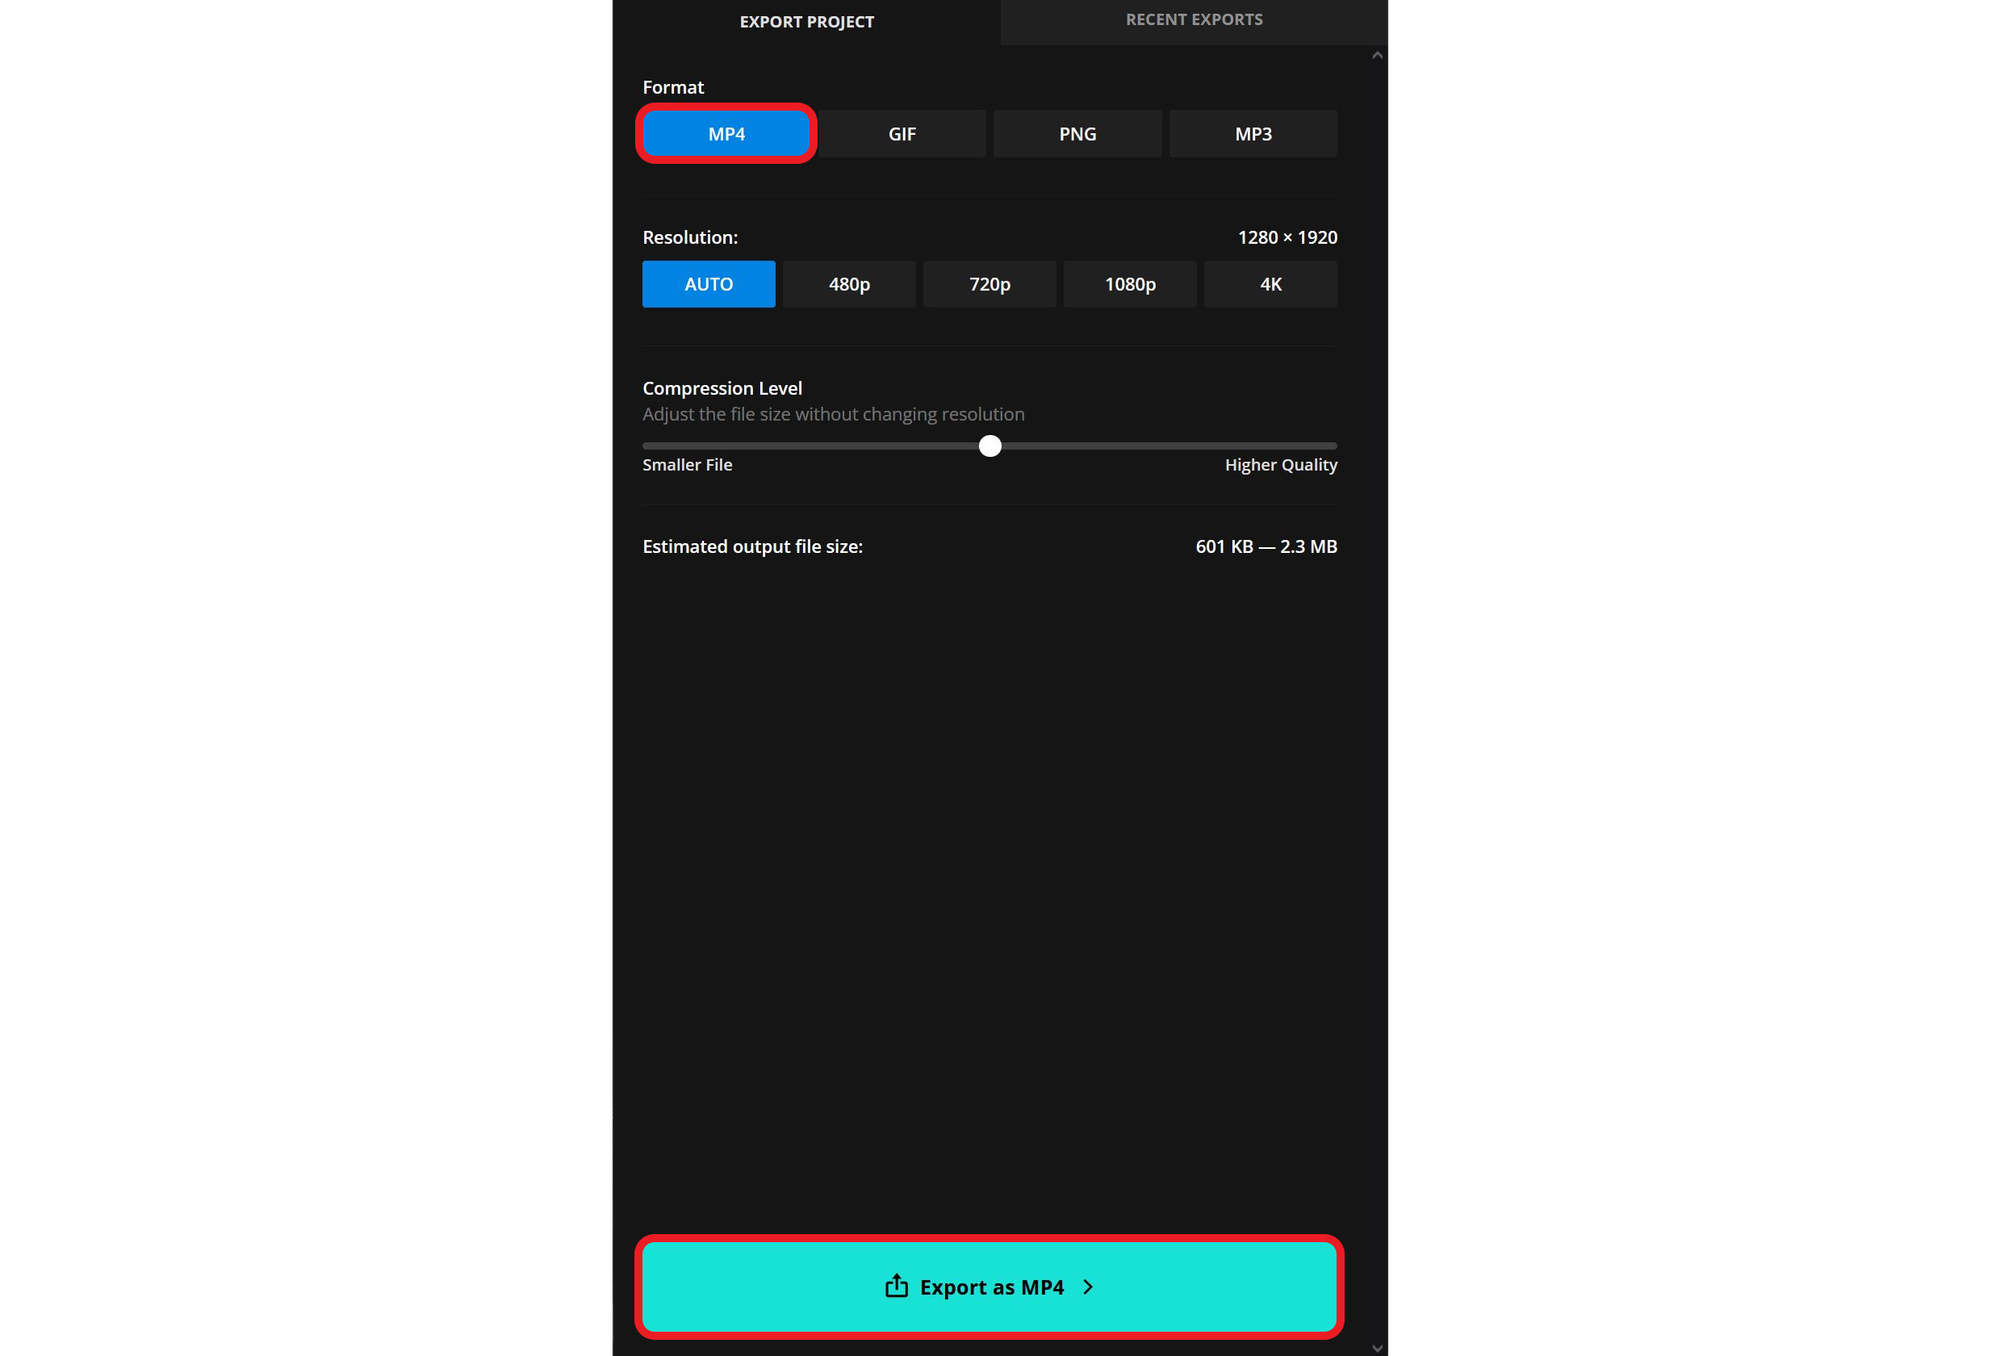
Optionally, you can also export your project as a GIF to automatically create a looping video without sound.
General Trend Advice and Results
For the best results, generate as many images as you can. While 100 might sound excessive, the more iterations you create, the more noticeable and dramatic the transformation will be.
If you want quicker results, try starting with a busier image. Instead of a simple portrait, use a scene with a detailed background or bright, varied colors. The more complex the image, the harder it is for ChatGPT to replicate it consistently — which leads to more obvious changes earlier in the process.
Example ChatGPT 100x challenge with 25 duplicated images.
In my own test, I used just 25 images. The final frame wasn’t drastically different from the original, but I did notice sudden jumps where one generation had significantly more changes than the previous ones. It’s a reminder that even with fewer images, unexpected results can emerge — and with 100, the evolution becomes even more surreal.


