Green Screen in the Browser With HTML Canvas

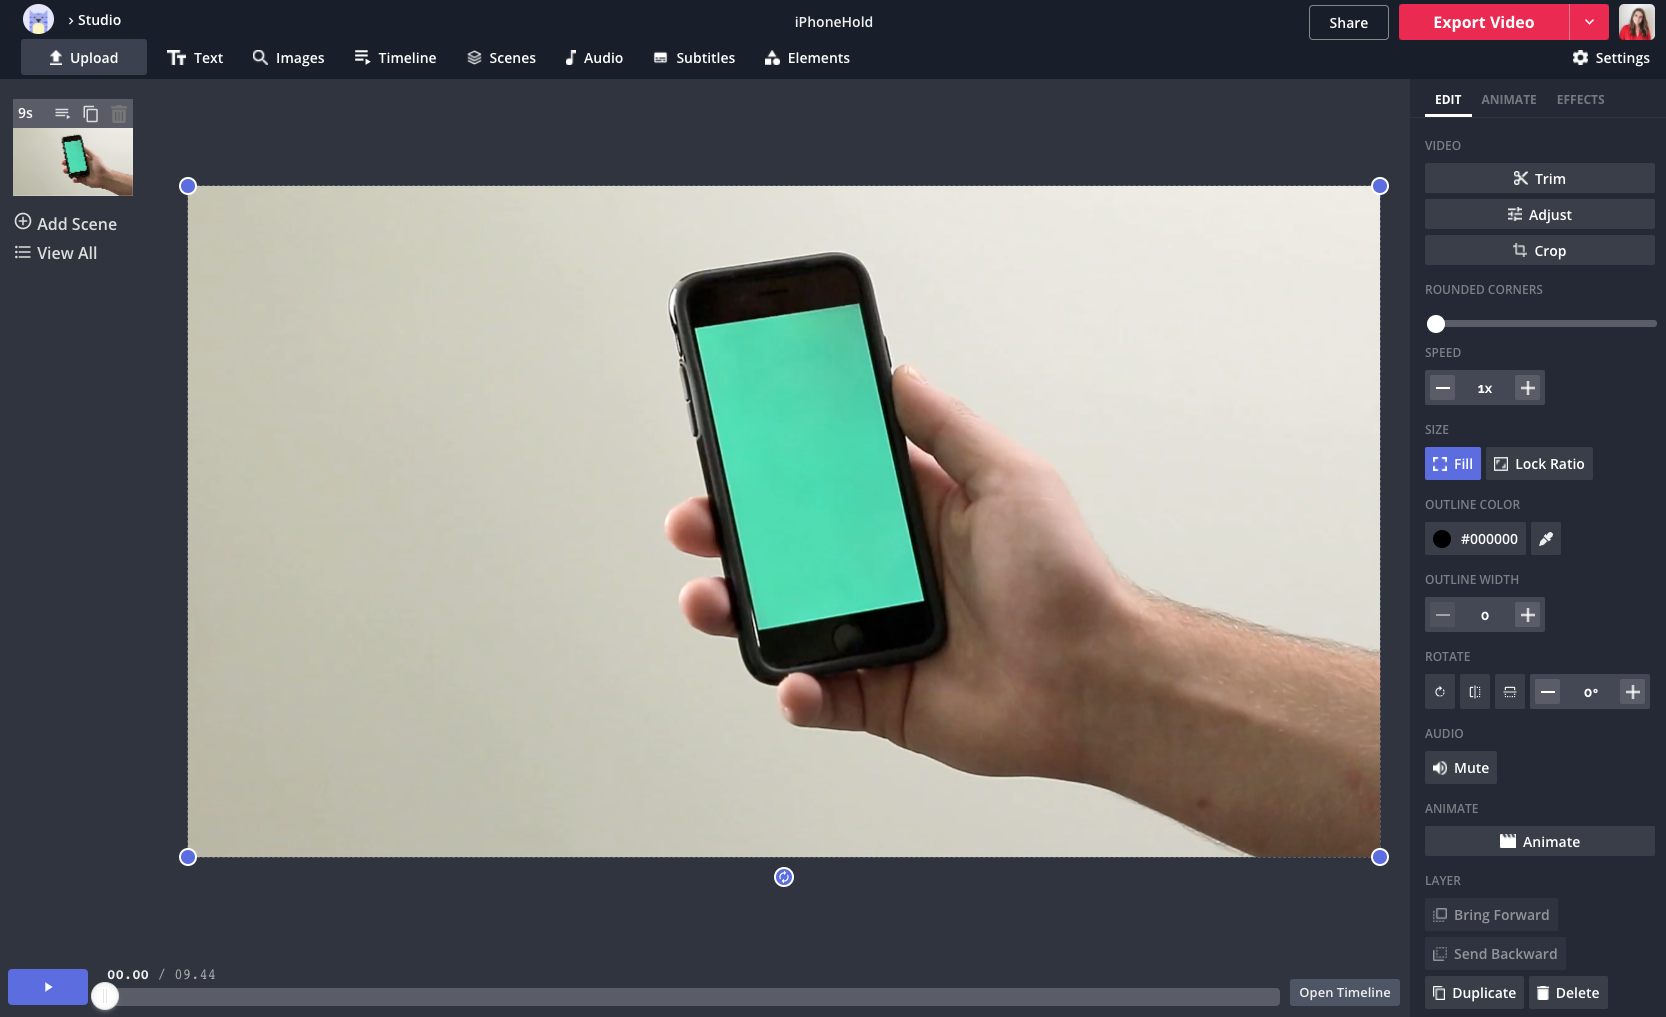
Kapwing's Studio now supports chroma key-based background removal, also known as green screen editing. This allows users to upload green screen videos, remove the green background, and replace it with whatever they choose.
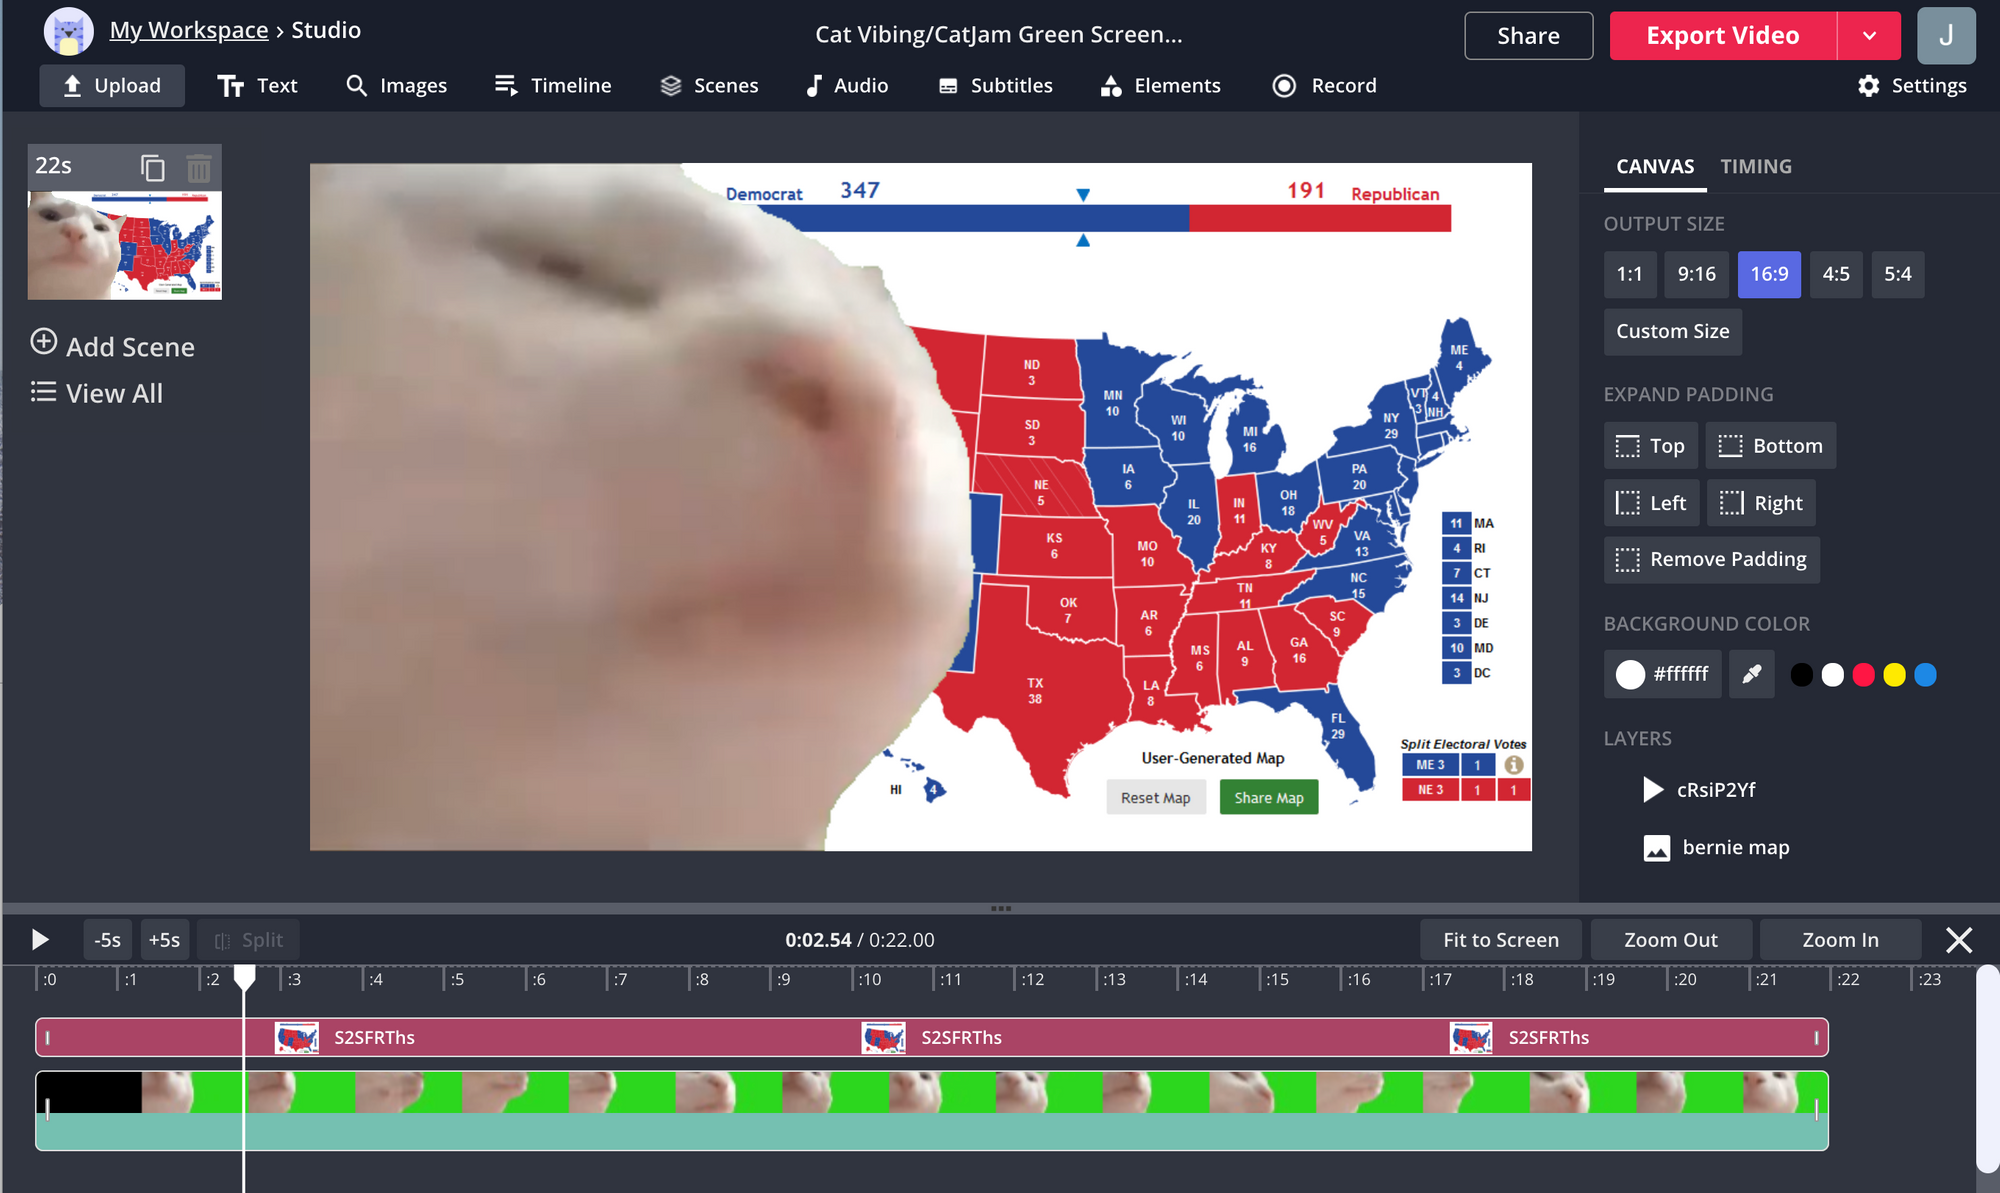
Kapwing Creators can now composite people and objects onto background images and videos without having to download complicated software. Below is a demo:
Before we built it, the Chroma Key tool was one of Kapwing's most requested features. Now, users can import green screen assets from YouTube or other stock market places, unlocking collaboration with a global community. In this article, we explain how Kapwing's Chroma Key technology works for other developers and video entrepreneurs building similar tools for their own application.
Background
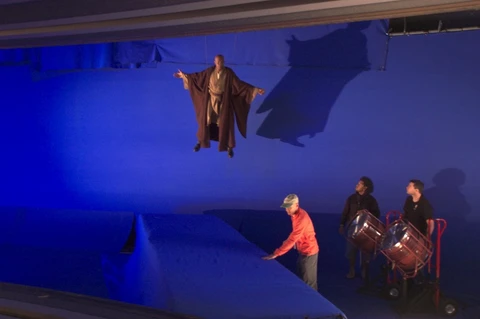
Chroma key has been a key technique in visual effects processing for over fifty years. The process starts by filming a subject in front of a uniform brightly-colored background. A filter is then applied to detect and remove the background, so that only the subject remains. The subject can then be composited onto a variety of other backgrounds.
Before digital cameras, chroma key compositing was achieved using chemical film. Camera output was put through a filter that only let through light of blue frequencies or above, creating a black-and-white print that only contained the blue parts of the picture. This print was then used to filter the original picture, to isolate only the parts of the image that weren’t blue. This led to blue screens as the standard for chroma key compositing.
When digital cameras came into the picture, compositing was done instead by filtering based on the input of one of the three color channels recorded by digital cameras: red, green, and blue. While blue screens remained the standard for movies, green became the standard for TV because weather-casters tended to wear a lot of blue. Red was avoided due to its overlap with skin tones.
Today, with the help of computers, we have a wider scope of possibilities for digital color keying and compositing, allowing us to key out colors other than red, blue, and green.

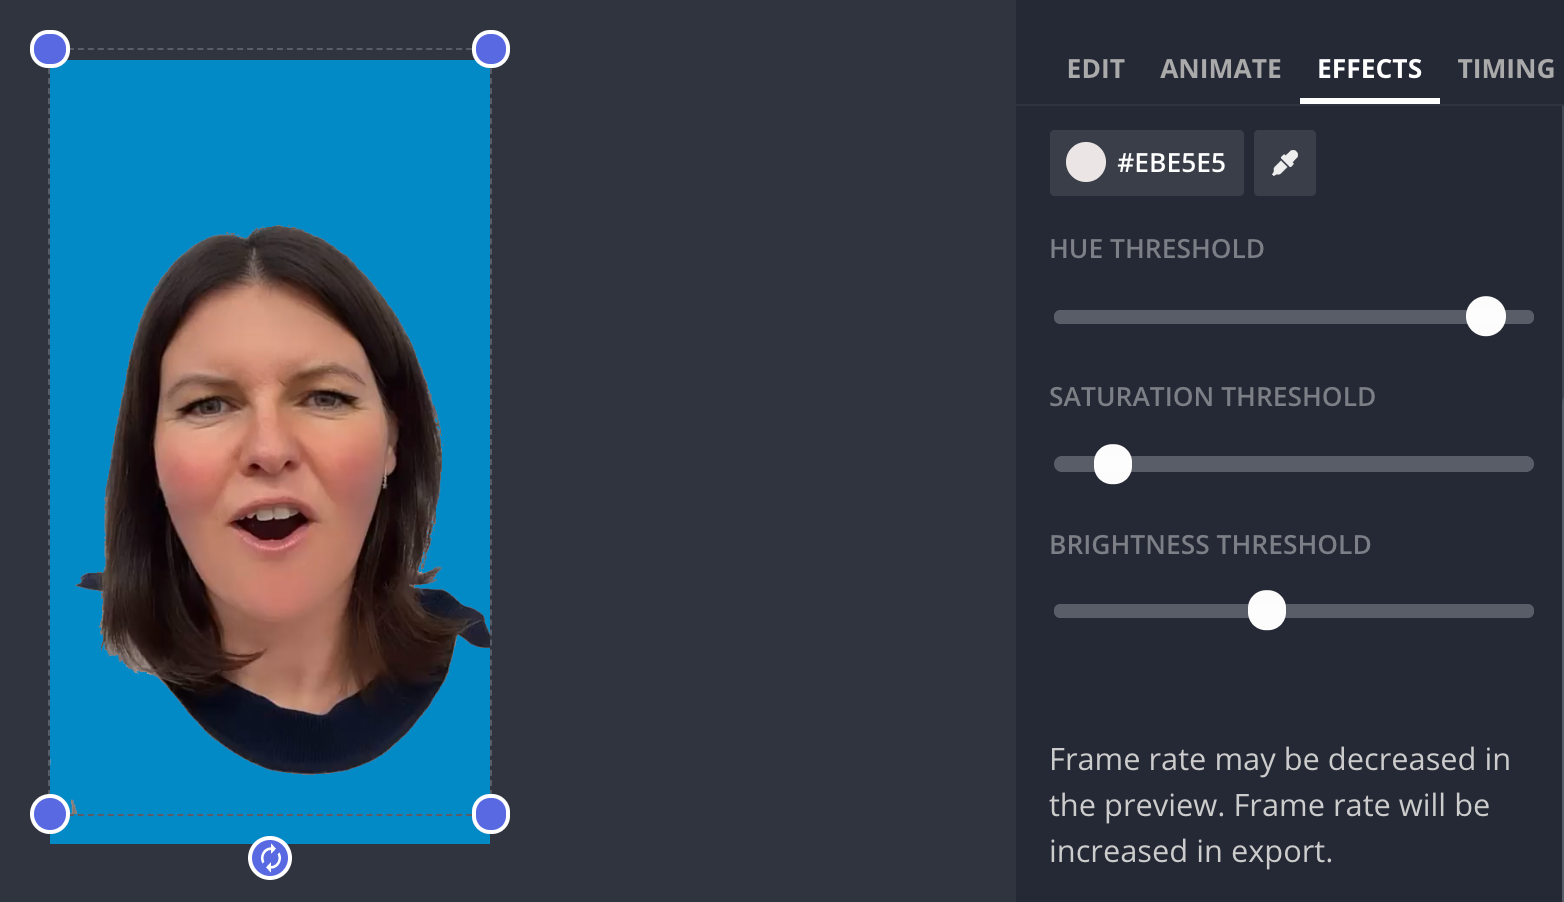
Green and blue screens remain the standard in video production, so when we made Kapwing's Chroma Key editor, we wanted to maintain strong support for removing the green and blue channels. At the same time, we wanted to take advantage of the added flexibility to allow users to remove backgrounds based on a custom hex code (selected using an eyedropper), an action that has become more and more popular as people become used to using "virtual backgrounds" outside of professional setups on video platforms like Zoom and TikTok.
The Theory
The idea behind digital chroma key seems simple: given a video and a color, we assume that any pixel matching that color represents the background, and we make it transparent. If you had an even backdrop where everything was exactly the same color, this would be simple.
When people film in front of physical backgrounds, however, there are variations in lighting and shadows across the backdrop. This means we don’t just want to key out one exact color; we instead want to capture a range of colors that are “close enough” to the target color.

In researching possible algorithms for digital chroma keying, we found two basic approaches, which we will call “color-based” and “channel-based”. The first focuses on a specific color value, while the second instead applies a filter based on one of the color channels (red, green, or blue). Each has strengths and weaknesses, and in the end we decided to support both.
Color-Based
In color-based algorithms, the user chooses a specific RGB color value. We then compare each pixel with that color to determine if it’s close enough to key out. This has the advantage of working for non-typical background colors, but can make it harder to adjust across lighting differences.
We wanted to give the user more fine-tuned control so they can define the color range that works best for them. In order to do this, we consider colors based on HSV (hue, saturation, value) rather than RGB.
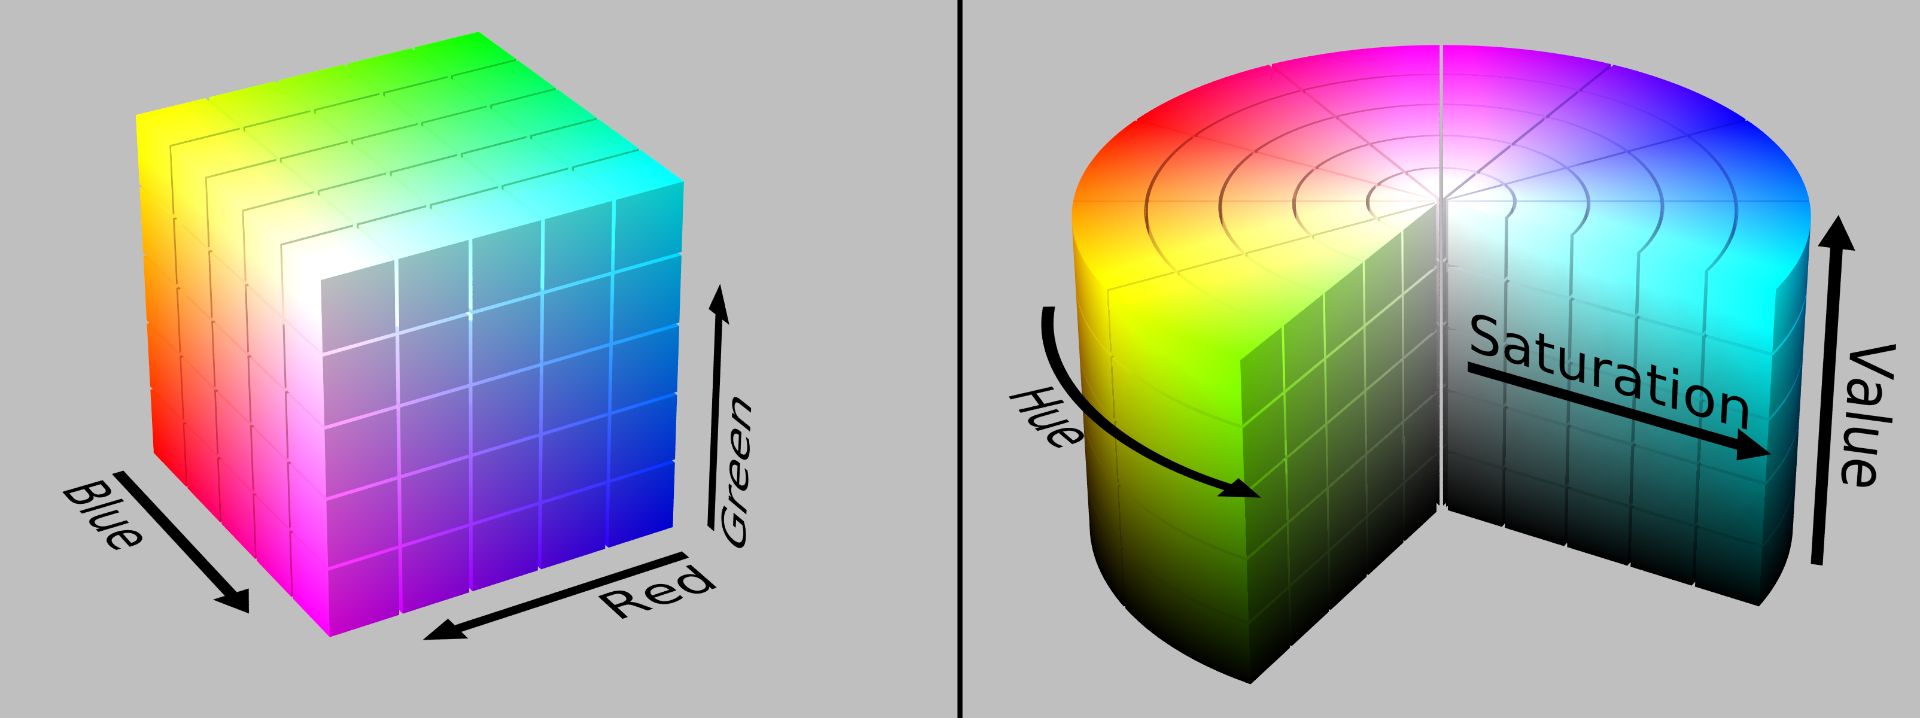
While RGB defines a colors based on the amount of red, green, and blue light a screen should emit to approximate them, HSV separates the hue (where a value would appear on a color wheel) from saturation (how deeply colored it appears) and brightness (how light/dark it appears). Instead of comparing RGB directly, we translate both colors to HSV and check each attribute against a threshold.
chromaKeyOut = (red, green, blue, data) => {
    const {
      key,
      hueThreshold,
      valThreshold,
      satThreshold,
    } = data;

    const { H, S, V } = this.rgbToHsv(red, green, blue);
    if (Math.abs(key.H - H) >= hueThreshold) return false;
    if (Math.abs(key.S - S) >= satThreshold) return false;
    if (Math.abs(key.V - V) >= valThreshold) return false;
    return true;
}
This lets the user set the distance thresholds for each attribute individually, giving us flexibility for different use cases. If they want to take out a colored backdrop that has wrinkles on it, for example they might want a small tolerance threshold for hue, but large tolerances for saturation and value to encompass both the darker and lighter parts of the backdrop.
On the other hand, if the user wants to isolate a dark object against a white background, they might want a high tolerance for hue difference, but lower tolerances for saturation or value changes.
Channel-Based
Since a real backdrop contains a large amount of variation, a color based approach can be difficult to fine-tune. It also relies upon choosing a good color value that lies near the middle of the range of values we want to remove. For the most common use cases of removing green or blue screens, it can be simpler and more effective to base the color keying on the green or blue channels.
In this case, let's assume that we are isolating a foreground against a brightly colored green background. It’s not enough to look at a pixel's green signal on its own because the signal from other channels change the color completely. For example, in the following hex values, note that the green channel value is the same (G=256) although the resulting pixel colors are very different.

Instead of checking the value of the green channel on its own, we want to check whether green is the dominant channel. That is, we want to make sure that the pixel contains significantly more green light than either red or blue. To do this, we take the difference between the green channel value and that of the next highest channel, and compare it to a threshold:
chromaKeyOut = (red, green, blue, data) => {
    const { threshold } = data;

    const max = Math.max(red, green, blue);
    if (max !== green) return false;

    const mid = Math.max(red, blue);
    return max - mid > threshold;
}
The user can still control the threshold to determine how green a color has to be before it is keyed out.
The Details
Note: Kapwing is a React App, so all code snippets will be in React.
Below is a block diagram of Kapwing’s video component. Normally the video plays and each frame is intercepted and drawn to a canvas. When there are modifications, such as filters or background removal, the frames are intercepted, modified in an intermediate canvas, and then drawn to the main canvas

We create a video element and an intermediate canvas, neither of which is rendered in the DOM:
this.video = document.createElement("video");
this.intermediateCanvas = document.createElement("canvas");
We render a canvas:
<canvas
  ref={(canvas) => {
    this.canvas = canvas;
  }}
  style={videoStyle}
  width={videoWidth}
  height={videoHeight}
/>;
When the canvas mounts, we call drawVideoToCanvas to write to the canvas on every frame.
drawVideoToCanvas = async () => {
    const { chromaKey } = this.props;
    const { width, height } = this.canvas;
    if (chromaKey) {
        await this.drawChromaKeyImage(this.video);
    } else {
        const ctx = this.canvas.getContext("2d");
        ctx.drawImage(this.video, 0, 0, width, height);
    }
    window.requestAnimationFrame(this.drawVideoToCanvas);
}
If chromaKey is not set, this function will simply draw the video's current frame with no modifications. If chromaKey is set, it calls drawChromaKeyImage:
drawChromaKeyImage = async (video) => {
    const { layer } = this.props;
    const {
        hueThreshold,
        satThreshold,
        valThreshold,
        chromaKeyColor,
    } = layer;

    // Assumes color is in hex format, get RGB values
    const keyRed = parseInt(chromaKeyColor.slice(1, 3), 16);
    const keyGreen = parseInt(chromaKeyColor.slice(3, 5), 16);
    const keyBlue = parseInt(chromaKeyColor.slice(5, 7), 16);
    let key = this.rgbToHsv(keyRed, keyBlue, keyGreen);

    let intermediateData = this.drawToIntermediateCanvas(
        video,
        this.fullIntermediateCanvas
    );

    const message = {
        key,
        hueThreshold,
        satThreshold,
        valThreshold,
        pixels: intermediateData,
    };

    // do calculation in web worker
    window.webWorker.postMessage(message);
    const response = await new Promise((res) => {
        webWorker.onmessage = (e) => res(e.data);
    });

    intermediateData = response.pixels;

    this.drawIntermediateDataToCanvas(
        intermediateData,
        this.fullIntermediateCanvas
    );
};
(The production code is more complex as it must handle edge cases, such as browsers that don’t support web workers, invalid inputs, etc).
This snippet calls three functions:
- drawToIntermediateCanvas: this is required to get a pixel array, which is needed because we can’t send a DOM element to the web worker. The web worker enables us to iterate over a large pixel array once per frame without blocking the main thread or degrading application responsiveness. The code for this is below:
drawToIntermediateCanvas = (video, intermediateCanvas) => {
    const {
        width: intermediateCanvasWidth,
        height: intermediateCanvasHeight,
    } = intermediateCanvas;

    const intermediateCtx = intermediateCanvas.getContext("2d");
    intermediateCtx.drawImage(
        video,
        0,
        0,
        intermediateCanvasWidth,
        intermediateCanvasHeight
    );
    const intermediateData = intermediateCtx.getImageData(
        0,
        0,
        intermediateCanvasWidth,
        intermediateCanvasHeight
    );
    return intermediateData;
};
2. WebWorker.postMessage: Note that the web worker itself is instantiated outside of this component as such:
window.webWorker = new Worker("/chromakey-worker.js");
The web worker must implement the onmessage callback, which sends data back to the main thread via its own postMessage call:
onmessage = async function (e) {
    let pxs = e.data.pixels.data;
    for (let p = 0; p < pxs.length; p += 4) {
        if (this.chromaKeyOut(pxs[p], pxs[p + 1], pxs[p + 2], e.data))
            pxs[p + 3] = 0;
    }

    postMessage({
        pixels: e.data.pixels,
    });
};
The pixels array encodes a pixel in 4 entries: red green, blue, opacity. We set pixel n opaque by setting pixels[4*n+3] = 0. Whether or not a pixel should be opaque is determined inside this.chromaKeyOut, which was outlined in the theory section.
3. drawIntermediateDataToCanvas: This is pretty straightforward, data sent back from the web worker is written to the intermediate canvas, which in turn is drawn to the final canvas.
drawIntermediateDataToCanvas = (intermediateData, intermediateCanvas) => {
    if (!intermediateCanvas) return;
    const { layer } = this.props;
    const {
        width: intermediateCanvasWidth,
        height: intermediateCanvasHeight,
    } = intermediateCanvas;

    const intermediateCtx = intermediateCanvas.getContext("2d");

    const ctx = this.canvas.getContext("2d");
    ctx.imageSmoothingEnabled = true;
    const { width: canvasWidth, height: canvasHeight } = this.canvas;

    intermediateCtx.putImageData(intermediateData, 0, 0);

    ctx.clearRect(0, 0, canvasWidth, canvasHeight);
    ctx.drawImage(
        intermediateCanvas,
        0,
        0,
        intermediateCanvasWidth,
        intermediateCanvasHeight,
        0,
        0,
        canvasWidth,
        canvasHeight
    );
};
Summary
Kapwing's Chroma key editor works by playing a video, intercepting each frame, keying out the background based on channel or color, and then drawing the result to an html canvas. We achieve our desired frame rate by performing our computations in a web worker, and we deal with real world color variation by converting RGB to HSV and allowing the user to set their own thresholds.
The Chroma Key editor joins our automatic Remove Background tool to give creators more freedom and customization on the appearance of their output video.
Kapwing's video editing takes technology that used to be highly technical and inaccessible and make it accessible to all. Meme makers, artists, students, social media creators, and any video editor across the world can now incorporate green screen assets into their project without needing an Adobe Premiere license. We hope this tool becomes a valuable resource to a large and diverse set of video creators.


