How to Do a Year in Review Video on Instagram
The most popular 2025 recaps have over 117K likes and millions of views.

As New Year's Day approaches, we start to see a ton of content from friends, relatives, and even companies looking back on the past year on Instagram. Spotify gives us our top songs, Reddit recaps our scrolling habits, and now everyone seems to be sharing their "Year in Review".
In this guide, we’ll walk through where to find Instagram’s 2025 Year in Review Reel templates, how to use them, and what to do if you want to share a similar recap on other platforms as well.
Table of Contents
- How to Find Trending Templates for Your 2025 Instagram Recap
- How to Create an Instagram Year in Review Reel from a Template
- How to Make a 2025 Year in Review Video Without IG
How to Find Trending Templates for Your 2025 Instagram Recap
If you want your recap Instagram Reel to feel current, it’s worth starting with a template that’s already trending. These templates are often tied to popular audios, which makes them easier for viewers to discover and recognize them. Using a trending format also saves time, since the clip timing and transitions are already built in.
There are two main ways that you can find a trending template to help craft that perfect 2o25 recap Instagram Reel:
- Using the Reels templates tab
- Choosing a trending template from your feed
1) Using the Reels Templates Tab
Go to your Instagram profile and hit the plus button in the top left corner to create a new post. From there, select Reel from the options.
Once you are in the editor, select the "Templates" tab, located right above the media library.
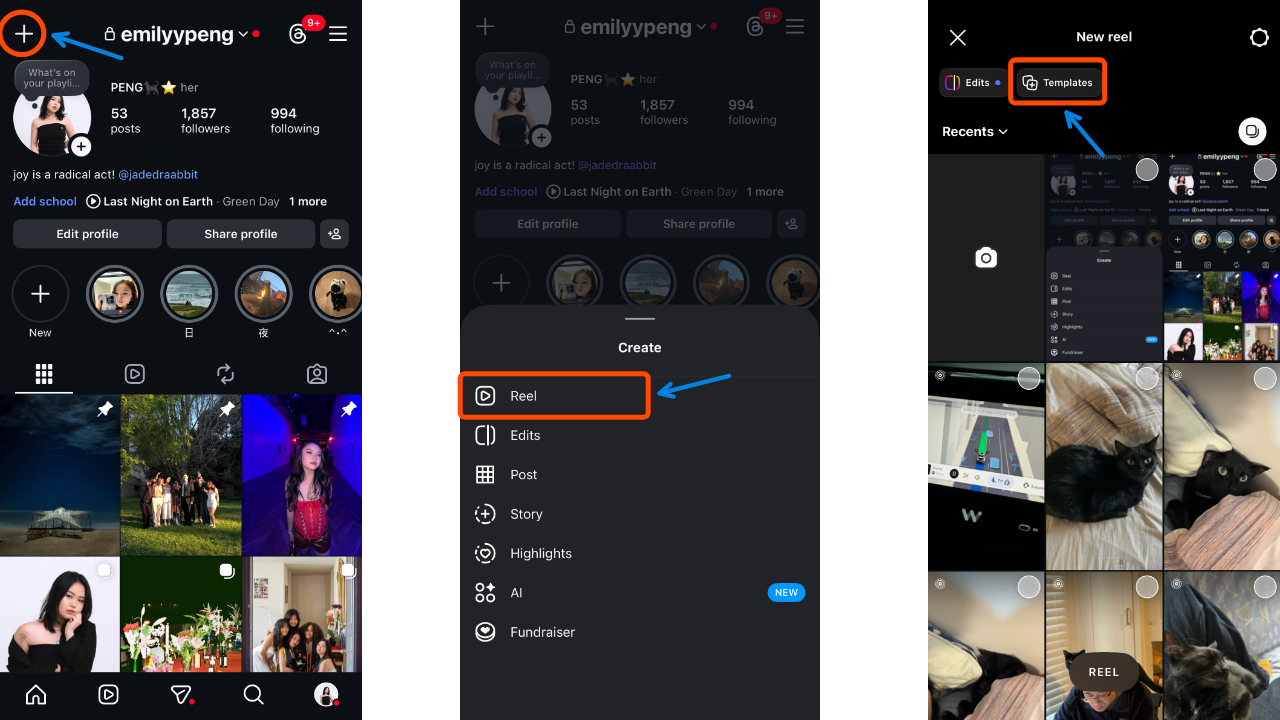
This will open the Reels Templates tab, where Instagram surfaces pre-built Reel formats tied to trending audios and transitions.
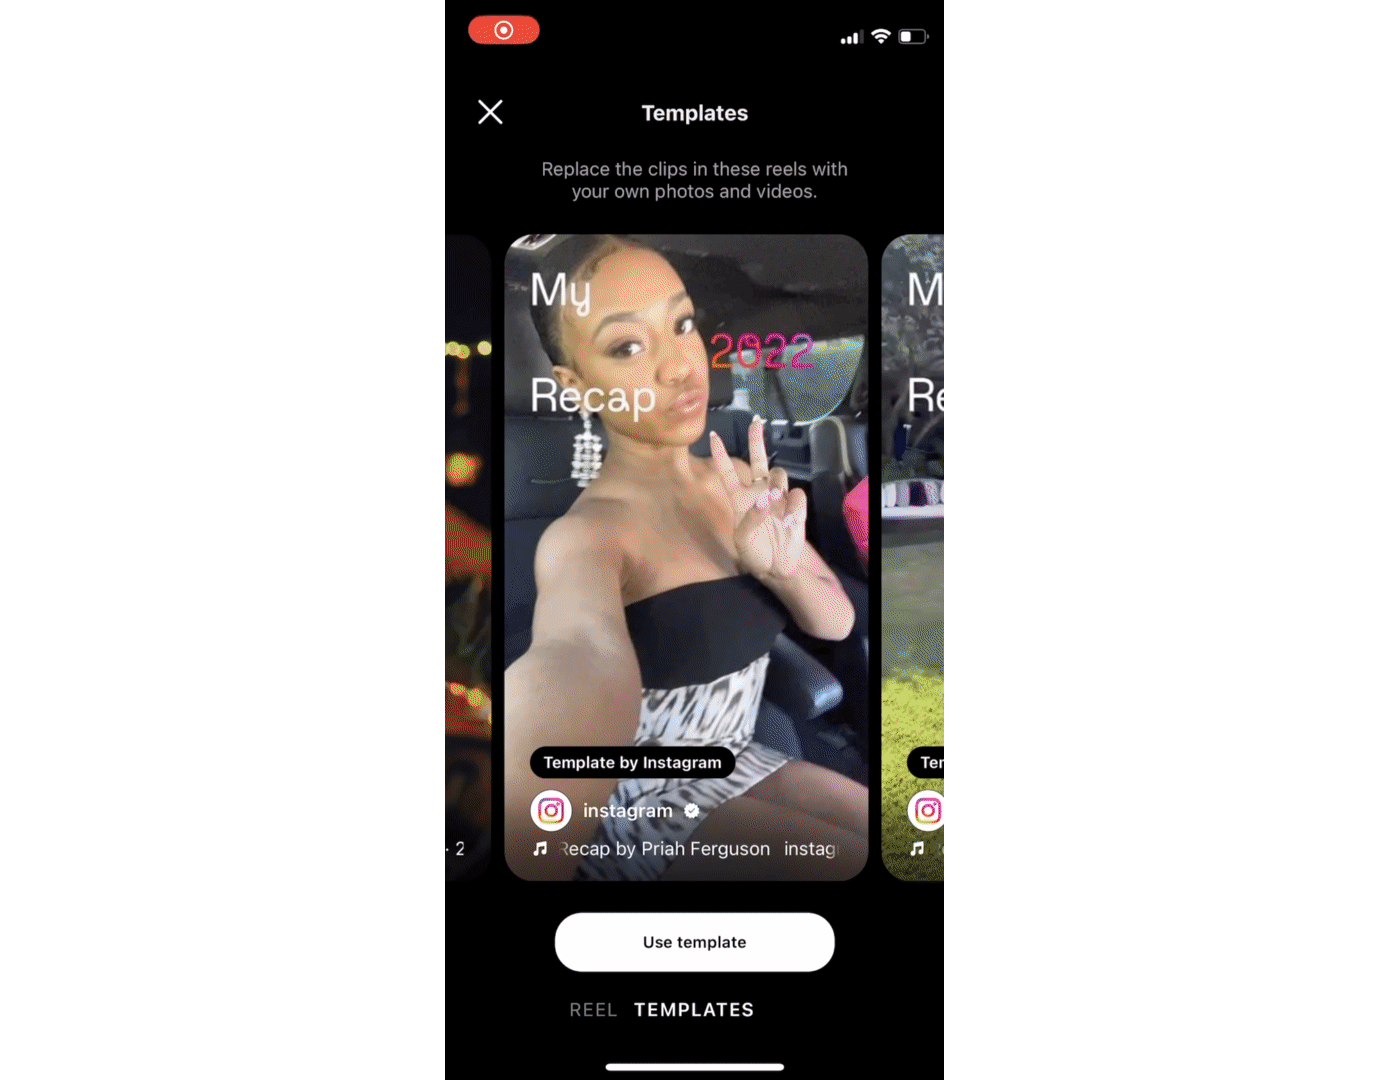
Around the end of the year, this tab is typically filled with “Year in Review” and “2025 Recap” templates, making it one of the easiest places to start.
Several audios in particular are popular this year.
- One of the most popular is @zimmer90’s remix of What Is Love. The audio opens with a single, longer clip paired with the lyric “Will we stay the same?”, before dropping into a sequence of 12 short clips. Many creators are using this to map their year month by month, overlaying text on each of the 12 clips to label when the photo or video was taken.
- Another widely used option is @northernelg’s 2025 hits remix, which stitches together the most recognizable songs from the year. This template is paired with 39 short video clips.
- Finally, @nxctemplate’s “Ordinary” remix begins with a photo collage that gradually fills the screen, before transitioning into a 12-second montage of photos and videos. The pacing makes it feel more cinematic and sentimental, ideal for creators who want their recap to feel reflective.
If those aren't your speed, keep swiping left to see other trending options. You can Save the templates that are the most interesting to you to revisit in the "Saved" tab.
2) Choose a Template from Your Reels Feed
A more organic way to find your perfect 2025 recap template is by discovering a Reel you like while scrolling Instagram.
Lots of accounts are posting their end-of-year recap videos right now, so there's plenty to choose from in your Reels feed.
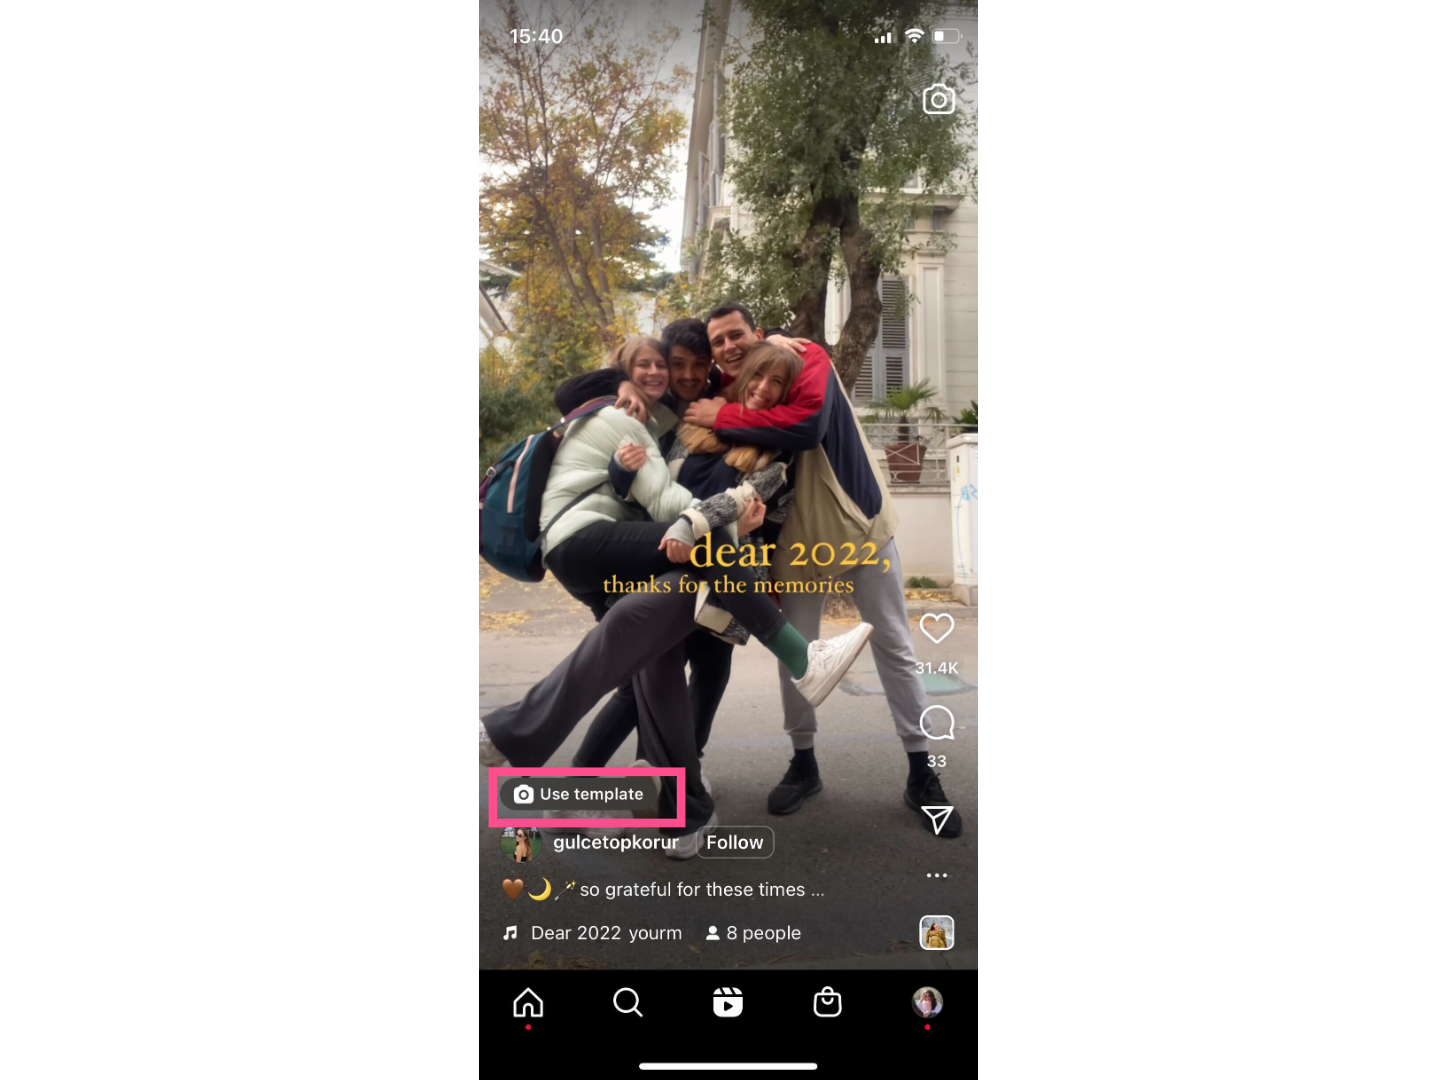
If a Reel can be copied, you'll see a little camera icon and the text "Use template" above the username. Click on it to open the template editor and add your own photos and videos.
If a Reel doesn't have the template option available, but you like the trending audio it's using, you can often still find a template. Click on the audio and search the results on the audio page.
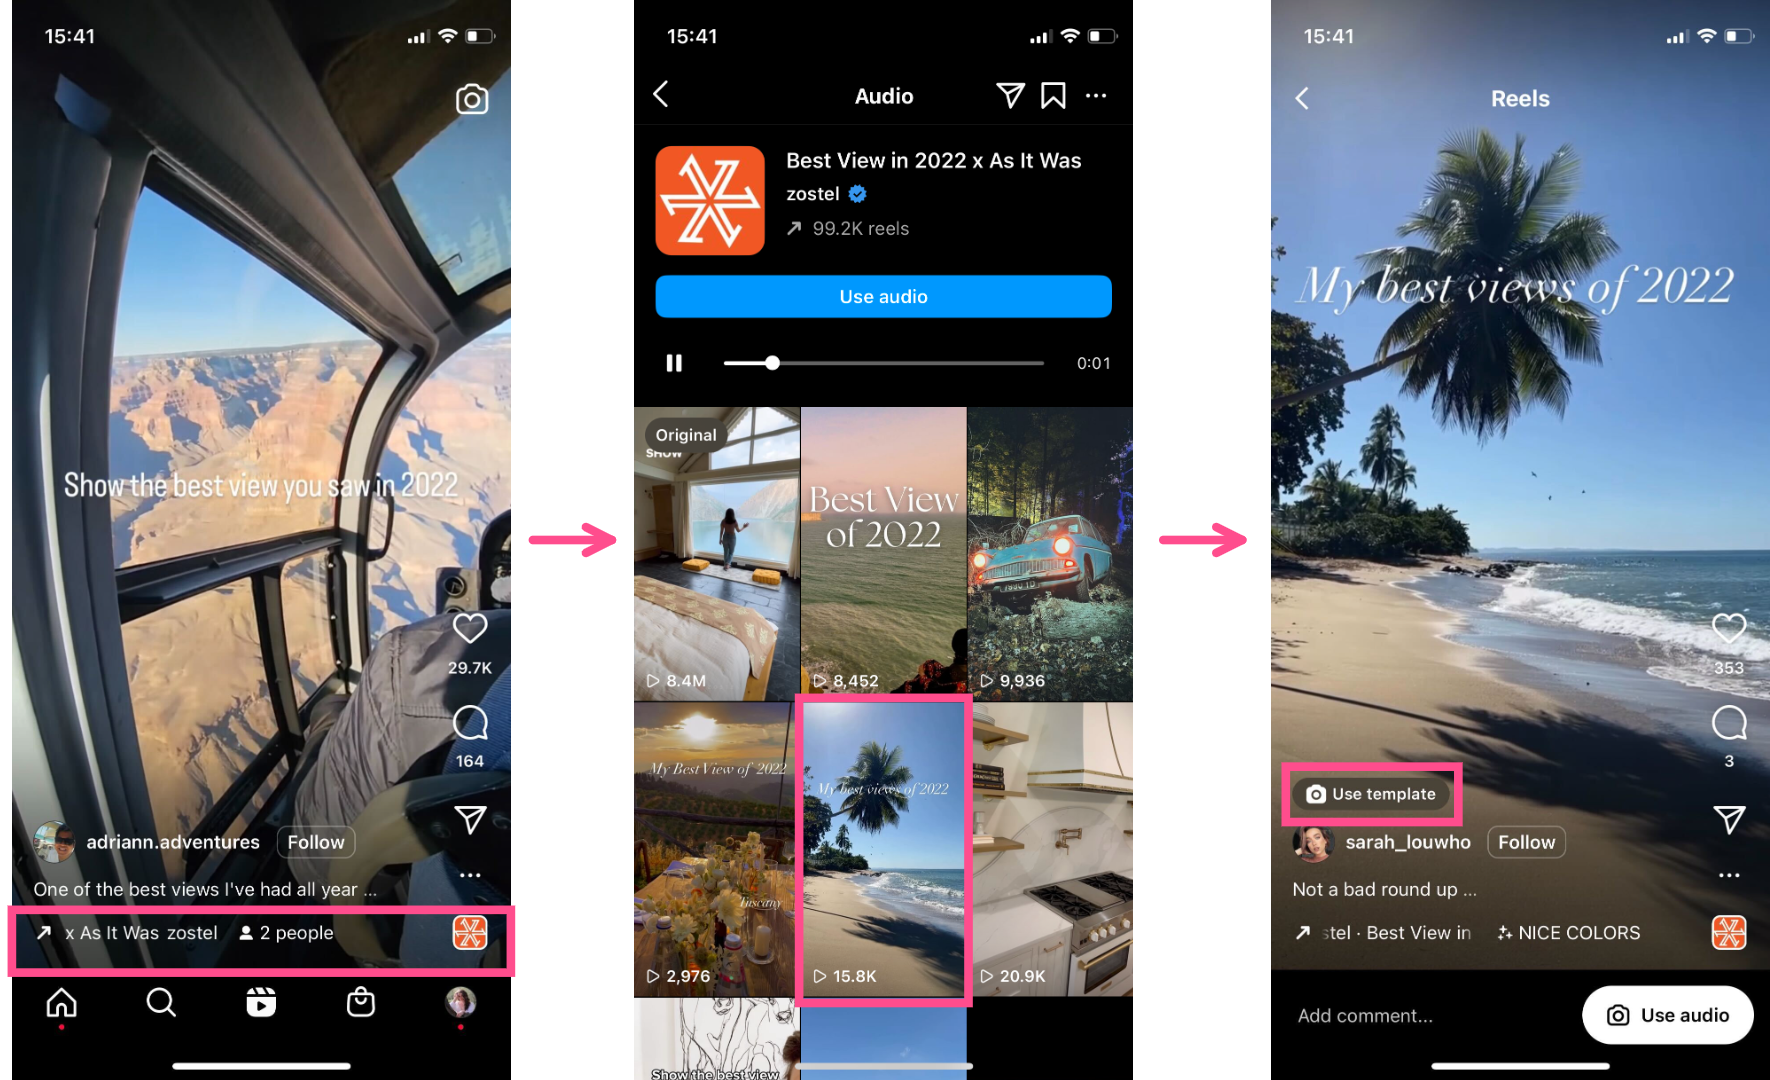
I was able to easily find multiple Reels with templates from this trending "Best View in 2025" audio by Zostel even though the original Reel I saw the audio on wasn't a template.
I chose my favorite format and turned it into my own 2025 recap. Make sure to save your Instagram Reel before publishing so that you can repost it on TikTok without a watermark.
How to Create an Instagram Year in Review Reel from a Template
Whether you discovered a template while scrolling your feed or selected one from the Reels Templates tab, the next step is turning it into a polished 2025 Year in Review Reel.
Once you’ve picked a template, Instagram handles the timing and transitions, all you need to do is drop in your photos and videos and make it your own:
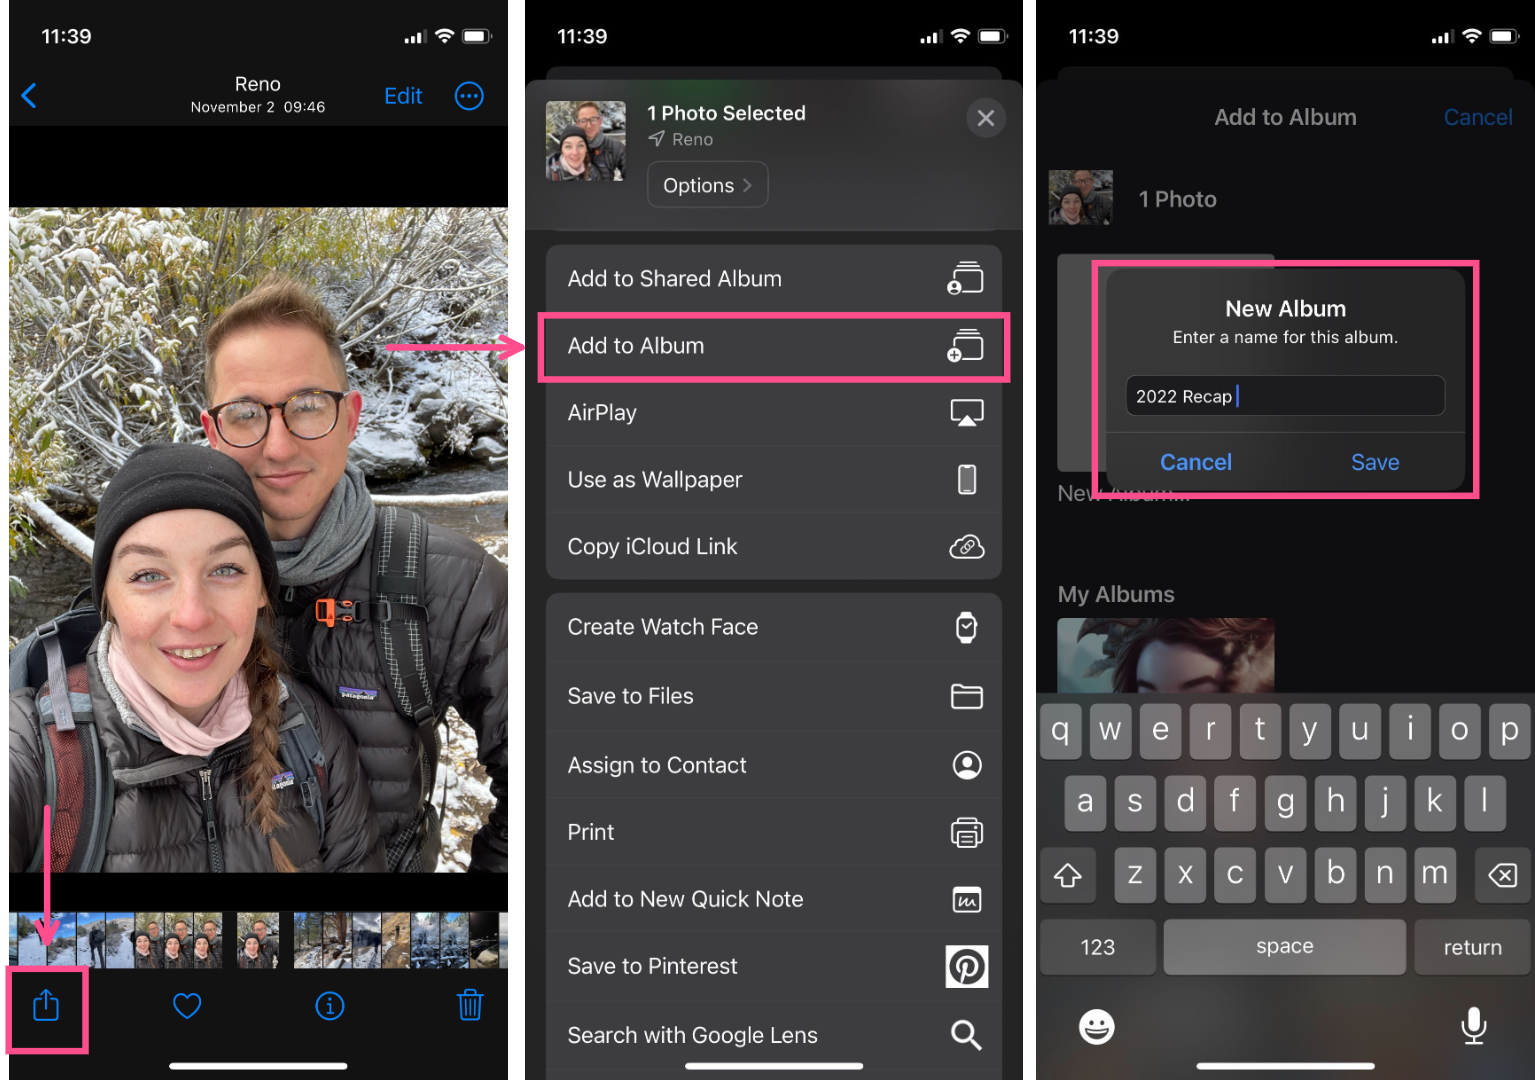
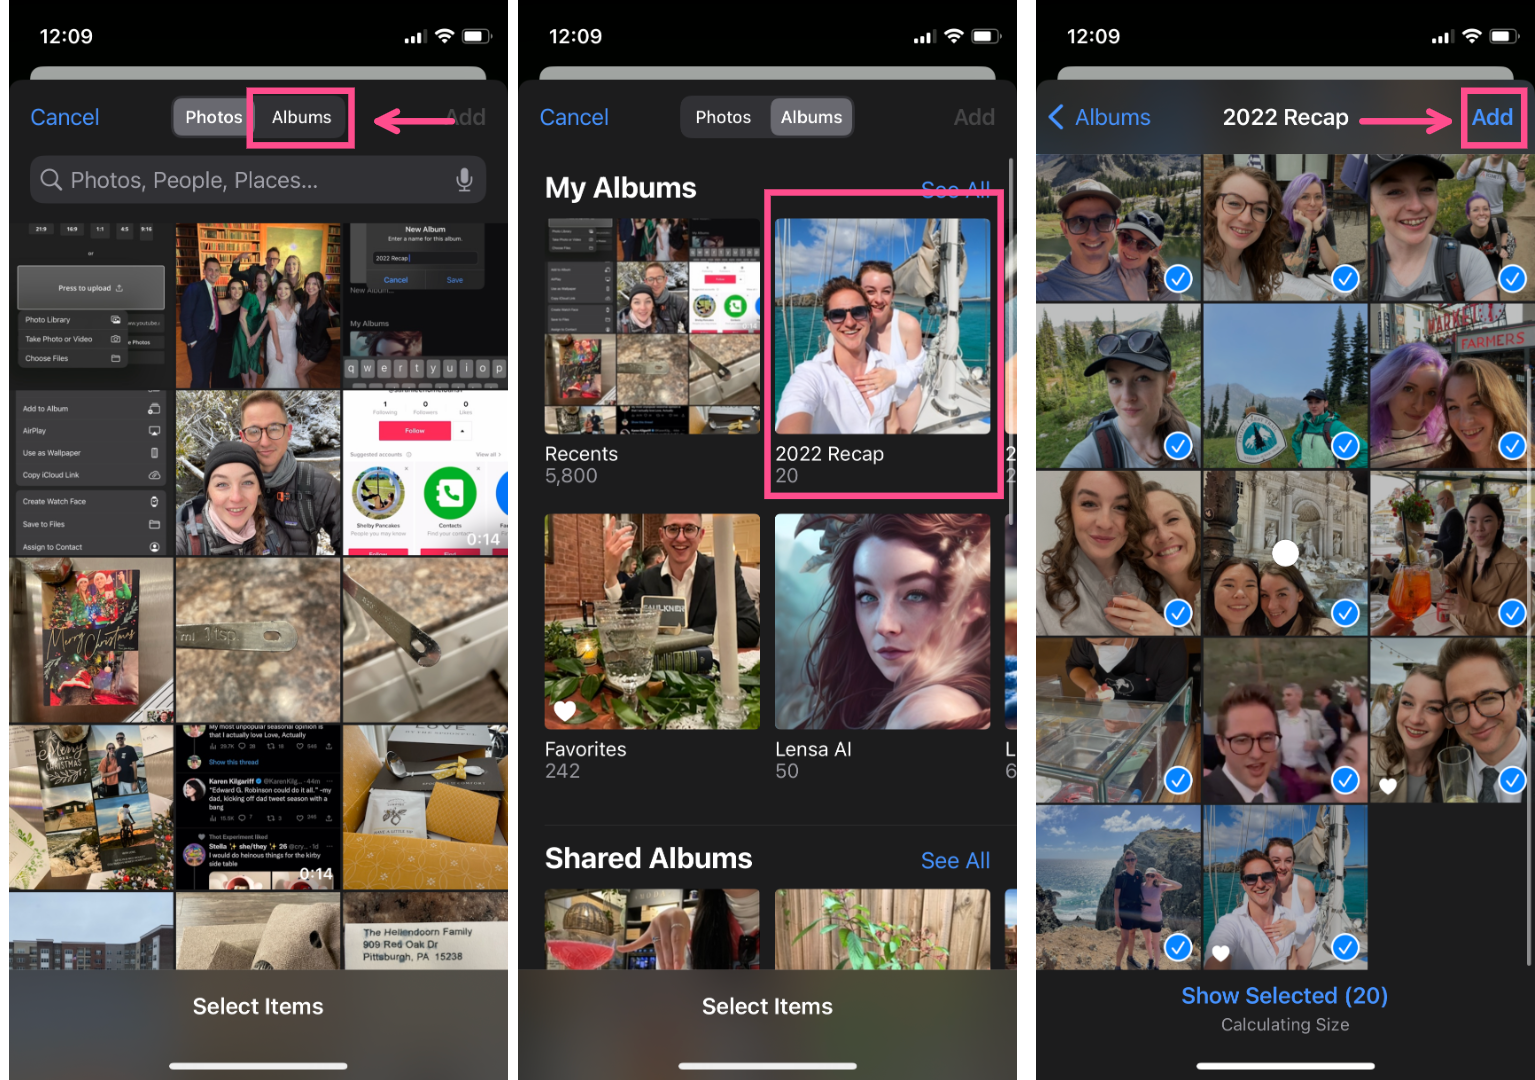
Step 1) Create an Album of Your Recap Photos and Videos
We carry a pretty impressive camera in our pockets every day, so it's never been easier to capture memories through photos and videos. That's great, but it also means that it might be overwhelming when it comes time to choose what goes in the highlights reel.
Before you get into the template editor on Instagram, take some time to scroll through your camera roll from this year and choose your favorite moments. As you do so, add them to your favorites or a single album so they're all in one place and easy to find.
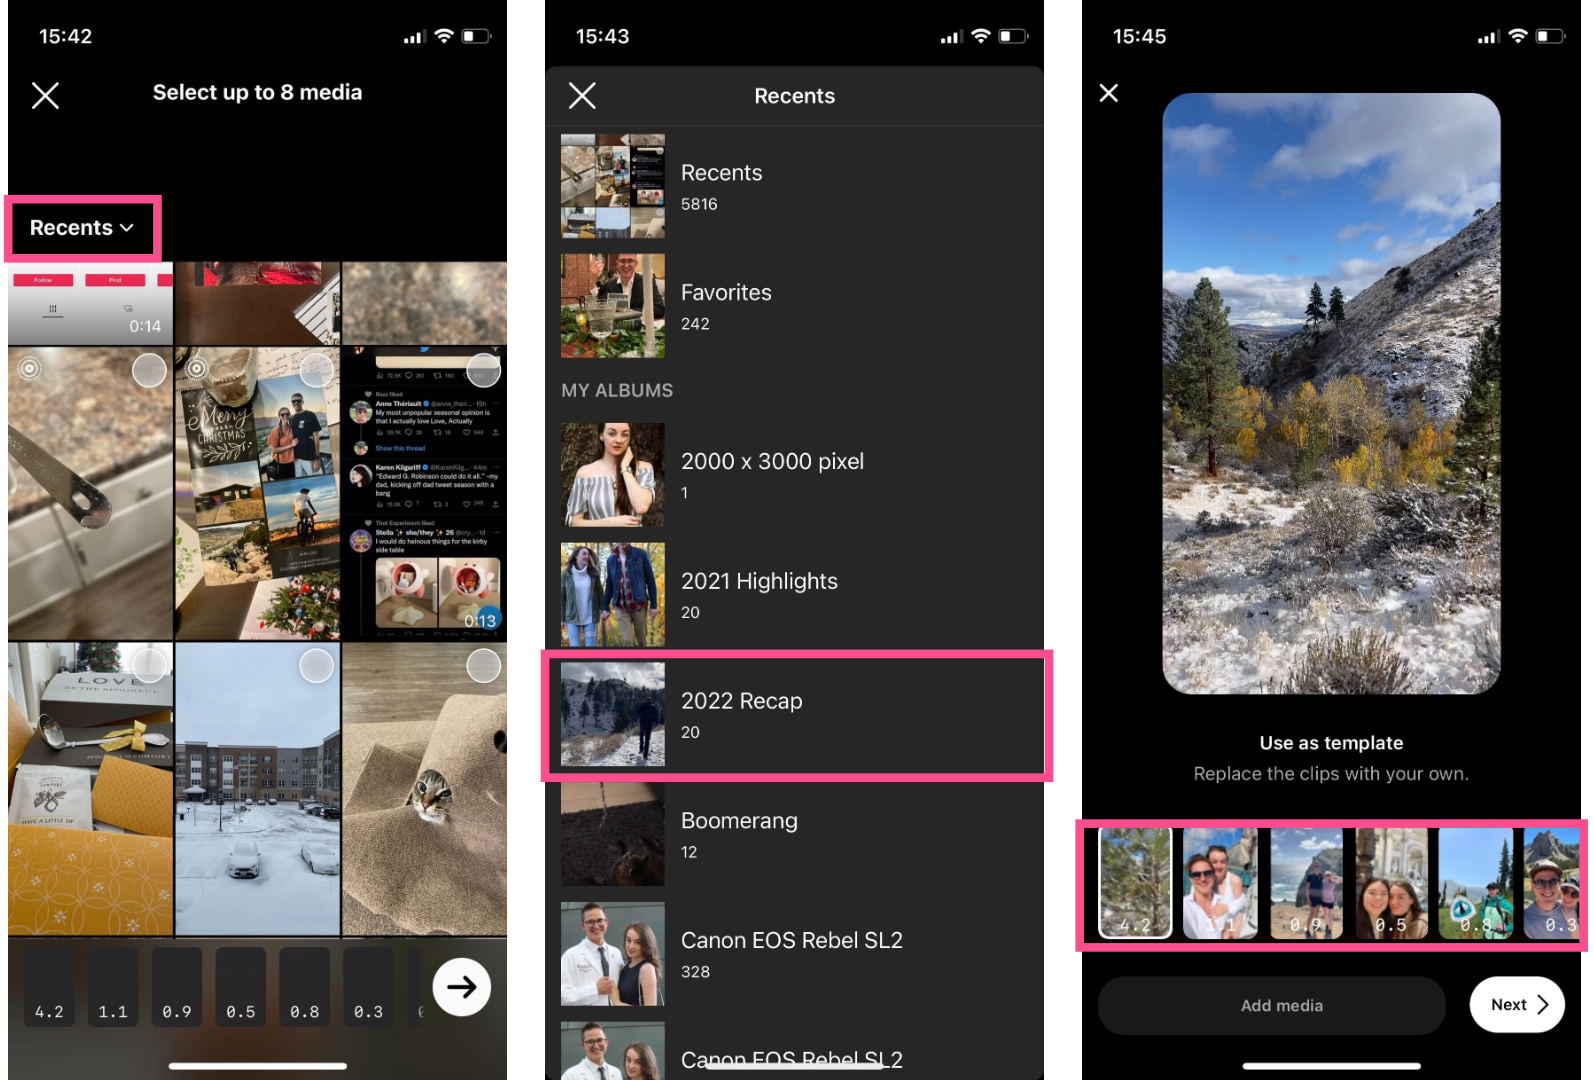
Step 2) Click Add Media in the Reels Template
Open the recap template you've chosen to use and tap the "Add media" button at the bottom of the screen.
This will automatically open your camera roll's "Recents" folder.

Tap the drop-down menu to see album selection and choose the album you've added your recap clips to.
When you're in the correct album, select your photos and videos. Select them in the order that you want them to appear in the template. Instagram will automatically trim them to fit the template.
Note: If you didn't capture a ton of video this year but still like the look of a video smashcut, add some live photos into the mix. Instagram adds Live photos as video clips instead of static photos.
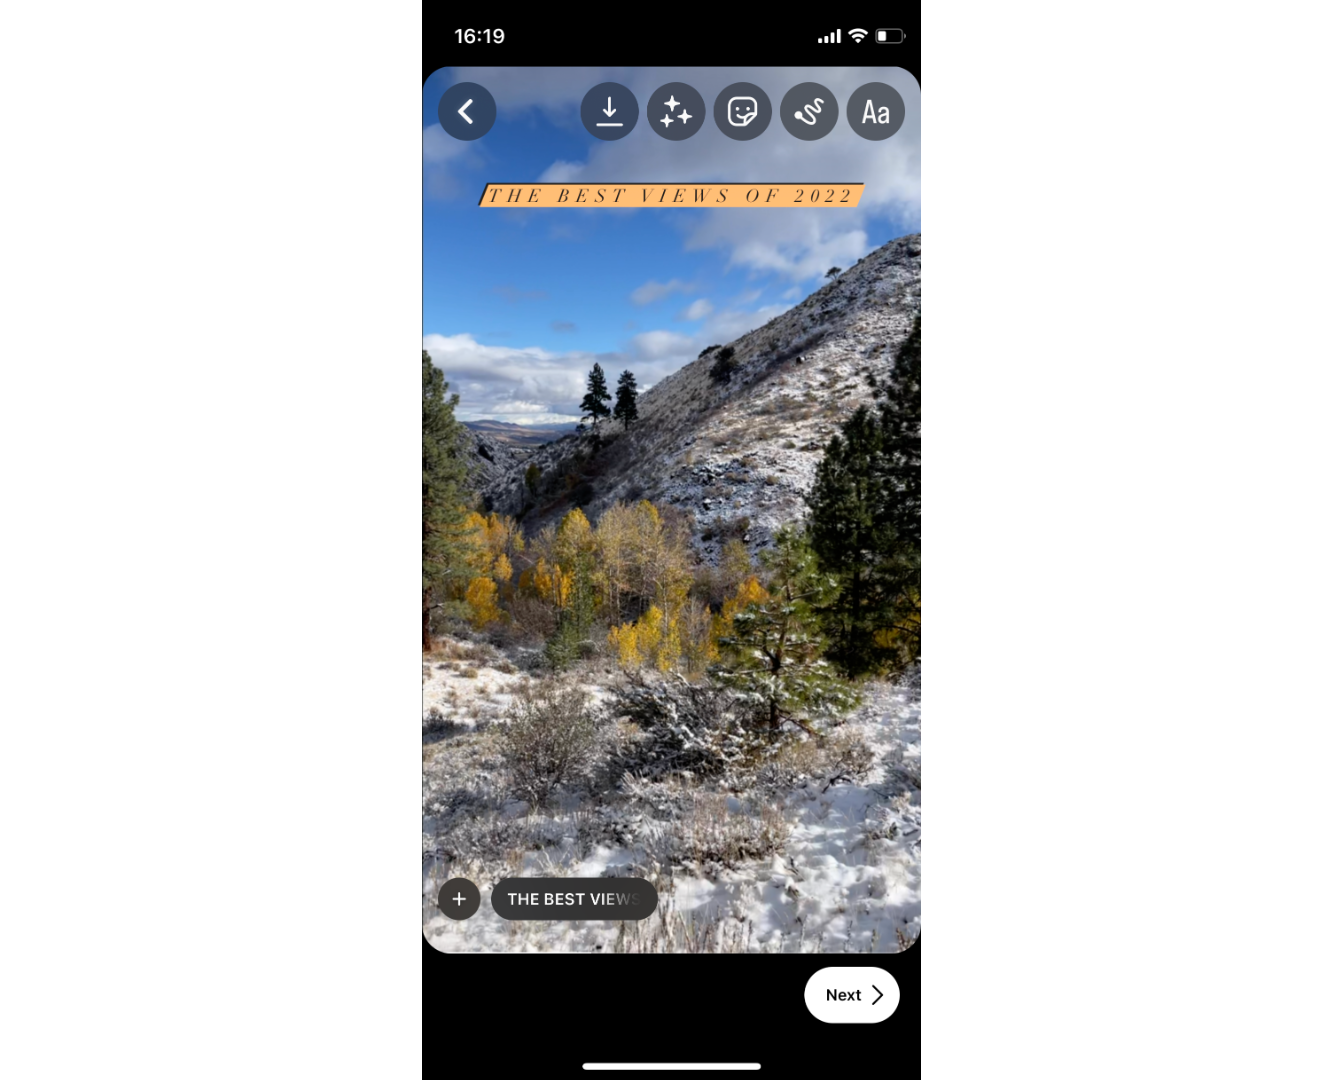
Step 3) Finalize and Share Your Year-End Recap
There's not much else you need to do, which is of course the beauty of templates.
Add some text on screen if you want, write your description, set the cover image, and you're ready to hit Share!
How to Make a 2025 Year in Review Video Without IG
Maybe you're not a fan of the template options on Instagram, or maybe you don't have Instagram. Whatever the reason, don't worry. You can still easily whip up a highlights reel of your 2025 to share on TikTok, YouTube Shorts, X, Bluesky, or just the family group chat.
Step 1) Upload Your Photos and Video Clips from Your Phone
Just like if you were making your 2025 recap video on Reels, I recommend going through your camera roll and making a dedicated album for this project beforehand. That means giving some thought to what you want to include.
Many Year in Review videos are just a candid compilation of the best, most memorable moments from the past 365 days, but maybe there's a particular story you want to tell. For example, you might choose a sequence of pictures illustrating a transformation over time, like your progress in the gym or how long your hair has gotten since last year.
Once you've chosen the photos and videos you want to use in your end of year recap, upload them to your video editor of choice. For this tutorial, I'll be using Kapwing, an online editor that I can use on my phone without needing to download anything extra.
Go to Kapwing on your mobile browser and click "Get started." You'll be prompted to sign in.

Once you're in your workspace, click on the "Create New Project" button to open the editor.
Click "Press to upload" and choose "Photo Library" to grab the images and photos on your phone.
If you've added them all to an album prior to this, tap on the Album tab at the top to open the album and select only those photos and videos. Once you've selected everything you want to include in your 2025 recap video, hit "Add" in the top right-hand corner.
It'll take a few seconds for Kapwing to process and upload all of your media, but once it's finished, it'll be automatically added to the timeline and ready to edit.
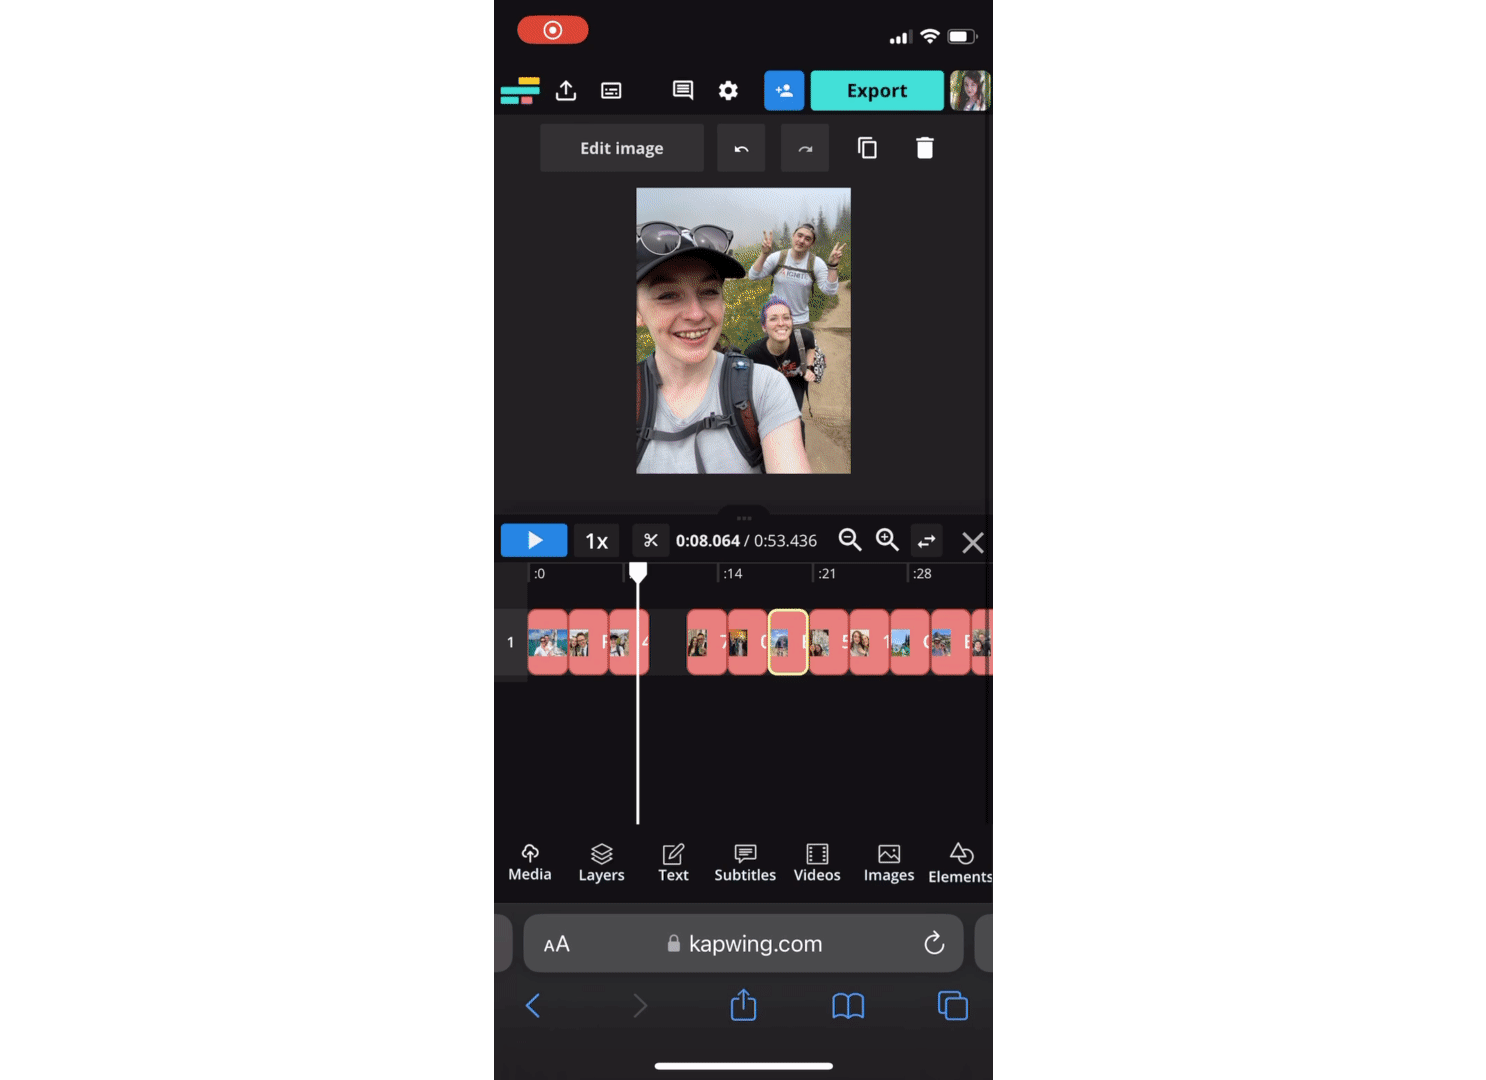
Step 2) Trim and Arrange Your Photos and Videos
For a Year in Review video that pops, you'll want to keep each individual clip pretty short.
I recommend trimming all the videos to 5 seconds or fewer to keep things moving and interesting.
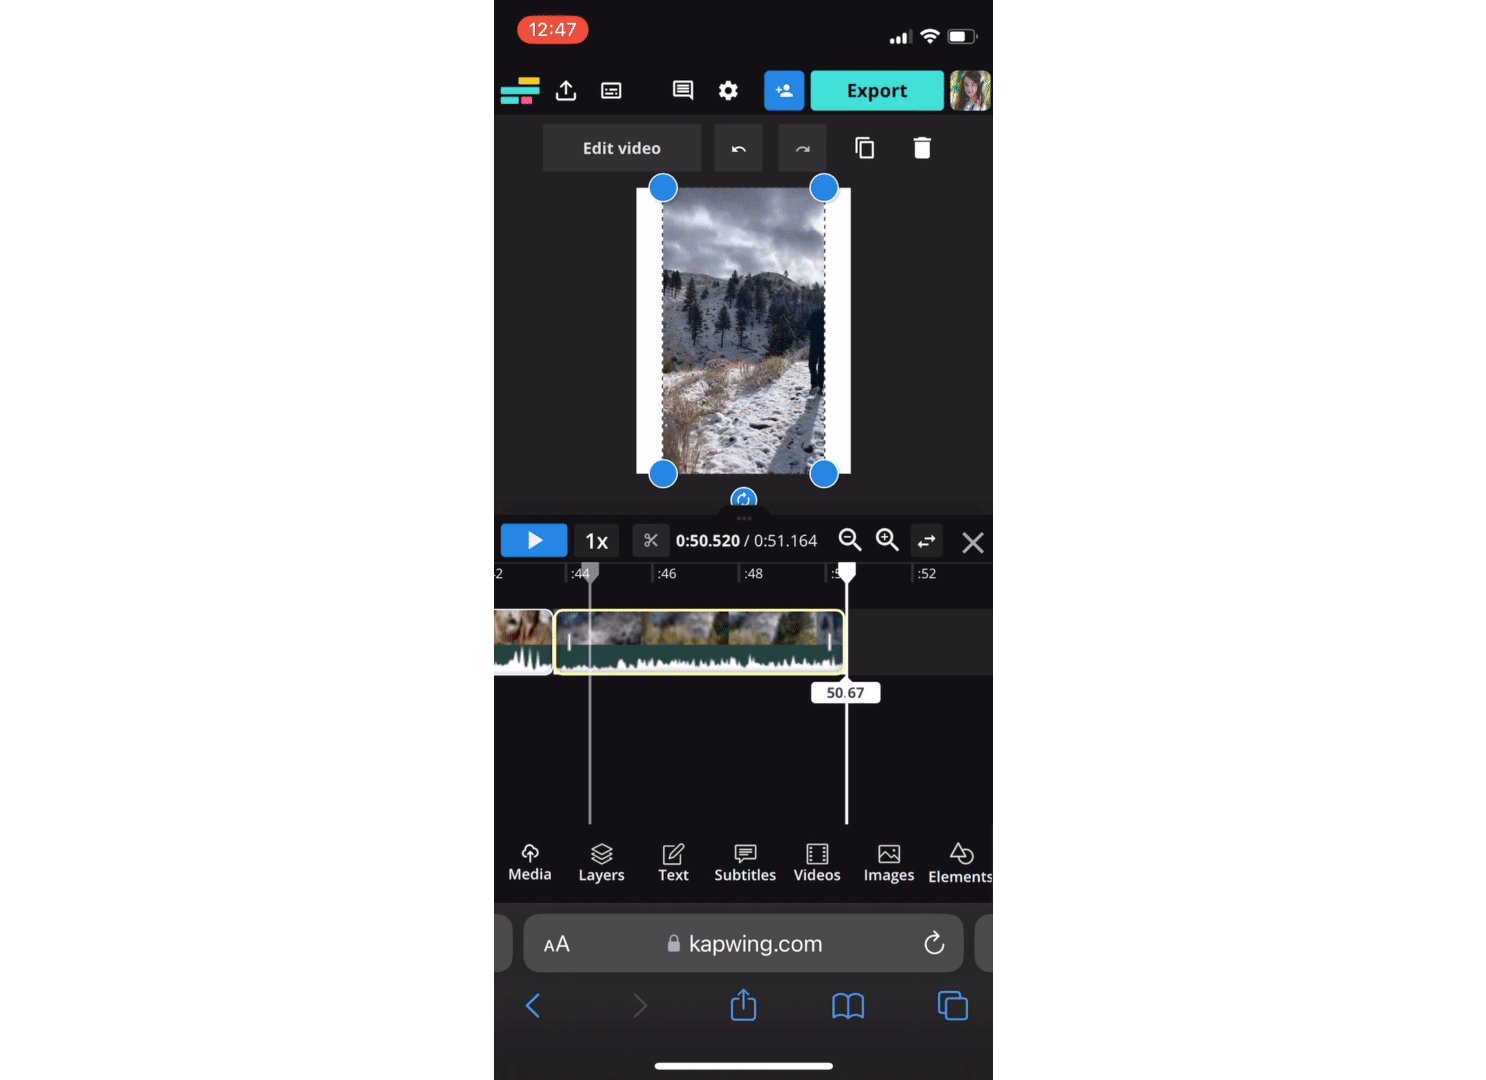
To trim a video in Kapwing, just grab either the beginning or the end of the clip in the timeline and slide it over to the desired start point/end point.
You'll also want to make sure that your photos and video clips are arranged in chronological order. To move them around on the timeline, simply tap, hold, and drag.
Step 3) Add Trending Music to Your Year in Review Video
You can do this step either in the video editor, baking the audio into the video, or by adding trending audio when you upload the video to whichever platform you'll be publishing it on.
If you choose to add your audio in Kapwing, tap the Audio tab at the bottom of the editor.

You have the option of uploading audio from a URL (like a trending sound from a TikTok link), your device, or Google Drive. You can also scroll down to choose a song from Unminus and Pixabay, which are integrated into Kapwing's audio library.
Once you select or upload the song, it will be added to the timeline. Simply trim it to the length of your video and you're good to go.
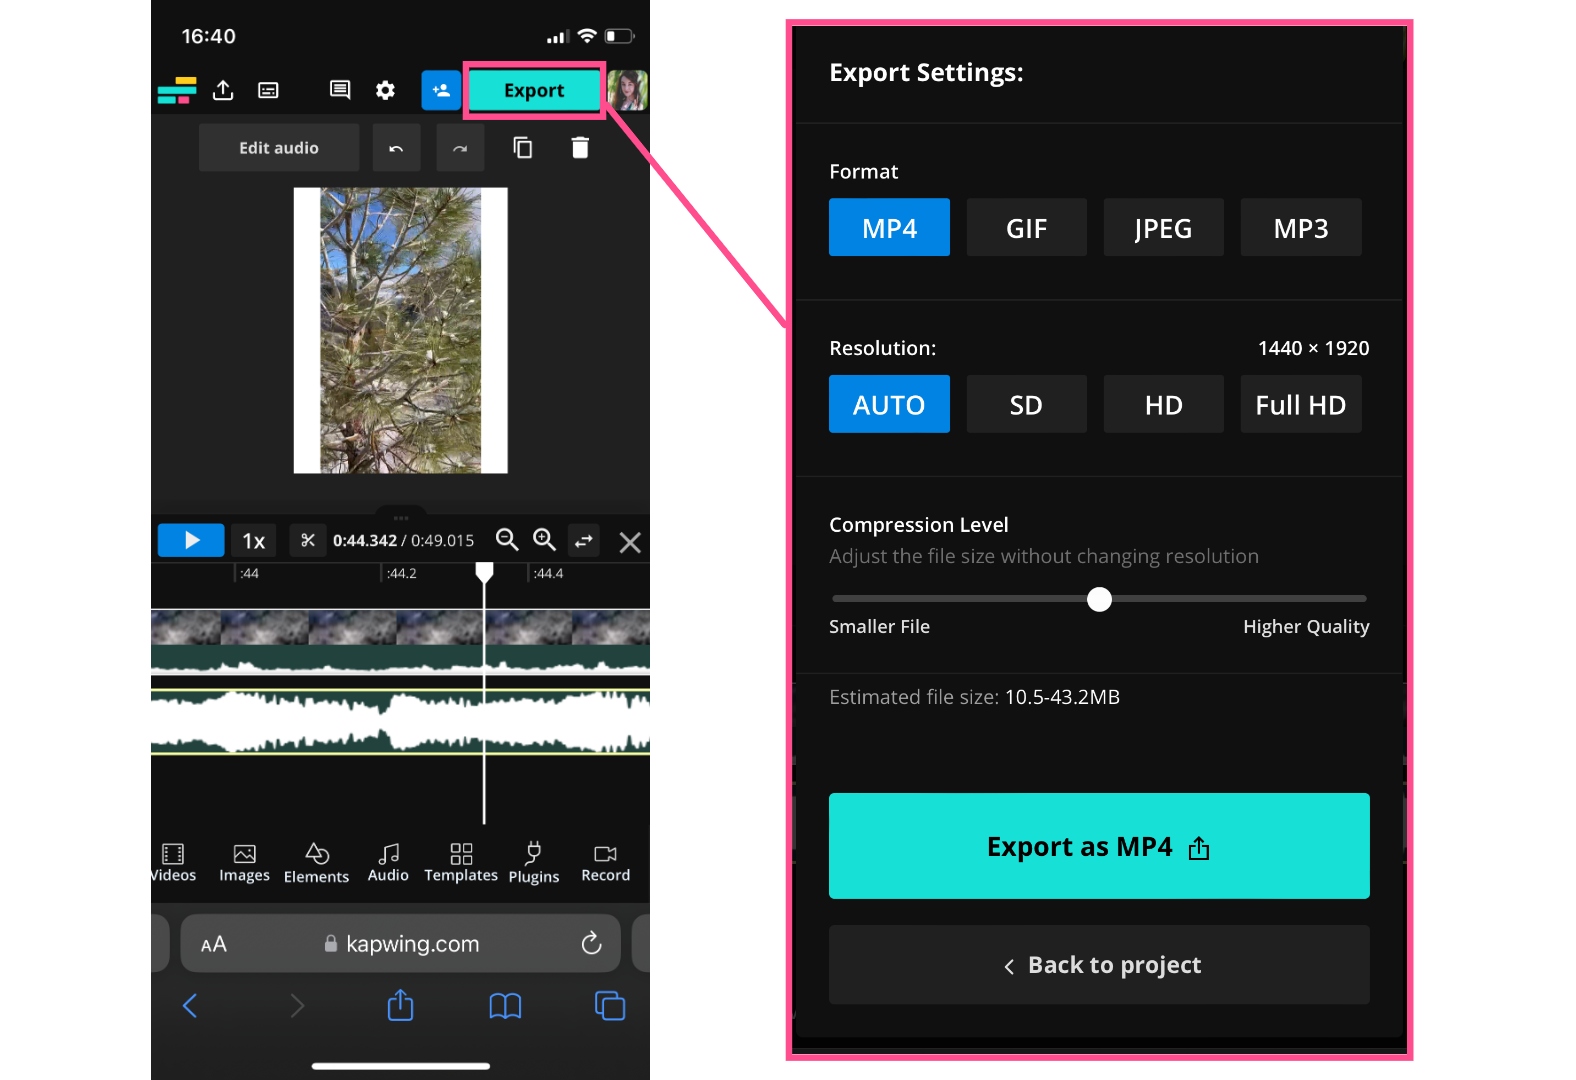
Step 4) Download and Share
Make any final edits, like adding text, voiceover, or aesthetic fonts and colors that will trend in 2025.
Finally, hit the Export button, choose your resolution and format settings, and download.