How to Make a Word Search Online
There are many tools to help with your students' learning in the classroom. In this tutorial, you'll learn how to make a word search to get your class engaged with different topics!
There are many tools to help with your students’ learning in the classroom such as labeled worksheets, flashcards, or educational memes! But have you considered word searches? Word Search Puzzles are a fun way to get your class to retain and engage with topics or subjects you’re teaching. Word Searches benefit students’ learning by helping with spelling or acting as a study guide before a test.
In this tutorial, I’m going to show you how to create your own Word Search Puzzle for your class using a template and Kapwing! Here are the steps:
- Make a Word Search List
- Find a Template using Kapwing
- Arrange the Words
- (Optional) Add Images
- Download and Share the Word Search
Step 1: Make a Word Search List
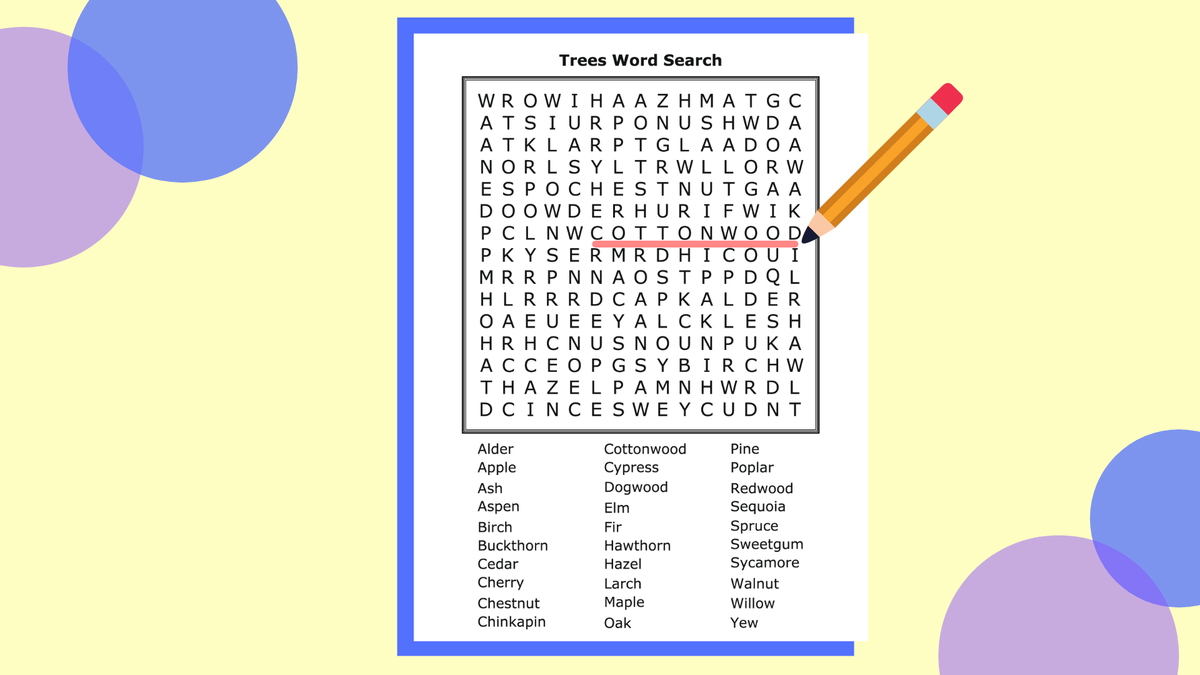
Think of a subject or topic that you would like to create a word search for. You can use any topic from historical figures to names of trees or the periodic table of elements to ocean animals! Most word search puzzles contain anywhere from 10 to 30 words, but you can use more words and include them in multiple puzzles.
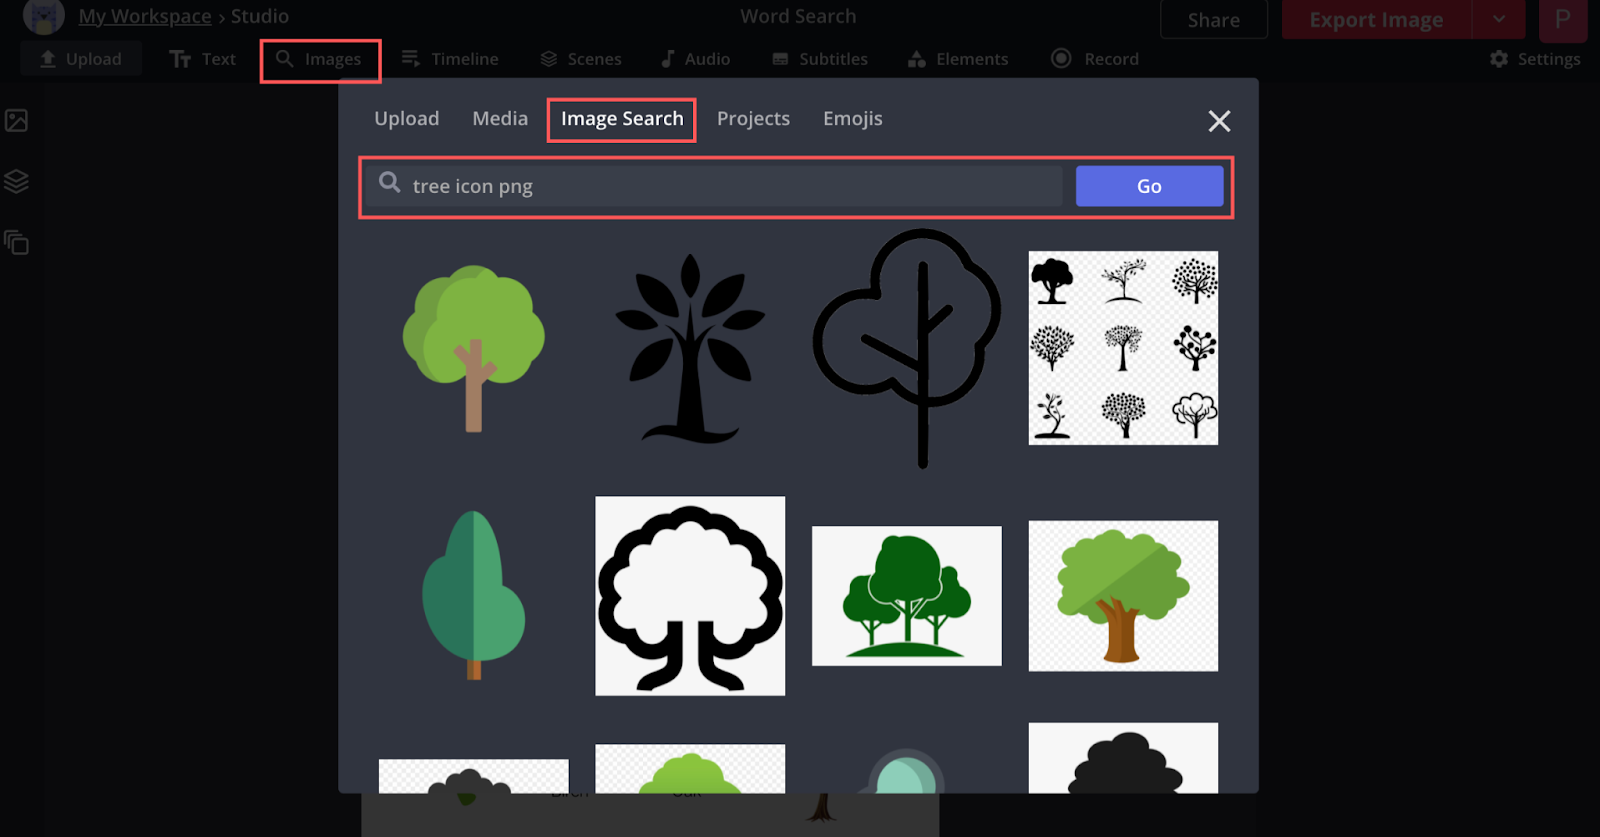
Step 2: Find a Template using Kapwing
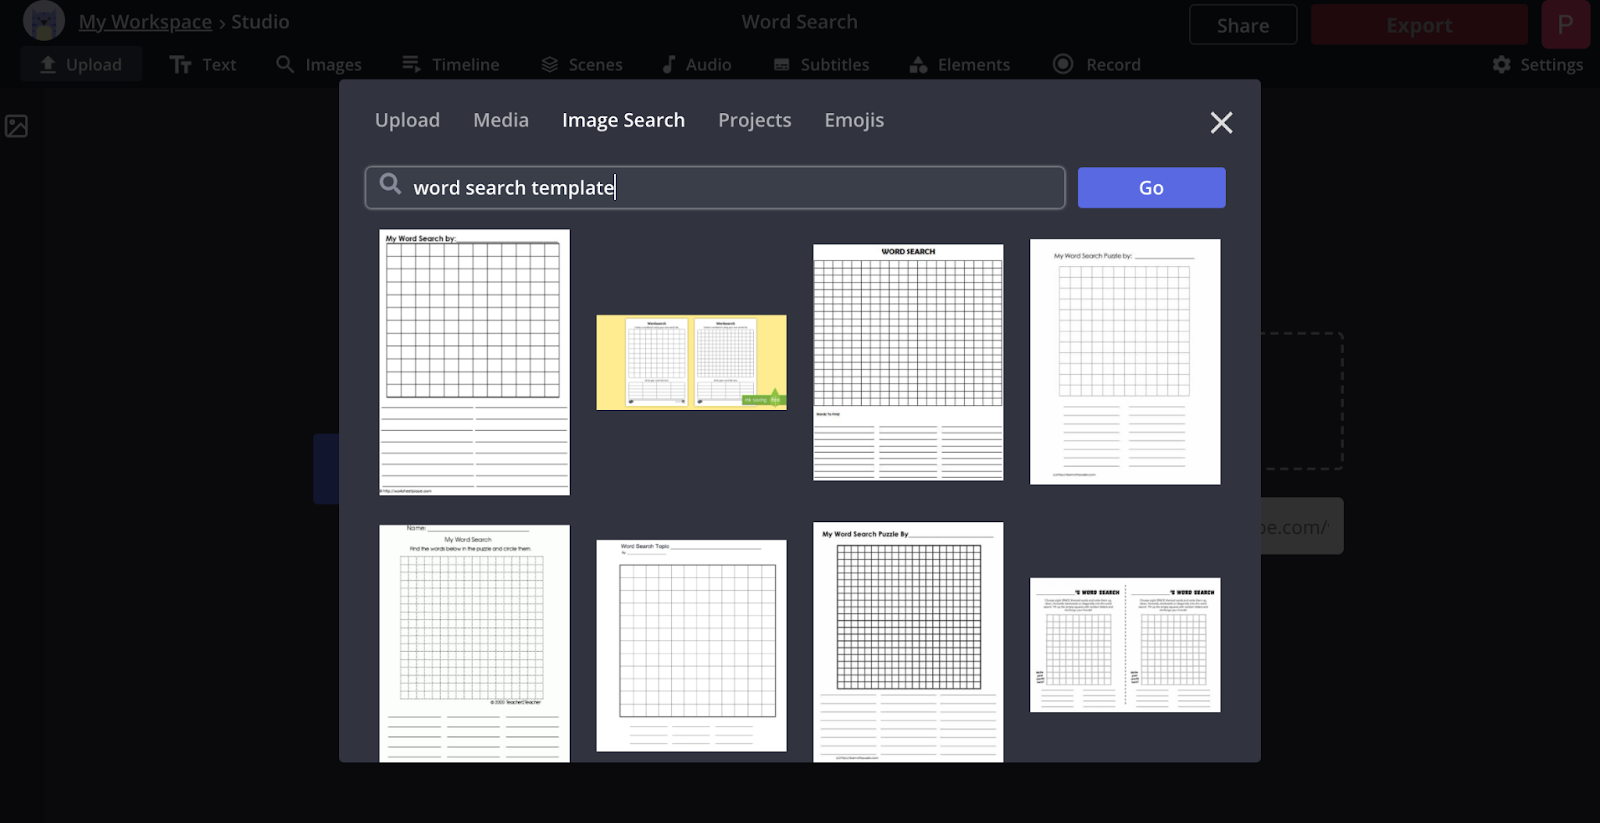
Go to the Kapwing Studio and click Get Started. Select Images at the top toolbar and search for “Word Search Template”. Find a grid that is clear and large enough for the 10 to 30 words that you have in your list. Select an image and wait for the image to upload into the Studio Timeline.
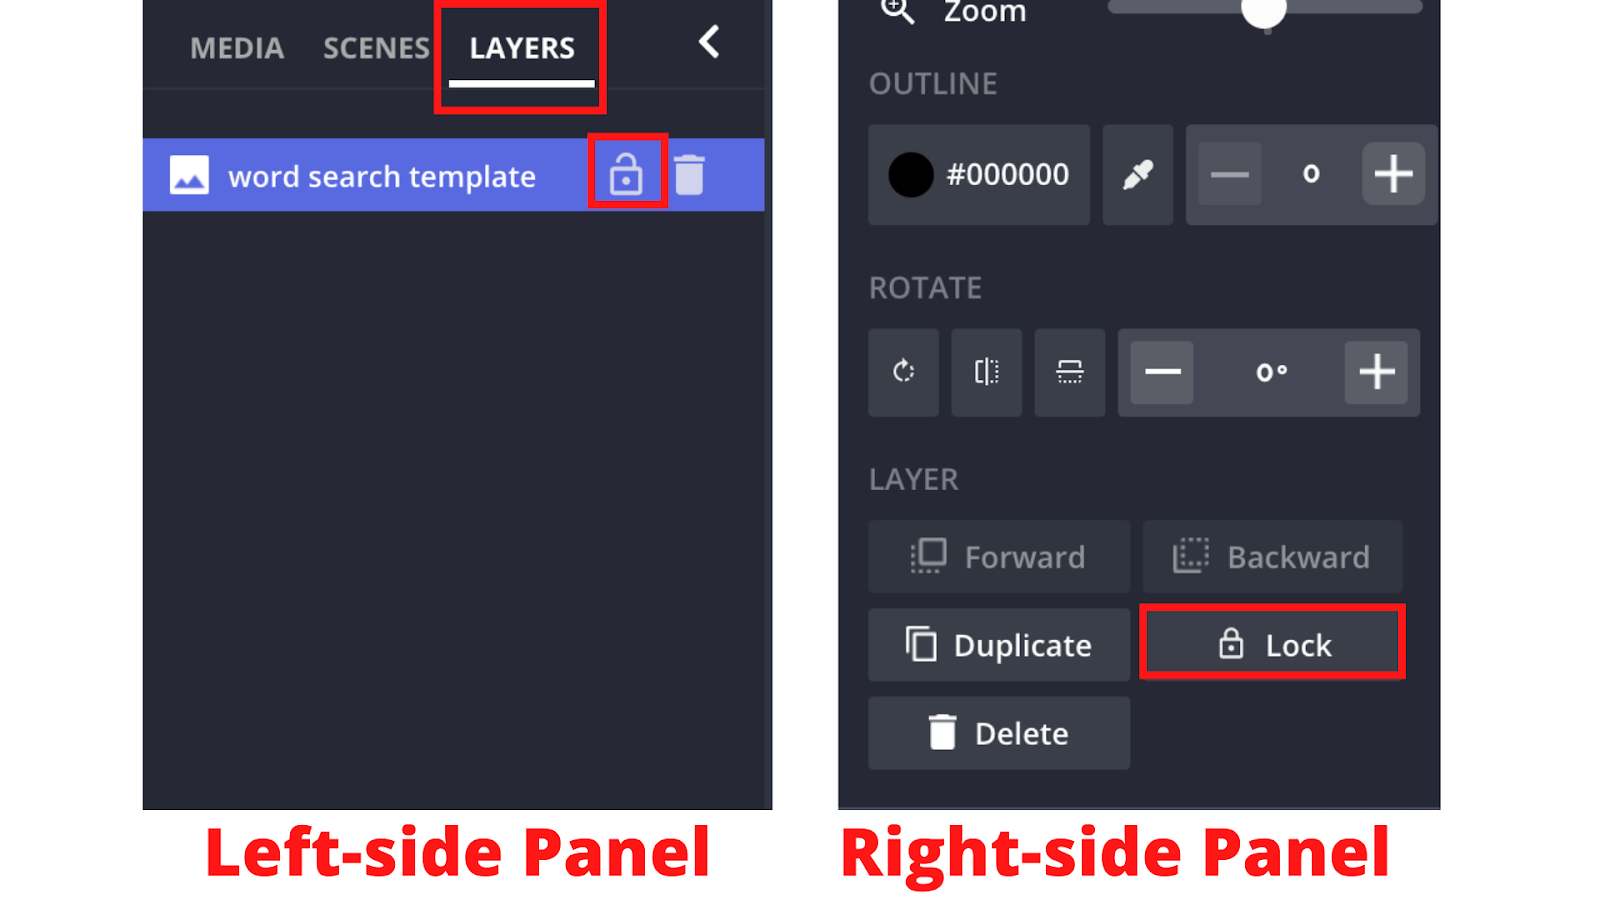
Because we will be adding lots of text layers to this image, I like to Lock the image/layer in place so it doesn’t move when we start arranging our words. There are two ways to lock your layers. Go to the left-hand side panel, click on Layers, select the image and click on the lock icon or on the right-hand side panel, scroll down until you see Layer, then select Lock.
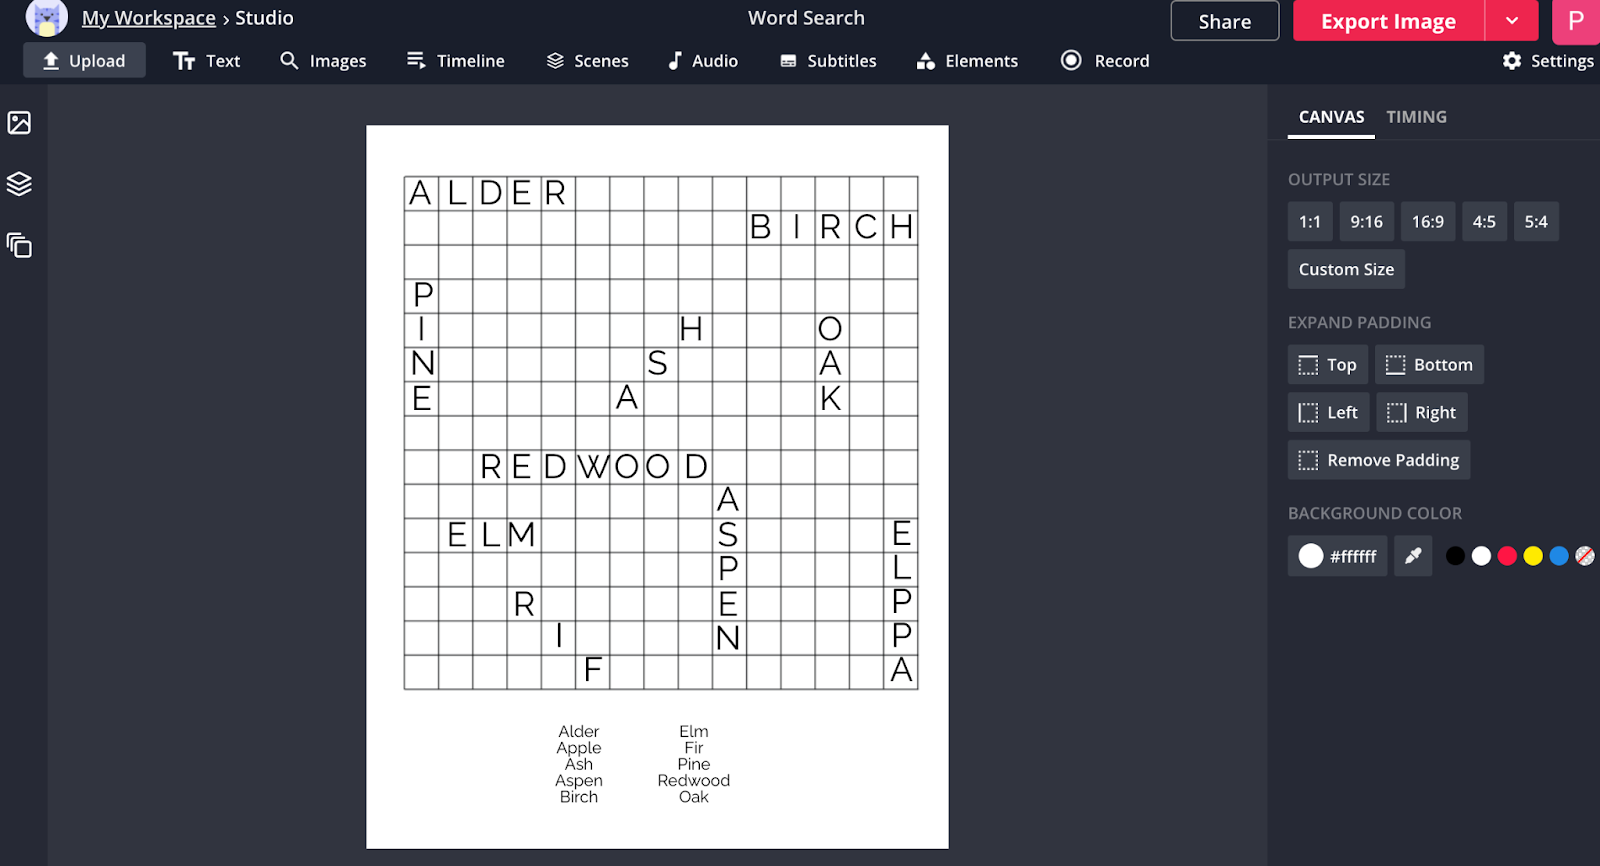
Step 3: Arrange the Words
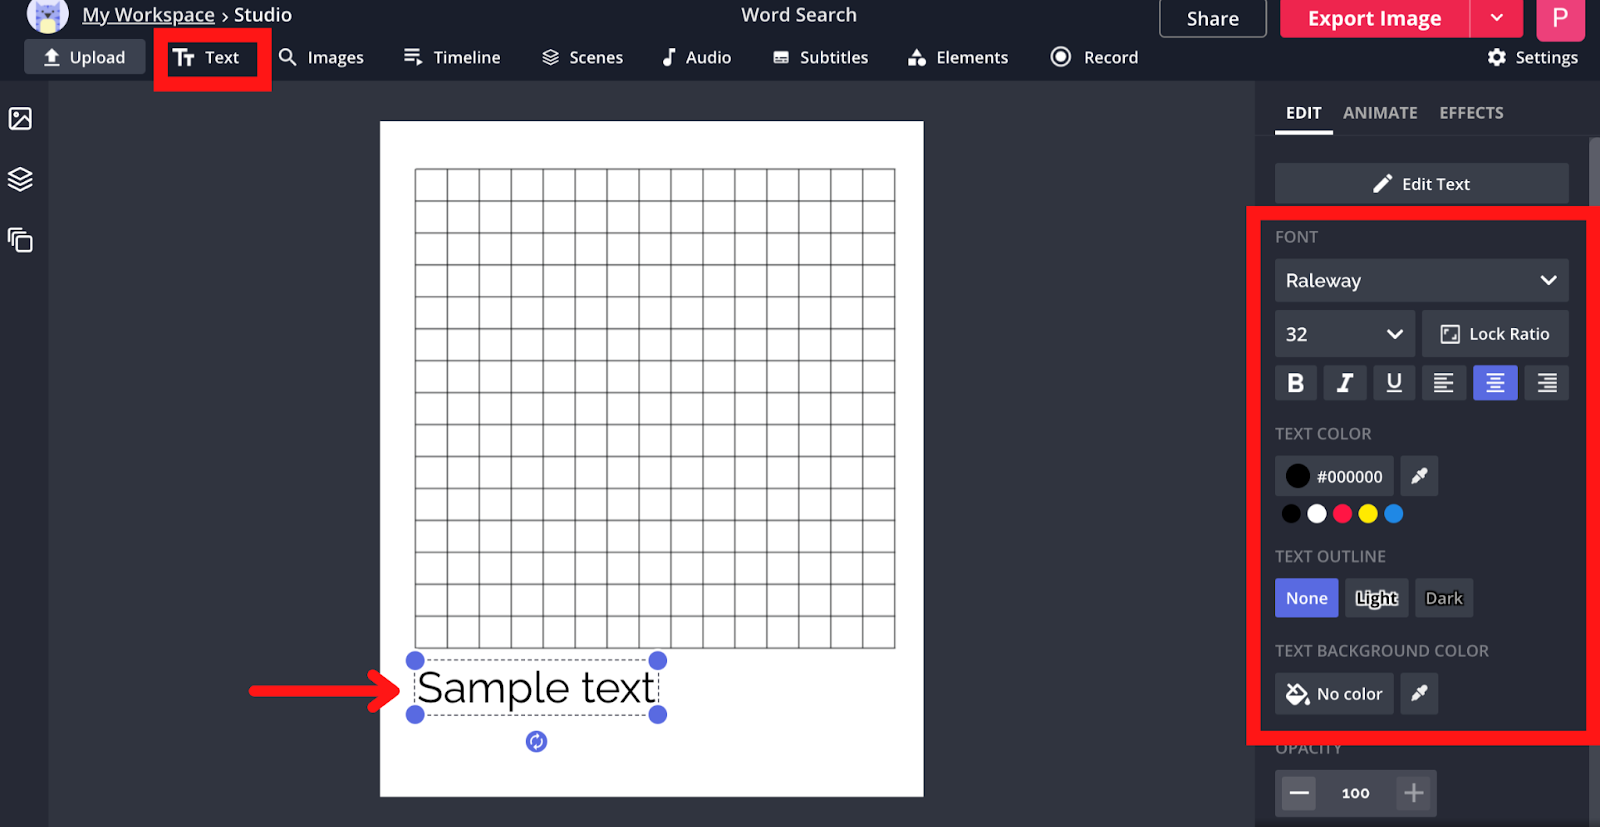
Use the Text tool to arrange your words in a word bank below the puzzle. Line up the words by columns until all of your words are listed. Use the right-side panel to choose a Font Type, change the size, or change the color.
After arranging your word bank, use the Text tool again to write each letter of each word inside the grid. Repeat this process until all words are inside the puzzle. Once your words are placed inside the grid, fill in the blank squares with random letters until you fill up the entire grid.
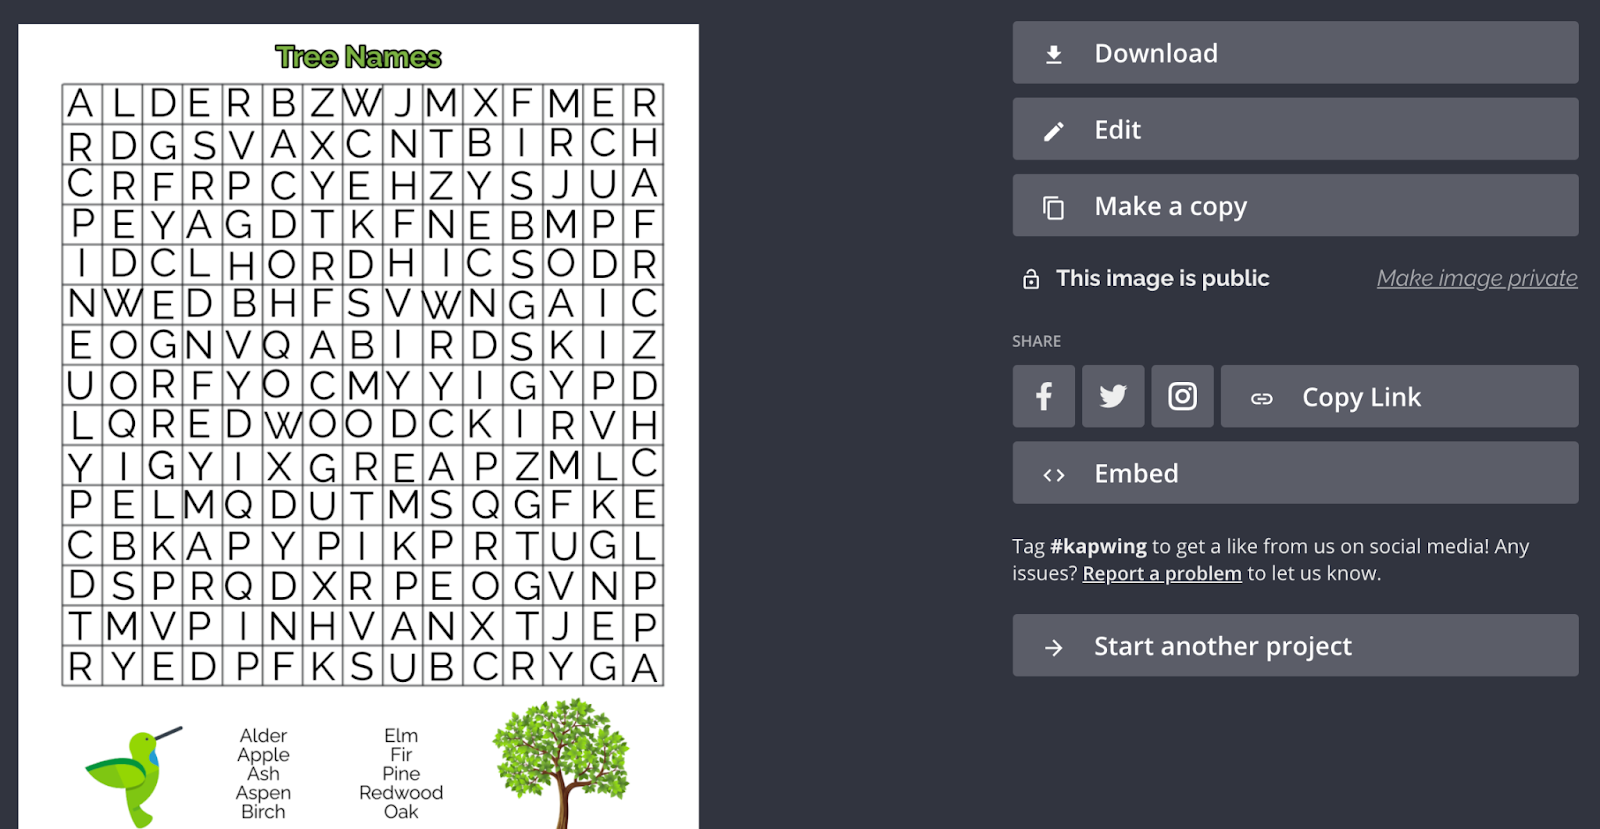
(Optional) Step 4: Add Images
If you want to make the word search puzzle more exciting and fun for your students, you can add images around the puzzle. To do this, select Images and search for an image you like. Once it uploads, you can resize the image by dragging one of the four corners.
Step 5: Download and Share the Word Search
On the top-right, click on Export Image, then select Download on the next page!
I hope that this tutorial helped you create a fun and unique puzzle for your students to benefit their learning! Don’t forget to tag us on social media @KapwingApp - we love supporting our educators! For more tips and tutorials for your classroom, check out our Classroom Resources page. While you’re here, you can also find related articles below: