
How to Make a Video Look and Sound Like a Horror Movie
Here's a quick and easy way to make your video look and sound like a horror movie for the Halloween season.
With Halloween around the corner, creators on all platforms have been getting into the Halloween spirit. Video posts showing off costume ideas, creators ranking their favorite candies, and even adjusting editing styles to resemble classic horror movies are all taking place.
In this tutorial, I'll show you an easy way to make your video resemble a horror movie using Kapwing. Let’s get started!
Step 1: Upload Your Video or Start with a Template
Head over to the Kapwing website in your browser, then click Start Editing or sign in to your workspace and click New Content.
You can choose to start with a blank canvas or upload a video from your device.
To upload your video, you can select Click to Upload to add the file from your device or drag and drop the file directly onto the canvas.
You can also paste a link from websites like YouTube, TikTok, or Twitch to upload your media or sign in to Google Drive or Google Photos to add a video from your account.
Once your video has been uploaded, you can preview and edit it as needed using Kapwing’s built-in video editing features.
Instead of starting from scratch, you can also choose from various ready-to-use templates courtesy of Kapwing such as the Film Template:
Film Template:

Step 2: Make Your Video Look Like a Horror Movie
Now that your video is in the Kapwing Studio, you can begin making edits to make it look like a horror movie. Here are several techniques, effects, and filters you can try to give your video an old horror effect.
Removing Color
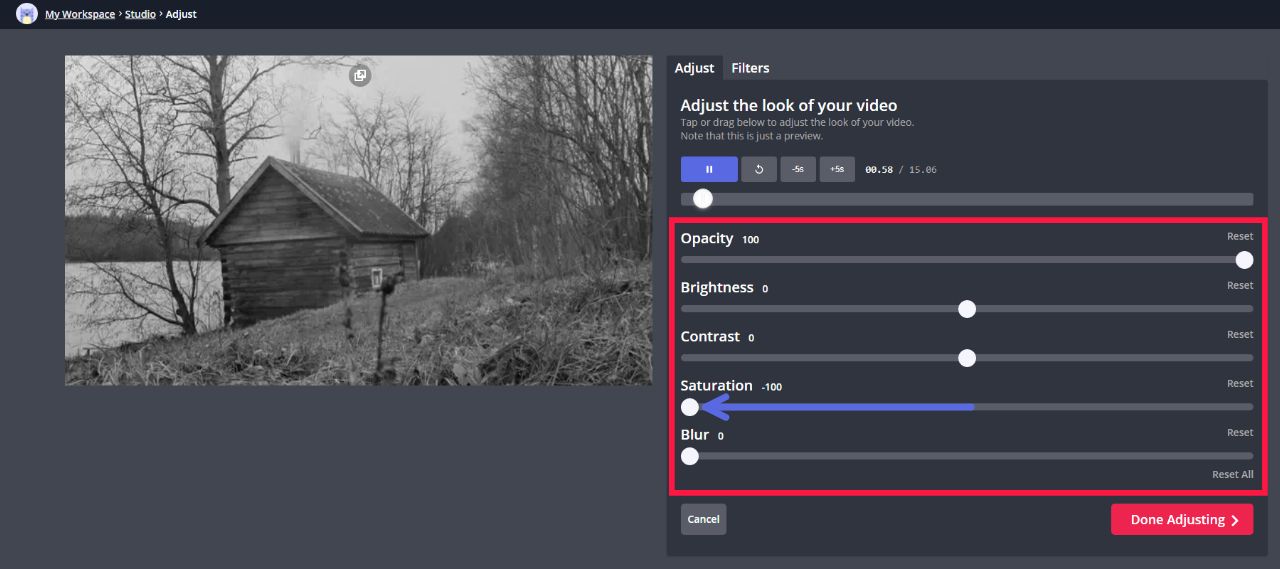
One way to make your video look older is to make it sepia tone or black and white. To fully remove color from your video, click on your video, select the Adjust button located under Video on the right side of the studio, and drag the Saturation slider all the way to the left.
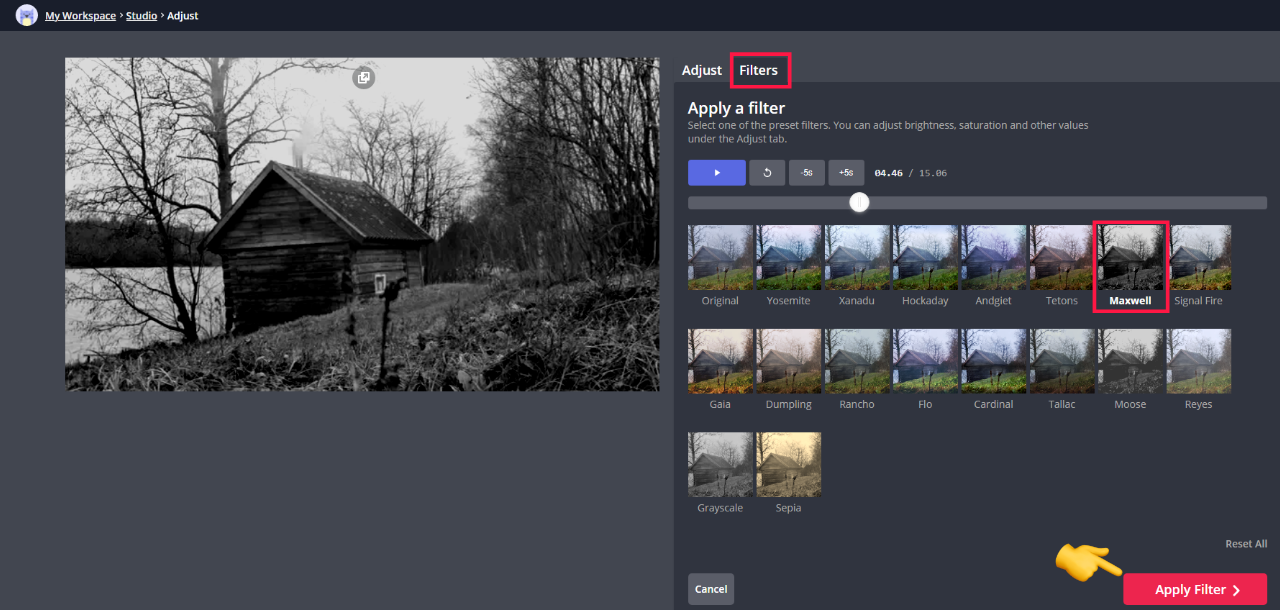
If you don’t feel comfortable adjusting any sliders, you can alternatively choose a filter by selecting the Adjust button located under Video, clicking on the Filters tab, choosing from the various black and white filter options like Maxwell, Moose, and Grayscale, and then pressing the red Apply Filter button in the bottom right.
Flicker Effect
To give your horror video an old-fashioned look, you can add a TV-style animation.
To do this, click the Images tab on the left side of the Studio and search for terms like “Static GIF” or “Film GIF”. This will allow you to choose from various animations from the web to add to your video.
Once you’ve selected your desired animation/GIF, simply click on it to add it to your timeline.
Next, adjust the length of the animation to ensure that it continues throughout the entirety of your video. If needed, you can reduce the opacity (or transparency) of the new animation layer by clicking on it, going to the Edit tab on the right side of the studio, clicking the Adjust button under the image header, and moving the opacity slider to the left as needed.
I recommend starting the slider at around 20% and adjusting from there.
Horror Sounds
Another huge characteristic of horror movies are their scary sound effects that are almost always added in post-production.
Fortunately, free horror themed sound effects are abundant on the internet. For example, this free Shutterstock horror sound effects pack includes a variety of sounds such as whispers, screams, creepy ambiance, and more. You can also find spooky sounds on YouTube and then convert the sounds you want to use to MP3 files using the Kapwing Converter.
Once you've downloaded the sounds of your choosing, import them into the Kapwing studio and edit them into your video as needed.
You can find more information on how to find and add scary sound effects to your video via Kapwing here.
Step 3: Download and Share Your Video!
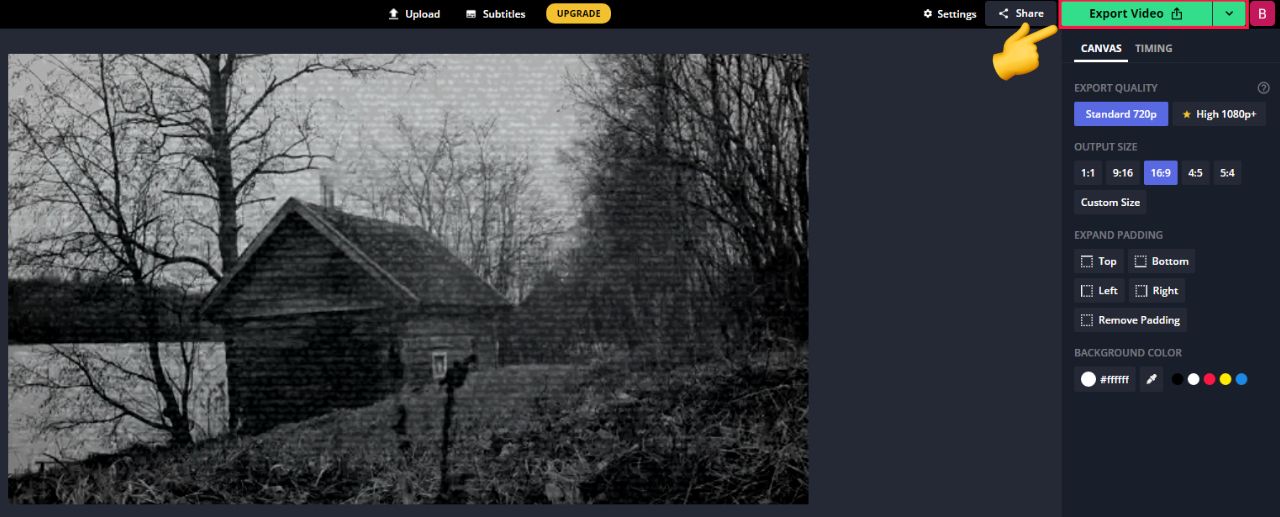
Once you’re satisfied with your video’s added creepiness, you can download your video by either clicking on the green Export Video button located on the top right of your workspace or selecting the drop down arrow directly to its right to export it as a specific file format.
After rendering, you can share your video using the provided links or you can download the file to publish it directly to any desired platform. If you would like to make any changes, you can easily go back into your workspace and make any edits as needed.

If you have any feedback about Kapwing or the Kapwing Studio feel free to let us know! For more tips and tutorials on creating great digital content in 2021, check back in at the Kapwing Resources page, subscribe to our YouTube channel, or read through some articles related to horror and Halloween:


