
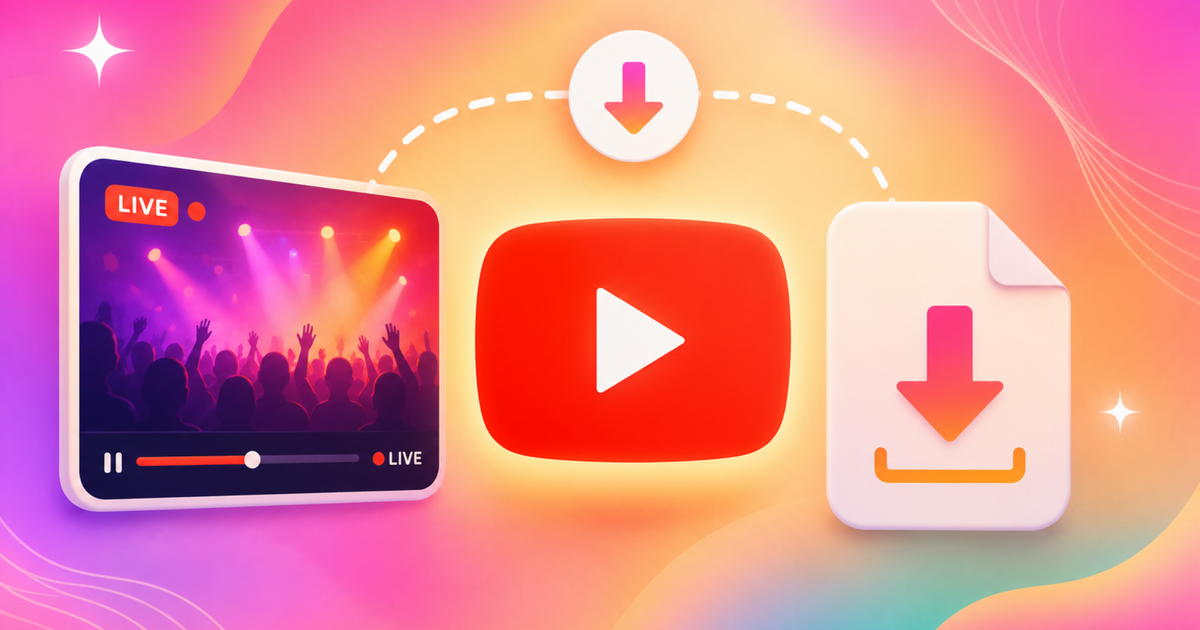
How to Download YouTube Live Streams
In this tutorial, you'll learn how to download your favorite YouTube Live Streams.
Live streaming has become one of the fastest-growing digital industries in recent years because you can reach audiences from all over the world. Since 2008, YouTube has been one of the largest free video-sharing websites where users can like, share, comment, and stream content.
You can stream anything from live sports and news to games and talk shows. Live streams publish to YouTube immediately after the stream ends and you can rewatch the video anytime. But sometimes you love the live stream so much you want to save the video and share it with other people or create a highlight video. Whatever the reason is, this tutorial will show you how to download a live stream in under five minutes with three steps!
- Copy the YouTube Link
- Open Kapwing’s Video Downloader
- Export and Download the Live Stream
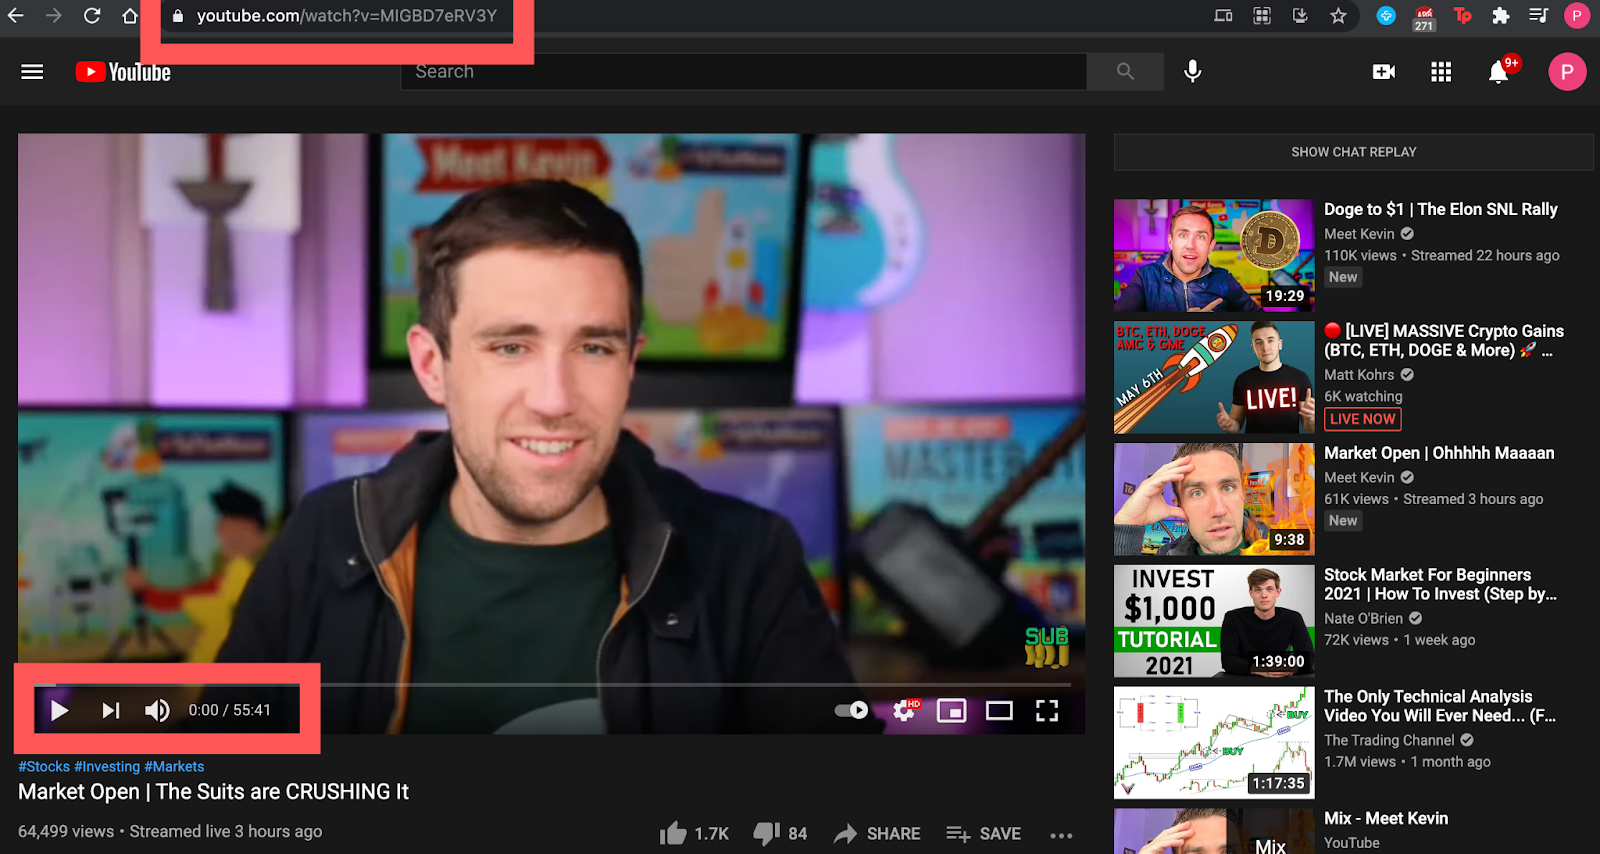
Step 1: Copy the YouTube Link
At the moment, Kapwing supports downloading videos that are under 1 hour long. Search for a live stream on YouTube and copy the video link at the top of your browser.
The video I found was 55 minutes long, which is within the video length requirements.
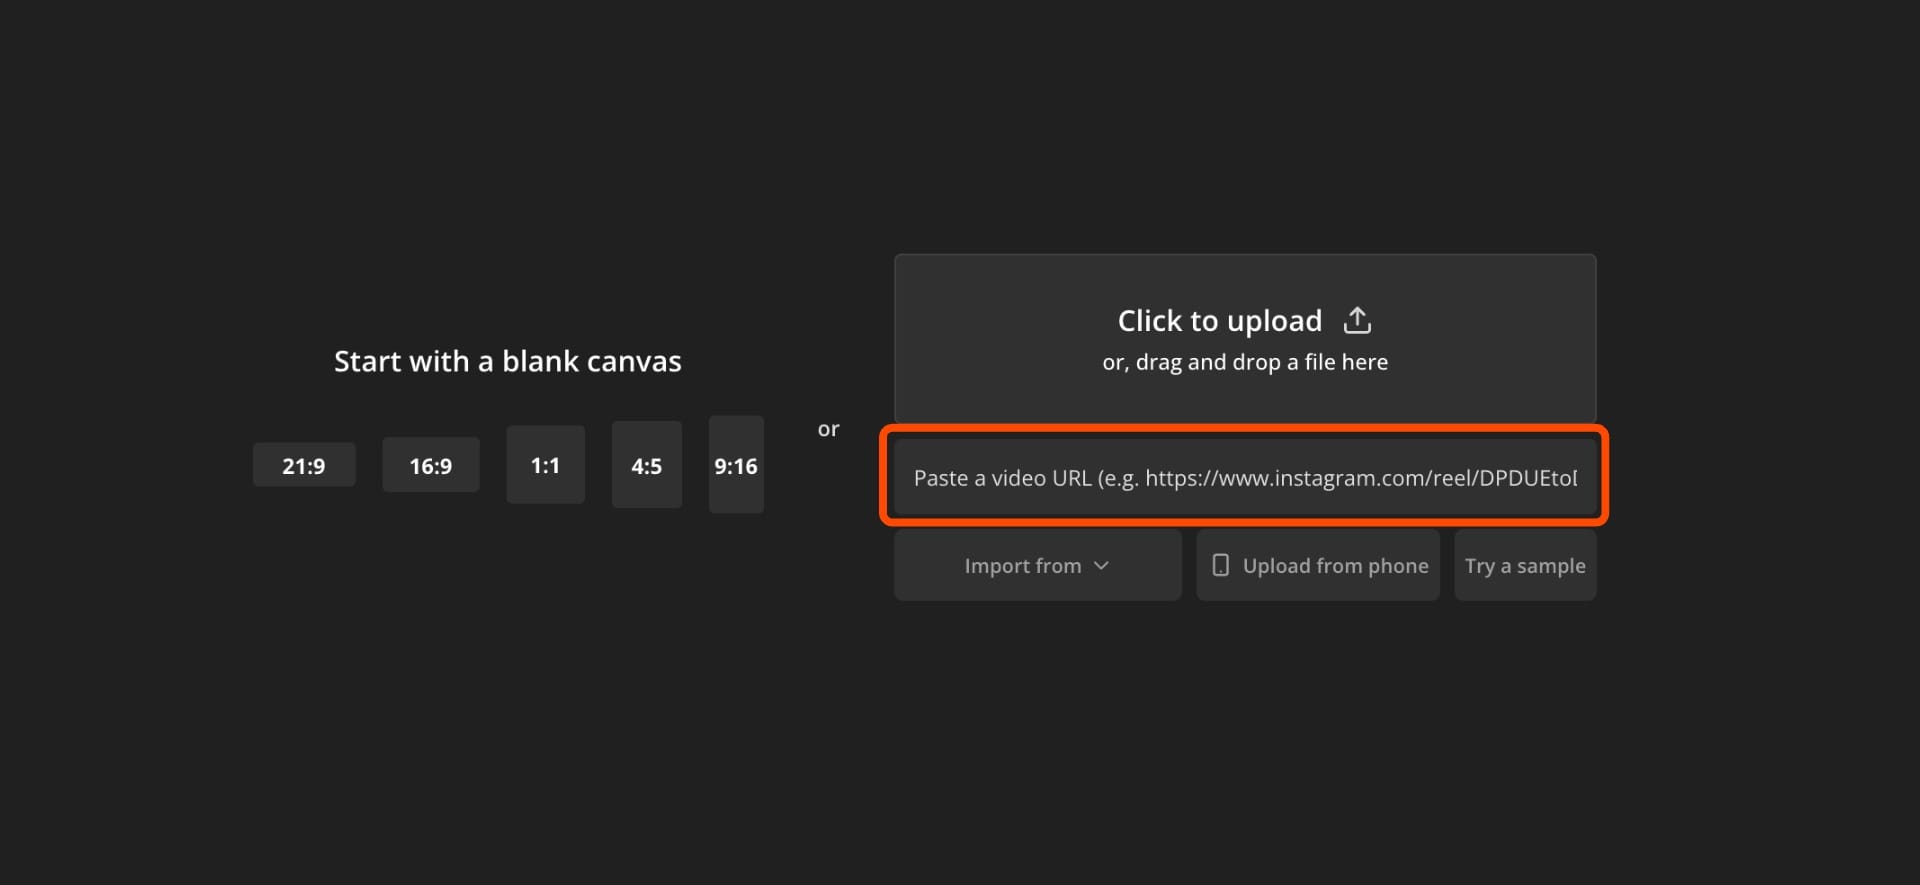
Step 2: Open Kapwing’s Video Downloader
Go to kapwing.com in your browser or open Kapwing’s Video Downloader. You will be given the option to upload a file or paste a URL.
Go ahead and paste the YouTube link into the Paste a URL box and wait a few seconds for the video to process and load into the Kapwing Studio Timeline.
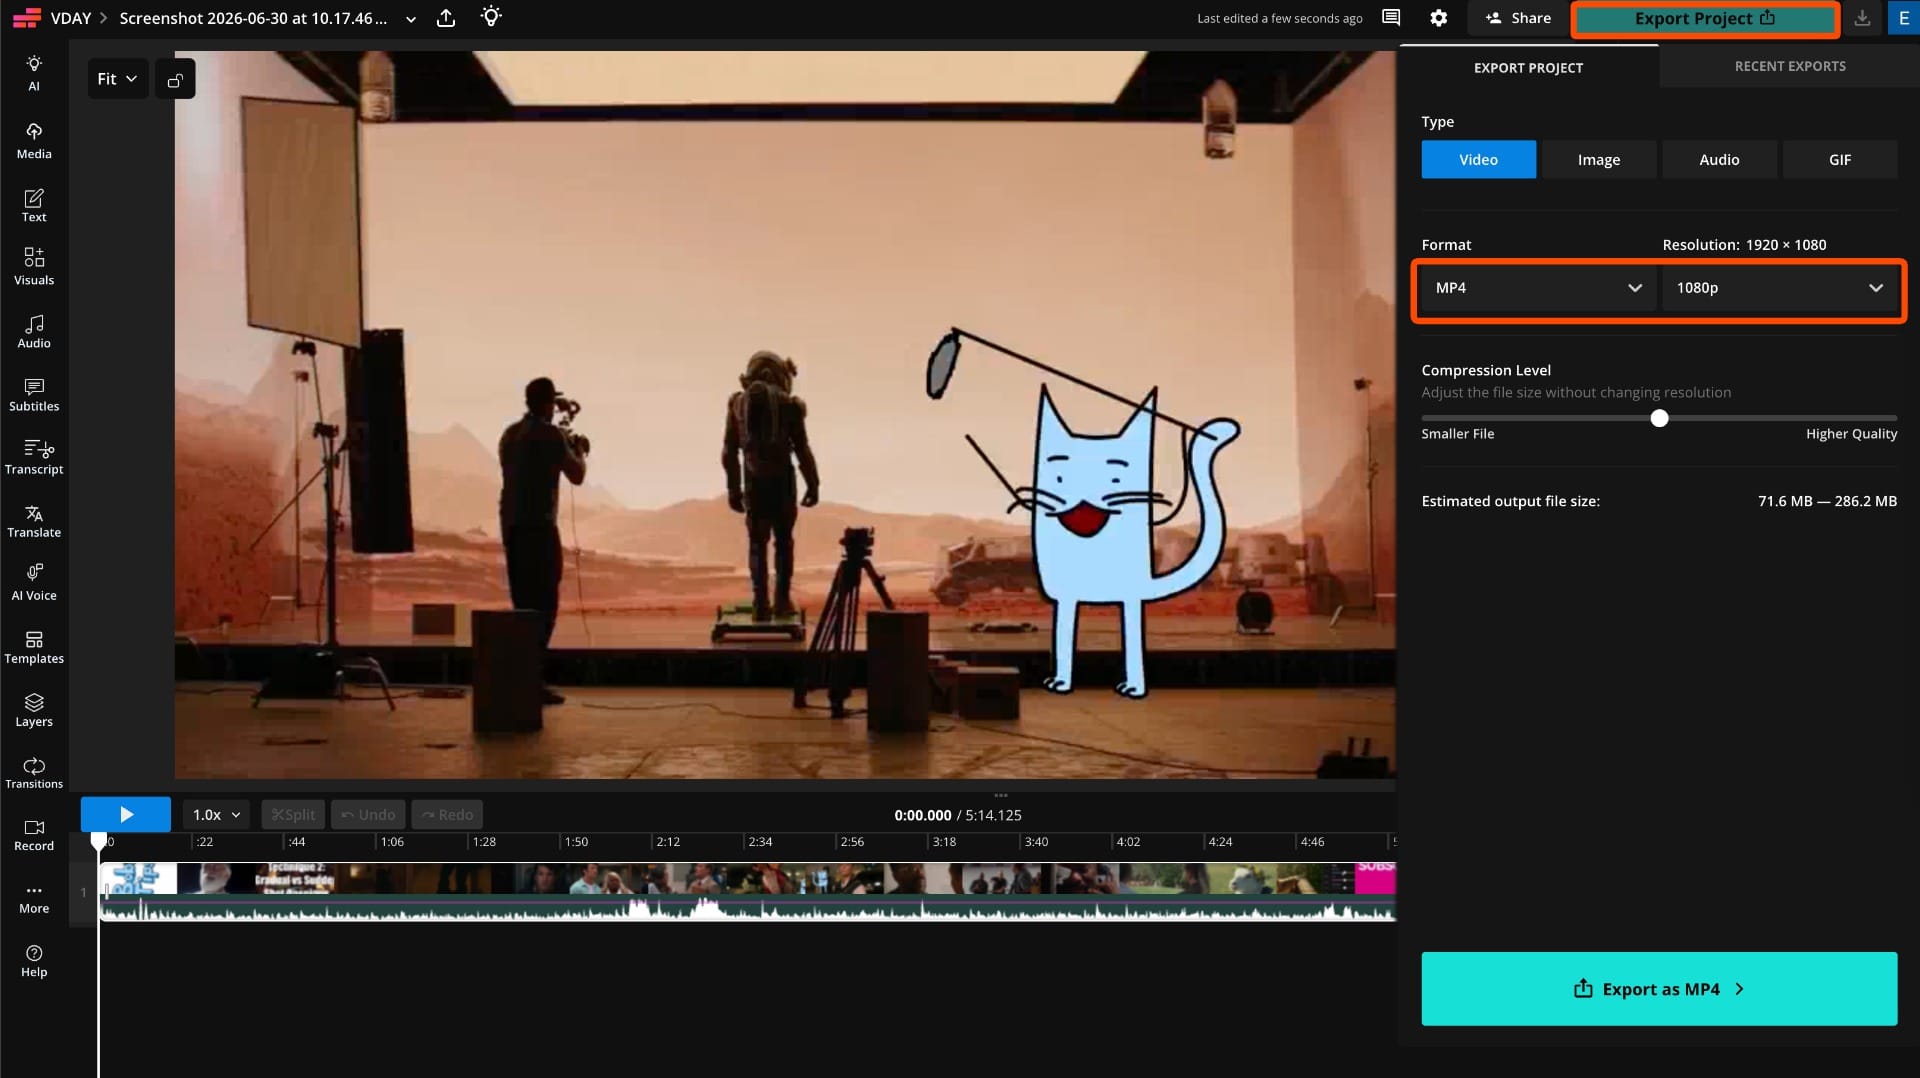
Step 3: Export and Download the Live Stream
Once your video uploads into the Kapwing Timeline you can export and download your video by selecting the arrow to bring up the drop-down menu and choosing Export as MP4, which is a multimedia video format. Kapwing also has three other export options to choose from:
- GIF: Convert your video into an animated GIF up to 20 seconds long.
- Image: Choose and save a single frame from your video
- MP3: Convert the YouTube format to save as an audio file
Wait a few seconds and your video will process before taking you to the next page. After exporting, select Download, and the downloaded live stream will be saved to your device. You can watch your video offline, use it in other projects, or share it with your friends!


