How to Send Branded Emails with Gmail's Professional Templates
Gmail has added new templates and multi-send for branded emails. In this article, I'll show you how to use these email marketing tools for your small business or brand.
Google recently added professional templates and multi-send to Gmail, making it an even better marketing tool for small business owners or creators who are just getting started with email marketing.
These two features work together to allow you to create and send beautifully branded emails to your whole email list without needing a full email marketing service like HubSpot or Mailchimp.
Bonus: Gmail's email marketing tools don't require any coding.
In this article, I'll be covering the following:
- How to Create a Branded Email from a Gmail Professional Template
- How to Customize Gmail Templates with Your Own Branding
- How to Use Multi-Send Mode in Gmail to Reach Your Email List
Let's get right into it.
How to Create a Branded Email from a Gmail Professional Template
The new Gmail Layout tool is full of professional email templates that are easy to use and customize. Unlike traditional templates in Gmail, which are just plain-text emails, the various layouts all offer a more professional look with text and asset modules, CTA buttons, and even customizable background colors.
To access the Layouts feature, you'll need to start a new email in Gmail by clicking the Compose button on your Gmail home screen.
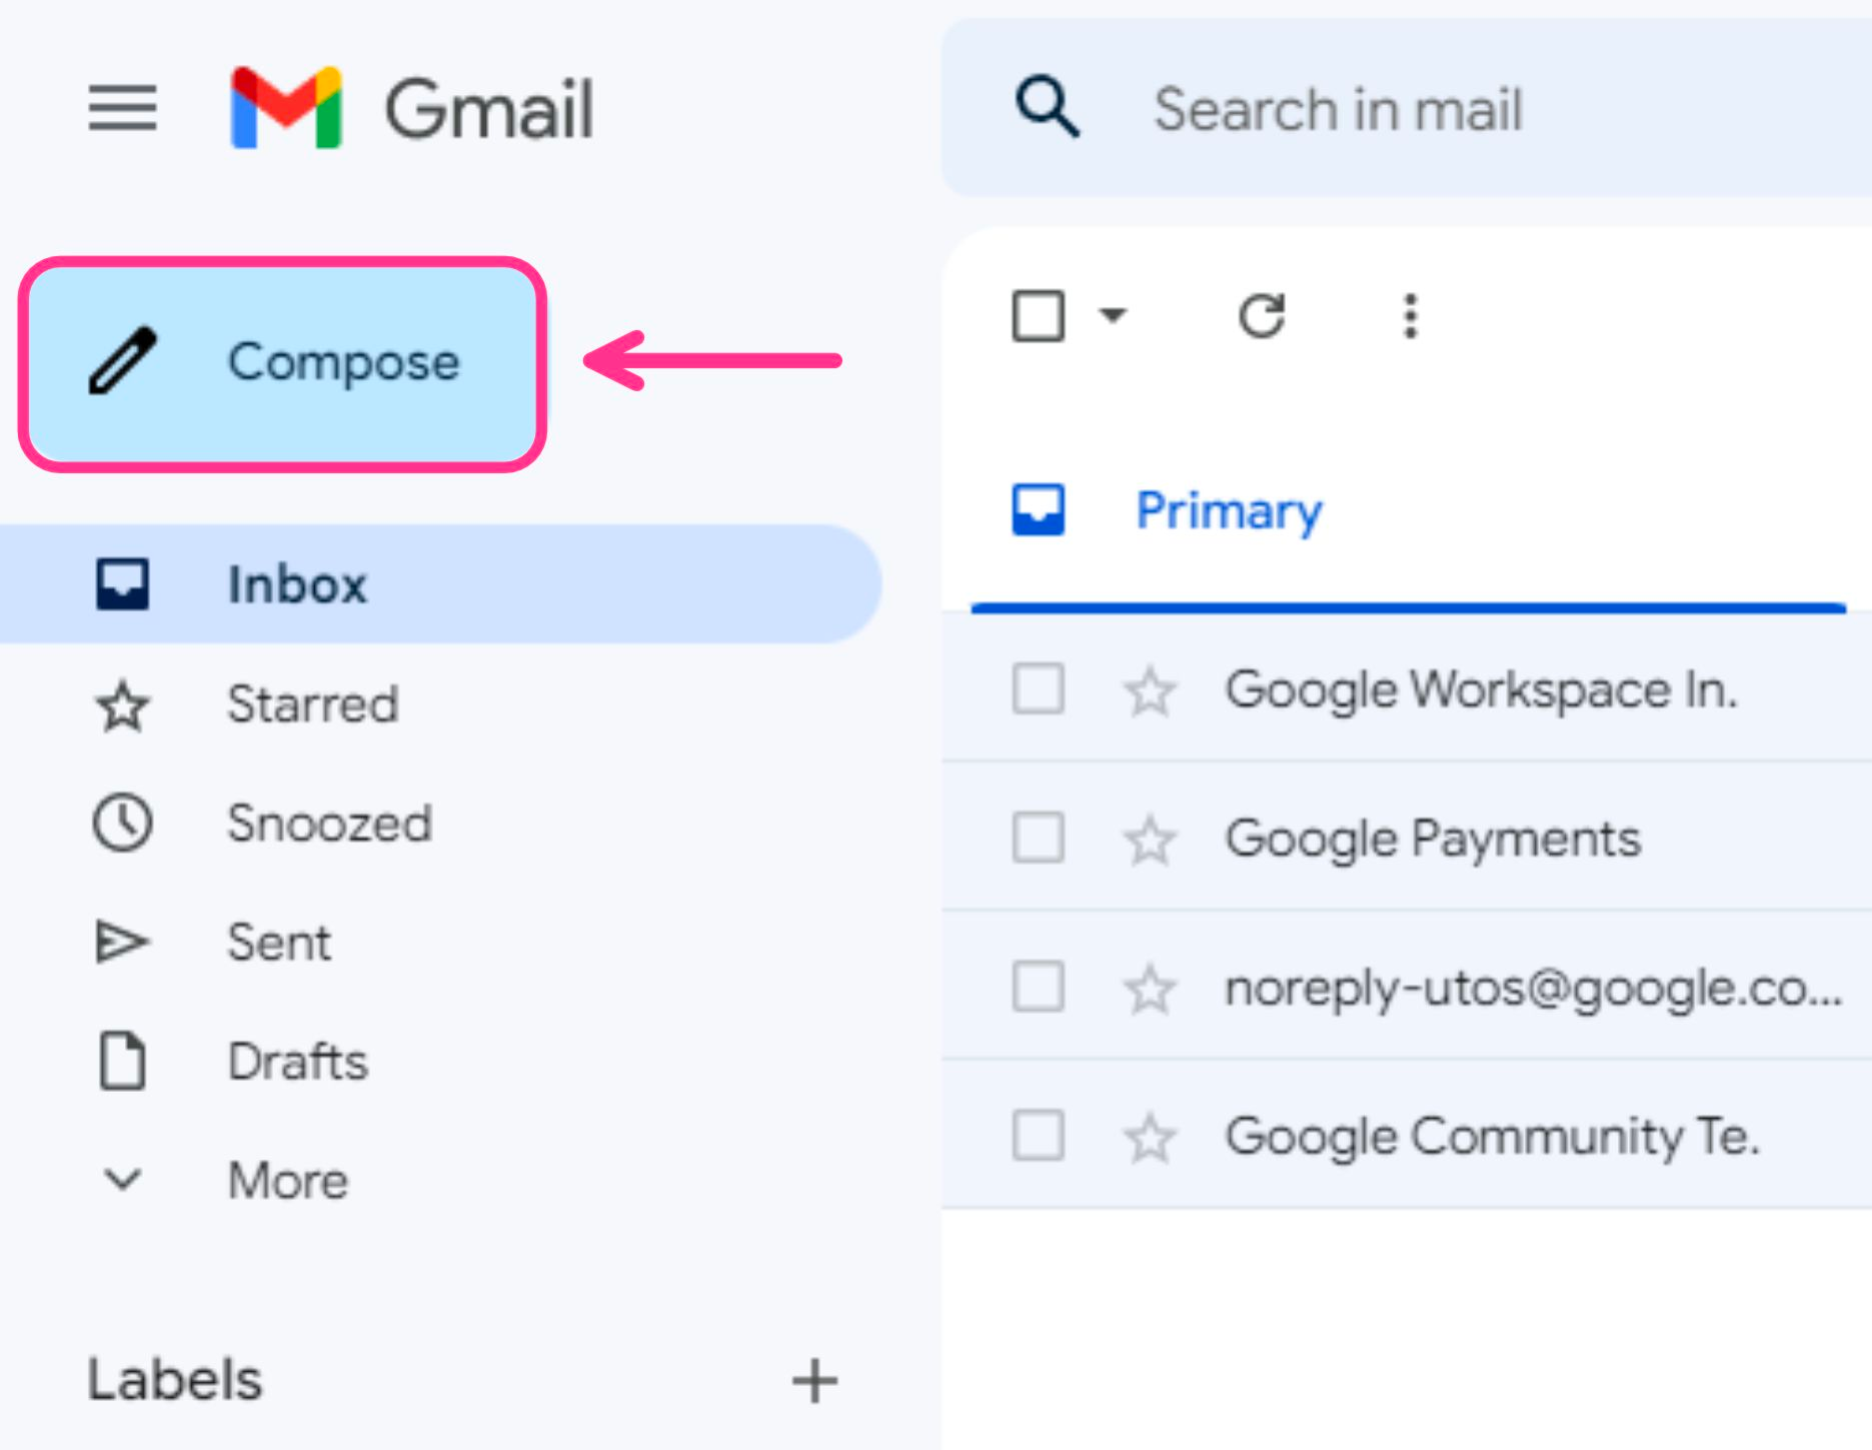
Once you have the new message window open, you'll see two new icons in the bottom menu: a square that looks like a collage and two envelopes stacked on top of each other. These are the new Layouts and Multi-Send features.

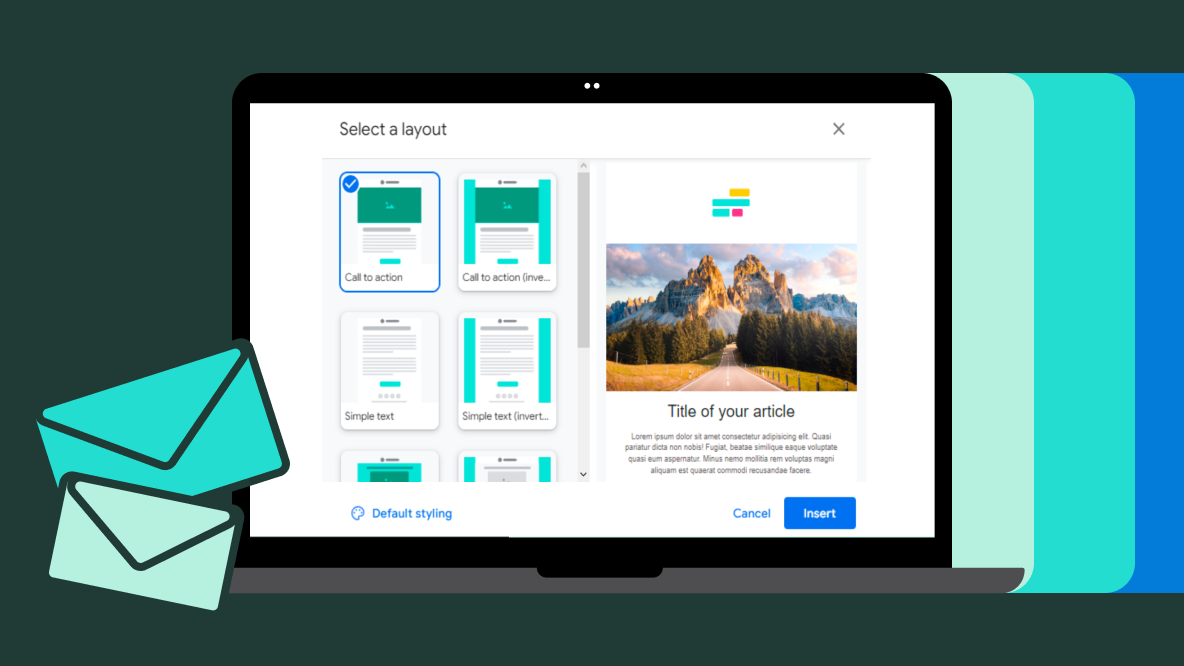
Click the Layouts tab — that's the one that looks like a collage and will also show the text "Choose layout" when you hover your mouse over it. In the Layouts popup window, you'll be able to scroll through all ten of Google's current layout templates.
If you don't see the Layouts icon in the composition window, you may need to sign up for a Google Workspace account in order to have the most up to date Google Suite features. Currently, you can start with a free 14-day trial and then choose from various options such as Business Starter ($6/month) and Business Plus ($18/month).
Once you've chosen the layout you want to use, customize it with your own branding by clicking the "Default Styling" button in the bottom left corner of the Layouts window.
How to customize Gmail professional templates
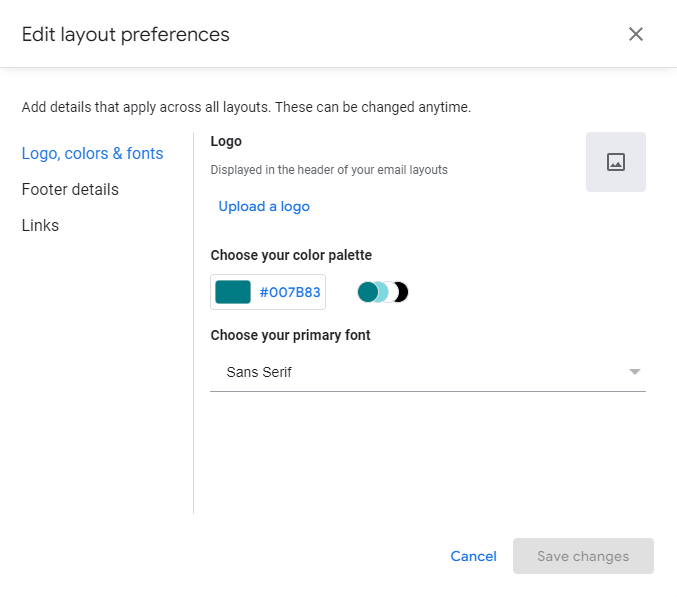
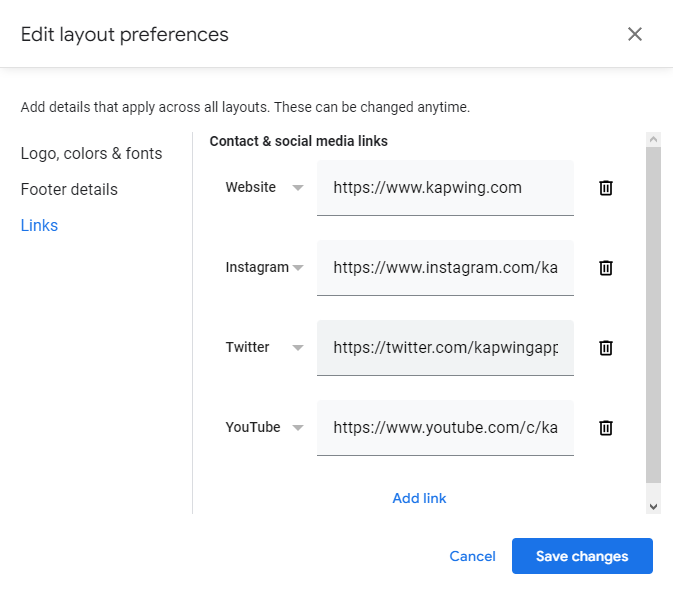
When you click into the "Default Styling" menu, you'll see three different categories for customizing the design of the template: logo, colors, and fonts; footer details; and links.
You'll want to have your company branding on hand for these next few steps. If you don't have a company brand guide yet or if you're a solo creator, stick to logo colors and simple fonts.
Step 1: Add Your Logo
To add your logo, simply click on "Upload a logo" and upload your brand's image.
Ideally, your logo should be a transparent background PNG. If you don't have a transparent background version of your logo, you can use Kapwing's Remove Background tool to quickly erase the background and convert the image into a transparent PNG.
Step 2: Add Your Primary Brand Color
To add your brand's primary color, click on the HEX code below "Choose your color palette."
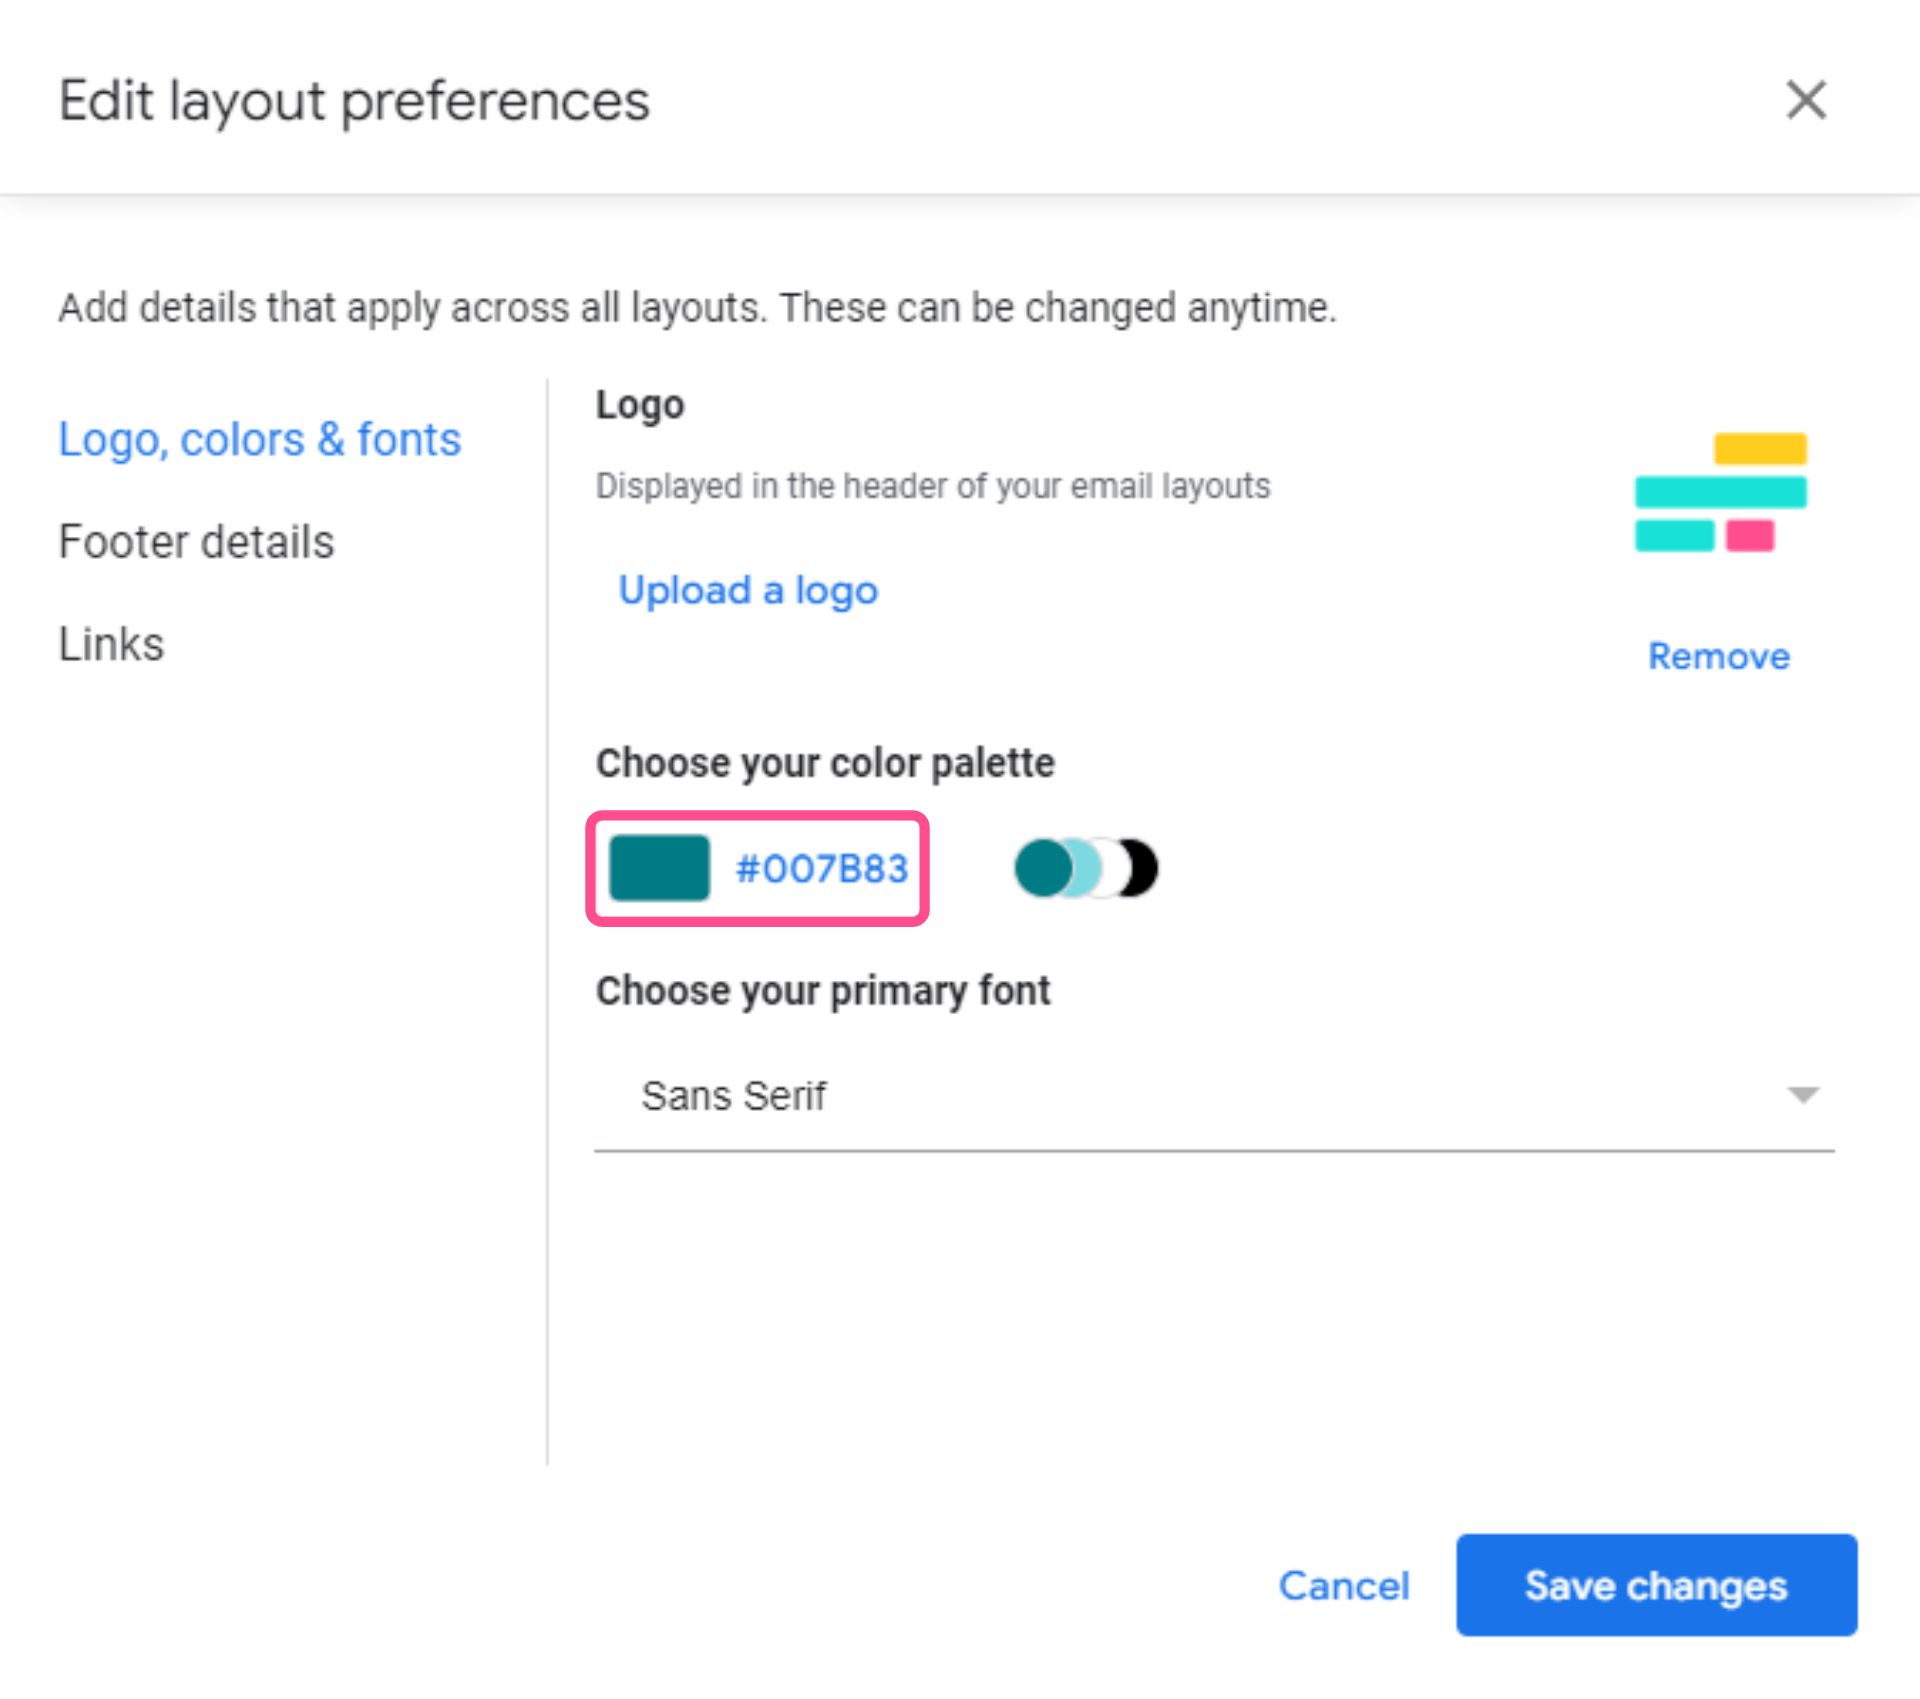
From here, you can either choose one of the default colors if any of them match your brand's primary color or tap the plus sign to add your own color. You can then enter the color's HEX code by typing it in letter/number by letter/number, # included.
Once you've entered the color, press save and select Save changes.
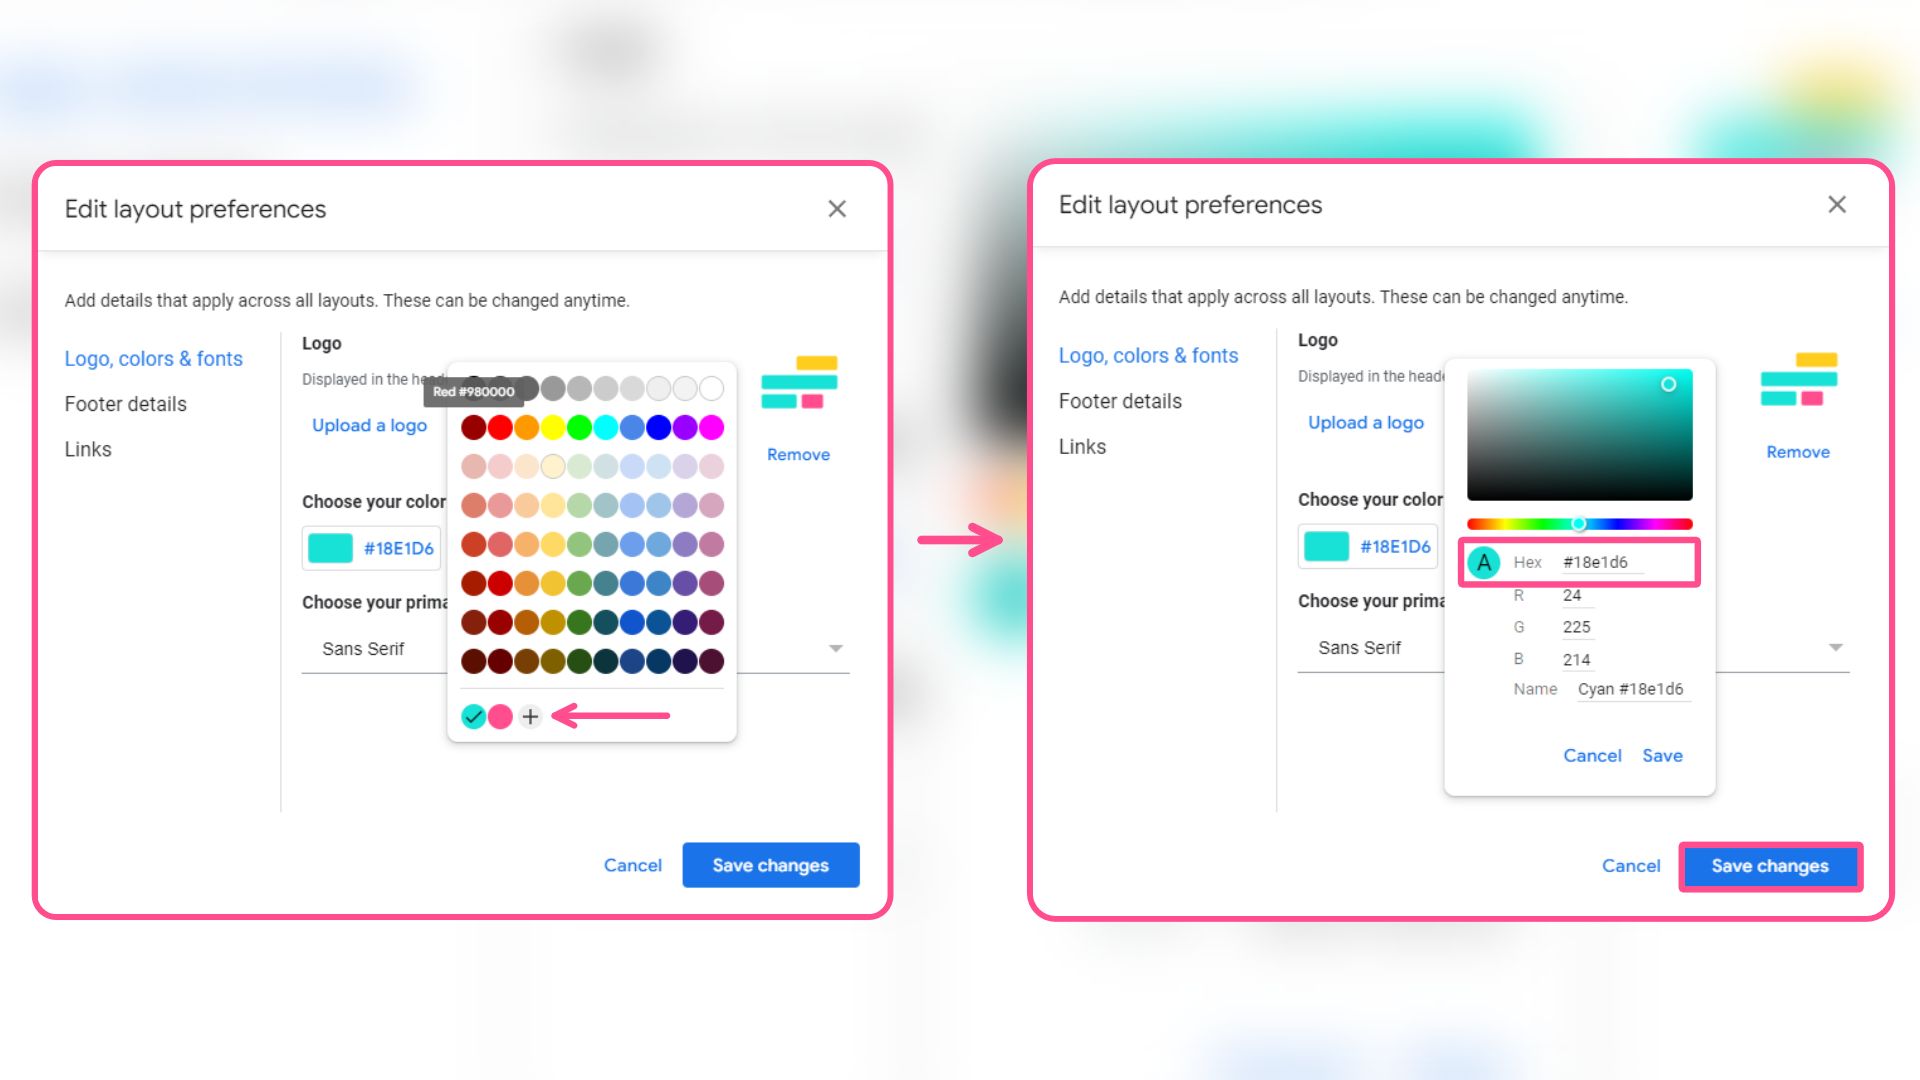
Note: As of right now, there isn't a ton of color customizations through this feature. Users can only enter a primary color and then Gmail will automatically generate three secondary colors that you can't change.
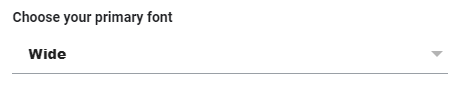
Step 3: Choose a Font
The default font for Google templates is Sans Serif, but there are other options that may fit better with your branding or vibe. Simply click the dropdown arrow and select from a few other Google Font options such as Wide, Verdana, and Comic Sans MS.
Step 4: Customize the Footer
In addition to the main stylistic elements of the template, you can also add business details (like your business address, contact information, hours, etc.) to your email footer.
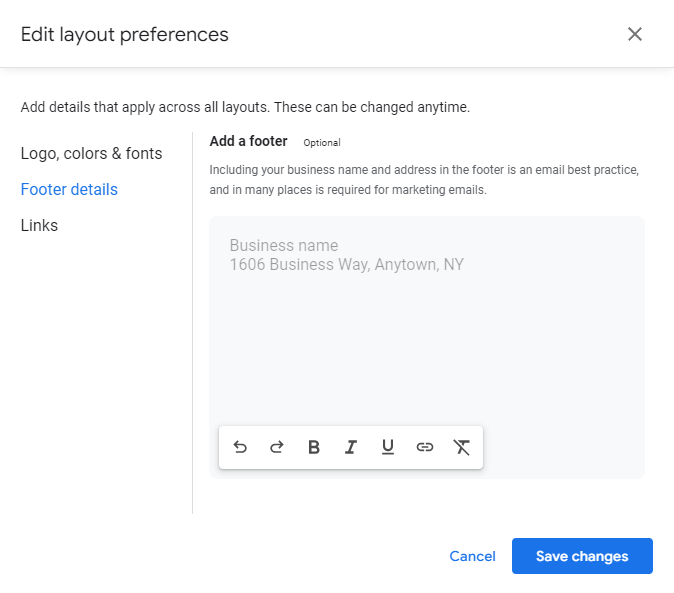
If you don't have a brick and mortar location for your brand, you're still legally required to include an address when sending commercial emails in the U.S. and many other countries as well. Don't worry, though — you don't have to put your home address in your emails. Not only is that unsafe, it's unnecessary.
There are several alternative options for business addresses when you don't have a physical location, including P.O. Boxes, virtual mailboxes, and co-working spaces.
Step 5: Add Your Website and Social Media Links
The new layouts feature also allows you to add links to your website as well as various social media sites, such as Instagram, YouTube, and Twitter.
Once you're satisfied with the information you've added, save your changes, choose the layout that best suits your needs, and press Insert.
All of your styling preferences will be applied to future templates.

You can then customize your template with the content you want to include like product launches, new blog posts, sales events, etc.
How to Use Multi-Send Mode in Gmail
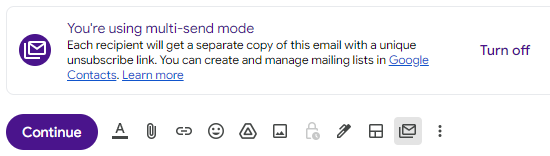
Another new feature that ties in directly with Layouts is Multi-Send Mode. Multi-Send Mode allows small businesses and creators to send emails to their whole mailing list at one time (as opposed to manually adding each recipient — because who has time for that?).
Using Multi-Send Mode, you can send an email to up to 1500 recipients at a time. This is different from just adding multiple recipients in the "To" line. Instead of sending a single email to multiple people, it sends each recipient an individual email.
To use this feature simply click on the Multi-send mode icon indicated by two envelopes. From here, you can then manage your mailing lists using Google Contacts.
If the 1500 recipient limit is too restrictive for your email list, I recommend splitting your list into multiple smaller lists (1500 emails or fewer) and then sending your branded email out in a few blasts, instead of all at once.
For more creator tips and tutorials, check out our Resource Library and subscribe to our YouTube channel! In the meantime, bookmark or read through some of our other resources for your small business or brand: