How to Make a Google Meet Virtual Background
Virtual Backgrounds have finally arrived in Google Meet. In this tutorial, I'll show you how to create a virtual background for your next video call on Google Meet.

We're becoming more acquainted with computer screens in 2020 as workplaces, schools, and just about everything else has moved online. If you don't have a physical office to decorate, you can personalize your computer screen with a virtual background. Google Meet, one of the most popular video conferencing tools in the world now supports virtual backgrounds.
Related: The Best Video Editor Software for Chromebook
Virtual backgrounds can be more than an aesthetic image. They're a great way to help colleagues get to know one another. For ice-breakers, showcase images of your family and recent travels. A branded background could be useful for presentations and to express company pride. Teachers can use virtual backgrounds to create the ambiance of a classroom.
You don't have to be tech-savvy to create a virtual background either. In this tutorial, I'll show you how to create a custom video background for your next video call on Google Meet.
- Upload an image to the Virtual Background Maker
- Resize your image
- Customize your virtual background
- Export and download
- Add your virtual background to Google Meet
Step 1: Upload your Background to the Virtual Background Maker
Head over to the Virtual Background Maker template in Kapwing and upload a photo. Kapwing is a free photo and video editing tool where we'll be creating our virtual background. If you don't have an image ready, search for a photo within Kapwing by clicking the Images tab.


Step 2: Resize your Image
After you upload the image, it's scaled to fit the entire background and might appear a little blurry. Click the Lock Ratio button to scale the image back to its original dimensions. Copy the image and align them next to each other to fit the background. Use the rotate tool on the copied version to create a seamless background.

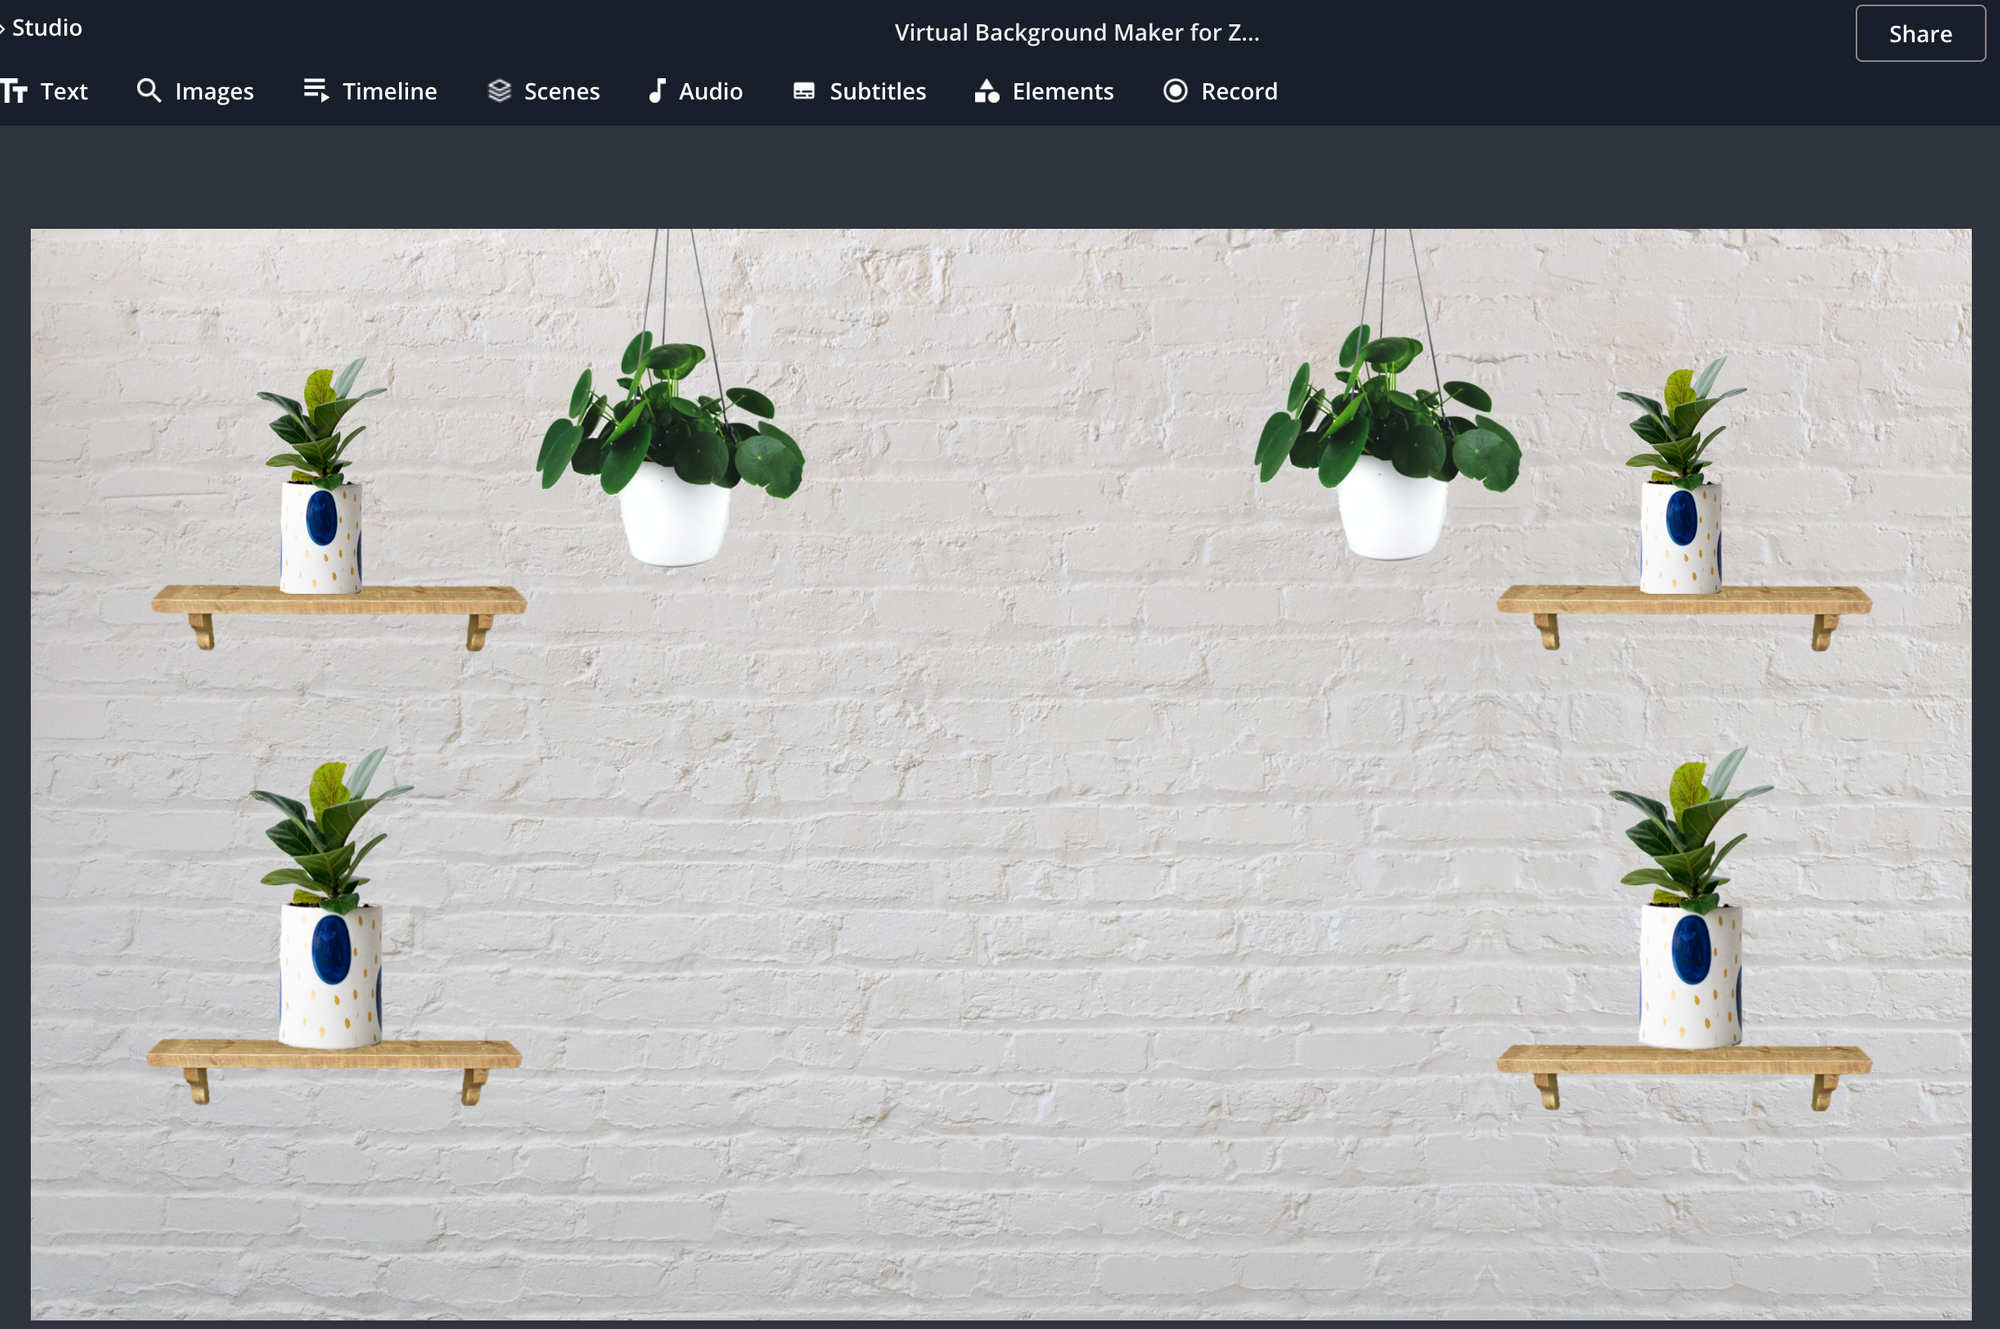
Step 3: Customize your Virtual Background
Personalize your virtual background by adding text and images. I'm creating a plant gallery, so I found images of shelves and plants with the Images tab. To remove the background, select the image and click Erase. Use the Magic Wand to select the background and click delete on your computer to remove it. Adjust the sensitivity bar if the magic wand is selecting parts of the image you want to keep.

Step 4: Export and Download
When you're happy with your background and ready to add it to Google Meet, click Export Image, then click Download. Your background will save to your device as a jpg file that can be uploaded into Google Meet.
Step 5: Add your virtual background to Google Meet
To use your background, open Google Meet, select a call and click the three dots at the top. Next, click Change Background. This will pull up Google's default virtual backgrounds. Click the + to upload your new background and you're all set.
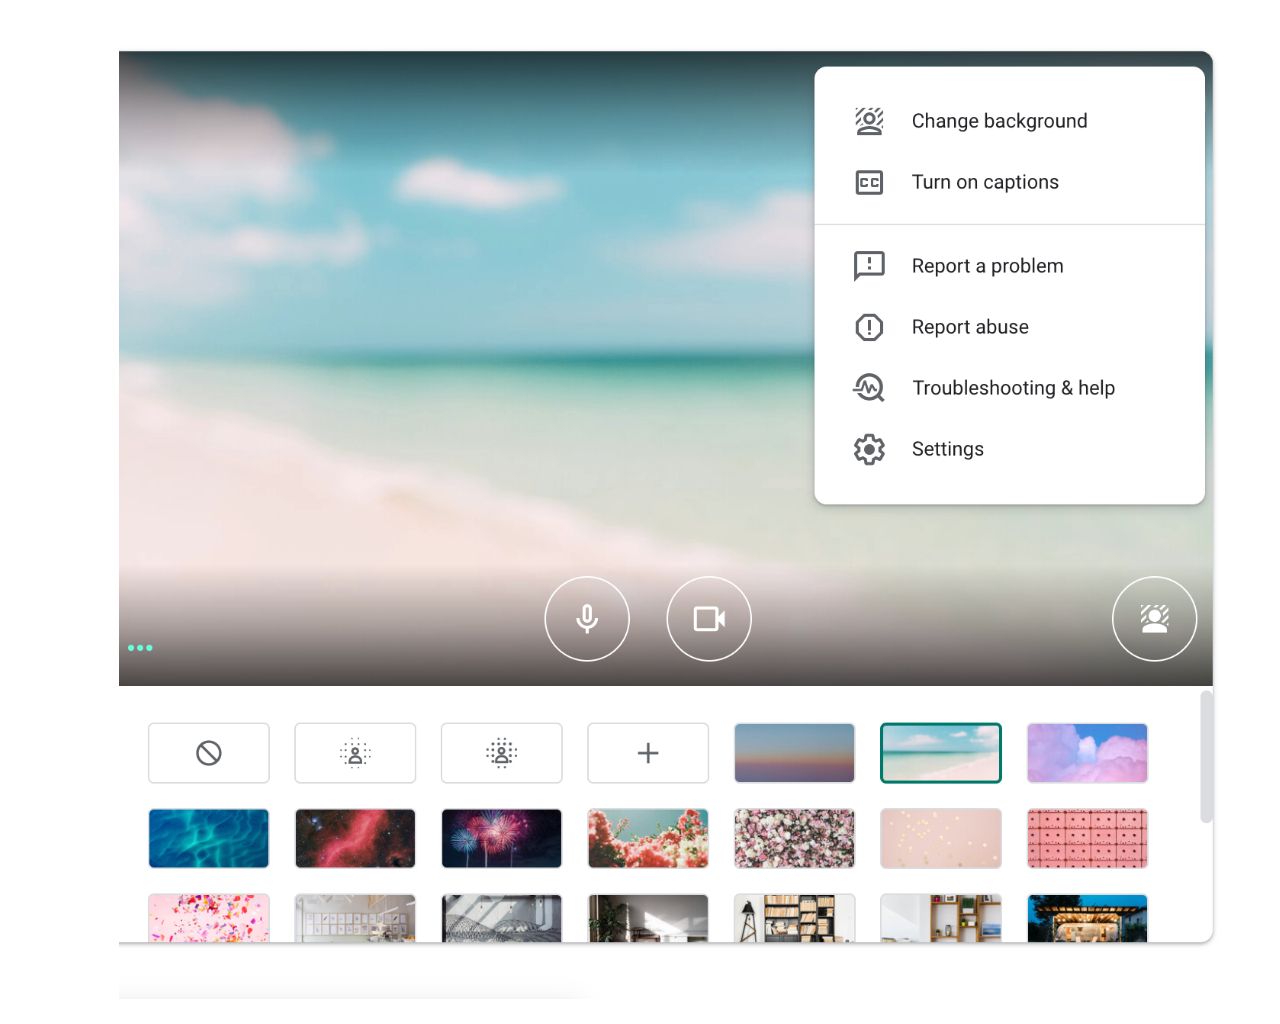
Google Meet recently updated, but the virtual background feature works the same way it used to. You can choose a blurry background, a stock background like the gradient, a branded background with a logo, or any other uploaded image.
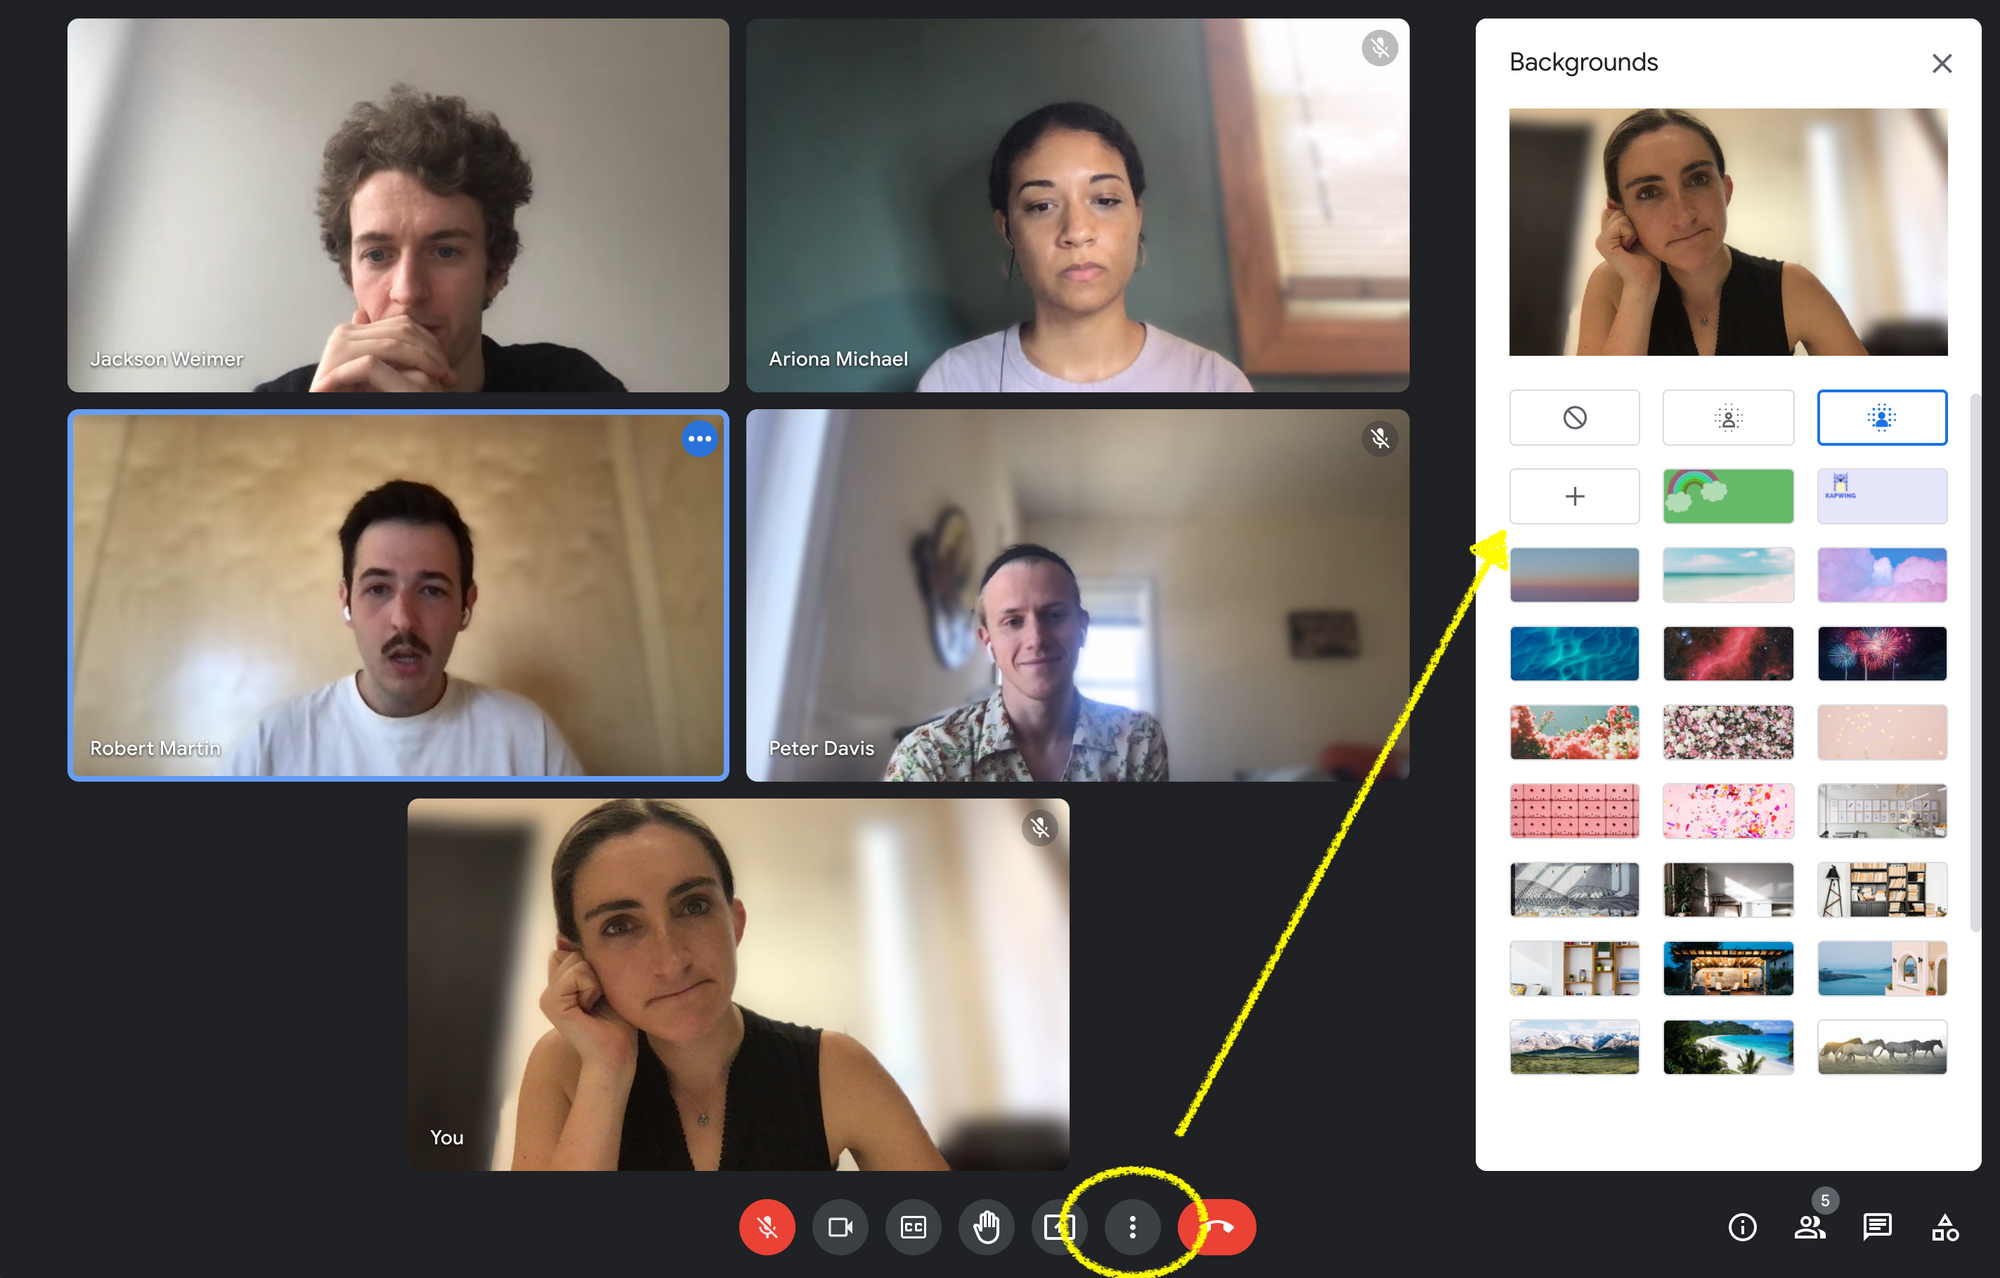
Click the three dot menu at the bottom of the meeting to change your Google Meet background.
I hope this article helped you create the perfect virtual background for your next video call! To find more content like this, check out Kapwing App on YouTube and follow us on Twitter @KapwingApp.
Related Articles: