How to Combine Multiple Audio Files Online
If you’re serious about your audio based content, combine multiple audio files to increase the production value. Maybe you need to add a sound effect, create a playlist or just combine a set of clips into one. In this article, you'll learn how to do it all in a few steps.

If you’re serious about your music, podcasts or other audio based content, combine multiple audio files to increase the production value. Maybe you need to add a sound effect, create a playlist or just combine a set of clips into one. Whatever the case may be, there’s an easy way to do it online.
There’s plenty of tools that help you combine multiple audio tracks, but you need the right one for the job. If you want to combine audio files with a simple drag and drop editor, I recommend Kapwing’s online studio. The web-based app works on every device and it's free to get started. In this article, you’ll learn how to combine multiple audio files with Kapwing in a few steps:
- Upload the First Audio File
- Combine Audio on the Timeline
- Add Other Elements
- Download the Project
1. Upload the First Audio File
First, open the Kapwing studio and ‘click to upload’ your audio or paste a link in the box below. Wait for the first track to upload then you’re ready to add more audio files.
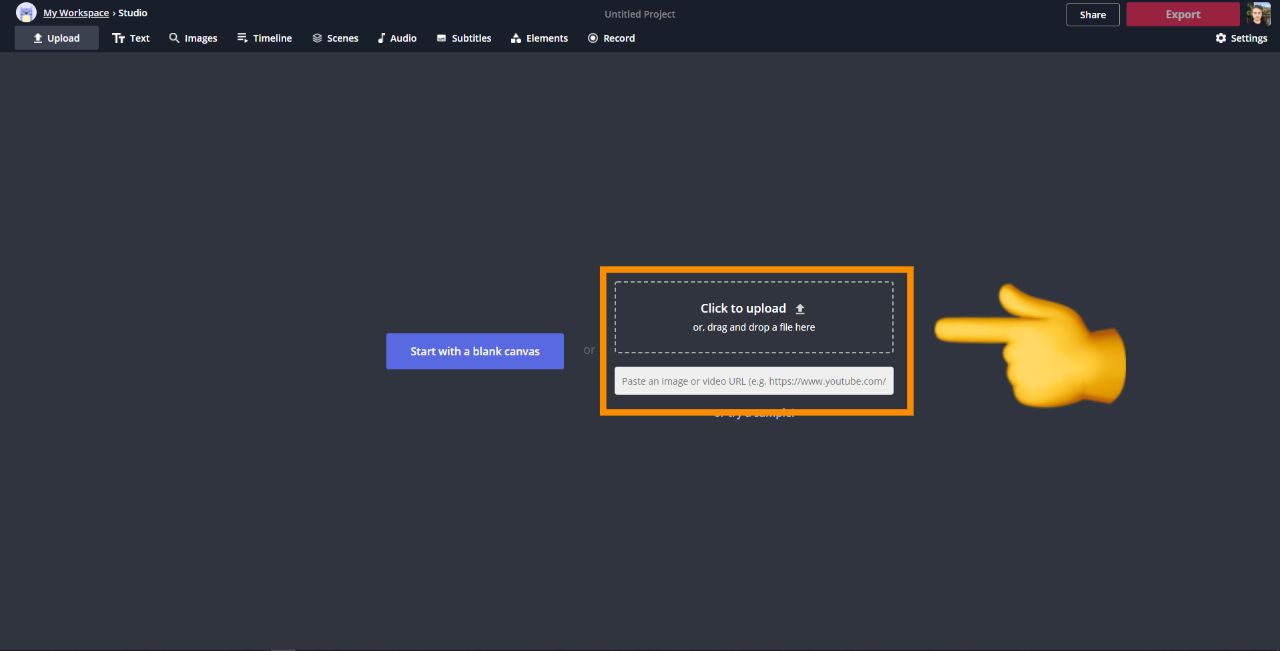
When you upload audio to Kapwing, a blank canvas is made that you can customize with different text and images. If you’re creating a podcast, consider reading our tutorial on how to make professional cover art.
2. Combine Audio on the Timeline
Now, open the ‘Timeline’ from the top bar. On the left, click the ‘Upload’ button to add the audio files to combine. Each new track will appear as an audio layer below the previous. Next, drag the tracks on the Timeline to place each file where you want. You can overlay tracks or place them next to each other.
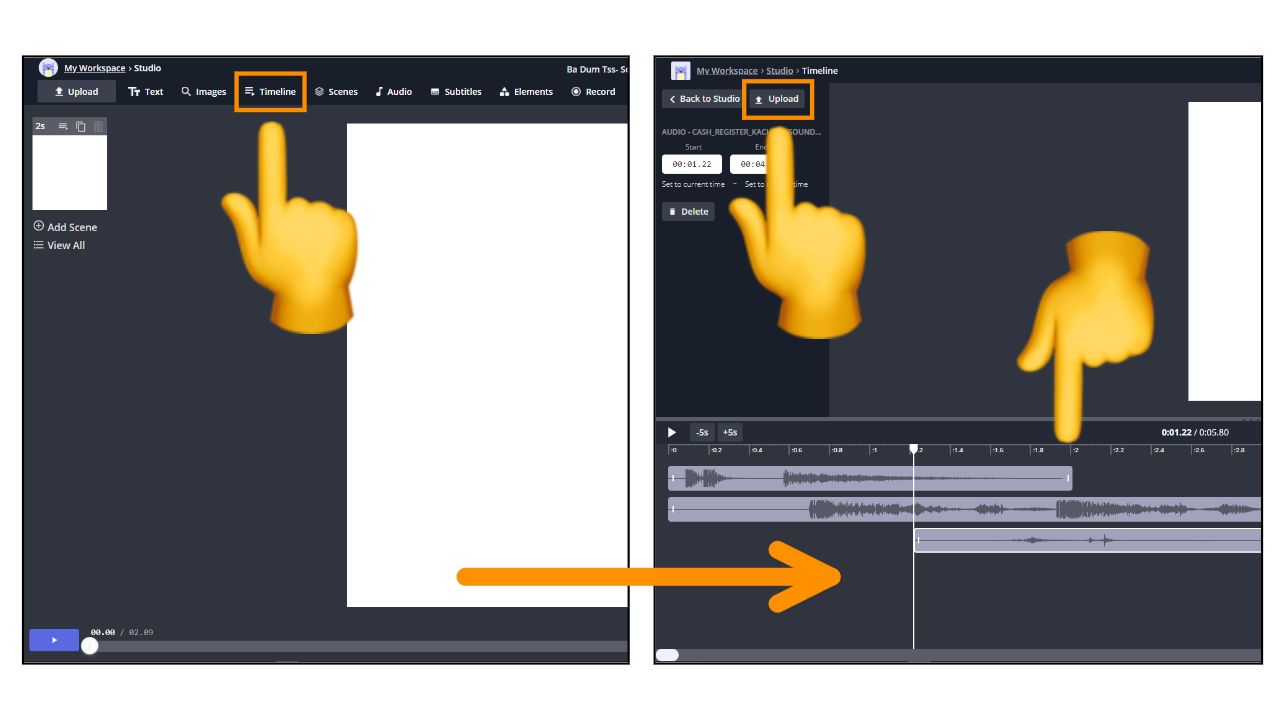
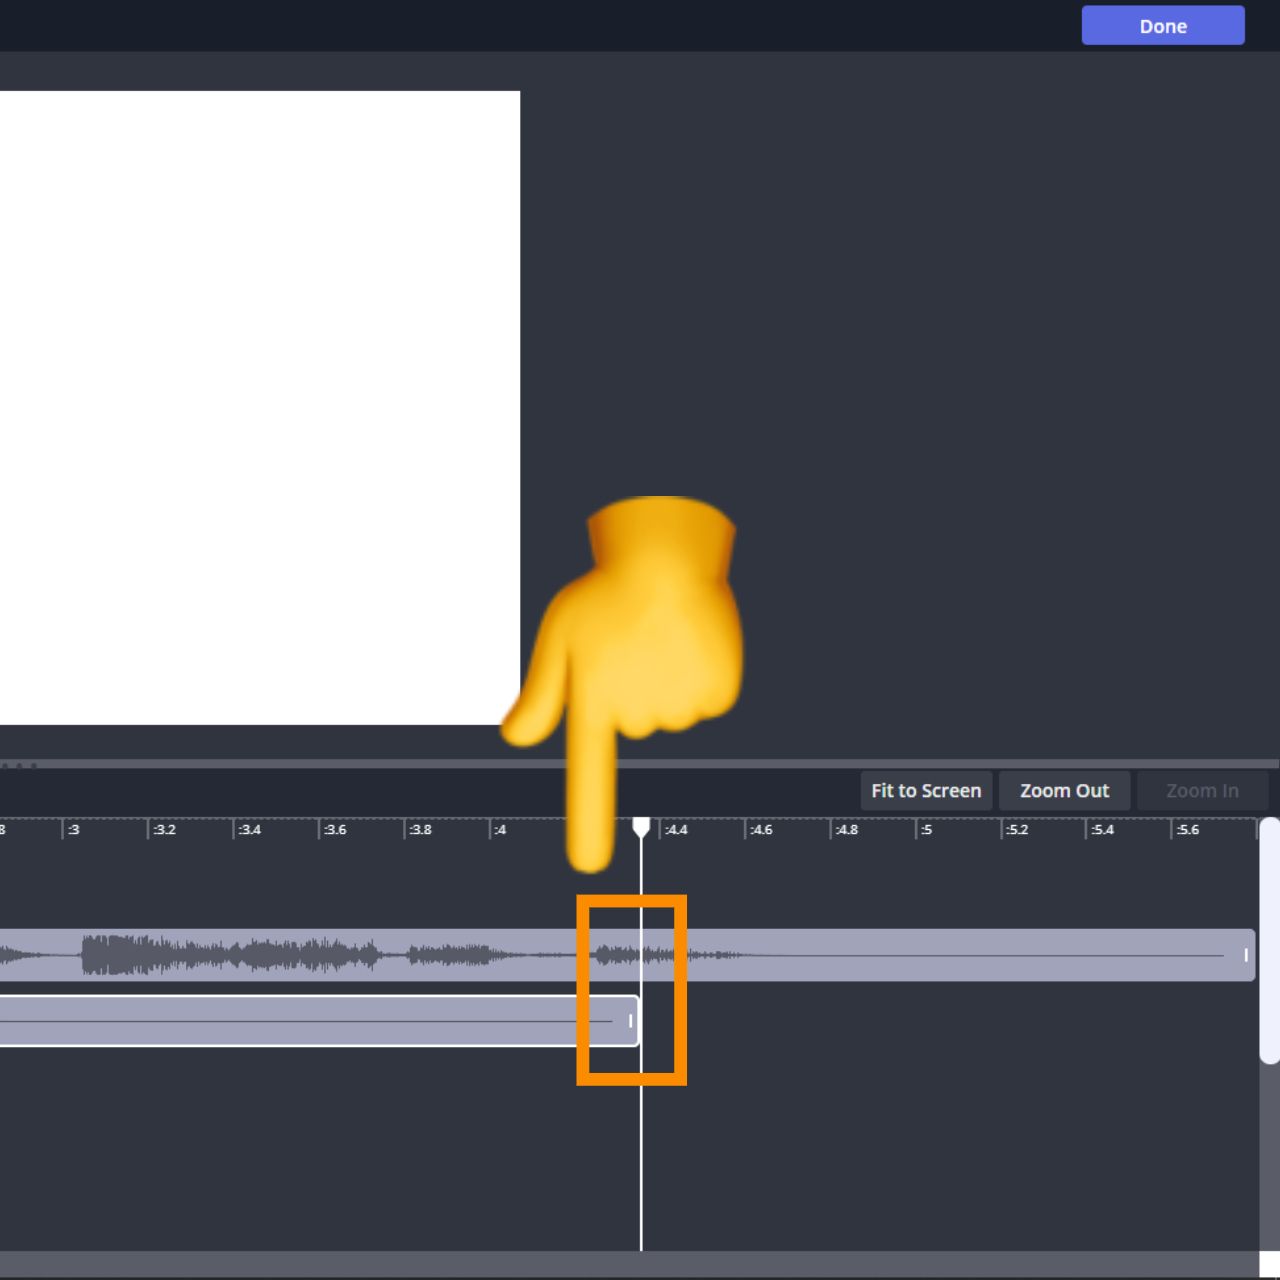
Also, there’s an option on each clip to trim. Just drag the end of the track to the cut part you don’t want. This helps shorten tracks with unnecessary footage.
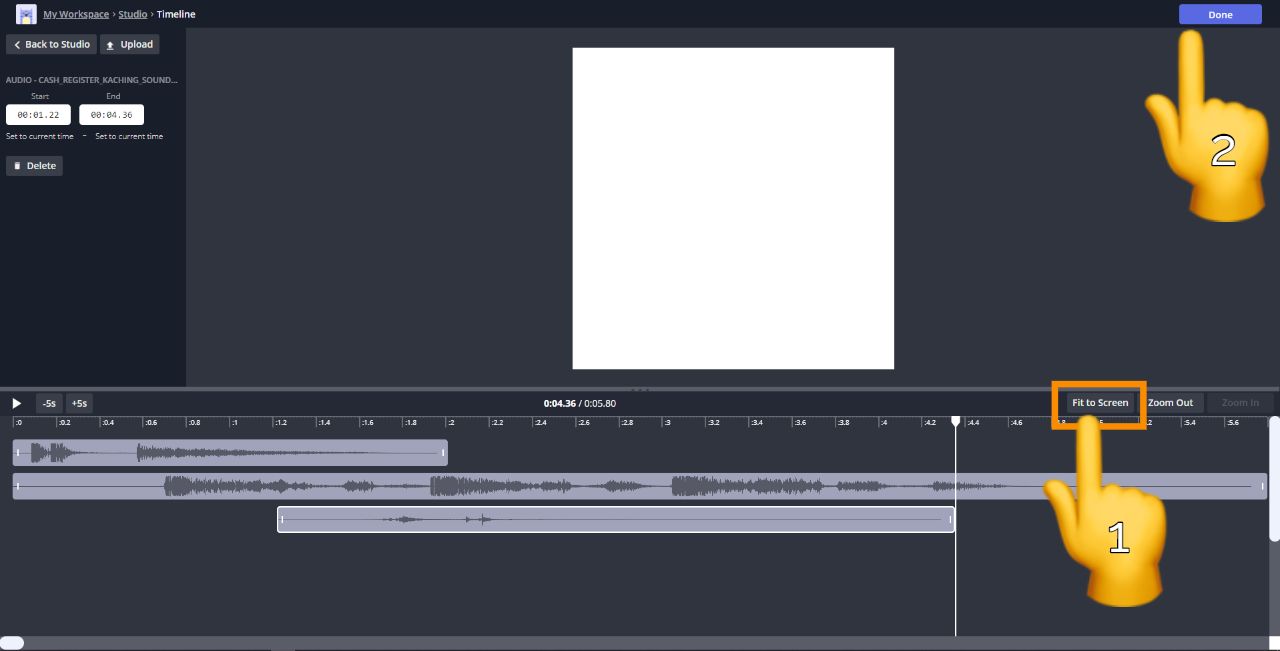
When you finish combining tracks, click the ‘Fit to screen’ button to view all tracks. Check the timeline to make sure each file where it needs to be then click ‘Done’ at the top.
If you have any trouble with the timeline, reference this video about how to use the timeline with ease.
3. Add Other Elements
Since we opened a blank canvas for this audio project, it’s time to customize the look. The studio provides many tools to amplify your message with visuals and animations. Here’s a few examples:
- Create an audio waveform – Make your audio visual by turning it into an audio waveform. Click "Elements" in the toolbar and select "Add a waveform" on the right side.
- Animate the video – Add some movement to your video with video animations. Click the video layer and explore the options in the "Animate" tab on the right side to include effects like fade, drop in, or hue rotate.
- Add text – Click "Text" in the toolbar and use options on the right side to adjust how it looks – you can change the font, color, or even add a drop shadow or animations.
- Add images and GIFs – Bring images and GIFs into the project using the "Upload" button or by searching for them in the "Images" tab.
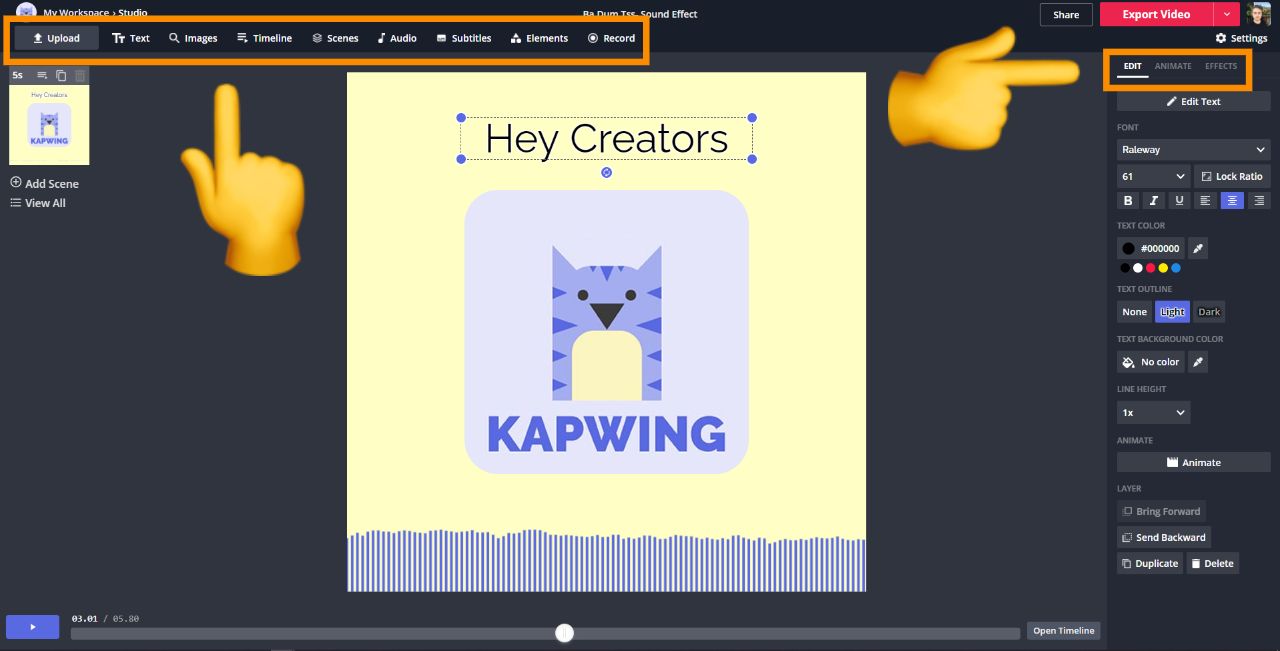
To change the timing for each element layer, open the ‘Timeline’ and adjust the placement and timing for each track similar to the steps above.
Alternatively, you can download the project and upload it to Kapwing’s convert video tool to remove the background and create just the MP3 file. To learn how it’s done, check out his article on the video to MP3 tool.
4. Download the Project
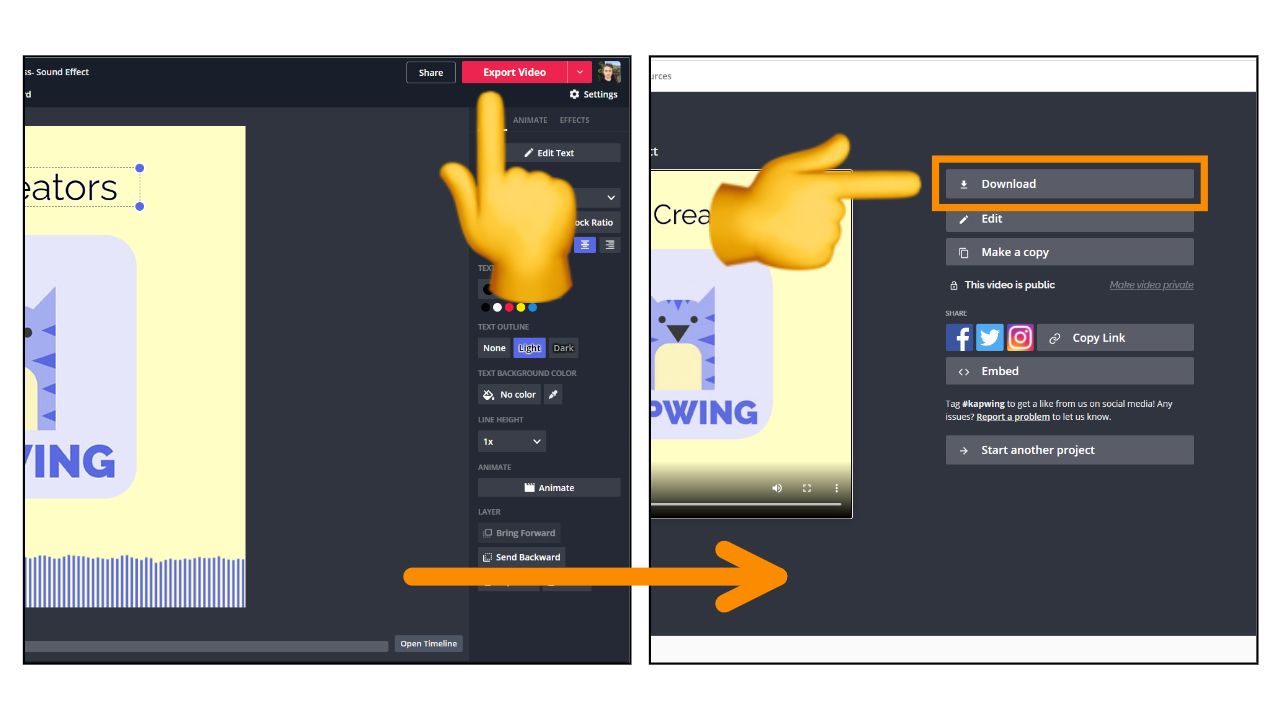
Once you’re satisfied with the project, click ‘Export Video’ in the top right. Wait for it to process and click ‘Download’ on the final screen to save the finished file.
Finally, you have an easy way to combine multiple audio files online. If you liked this guide, be sure to subscribe to the Kapwing Resources page for new tutorials. And, check out the related articles to keep learning:
Related resources:


