How to Make a Graphic Organizer Online (Template Included)
Graphic organizers are a brilliant tool to help you better understand the relationships between concepts, facts, and ideas. Whether you're a student or an educator, we've made it quick and easy to create a graphic organizer online. Get started with our template!
If you're a visual learner like me, then graphic organizers are a brilliant tool to help you understand the connections and relationships between multiple concepts, facts, and/or ideas. If you've never made one before, think of it as a sort of "thought pyramid" with a central idea at the top and supporting ideas split into tiers underneath. Of course, graphic organizers don't have to mimic the shape of a pyramid – you can design yours in any number of ways.
Whether you're a student or an educator, we've made it quick and easy to create a graphic organizer online that resonates with your specific learning or teaching style. In this tutorial, I'll show you how it's done:
- Start with our Graphic Organizer Template
- Rearrange and Add Shapes
- Add Text
- Finalize your Design
- Download and Share your work
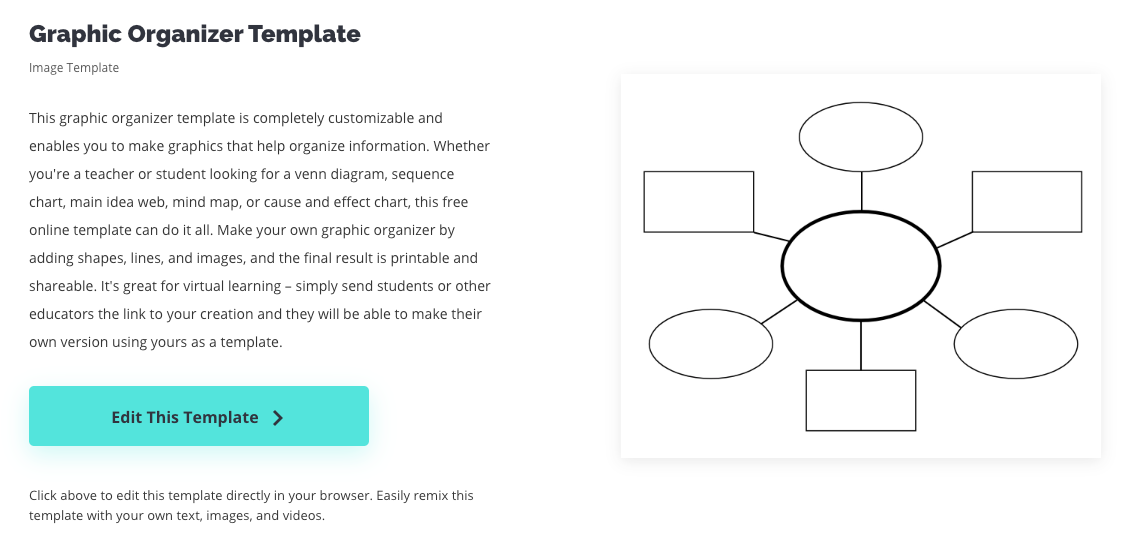
1. Start with our Graphic Organizer Template
Start by opening our customizable Graphic Organizer Template. Click "Edit This Template" to open the Kapwing editor where you can make changes and create your own, custom graphic organizer.
2. Rearrange and Add Shapes
You can use the template as is or change it up by clicking and dragging the Shapes into different formations. Delete Shapes by selecting them and hitting the "Delete" button or duplicate them by hitting "command" + "c" then "command" + "v."
You can even add new shapes. Open the Elements tab then select the shapes you'd like to add to your canvas and arrange.
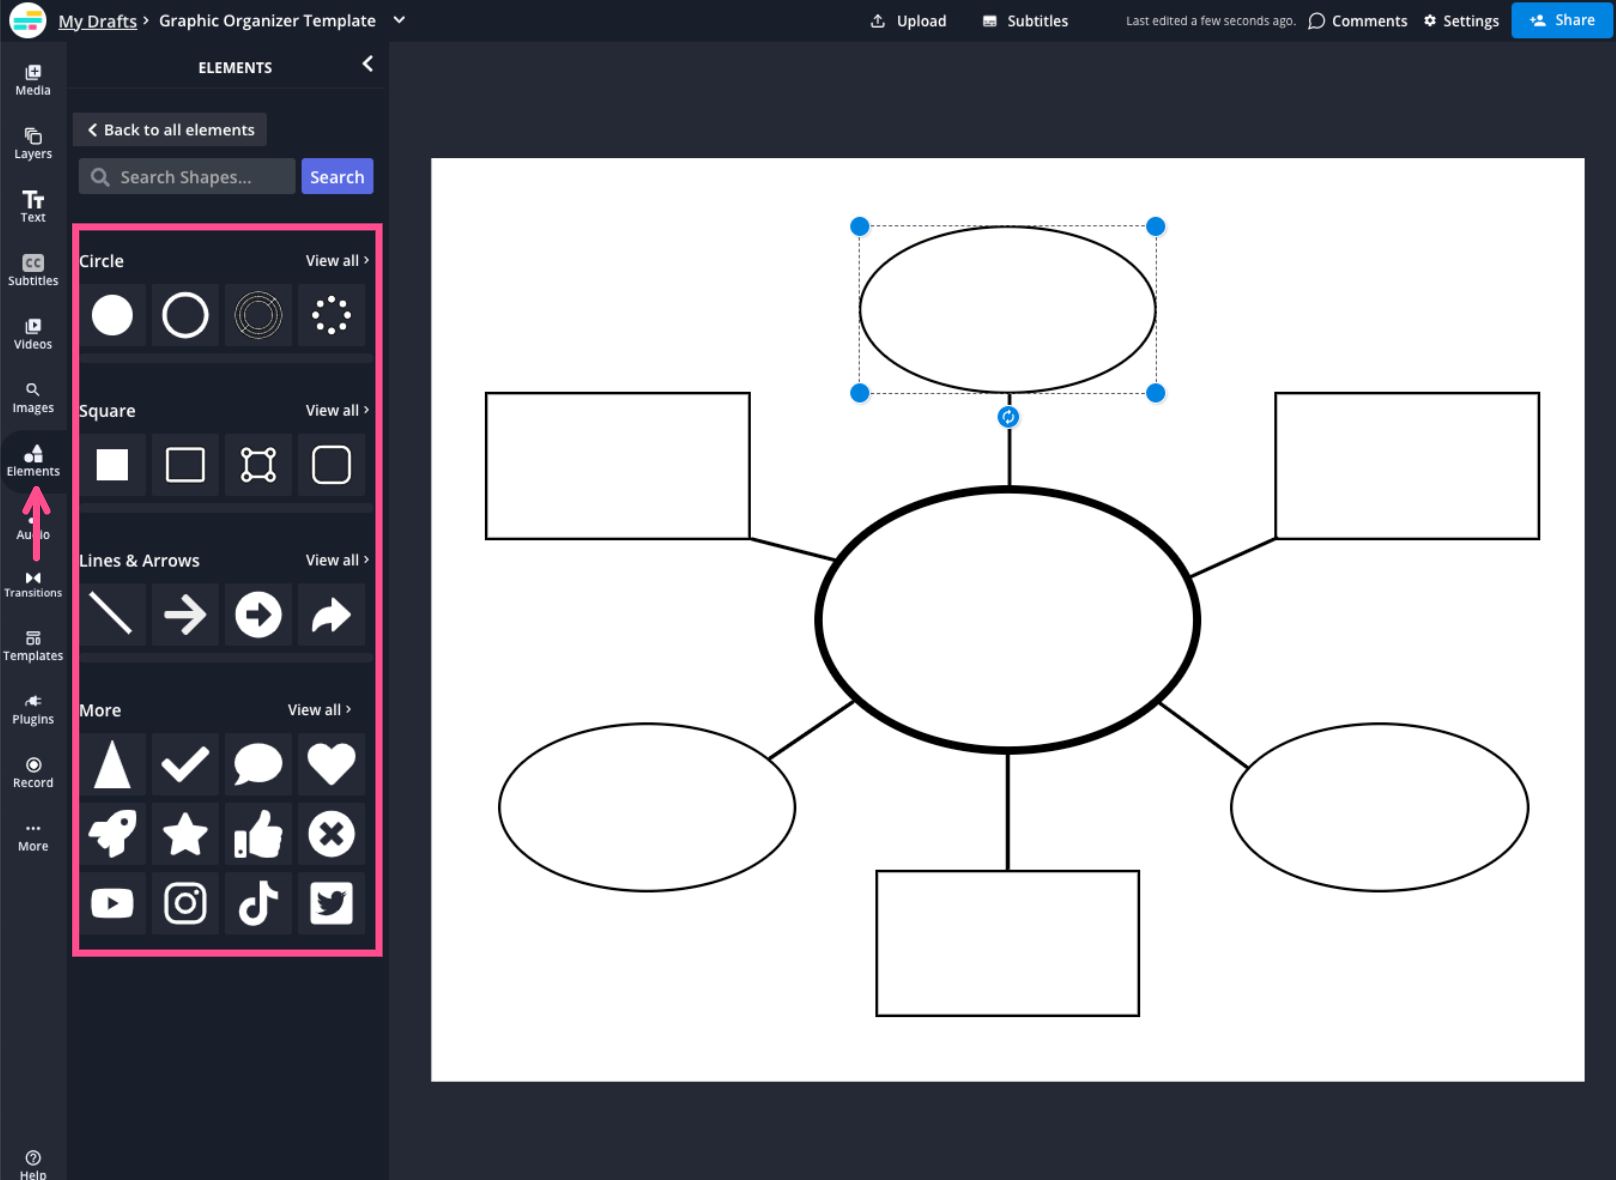
If you've added a new shape, you'll need to make the center of the shape transparent. Select the shape, then select "Fill Color" under the Edit tab. Click on the no-color option (or any color you want!).
Connect your shapes with lines to signify the correlation between each idea. You can change the color, width, and style of the lines (or make them into arrows!) in the Edit tab.

Don't be discouraged if it takes a while to get the structure just right or if you need to Google "graphic organizer designs" for inspiration. You may also want to take a second to consider the flow of your written content or even map it out in a separate Kapwing Project. This information will most likely determine the final design of your graphic organizer in Step 4.
3. Add Text
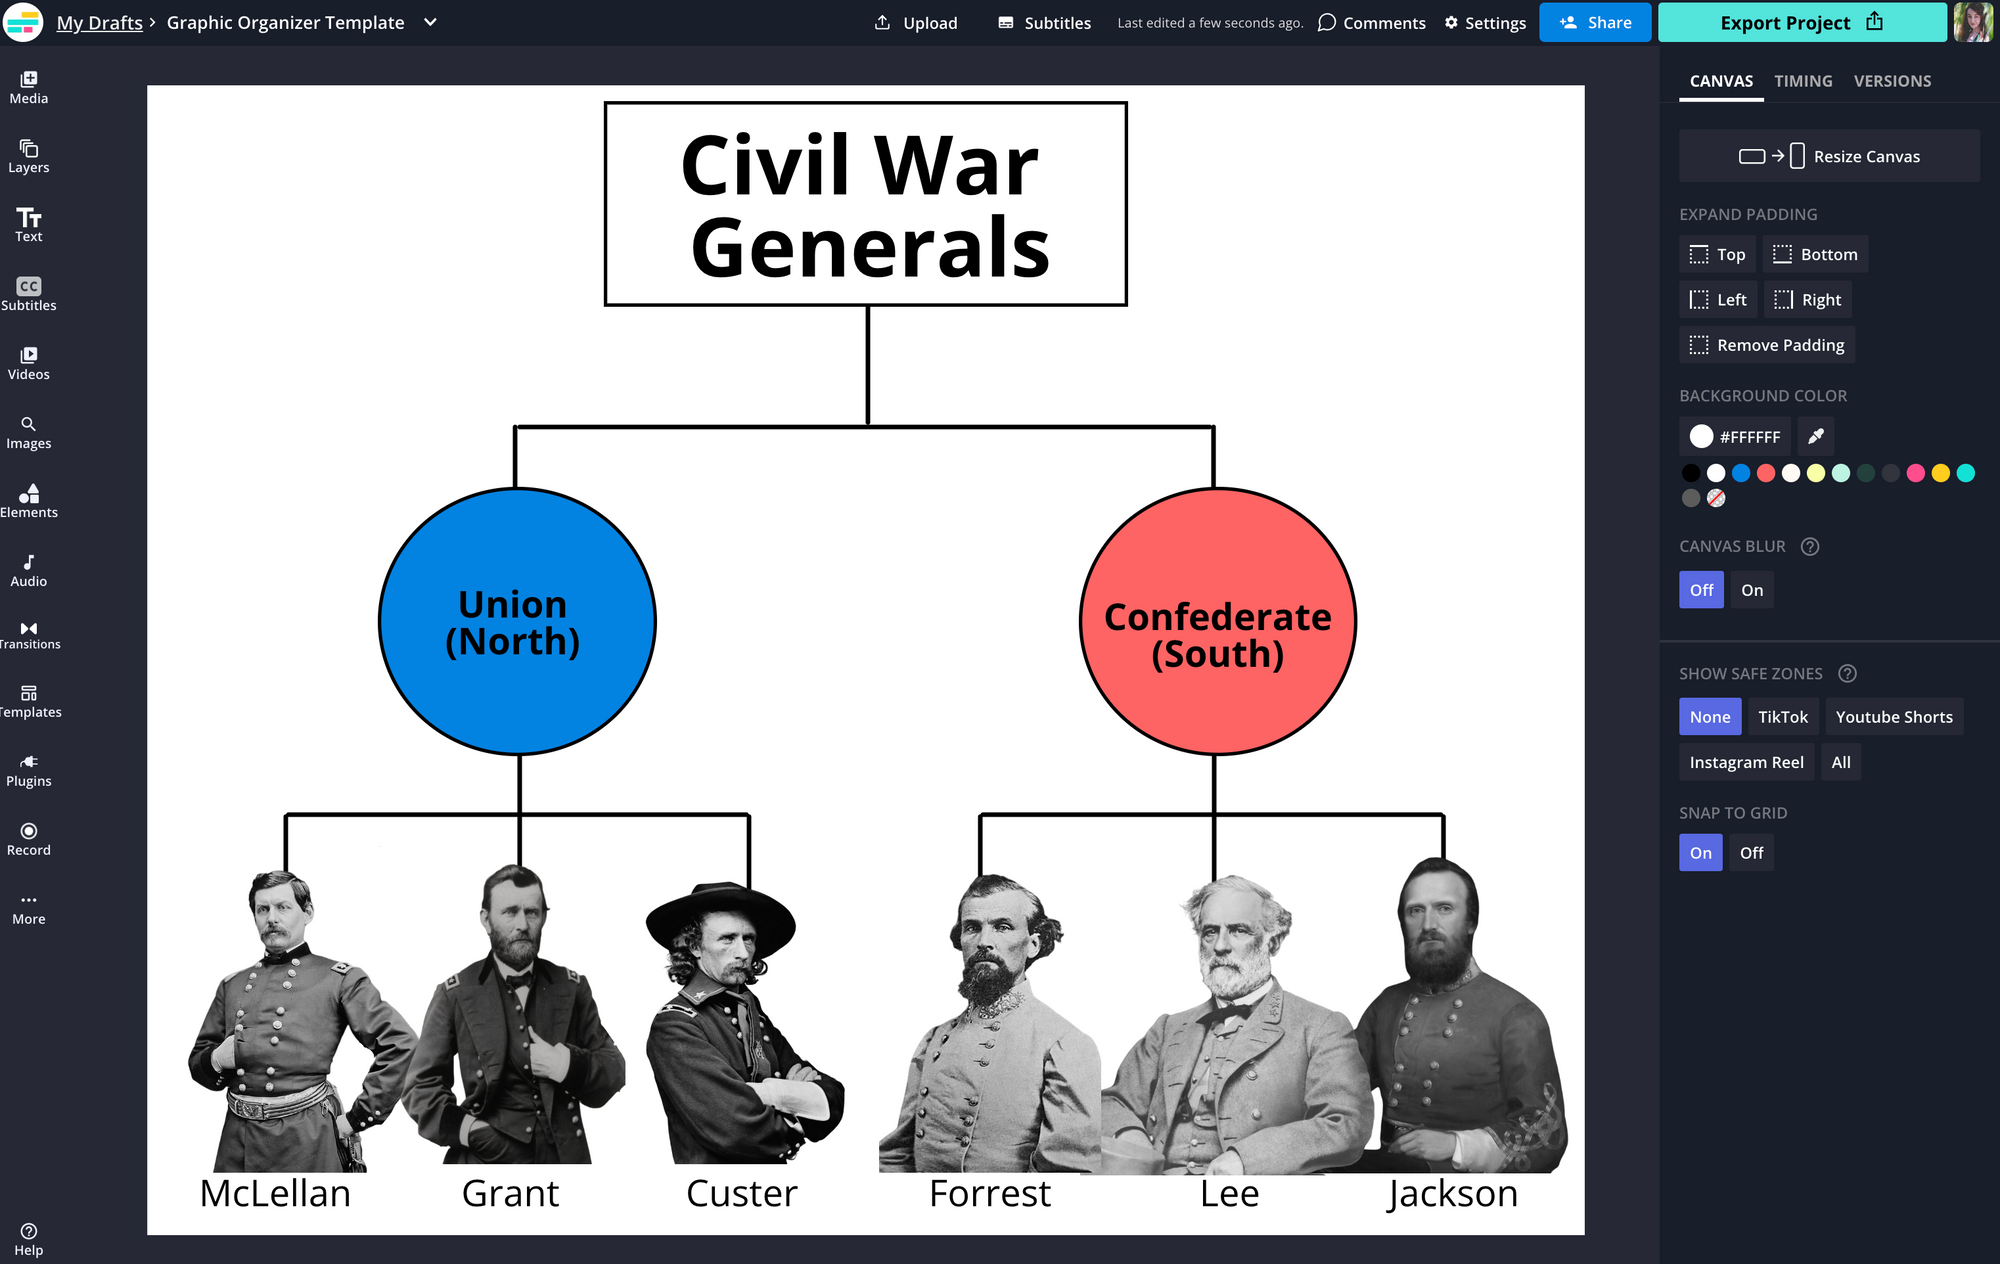
Add text to your canvas by clicking "Text" and fill out each text box with the information you'd like to include in your graphic organizer. Click and drag each text box to position it in the Shapes. Change the font, size, and color of the text using the Style Toolbar.
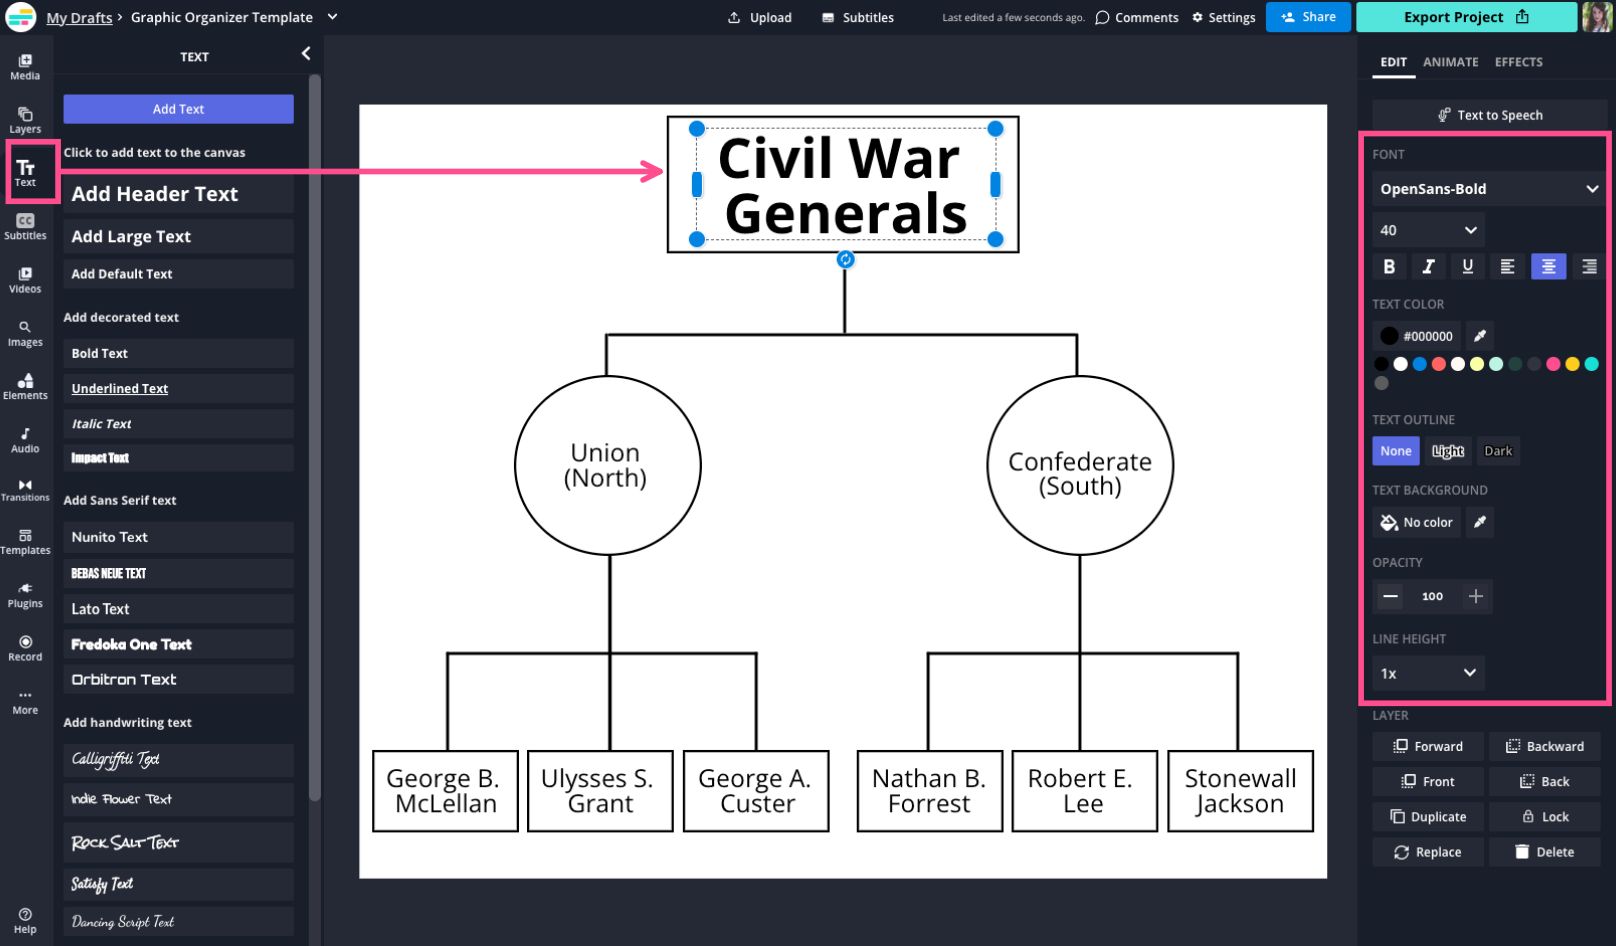
In this example, I'm demonstrating which generals fought for the Union and which fought for the Confederacy during the Civil War.
4. Finalize your Design
Polish off the design of your graphic organizer by adding any final touches (i.e. background colors, pictures, gifs, etc.).
5. Download and Share your work
When your graphic organizer is complete, click "Export Project" and Download the finished product. If you're a teacher, click "Copy Link" and you can email the link to your graphic organizer directly to your students, so they're able to download and print it at home. Or send them this article and our video tutorial so that they can make their own!

If you're teaching or learning from home this year, we've got your back. Students and educators get access to Kapwing Pro for free. Check out Kapwing for Edu and sign up to get started.
In the meantime, you can browse our Resource Library — we've created tons of helpful content tutorials for teachers and students and we publish new articles every week, so check back for the latest ones!
Related articles: