
Getting Started with Kapwing Studio

Whether you want to edit photos, videos, a video's audio, or GIFs, Kapwing Studio gives you more editing functionality than any other editor on the web.
In this article, you will learn how to do the following basic editing functions in the Studio:
1. Upload Content to the Studio
2. Add Audio
3. Add Text
4. Add Shapes
5. Add Images
6. Crop, Resize, and Rotate Layers
7. Trim Video Layers
8. Add Filters
9. Adjust Speed
10. Make a GIF
For in-depth tutorials, check out our YouTube channel, blog, or resource page.
Uploading Content to the Studio
Kapwing supports video and photo uploads of nearly every file type. All you need to do is go sign in at Kapwing.com and click "Create a Project". We recommend creating an account which will allow you to export content without a watermark and save projects to a folder.
If you want to import a video, photo, or GIF from somewhere on the internet, then all you need to do is paste the URL in the field on the right. And if you're uploading your content from your own device, just select "Click to Upload" and find the file in your file browser. If your file is accessible, you can even drag & drop it into the Studio window.
Reminder: Whenever you add new content to the timeline, you can rearrange your layers by clicking on a layer and choosing "Forward" or "Backward" from the panel on the right.
Adding, Removing, and Editing Audio
Kapwing Studio also gives you the best audio editing tools. Utilize our Clean Audio feature to remove background noise. To mute a video, simply select the video or audio file and click the volume icon located in the right toolbar. You can also adjust the volume by clicking and dragging the knob to the right of "Volume".
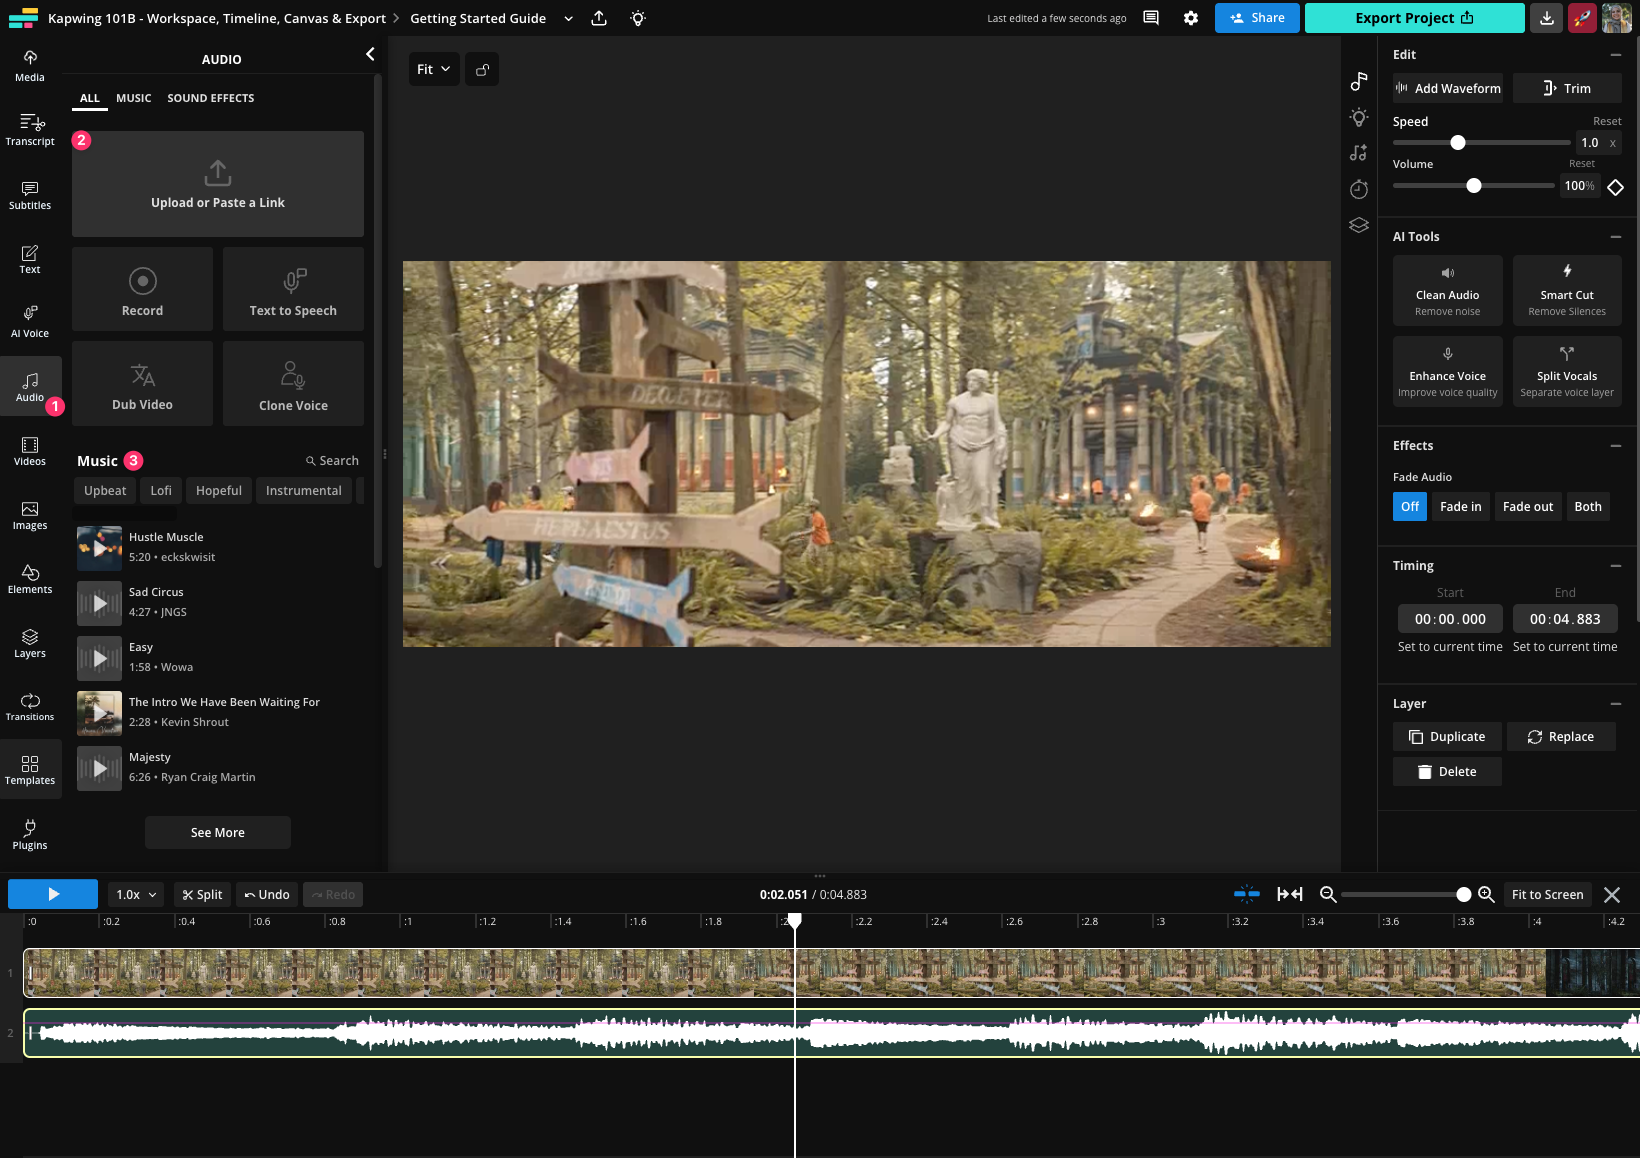
To add a different audio track, click "Audio" (1) from the left toolbar. In the Audio window, you can upload music from your device or from web sources like YouTube and SoundCloud (2). There are also some pre-uploaded tracks available under "Music" (3).
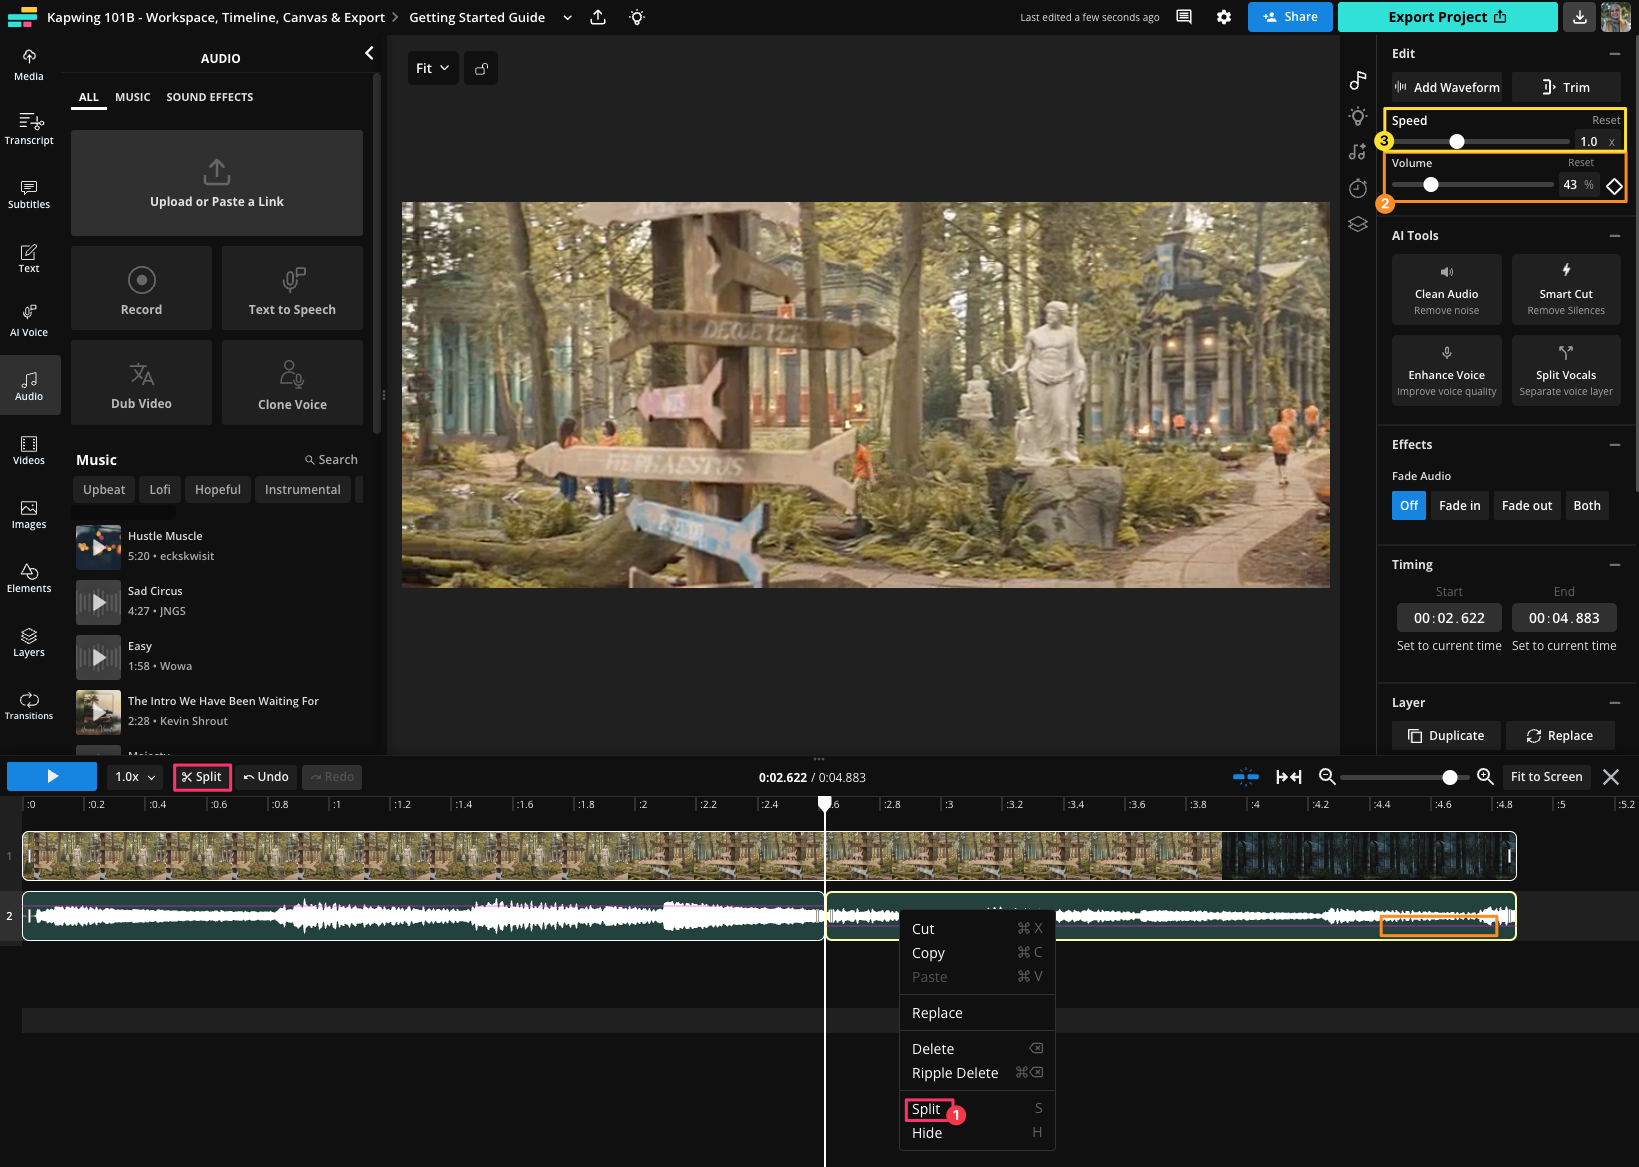
Once you've added your audio track, you can trim it/split it (1), adjust its volume (2), and speed it up (3). If you haven't muted your video, the new audio track will play on top of the existing audio – if you'd like to hear only the new track, just mute the video! Bonus: If the audio is not long enough, you can copy and paste it so it loops.
Adding Text
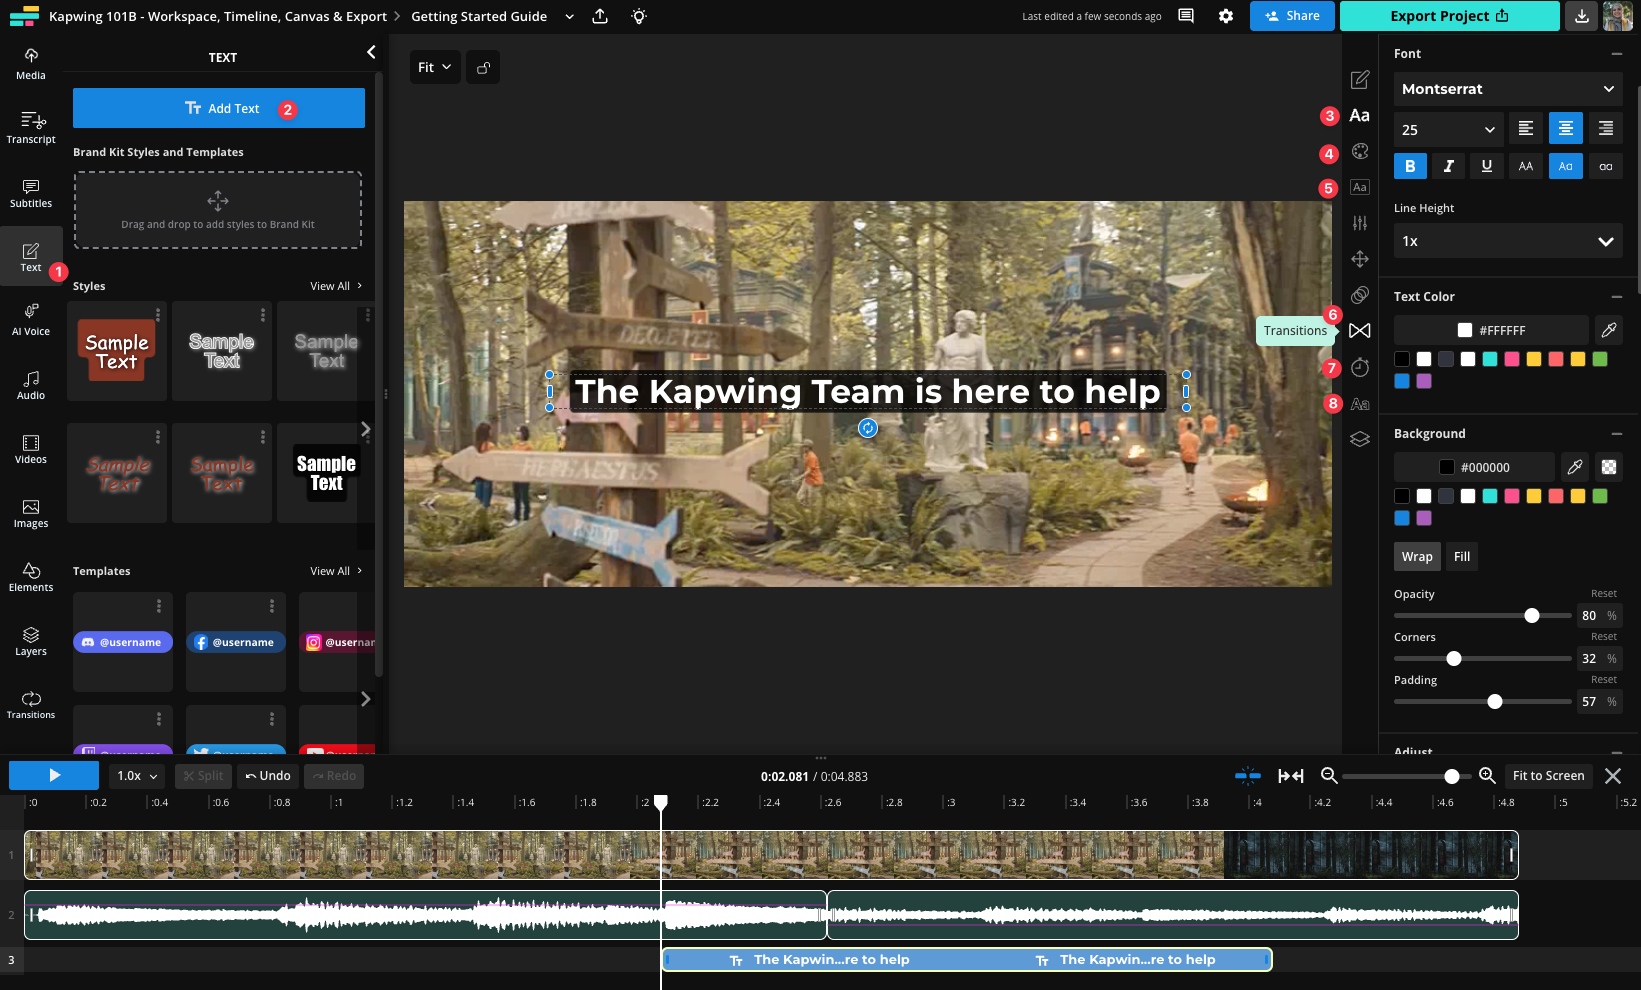
Select the area on the timeline or on the project you'd like to add text to and select "Text" (1) from the left toolbar. Click "Add Text" (2) or select a stylized text option to add a text box to the canvas. Double-click on the text box to add and edit your text. In the Text Edit window on the right, you can edit font (3), text color (4), background (5), and apply boarder to the text (8).
You can also enter a precise hex value for your text's color and edit its outline. And you can click "Transitions" (6) to add exciting and eye-catching animations to your text! To adjust the time that your text is visible use the "Timing" panel (7).
You can click & drag anywhere on a text box to reposition it, and you can click & drag a corner of the box to resize and rearrange the text inside the box. The rotation button on the bottom edge of the box allows you to rotate your text box to any angle.
To add subtitles instead of text, you can click on the Subtitles icon in the left side bar. You'll have the option to auto-generate subtitles or manually put them in.
Adding Shapes
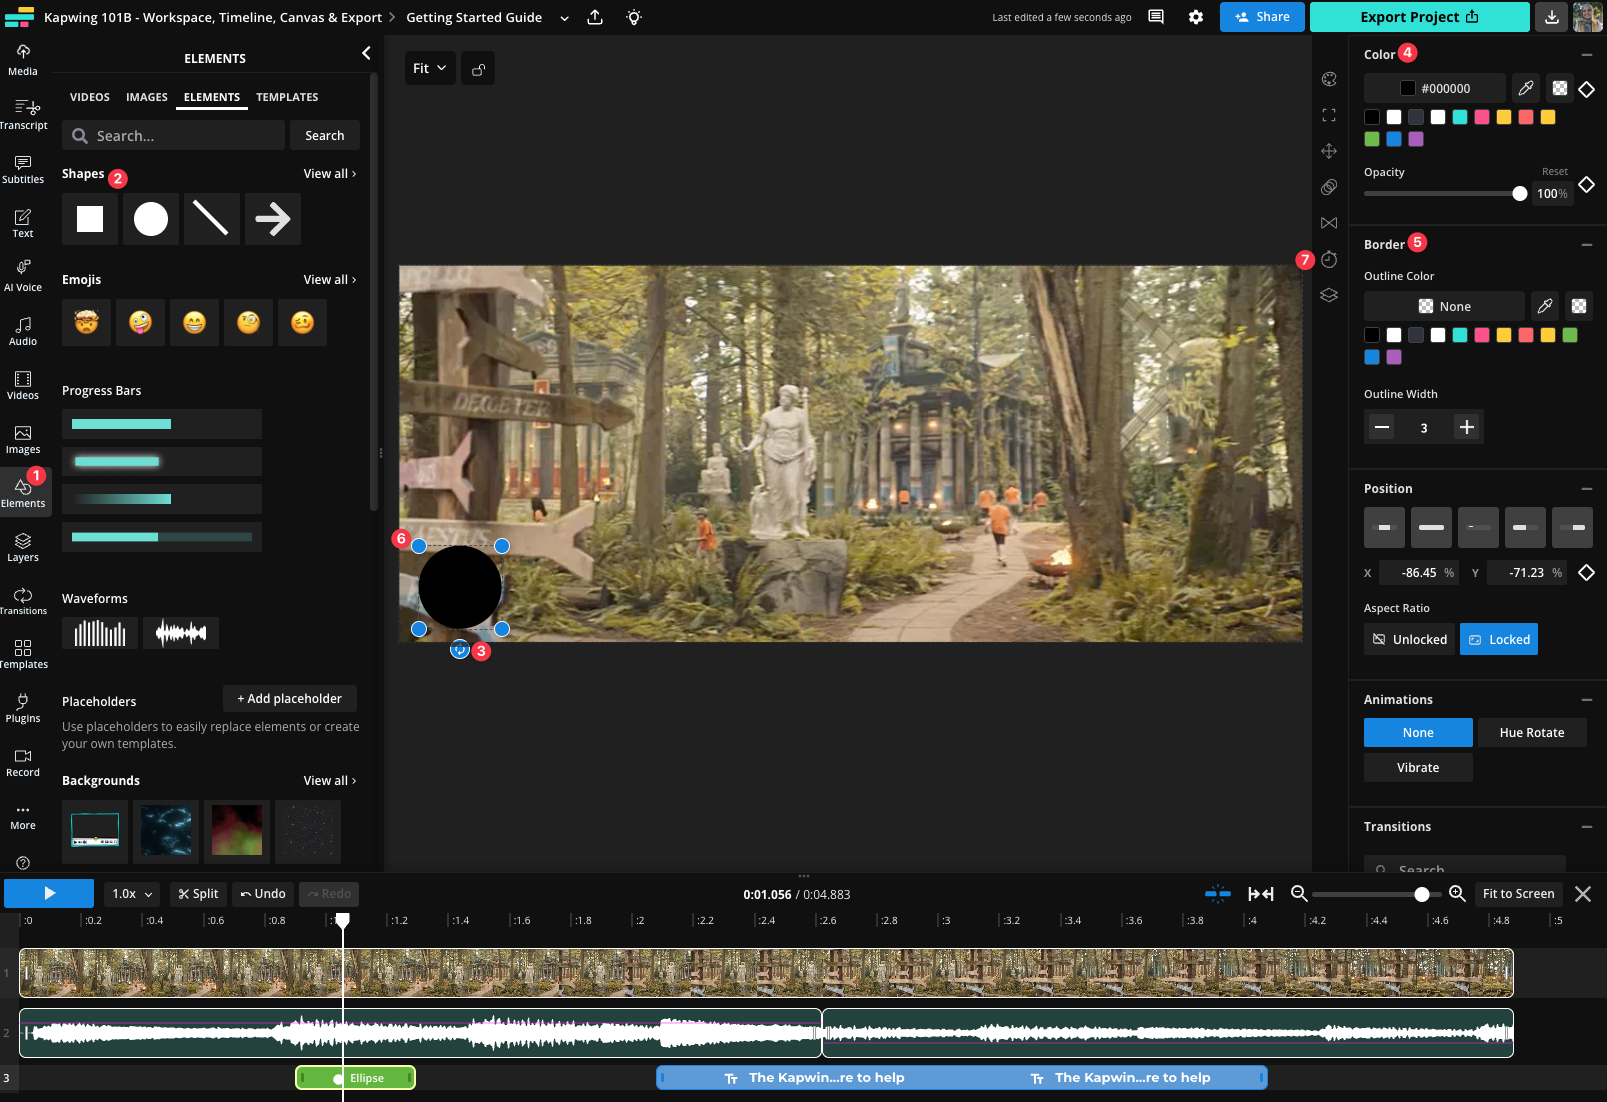
Start by selecting "Elements" (1) from the left bar and choose one of the available shapes (2). Once you've added your shape, you can rotate it with the rotate button on the bottom edge (3), change its color precisely (4), edit its outline's color and thickness (5), resize it by clicking & dragging its corners (6), and change when it appears and disappears in the timeline (7).
Adding Images
If you want to add images to your project, click on "Images" from left tool bar or select "Images" in the Elements tab. Here, you can search the internet for pictures that you can import directly to your Studio project. You can also click "Upload" in the top toolbar to paste a link or search your file browser for images. Once they're in the Studio, you can resize, crop, reposition, rotate, and adjust your pictures.
Cropping, Resizing, and Rotating
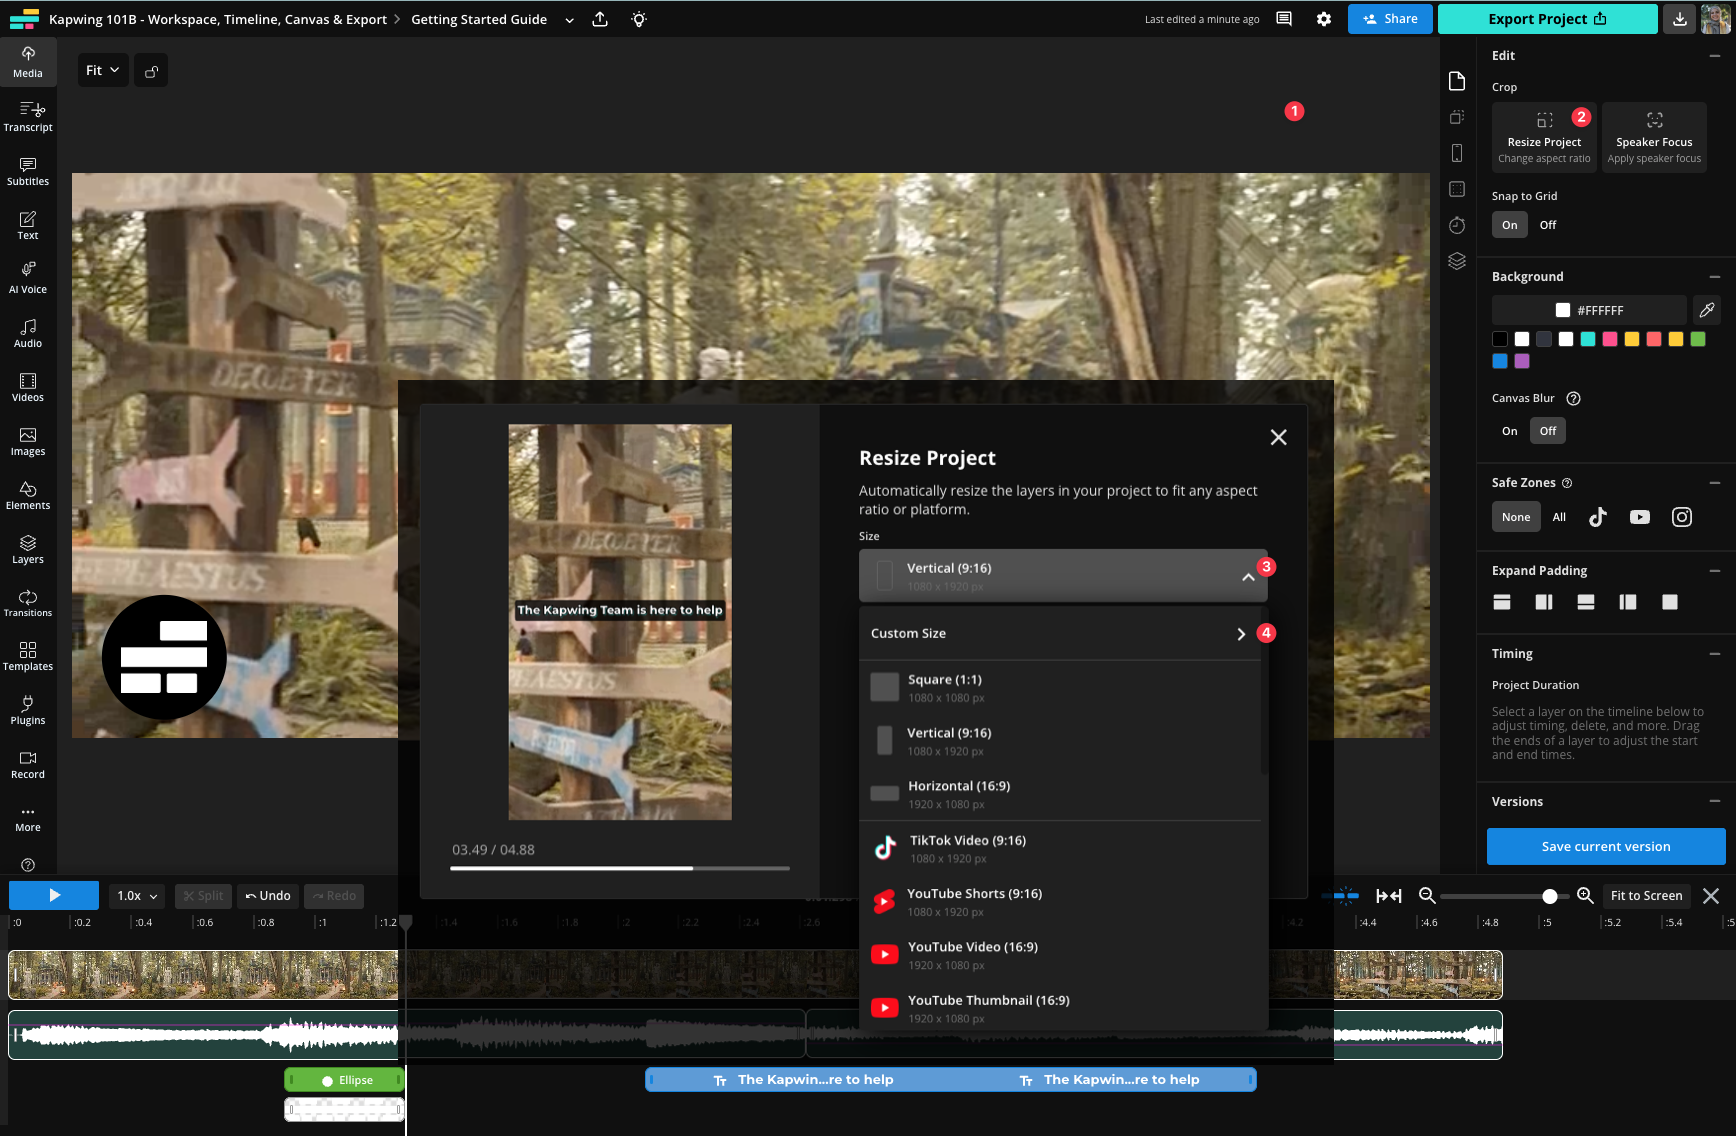
Kapwing Studio gives you tons of options to crop & resize your content. If you want to change the size or dimensions of your canvas, first deselect all layers. You can do this by clicking in the gray area outside of the canvas (1). Now, you can select Resize Project (2) and in the drop down (3), select a pre-sized option from or select "Custom Size" (4). Here, you can enter the precise dimensions you'd like for your project, or choose other preset aspect ratios.
You can additionally add padding to any side of the canvas. You can also click & drag a corner of your content, deselect it by clicking anywhere outside it, and click "Remove Padding" on the right side of the window to trim the canvas to the dimensions of your content.
If you want to change the size and dimensions of your content and would also like to control what parts are shown, click on a layer and select "Crop" from the right menu. Now, you can click & drag the corners and edges of your content and shift the object's "mask" to control the visible portion of your content.
Trimming Video
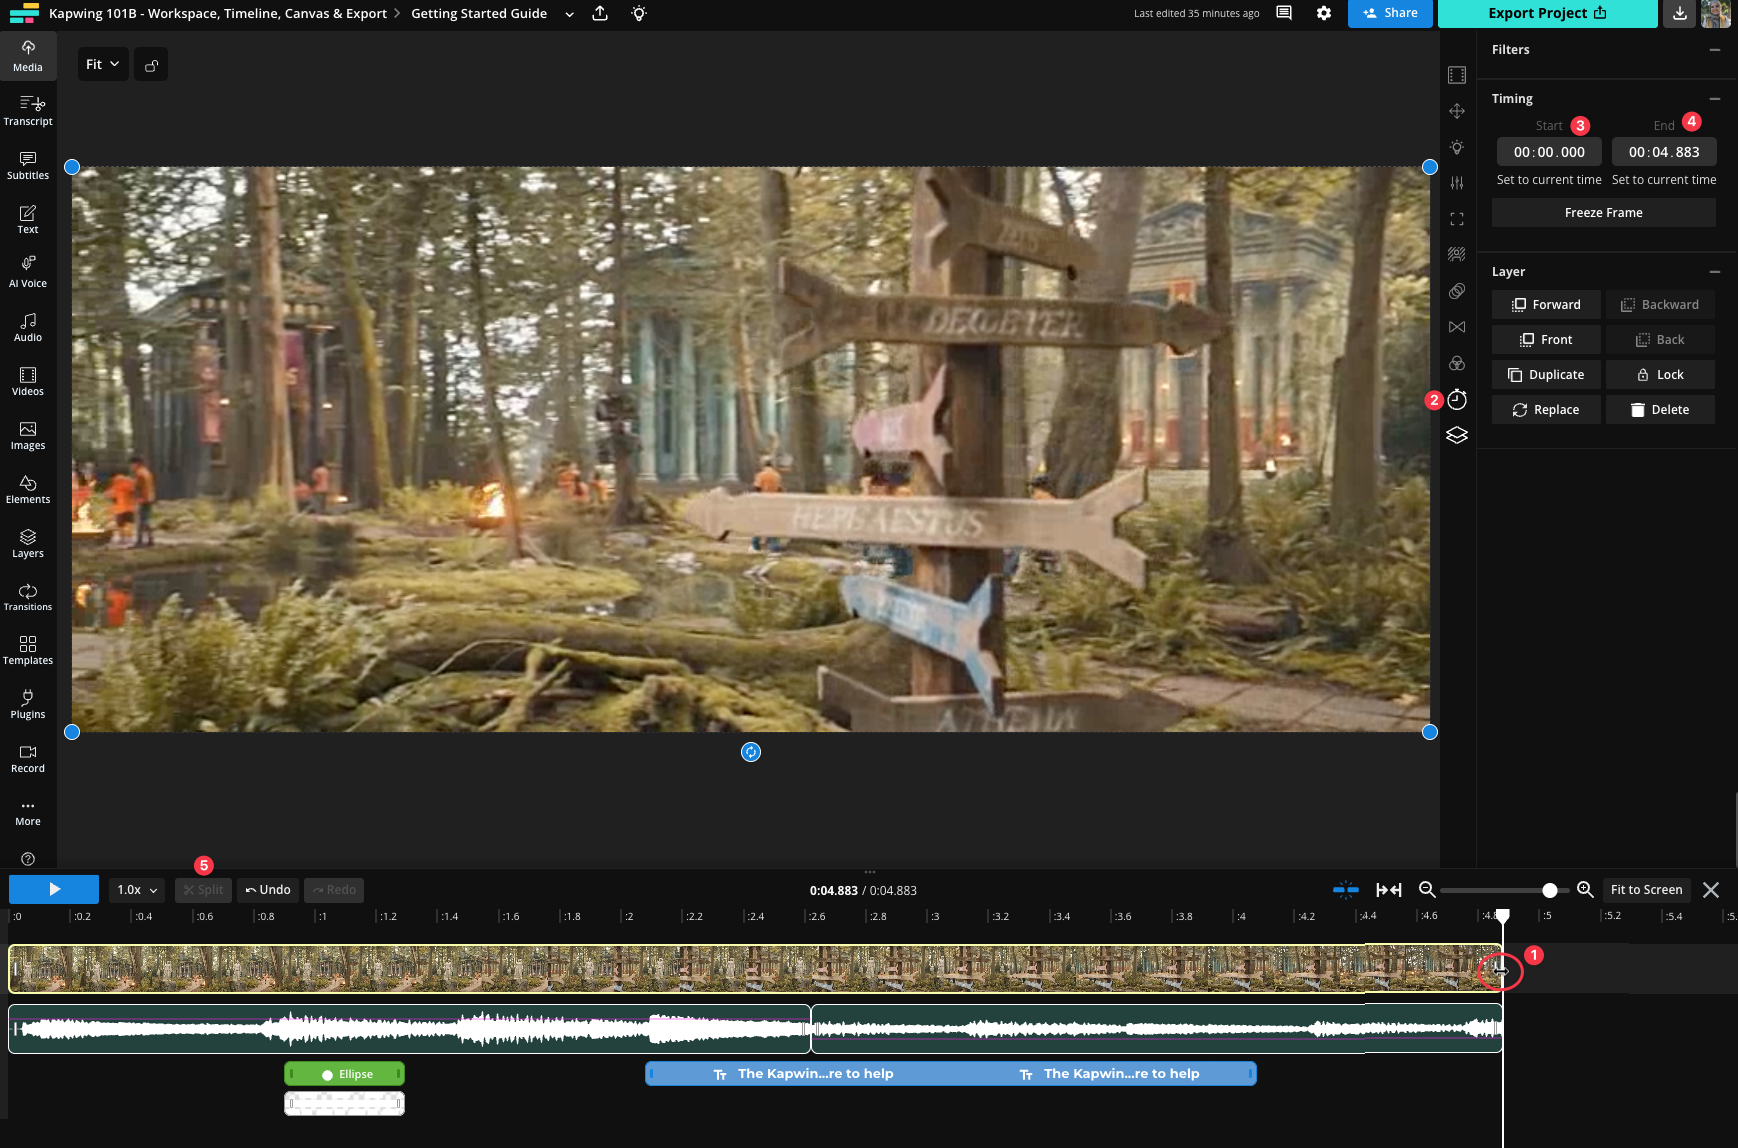
Once your video has been uploaded to the Studio, use the start and end time sliders (1) to adjust when it starts and ends playing in the timeline. You can also click into the "Trim" icon (2) to open the trim panel on the right side which will allow you to type in the desired start (3) and end time (4) of your clip. Lastly, you can also press the "S" key or "Split" (5) to trim video into chunks.
Note: If you're trimming the beginning of your video and don't want a video delay, make sure your video is positioned at the 0:00 mark. To eliminate any gap, drag your clip to start at 0:00. Alternatively, you can select the gap that appears in front of the video and delete it with the "delete" key on your keyboard.
Adding Filters
You can add pre-made filters by selecting the photo or video you want to add the filter to. To the right under the edit tab you can select the "Filter" icon and apply the filter you want. You can even add precise, custom visual adjustments to your photos and videos in the Studio! Just click on the layer you'd like to edit and choose "Adjust" icon the right side of the right panel. Here, you can change the opacity, brightness, contrast, saturation, and blur of your photo or video.
Adjusting Video and Viewing Speed
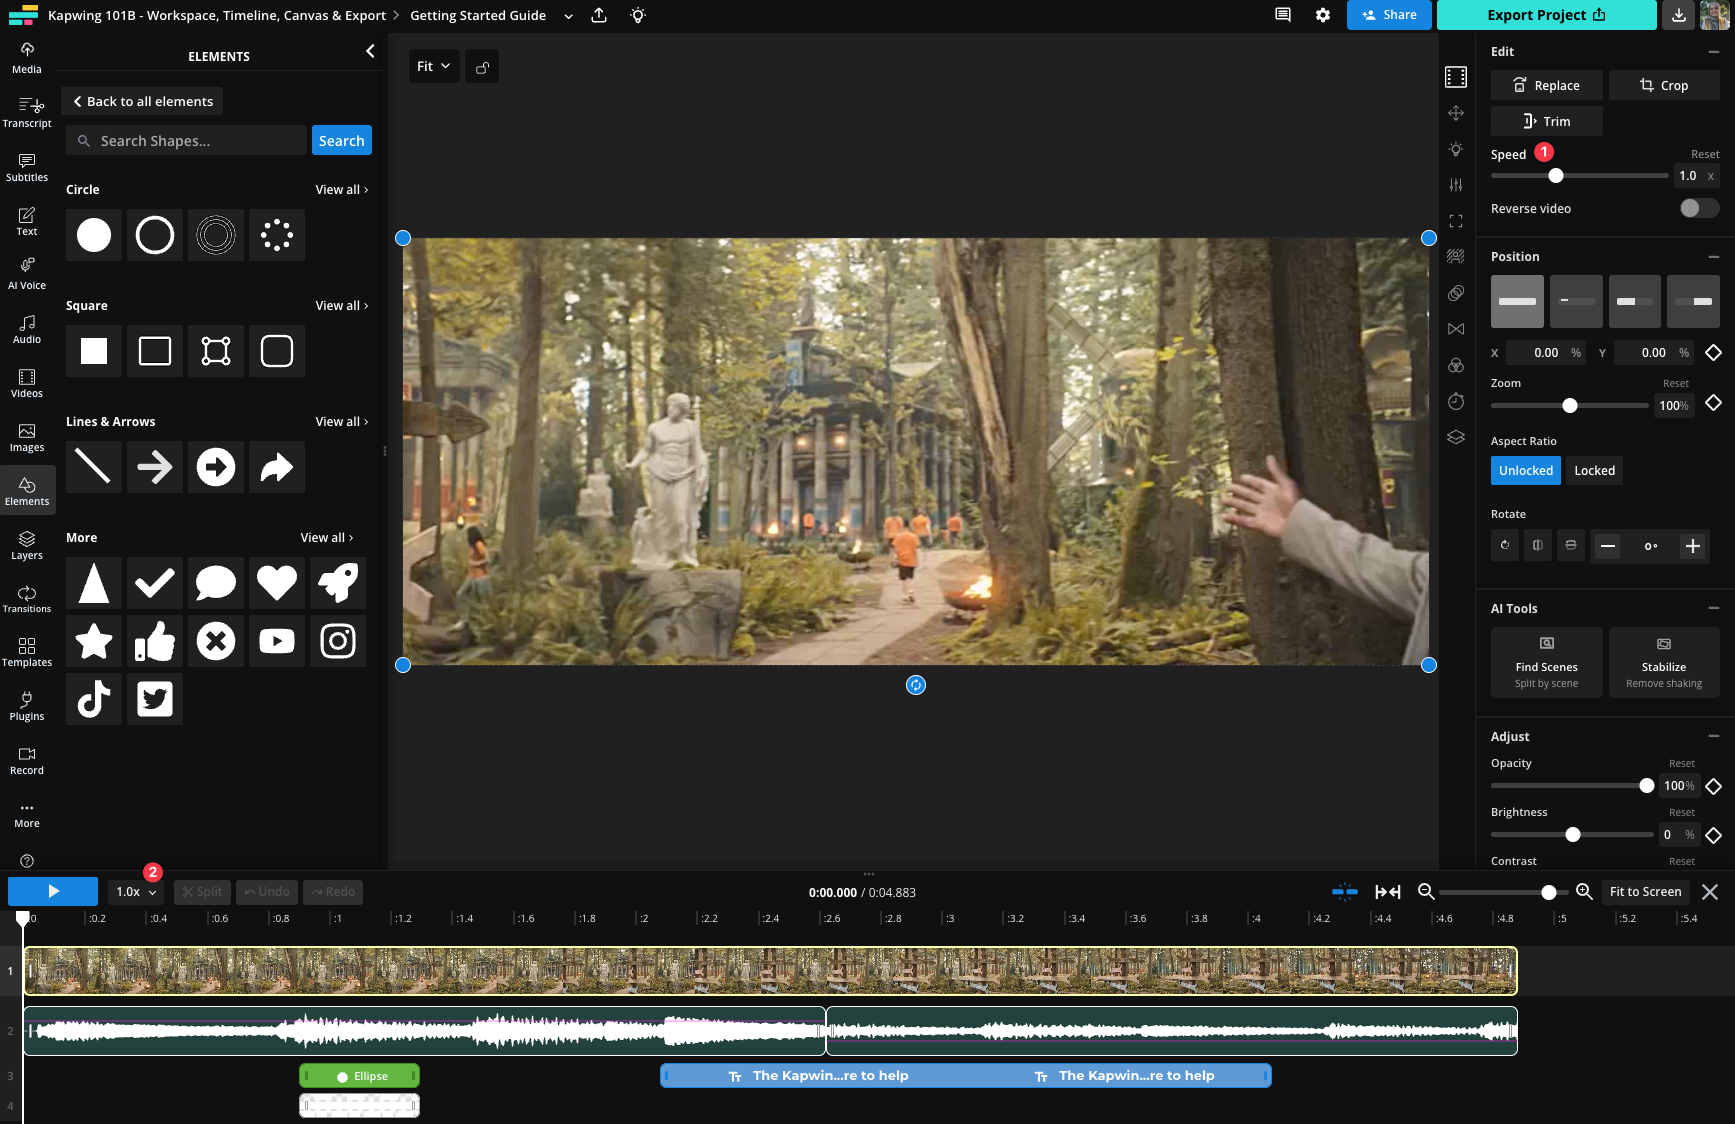
If you want to change the speed of your video, select the video layer and use the "Speed" slider or number box (1) on the right side of the Studio. You can make your video play at .25x to 2x speed at 0.1 increments as well as 4x speed!
If you want to preview your project at a different speed for faster editing you can do so by selecting the numbered dropdown (2) on the top left of the timeline and choosing which speed you wish to preview your project at.
Making a GIF
If you want your output file to be a GIF, click on the Export button at the top right corner of the window once you're done editing. Here, change your output file type to "GIF" proceed with exporting your project.
Looking for more help?
Check our Release Notes for tutorials on how to use the latest Kapwing features!


