
How to Upload Custom Fonts to Use on Kapwing
Adding your own custom fonts to all of your content is super easy to do on Kapwing! Having your own distinctive font makes it easier to maintain uniformity and consistency in your content, which helps your social media pages stay true to your brand. Since this is a Kapwing Premium feature, only projects made from an upgraded workspace can use it.
To upload your own custom font in Kapwing:
To start, you must already have your .ttf or .otf font file created yourself or downloaded from a different website. Please do not upload zip files containing multiple fonts - each font must be uploaded individually. Note: this is a premium capability and requires a Paid Plan.
1. In Studio, after you've uploaded your content or started with a blank canvas, click the "text" tab to create a text box
2. Once you have your text box, navigate to the fonts section in the edit menu, click the down arrow to expand the font options, select “Browse All Fonts”, and then click the “Upload Font” tab.
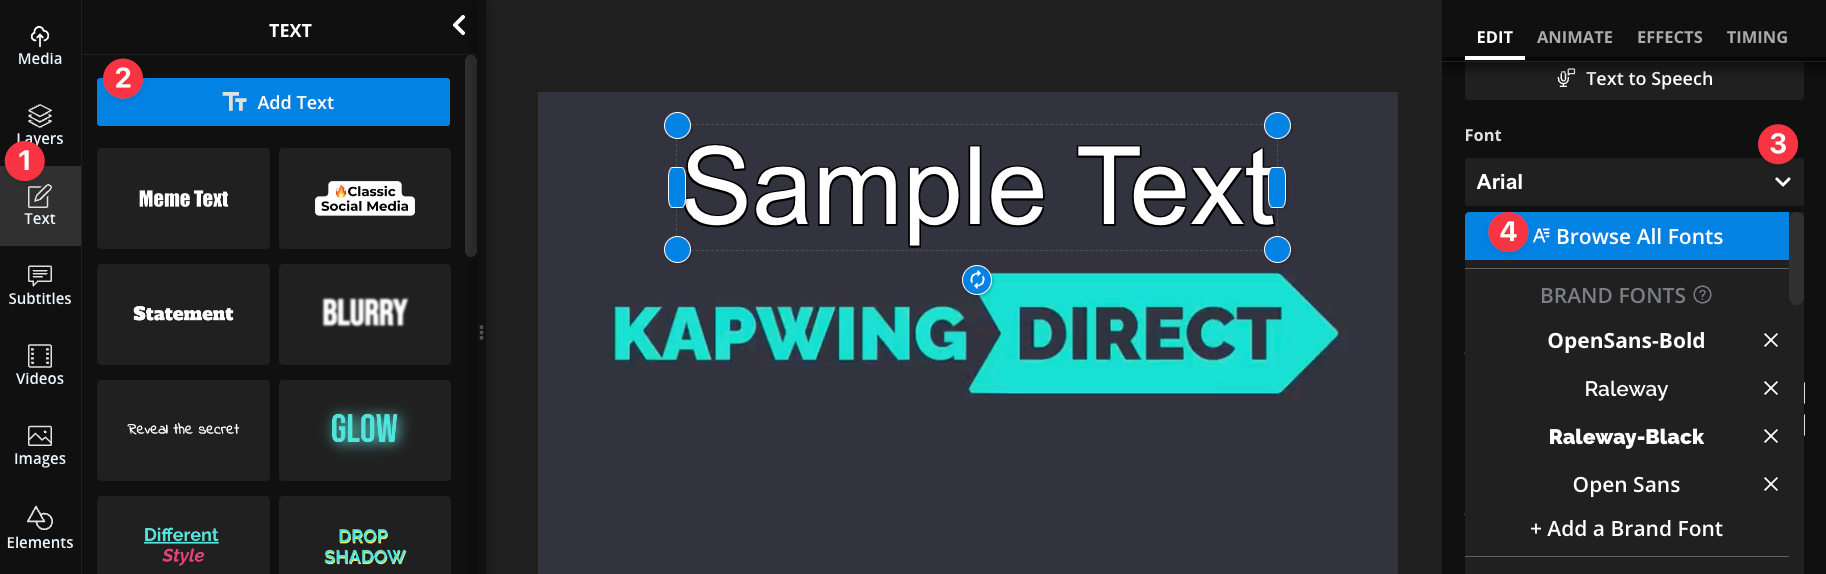
3. Select the "Upload Font" tab
4. Upload your .ttf or .otf font file, and you're done! Once uploaded, these fonts are saved in your library for quick access in the future.
Note: If you want to delete a custom font, select the "delete" on the right of the font
Additional Resources
Add Text to Image
Add Text to Video